


With RGB Fusion 2.0, you can monitor RGB lighting on graphics cards, keyboards, and other peripherals. However, sometimes you may find RGB Fusion 2.0 not detecting GPU despite multiple refreshes. Thankfully, this problem has multiple fixes, including updating BIOS and reinstalling the software.
- RGB Fusion 2.0 may display GPU detection errors due to faulty data in its files, incompatibility between the software and the graphics cards, and incorrect BIOS configurations.
- You can fix the error by reinstalling RGB Fusion 2.0, updating BIOS, and reinstalling graphics drivers.
- Before trying the fixes, you must confirm whether RGB Fusion 2.0 is compatible with your graphics card and motherboard.
Method Difficulty Rating
Update Graphics Card Driver
Rated: 3/10
Reinstall Fusion 2.0
Rated: 3/10
Update BIOS
Rated: 4/10
Update Graphics Card Driver
This troubleshooting step helps ensure that the GPU runs efficiently on your computer. Inspect if the RGB Fusion 2.0 software can detect the GPU after installing the required updates. Updating GPU drivers has also fixed this issue for many users on the OverclockersUK forum. These are the steps to do it:
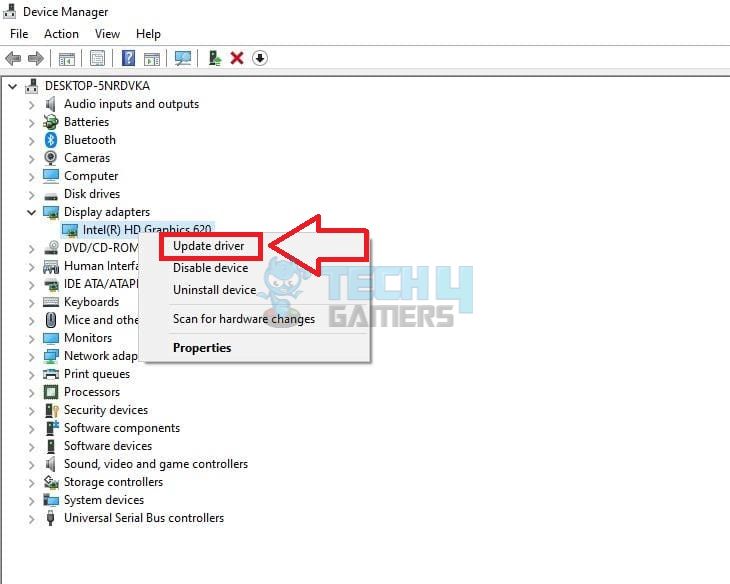
- Go To Device Manager: Press the Windows+X keys to open the quick access menu > Click “Device Manager”.

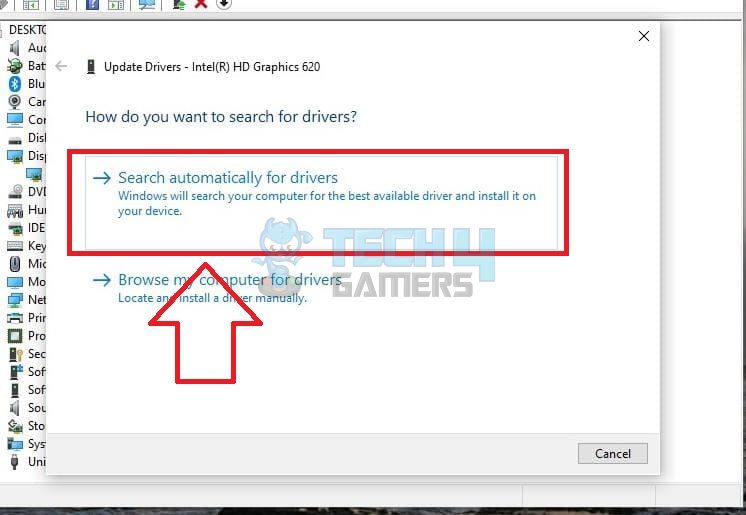
Update Driver (Image By Tech4Gamers) - Search Drivers: Pick “Update Driver” from the list of options for your graphics card > Select “Search Automatically For Drivers.”

Search For Drivers (Image By Tech4Gamers) - Install Drivers: Install the updates if your PC detects any.
Reinstall RGB Fusion 2.0
The application file may have developed glitches or bugs that could affect its operation and lead to GPU detection errors. Reinstalling will resolve such errors, allowing you to use RGB Fusion 2.0 to control RGB lights easily, as it did for several users on The Tech Game Forum. The steps below will assist you in reinstalling RGB Fusion 2.0:
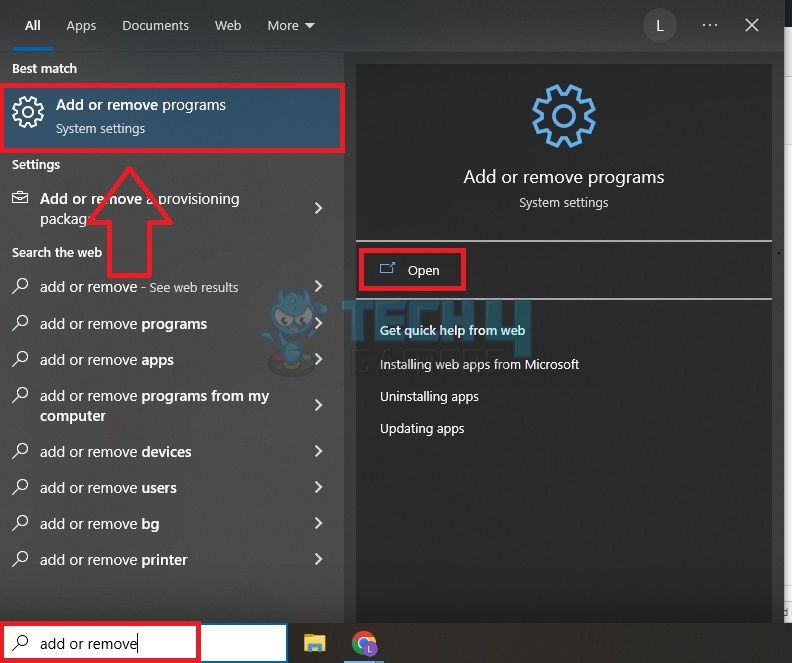
- Search For Add Or Remove Programs: Click the “Search Bar” and write “Add Or Remove Programs.” > Click the results.

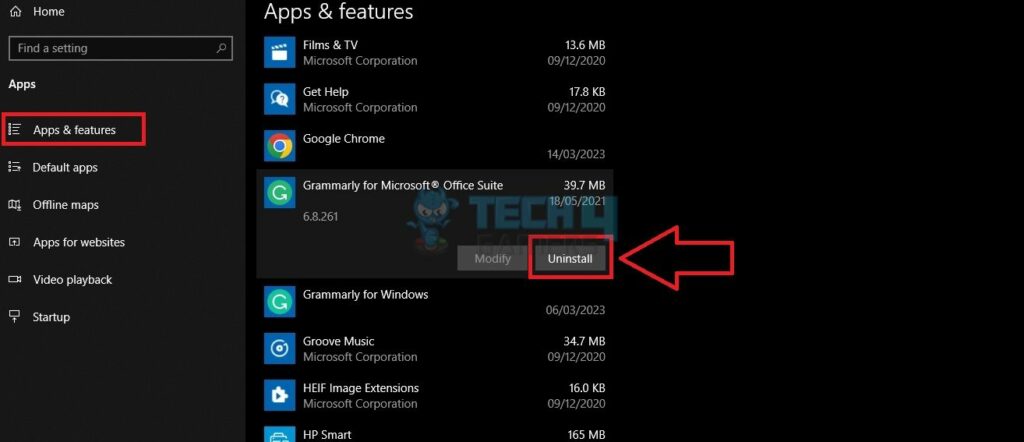
Go To Add Or Remove Programs (Image By Tech4Gamers) - Uninstall RGB Fusion: Navigate to “RGB Fusion 2.0” in the list of installed apps and click on it > Press “Uninstall.”

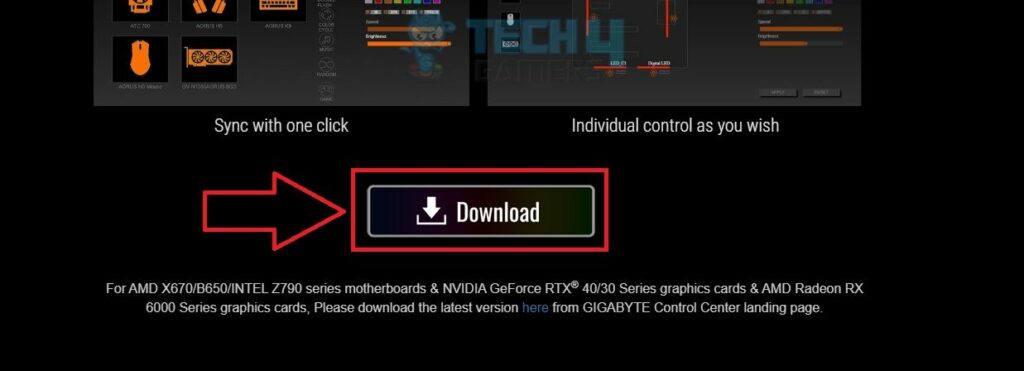
Click Uninstall (Image By Tech4Gamers) - Download RGB Fusion: Head to Gigabyte’s RGB Fusion 2.0 page > Press the “Download” button > Save the file on your computer > Extract the installed “ZIP File.”

Download RGB Fusion 2.0 (Image By Tech4Gamers) - Install The Software: Follow the on-screen prompts to complete the software installation.
Update BIOS
Old BIOS may produce several issues with various devices in your PC, including the RGB Fusion fan not detecting the GPU. Updating BIOS allowed many users on the PCPARTPICKER forum to counter this problem.
- Enter Command: Press Windows+R keys > Type “cmd” to open the command prompt > Enter the command “wmic bios get smbiosbiosversion” > Check the BIOS version.
- Turn Off Antivirus: Search “Security and Maintenance” > Click the security option to access antivirus settings > Disable the Antivirus.

Turn Off Antivirus In Security and Maintenance Settings (Image By Tech4Gamers) - Disable Bitlocker Driver Encryption: Search “Manage Bitlocker” > Click “Turn Off Bitlocker” to temporarily suspend it (Make sure you have the Bitlocker recovery key before suspending Bitlocker).
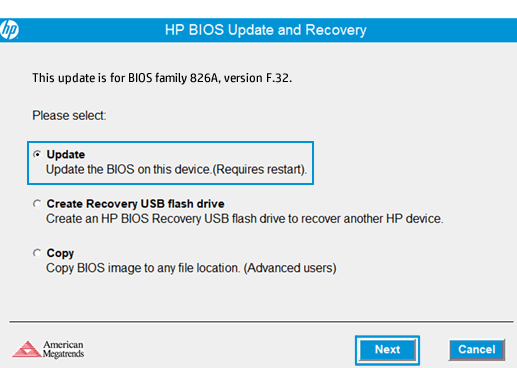
- Download BIOS File: Go to your motherboard manufacturer’s official website > Choose your PC’s model and operating system > Download the BIOS file.
- Update BIOS: Update the BIOS by following the instructions.

Select The Update Option (Image By HP) - Enable Antivirus And Bitocker: After the installation, reboot your PC and enable the antivirus and Bitlocker protection.

Summary
You can follow the above solutions when RGB Fusion 2.0 is not detecting GPU. This issue has frustrated many users, but with our mentioned solutions, you will hopefully be able to fix it.
Your RGB FUSION 2.0 is traaaaash I’m leaving gigabyte because mb & gpu & fusion not detecting them all of them gigabyte products
— Mohammed Nouh (@m94Nouh) June 30, 2021
In addition, you should make sure that the RGB light settings are not disabled in your computer’s BIOS. Not all graphics cards are compatible with RGB Fusion 2.0, which may lead to detection errors.
Additionally, if none of the solutions work, you can always get help from the assistance team at Gigabyte Support and explain the issue you are facing and all the solutions you have tried to make it disappear. As this is an old issue, they should be able to provide you with some pro tips that may fix the problem.
Related Articles:
- Windows Standalone Installer Searching For Updates [FIXED]
- Unusual Traffic From Your Computer Network [FIXED]
- Atibtmon.exe Runtime Error AMD [Proven Fixes]
- FIXED: The Computer Did Not Resync, No Data Was Available
- Potential Windows Update Database Error Detected [FIXED]
Thank you! Please share your positive feedback. 🔋
How could we improve this post? Please Help us. 😔
[Errors Troubleshooting Expert]
Arsalan Shakil (aka GuyThatDoesEverything on YouTube) is a PC Tech Enthusiast and Electronic Geek. With over 10+ years of experience in Electronics, he then decided to explore Software Engineering to design embedded products and automate existing hardware solutions.
When he started tearing down old cameras to understand how they worked, he was shocked (literally, when he got zapped by a flash discharge capacitor), giving him the power (debatable) to fall in love with videography/photography. He also started making some fun videos that later became YouTube tech reviews.
Skills:
- 10+ years of experience in Electronics design, embedded solutions, and prototyping
- Majored in Software Engineering
- Research paper publication in IEEE for Embedded Military Uniform & LoRa WAN wireless technology
- Specialized in IoT Solutions
- PC Enthusiast & PC Modder
In his local region, he’s known to expose cheap PSU brands, often claiming fake certification or false claims on the box. He’s a true nerd and needed some friends in his life. Then he met some guys who work at Tech4Gamers, and they also came out to be equal nerds who suggested he join Tech4Gamers as a Hardware Expert.


![The Computer has Rebooted From a Bugcheck Error [FIXED]](https://tech4gamers.com/wp-content/uploads/2024/03/BugcheckFeaturedImage-218x150.jpg "The Computer Has Rebooted From A Bugcheck Error [Our Ultimate Guide]")

