 Threads

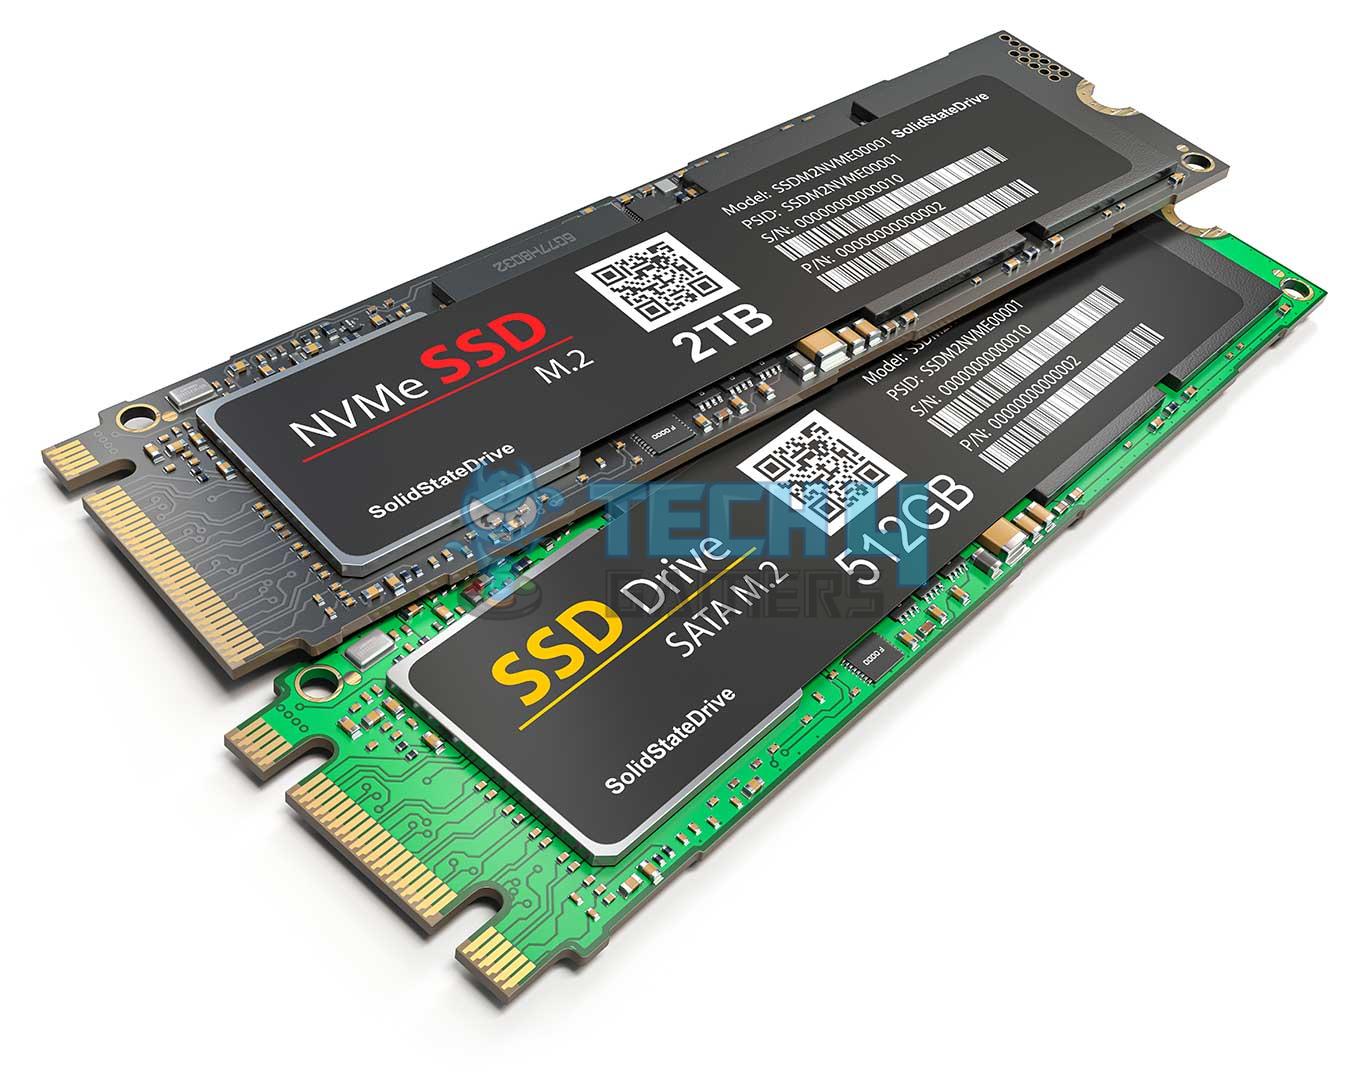
M.2 SSDs have transformed computing by enabling lightning-fast data transfers and storage efficiency. However, the irritation of M.2 SSD not showing up in Windows 11 might impede workflow and raise concerns about data accessibility.
You might face this issue when the SSD is not connected properly, old drivers are causing the SSD not to show up, the BIOS configuration for the SSD needs to be changed or the SSD requires partitioning.
Key Takeaways
- The M.2 SSD doesn’t show up in Windows for several reasons, such as, BIOS configuration isn’t correct, SSD is not correctly placed or drivers are outdated.
- One of the first things you should do in this case is check the SSD on multiple systems, clean the M.2 port, change the connecting cables, and re-connect the SSD.
- Furthermore, you can try updating storage controller drivers, initialising SSD or turning off the secure boot feature.
Method Difficulty Rating
Rated:4/10
Rated: 5/10
Rated: 7/10
Rated: 7/10
Rated: 6/10
Install The Latest Storage Controller Drivers
Drivers are responsible for making a device function on a computer. They can also be responsible for a device’s dysfunctionality if they are outdated. The SSD not showing up on your computer might be because of old storage controller drivers installed on the Windows. Updating these might allow the SSD to get detected by the computer.
Follow these steps to update the storage controller drivers in Windows 11:
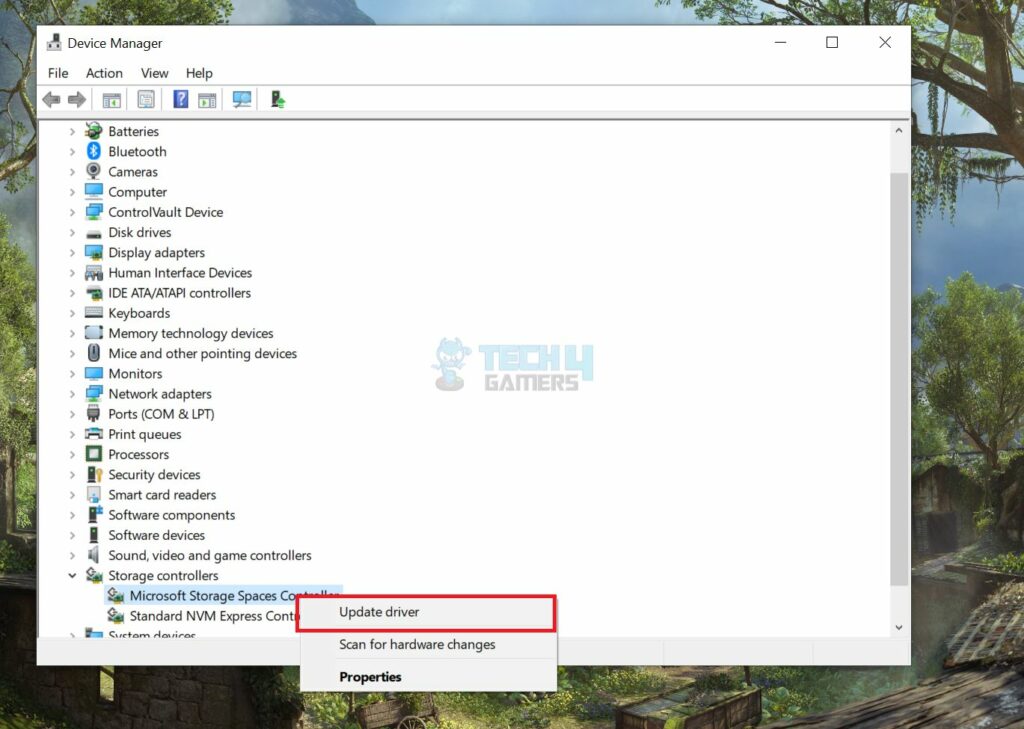
- Driver Update: Right-click Windows button > Device Manager > Storage Controllers > Right-click Microsoft storage spaces controller > Update driver > Follow on-screen instructions.

Driver Update (Image by Tech4Gamers)
It was also recommended to update the SSD drivers on YouTube. Viewers found this very helpful in solving the M.2 SSD issue.
Diagnose The SSD Using The Command Prompt
Another solution to fix the M.2 SSD detection issue is to diagnose the SSD with the command prompt. Doing so will run a hardware and device troubleshooter that automatically fixes any minor problems preventing the computer from detecting the M.2 SSD.
Follow the instructions below to run the Device Diagnostics:
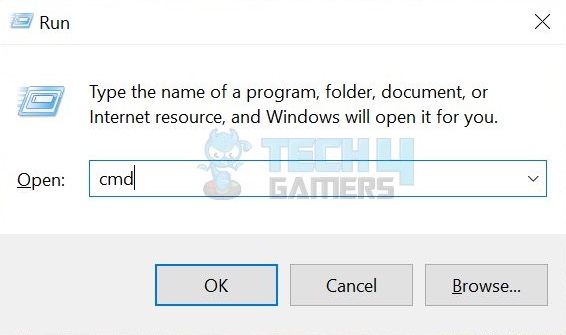
- Launch RUN: Desktop screen > Press Windows + R to launch the RUN command window >Type cmd > Click OK.

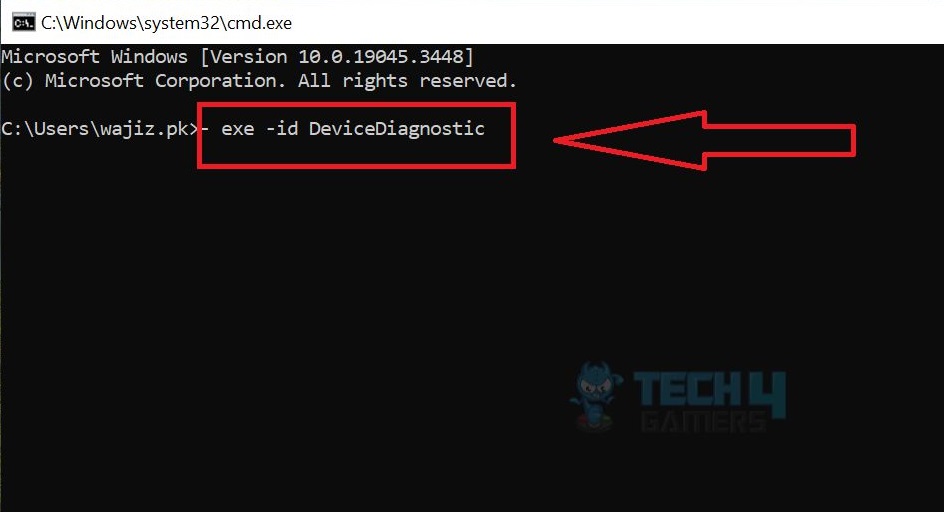
Launch RUN Command (Image by Tech4Gamers) - Type Command: Command Prompt > Copy and paste command: – exe –id DeviceDiagnostic > Hit Enter.

Command Prompt (Image by Tech4Gamers) - Troubleshoot: Hardware and Devices troubleshooter > Click Next > Follow on-screen instructions.
During our research, we found out that this method is also suggested on YouTube and worked for the viewers.
Load The Default BIOS Configuration
It may be that your custom BIOS settings are preventing your computer from detecting the M.2 SSD you are trying to connect. Resetting the BIOS configurations may change things.
Initialize The SSD
Another reason your SSD doesn’t show up is that it may not have been initialized, and you may have to initialize it manually. You will also have to assign it a name, a letter to be precise, for it to show up.
Initializing a disk in Windows 11 can be a lengthy process, but following these instructions properly will get you done with it in no time:
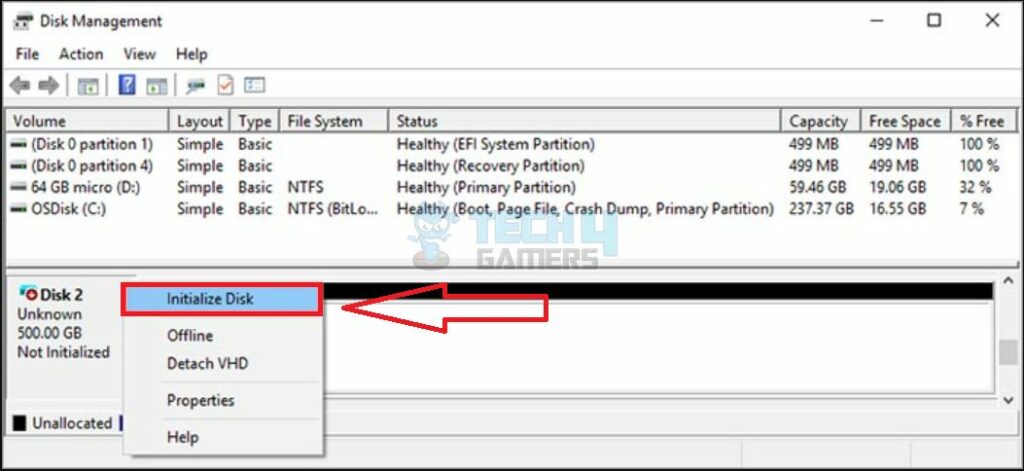
- Initialize Disk: Right-click the Windows icon > Go to Disk Management > Right-click SSD > Select Initialize Disk.

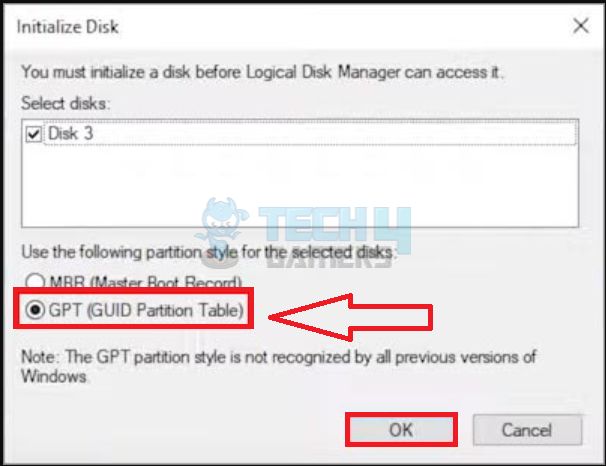
Initialize Disk (Image by Tech4Gamers) - Select partition: If your SSD is smaller than 2TB, select the MBR option > Else, select GPT > Click OK to proceed.

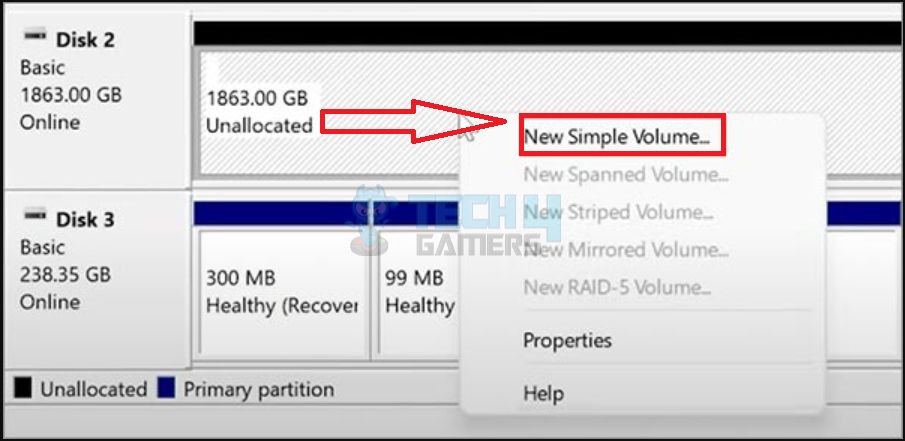
Select Partition Style (Image by Tech4Gamers) - Creating Volume: Right-click on the Unallocated disk > Choose New Simple Volume.

New Simple Volume (Image by Tech4Gamers) - Allocate Size: Click Next on the Wizard window > Enter the size of the SSD (It can be maximum).

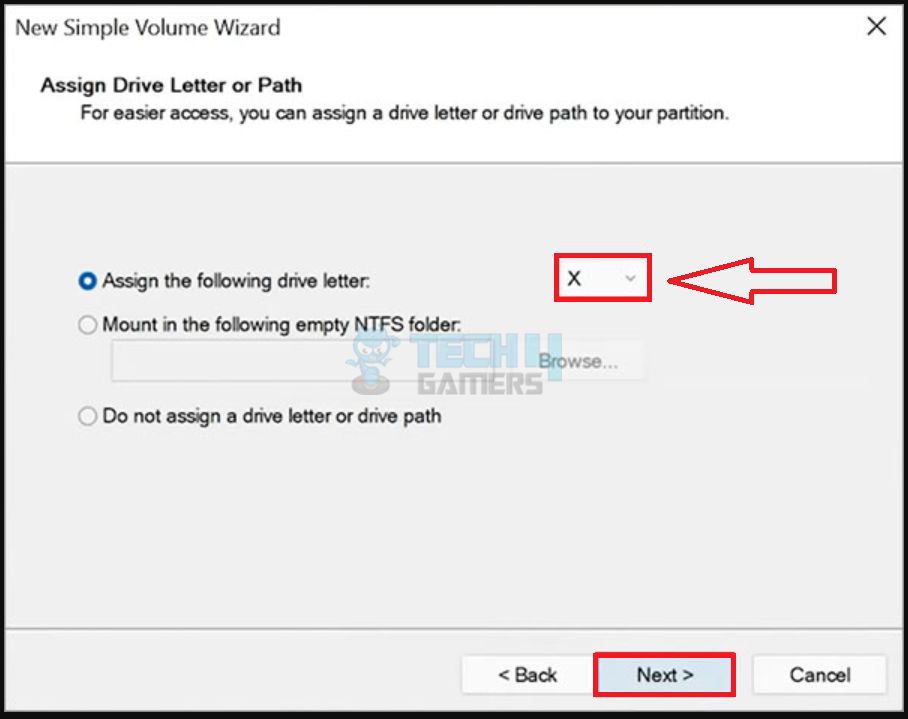
Set The Size (Image by Tech4Gamers) - Assign Drive Letter: Choose a letter from dropdown > Click Next.

Assign The Disk Letter (Image by Tech4Gamers) - Final Setup: Click Format this volume with the following settings > Set file type as NTFS > Click Next > Click Finish.
We also came across the AMD community forum, where users claimed to find this method convenient.
Turn Off The Secure Boot Feature
The secure boot feature protects your computer from malicious programs and allows it to boot safely. But this feature may be why your M.2 SSD doesn’t show up, as it may have considered the SSD full of malicious data. Turning off the secure boot may allow the SSD to get detected, so it’s worth a shot.
Follow the steps below to turn off the secure boot:
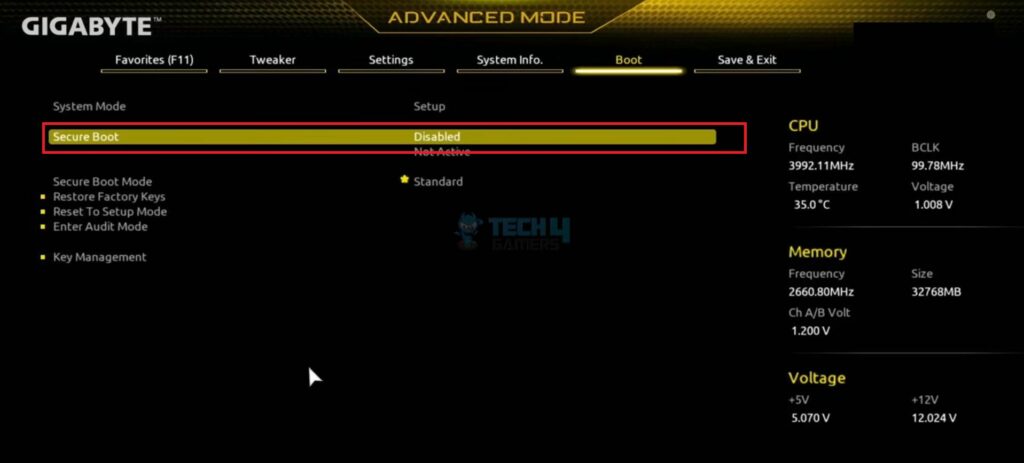
- Go to Settings: Restart the computer > Enter the BIOS settings > Find Secure Boot.
Tip: Different BIOSs have different interfaces, so you will have to manage that.
Secure Boot (Image by Tech4Gamers) - Disable Secure Boot: Press Enter or use the mouse to disable > Save settings > Restart your computer again.
A user on the Microsoft community forum claimed that turning off the secure boot feature allowed the computer to detect the SSD, which makes this solution even more worth trying.
Final Verdict
There are various methods involved in troubleshooting an M.2 SSD that is not showing up in Windows 11. Keep in mind the dangers of working with hardware; if in doubt, get expert assistance. Use Disk Management to initialise the drive if necessary. Updating drivers and firmware can improve compatibility. If the SSD is still not detected, it may be malfunctioning or incompatible. Examine motherboard compatibility and consider a BIOS upgrade.
- How To Fix Windows 11 Screen Saver Not Working
- How To Fix User Profile Cannot Be Loaded In Windows 11
- 4 Ways To Fix Docker Desktop Starting Forever In Windows 11
Thank you! Please share your positive feedback. 🔋
How could we improve this post? Please Help us. 😔
[Errors Troubleshooting Expert]
Arsalan Shakil (aka GuyThatDoesEverything on YouTube) is a PC Tech Enthusiast and Electronic Geek. With over 10+ years of experience in Electronics, he then decided to explore Software Engineering to design embedded products and automate existing hardware solutions.
When he started tearing down old cameras to understand how they worked, he was shocked (literally, when he got zapped by a flash discharge capacitor), giving him the power (debatable) to fall in love with videography/photography. He also started making some fun videos that later became YouTube tech reviews.
Skills:
- 10+ years of experience in Electronics design, embedded solutions, and prototyping
- Majored in Software Engineering
- Research paper publication in IEEE for Embedded Military Uniform & LoRa WAN wireless technology
- Specialized in IoT Solutions
- PC Enthusiast & PC Modder
In his local region, he’s known to expose cheap PSU brands, often claiming fake certification or false claims on the box. He’s a true nerd and needed some friends in his life. Then he met some guys who work at Tech4Gamers, and they also came out to be equal nerds who suggested he join Tech4Gamers as a Hardware Expert.


