


If you encounter the Sleep option missing in Windows 11, don’t panic since it is a widely-known issue. When I came across this after updating my PC from Windows 10, there were a few methods that effectively restored the missing Sleep option, for instance, rolling back the drivers.
- The Sleep option in Windows 11 may disappear due to outdated drivers/Windows, inaccurate settings, and more.
- Use the Power troubleshooter, update/reinstall the Display drivers, and repair with Windows ISO to eliminate the issue.
- Remember to turn the antivirus back on if you disable it for any of these methods, especially when repairing with Windows ISO.
Method Difficulty Rating
Enable Sleep
Rated: 2/10
Roll Back Driver
Rated: 1/10
Reset Power Plans
Rated: 2/10
Use Windows ISO
Rated: 6/10
Verify Sleep Is Enabled
Double-check that you have given the relevant permissions for the Sleep button to appear in the Power menu and did not disable it mistakenly. It will not show up in the Power options if not selected. Hence, I used the following steps to check it on my PC.
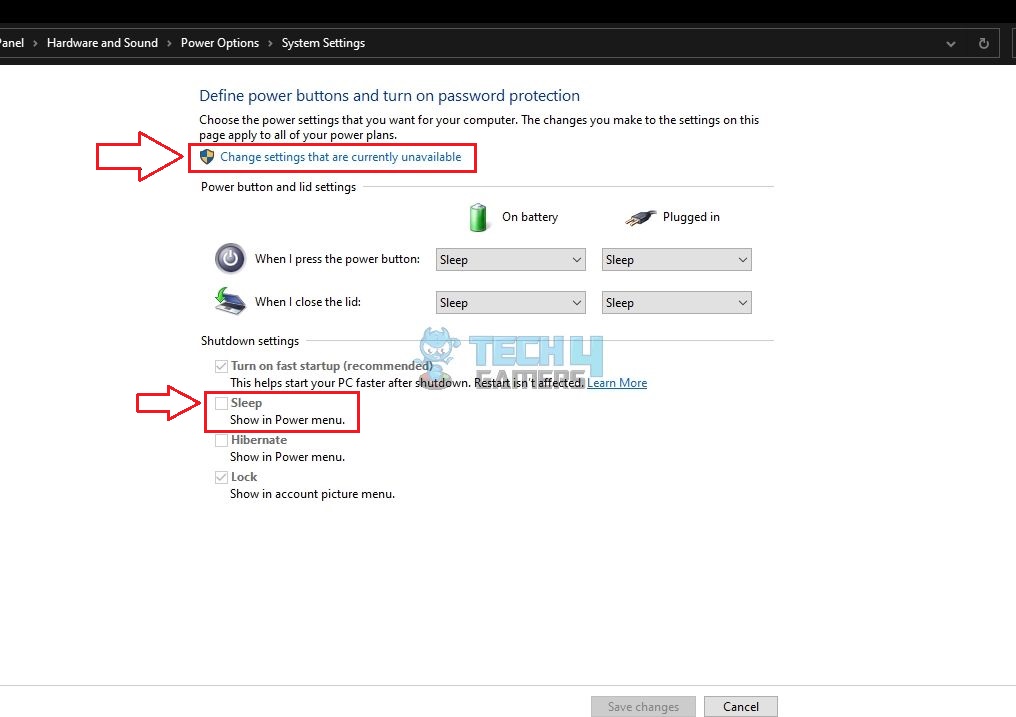
- Get To System Options: Launch the Control Panel > System And Security.
- Open Power Settings: Under Power Options, click Choose What The Power Button Do.
- Modify Configurations: If you see no tick behind the Sleep box, choose Change Settings That Are Currently Unavailable.

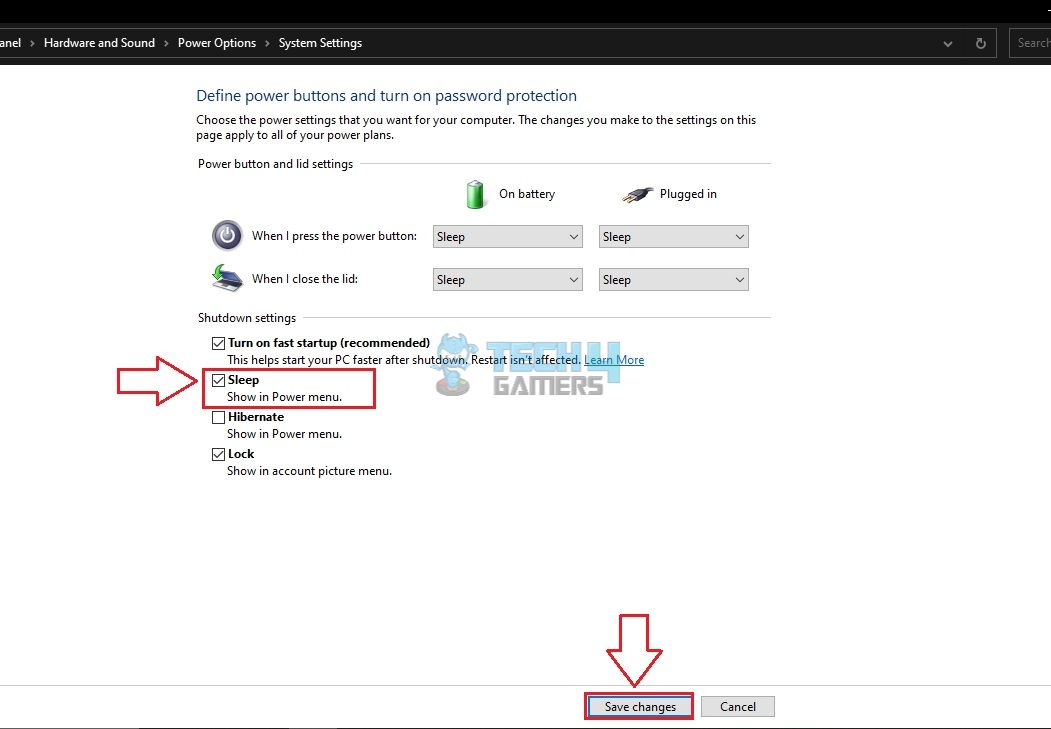
Change Power Settings (Image By Tech4Gamers) - Turn On Sleep Option: Mark the box next to Sleep > Save Changes.

Enable Sleep (Image By Tech4Gamers)
Roll Back Graphics Driver
In rare cases, the driver updates you installed may be corrupt or contain bugs, disrupting the functioning of related features, such as the missing Sleep option.
A Windows Insider MVP posted on the Windows 11 Forum a way to undo the most recent updates for drivers, so I performed it on the graphics driver. It turned out that the fault was within the patch, and rolling back the driver brought back the Sleep option. Move to a previous driver version with the instructions below.
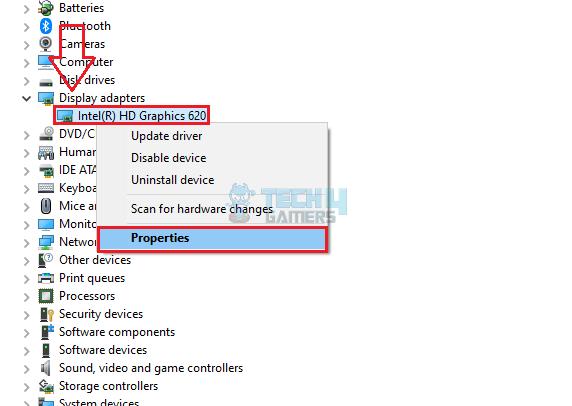
- Launch Device Manager: Click on the Windows Search Bar > Search for Device Manager.
- Move To Adapter Properties: Expand Display Adapter > Right-click on the relevant adapter > Properties.

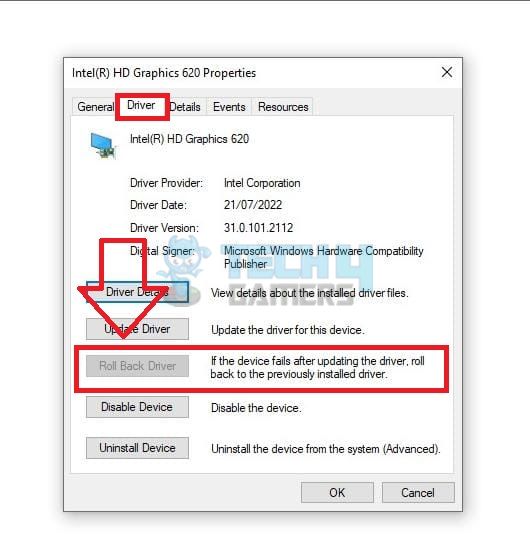
Choose Properties For Graphics Driver (Image By Tech4Gamers) - Roll Back Driver: Open the Driver tab > Notice the Roll Back Driver option. If it is clickable, then click on it.

Roll Back Driver (Image By Tech4Gamers)
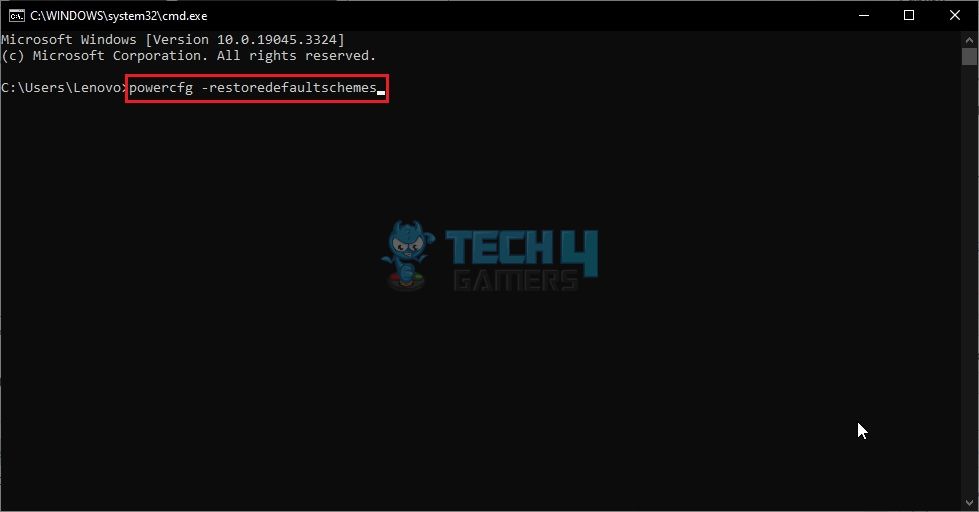
Reset Power Plans
There are defined Command Prompt codes to control various aspects of Windows, including resetting the power plans to default. Doing so will reverse any faulty changes you might have made to the power settings. Hence, I executed powercfg -restoredefaultschemes in CMD, and it did the trick. Just make sure to restart the computer to apply the new settings.
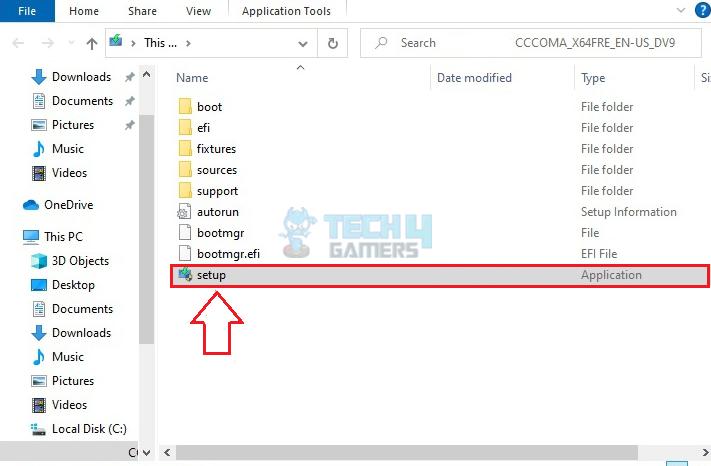
Repair With Windows ISO File
- Install ISO File: Download the Windows 11 ISO File on your computer.
- Remove Peripherals: Turn off the WiFi connectivity > Disconnect all external hardware except the mouse and the keyboard.
- Turn Off Antivirus: Disable any third-party antivirus apps, like McAfee or Avast.
- Open ISO File: Head to the location where the ISO File is installed > Double-click on the file.
- Run The Setup: Select Setup.exe.

Click On Setup File (Image By Tech4Gamers) - Upgrade: Choose the Upgrade option in the dialog box.
The solution also worked for a user on Microsoft Community when suggested by an Independent Advisor.
Final Words
Lots of users have been complaining about the same problem in Windows 11, as evidenced by multiple threads on Reddit. Furthermore, when a user on X tweeted about the issue, Microsoft Support promptly reached out, requesting the user to direct message (DM) them regarding the problem, but no official solutions were provided.
Hello there! Your tweet about Sleep Mode option that's missing on your Windows 11 device caught our attention. If you’d like our help with this, please send us a DM to discuss it further & to maximize character usage. We’ll be glad to assist however possible. -Nick https://t.co/3qcAsLFkaY
— Microsoft Support (@MicrosoftHelps) December 14, 2023
These little issues have greatly affected the user experience on Windows 11, with newer bugs coming up every day without any official acknowledgements from Microsoft. There have been similar problems like the screen stuck on restarting or the Quick Access menu missing in Windows 11.
Nonetheless, the fixes mentioned above were of great help to me in resolving this frustrating trouble in my Windows OS.
Other Issues In Windows 11:
- Windows 11: Computer Won’t Wake Up From Sleep [SOLVED]
- How To Fix Cursor Moving On Its Own In Windows 11
- FIXED: App Has Been Blocked For Your Protection Windows 11
- 5 Ways To Fix File Explorer Crashing In Windows 11
- Quick Fixes For Kernel Security Check Failure In Windows 11
Thank you! Please share your positive feedback. 🔋
How could we improve this post? Please Help us. 😔
[Errors Troubleshooting Expert]
Arsalan Shakil (aka GuyThatDoesEverything on YouTube) is a PC Tech Enthusiast and Electronic Geek. With over 10+ years of experience in Electronics, he then decided to explore Software Engineering to design embedded products and automate existing hardware solutions.
When he started tearing down old cameras to understand how they worked, he was shocked (literally, when he got zapped by a flash discharge capacitor), giving him the power (debatable) to fall in love with videography/photography. He also started making some fun videos that later became YouTube tech reviews.
Skills:
- 10+ years of experience in Electronics design, embedded solutions, and prototyping
- Majored in Software Engineering
- Research paper publication in IEEE for Embedded Military Uniform & LoRa WAN wireless technology
- Specialized in IoT Solutions
- PC Enthusiast & PC Modder
In his local region, he’s known to expose cheap PSU brands, often claiming fake certification or false claims on the box. He’s a true nerd and needed some friends in his life. Then he met some guys who work at Tech4Gamers, and they also came out to be equal nerds who suggested he join Tech4Gamers as a Hardware Expert.


