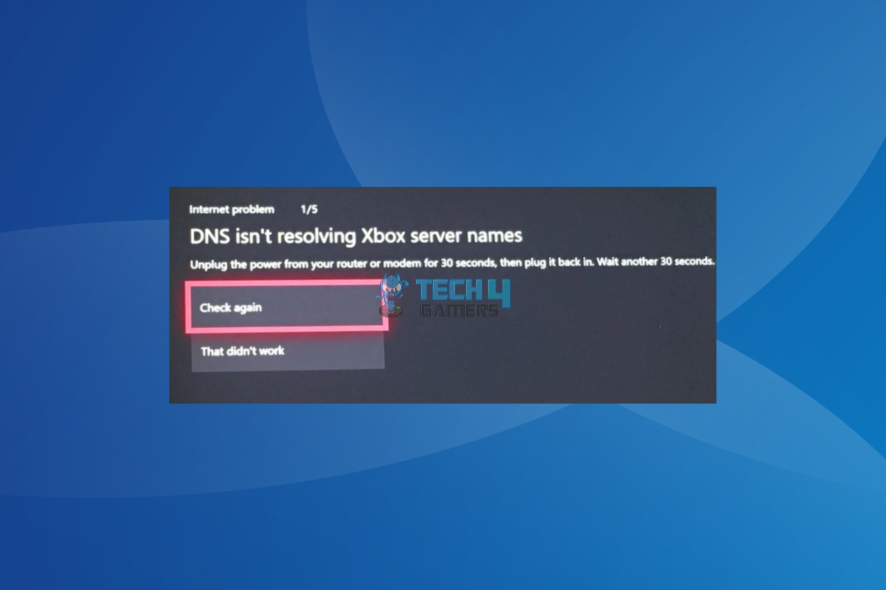
The “DNS isn’t resolving Xbox server names” error on an Xbox console typically indicates a problem with the Domain Name System (DNS) resolution, preventing the console from connecting to Xbox servers.
This issue may be resolved by manually configuring the DNS settings on the console or troubleshooting network connectivity problems. Ensure that the DNS servers are functioning correctly, and consider restarting both the console and the router to refresh network configurations. If the problem persists, checking for any service outages on Xbox Live or contacting Xbox support may provide further assistance.
- Xbox sometimes stops responding to DNS requests during browser operations.
- This problem surfaces due to many factors, including router connection errors, wireless connection malfunctions, and invalid DNS addresses.
- This issue can be eliminated by resetting the console and router, manually configuring the DNS, and changing the DNS to a public DNS (Google, Cloudflare).
The error message may appear like this:
Method Difficulty Rating
Configuring DNS
Rated: 7/10
Resetting Router:
Rated: 3/10
Altering Wi-Fi Width
Rated: 7/10
Switching To WLAN
Rated: 4/10
Manually Configuring The DNS Settings
Incorrect DNS settings on Xbox can lead to DNS errors as the console relies on accurate Domain Name System (DNS) information to connect to online services. If the DNS settings are misconfigured or outdated, the Xbox may struggle to resolve server addresses, resulting in connectivity issues and the display of a DNS error message.
After many successful outcomes, the standard solution I recommend is to modify the DNS Server from a private to a public DNS server like Google’s DNS or Cloudflare’s DNS. This method was beneficial for me and several online users. Follow the steps below to implement this method:
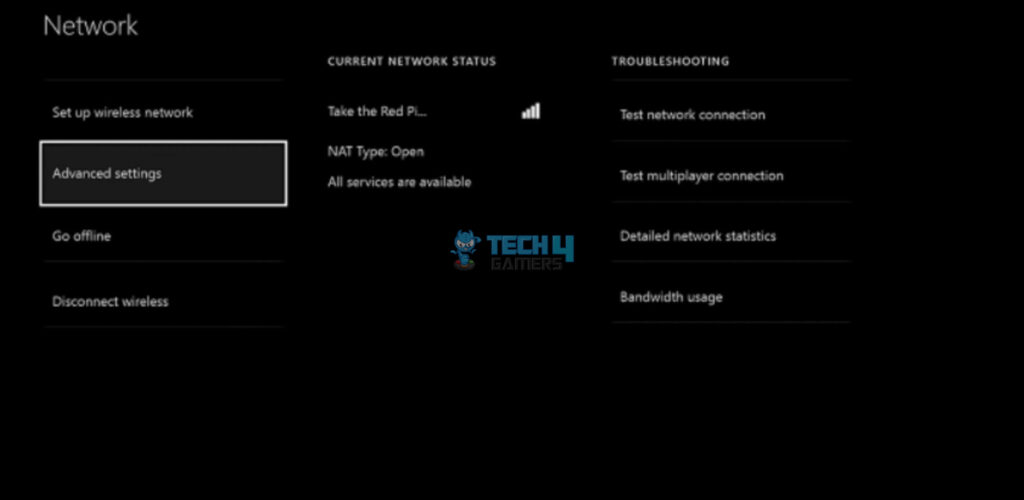
- Go to Advanced DNS Settings: Go into the Console’s Menu > Locate and choose Settings > Network > Advanced settings.

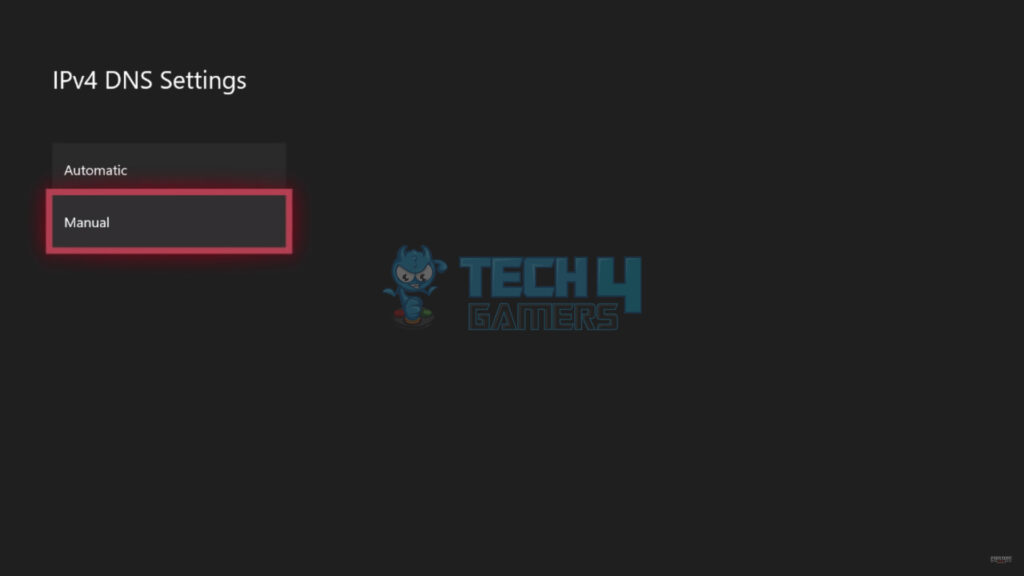
Advanced Settings (Image Credits: Tech4Gamers) - Manual DNS Settings: Select Advanced Settings > DNS settings > Manual option.

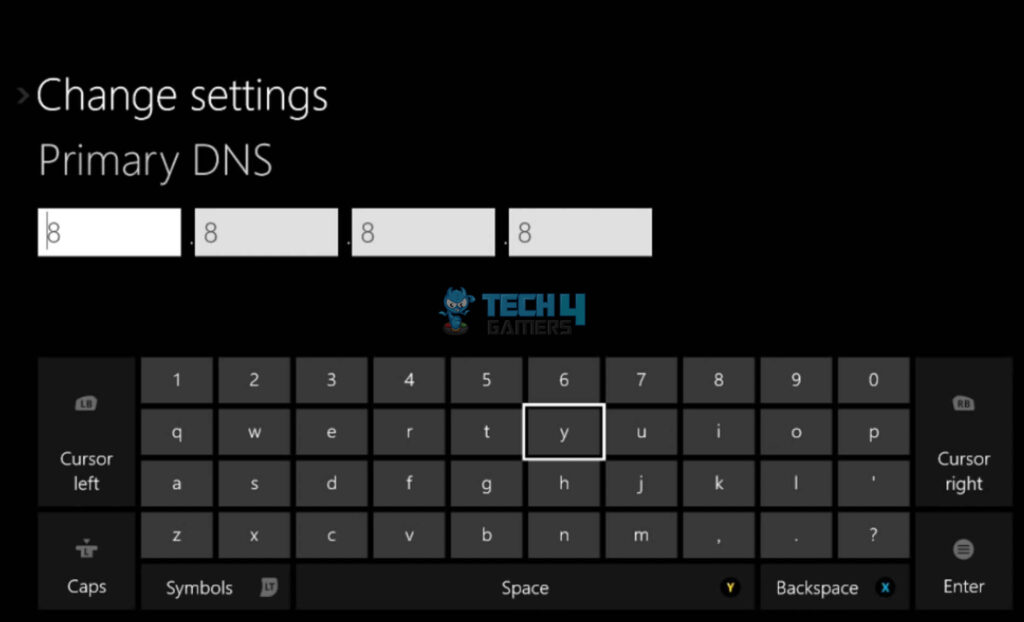
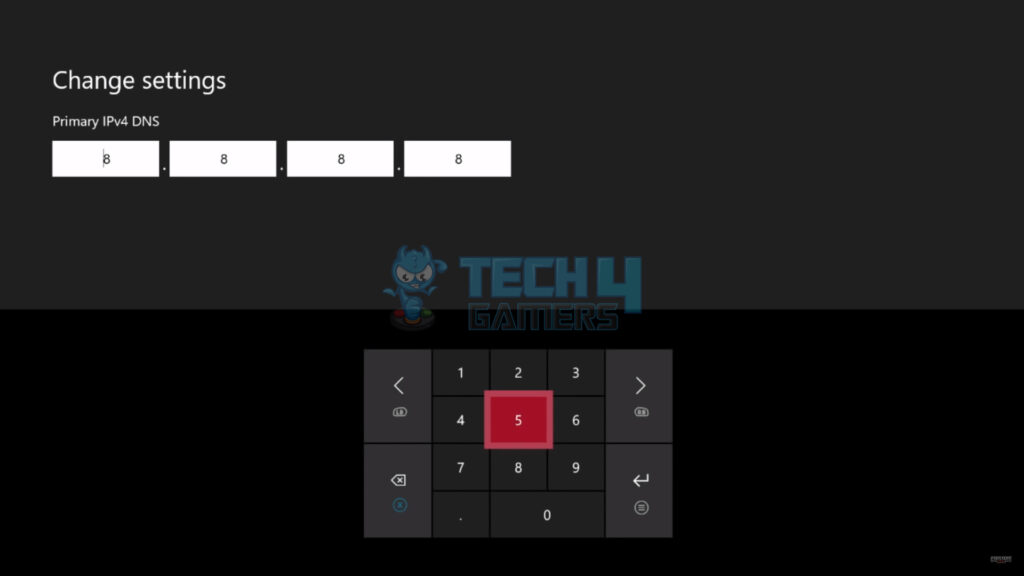
Manual DNS Configuration (Image By Tech4Gamers) - Primary Boxes: The console will display the Primary DNS boxes.

Primary DNS (Image Credits: Tech4Gamers) - Enter Primary Address: Enter either one of the following primary DNS addresses:
Cloudflare Primary DNS: 1.1.1.1
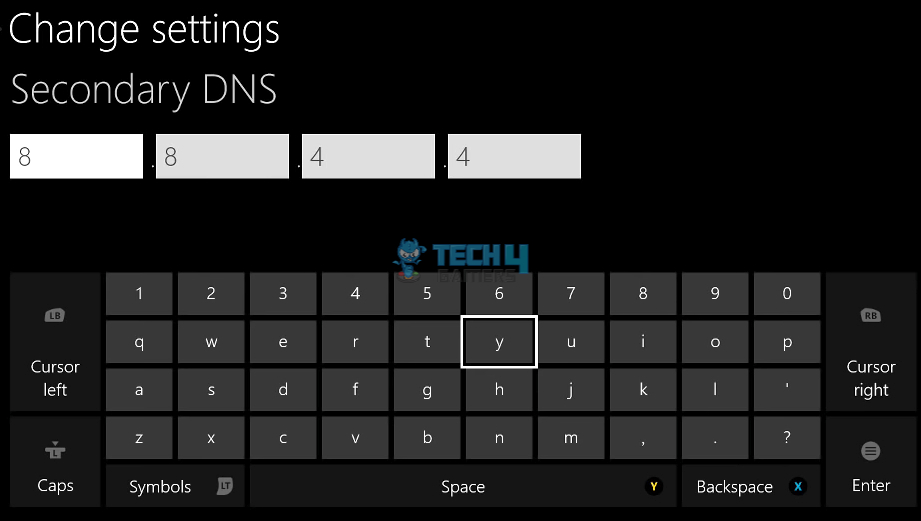
Google Primary DNS: 8.8.8.8Primary DNS (Image By Tech4Gamers) - Secondary Address Boxes: After you hit the Enter key > You will be shown the boxes asking for Secondary DNS Addresses next.

Secondary DNS Settings (Image Credits: Tech4Gamers) - Enter Secondary Address: Enter either one of the following Secondary DNS Addresses:
Cloudflare Secondary DNS: 1.0.0.1
Google Secondary DNS: 8.8.4.4 - Save the Settings: Now, hit the B key on your console’s controller > Save the DNS settings.
Restoring Default Settings Of The Internet Router
Incorrect router settings can cause connectivity issues on Xbox, leading to errors. The router manages network traffic and assigns IP addresses; if its settings are misconfigured, it can disrupt communication between the Xbox and online servers, causing connectivity problems and triggering error messages.
One of the solutions I use to resolve this issue is restoring the strength of your internet connection and DNS connections to the Internet Router’s Default Settings. When I researched online, I analyzed that this method also helped Microsoft users as well. You can follow this method using the steps below:
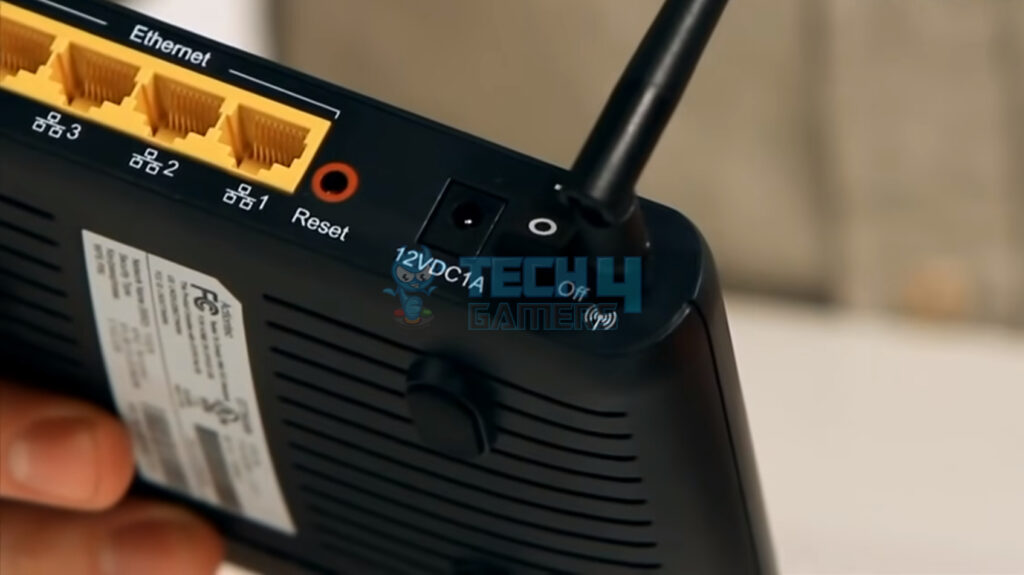
- See Router’s back: Get your internet router > Flip it to see its back.

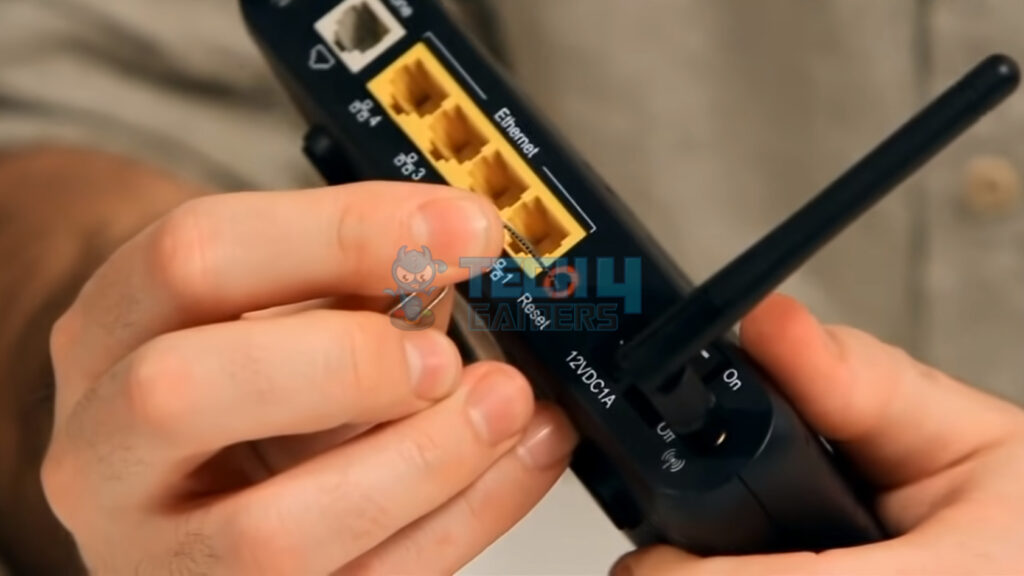
Router Backside (Image By Tech4Gamers) - Locate Reset: You will spot a collection of ports and pin slots > Locate and refer to a button or place named Reset.

Router Reset (Image Credits: Tech4Gamers) - Reset the Router: Suppose the Reset option refers to a button > Press and hold the button for 10 to 15 seconds > Otherwise if the Reset option refers to a pin slot (shared), > Use a pin to press > Hold for 10 to 15 seconds.
Resetting Router (Image By Tech4Gamers) - Restart your Internet connection: Restart your Internet connection after these steps > Connect to the Internet again.
Altering The Wi-Fi Channel’s Width
Altering the channel length on a router can impact the signal strength and stability of the Wi-Fi connection for an Xbox. Incorrect adjustments may lead to interference and signal degradation, resulting in poor connectivity, latency, and potential errors during online gaming or other network-dependent activities.
A helpful method to eliminate the DNS error is to modify the Wi-Fi Channel Width using IP configuration in the Command Prompt. This method proved helpful for me and many users online. Carry out this method using the following steps:
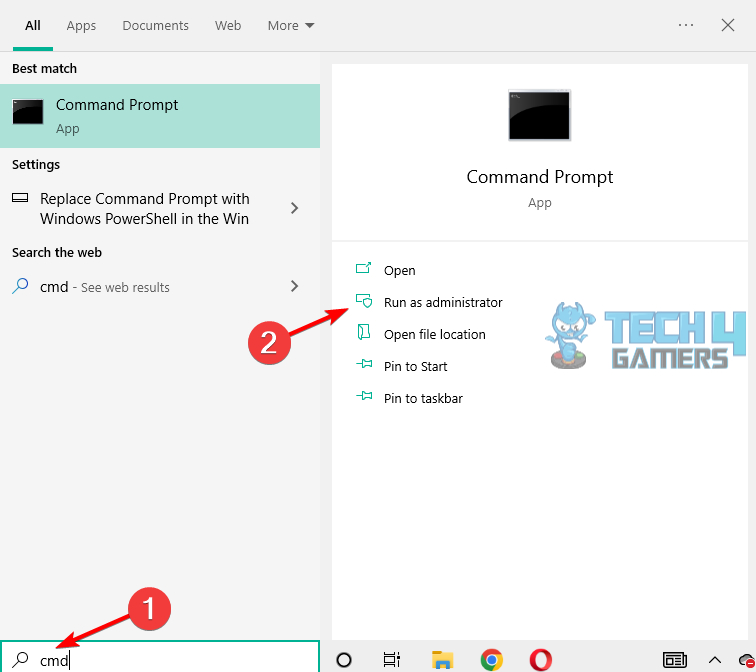
- Open Windows Search Bar & Command Prompt: Open the Windows search bar > Type cmd > Open the command prompt.

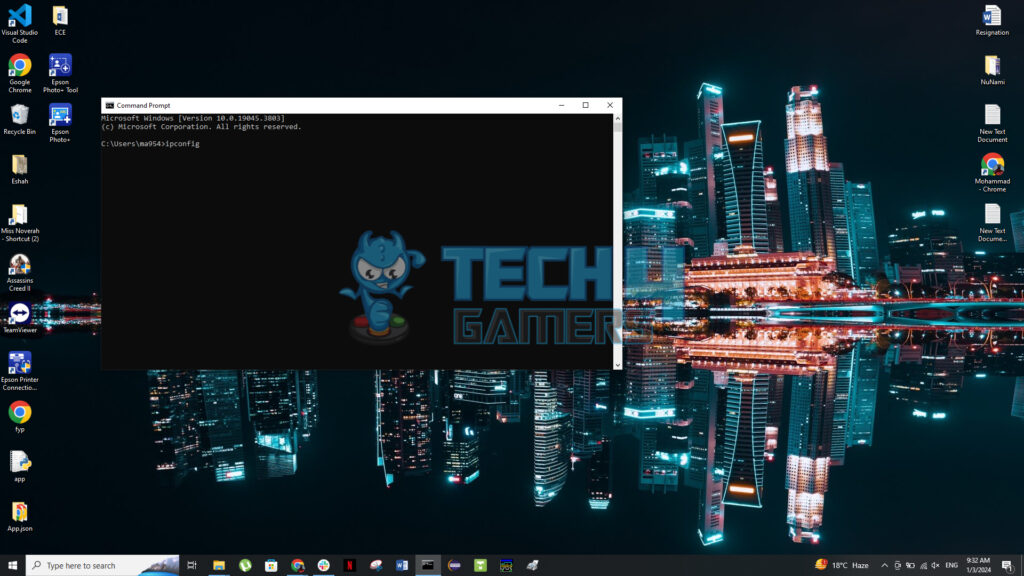
Run Command Prompt (Image Credits: Tech4Gamers) - Locate the default Gateway number: Type ipconfig > Hit Enter.
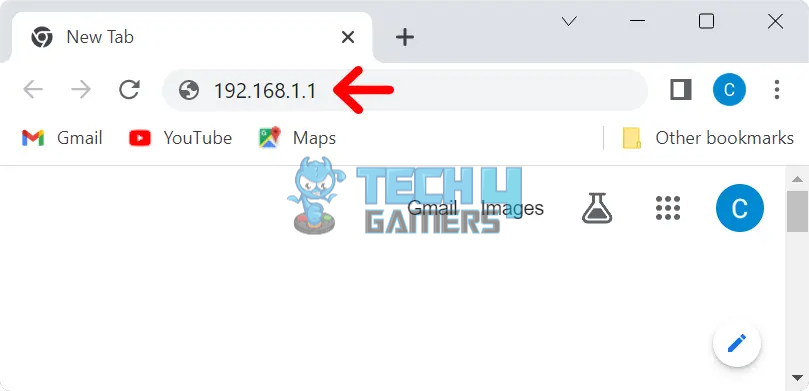
ipconfig command (Image By Tech4Gamers) - Launch the default Gateway number: Launch the internet browser > Type Default Gateway in the browser’s search bar > Hit Enter.

Launch Gateway (Image By Tech4Gamers) - Logging Into ISP server: Log into the ISP’s login page.

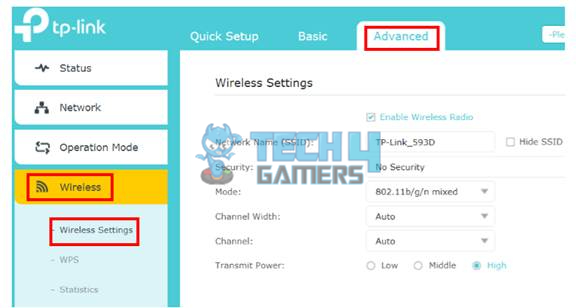
Logging in (Image By Tech4Gamers) - Going Into Wireless Settings: When the next page (router’s configuration page) opens > Locate and go into the Wireless settings of the internet router.

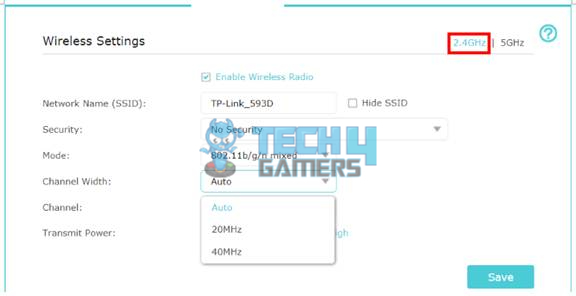
Advanced Wireless Settings (Image By Tech4Gamers) - Change the Channel Width: Select the Channel Width option in the menu > Choose 20MHz from the options > Save the settings.

Channel Width (Image By Tech4Gamers) - Check for errors: Close the opened windows on your console > Restart your router and console > Check whether the errors are removed.
Switching To WLAN/Wired Connection
As mentioned before, the DNS issue mainly occurs due to the wireless connection of the console. Incorrect wireless connection settings on an Xbox can lead to various issues, including connection errors.
Suppose the wireless configuration, such as the SSID, security type, or password, is not accurately entered. In that case, the Xbox may struggle to establish a reliable connection to the Wi-Fi network, causing disruptions, slow performance, and potential error messages during online gaming or content streaming.
Thus, I have tested and examined that the error resolves after the console switches to a wired connection instead of a wireless connection. I switched the console to a wired connection, which solved the error in my device. Moreover, I observed that this method resolved numerous online user’s device DNS errors. Perform the method in the following sequence:
- Disconnect from the Wi-Fi: Disconnect from the Wi-Fi (wireless connection) to the console.
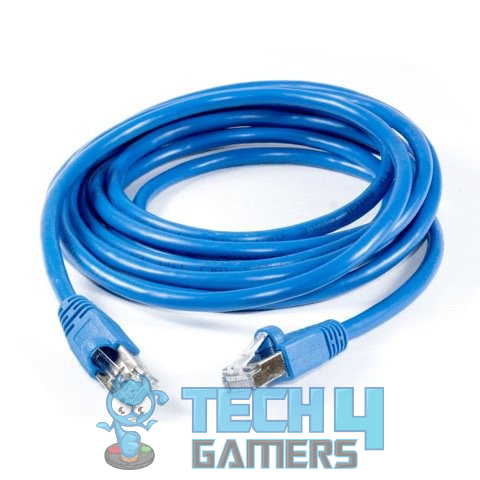
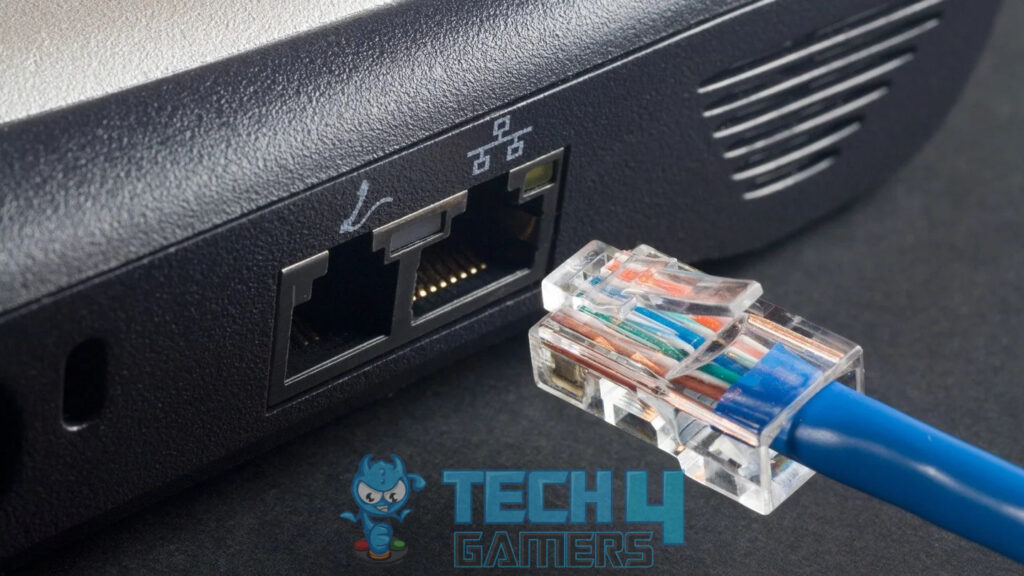
- WLAN cable: Take a WLAN cable of a suitable length.

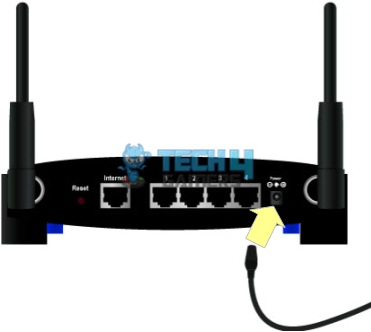
Ethernet Cable Image By Tec4Gamers) - Connect the wire: Connect the wire from the console’s backside port > Connect the other end to the router’s backside.
Connecting Cable to Router (Image By Tech4Gamers) - Ensure the connection: Ensure the cable is connected correctly and you hear a clicking sound when you press the cable head into the router’s ports and the console’s WLAN port.
Last Words
In my experience, tackling the “DNS isn’t resolving Xbox server names” error demands a hands-on approach, addressing various factors contributing to DNS issues on the Xbox console. I’ve found that manually configuring DNS settings, restoring the router to default settings, adjusting the Wi-Fi channel width, or switching to a wired connection can effectively resolve problems arising from router misconfigurations, wireless connection issues, and signal interference, as proven by global forums like Microsoft. The difficulty ratings and step-by-step methods provided have proven invaluable in troubleshooting and eliminating DNS errors, ensuring a smoother online gaming experience based on my journey.
FAQs
Xbox sometimes stops responding to DNS requests during browser operations.
The DNS issue is primarily caused by router connection errors, wireless connection malfunctions, and invalid DNS addresses.
This issue can be resolved by resetting the console and router, manually configuring the DNS, and changing the DNS to a public DNS (Google, Cloudflare).
Relevant Articles:
- Xbox Series X Won’t Connect To Wi-Fi [20 FIXES]
- How To Change DNS On Xbox? [360, One, Series X/S]
- How To Change NAT Type In Xbox One? [Step By Step]
Thank you! Please share your positive feedback. 🔋
How could we improve this post? Please Help us. 😔
[Error Fix Expert]
Hello, I’m Uzair Shabir, a tech enthusiast pursuing a Bachelor’s in Electrical Engineering. At Tech4Gamers, I’m an Error Fix Expert, crafting articles on different issues and how to fix them. With a Google IT Support Certificate, I navigate tech complexities to deliver insightful perspectives.
Get In Touch: UzairShabir@tech4gamers.com