As a Hardware Expert at Tech4Gamers, I bring my decade-long expertise in electronics design, embedded solutions, and prototyping. My knack for exposing misconceptions in the tech world finds a perfect outlet here.
Abdul Hadi
At Tech4Gamers, I bring a decade of gaming and PC hardware expertise. Expect solutions to any tech challenge as I contribute my knowledge to this vibrant community.
The timely installation of Windows updates can avoid data loss, glitches, and various vulnerabilities while enhancing your system’s performance. Coming to how to update Windows, you can either keep the auto-update feature on or manually update your Windows using Settings, ISO Files, and more.
WARNING: Keep your PC powered on and plugged in during the installation. You can lose your data if the PC turns off mid-installation.
Key Takeaways
Windows updates are a part of Microsoft’s support and maintenance system that keeps your PC up to date and prevents security threats.
There are multiple ways to update your Windows, including Windows Update Utility, Auto Update feature, and downloading updates manually.
Microsoft has ceased support for Windows 7 and 8, while Windows 10 and 11 continue to receive regular updates.
Windows 11
There are three ways to install Windows 11updates:
Using Settings.
Using Windows 11 Update Utility
Turn On Automatic Update.
Update Manually
To get the latest update on your Windows 11:
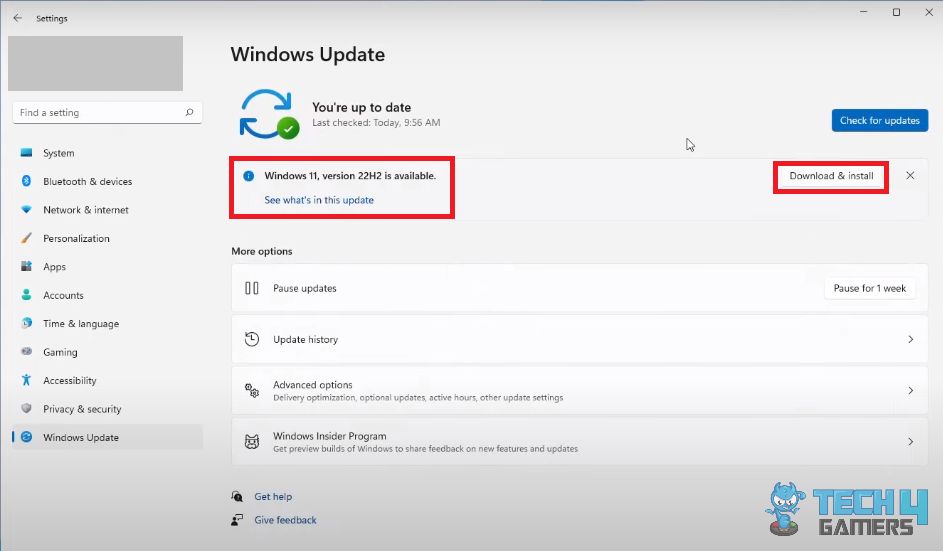
Go to Settings > Windows Update > Press Check For Updates.
If the update utility shows an available update, click Download And Install.
Download And Install Updates (Image By Tech4Gamers)
Once the update has been downloaded and installed, restart your system.
Note: If you don’t perform or schedule a restart, Windows will automatically schedule a restart for your device outside the hours you typically use it.
If your system is compatible with the update, click Next.
Once the download has been finished, your system will start a 30-minute countdown to restart your system for the update. Instead, pick Restart Now.
Windows 8
Here are the four simple ways to perform an update on Windows 8:
Using Settings.
Using Control Panel.
Using Microsoft Download Center.
Turn On Automatic Update.
Update Manually
Take note of this method:
Access Settings > Change PC Settings > Update And Recovery > Windows Update.
Hit Check Now.
If a relevant update is available for the system, it will be displayed under the Windows Update option > Press Install.
A list of important updates will be displayed. It is recommended to select all of them.
Accept the license terms > Finish > Restart the system once updated.
Using Control Panel
Here’s how to do it:
Open Control Panel > System And Security > Windows Update > click Check For updates.
If a relevant update is available for the system, it will be displayed under the Windows Update option. If not, the system will notify you that the PC is up to date.
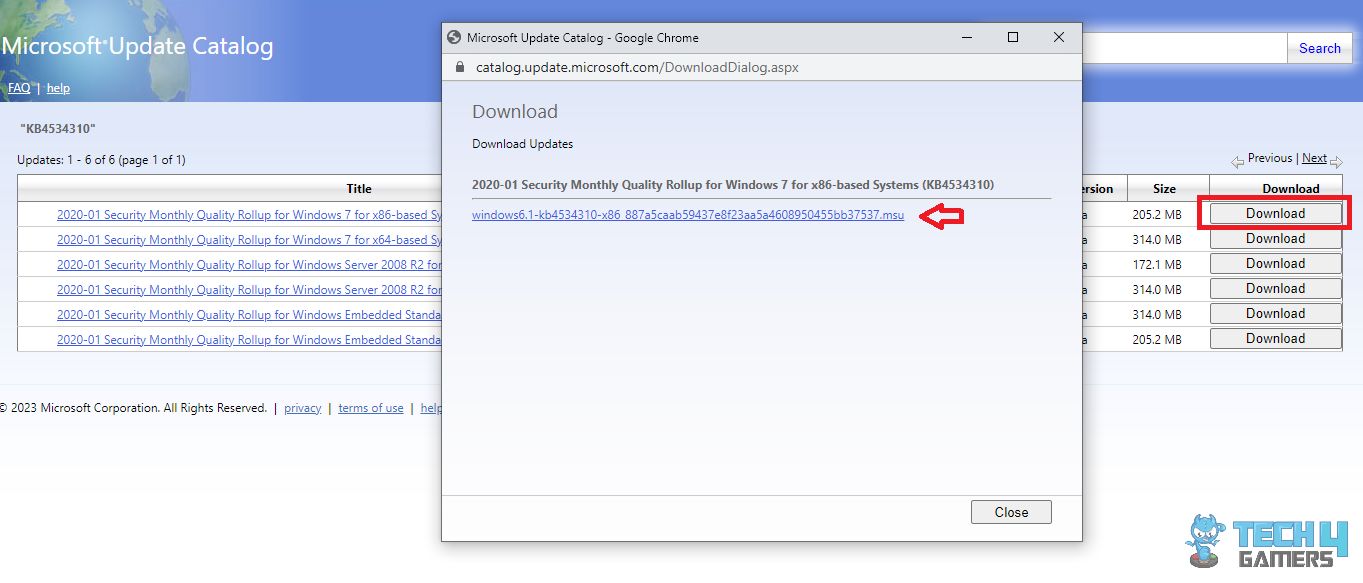
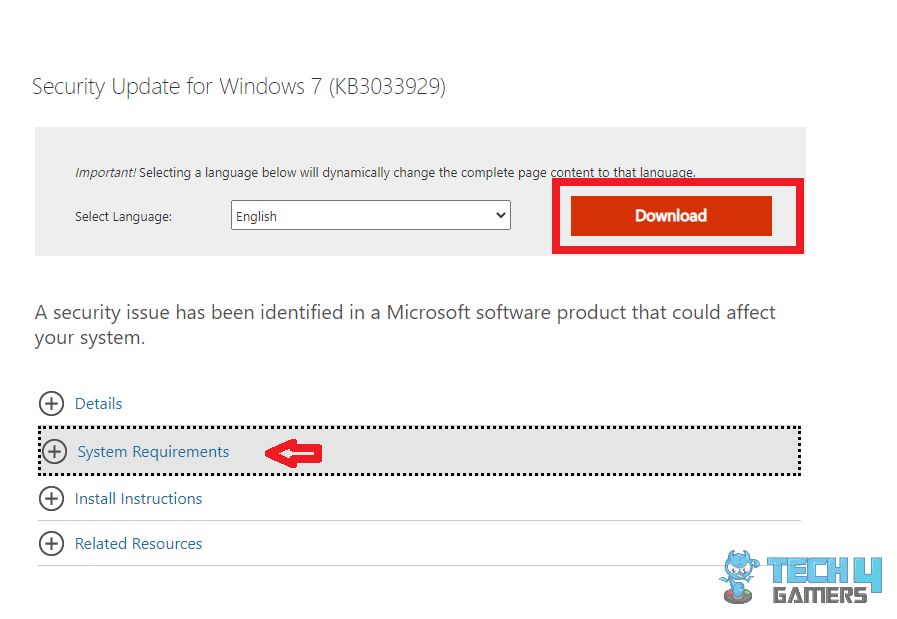
Select System Requirements to confirm compatibility > Press Download > Run > Restart PC afterward.
Microsoft Download Center (Image By Tech4Gamers)
Turn On Automatic Update
Below are the complete instructions you can refer to:
Move to Start > All Programs.
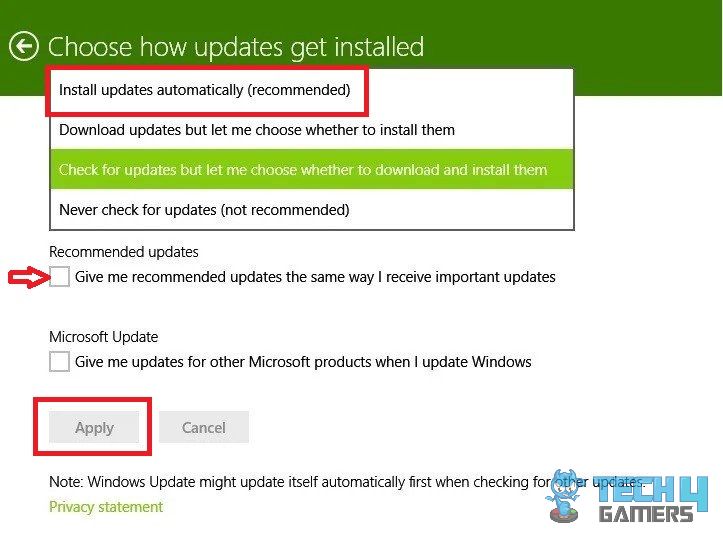
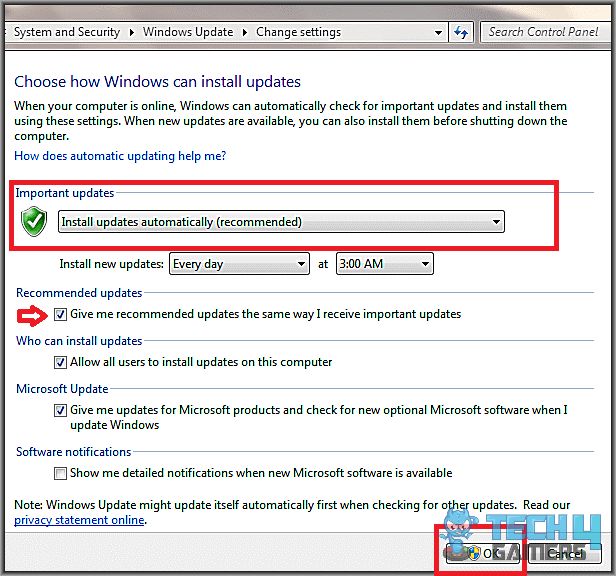
Scroll to Windows Update > Change Settings > Pick Install Updates Automatically in the drop-down.
Enable Auto-Update (Image By Tech4Gamers)
Select relevant checkboxes to optimize future updates > OK.
Tip: You can roll back to the previous Windows version and undo the updates if you encounter issues after installing the updates.
Frequently Asked Questions
How To Keep Your Computer Updated?
The recommended way to keep your system up to date is to turn on the automatic update feature to install the updates automatically.
How Long Would An Update Take To Download To My Computer?
The time required to download an update to your PC depends upon several factors, including your internet speed, the size of the update file, and network settings.
Can I Uninstall An Update?
Yes, you may uninstall an update by following these steps: Start>Settings>Update & Security>Windows Update>Advanced Options>View your update history>Uninstall Updates. Click on the specific update that you want to remove and click uninstall.
Haddi has been in the Gaming and tech Space for over 10 Years Now; he has worked on notable websites like eXputer, Gamepur, Gear Siege, Gearnuke, and plenty more. He is an expert at Games & PC Hardware; you can expect him to solve any problem. People often joke, that if there is any problem anyone can solve, Haddi can solve it faster. Currently, Haddi writes and manages a Team of Experts at Tech4Gamers.
Contact: Haddi@tech4gamers.com
Join Our Community
Still having issues? Join the Tech4Gamers Forum for expert help and community support!
 Threads