Compared to the sharp and right-angled corners available on Windows 10 and prior, the new Windows 11 has a much softer style by utilizing rounded corners. However, many users still prefer the old visual interface but don’t know how to disable rounded corners in Windows 11. I tested many ways to do so, all of which were very effective.
- Windows 11 incorporates rounded corners, lending it a softer and more visually appealing appearance.
- Disable the rounded corners in Windows 11 using the Registry Editor, Device Manager, or third-party applications.
- Be careful when using the Registry to avoid messing with any other setting.
Methods Difficulty Rating
Rated: 7/10
Rated: 2/10
Rated: 6/10
Using Registry Editor
The Registry Editor is useful in making advanced system changes and lets you control several configurations of your Windows. I modified the frame-related settings in the computer’s registry to disable rounded corners. Proceed with the following steps to perform this technique correctly.
- Launch Registry Editor: Open Windows Search with Win + S > Type Registry Editor > Run As Administrator > Yes.
- Move To Correct Registry: Navigate to Computer > HKEY_CURRENT_USER > Software > Microsoft > Windows > DWM.
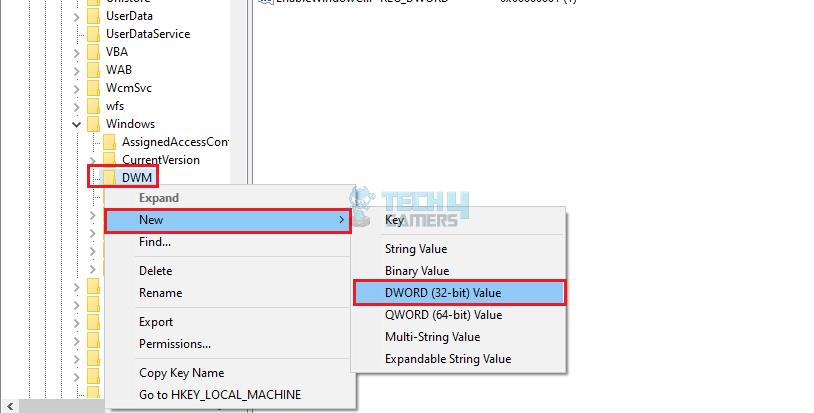
- Create DWORD Value: Right-click on the DWM key on the left pane > New > DWORD (32-bit) Value > Name it UseWindowFrameStagingBuffer.

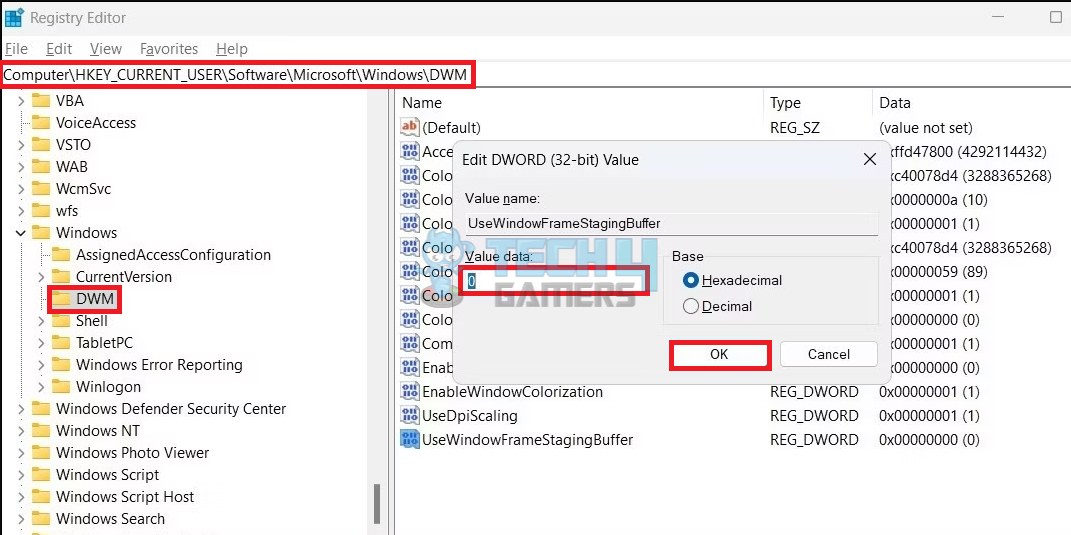
Create DWORD Value (Image By Tech4Gamers) - Change Value Data: Double-click on this DWORD > Change the Value data to 0 > OK > Restart PC.

Edit Value Data (Image By Tech4Gamers)
Using Device Manager
The Device Manager helps manage hardware components, such as the keyboard and mouse. Disabling rounded corners through this method involves disabling the connected display device. While it’s a straightforward process, it will only temporarily turn off rounded corners, and you can easily reverse the change by re-enabling the device in Device Manager.
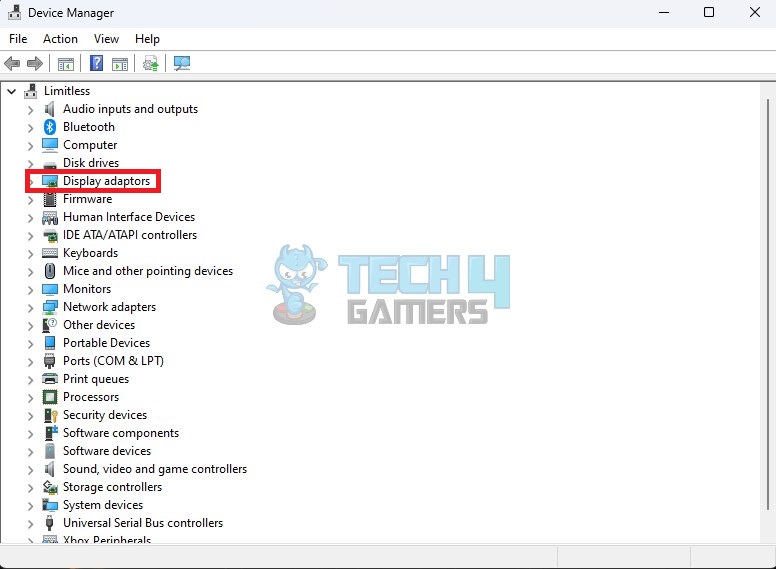
- Access Device Manager: Right-click on the Start button > Device Manager.
- Select Display Adapter: Expand the Display Adapters section.

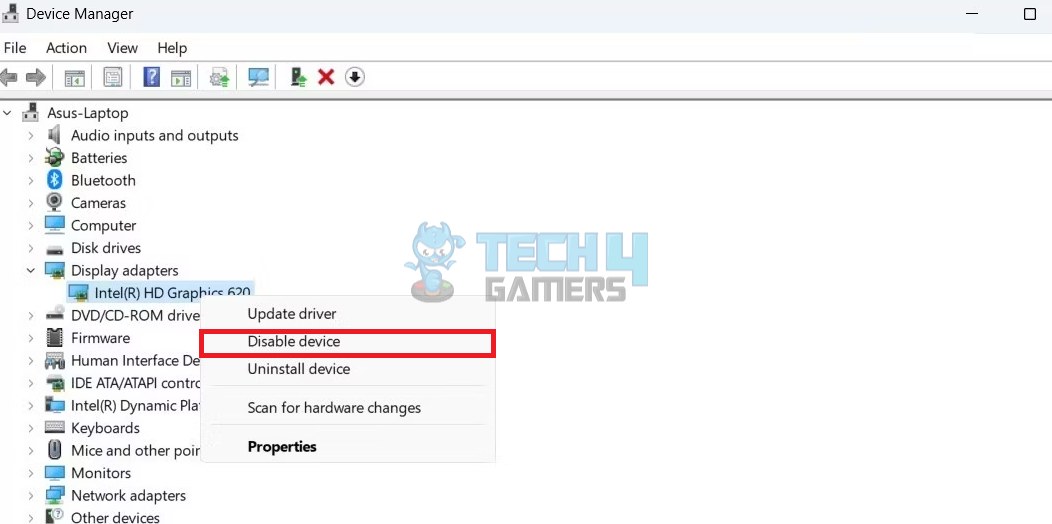
Locate Display Adapters (Image By Tech4Gamers) - Disable Driver: Right-click on your respective display driver > Disable Device.

Click Disable Device (Image By Tech4Gamers)
Using Third-Party Tool
For a simpler approach to disable rounded corners, I resorted to a couple of third-party software designed for this purpose. These tools are typically user-friendly and don’t require navigating complex system settings.
Win11DisableOrRestoreRoundedCorners
Remove rounded corners with the Win11DisableOrRestoreRoundedCorners tool using these instructions:
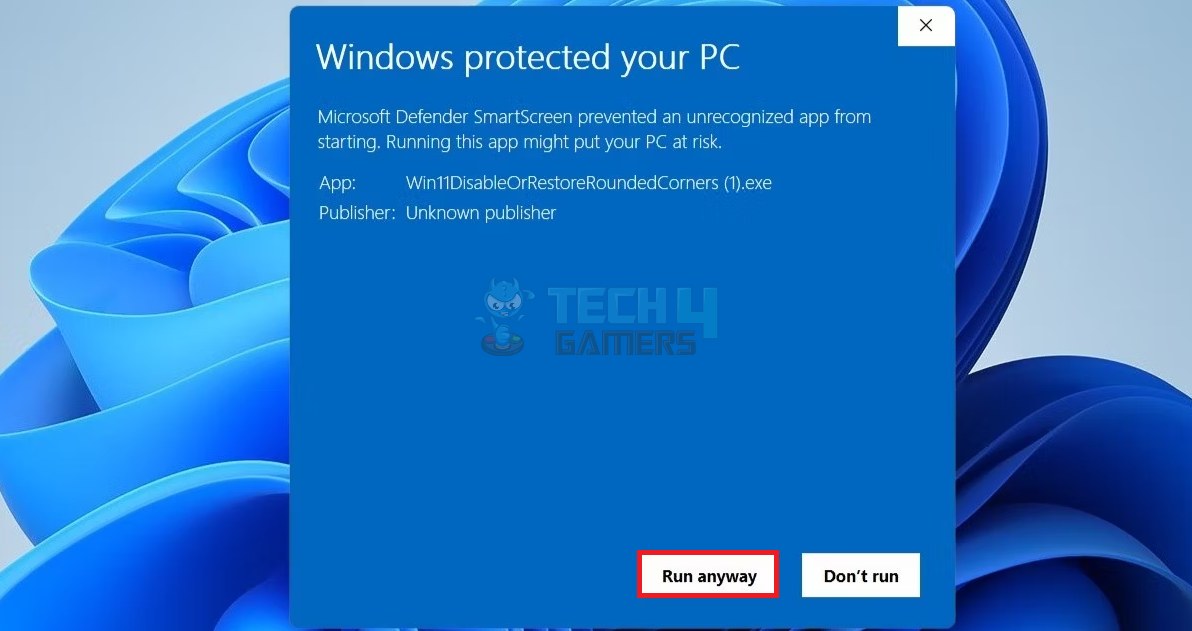
- Download The Tool: Download the Win11DisableOrRestoreRoundedCorners tool from GitHub’s website > Run the executable file.
- Bypass Warning: If the Microsoft Defender SmartScreen window appears, press More Info > Run Anyway > Yes.

Press Run Anyway (Image By Tech4Gamers)
ExplorerPatcher
Following steps provide the details for using this tool:
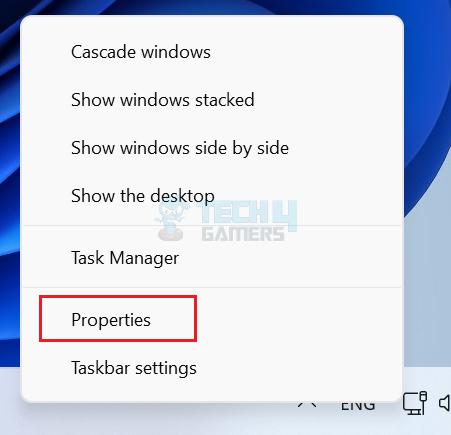
- Download the ExplorerPatcher tool > Extract the file > Run it.
- Come to the Desktop > Right-click Taskbar > Properties.

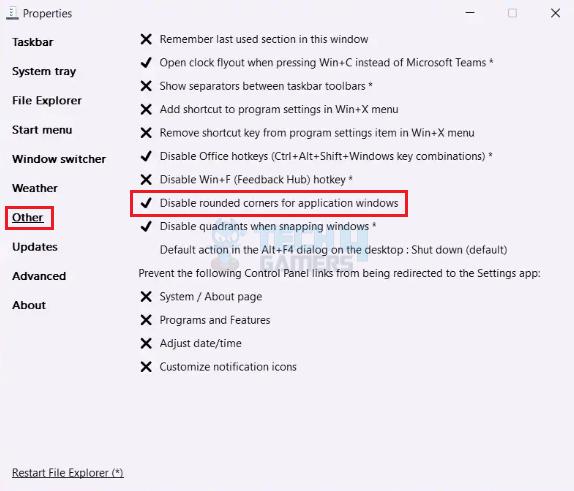
Select Properties (Image By Tech4Gamers) - Highlight Other on the left bar > Click Disable Rounded Corners For Application Windows.

Disable Rounded Corners In ExplorerPatcher (Image By Tech4Gamers)
Last Words
Although the methods above were effective in disabling rounded corners, I noticed that the customization reversed itself once my system installed new Windows updates. Therefore, I had to manually adjust the corner angles again after updates.
FAQs
Windows 11 has introduced a revamped user interface that incorporates rounded corners, giving it a modern and aesthetically pleasing appearance.
Yes, you can revert to the rounded corners by reversing the settings.
Use the Registry Editor, Device Manager, or third-party applications to get sharp corners in Windows 11.
More About Windows 11:
- How To Remove PIN From Windows 11? [ALL METHODS]
- How To Find MAC Address In Windows 11?
- How To Update Windows [11, 10, 8, And 7]
Thank you! Please share your positive feedback. 🔋
How could we improve this post? Please Help us. 😔
[How To Guides Specialist]
Dayan Shahid is a skilled mechanical engineer passionate about technology. With certifications in various programming languages and subjects ranging from microcontrollers to aerial robotics, Dayan can effortlessly present complex technical topics in an engaging way. His ability to bridge the gap between theory and practical applications sets him apart as he continues to inspire others through their insightful content.