


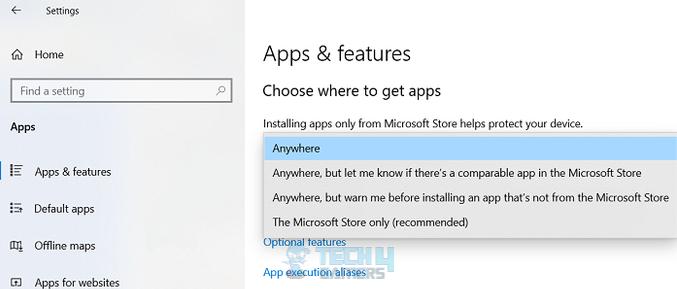
In Windows 11, you can decide if the system can install apps from third-party sources or just the Microsoft Store. However, if the Windows 11 Choose Where To Get Apps is missing, check if your computer’s S mode is enabled. If yes, get out of the mode to utilize this feature.
- The feature may not work if you are in S Mode, have antivirus restrictions, or have corrupt files.
- Bring back the missing option by switching out of S Mode, upgrading to Windows 11 Home, and loading Clean Boot mode.
- You may need to reset the Microsoft Store if other fixes fail.
Method Difficulty Rating
Disable S Mode
Rated: 3/10
Modify Policy
Rated: 4/10
Upgrade Windows
Rated: 4/10
Switch Out Of S Mode
S Mode is a dedicated feature on Windows 11 that protects your computer from threats and viruses by preventing downloads from unreliable sources. You can only install apps from the Microsoft Store when this is enabled, as also confirmed by a Windows Insider MVP on Windows 11 Forums.
Consequently, I verified that the S mode is deactivated on my computer using the following steps.
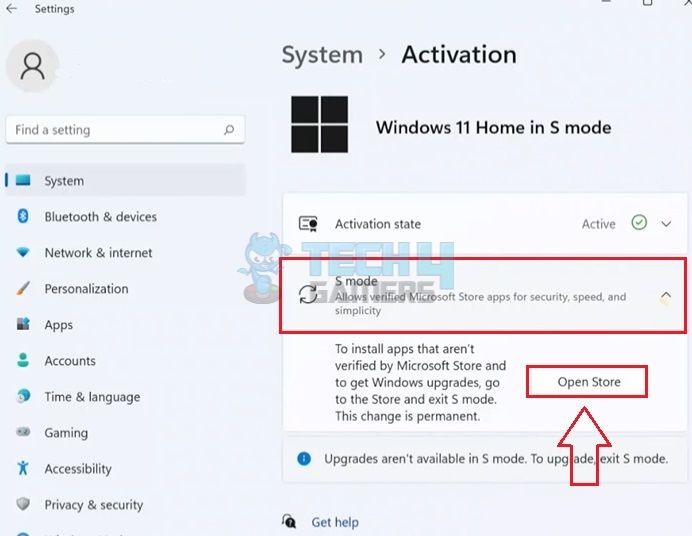
- Launch Activation Section: Open the Settings > System > Activation.
- Select S Mode: Choose the S Mode option > Open Store.

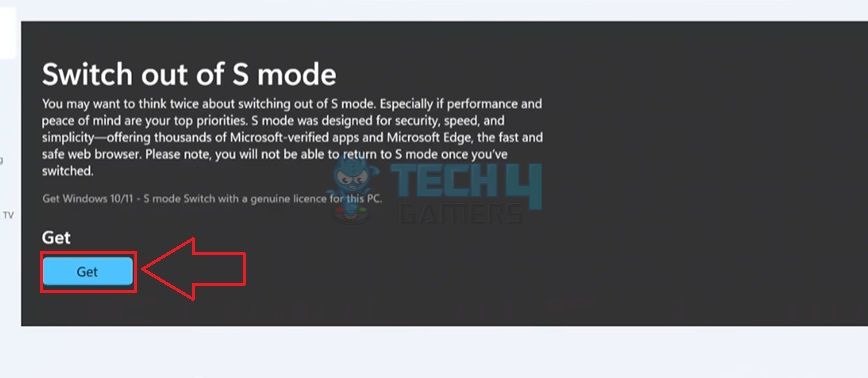
Choose Open Store Option (Image By Tech4Gamers) - Disable S Mode: This will take you to the Switch Out Of S Mode screen > Get.

Hit The Get Button (Image By Tech4Gamers)
Change Group Policy
A certain Policy in Windows, known as the App Install Control, looks after the app installation on your computer. When this was enabled, it restricted me from installing apps from anywhere other than the Microsoft Store.
So, I set this Policy to Not Configured, then tried installing the desired app from another source, which re-enabled the Choose Where To Get Apps option in my Windows 11.
- Execute Code In Run: Launch the menu by running gpedit.msc in the Run box.
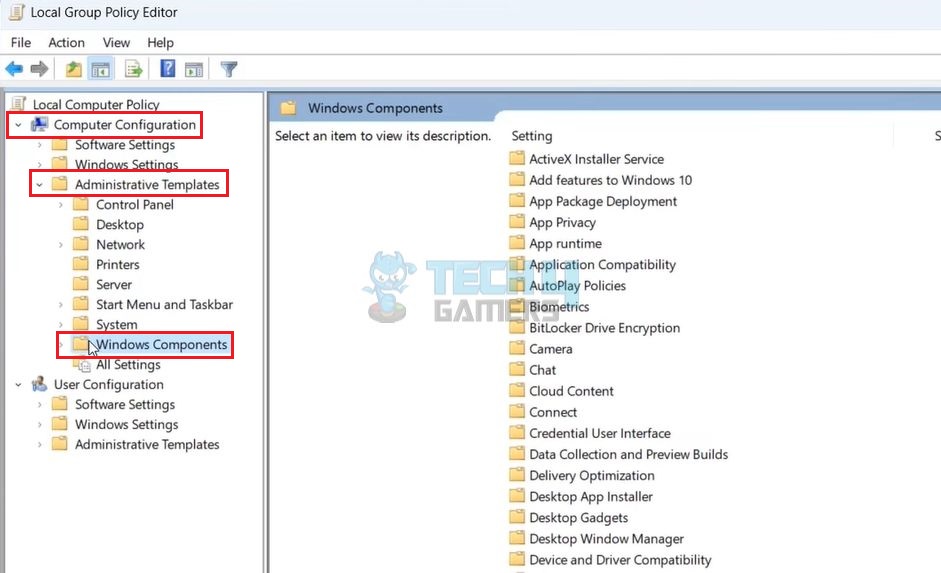
- Move To Windows Components: Select Computer Configuration > Administrative Template > Windows Components.

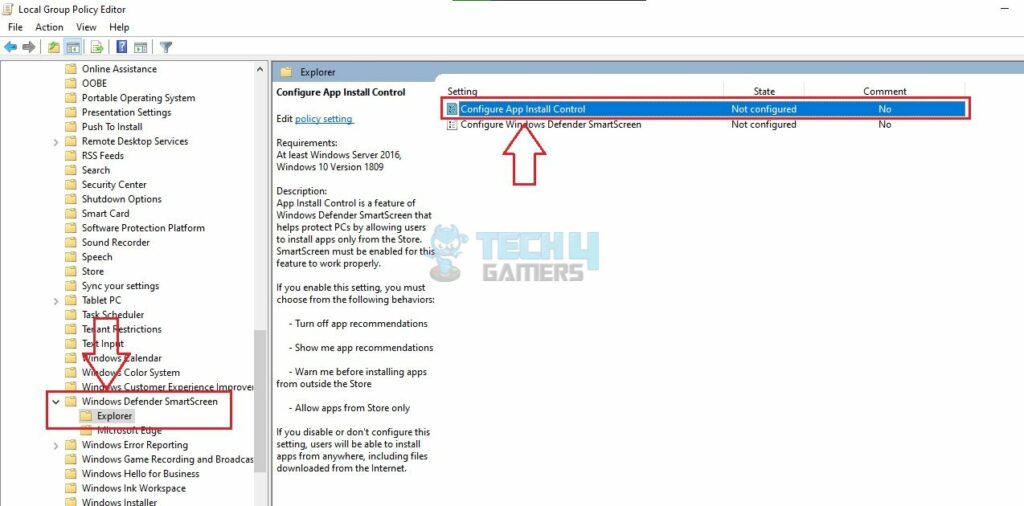
Navigate To Windows Components (Image By Tech4Gamers) - Select Relevant Policy: Go to Windows Defender SmartScreen > Explorer > Configure App Install Control.

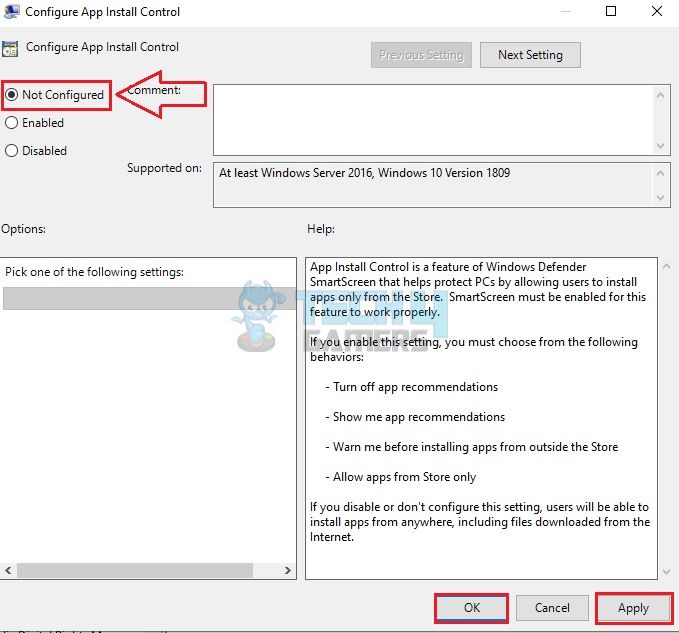
Select Configure App Install (Image By Tech4Gamers) - Set To Not Configured: Mark Not Configured in the window > Apply > Restart the computer.

Mark Not Configured (Image By Tech4Gamers)
Upgrade To Windows 11 Pro
Windows 11 Pro offers better performance and fewer hindrances to the user experience. Therefore, I upgraded my Windows edition and immediately noticed a better functioning of its features. Follow these steps to upgrade the Windows for free.
- Open Windows Activation: Select the System tab in the Settings interface > Activation.
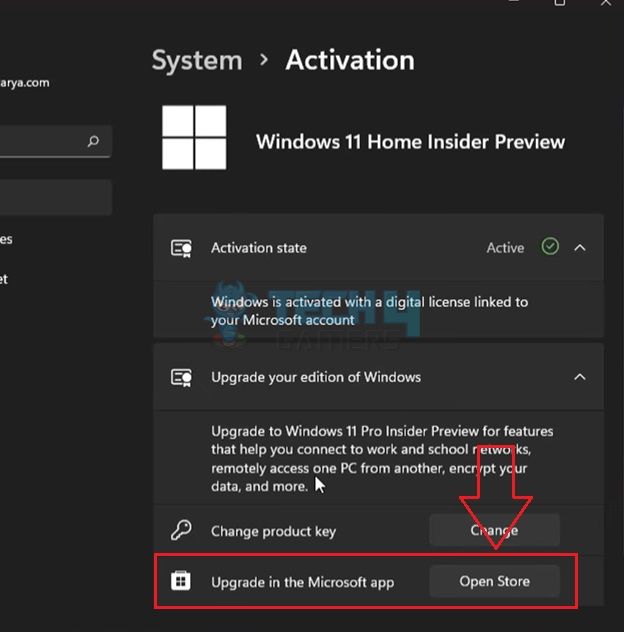
- Click Open Store: Expand the section Upgrade Your Edition Of Windows > Hit the Open Store button next to Upgrade In Microsoft App.

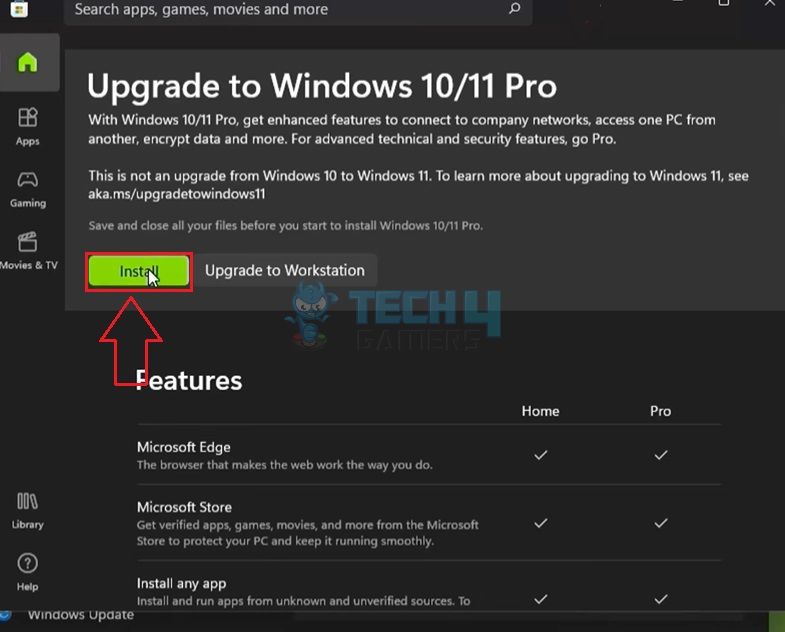
Press Open Store (Image By Tech4Gamers) - Press Install: Choose Install to upgrade your Windows.

Install Upgrade (Image By Tech4Gamers)
This simple solution has also been super effective in resolving the error for many users in the Microsoft Community.
Wrap Up
When researching this problem, I came across another user on Windows 10 Forums who faced a similar issue in Windows 10. This means that the error is not limited to a certain Windows version, yet Microsoft hasn’t recommended any official fix or addressed the trouble in their recent updates.
Nevertheless, the above solutions were pretty useful in restoring the Choose Where To Get Apps feature in my OS. Once back, I had greater control over the app installation on my computer and could easily get them from third-party sources as well.
Related Articles
- How To Fix Windows 11 Crackling Audio? [21 FIXES]
- How To Fix Spacebar Not Working In Windows 11
- 5 Ways To Fix No Power Options Available In Windows 11
- Windows 11 Quick Access Missing [FIXED]
- What To Do If Sleep Option Is Missing In Windows 11?
Thank you! Please share your positive feedback. 🔋
How could we improve this post? Please Help us. 😔
[Errors Troubleshooting Expert]
Arsalan Shakil (aka GuyThatDoesEverything on YouTube) is a PC Tech Enthusiast and Electronic Geek. With over 10+ years of experience in Electronics, he then decided to explore Software Engineering to design embedded products and automate existing hardware solutions.
When he started tearing down old cameras to understand how they worked, he was shocked (literally, when he got zapped by a flash discharge capacitor), giving him the power (debatable) to fall in love with videography/photography. He also started making some fun videos that later became YouTube tech reviews.
Skills:
- 10+ years of experience in Electronics design, embedded solutions, and prototyping
- Majored in Software Engineering
- Research paper publication in IEEE for Embedded Military Uniform & LoRa WAN wireless technology
- Specialized in IoT Solutions
- PC Enthusiast & PC Modder
In his local region, he’s known to expose cheap PSU brands, often claiming fake certification or false claims on the box. He’s a true nerd and needed some friends in his life. Then he met some guys who work at Tech4Gamers, and they also came out to be equal nerds who suggested he join Tech4Gamers as a Hardware Expert.


![Star Wars Empire at War Forces of Corruption Exception Errors [FIXED]](https://tech4gamers.com/wp-content/uploads/2023/11/Error-Fixes-17-218x150.jpg "How I Fixed Exception Errors In Star Wars Forces of Corruption")
