


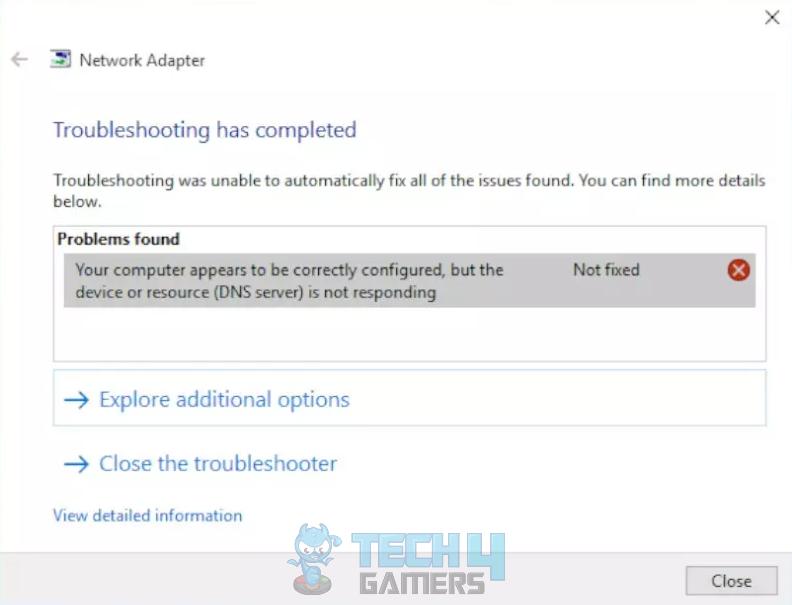
The error message, “Your Computer Appears To Be Correctly Configured, But The Device Or Resource Is Not Responding,” hints at problems with the network connectivity, such as the computer failing to connect with some device or a resource on your network. There are many solutions, like power cycling the router, clearing the DNS cache, and changing the DNS server.
- The DNS server error may occur due to misconfigured DNS settings, outdated Windows/network drivers, faults within the connection, and more.
- You can start by restarting the PC and the internet router, and when nothing works, reset your network to solve the trouble.
- The “Roll Back Driver” option will only be available if you have recently updated the network driver on your PC.
You will see the following message when the error occurs:
Method Difficulty Rating
Rated: 7/10
Rated: 4/10
Rated: 4/10
Change DNS Server
You also have the option to change your DNS server to Google DNS Server if your current one is not responding or showing errors. This method also helped several Windows users on a forum.
Follow these steps to do it:
- RUN Command: Press the “Windows+R” keys > Enter “ncpa.cpl” in the RUN Window > hit “OK.”
- Network Adapter Properties: Right-click on the network adapter > Select “Properties.”

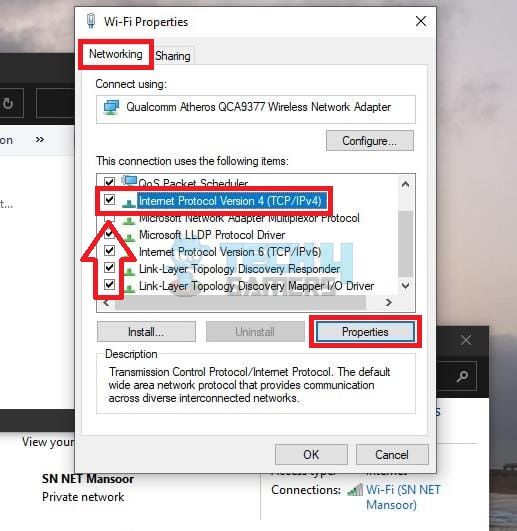
Right-click And Select The Wi-Fi Properties (Image By Tech4Gamers) - Internet Protocol Version 4: Go to the “Networking” tab > double-click on “Internet Protocol Version 4 (TCP/IPv4).”

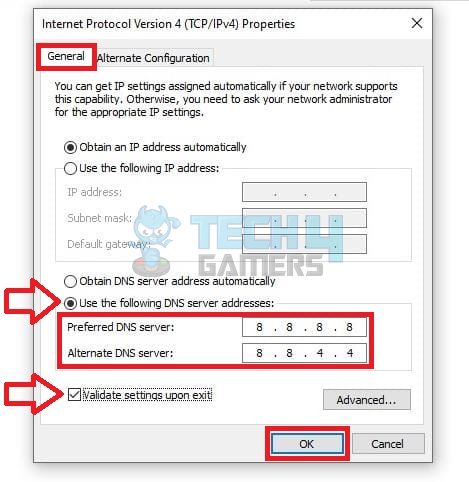
Double-click “Internet Protocol Version” From The Networking Tab (Image By Tech4Gamers) - Enter The DNS Server: Mark the circle beside “Use The Following DNS Server Addresses” > Enter “8.8.8.8” in the “Preferred DNS Server” box > Enter “8.8.4.4” in the “Alternate DNS Server” box.

Update DNS Settings To Fix A Slowed Down Computer(Image By Tech4Gamers) - Save Settings: Put a check on the box “Validate Settings Upon Exit” > Press “OK” to save the new DNS addresses.

Reset Network Settings
Sometimes, this issue can be solved by resetting your network settings. If some wrongly configured network settings are causing the error, this method can help resolve it. Furthermore, resetting the network has also fixed several forum users‘ issues.
The steps below can help you reset your network settings:
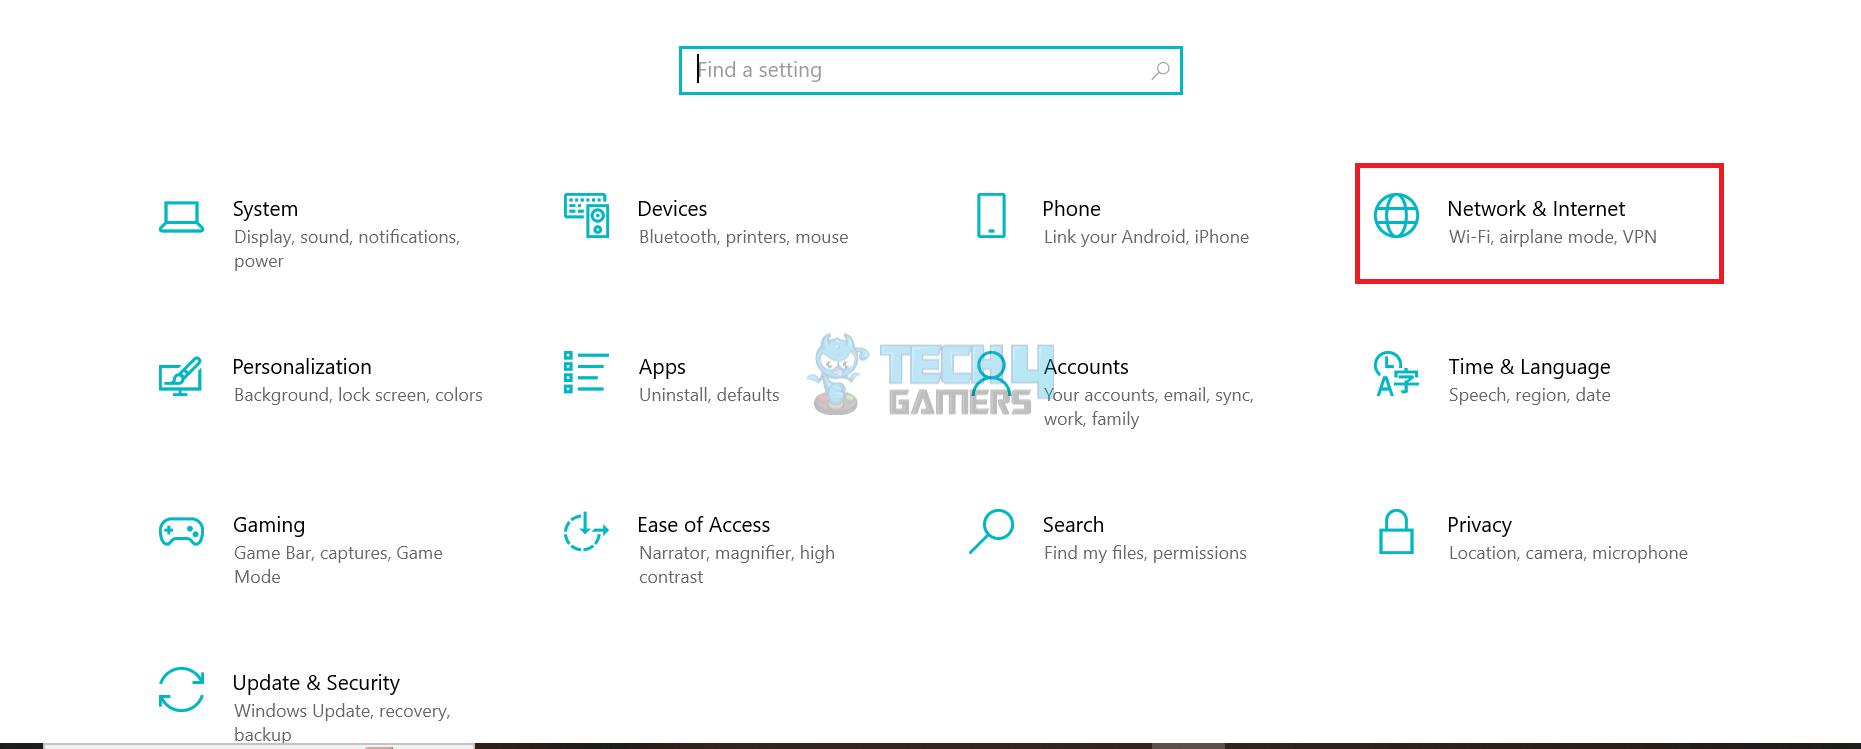
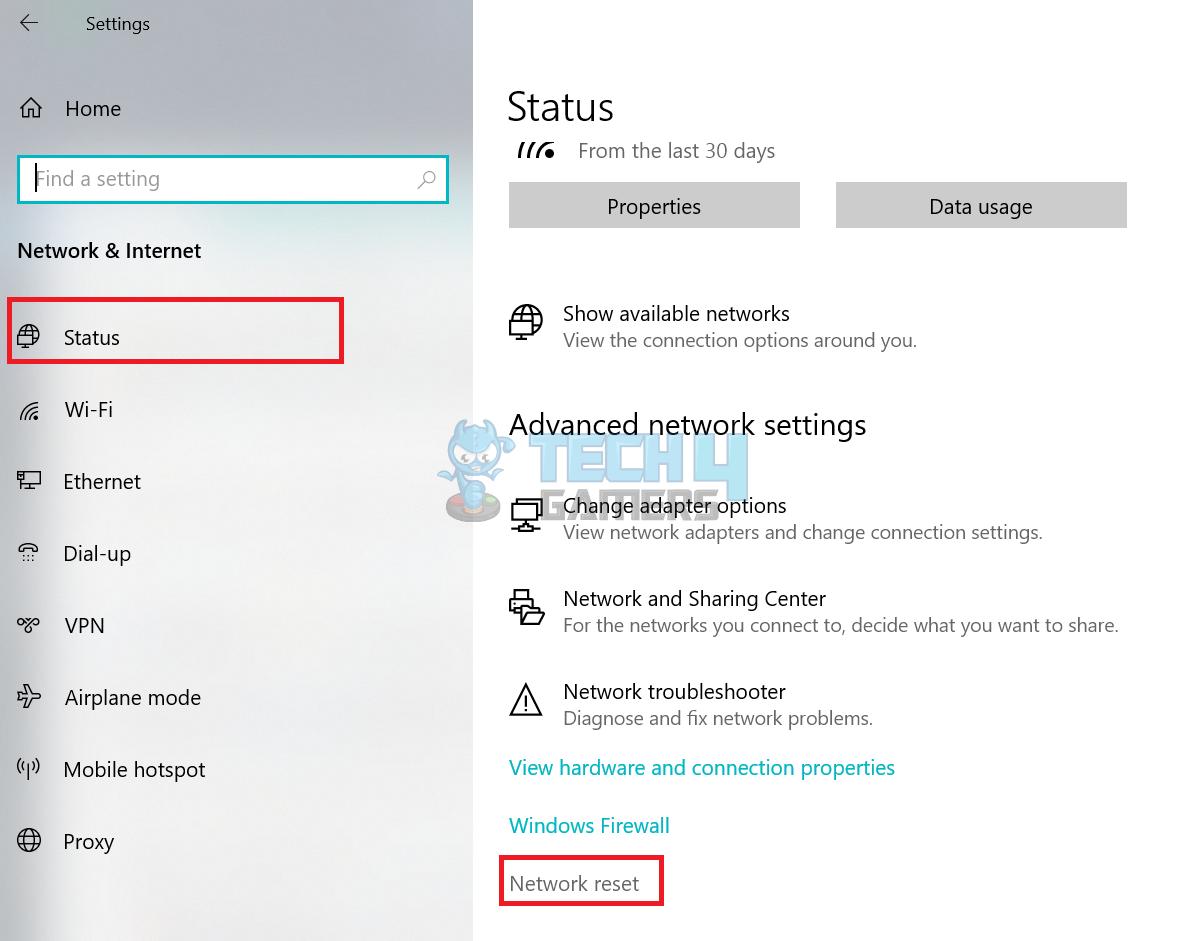
- Network & Internet: Open the Windows settings > Click “Network & Internet.”

Go To The Network & Internet Option From Windows Settings (Image By Tech4Gamers) - Network Reset: Click the “Status” tab on the left > “Network reset.”

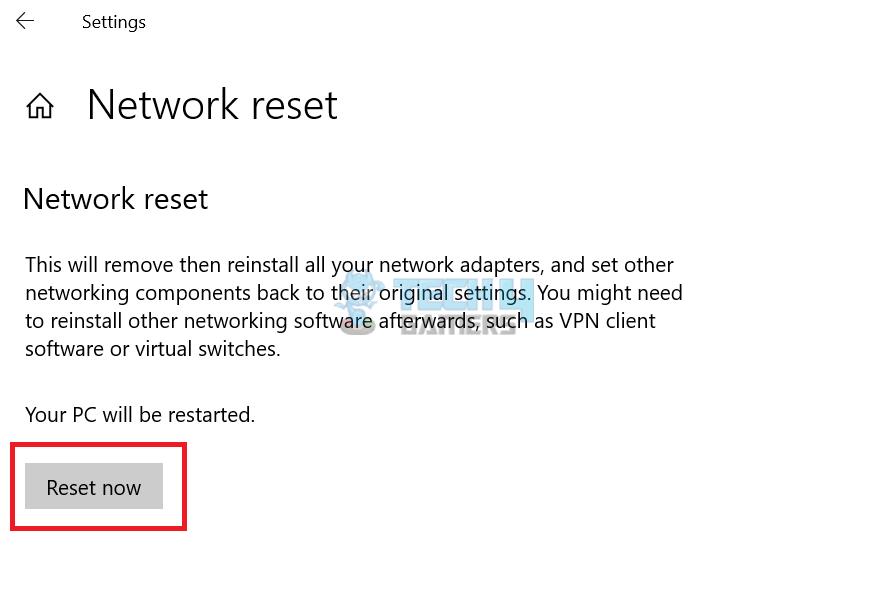
- Reset Now: Click the “Reset Now” button to restart your PC and reset the network.

Click The Reset Now Button To Complete The Network Reset Procedure (Image By Tech4Gamers)
Using Command Prompt
The DNS server error can also be fixed by giving some commands to the command prompt. These commands tweak the DNS server, which may fix the problem.
Follow the steps below to do it:
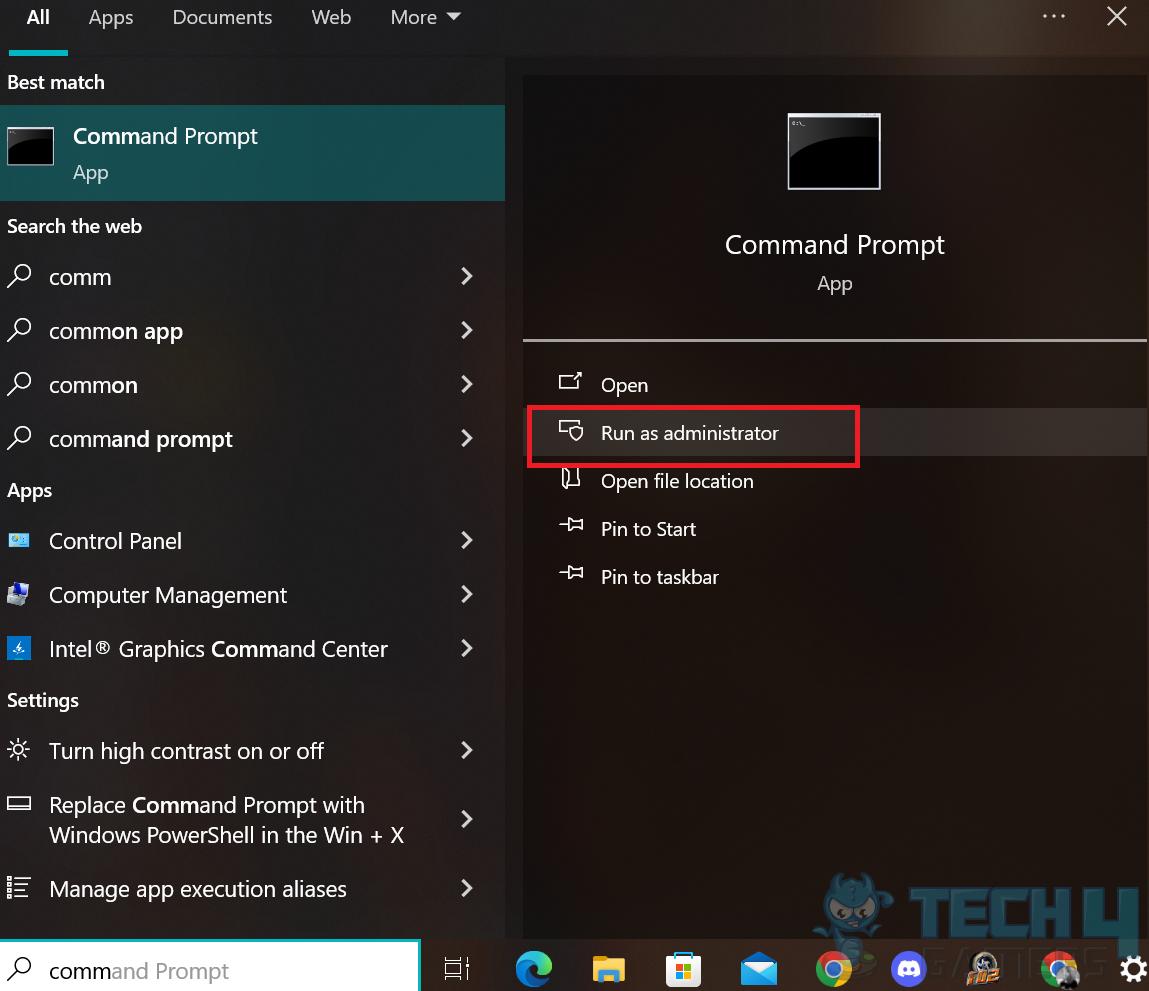
- Open Command Prompt: Search for the command prompt > Click “Run as administrator.”

Click On “Run as administrator” To Open The Command Prompt With Admin Access (Image By Tech4Gamers) - Enter Commands: Type the following commands individually and press enter after each command:
ipconfig /flushdns > ipconfig /registerdns > ipconfig /release > ipconfig /renew.
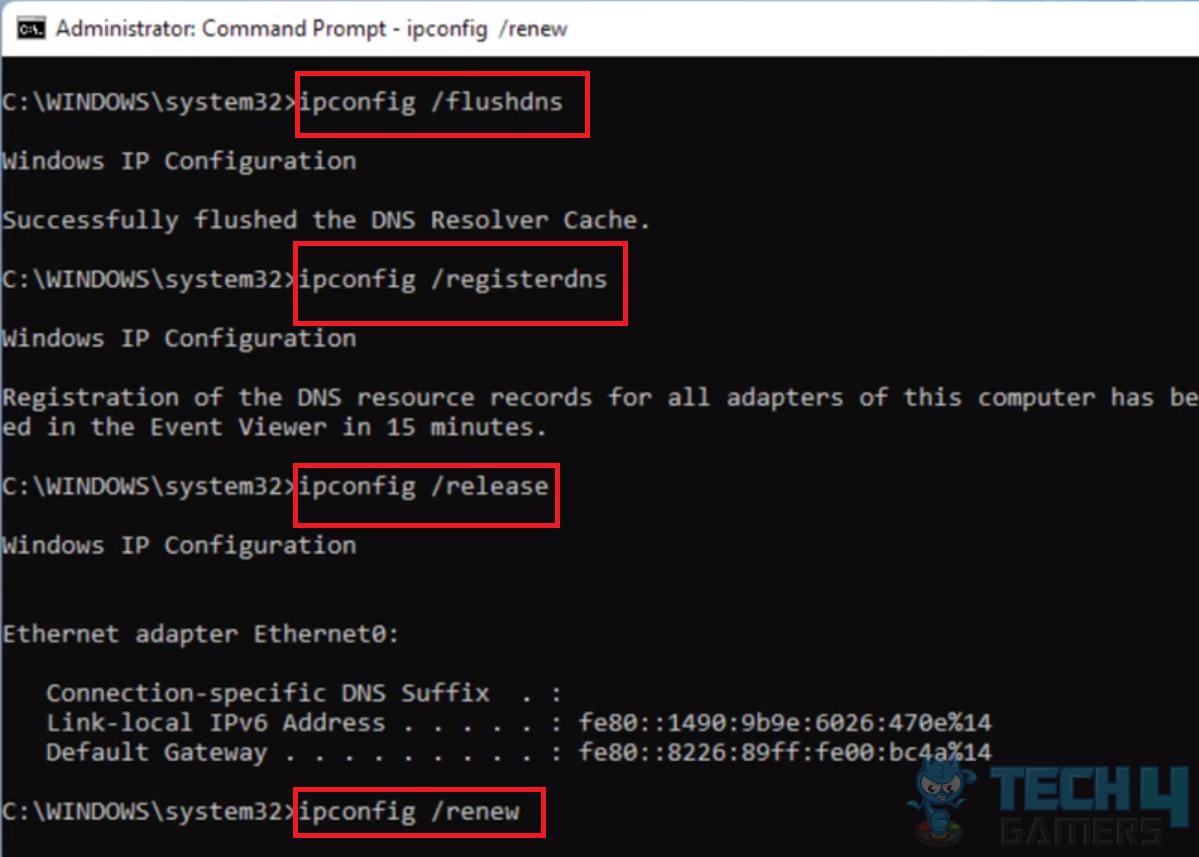
3. Exit Command Prompt And Verify: After entering all the commands, type “Exit” > Press enter > Restart your PC, and check if the problem continues.
Final Words
As per my research, this error is pretty common among Windows users, and most of them were able to fix it by changing the DNS server. Personally, I would recommend power cycling the router first, as it is a rather easier process to go through. If it doesn’t work, you can try changing the DNS server or any other solution if the DNS method also fails.
More Error Fixes:
- How To Fix Audio Renderer Error: Please Restart Your Computer
- How To Fix Windows Error 0X80072F8F-0X20000
- FIXED: App Has Been Blocked For Your Protection Windows 11
Thank you! Please share your positive feedback. 🔋
How could we improve this post? Please Help us. 😔
[Errors Troubleshooting Expert]
Arsalan Shakil (aka GuyThatDoesEverything on YouTube) is a PC Tech Enthusiast and Electronic Geek. With over 10+ years of experience in Electronics, he then decided to explore Software Engineering to design embedded products and automate existing hardware solutions.
When he started tearing down old cameras to understand how they worked, he was shocked (literally, when he got zapped by a flash discharge capacitor), giving him the power (debatable) to fall in love with videography/photography. He also started making some fun videos that later became YouTube tech reviews.
Skills:
- 10+ years of experience in Electronics design, embedded solutions, and prototyping
- Majored in Software Engineering
- Research paper publication in IEEE for Embedded Military Uniform & LoRa WAN wireless technology
- Specialized in IoT Solutions
- PC Enthusiast & PC Modder
In his local region, he’s known to expose cheap PSU brands, often claiming fake certification or false claims on the box. He’s a true nerd and needed some friends in his life. Then he met some guys who work at Tech4Gamers, and they also came out to be equal nerds who suggested he join Tech4Gamers as a Hardware Expert.


