


You may encounter the error “Unable to recover your PC. The system drive is too small” when attempting to recover your PC. However, the process may fail due to insufficient storage on the target disk to complete the installation.
Methods Difficulty Rating
Rated: 4/10
Rated: 4/10
Rated: 6/10
Rated: 6/10
Rated: 7/10
Basic Fixes
Before delving into technical methods, check the total storage of your target hard drive. Ensure it matches or exceeds the required space. Clear out unnecessary programs and software to free up space for new files during recovery. Consider upgrading to a larger-capacity hard drive if the requirements aren’t fulfilled.
Repair Corrupt Files
We suggest you run the System File Checker (SFC) Scan to analyze the PC for missing or corrupt files and replace them. Meanwhile, the Deployment Image Servicing And Management (DISM) Scan repairs the Windows Image and several other system and driver errors. We usually find these scans useful in resolving problems related to Windows OS.
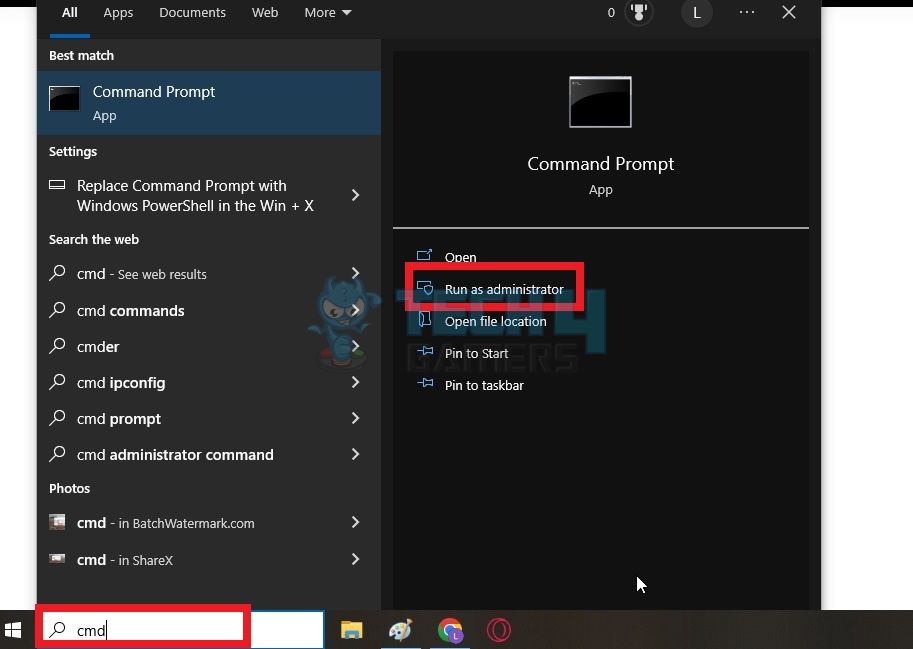
- Open CMD: Click on the search bar > Type cmd > Enter > Click Command Prompt > Choose Run as Administrator in the right panel.

Command Prompt – Image Credits [Tech4Gamers] - Run Commands: Hit Yes > Enter the code, sfc/scannow > Execute, dism/online/cleanup-image /checkhealth > Run the code, dism/online/cleanup-image /scanhealth > Type and enter dism/online/cleanup-image /restorehealth.
Use MiniTool Partition Wizard
You can migrate the Operating System from a larger source disk to a smaller target disk using MiniTool Partition Wizard, which will solve your problem in no time. Tenforums also talks about this method, which worked wonders. However, the total occupied space on the source disk should be less than the free space on the target drive.
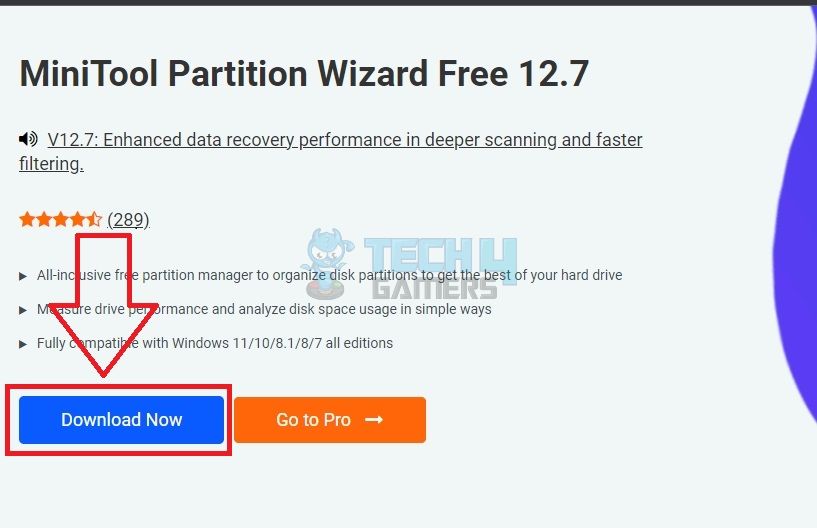
- Get Software: Download MiniTool Partition Wizard on your PC.

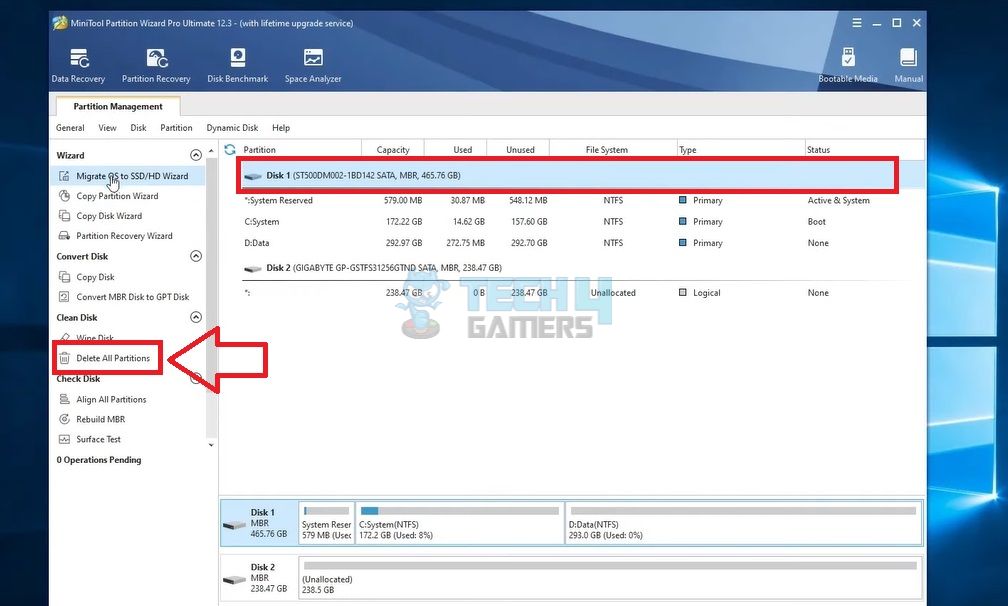
Download – Image Credits [Tech4Gamers] - Delete Partitions: Connect the Source Drive > Target Drive to your PC > Launch Partition Wizard once installed > Highlight the target drive > Click on Delete All Partitions from the left panel.

Delete Partitions – Image Credits [Tech4Gamers] - Apply Changes: Hit Yes > Press Apply in the bottom left corner.

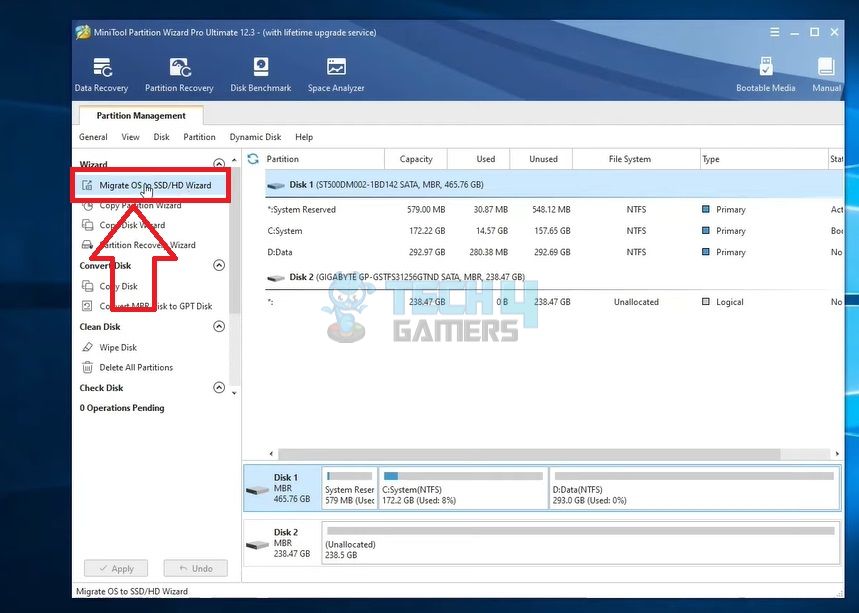
Apply – Image Credits [Tech4Gamers] - Migrate SSD: Select Yes to save the changes > Highlight the Source Drive > Choose Migrate OS To SSD/HD.

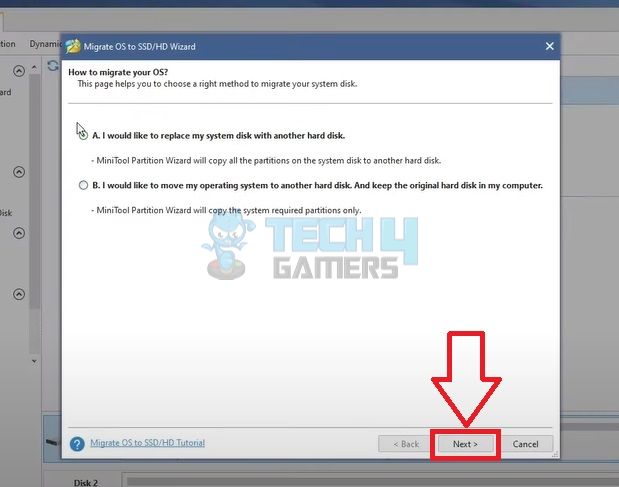
Migrate OS – Image Credits [Tech4Gamers] - Choose Method: Decide the Migration Method from the dialogue box > Mark the relevant box > Press Next.
- Option A copies all partitions on the system disk, such as OS, games, and other programs, and moves them to the target disk.
- Option B only copies the necessary partitions from the source to the target disk.

Migration Method – Image Credits [Tech4Gamers]
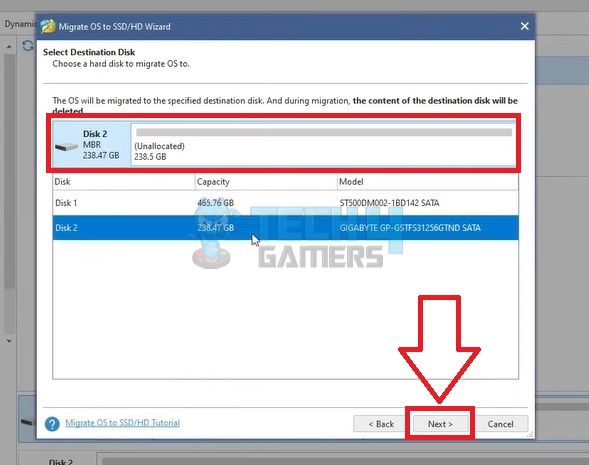
- Select Disk: Choose your Target Disk > Click Next. It should be Unallocated since we deleted all its partitions in Step 4.

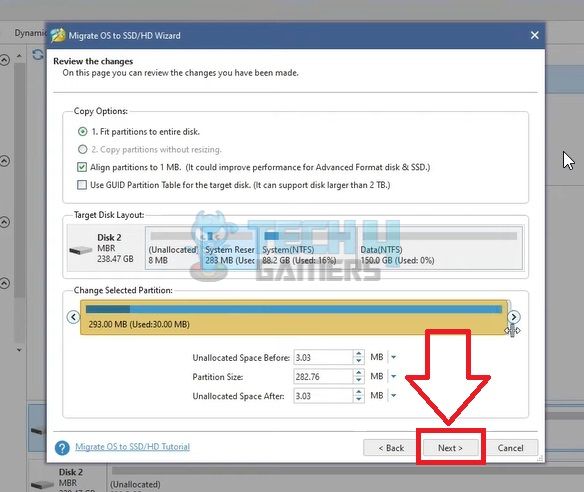
Target Disk – Image Credits [Tech4Gamers] - Select Option: Choose one option: Fit Partitions To Entire Disk(if the target disk is smaller) or Copy Partitions Without Resize > Click Next.

Review Changes – Image Credits [Tech4Gamers] - Finish Setup: Choose Finish.

Finish – Image Credits [Tech4Gamers] - Apply Changes: Press the Apply button.

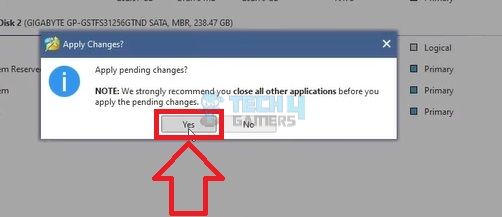
Apply – Image Credits [Tech4Gamers] - Apply Changes: Click Yes to start the process.

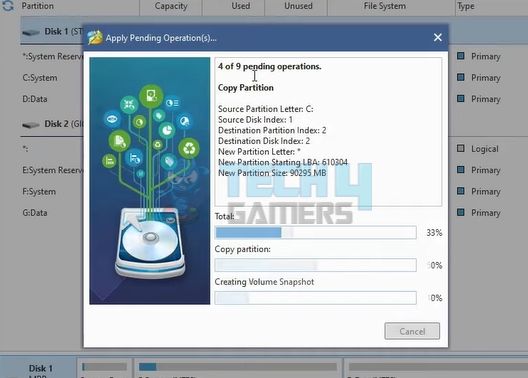
Yes – Image Credits [Tech4Gamers] - Migration Process: The Migration should now begin.

Migrating – Image Credits [Tech4Gamers]


Extend Drive Size
We also used MiniTool Partition Wizard to extend disk size by clearing unnecessary files and programs.
Resize System Reserved Partition
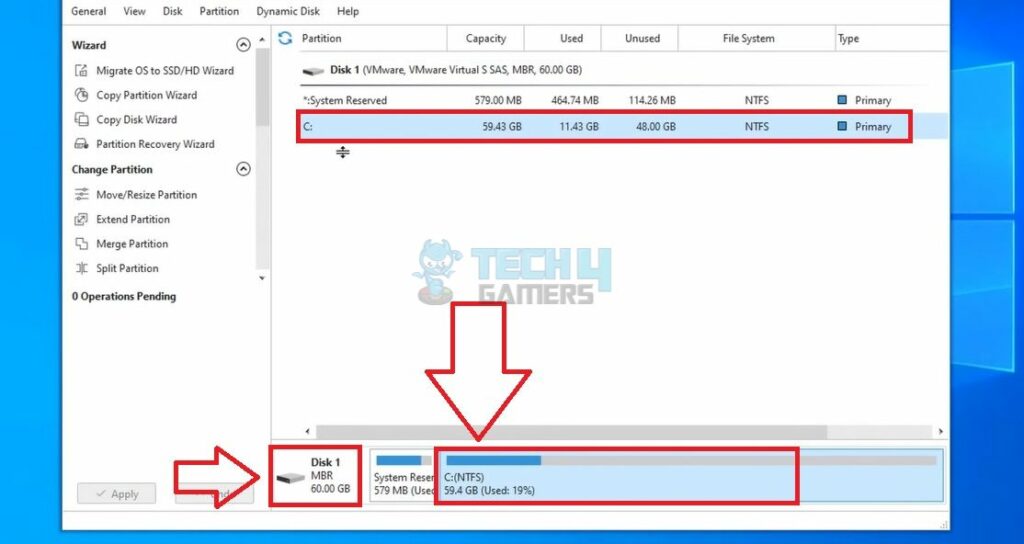
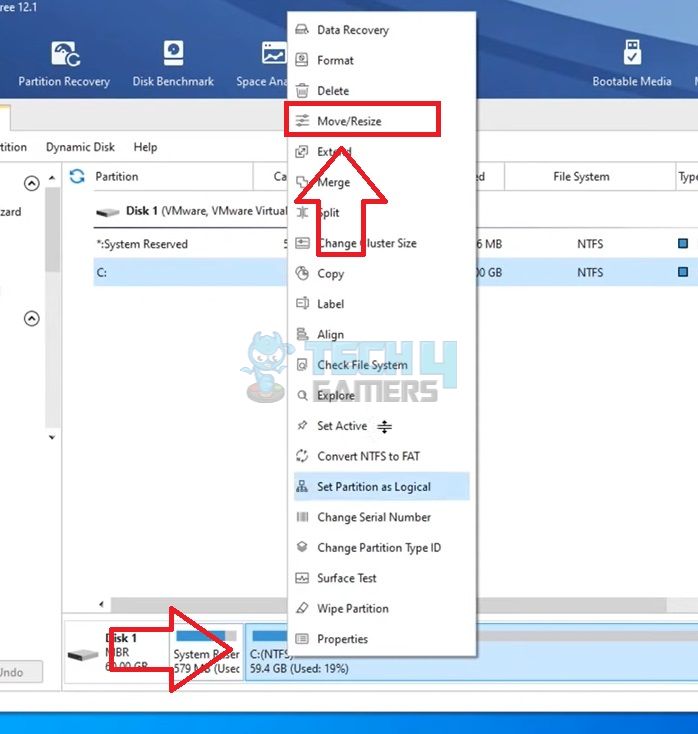
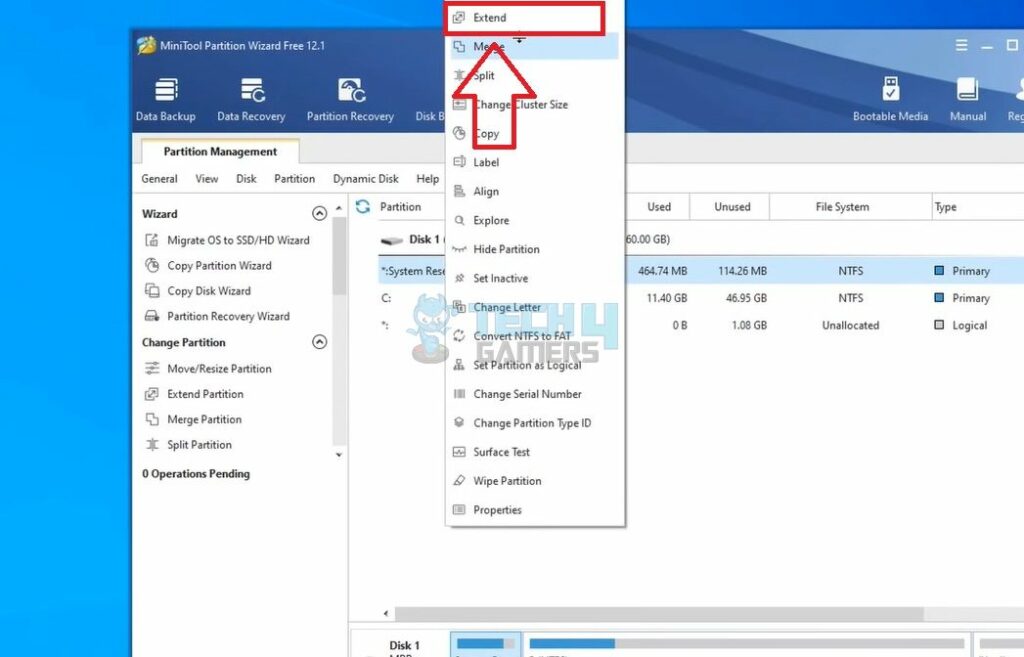
- Choose Drive: Highlight the C Drive > Ensure that you are running MBR; otherwise, you cannot resize the partition on your PC > Go to the bottom of the dialogue box > Right-click on C:(NTFS).

MBR – Image Credits [Tech4Gamers] - Select Option: Pick Move/Resize from the sub-menu.

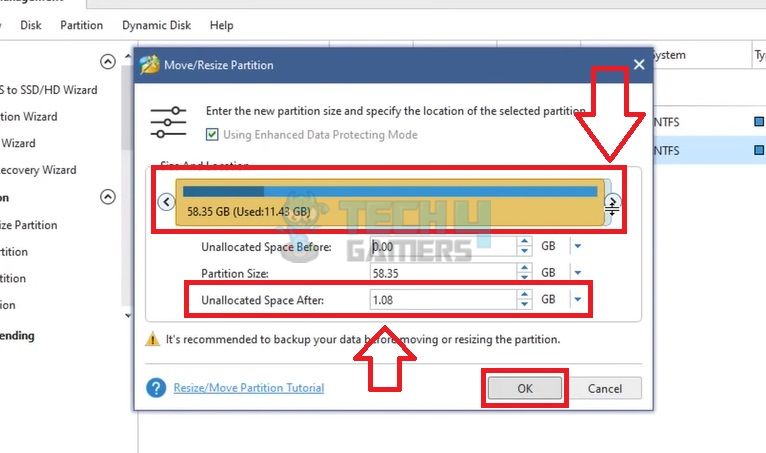
Move/Resize – Image Credits [Tech4Gamers] - Set Unallocated Space: Locate the Size And Location slider > Move it slightly to the Left using the Arrow Button > Set the Unallocated Space After to 1GB > Press OK.

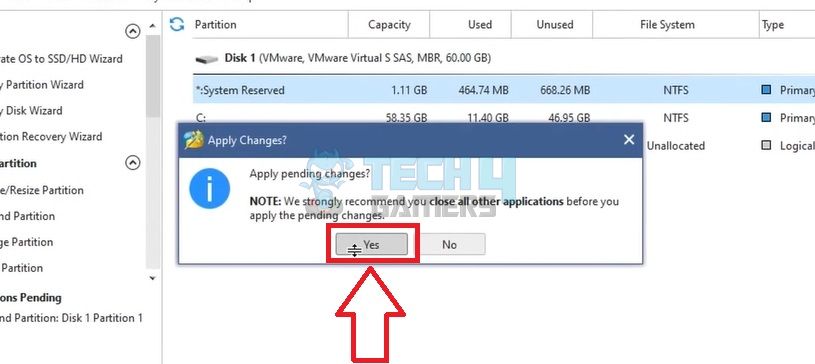
Resize – Image Credits [Tech4Gamers] - Apply Changes: Hit the Apply button.

Apply – Image Credits [Tech4Gamers] - Confirm Selection: Select Yes.

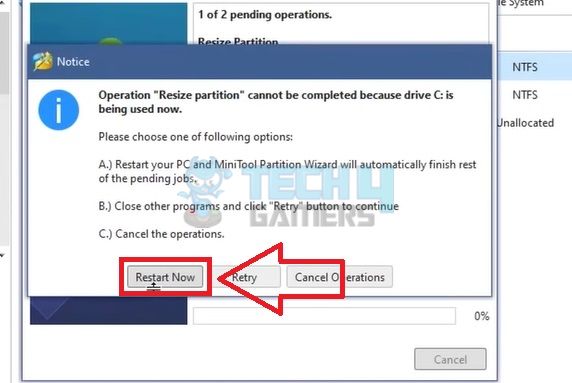
Yes – Image Credits [Tech4Gamers] - Restart PC: Choose Restart Now to take space from your C Drive.

Restart Now – Image Credits [Tech4Gamers]

Extend System Reserved Partition
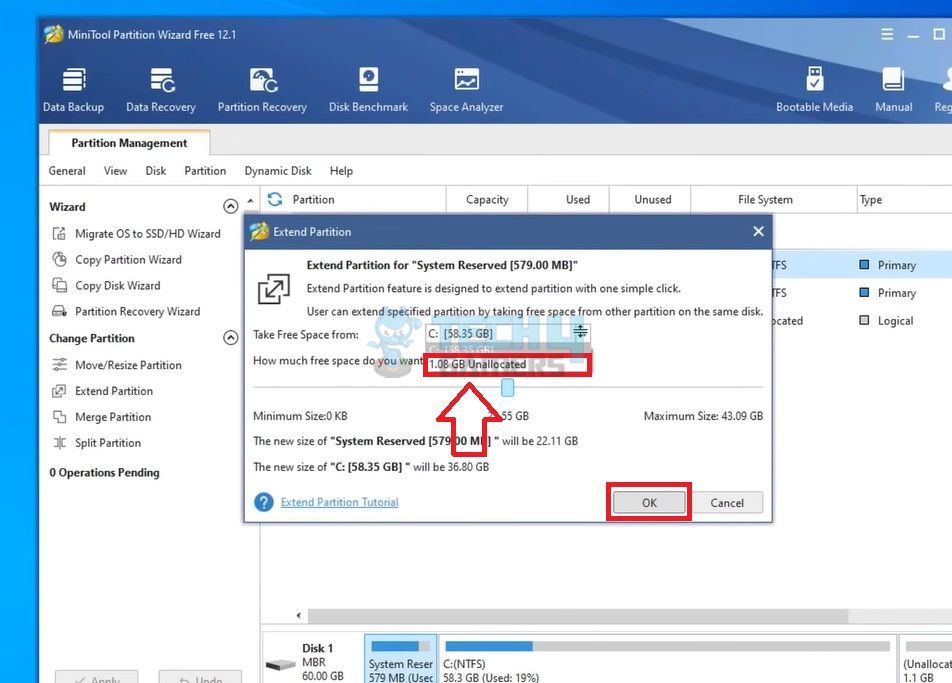
- Extend Partition: Launch MiniTool Partition Wizard > Highlight the Target Disk you need to extend > Right-click on System Reserved Partition > Go to Extend.

Extend – Image Credits [Tech4Gamers] - Choose Space: Click the box beside Take Free Space From > Choose Unallocated Space > Press OK.

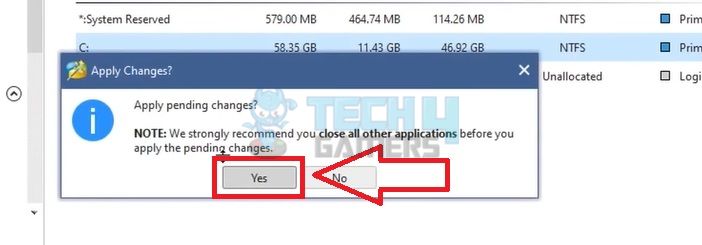
Unallocated – Image Credits [Tech4Gamers] - Apply Changes: Click Apply for the changes.

Apply – Image Credits [Tech4Gamers] - Confirm Selection: Click Yes to confirm the new changes.

Yes – Image Credits [Tech4Gamers] - Restart PC: Hit Restart Now to configure your drive with the new changes.

Restart Now – Image Credits [Tech4Gamers]
Windows Installation Media Tool
A bad Windows Installation Media will cause problems during the recovery phase on your PC. Therefore, re-create the installation media with the Windows Installation Media Tool and restart the installation process to solve the error. A Dell community user venturing through this error also fixed it with this method.
Download Installation Media
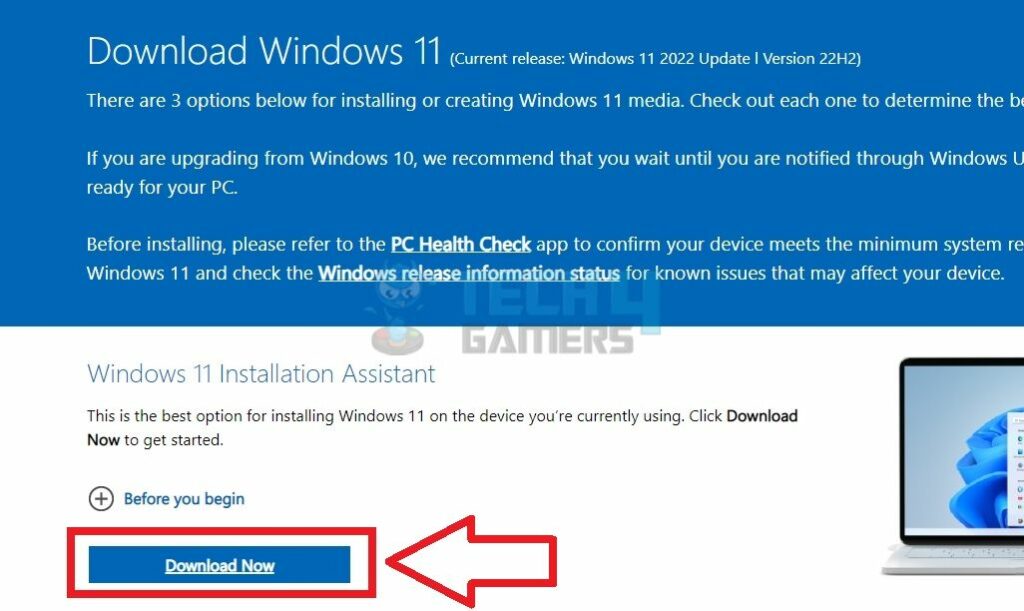
- Download Software: Get the right Windows Installation Media Tool version on your PC.

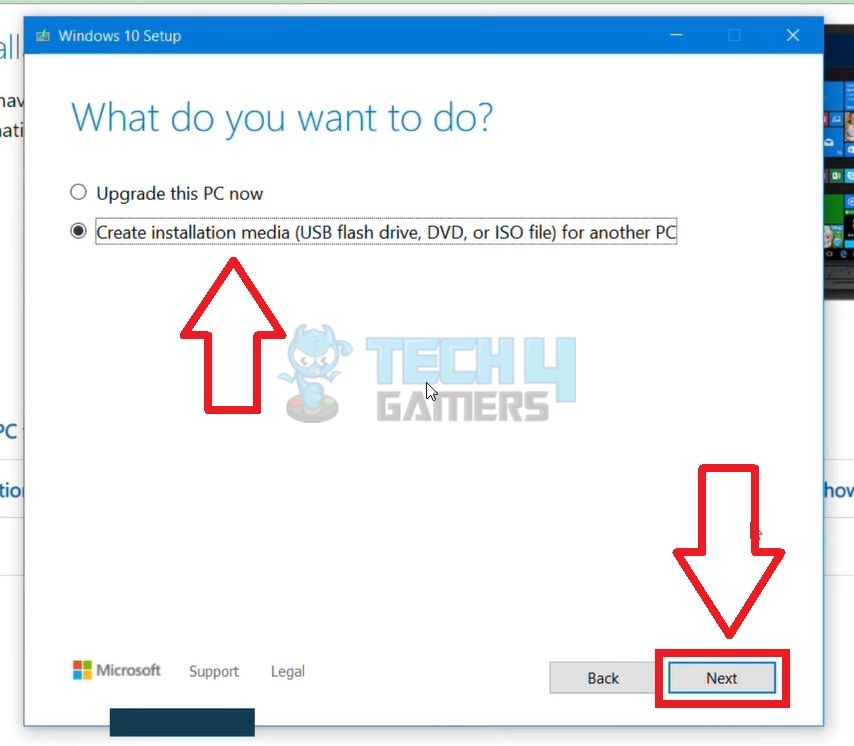
Download – Image Credits [Tech4Gamers] - Create Media: Insert an Empty 8GB USB > Open the Media Tool after installation > Pick Create Installation Media (USB Flash Drive, DVD, Or ISO File) For Another PC > Press Next.

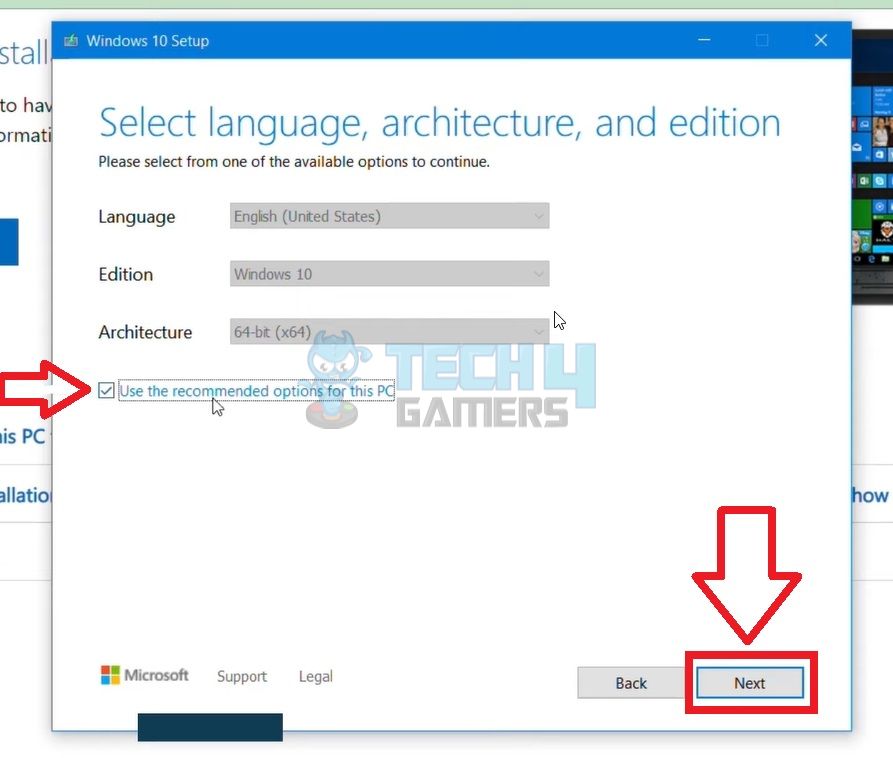
Create Media – Image Credits [Tech4Gamers] - Choose Option: Check mark on Use the recommended options for this PC > Click Next.

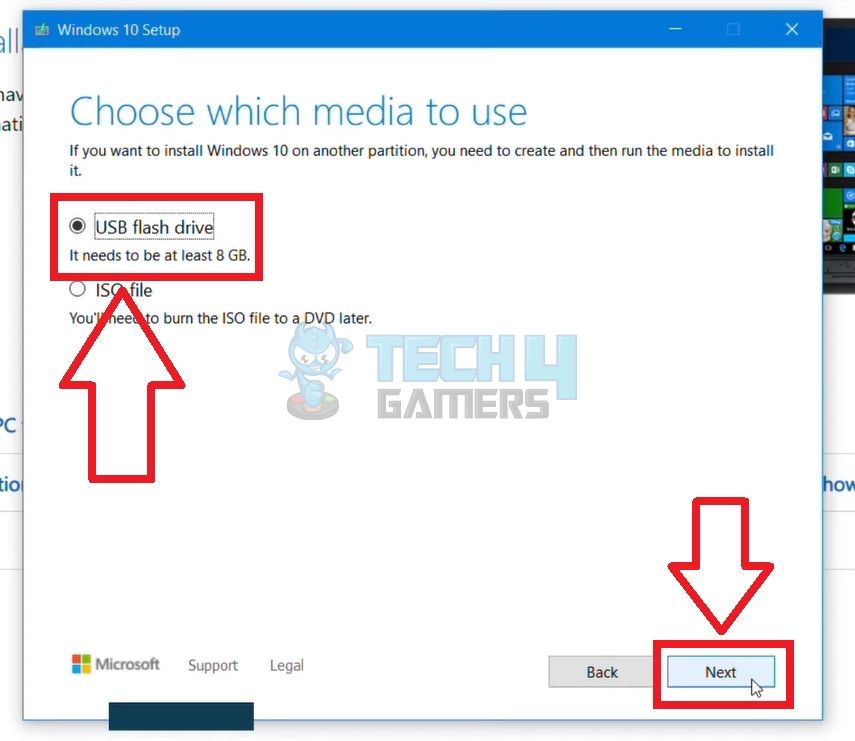
Use Recommended – Image Credits [Tech4Gamers] - Select Drive: Choose USB Flash Drive > Hit Next.

USB Flash Drive – Image Credits [Tech4Gamers] - Choose Option: Select the Connected USB > Click Next.

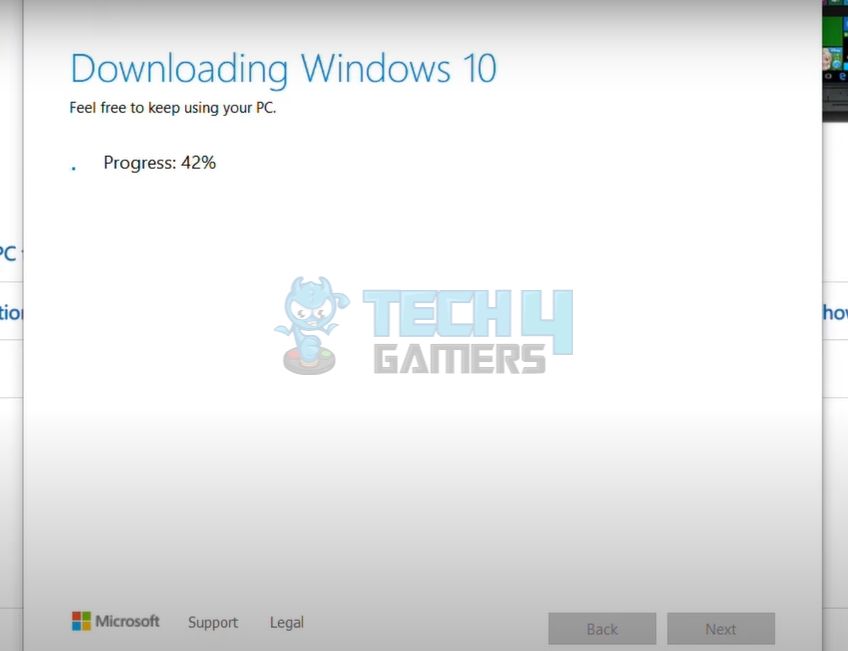
USB – Image Credits [Tech4Gamers] - Setup Completion: Let the download complete.

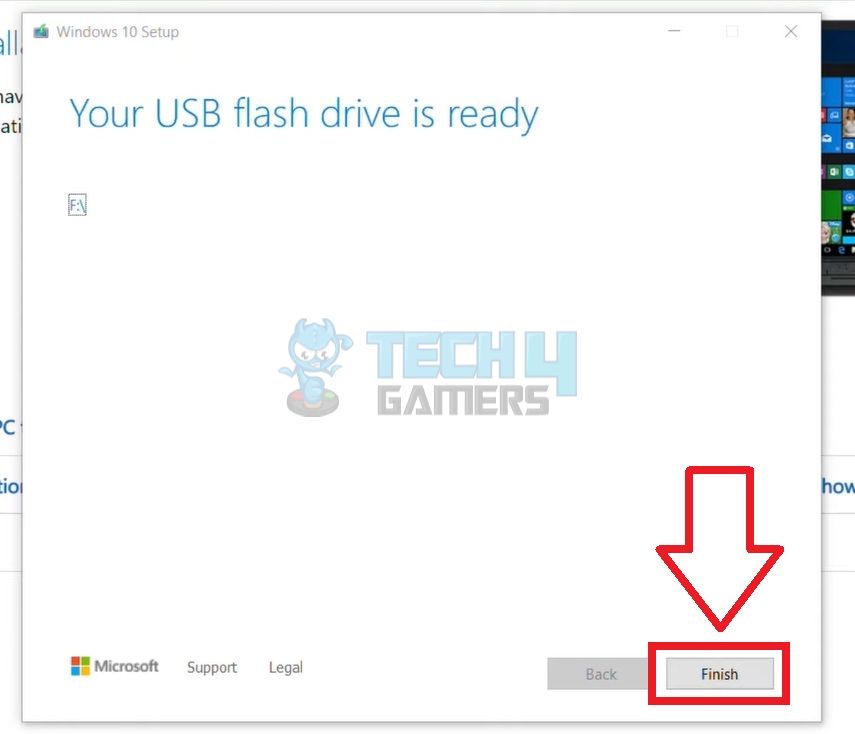
Downloading Windows – Image Credits [Tech4Gamers] - End Setup: Click on the Finish button.

Finish – Image Credits [Tech4Gamers]

Install Windows
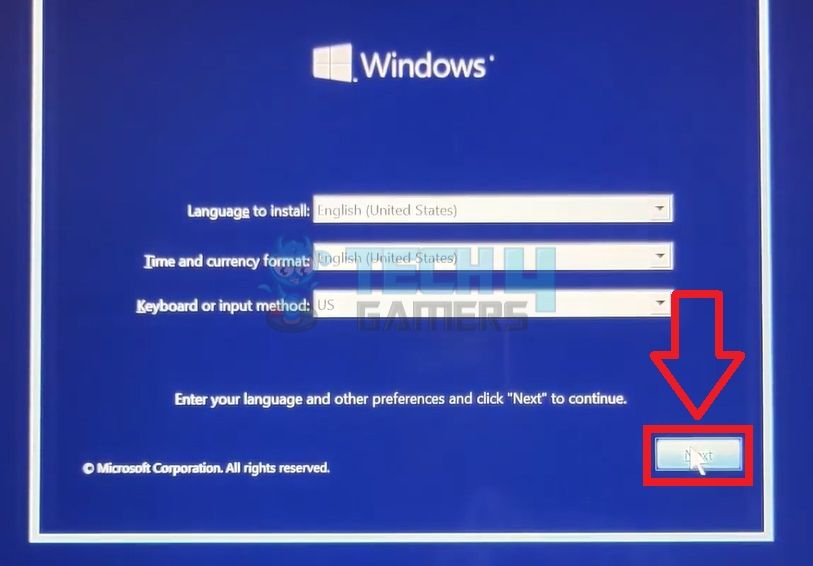
- Choose Options: Connect the USB to the PC > Start Windows Process > Choose Language > Select Time and Currency Format > Choose preferred Keyboard or input method > Hit Next.

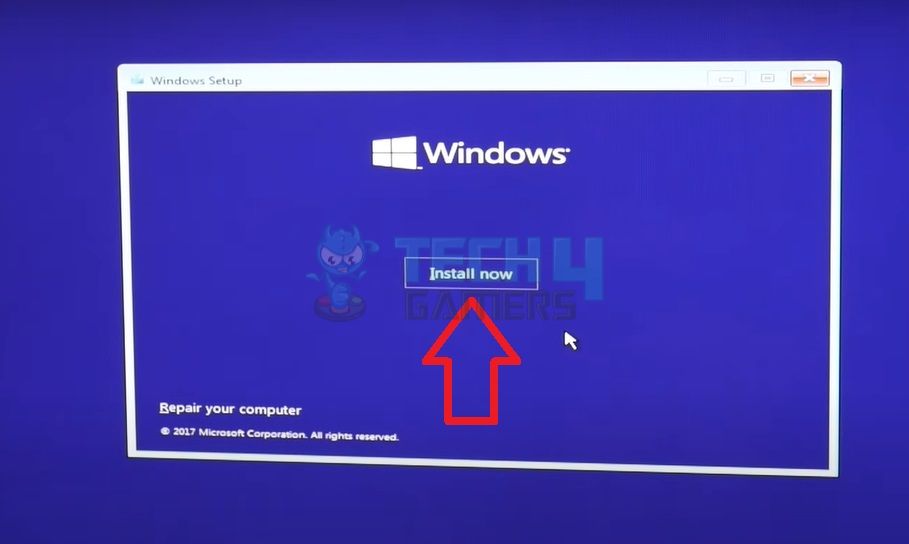
Next – Image Credits [Tech4Gamers] - Install Windows: Press the Install Now button.

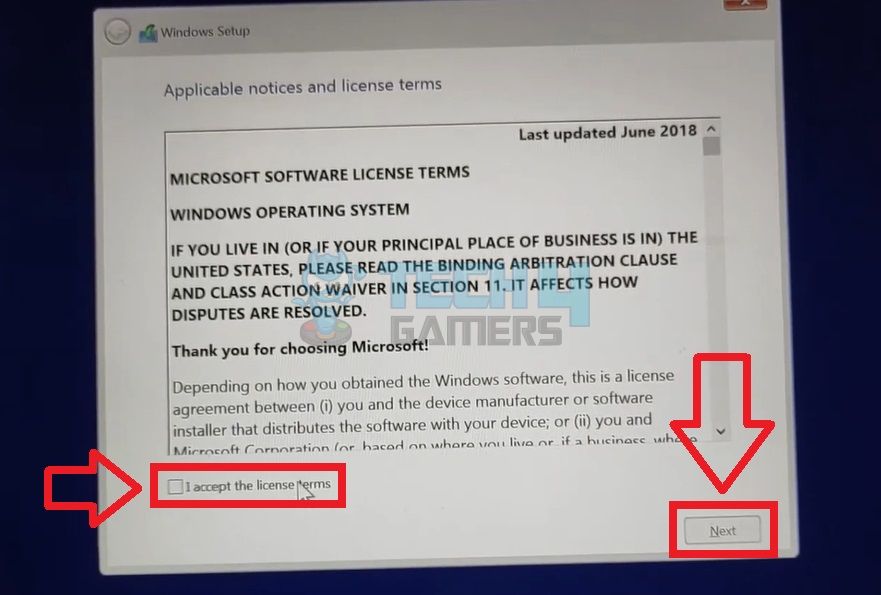
Install Now – Image Credits [Tech4Gamers] - License Terms: Accept The Terms > Click Next.

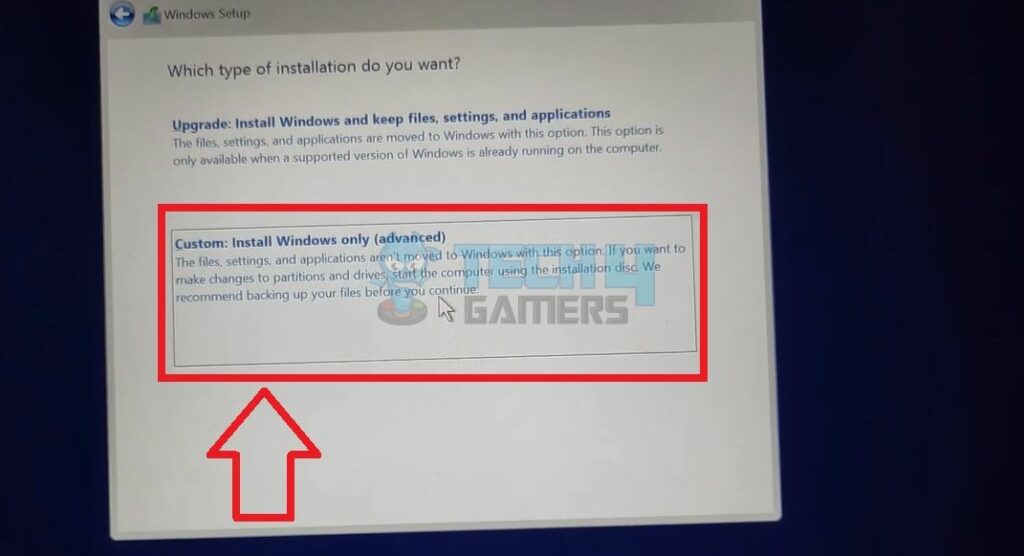
Accept Terms – Image Credits [Tech4Gamers] - Choose Type: Custom: Install Windows Only (advanced).

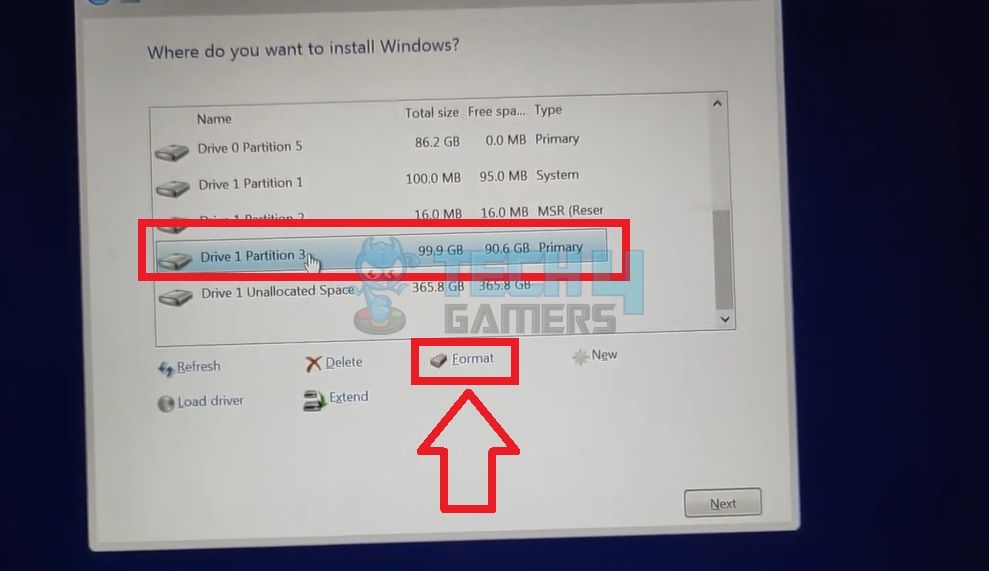
Custom – Image Credits [Tech4Gamers] - Choose Disk: Highlight the Target Disk > Press Format.

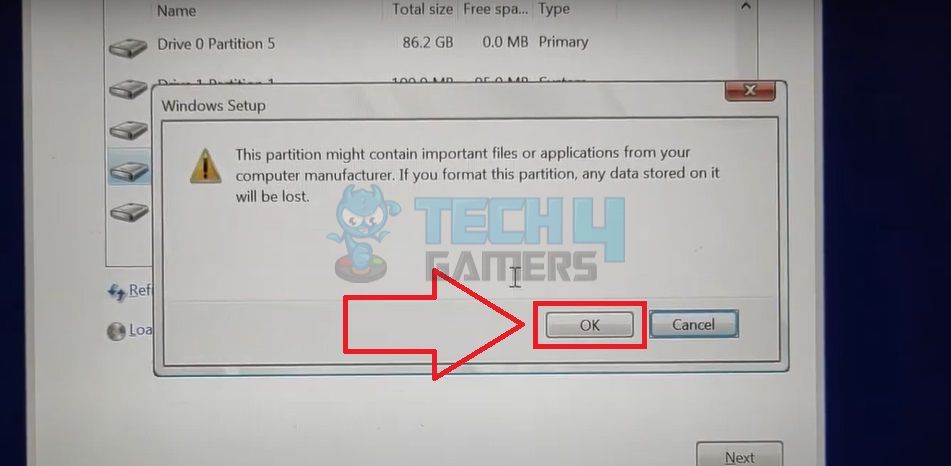
Format – Image Credits [Tech4Gamers] - Confirm Selection: Choose OK from the pop-up.

OK – Image Credits [Tech4Gamers] - Install Windows: Restart the installation with Install Now.

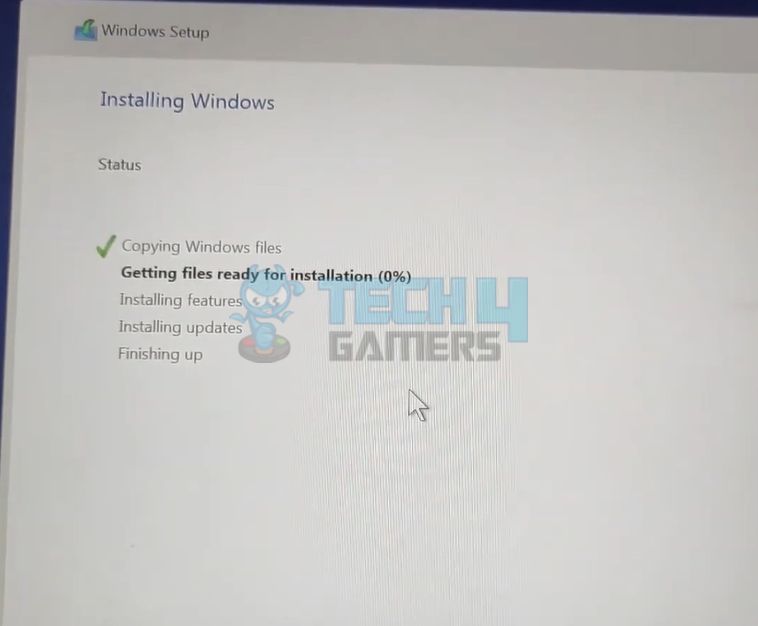
Install Now – Image Credits [Tech4Gamers] - Finish Installation: Choose Target Disk > Click Next > Allow installation to finish.

Installing Windows – Image Credits [Tech4Gamers]
Final Words
We recommend not turning off your PC when installing or resetting Windows to avoid such errors. A corrupt Windows installation media is another reason you may face this error. Learn How To Update Windows [11, 10, 8, And 7] with our extensive guide.
The error may occur for various reasons, such as when the primary drive is short on storage to store the files required during the Windows installation process. We found recovering from a USB drive is a workaround for this error; the Reddit community is also talking about it:
Got this error "Unable to recover your PC. The system drive is too small." while restoring from USB recovery drive. bought an SSD (256gb) and was trying to load windows on SSD through recovery drive. Any solutions??
byu/Girish215 inWindowsHelp
Apart from this, we have Microsoft Support on our back. You may find several troubleshooting methods by experts there.
Related Articles:
- How to Ground Yourself When Building A PC
- Origin: We’ve Noticed Your Computer Is Offline [FIXED].
- Why Is My Computer So Slow All Of A Sudden?
- How To Switch To HDMI On PC In Windows 11?
- FIXED: Windows 11 Freezes But Mouse Still Moves
Thank you! Please share your positive feedback. 🔋
How could we improve this post? Please Help us. 😔
[Errors Troubleshooting Expert]
Arsalan Shakil (aka GuyThatDoesEverything on YouTube) is a PC Tech Enthusiast and Electronic Geek. With over 10+ years of experience in Electronics, he then decided to explore Software Engineering to design embedded products and automate existing hardware solutions.
When he started tearing down old cameras to understand how they worked, he was shocked (literally, when he got zapped by a flash discharge capacitor), giving him the power (debatable) to fall in love with videography/photography. He also started making some fun videos that later became YouTube tech reviews.
Skills:
- 10+ years of experience in Electronics design, embedded solutions, and prototyping
- Majored in Software Engineering
- Research paper publication in IEEE for Embedded Military Uniform & LoRa WAN wireless technology
- Specialized in IoT Solutions
- PC Enthusiast & PC Modder
In his local region, he’s known to expose cheap PSU brands, often claiming fake certification or false claims on the box. He’s a true nerd and needed some friends in his life. Then he met some guys who work at Tech4Gamers, and they also came out to be equal nerds who suggested he join Tech4Gamers as a Hardware Expert.


