Threads

When Windows 11 users upgrade to a new PC or laptop, and numerous programs are installed on the old system, then manual reinstallation of each program may prove to be a hassle. Fortunately, there are several ways that can make transferring installed programs from one computer to another Windows 11 unproblematic.
Key Takeaways
- Changing the computer and upgrading to another Windows 11 may become a complex process if the user tries to manually reinstall the numerous programs installed on the old computer, one by one, on the new one.
- To make the target programs available on the new system, Windows 11 users may use various ways to transfer the installed programs from the old PC to the new one rather than manually reinstall each.
- There are several ways to relocate the programs from one computer to another, including transfer via cloud storage, USB drive, USB cable, and network connection.
How To Transfer Programs From One Computer To Another Windows 11?
The typical copy-pasting method isn’t an option when it comes to transferring programs that are installed on one computer to another.
However, there are several effective ways, such as using Windows built-in utilities and third-party software, that you can go through to perform the task and make the programs available on your new Windows 11 system without the tiring manual reinstallation of each.
The hassle-free ways of transferring installed programs from one computer to another Windows 11 are as follows:
- Transfer The Target Program To Another PC Through the Network
- Transfer The Target Programs From One System To Another Using Cloud Services
- Move Programs From One PC To Another Via Email
- Move Programs From One PC To Another Using A USB Flash Drive
- Relocate Programs From One System To Another Using A USB Cable
- Transfer Programs Via Windows Settings (Built-in Method)
- Transfer Programs Via Third-Party Software
Transfer The Target Program To Another PC Through the Network
The method we found effective to transfer the programs from one computer to another is to move them through the network.
On the LAN, create a shared folder and store the programs you want to move to the new system. Now, as both computers are on the same network, you can access the desired programs from the shared folder on the new system. This simple method may be an effective bridge between systems to transfer programs and files.
Transfer The Target Programs From One System To Another Using Cloud Services
Using cloud services such as Azure, Dropbox, and Google Drive to transfer the programs from one system to another is a practical method that works for us and may also help you.
Here’s how to relocate programs through cloud services:
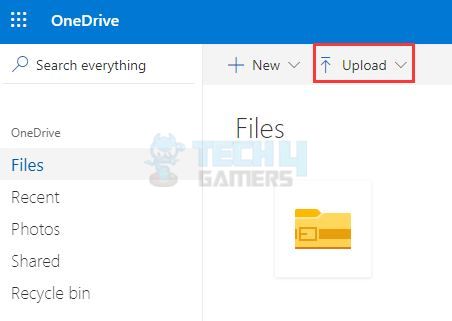
- Access the cloud service like OneDrive on the old computer and store the program you want to move to the new system.

Transfer Files With OneDrive – Image Credits (Tech4Gamers) - Now, access the cloud service from the other computer.
- Locate the target program and download it to the second computer’s drive.
This is an effective method of transferring programs, as per our experience, and the Reddit user Haxican calls it the best practice.
Also Read: How To Show Battery Percentage In Windows 11?
You can also relocate the target program from one computer to another through the email service. For this, contact your email provider to know the program size limit allowed for transfer through email.
Move Programs From One PC To Another Using A USB Flash Drive
While working on the matter, we found that USB flash drives may be an effective tool for backing up crucial system files and data and transferring programs from one system to another. The process requires a USB drive, setup, and .EXE files. Also, backing up the activation key is a must.
Here’s how to use a USB flash drive to relocate programs from one PC to another:
- Connect the USB drive to the PC on which the target program is located.
- Copy the program and paste it into the USB flash drive, then unplug the drive from the system.
- Now, connect the drive to the other system and then copy and paste the desired program from the drive.
This method effectively worked when we tried it, and also, as the YouTuber named IT System Admin suggested in his video, it helped his audience in transferring the programs without a hassle.
Also Read: How To Turn Off Mouse Acceleration In Windows 11
Relocate Programs From One System To Another Using A USB Cable
You can relocate the target programs via system-to-system transfer by establishing a USB cable connection between the PCs. You will need a USB networking cable to connect the two systems and act as a bridge, allowing them to communicate and share programs.
Here’s how to connect the two systems via USB cable:
- Start the systems and wait patiently for them to boot up fully.
- Plug one end of the USB cable into the USB port of the first system and then the second end into the second system’s USB port.
- Wait patiently for the systems to recognize the USB connections and launch the installation wizard.
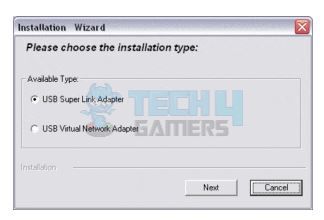
- Select the USB Super link adapter as the installation type and click on the Next option.

Select The USB Super Link Adapter As The Installation Type – Image Credits (Tech4Gamers) - Then, access the Mode drop-down menu and click on the option High-Speed Data Bridge.
- From the Start menu, opt for the Run option, then in the run box, type devmgmt.msc and press the Enter key.
- Expand the System Devices option by clicking the plus sign and check if the USB cable is mentioned in the list as Hi-Speed USB Bridge Cable. Depending on the manufacturing company, the name can be different.
- Insert the installation disk into the first computer and install the data relocation software.
- Once finishing up with the first one, perform the same task and install the software onto the other computer.
- Launch the software on the two connected computers. A two-sided window will appear on the screens.
- The left window will show the main PC, while the other window on the right will display the second PC connected through a USB cable onto which you want to transfer the programs.
- Now, pick up desired programs and files from the target drive, then drag and drop them into the target location of the second PC.
- Unplug the cable when the program transfer between the computers finishes promptly.
Transfer Programs Via Windows Settings (Built-in Method)
Windows Settings is a built-in feature through which the users can easily move programs installed on one system to another.
Here’s how to transfer through the Windows Settings app:
- Make sure that both systems are linked through the same network.
- Press the shortcut keys Windows + I to jump to Windows Settings.
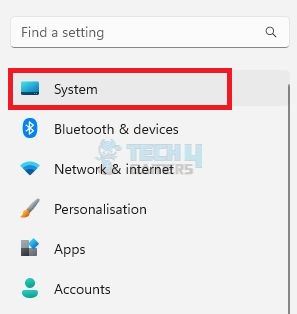
- Hit the options System and then Storage.

System – Image Credits (Tech4Gamers) - Now, select Advanced Storage by scrolling down the screen.
- From Other storage options, opt for Nearby Sharing and then Transfer Now options.
- Select the programs to be transferred and follow the instructions on the screen to relocate them to the other target computer nearby.
Also Read: How To Remove PIN From Windows 11?
Another recommended way that worked efficiently for us is transferring installed programs from one system to another by using credible third-party software such as EaseUS TodoPCTrans and AOMEI Partition Assistant Professional.
Installed Programs Migration Via AOMEI Partition Assistant Professional
Here’s how to perform the program transfer using the Disk Clone Wizard feature of the software:
- Install and access the program, then select the Clone Disk option from the menu on the right.
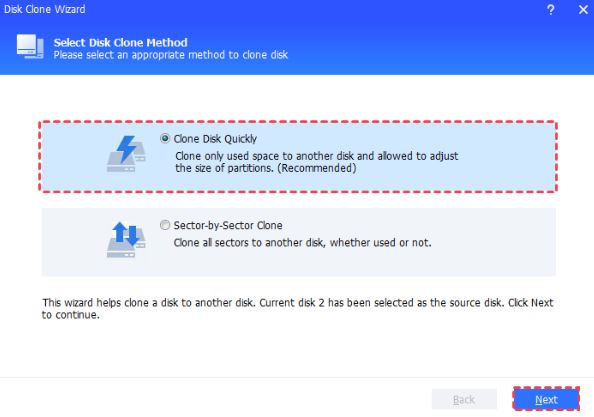
- A window with a list of available cloning procedures will appear on the screen. Select from the options:
The Clone Disk Quickly option allows you to copy only the used disk space.
Sector-by-Sector Clone option will enable you to copy the whole disk with all the sectors, including the used and unused space.
Clone Disk Quickly And Sector-by-Sector Clone Options – Image Credits (AOMEIPartitionAssistant) - Hit the Next button after selecting the previous drive as the source disk.
- Then select the target drive and hit the Next button again.
- Now, to fit the new disk, resize the partition and hit the Next button, then click on Apply from the main interface.
- The software will now relocate the target programs from the old system to the updated one.
Installed Programs Migration Via EaseUS TodoPCTrans
Here’s how to perform the program transfer through the software:
- Install the third-party software on both computers.
- Connect the source and target computers through a network like WIFI or LAN.
- Select the program that you want to relocate and follow the instructions appearing on the screen.
- Lastly, hit the Transfer button to initiate the migration.
Frequently Asked Questions
There are several ways through which a Windows user can relocate the installed programs from one computer to another, including transfer via USB cable, network connection, cloud services, and third-party software.
Yes, typically, the licenses and program settings are transferred along with the program, no matter whether you’re utilizing the Windows built-in tools or third-party programs. However, to avoid any mishap in the transfer, you must go through the licensing terms of the program.
You can transfer programs easily from Windows 10 to Windows 11 using built-in tools and third-party software only if there are no compatibility or update issues with the target programs.
Related Articles
Thank you! Please share your positive feedback. 🔋
How could we improve this post? Please Help us. 😔
[How To Guides Specialist]
Dayan Shahid is a skilled mechanical engineer passionate about technology. With certifications in various programming languages and subjects ranging from microcontrollers to aerial robotics, Dayan can effortlessly present complex technical topics in an engaging way. His ability to bridge the gap between theory and practical applications sets him apart as he continues to inspire others through their insightful content.