Threads

Controlling case fan speed is essential for maintaining optimal cooling and noise levels in your computer. Adjusting fan speeds can help you strike the right balance between efficient cooling and a quiet system. Therefore, it is important to learn about how to control case fan speeds so you can start adjusting them accordingly.
Key Takeaways
- Adjusting case fan speed is crucial for maintaining a balance between efficient cooling and a quieter computer environment.
- You have various options for fan RPM control, including BIOS settings, fan controllers, and software tools like SpeedFan or MSI Afterburner, allowing you to choose the method that best suits your needs.
- Continuously monitor your system’s temperatures to ensure they remain within safe limits while adjusting fan speeds, optimizing performance, and preventing overheating.
Prerequisites
I suggest you take care of a few things before you begin the process of setting up your fan speed:
- Ensure your computer is turned off and unplugged from the power source before making any hardware adjustments.
- Depending on your chosen method, you might need fan control software, a fan controller, or a motherboard with PWM (Pulse Width Modulation) support.
Through BIOS/UEFI Settings
Many motherboards allow you to control case RPM directly through the BIOS/UEFI settings. Read our detailed guide for accessing BIOS in Windows 11.
Here’s how:
- Restart the computer > Press the appropriate key (usually Del, F2, or F12) during startup to access the BIOS/UEFI settings.
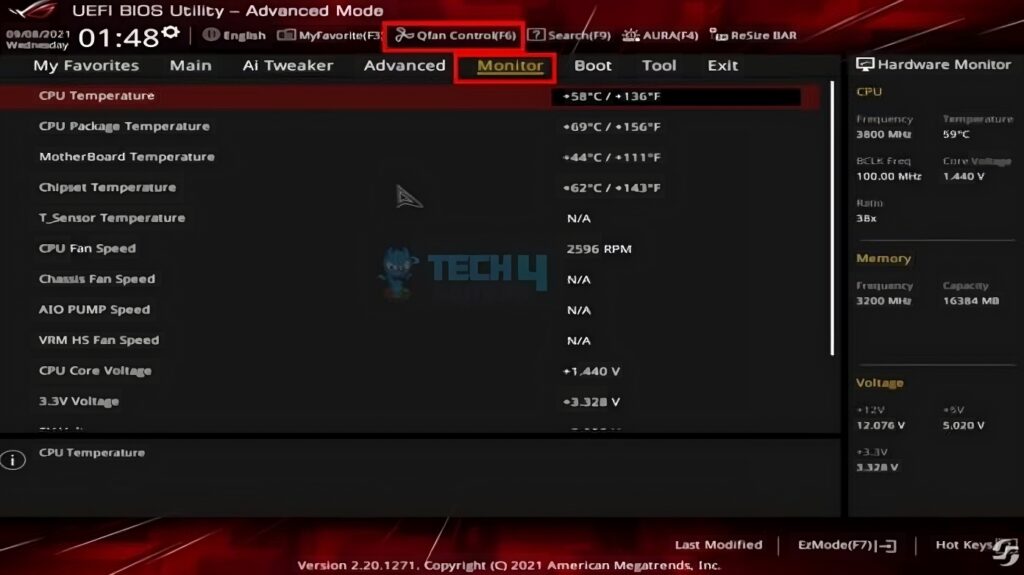
- Look for a section related to hardware monitoring or fan control. The exact location and options may vary depending on your motherboard manufacturer.

AMI BIOS/UEFI Interface – Image Credit (Tech4Gamers) - You can usually set fan speed control to either PWM or Voltage. PWM offers more precise control. Set the desired fan speed for each fan header.

Changing fan speed – Image Credit (Tech4Gamers) - Save your changes and exit the BIOS/UEFI. Your fans should now operate at the desired speed.

Through A Fan Control Software
In my opinion, fan control software is an effective way to adjust your case fan speeds without the need for additional hardware.
Here’s how to control fan speed with three popular software options:
Using SpeedFan
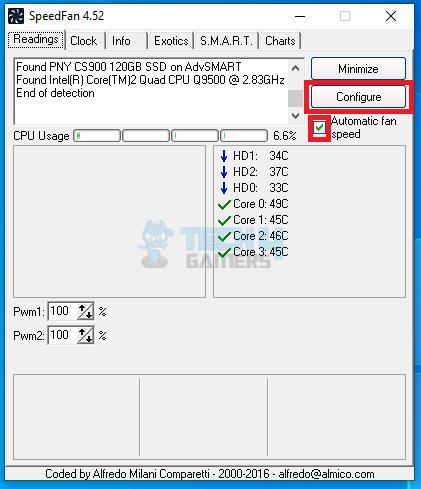
- Download SpeedFan from its official website and install it.
- Open SpeedFan after installation. The main interface displays various temperature readings and fan speeds. You can see your case fans listed with labels like Fan1, Fan2, and so on.
- Check Automatic fan speed > Click on Configure.

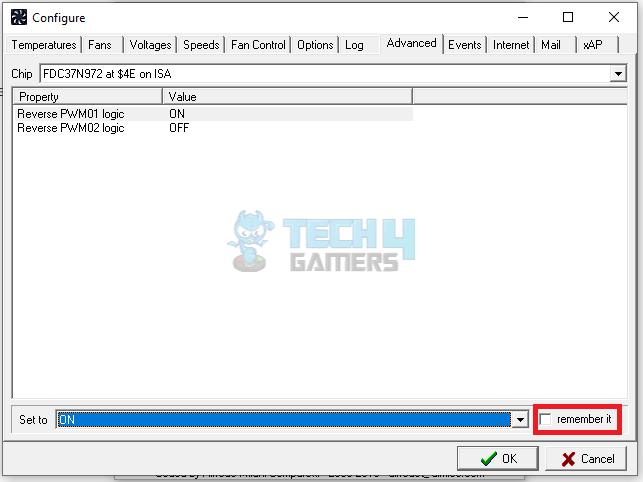
Configure SpeedFan – Image Credit (Tech4Gamers) - Select Advanced > Choose the fans > OK > Select the fan headers > Set them to Software Controlled > Check the Remember it box.

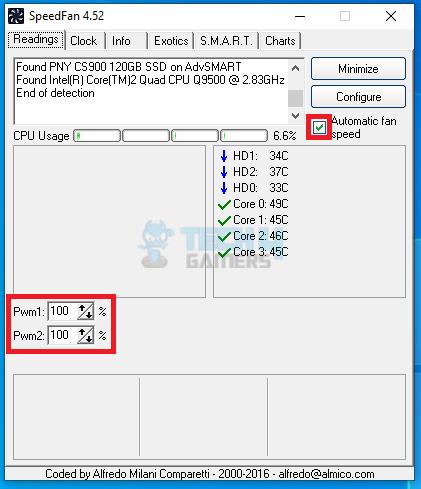
Configure – Image Credit (Tech4Gamers) - Now, you can go back and change the PWM directly by adjusting the values.
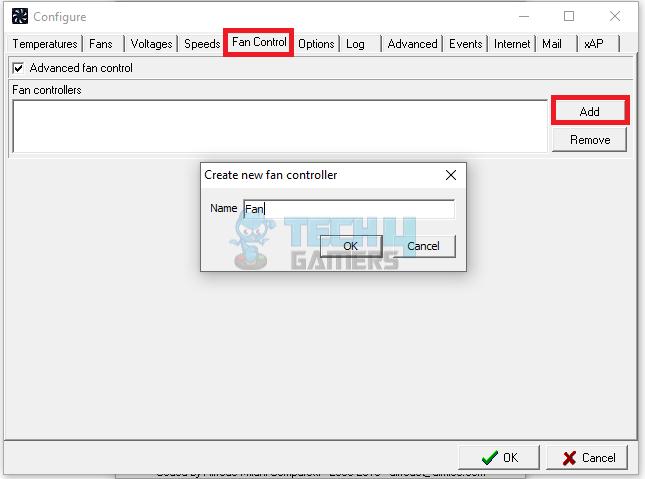
Changing PWM – Image Credit (Tech4Gamers) - Configure > Fans > Create New Profile > Add > Manually adjust the curves to your liking.

Fan controller profile – Image Credit (Tech4Gamers) 
Adjusting Fan Curves – Image Credit (Tech4Gamers) - Once you’re satisfied, save your settings and minimize SpeedFan to run in the background.

Using MSI Afterburner
MSI Afterburner is primarily designed for overclocking graphics cards but also allows fan speed control for case fans if your motherboard supports it.
- Visit the MSI website or other reputable sources to download MSI Afterburner.
- Download and Install Software on your computer > Open MSI Afterburner and you will see information about your graphics card.
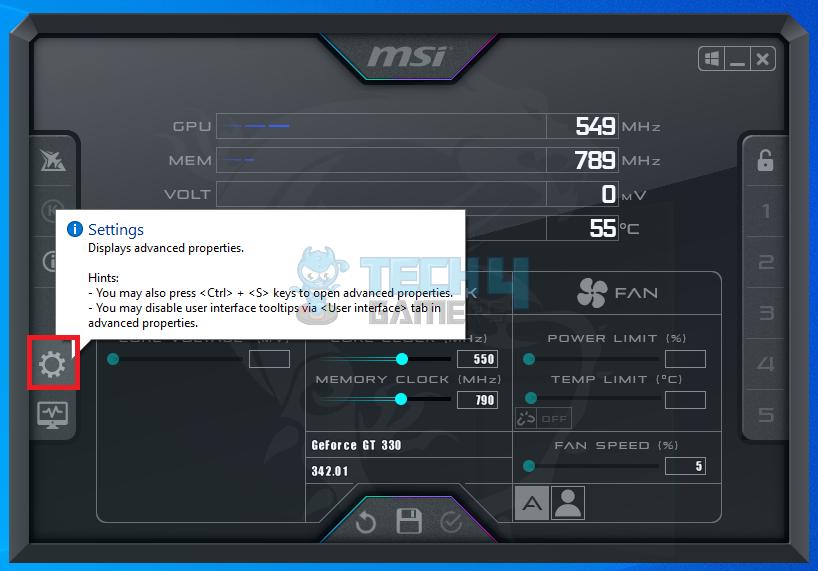
- Click Settings > Select the Fan tab.

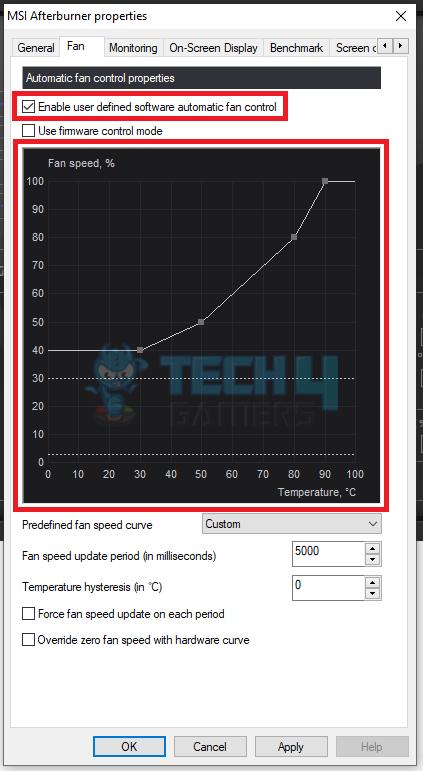
Settings – Image Credit (Tech4Gamers) - Check the box Enable User Define Software Automatic Fan Control > Customize fan speed settings.

Changing fan speed with MSI Afterburner – Image Credit (Tech4Gamers) - Click Curve to set a custom fan curve > Drag the points on the graph to specify fan speeds at different temperatures > Click OK > Apply to apply the curve.
Keep an eye on your system’s temperatures while MSI Afterburner automatically adjusts fan speeds according to your custom curve.
Using HWMonitor
HWMonitor is primarily a monitoring tool, but some motherboards may allow limited fan control through it.
- Download HWMonitor > Install software > Open HWMonitor, and it will display various temperature and voltage readings for your hardware components.
- Look for the Fans section in HWMonitor. It should display the current fan speeds of your system.
- HWMonitor may provide basic fan control options, such as setting a fixed fan speed. However, not all motherboards and systems will support this feature.
- If your motherboard supports fan control through HWMonitor, you can typically set a fixed fan speed by selecting the desired fan and entering a value or percentage.
Fan Speed Controller
A fan speed controller hub is a device that allows you to control multiple fans at once, often with a remote control. Also, read our guide on how to fix case fan not spinning, but light works.
Here’s how to use one:
- Purchase a fan speed controller hub suitable for your needs, ensuring it can accommodate the number and type of fans you have.
- Follow the manufacturer’s instructions to install the fan speed controller hub. Typically, you’ll connect your fans to the hub, which is then connected to the power supply.
- Many controller hubs come with a remote control that allows you to adjust fan speeds easily. Use the remote to increase or decrease fan speeds as desired.
- Regularly check your system’s temperatures to ensure they remain within safe ranges while adjusting fan speeds.
Through Control Panel
While you cannot directly control fan speed via the Control Panel, you can adjust power settings that may indirectly affect how your fans operate.
This method focuses on configuring the power plan settings:
- Press Win + X > Select Control Panel > Select Power Options > Click Change advanced power settings to access more granular settings.
- Expand Processor power management > Adjust System cooling policy > Choose Active or Passive > Click Apply > OK.

System cooling policy settings – Image Credit (Tech4Gamers)

Related Articles
Thank you! Please share your positive feedback. 🔋
How could we improve this post? Please Help us. 😔
[How To Guides Specialist]
Dayan Shahid is a skilled mechanical engineer passionate about technology. With certifications in various programming languages and subjects ranging from microcontrollers to aerial robotics, Dayan can effortlessly present complex technical topics in an engaging way. His ability to bridge the gap between theory and practical applications sets him apart as he continues to inspire others through their insightful content.