


Among other errors and bugs in Battlefield 2042, players have been getting the “Unable To Load Persistence Data.” Multiple reasons, including corrupted temporary files and caches, cause the issue. Take every obstacle as a chance to develop your skills and exploration in the world of gaming.
- Battlefield 2042 players worldwide are facing the “unable to load persistence data” error that kicks them out of the game, which might pop up due to the cache and temp files.
- You will face disruption in gameplay, loss of progress, or inability to customize; however, fixing the error can enhance gameplay and smooth multiplayer experience.
- The issue can be solved by clearing temporary files, setting up a VPN, disabling cross-play, or power cycling your console.
- Common reasons behind the error seem to be existing DNS ranges, an old router with no UPnP support, temporary files and cache, and the Crossplay feature.
Methods Difficulty Rating
Rated: 4/10
Rated: 6/10
Rated: 5/10
Rated: 6/10
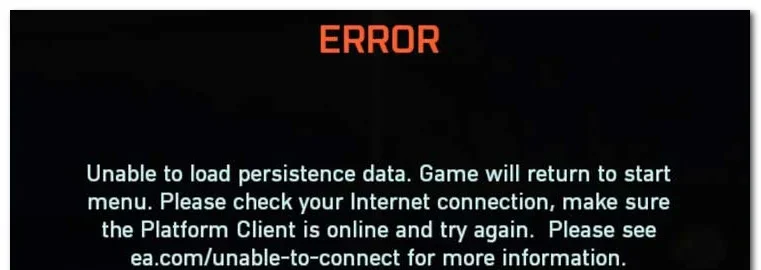
This error message box will pop up on your screen:
Set Up VPN
Using a VPN is the easiest of all fixes as far as we have researched, so we have chosen it as the first. The problem in your case may have arisen due to the network restrictions imposed by your ISP or regional restrictions, which usually cause difficulties in establishing a connection with the EA server. Setting up a VPN is the best way to fix the problem.

Clear Temp/Cache Files
Temporary files may seem like an issue on computers only, but they can also affect your gaming consoles. The cache files that form on any device can sometimes be the underlying cause of a recurring error, which in this case is “Unable to Load Persistence Data.” While looking into this error, it has been noted in online forums, blogs, and reviews that many players, such as EA Community, were able to resolve the problem through this method.
In most cases, those who are playing the game on Xbox are the ones facing this problem, especially those on Xbox Series X and S. Let’s look into the methods to clear temp files, including PC:
Clearing PC Cache
Following are the steps to remove PC cache files:
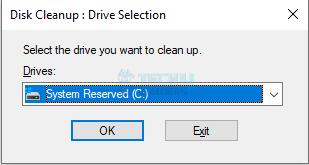
- Choose Drive: Open the Start menu > Click on the search bar > Type Disk Cleanup > Select Disk Cleanup from the results > Click arrow > Choose the drive you want to clean from dropdown (recommended C: drive) > Click OK.
Note: Disk Cleanup will calculate how much space you can free up.
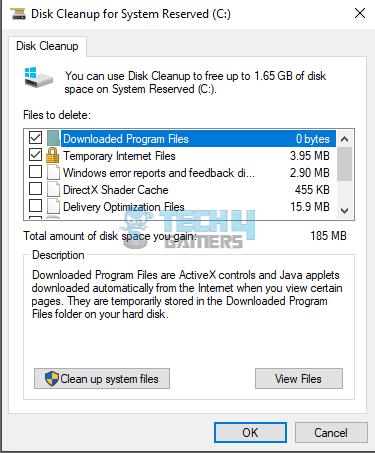
Choose Drive – Image By Tech4Gamers - Choose Files: Check the boxes of Temporary Internet Files and Temporary files (and any other files you want to delete) > Click OK > Hit Delete Files to confirm.

Disk Cleanup – Image By Tech4Gamers
Xbox One & Xbox X
Clearing the cache of a console can be done by power cycling it. Here is how you can do it:
- Power Off Console: Please turn on your console > Let it run for a few minutes before power cycling it > Press the power button > Keep it pressed until it’s off > Wait for at least 10 seconds.

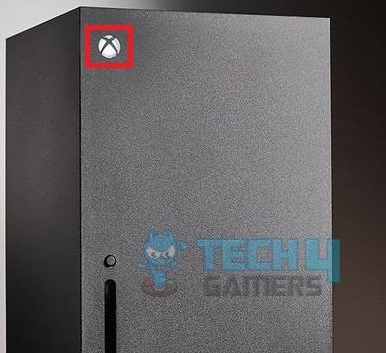
Xbox X – Image By Tech4Gamers - Disconnect Cable: The LED on your console starts blinking > Once your system is off, leave the button > Unplug your console’s main power cable > Wait for 60 seconds before turning it on again.
Switch on your console, and you can hopefully play the game without interruption now.
PlayStation 5
Here are the steps you must follow to successfully power cycle PlayStation 5:
- Switch Off Console: Please turn off your console > Press the power button > Keep it pressed until it becomes quiet > Disconnect the power cable when it stops blinking > Wait for at least 30 minutes before turning it on again > Power on the console.

PS5 – Image By Tech4Gamers
Start the game again to see if it is running smoothly and without the error.
PlayStation 4
The steps to power cycling your PlayStation 4 are as follows:
- Shutdown Console: Press the power button (probably after getting the persistence error) > Keep pressing it until the machine stops > Disconnect the power cable > Wait for at least 60 seconds > Power on your console.

PS4 – Image By Tech4Gamers
Try and play the game and see if the error persists. If your game wasn’t running due to temporary files and cache issues, you should be able to play it uninterrupted now.
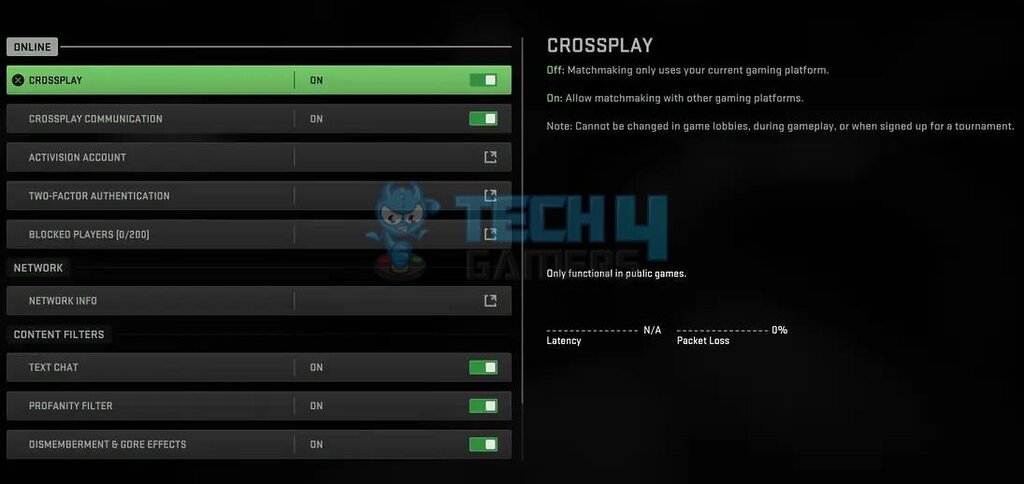
Disable Crossplay
As exciting as the announcement of this feature from EA was, it didn’t come without its fair share of downsides. We experienced turning it off can solve the error if you don’t use this feature much. However, you will miss the feature if you like playing with competitors from other consoles.
PlayStation
Let’s see how we can disable Crossplay and get back to enjoying some destruction in Battlefield 2042.
- Access Settings: Run Battlefield 2042 > Wait for the game to load > Click on Options at the bottom to open the menu > Click on General > Scroll to the bottom > Click Other section.
- Disable Crossplay: Click on Crossplay, the first entry > Toggle off the option > Save the changes > Exit the menu.

Toggle off Crossplay – Image By Tech4Gamers
Run the game again; hopefully, you will not be bothered by the same error.
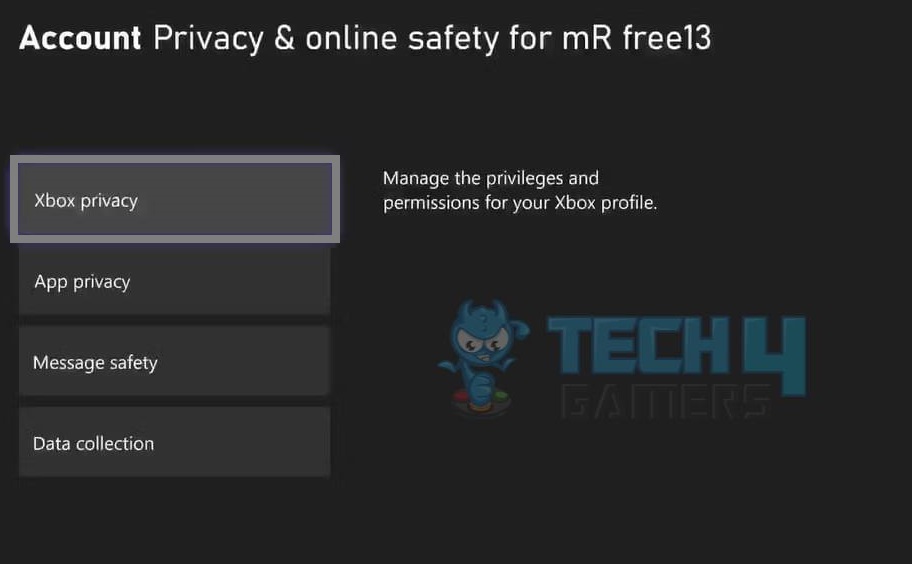
Xbox Series X and One
You must complete the following steps to disable the option on the Xbox Series X and One.
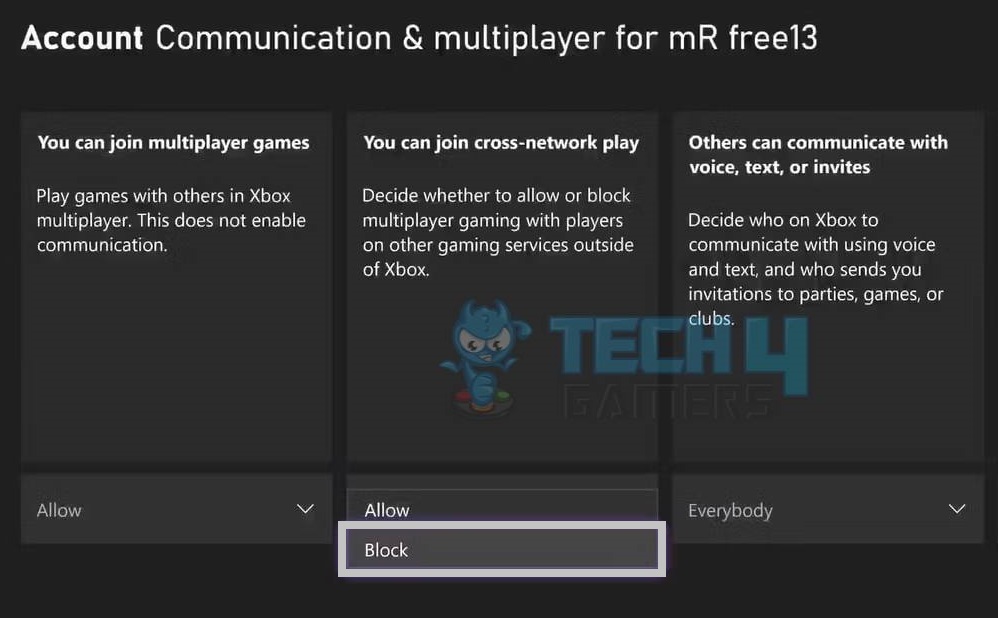
- Open Settings: Press the Xbox button > Go to the Xbox guide > Look for Settings at left > Click General tab > Find the Online Safety & Family option > Click Privacy and Online Safety > Hit Xbox Privacy.

Xbox Privacy – – Image By Tech4Gamers - Turn off Crossplay: Click View Details and Customize > Go for the Communication and Multiplayer option > Select “You Can Join Cross-network Play” > Choose Block > Save changes > Exit the settings > Launch the game, and you should be set.

Block Crossplay – Image By Tech4Gamers
Yes, the Crossplay feature is buried in layers, and accessing it is painful, but if this is what’s causing you to be kicked out of the game, it sure won’t hurt disabling it by going through this process only once.
Modify DNS Settings
Many factors can cause the Battlefield 2042 Unable To Load Persistence Data error, but based on what we have discovered, the DNS range is the biggest culprit causing this problem. The DNS range your device is currently associated with cannot connect with the EA server. We tried switching to Google DNS which resolved the error.
Read how to modify DNS settings on a Windows, Mac, Phone, or Tablet. However, instructions to change DNS settings on PlayStation 5, PlayStation 4, Xbox Series, and Xbox One are different from the above given devices. Let’s learn the steps for each device one by one.
PlayStation 5
Here are the steps that you will follow for your PS5.
- Open Settings: Go to Home > Click on Gear icon > Hit X > Choose the Network option > Access Settings.
- Enter DNS: Click Set Up Internet Connection > Go for the Manual Setup > Choose LAN or Wi-Fi > Select DNS option > Enter the new DNS ranges > Primary DNS: 8.8.8.8 – Secondary DNS: 8.8.4.4 > Click OK > Wait for the console to connect to the new network.

DNS Settings – Image By Tech4Gamers

Run the game again; you should be able to play it without problems now.
PlayStation 4
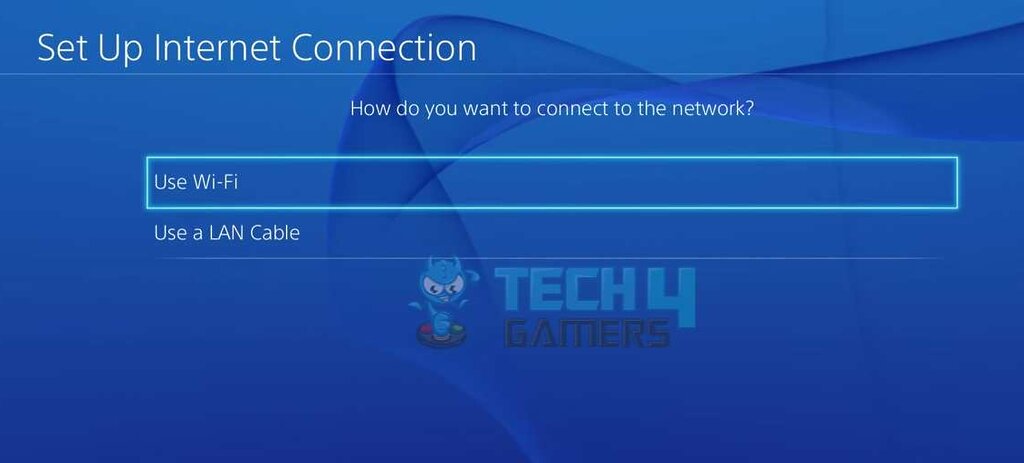
Here is how you will set up a new connection on your PlayStation 4.
- Network Settings: Scroll the menu home screen > Go to the Toolbox > Click on Settings > Choose Network > Go for Set Up Internet Connection > Pick one: LAN or Wi-Fi.

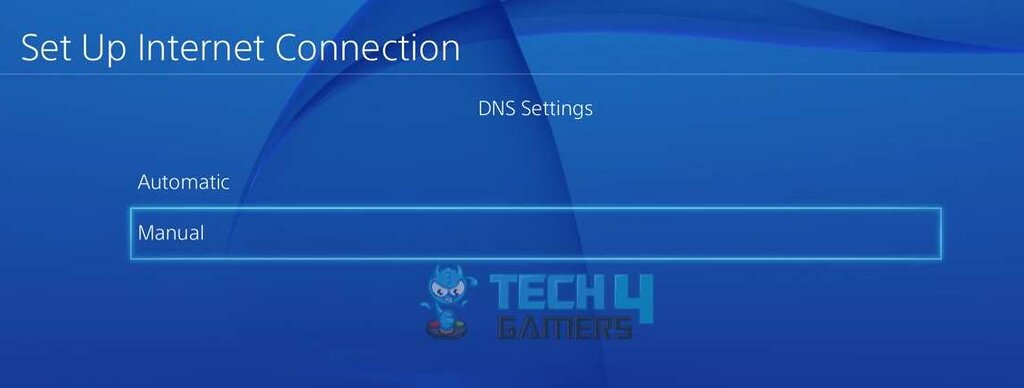
Choose Wi-Fi or LAN – Image By Tech4Gamers - Choose Options: Choose Custom > Click Automatic > On the DHCP Host Name screen > Choose Do Not Specify > Select Manual.

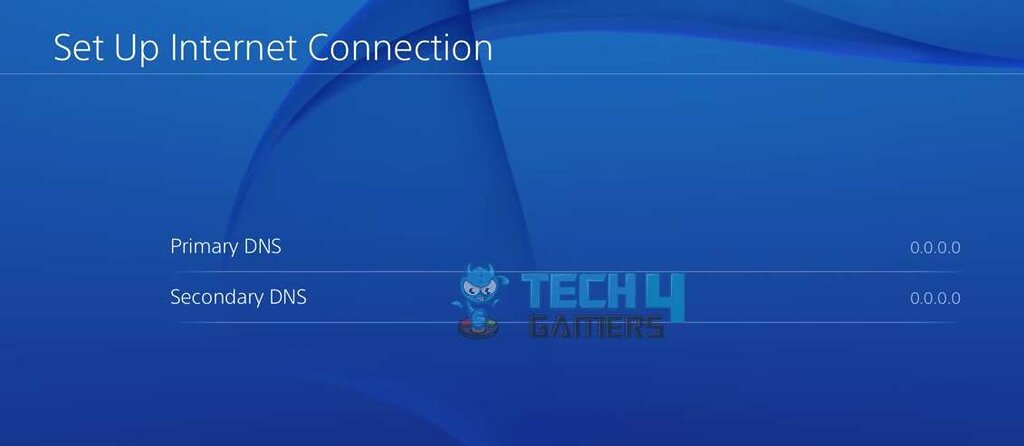
Select Manual – Image By Tech4Gamers - Enter DNS: Enter your DNS ranges: Primary DNS: 8.8.8.8 – Secondary DNS: 8.8.4.4 > If you want an IPV6 connection, enter: Primary DNS: 208.67.222.222 – Secondary DNS: 208.67.220.220 > Choose Automatic on MTU screen.

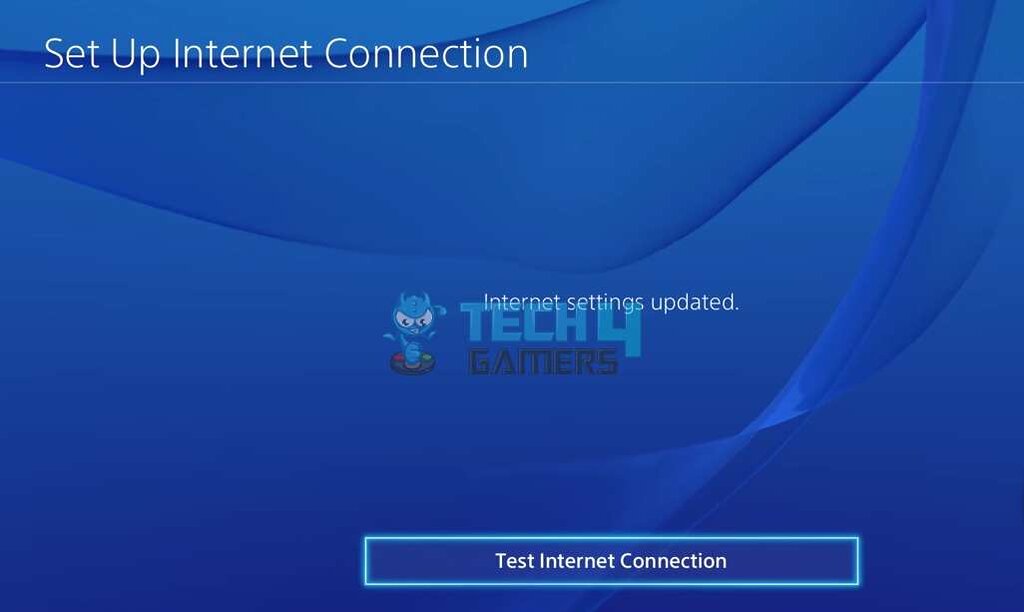
Enter DNS – Image By Tech4Gamers - Finish Changes: In Proxy Server, select Do Not Use > Go for Test Internet Connection > Reboot router > Restart PS4.

Test Internet Connection – Image By Tech4Gamers
Play your game and see if the error is gone.
Xbox Series X and Xbox One
We are using Google’s provided DNS ranges, so they will remain the same no matter which device or console we discuss. Let’s look at the steps to provide your DNS ranges on your Xbox:
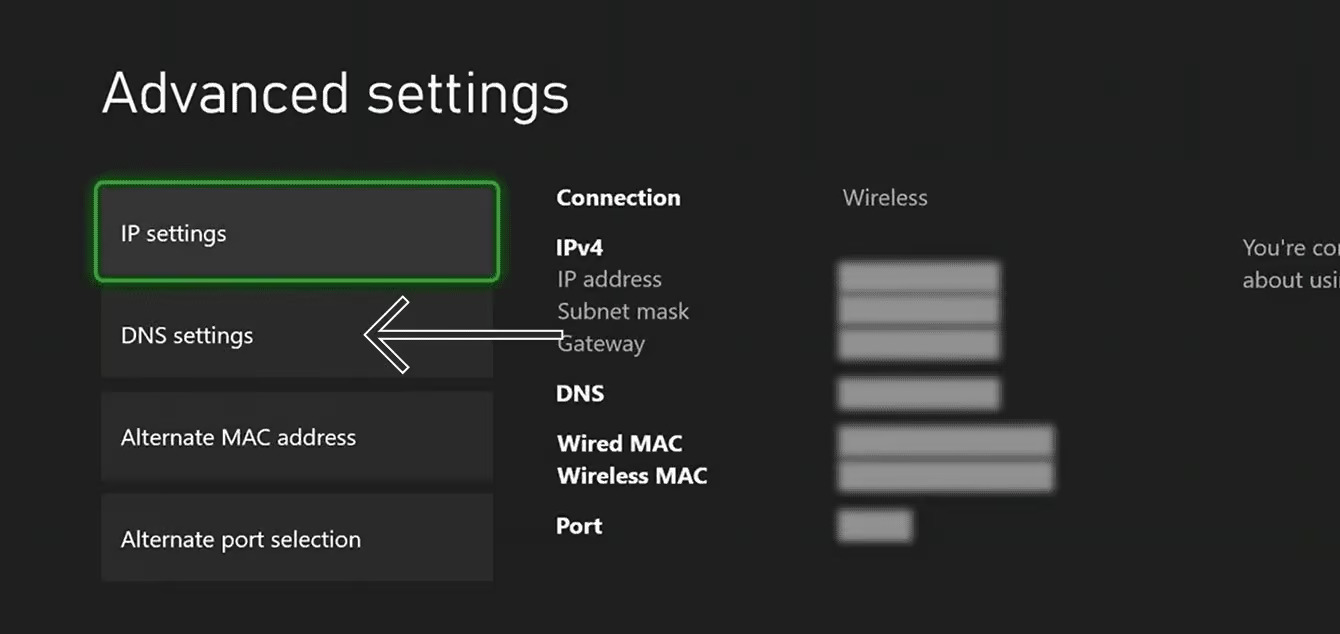
- Access Settings: Go to Home screen > Access your console’s network settings > Click on the gear icon > Go into All Settings > Click Network > Press A > Choose Advanced Settings.
- Enter DNS: Click DNS Settings > Pick Manual > Insert the Google DNS ranges Primary DNS 8.8.8.8 – Secondary DNS 8.8.4.4.

Xbox DNS Settings - Save Settings: Click on the Save Changes > Exit settings > Reboot your console > Restart internet router.
Launch the game, and you should be able to play it without interruptions.
Final Thoughts
Tackling the “Battlefield 2042 Unable To Load Persistence Data” issue also lets you optimize your game. Through community insights and support forums such as Reddit, gamers can overcome technical hurdles that ensure a smooth gaming experience.
"Unable to load persistence data" error. Anyone else?
byu/zafrothunder inbattlefield2042
Want to take your PC gaming skills to the next level? Wondering whether NVIDIA or AMD will be better at delivering the much-needed graphics performance? Read our RX 7900 XT Vs RTX 3090 Ti review to see two of the best cards from the companies compete against each other.
Frequently Asked Questions
You might be facing the error because your old router doesn’t support UPnP.
Even if it’s a new router with UPnP support, the option might be disabled in settings.
You can easily fix the error by setting up a VPN, clearing temp files, or modifying DNS.
Related Articles:
- Skyrim Not Detecting NVIDIA Graphics Card
- Xbox: The Person Who Bought This Needs To Sign In [FIXED]
- PS4 DNS Error [Proven Fixes In 2024]
- DNS Isn’t Resolving Xbox Server Names [Quick Fixes]
- Xbox Party Chat Not Working [Proven Fixes 2024]
Thank you! Please share your positive feedback. 🔋
How could we improve this post? Please Help us. 😔
[Errors Troubleshooting Expert]
Arsalan Shakil (aka GuyThatDoesEverything on YouTube) is a PC Tech Enthusiast and Electronic Geek. With over 10+ years of experience in Electronics, he then decided to explore Software Engineering to design embedded products and automate existing hardware solutions.
When he started tearing down old cameras to understand how they worked, he was shocked (literally, when he got zapped by a flash discharge capacitor), giving him the power (debatable) to fall in love with videography/photography. He also started making some fun videos that later became YouTube tech reviews.
Skills:
- 10+ years of experience in Electronics design, embedded solutions, and prototyping
- Majored in Software Engineering
- Research paper publication in IEEE for Embedded Military Uniform & LoRa WAN wireless technology
- Specialized in IoT Solutions
- PC Enthusiast & PC Modder
In his local region, he’s known to expose cheap PSU brands, often claiming fake certification or false claims on the box. He’s a true nerd and needed some friends in his life. Then he met some guys who work at Tech4Gamers, and they also came out to be equal nerds who suggested he join Tech4Gamers as a Hardware Expert.


