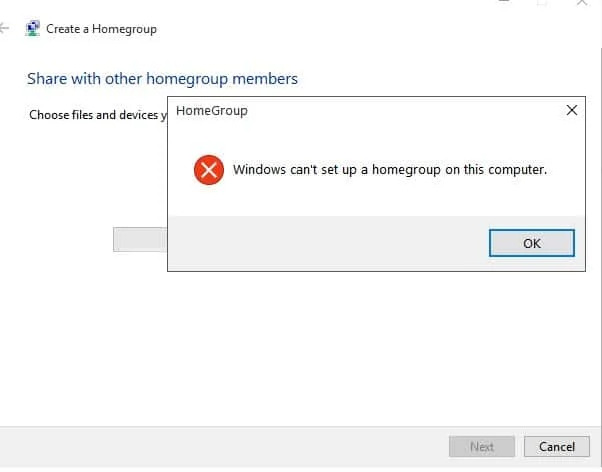
Have you ever received the error “Windows cannot create a homegroup on this computer”? This error may occur for several reasons, including IPv6 malfunction or PC name mismatching. According to several Microsoft users, other reasons include PeerNetworking turned off, corrupting PeerNetworking folder files, and more.
- Windows sometimes throws a failure message when the user tries to connect to his HomeGroup connection.
- This error can arise for several reasons, including different time zones, PC name errors, IPv6 disabled, etc.
- The issue can be solved by several methods and fixes, like troubleshooting, renaming the PC, and more.
The error message may be displayed as:
Method Difficulty Rating
Rated: 6/10
Rated: 7/10
Rated: 4/10
Rated: 7/10
Enabling IPv6
The “Windows Cannot Create A Homegroup On This Computer” error can be attributed to IPv6-related issues. When a network primarily relies on IPv6 and encounters compatibility problems with certain devices or applications that are not IPv6-compatible, it can lead to the failure of Homegroup creation in Windows, triggering this specific error message. Ensuring proper IPv6 configuration and compatibility across all network devices is crucial to resolve this.
Follow the steps mentioned below:
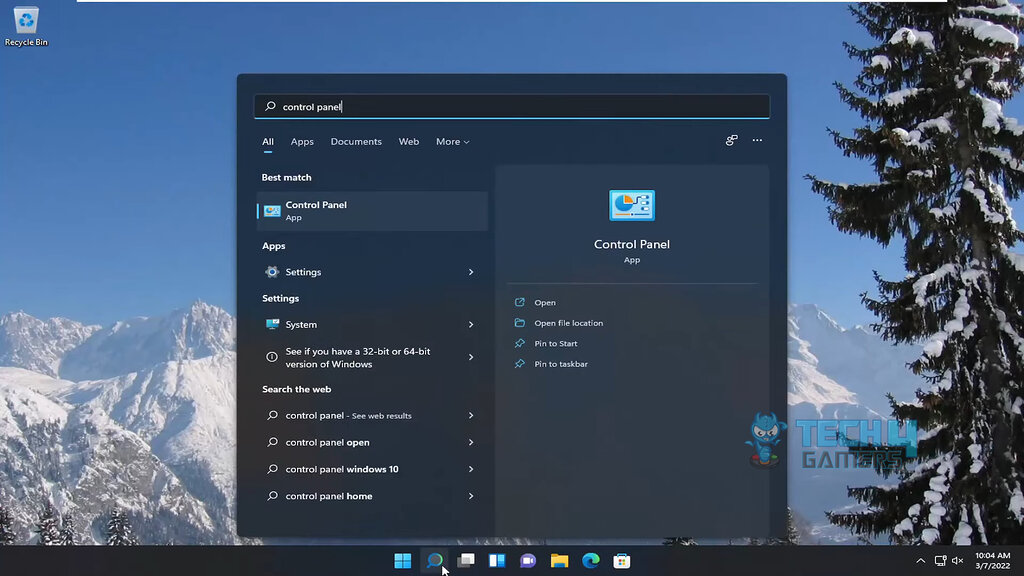
- Open Control Panel: Search for the Control Panel in your Windows Search.

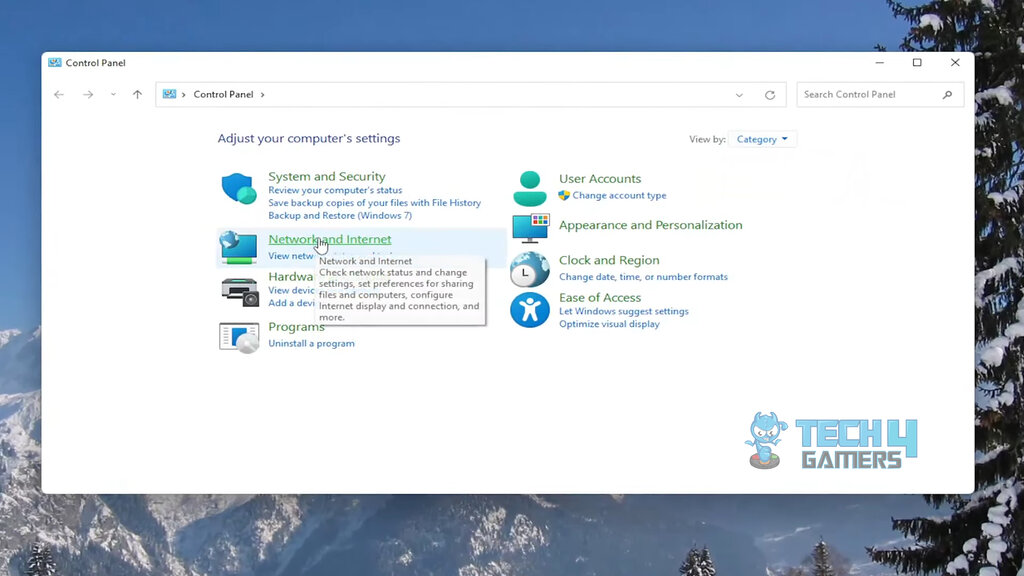
Control Panel (Image By Tech4Gamers) - Network & Internet: Select the Network and Internet option.
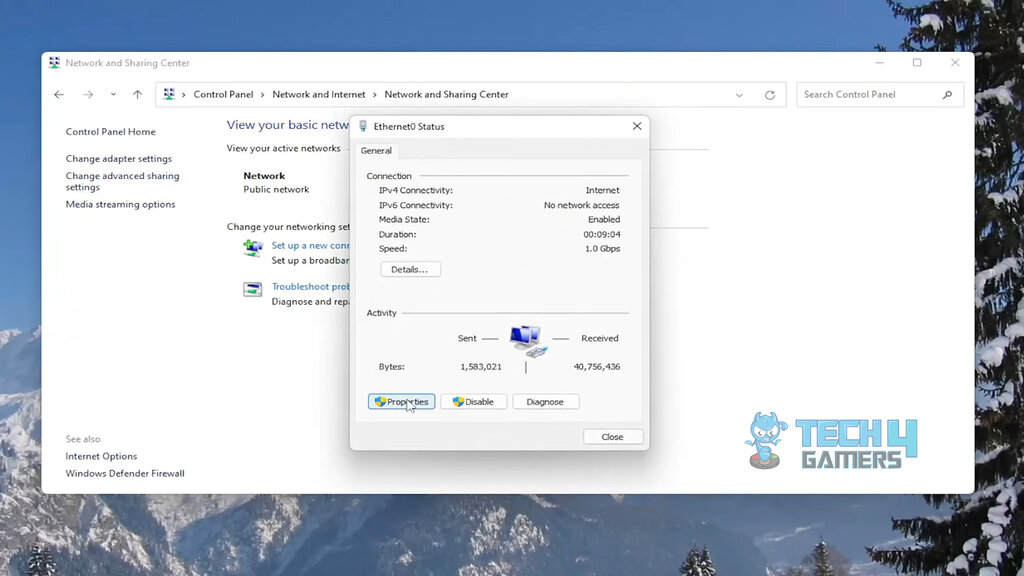
Network & Internet (Image By Tech4Gamers) - Open your WiFi settings: Click on Wi-Fi or Ethernet from the left-hand pane, depending on which connection mode you use on your computer > Reach the Change Adapter option.
Connection Properties (Image By Tech4Gamers) - Locate IPv6 option: Please select the relevant network > Browse its properties > Locate and enable the Internet Protocol Version 6 (TCP/ IPv6) feature.
Enabling IPv6 (Image By Tech4Gamers) - Reconnecting the HomeGroup: After IPv6 is enabled on every computer > Try reconnecting every laptop on the homegroup to check whether the issue has been resolved.

Turning Network Discovery On
This error may also occur when Network discovery is disabled. This feature enables devices to identify and communicate with each other on a network. If Network discovery is turned off, it hinders the creation of a Homegroup as the system cannot locate and connect to other devices, prompting the mentioned error. Enabling Network discovery in network settings is essential to resolve this issue.
I resolved my system’s issue using this method. Furthermore, upon research, I discovered that multiple Microsoft users also got help from this solution. Switch the Network Discovery back on by following the steps below:
- Run Control Panel: Open the Start menu > Run the Control Panel located in the menu.
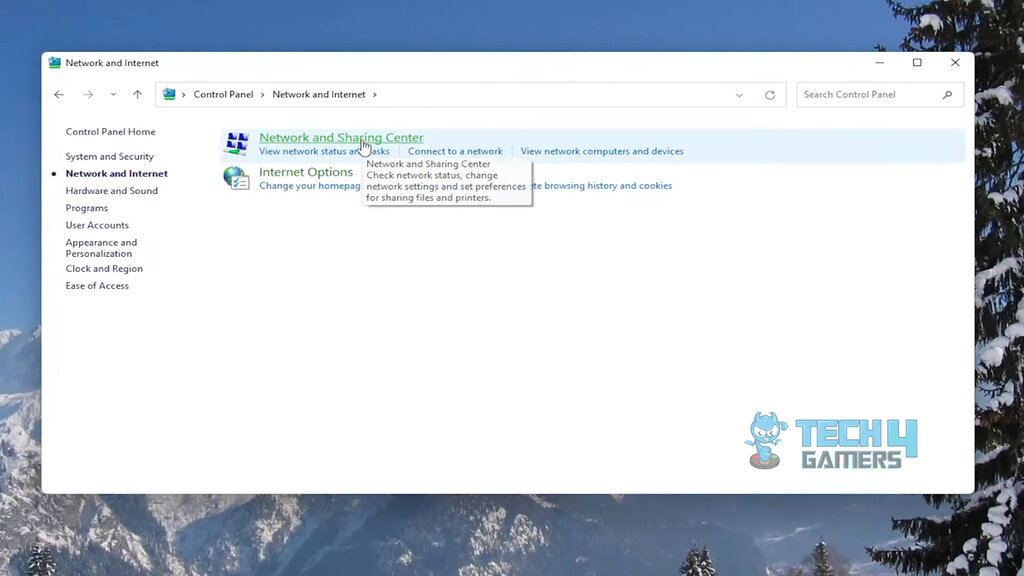
Control Panel (Image By Tech4Gamers) - Open Network & Sharing Center: Type network in the search box > Click Network and Sharing Center.
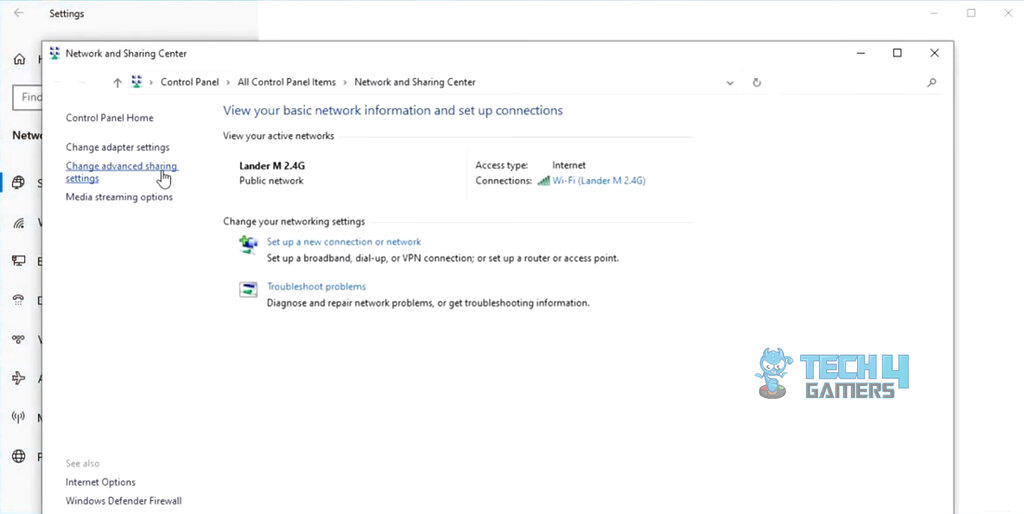
Network & Sharing Center (Image By Tech4Gamers) - Select Change Advanced Settings: Select the Change Advanced Sharing settings in the left window pane > Locate the home or work network profile in the top windows.

Change Advanced Settings (Image By Tech4Gamers) - Turn On Network Discovery: Click turn on Network Discovery > Click save changes.
Turn On Network Discovery (Image By Tech4Gamers) - Recheck the issue: Close the window > Return to your desktop > Repeat the actions that prompted the error to check whether it has gone.

Change Your Computer’s Name
If the above methods do not work and the error persists, you can try changing the name of your computer, which can alter configuration issues. By changing your computer’s name, you can force Windows to create fresh and working configuration files.
This method proved simple and helpful for me and numerous SevenForum users. I changed the name of my computer using the following procedure:
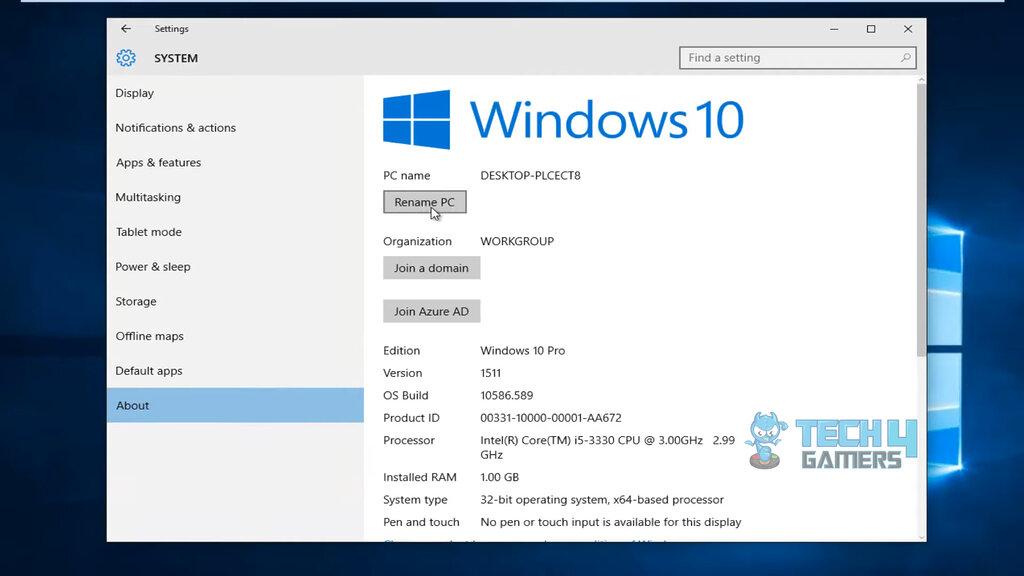
- Rename This PC Option: Open the Search Bar in your Taskbar > Look for Find Your PC Name > Select the Rename this PC option.
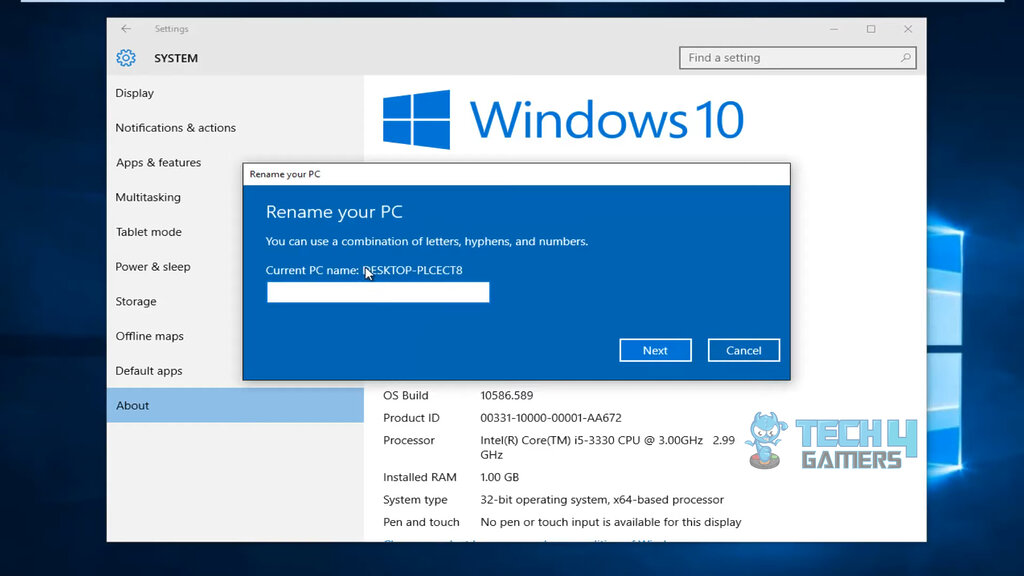
Rename PC (Image By Tech4Gamers) - Enter the New PC Name: Enter the new name > Click on the Next option.
Enter New PC Name (Image By Tech4Gamers) - Recheck the error: After successfully changing your computer’s name > Restart your computer > If required, perform these steps on the other computers connecting to the HomeGroup.
Enabling Peer Network Grouping Services
Another reason why this issue can raise its head is that the Peer Network Grouping Services may be turned off. They are turned on by default, but occasionally, Windows update turns some features on, which might include this feature.
This method worked on my system successfully. Moreover, this method benefitted several users on EightForum who were reporting the same problem. To re-enable Peer Network Grouping Services, follow the steps outlined below:
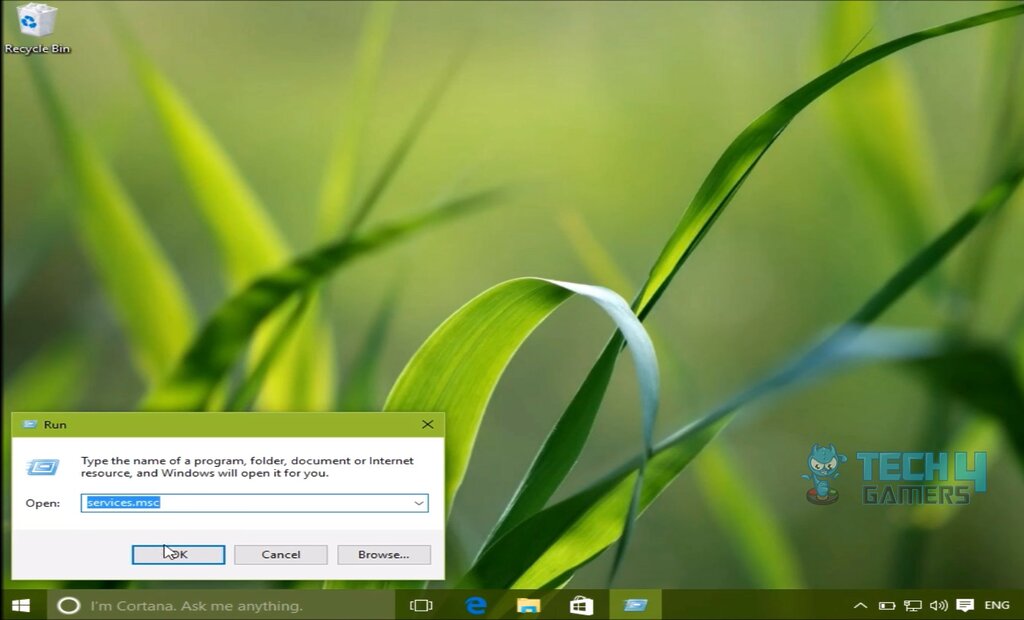
- Run Windows Services Via Run Utility: Press your keyboard’s Windows and R keys simultaneously to open the Run utility > Enter services. msc in the search dialogue box of the run utility window.

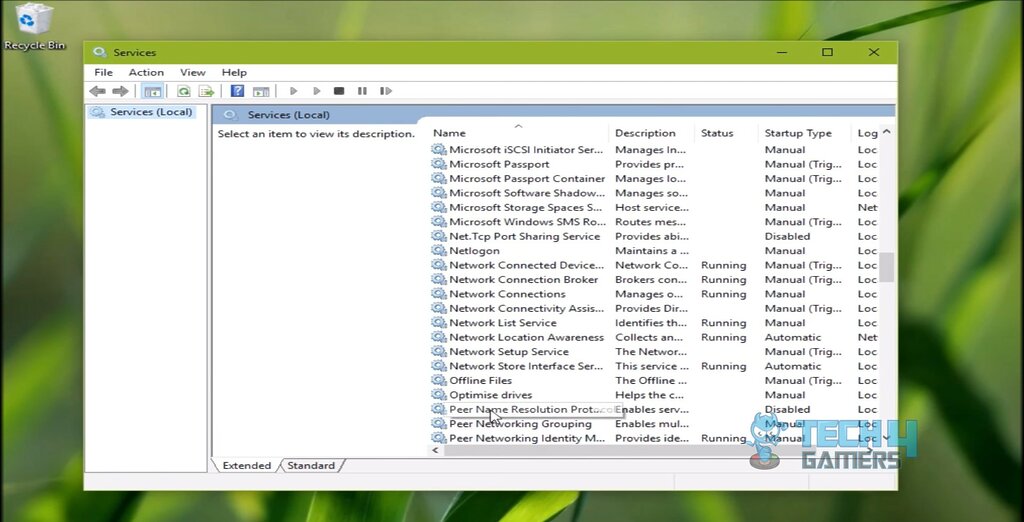
Services.msc Folder (Image By Tech4Gamers) - Search the services: Search for these services:
> Peer Network Grouping
> Peer Network Identity Manager
> HomeGroup Listener
> HomeGroup Provider

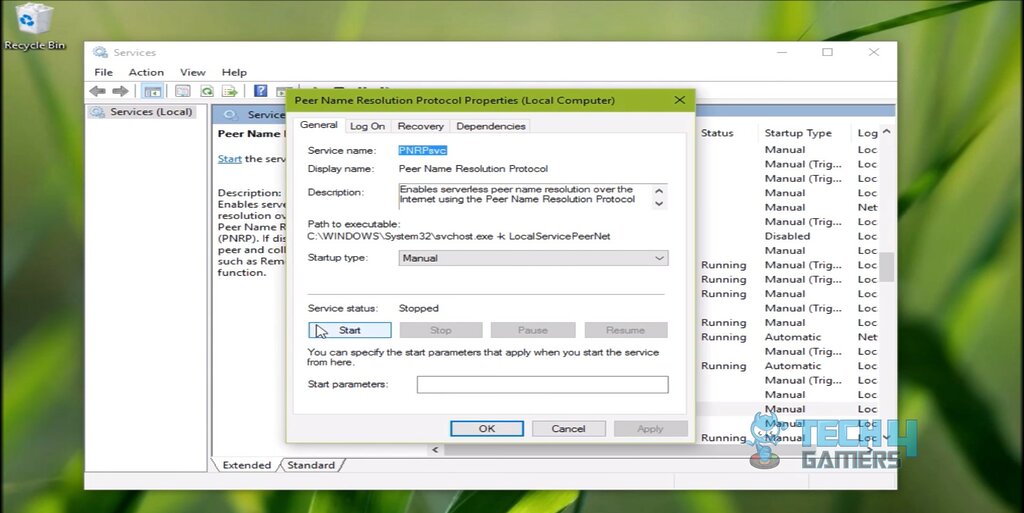
- Start the services: Right-click on every service mentioned above > Click on Start > Don’t change if any or all of them are already started.
Starting PeerNetwoking Services (Image By Tech4Gamers) - Switch Services Startup type to Automatic: Select these services individually > Click on Properties > Set the startup type to Automatic > Close the window > Retry creating a new homegroup to check whether the problem is resolved.

Automatic Startup Type (Image By Tech4Gamers)

Final Comments
Windows, despite being user-friendly, generates several errors which are quite specific and frustrating for the users. Such an error is the “Windows cannot create a HomeGroup on this computer”. This error has generally affected the organizations, where there are several computers connected under a single controlled HomeGroup.
During my research, I found out that the majority of the Twitter users reported that they had issues in their IPv6 settings which led to the HomeGroup creation error on their PCs. This cause has been neutralized in the method I discussed above.
Turns out Windows 10 shows “A homegroup can only be created on a private network” error even if you’re on a private network IF you have IPv6 disabled. Thanks for the helpful error message, Microsoft!
— Viktor B (@noobient) February 2, 2018
I would suggest the users to reset their network settings if they come across this error, as incorrect network settings like Network Discovery and IPv6 are the primary causes of it.
Relevant Articles:
- Windows Update Error 0x800f0922 [FIXED 2024]
- Your PC is At Risk Updating It Now [FIXED 2024]
- How To Remove Malware And Viruses From PC?
- FIXED: Windows 11 Error “No Such Interface Supported”
- Undoing Changes Made To Your Computer [16 FIXES]
Thank you! Please share your positive feedback. 🔋
How could we improve this post? Please Help us. 😔
[Error Fix Expert]
Hello, I’m Uzair Shabir, a tech enthusiast pursuing a Bachelor’s in Electrical Engineering. At Tech4Gamers, I’m an Error Fix Expert, crafting articles on different issues and how to fix them. With a Google IT Support Certificate, I navigate tech complexities to deliver insightful perspectives.
Get In Touch: UzairShabir@tech4gamers.com