 Threads
Beautiful RGB!
Review Summary
The CORSAIR H100i RGB PLATINUM V2 is a liquid CPU cooler that excels in both design and performance. Featuring a sleek aesthetic with customizable RGB lighting, it caters to users who prioritize efficient cooling along with visual appeal. The cooler offers compatibility with various CPU sockets, making it versatile for different setups.
Hours Tested: 5

Overall
-
Performance - 9/10
9/10
-
Design - 8.5/10
8.5/10
-
Features - 9/10
9/10
-
Value - 8/10
8/10
-
Build Quality - 8/10
8/10
Pros
- Efficient Cooling Performance
- Sleek Design
- Customizable RGB Lighting
- Compatibility with Various CPU Sockets
- User-Friendly Installation
Cons
- Noise Levels
- Exclusive RGB Connectors


In the world of CPU cooling solutions, personal preferences play a significant role. In this review, we’ll explore the CORSAIR H100i RGB PLATINUM, particularly the V2 model, exploring its design, cooling performance, and quality. As a user who values a software-free cooling solution for AIOs, this cooler presented a unique perspective, challenging my preferences.
Key Takeaways
- The CORSAIR H100i RGB PLATINUM V2 is a top-performing liquid cooler with a sleek design and customizable RGB lighting.
- You should get the CORSAIR H100i if you prioritize efficient cooling, appreciate aesthetic RGB lighting, and need compatibility with various CPU sockets.
- You should not get the CORSAIR H100i if noise levels are a significant concern for you or extensive RGB customization is not a priority.
- Why you can trust Tech4Gamers: We understand the importance of making informed decisions. That’s why our team spends significant time testing every product we review. Find out more about how we test.
Here are the specifications of CORSAIR H100i:
| Thickness | 1.11 inches / 25.1mm (2.28 inches / 57.9mm with fans) |
| Width | 4.75 inches / 120.65mm |
| Depth | 11 inches / 279.4mm |
| Pump Height | 1.46 inches / 37.08mm |
| Speed Controller | Software, BIOS |
| Cooling Fans | (2) 120 x 25mm |
| Connectors | (1) SATA(2) 4-pin PWM(2) 4-pin RGB(1) Micro-USB |
| Weight | 67.8oz / 1,921g |
| Intel Sockets | 2066, 2011x, 1366, 115x |
| AMD Sockets | AM2(+), AM3(+) AM4, FM1, FM2(+), TR4 |
| Warranty | 5 years |
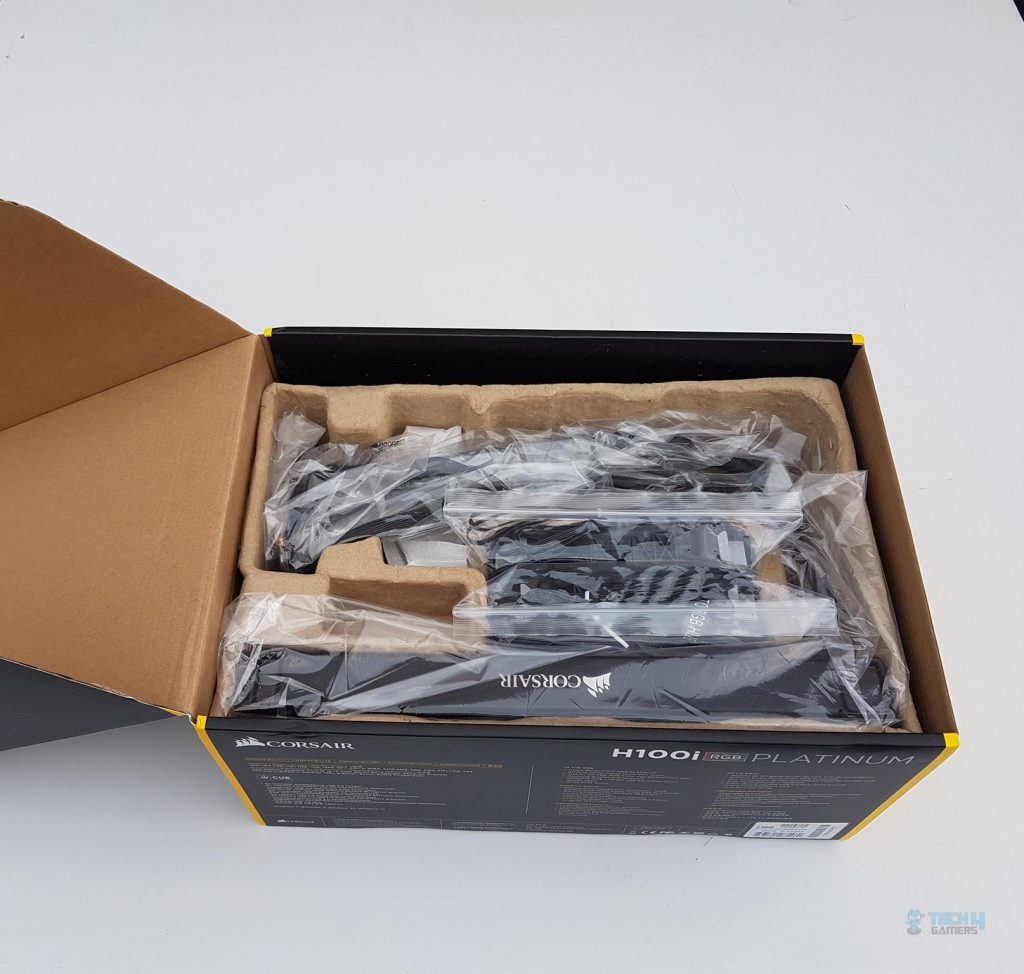
Packaging And Unboxing
The cooler is shipped inside a cardboard box having a CORSAIR’s typical packing theme of black and yellow colors. The cooler’s main section flaunts vibrant colors, featuring the prominent CORSAIR brand name and logo. Notable features like a dazzling multi-zone backlit design and a solid 5-year warranty are showcased.
Flipping to the backside, key features steal the spotlight—ML RGB fans, Zero RPM mode, and an optimized pump for a powerful yet quiet cooling experience. Specs are neatly listed, and symbolic radiator pictures add a visual touch.
Both sides mirror each other, adorned with the CORSAIR brand, logo, and cooler features. Inside, the CORSAIR H100i RGB PLATINUM’s attributes are detailed in various languages, and a sticker at the bottom right displays part and serial numbers.
iCUE compatibility and features are communicated in a multilingual format. Unboxing reveals neatly packed components beneath a white Styrofoam layer, with user guides and warranty info sitting on top—a thoughtful touch for a hassle-free setup.
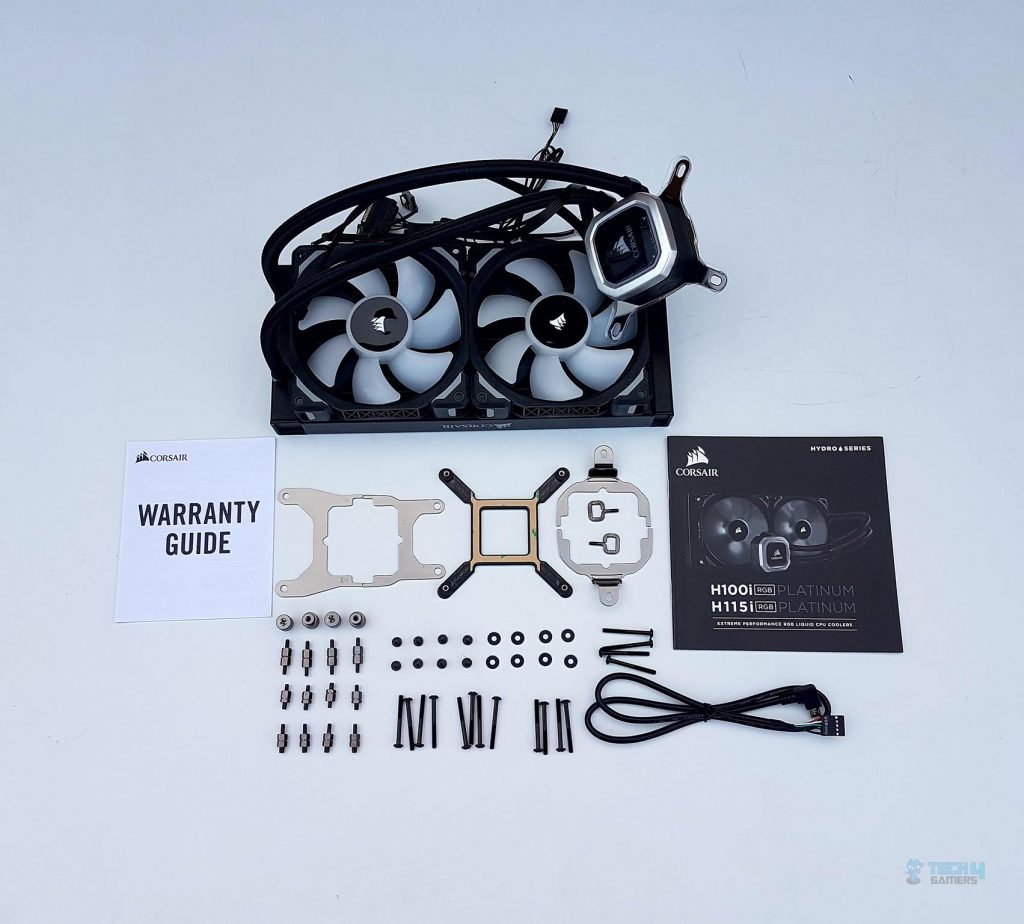
Contents
There are a lot of accessories included in the CORSAIR H100i RGB PLATINUM CPU Liquid Cooler box:
- 1x Radiator
- 2x Fans
- 1x Intel Backplate
- 2x Intel Mounting Brackets
- 2x AMD Mounting Brackets AM4
- 2x AMD Mounting Brackets TR4
- 2x AMD Mounting Clips
- 4x Thumb Screws
- 4x Intel LGA115X Standoffs
- 4x Intel LGA20XX Standoffs
- 4x AMD TR4 Standoffs
- 8x Radiator Screws
- 8x Washers
- 16x Fan Screws
- 1x micro USB Cable
- User Manual and Warranty Guide
Closer Look
Meet the CORSAIR H100i RGB PLATINUM CPU Liquid Cooler – a game-changer in cooling. Packed with two ML RGB fans and a sleek pump for optimal flow. The block rocks 16 digital RGB LEDs, giving your setup a vibrant vibe. And hey, each ML RGB fan adds its own flair with 4 LEDs in the hub.
The radiator measures 277x120x27mm, with a slim 27mm thickness. Adding 25mm fans brings the total height to around 52.2mm, accounting for the metal screw heads, expect a total of 54-55mm. Being aluminum, it’s light and breezy.
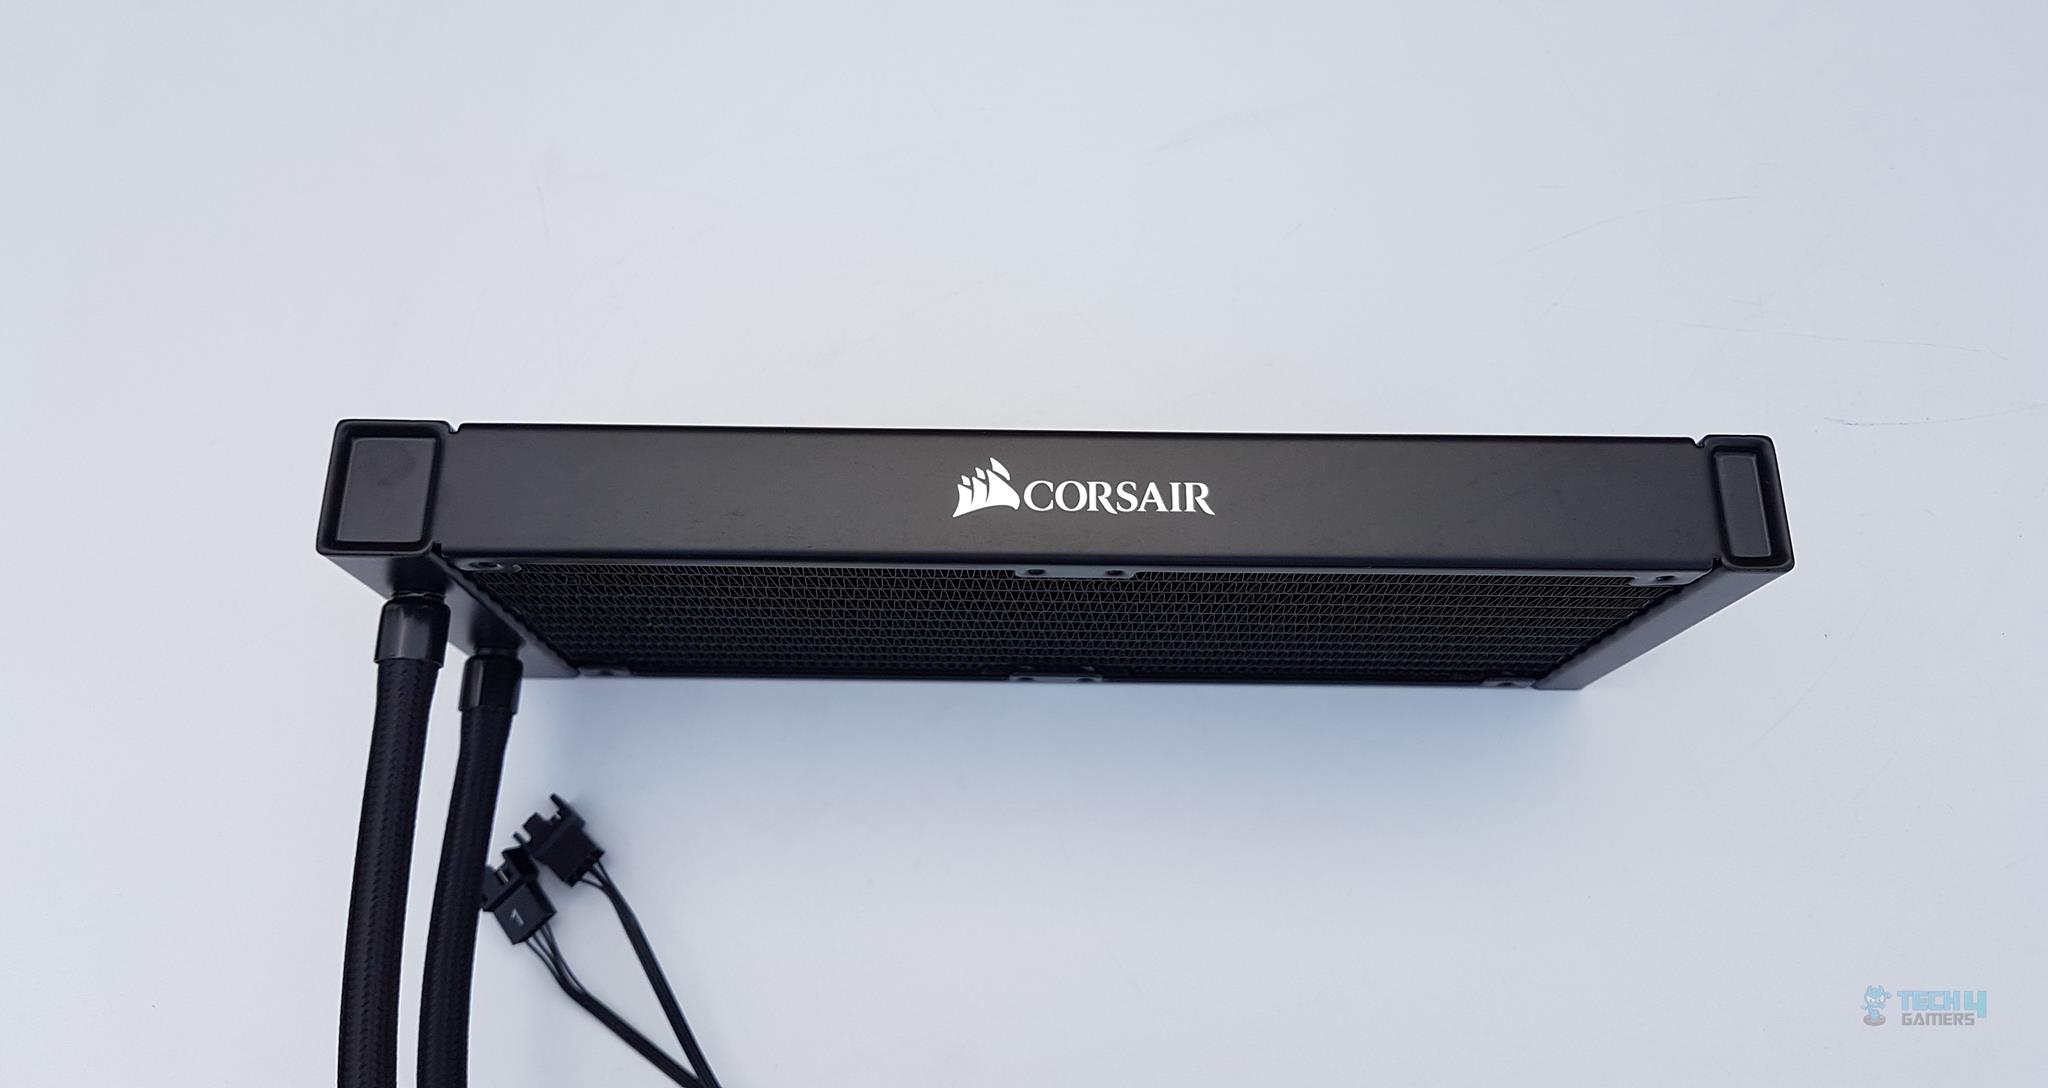
The radiator brings serious performance with a 20 FPI count, ideal for fans with high airflow and air pressure. It rocks a sleek straight-edge design, a cool 277mm length (including head chambers), and 120mm depth.
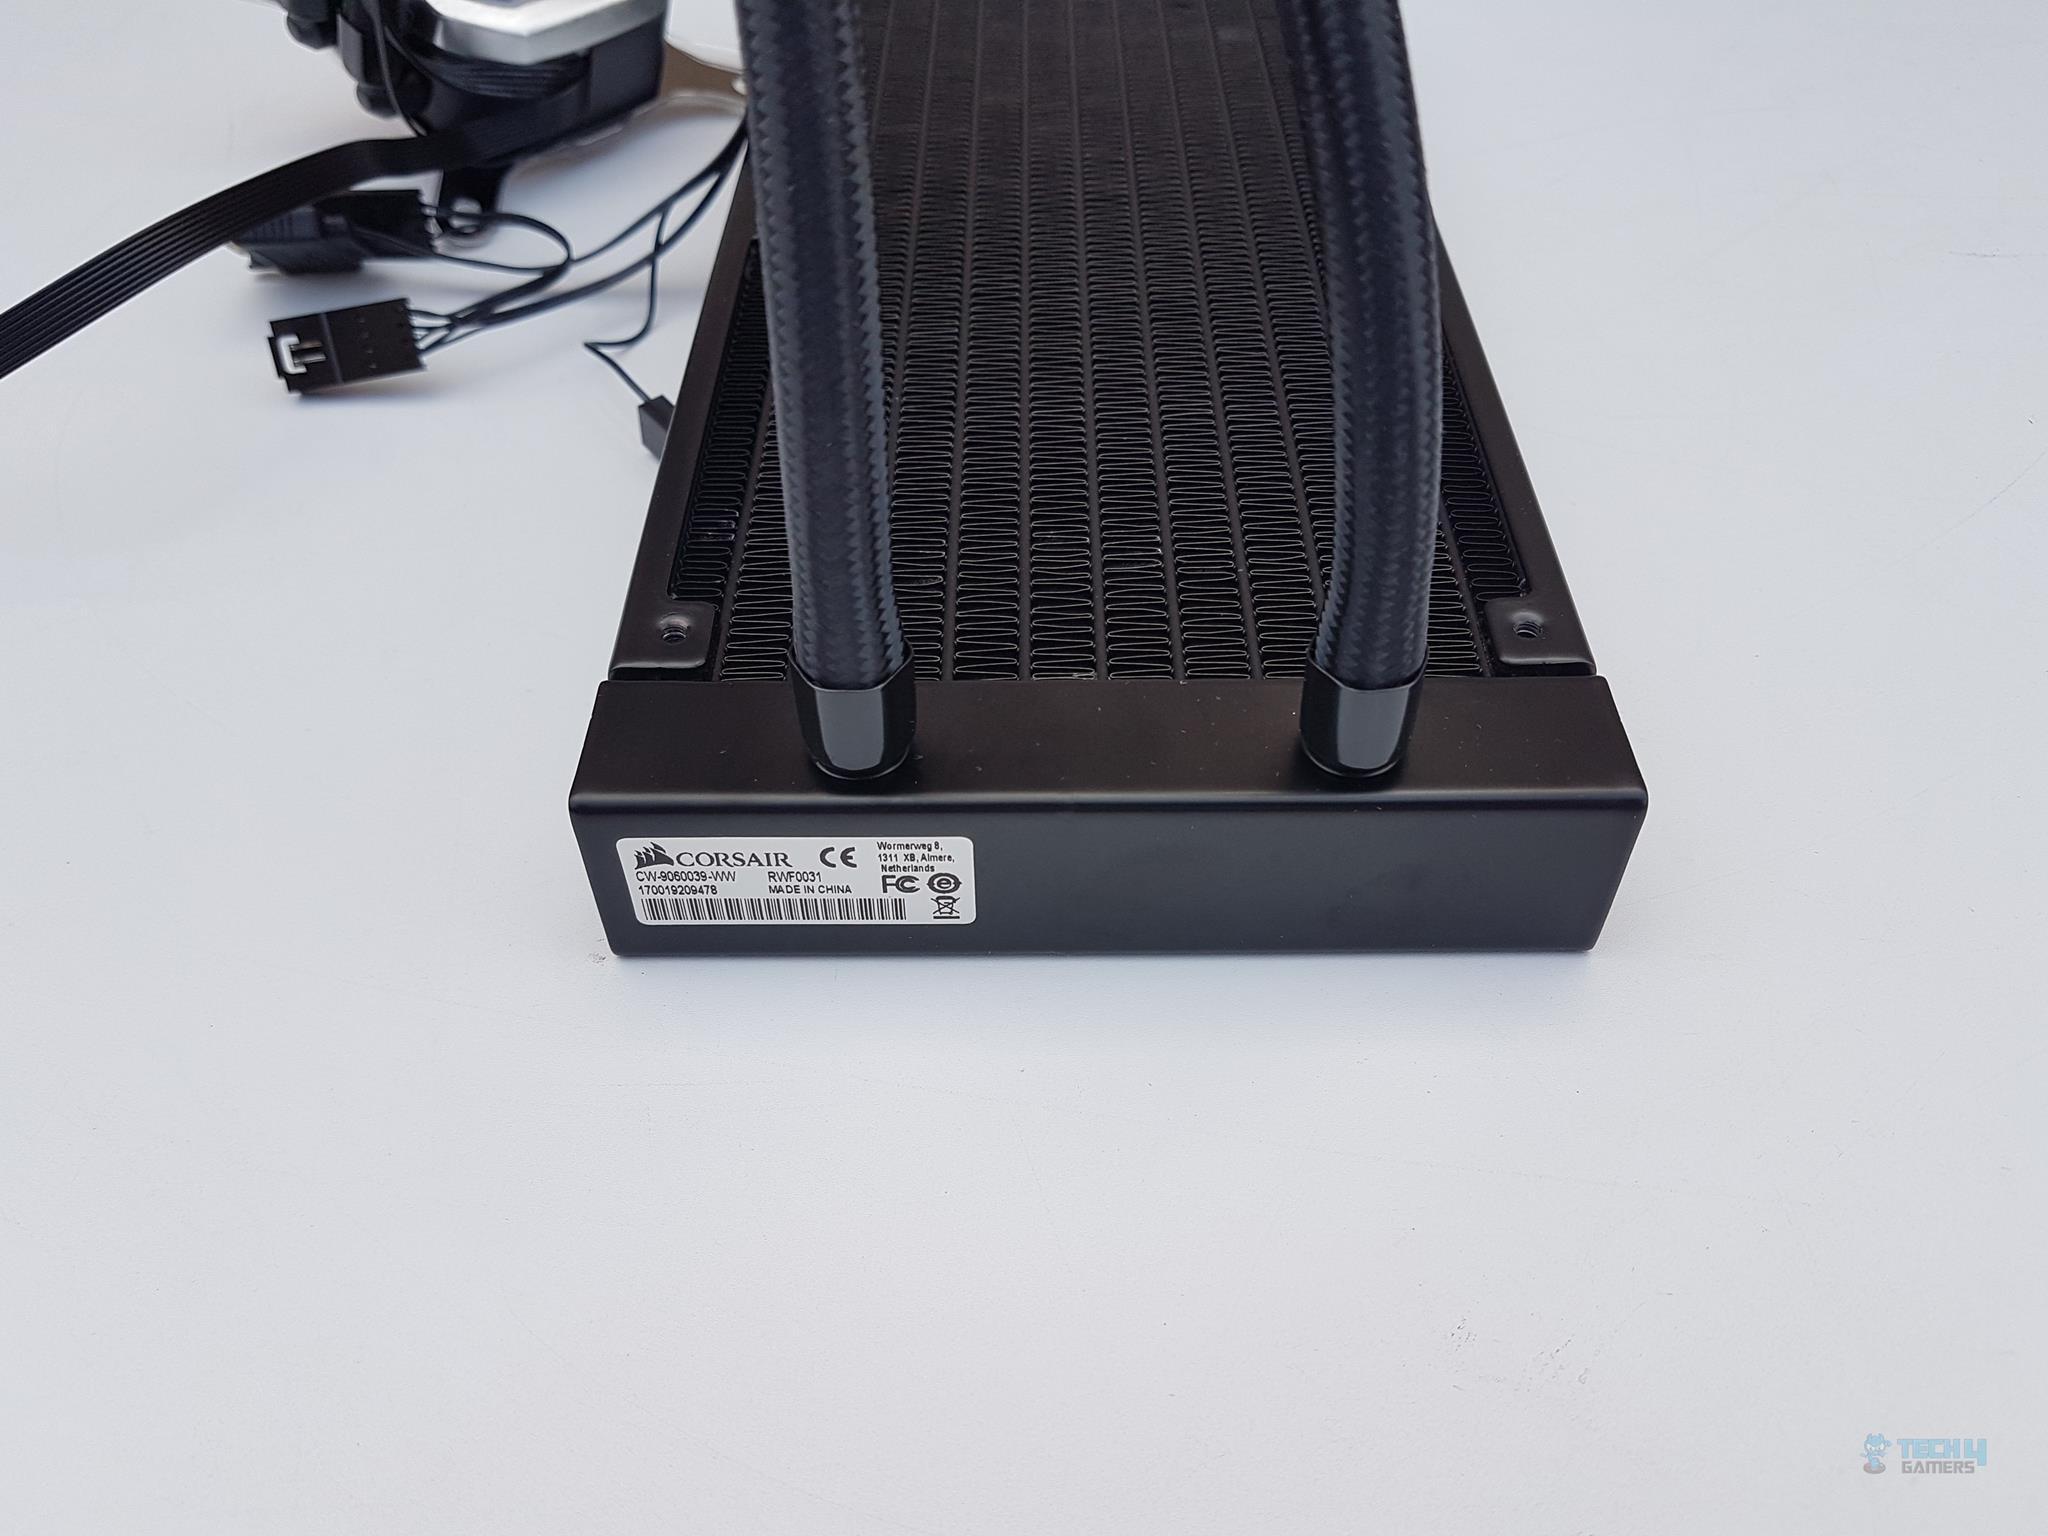
While installing fans, watch out for no protective plating under the mounting holes—be gentle to avoid fin damage or worse, leakage.
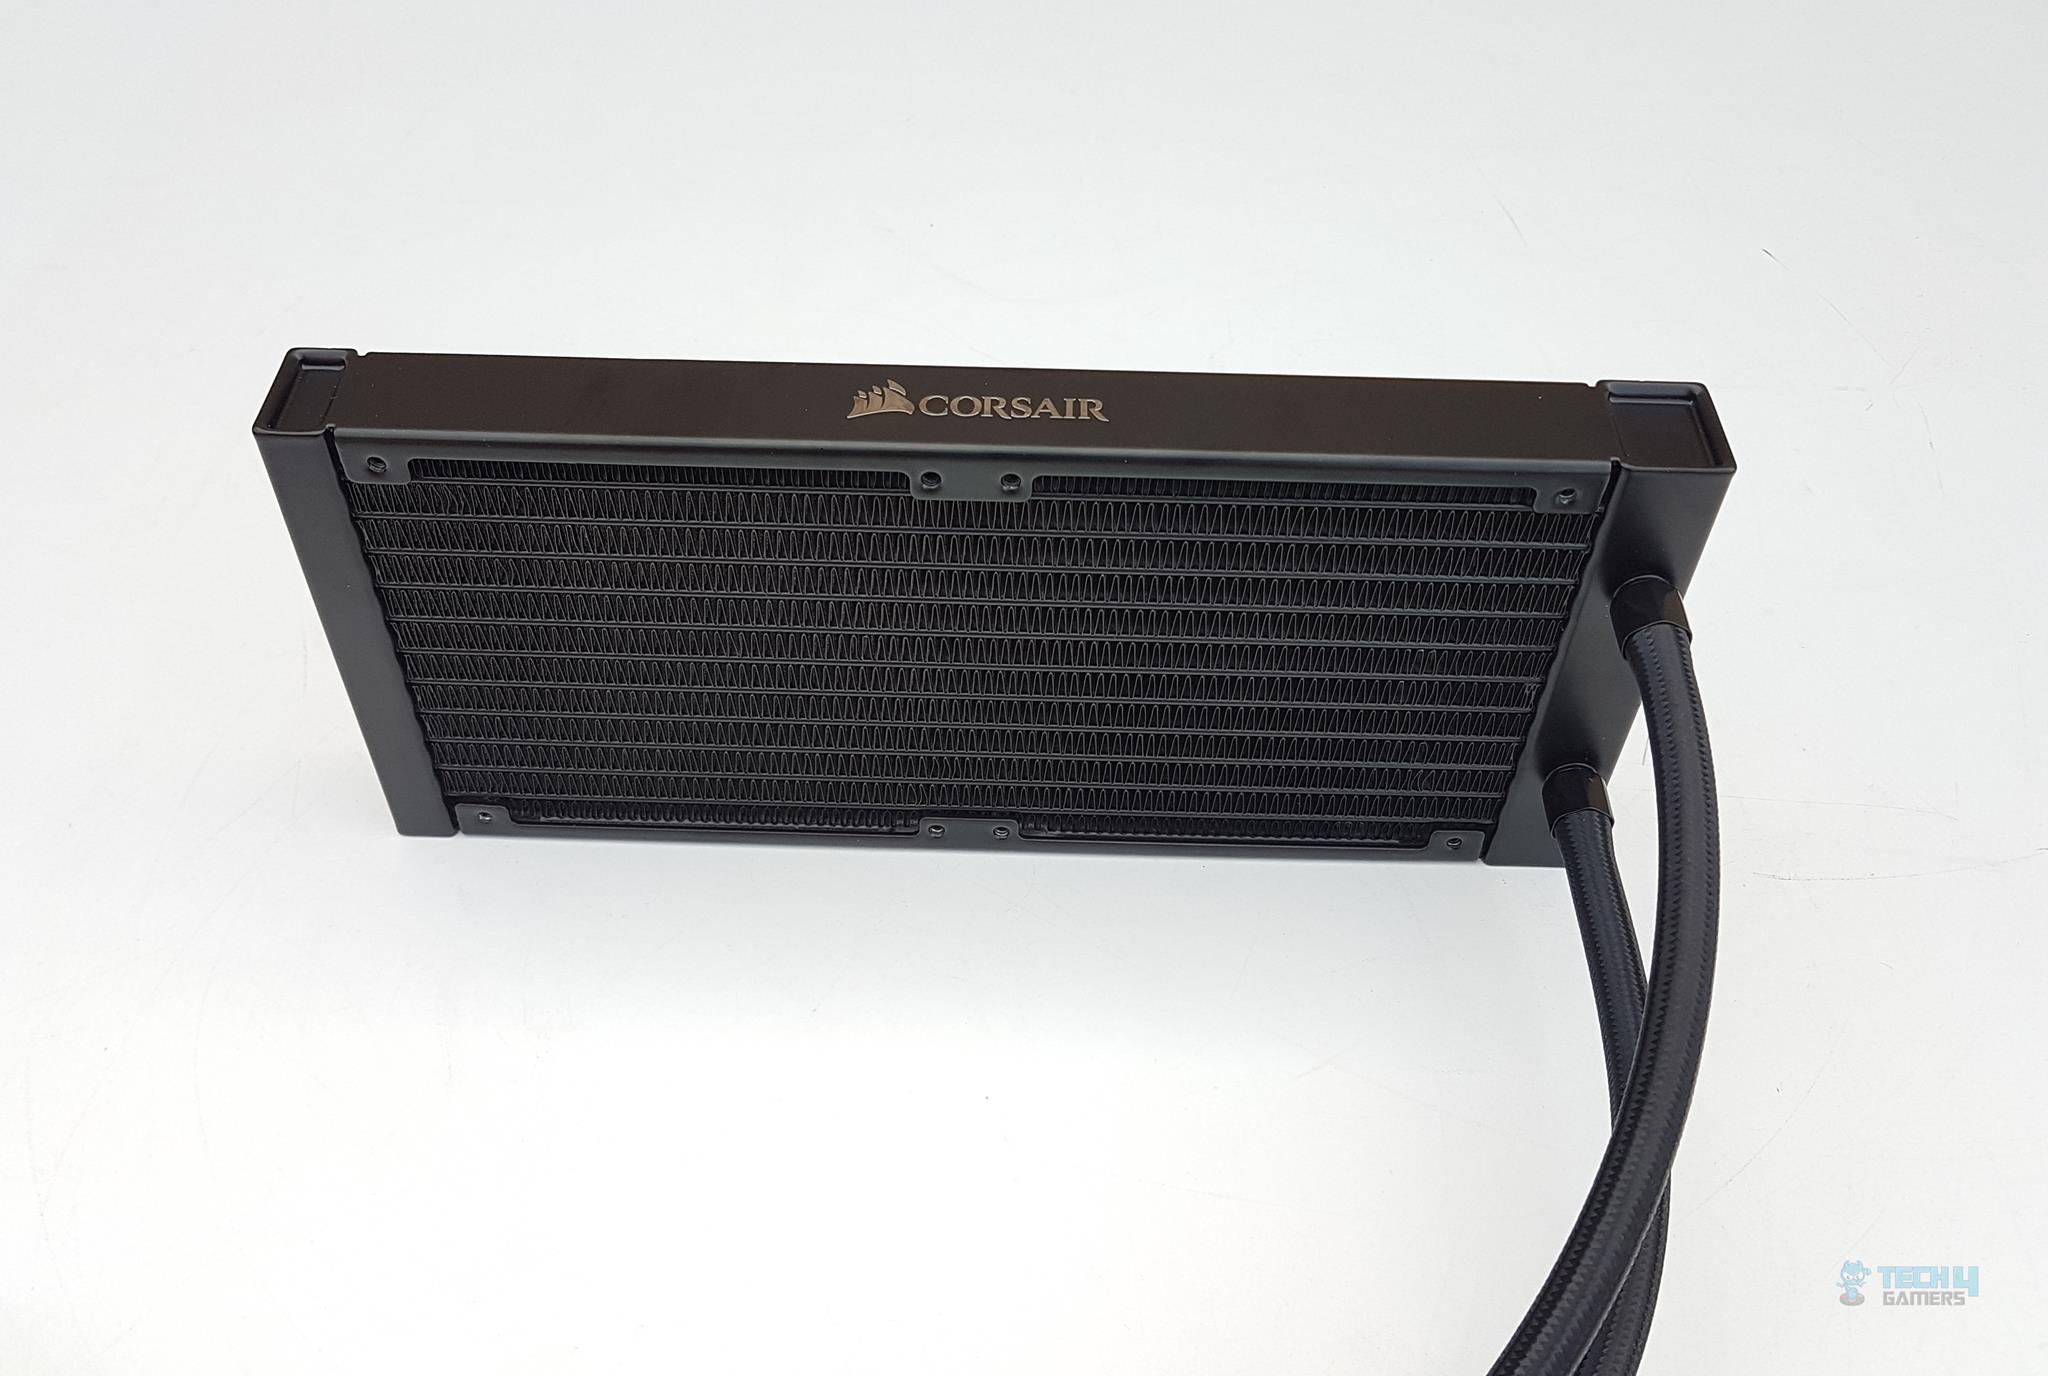
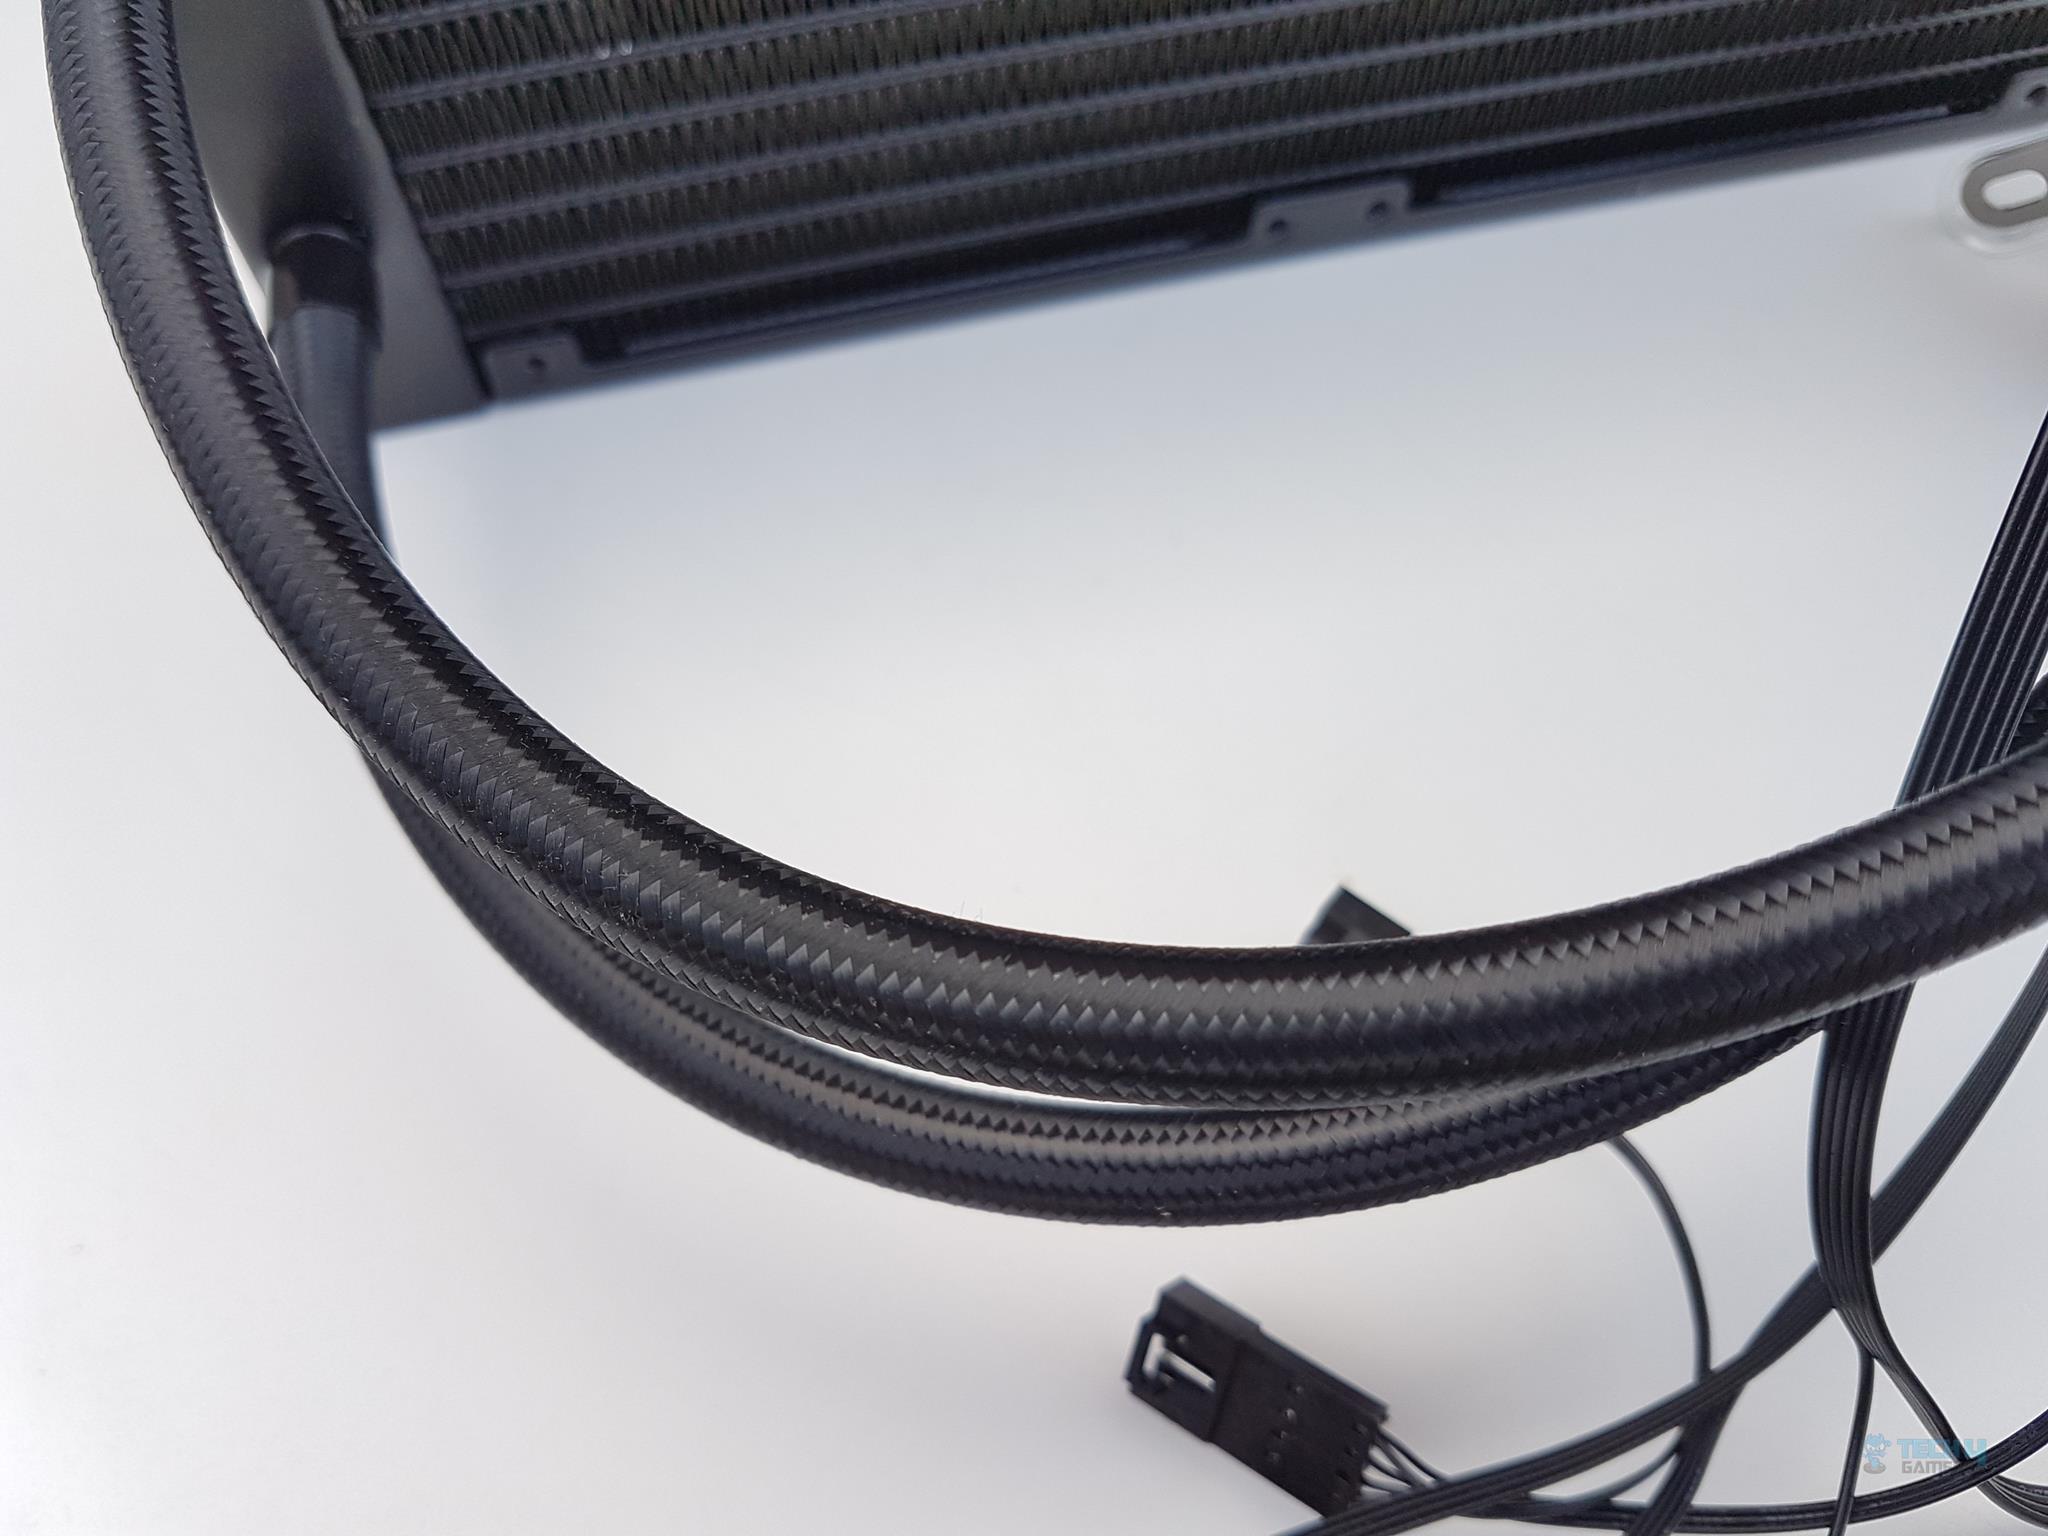
The hoses clamped with barbs, sport a slick braided and meshed look on the CORSAIR H100i RGB PLATINUM. They’re approximately 350mm, offering flexibility with a clean finish. And of course, the metallic shiny CORSAIR branding on both sides adds that extra touch of style.
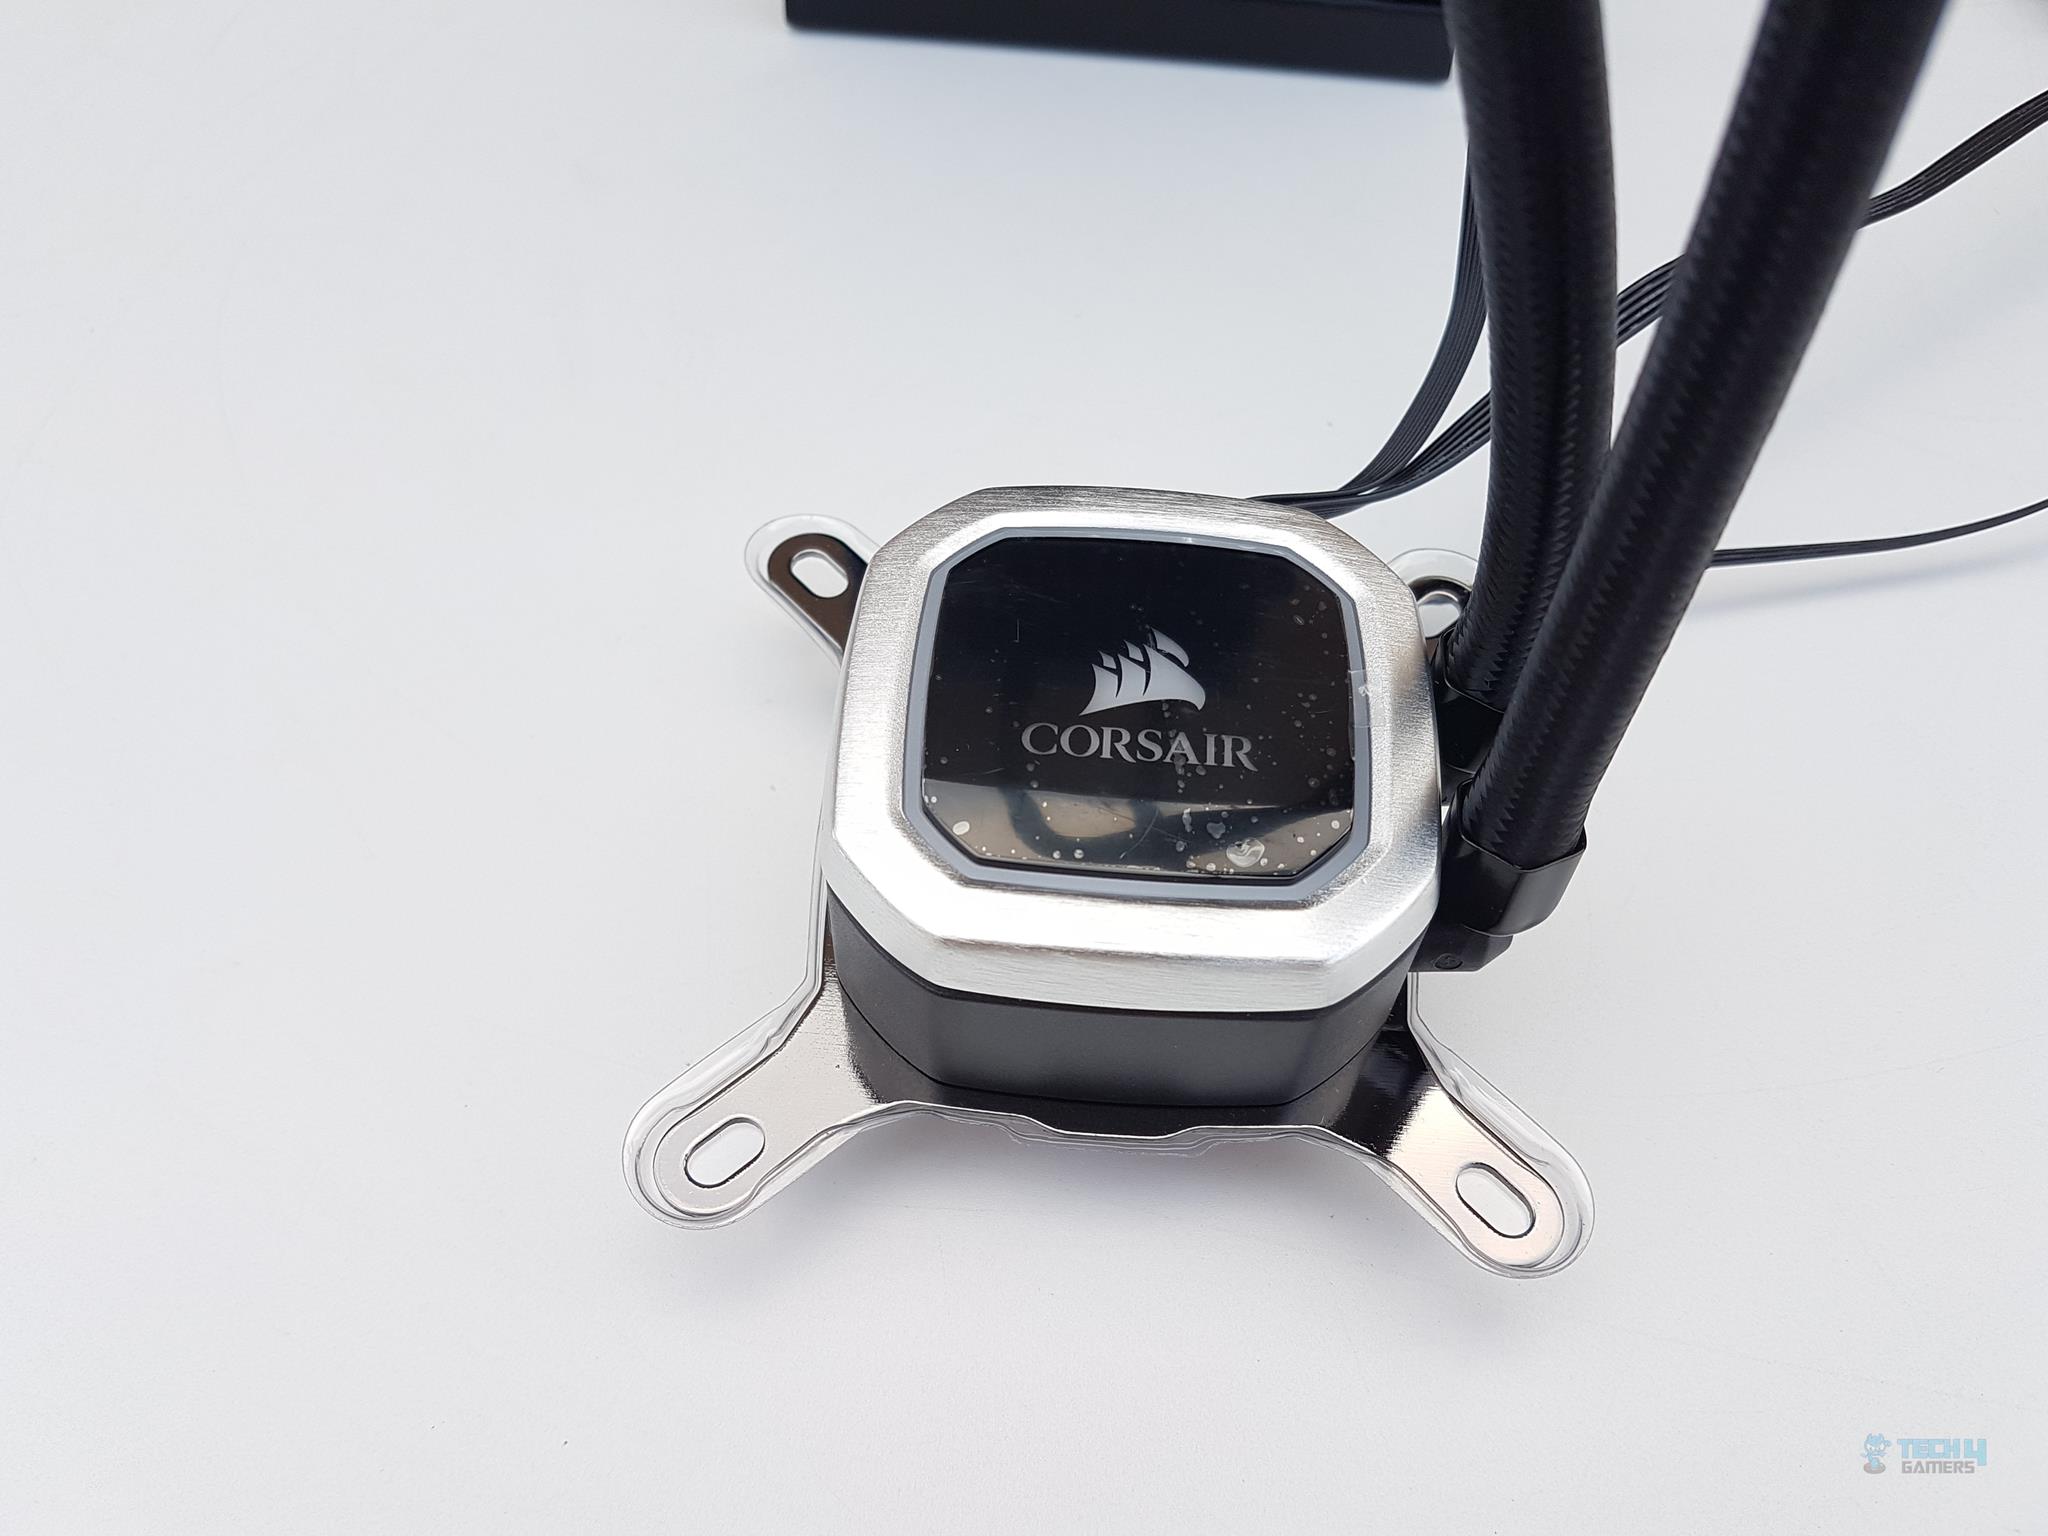
Let’s take a look at the main ingredient aka water block. CORSAIR was able to retain the footprint of the block design to an extent as well which may be hidden from the naked eye. Only a closer look or the mounting hardware will give it away.
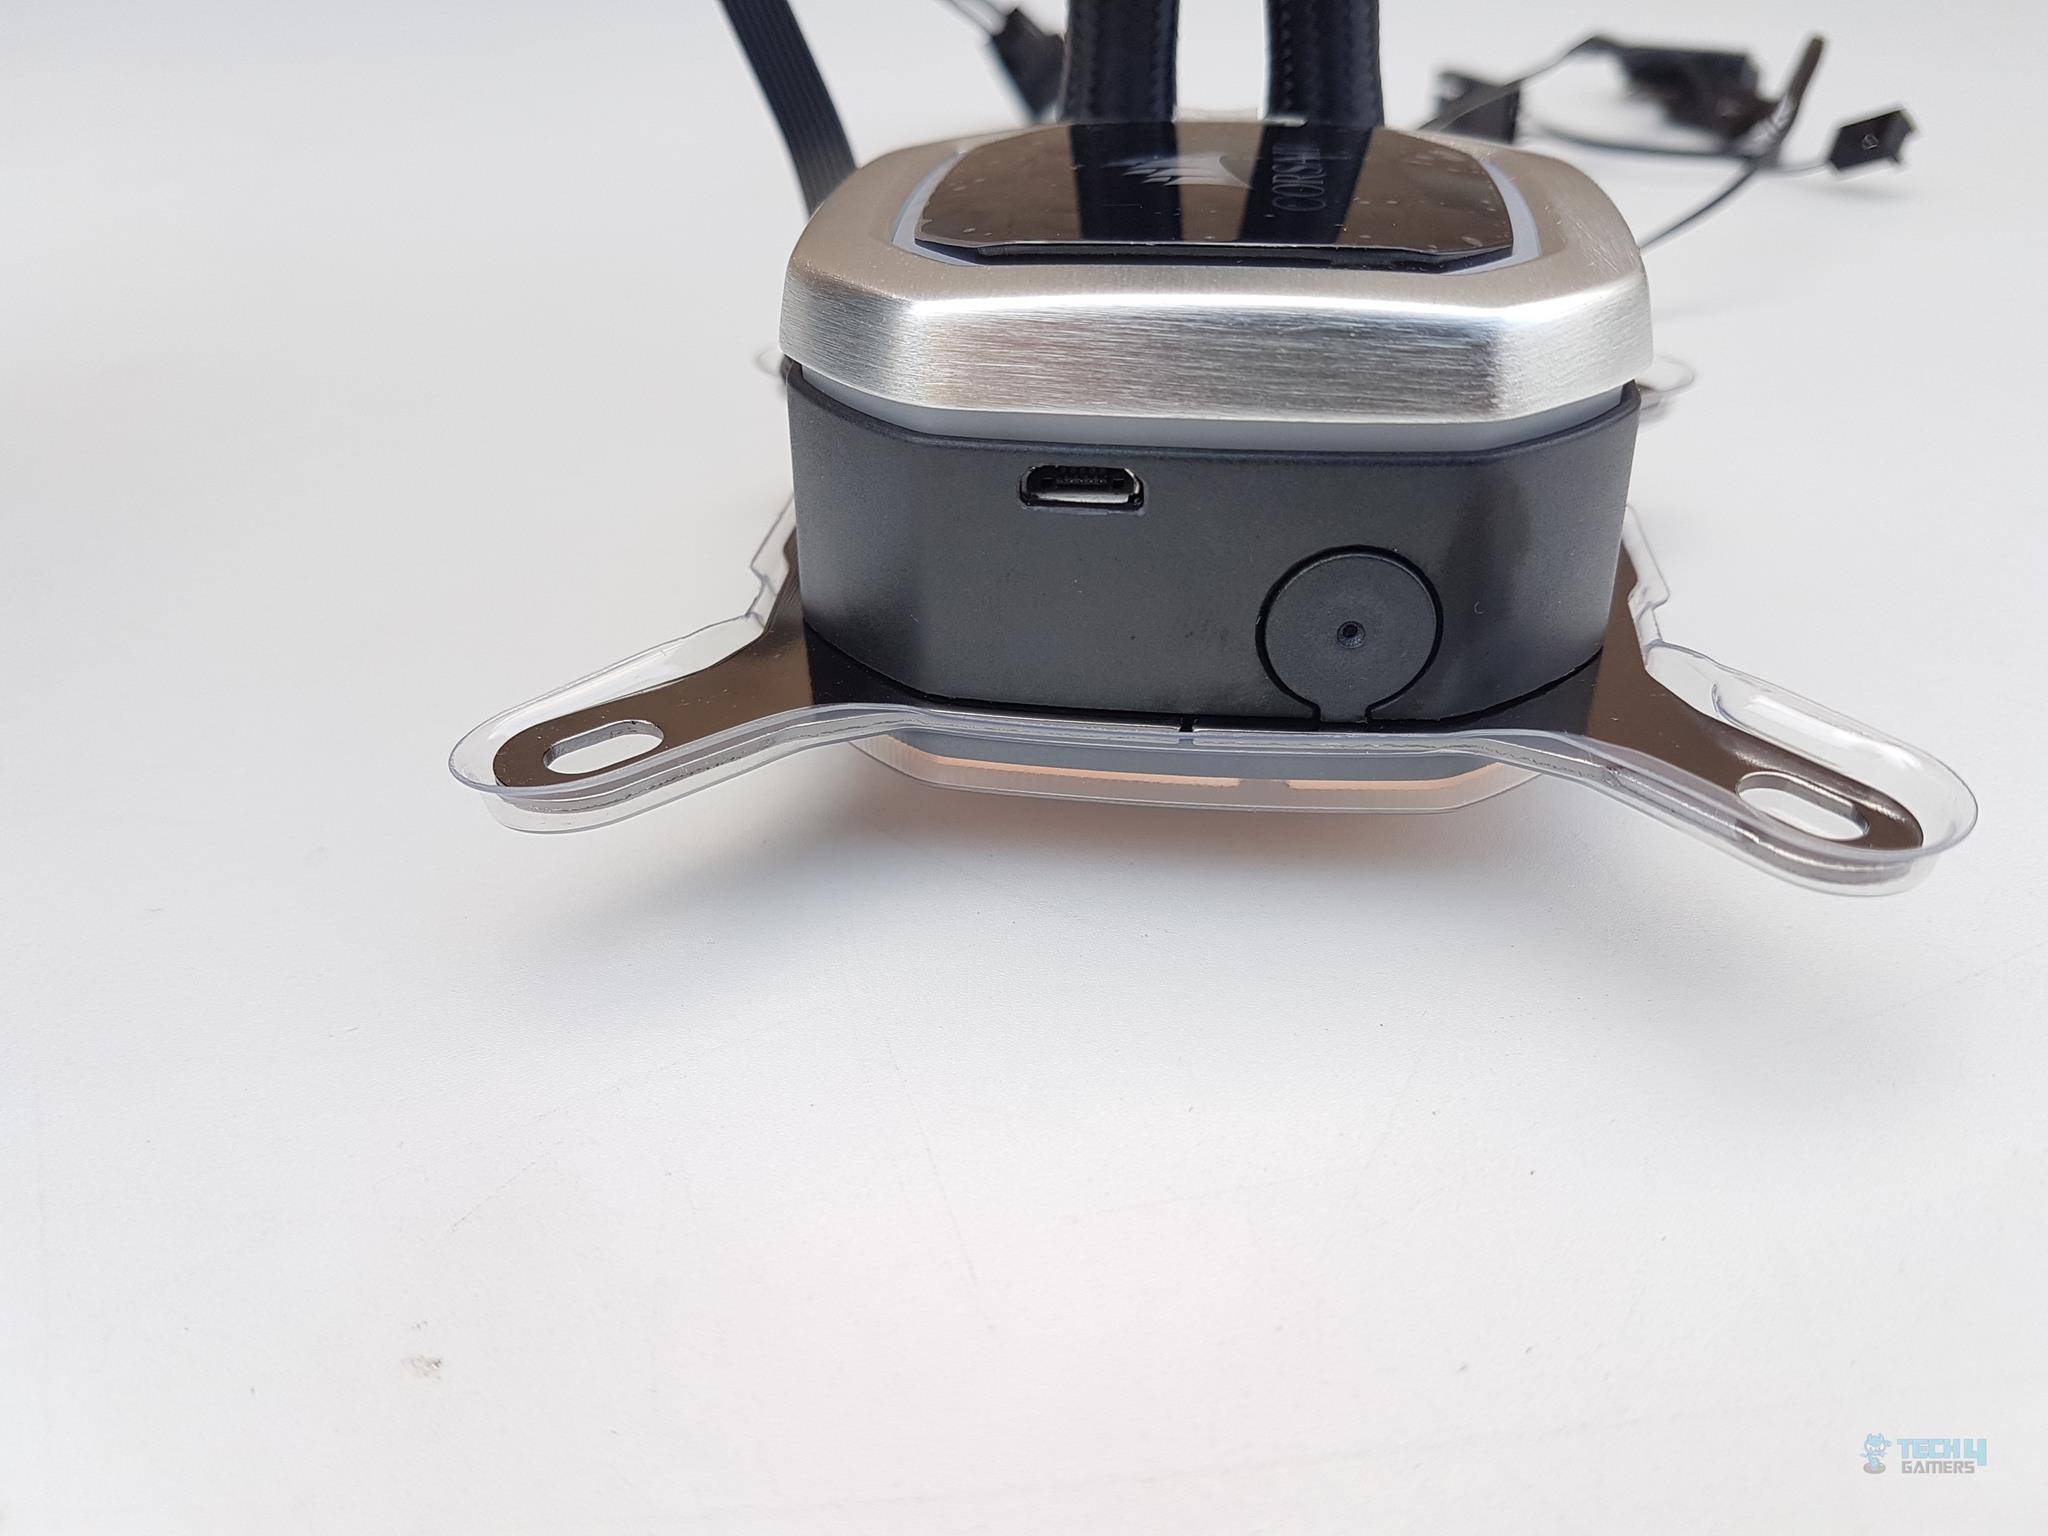
The pump housing rocks a plastic build but flaunts an aluminum finish on the top sides, giving it a slick vibe that plays well with the black lid. And guess what? When you power it up, the CORSAIR logo and name light up, adding some serious flair.
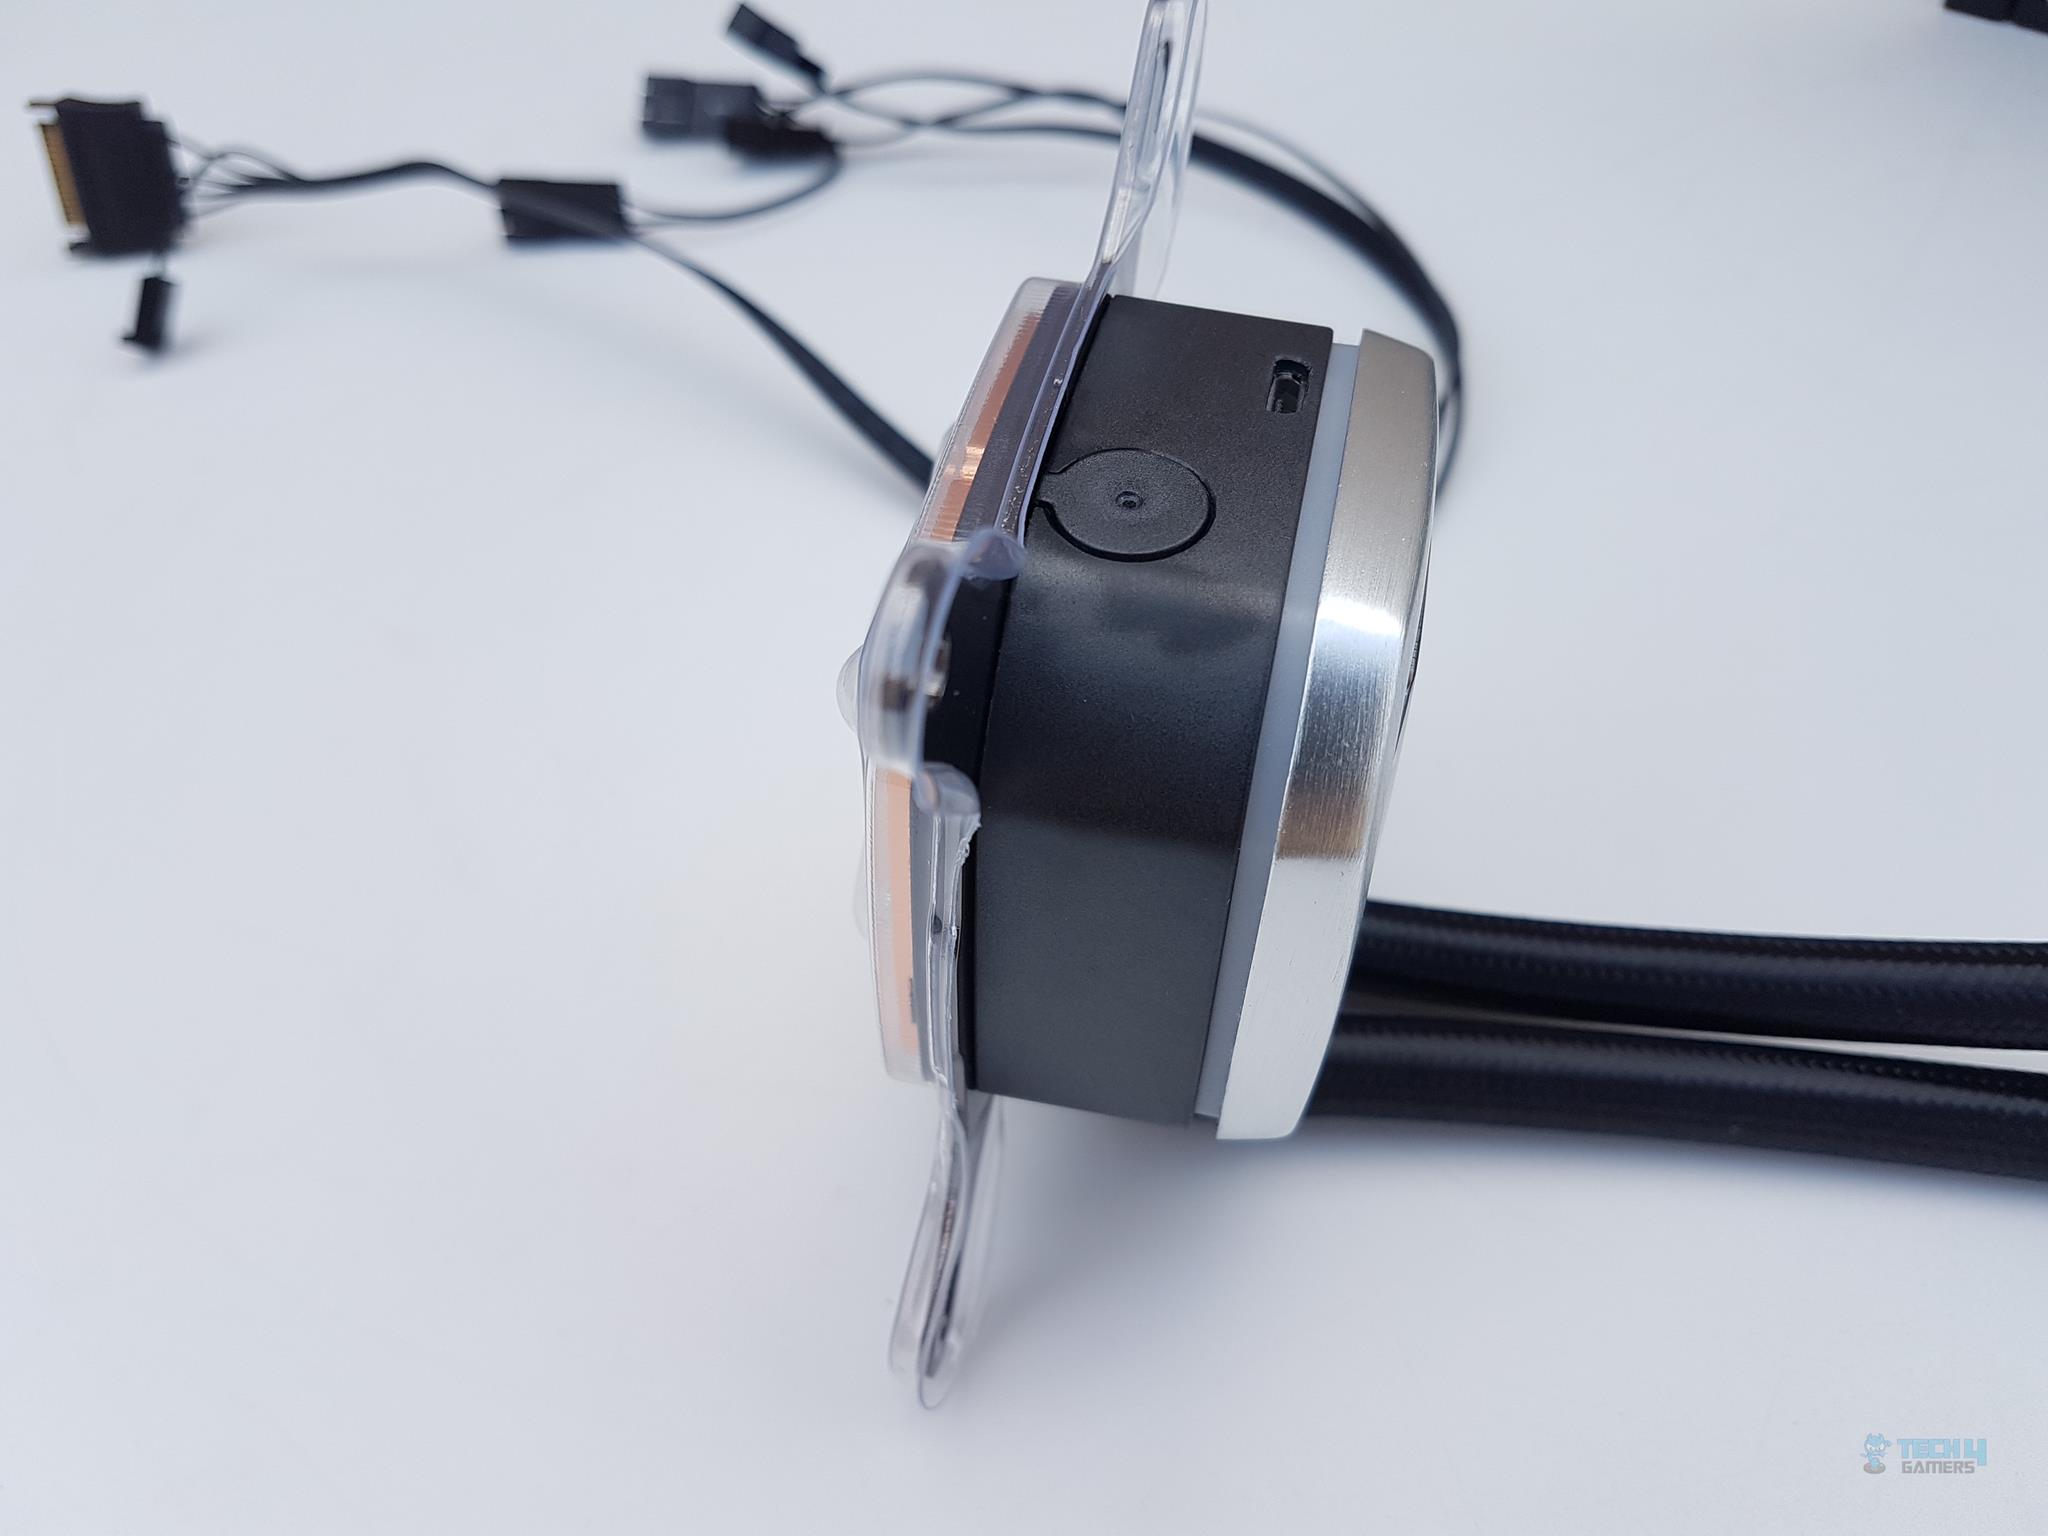
Peek at the top, and you’ll spot four digital RGB LEDs, while the sides boast a grand total of twelve, with three on each. Intel mounting brackets? Yep, they’re pre-loaded, just like the cool predecessors.
Now, those sides aren’t just black—they’re matte black, rounded at the edges to keep the design game strong. There’s a micro-USB port on the top front, but hold up—what’s that on the bottom right? Could be a refill port, but I’m not placing bets on it.
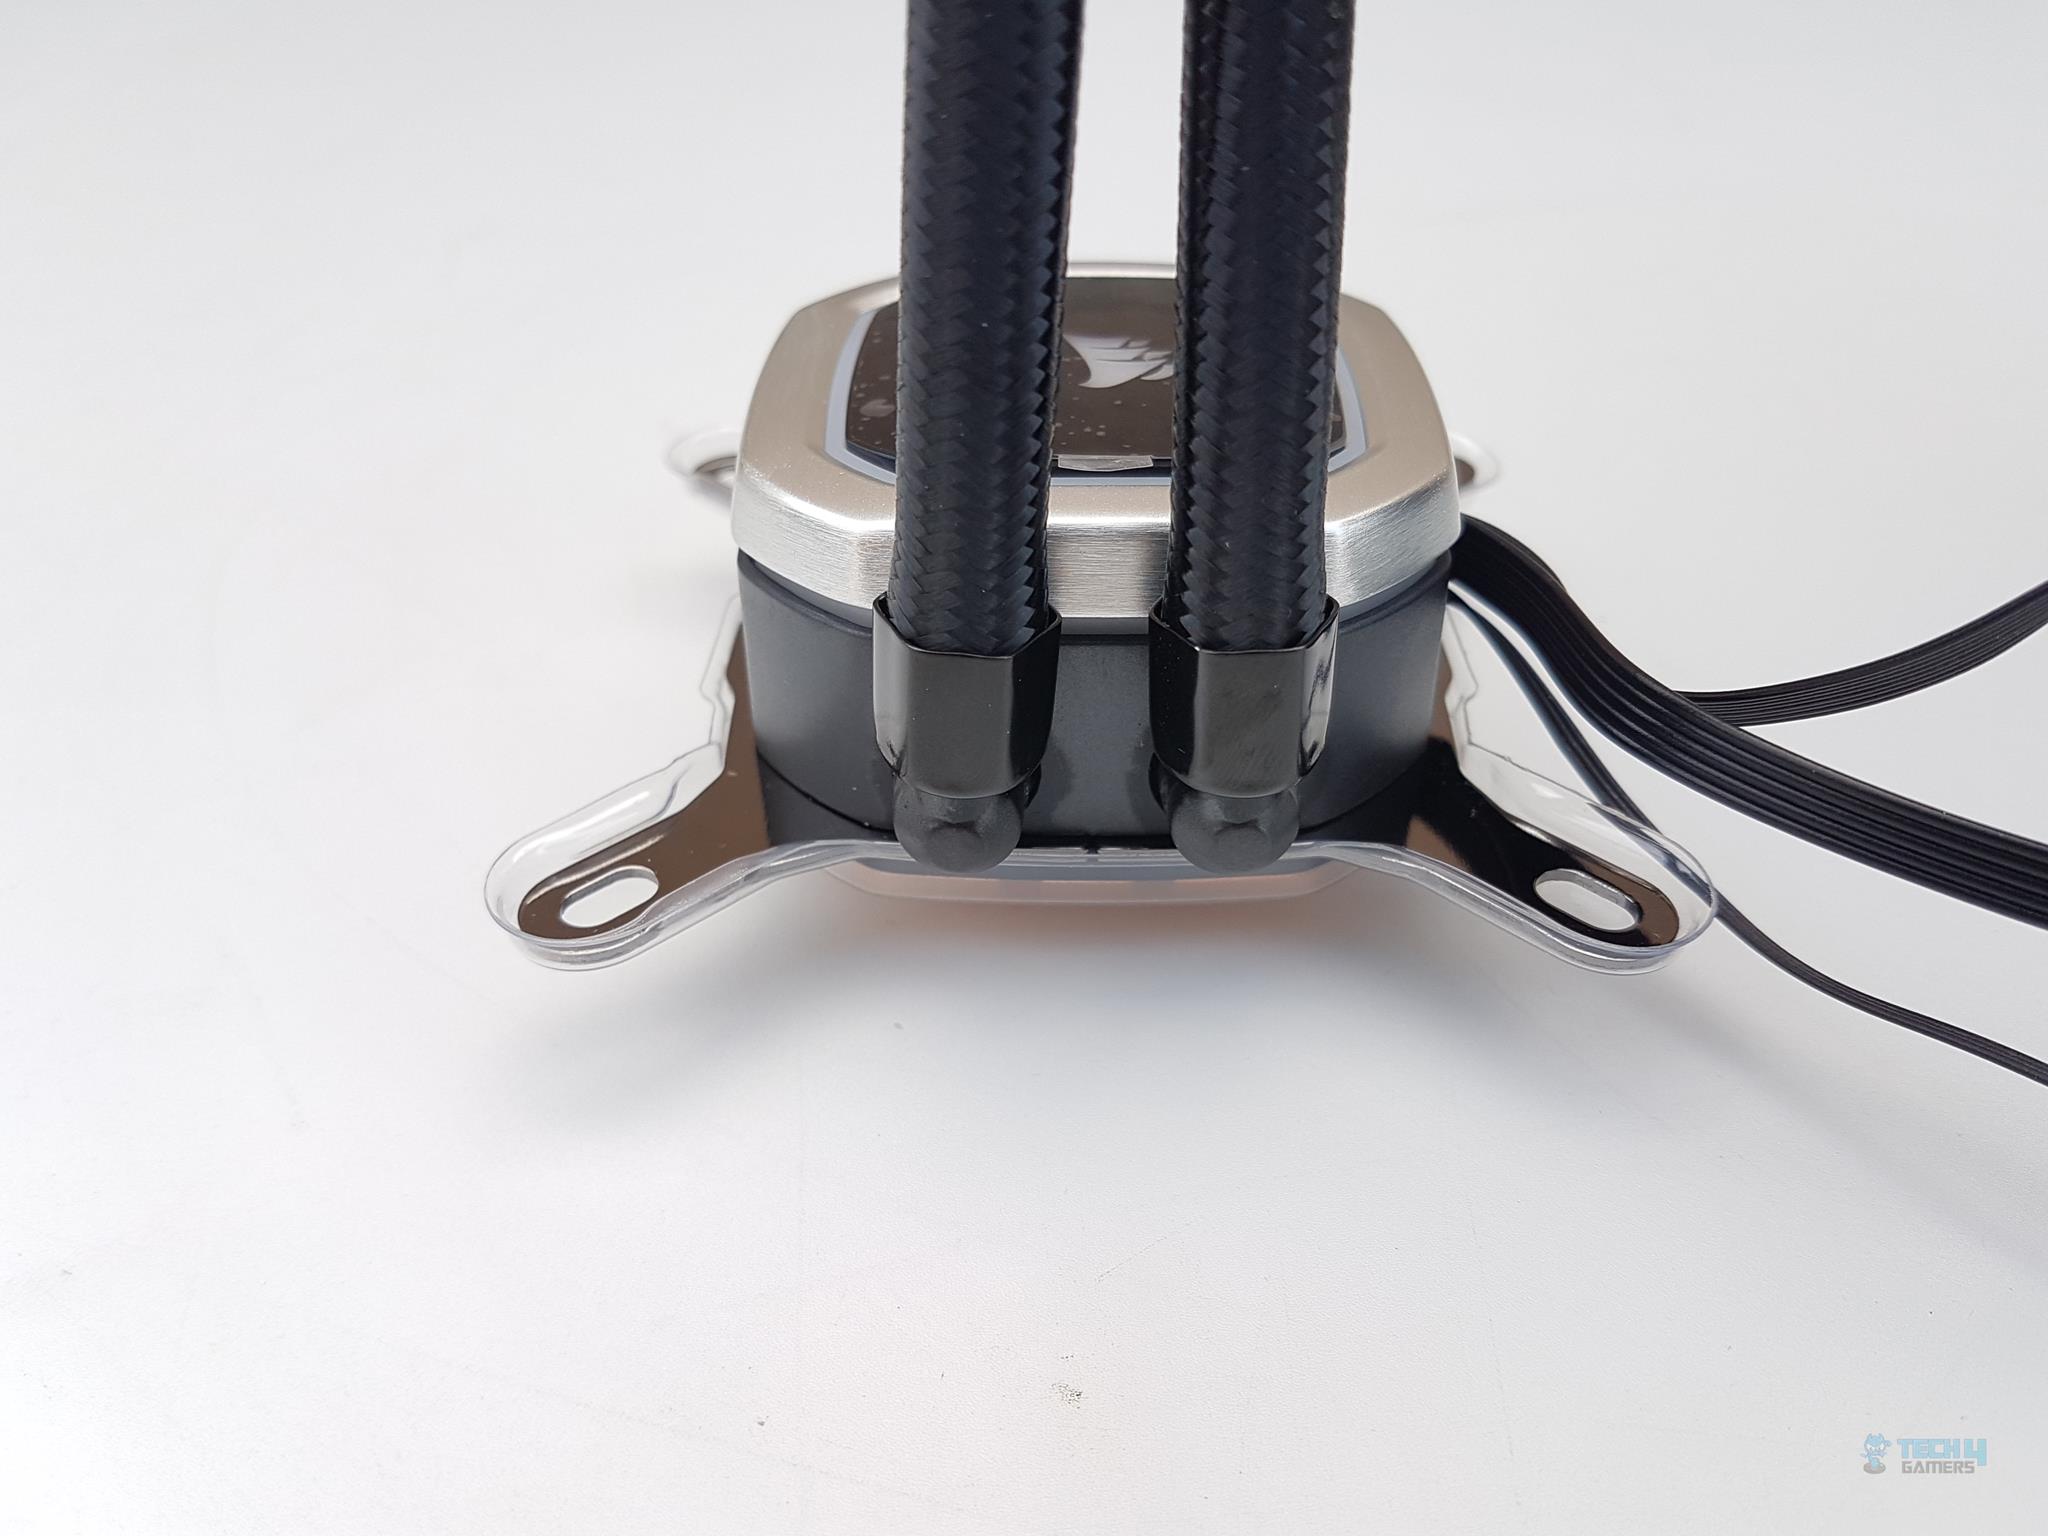
Flipping to the backside of the block, you’ll spot the hoses neatly set at a 90-degree angle. The cool part? You can twist them in any direction, and they’re surprisingly flexible. Plus, cables pop out from the right side.
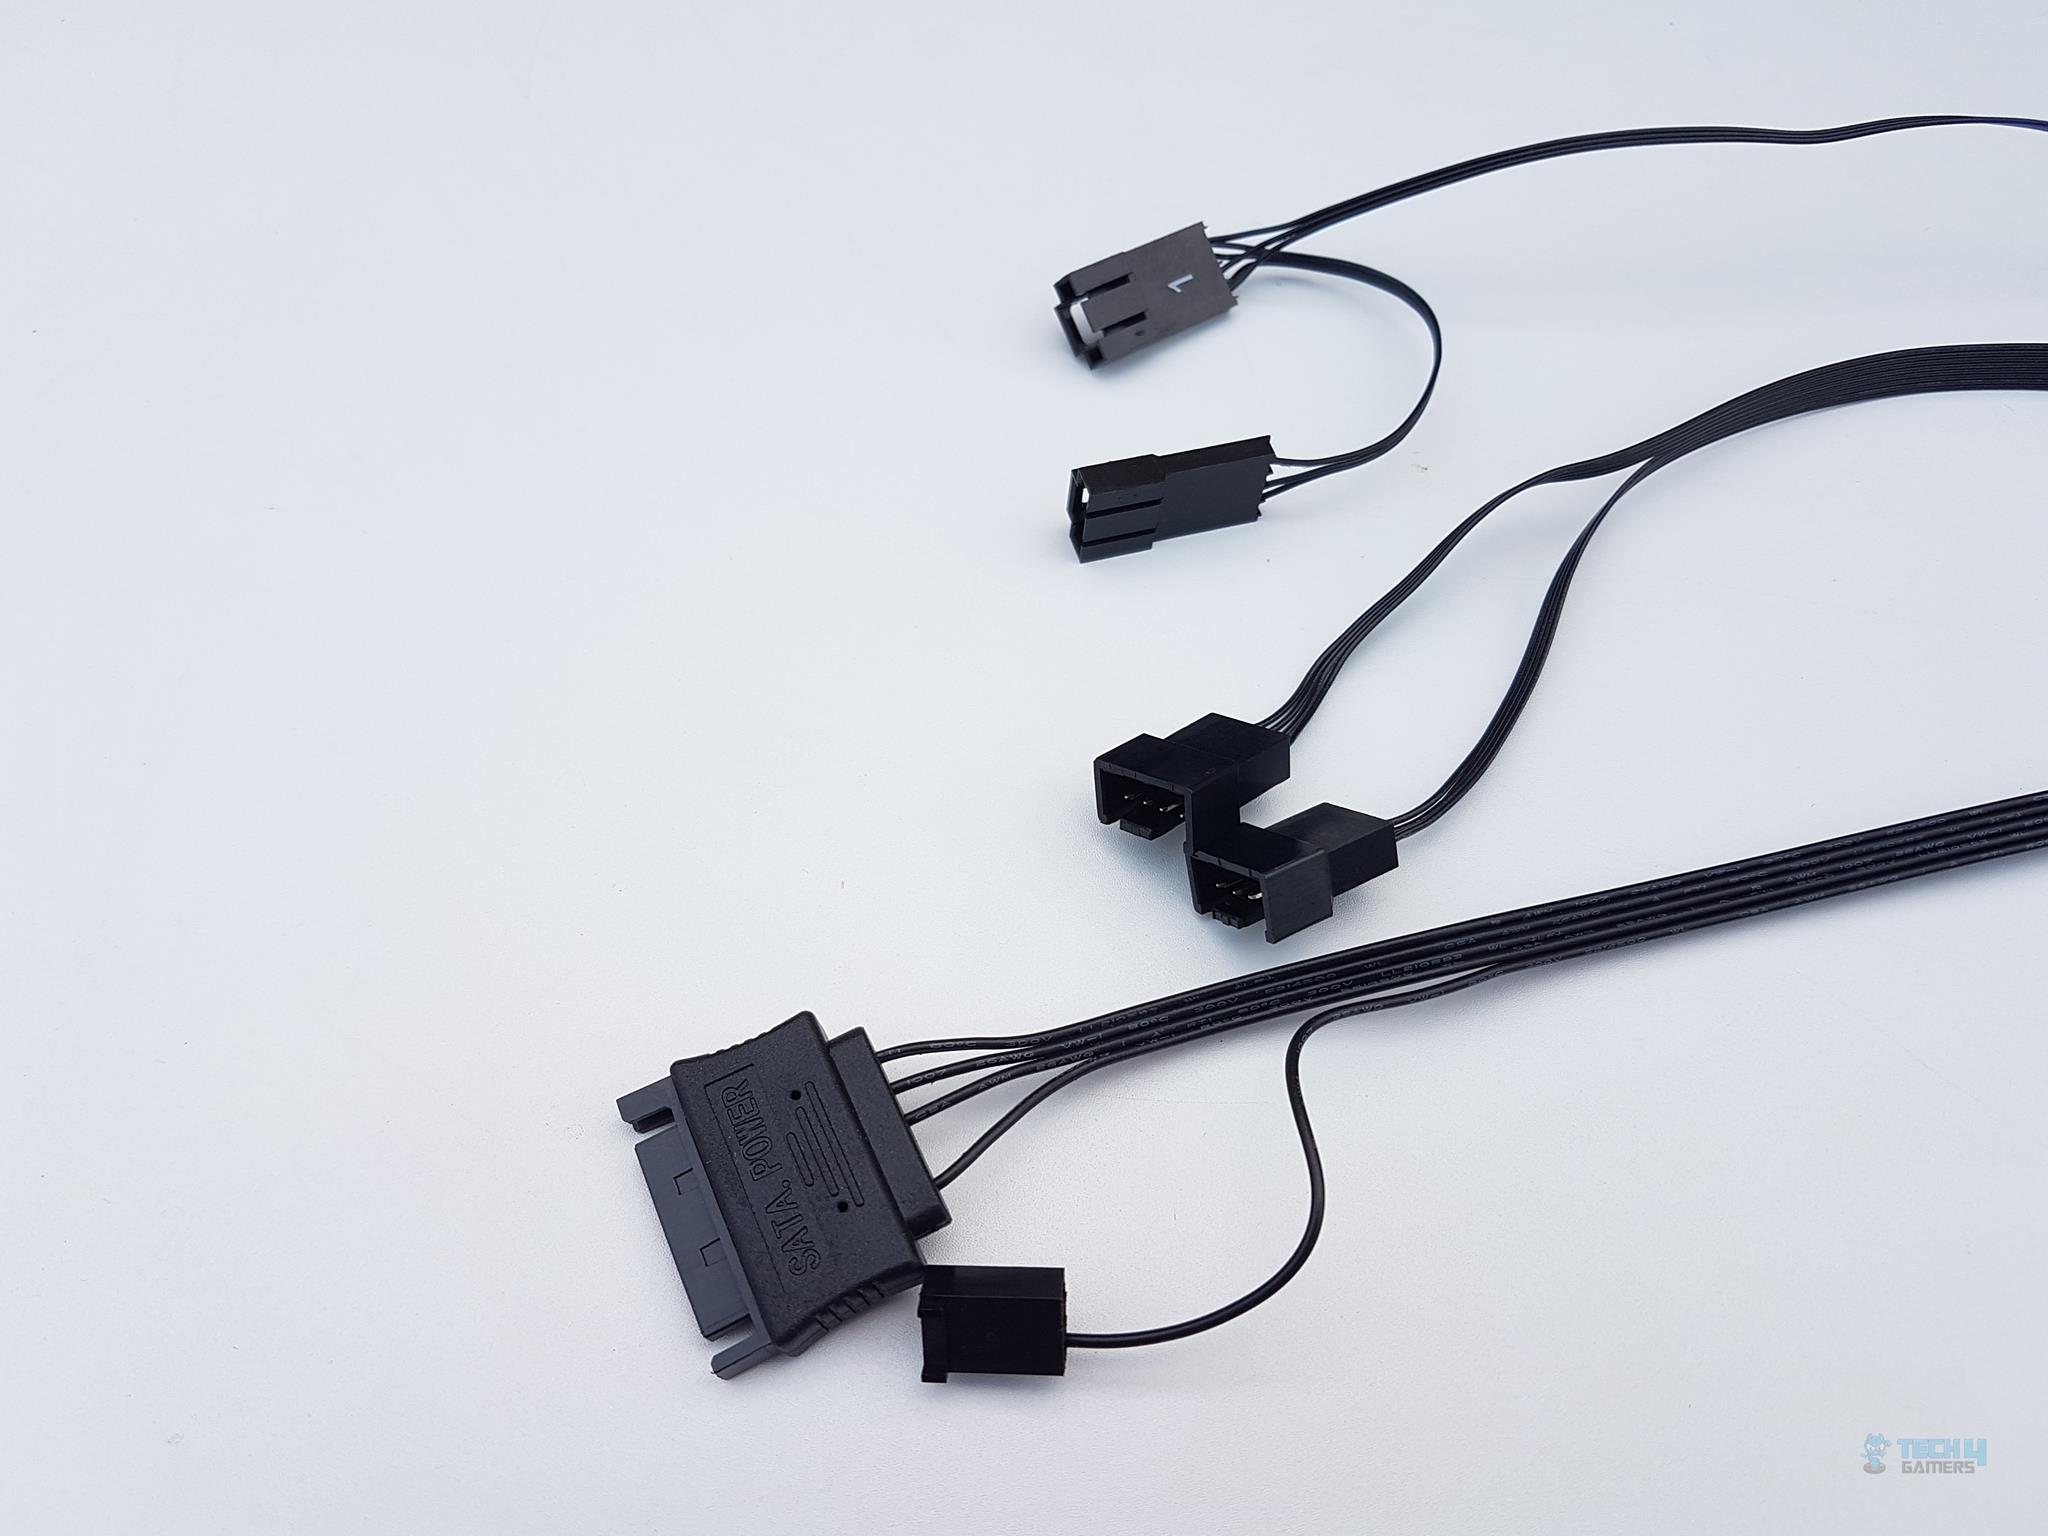
Here’s the cable rundown:
- SATA Power Cable [Approx. 196mm]
- 3-pin Power Cable extending from the SATA Cable [Approx. 305mm]
- Digital RGB LED Connectors Cable [Approx. 300+78mm]
- 2-way 4-pin PWM Fan Connectors Cable [Approx. 296mm]
Quick heads-up: those digital RGB LED connectors are exclusive, so no direct hooking up to your motherboard’s digital lighting header.
And don’t miss the number 1 tag on both the RGB and one of the 4-pin PWM connectors. Why? Well, when you’re rocking dynamic lighting modes, they kick off from one RGB device and glide through the others in sequence. That number game? It’s your guide to the dazzling order.
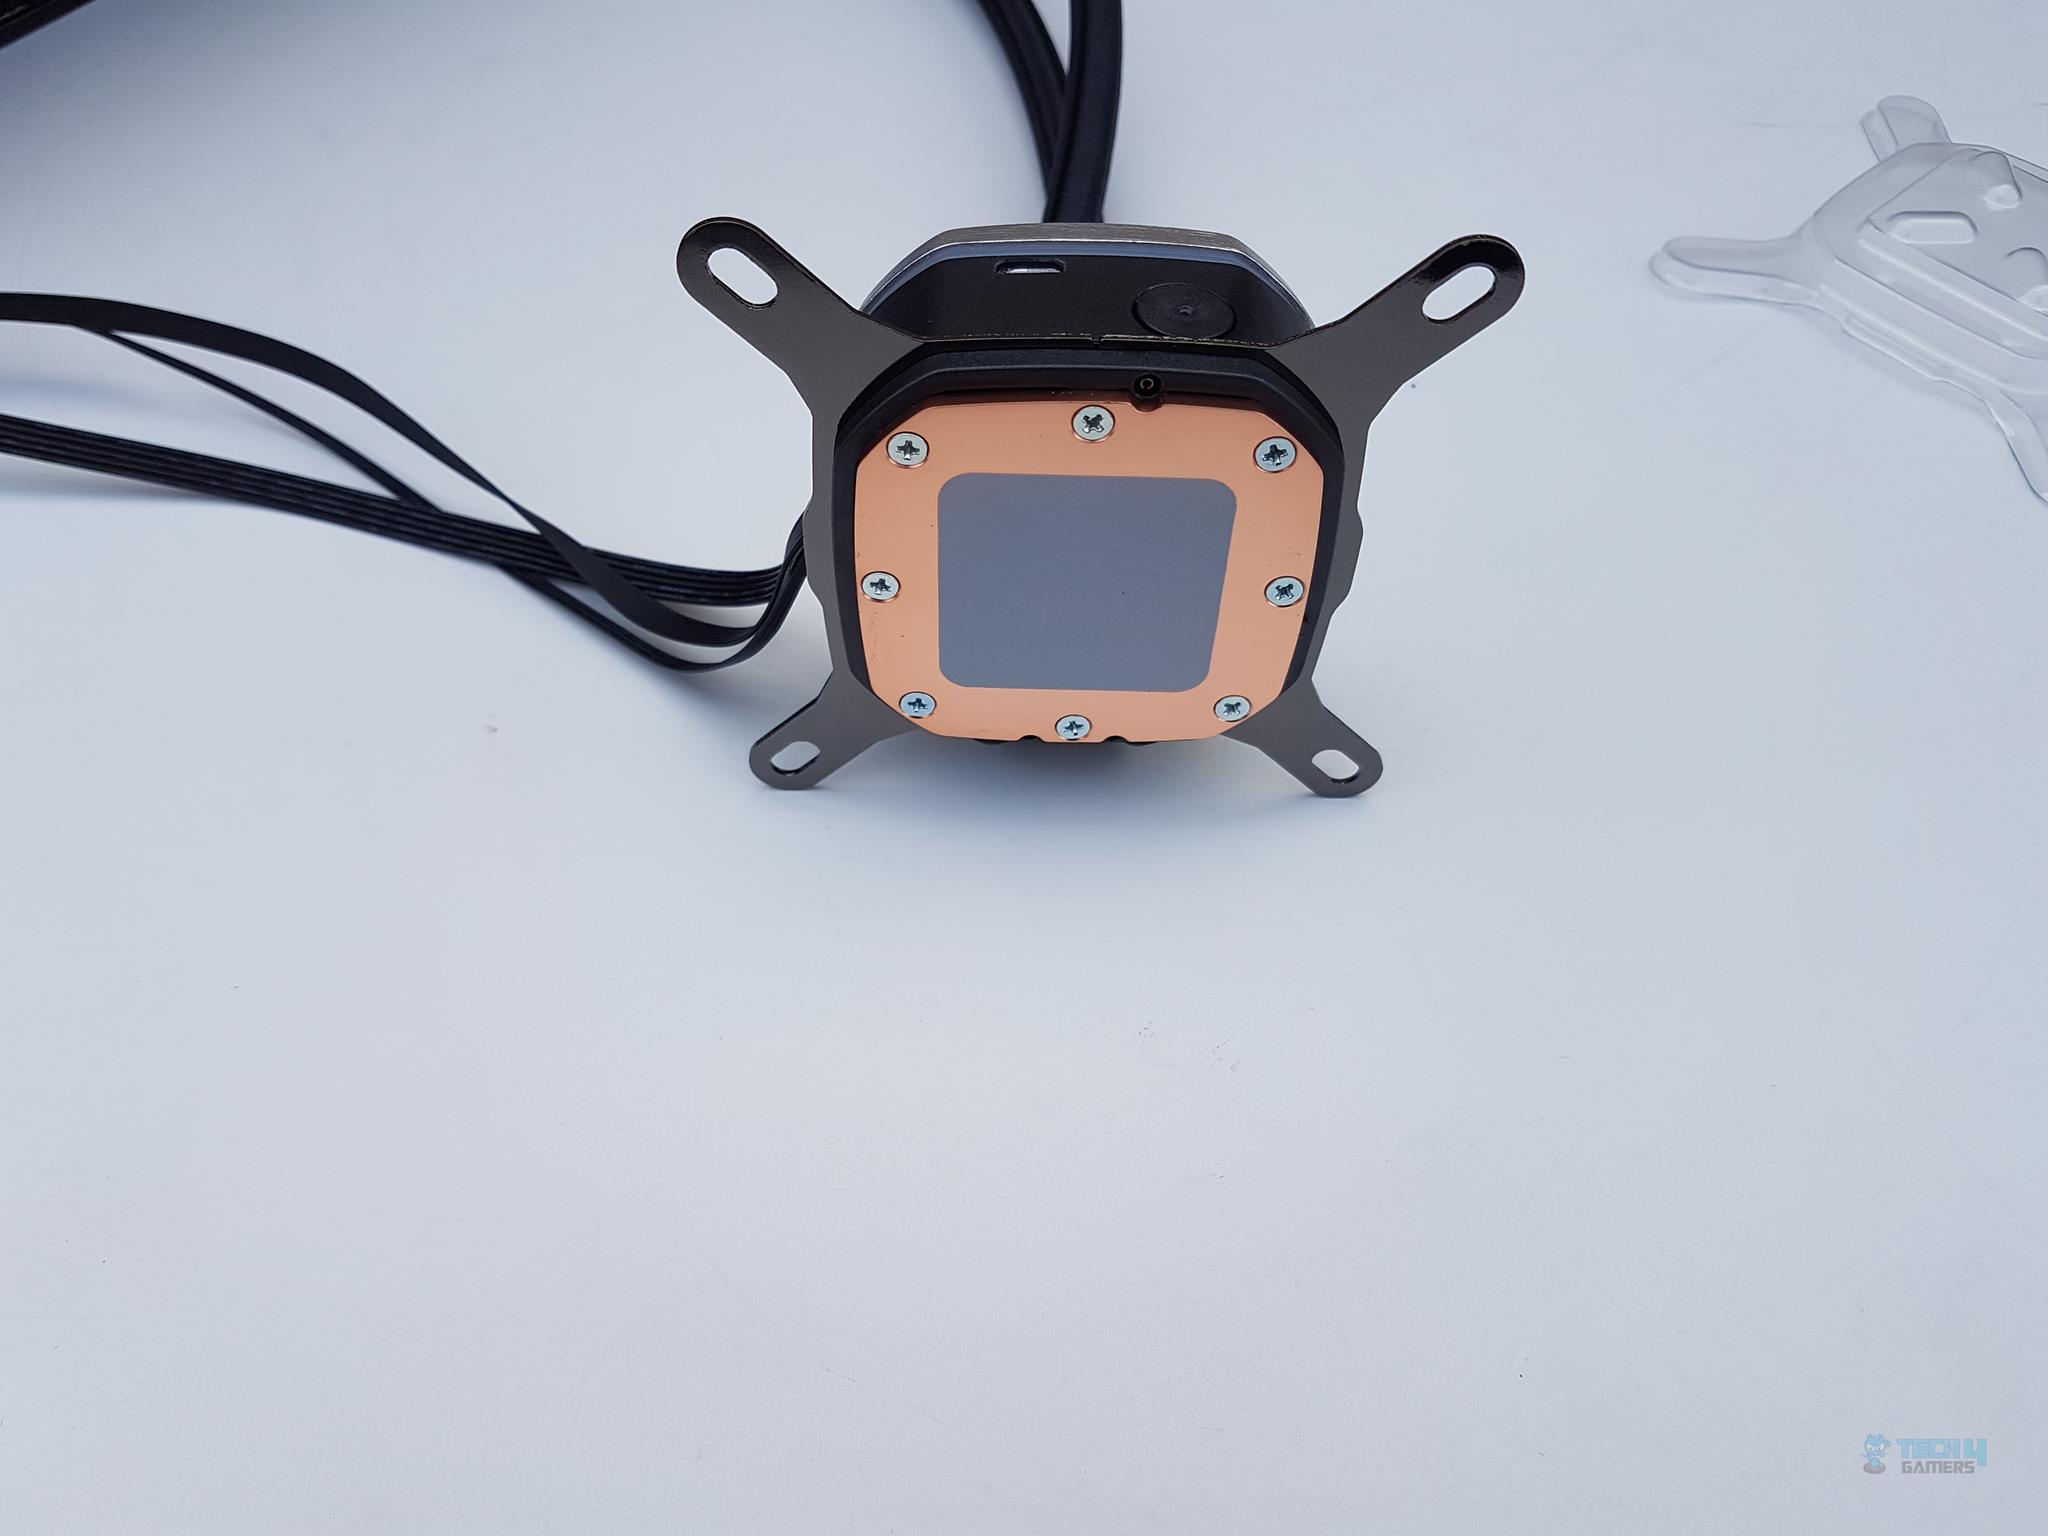
Let’s break down the base: a cool copper plate, sizing up at 55x55mmx2mm, with 2mm of that rocking the copper vibe. Held tight by 8 screws, it’s in a solid relationship with the main housing.
Now, that USB cable? It’s a smooth operator with a right-angled micro-USB connector, making installation a breeze. Stretching out at 622mm, it’s your ticket to clean cable vibes, reaching down to the motherboard’s bottom, where those 9-pin USB 2.0 headers hang.
But wait, there’s a catch – you’ll need a free USB 2.0 header on your motherboard. Why? Because this cable is the maestro behind the pump’s lighting and thermal magic. Keep that USB slot open and ready!
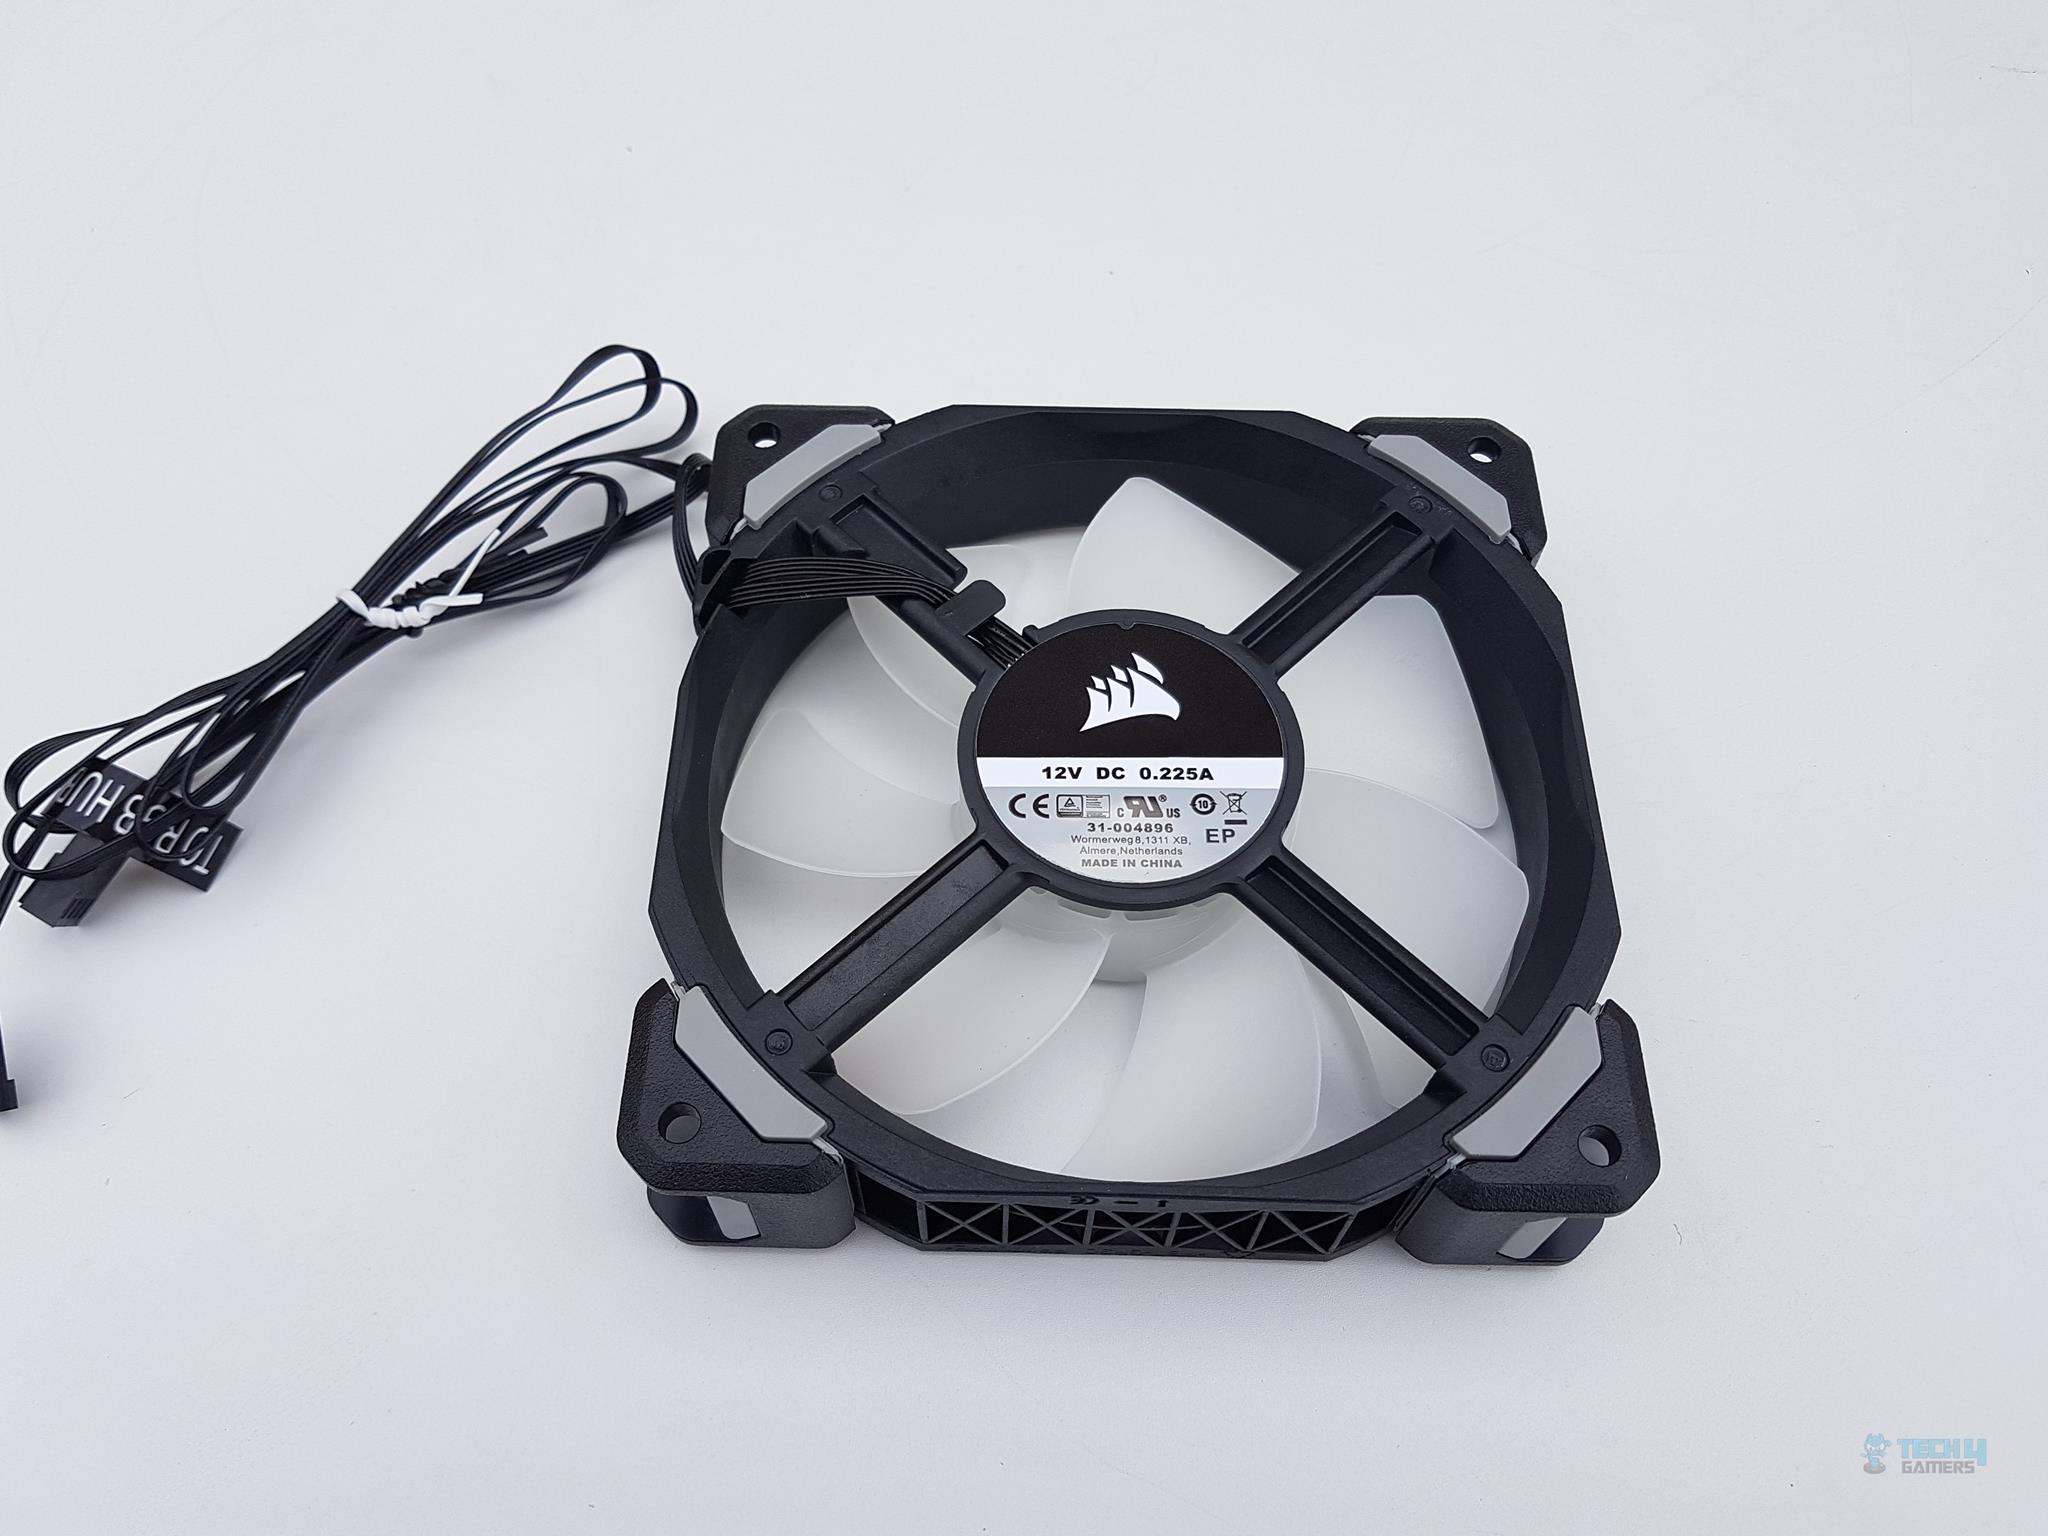
Let’s talk fans. CORSAIR hooks you up with two ML 120 RGB Fans, each at a neat 120x120x25mm. These crank it up to 2400 RPM, pushing out a cool 75 CFM with a solid air pressure rating of 4.2mmH₂O. But, heads up, the noise hits 37 dBA. They’re all about that 4-pin PWM life, running at 12VDC with a 0.225A current.
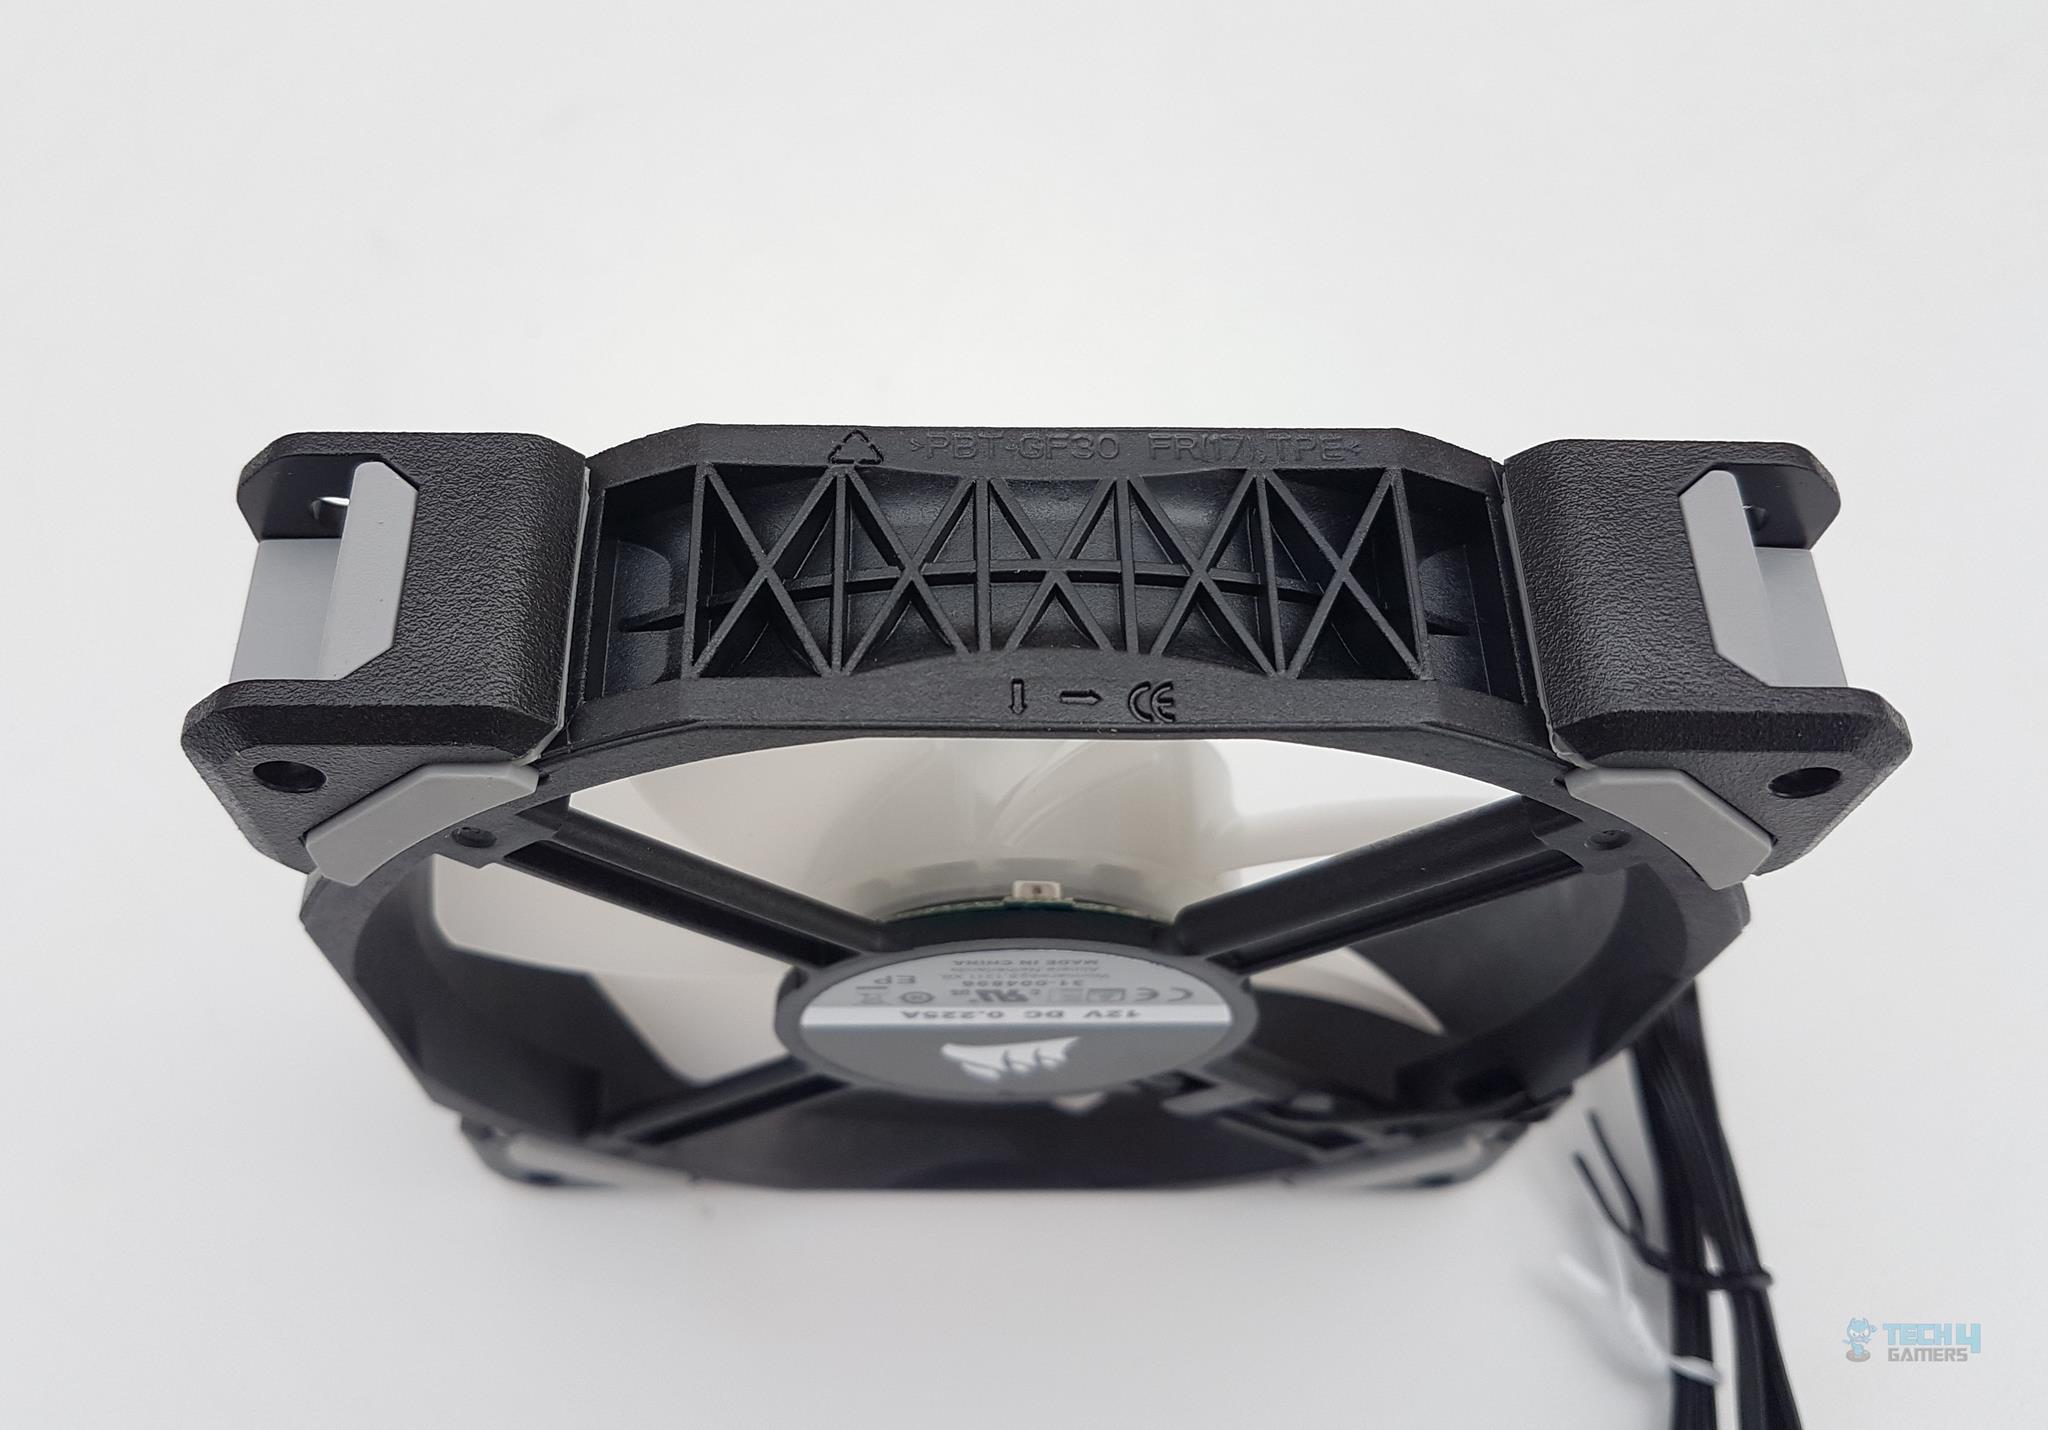
Now, here’s the style scoop – a matte black frame, 7 sleek white blades, and customizable black and gray corners. Big center, rocking the CORSAIR logo on a black sticker with 4 snazzy digital RGB LEDs. Those arrows on the side? They’re your guide to blade spin and airflow.
Built tough with PBT material, flip it around, and you’ll spot a sturdy 4-arm setup cradling the motor and blades. Oh, and a sticker in the center? It reps the CORSAIR brand logo and some crucial info. Proudly made in China, these fans are the real deal.
Installation
I have tested this cooler on the Intel LGA2011-V3 socket (X99) and AMD AM4 platform.
Below is the installation guide for Intel LGA 2011-V3:
- Install the LGA-2011 screws on the mounting holes around the CPU Socket.
- Intel brackets are pre-installed on this cooler.
- Install the fans on the radiator.
- Install the radiator in the chassis.
- Place the cooler on the CPU by aligning the holes on the mounting brackets with the LGA 2011 screws.
- Secure the cooler by using the thumbscrews. Use a screwdriver for this job and go diagonal for even pressure.
- Remove the Intel mounting brackets from the pump by sliding them out in the opposite direction.
- Install the AMD mounting brackets on the housing by sliding them inside from the opposite direction and snapping them together.
- Install the AMD clips on each end of the AMD mounting bracket using two thumbscrews (one for each side).
- The cooler will be installed on the AMD stock backplate.
- Place the block on the CPU by aligning the clips on the brackets with the latches or catchers on the stock backplate. Once placed, simply hand-tighten the screws to the full.
Common Steps
- Connect the 3-pin power cable to the CPU fan header/Pump/AIO header if available or any of your desired fan headers.
- Connect the female RGB connectors of the pump to the male RGB connectors of the fans.
- Optionally connect the 4-pin PWM connectors of the fans to the 2-way headers of the pump.
- Connect the SATA cable of the pump to the PSU.
- This would complete the installation.
Clearance And Installation Notes
The best thing about AIOs is the maximum clearance and compatibility concerning the chassis, DIMM slots, and PCIe slots. This cooler has no such clearance issue. The tubes are not blocking any DIMM slot and RAM modules of any height can be used.
Similarly, the block is not obstructing the first PCIe x16 3.0 slot. Make sure that the chassis has provision for a 240mm radiator mounting (277mm total length for this cooler) and clearance for 55mm height and you are good to go.
Lighting And Software
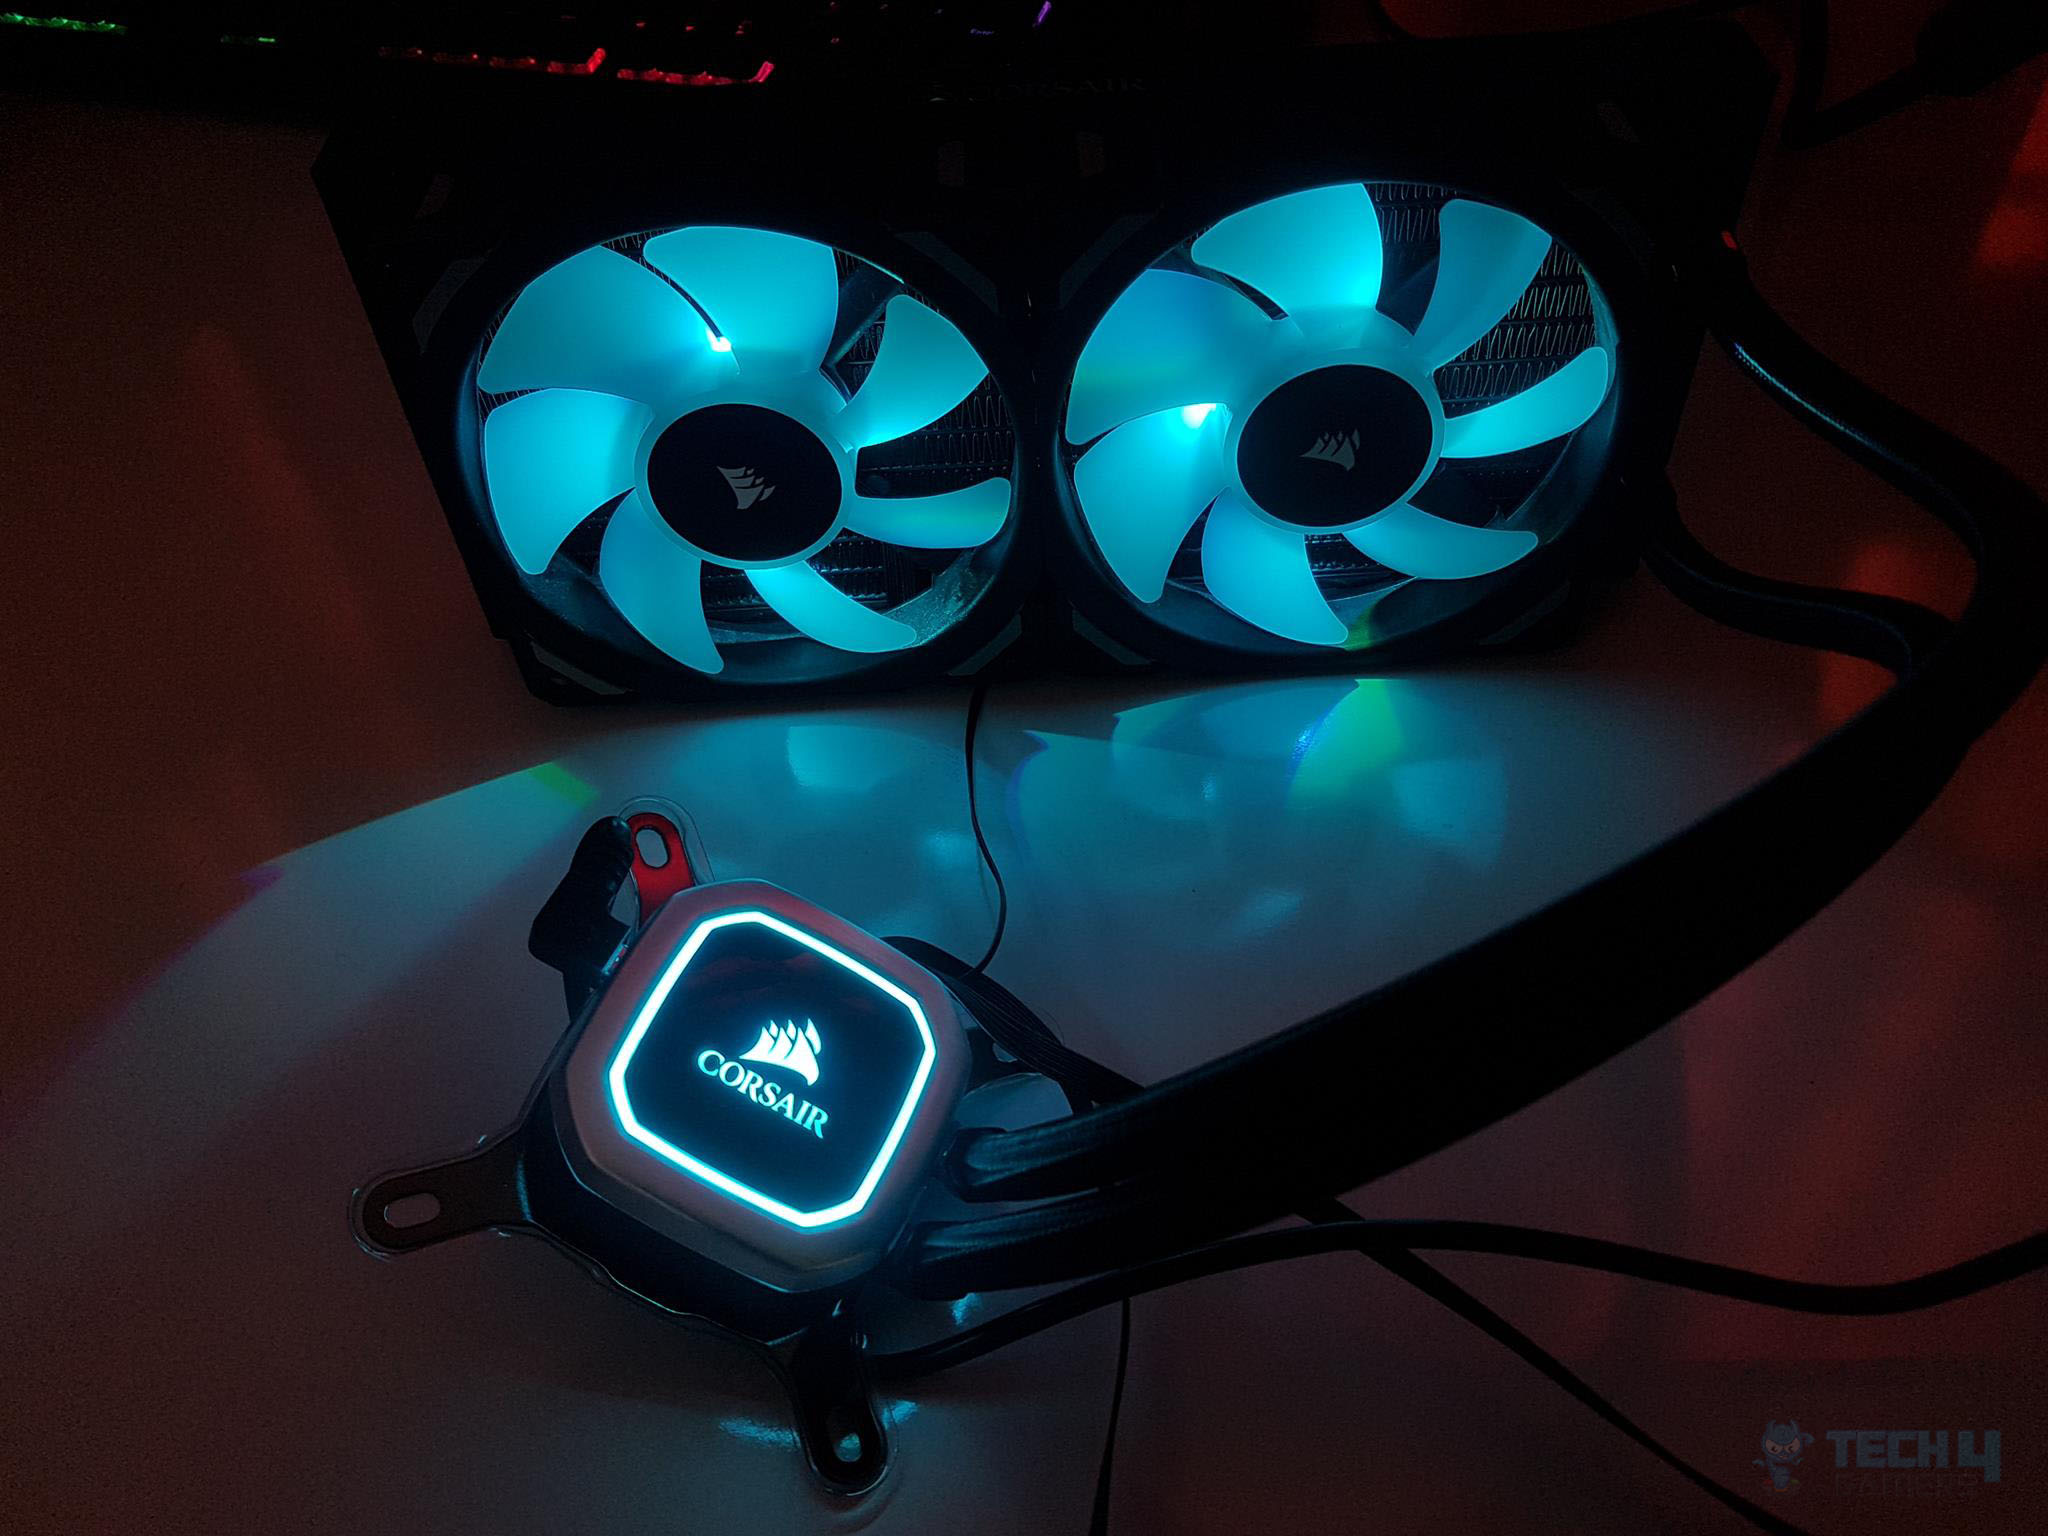
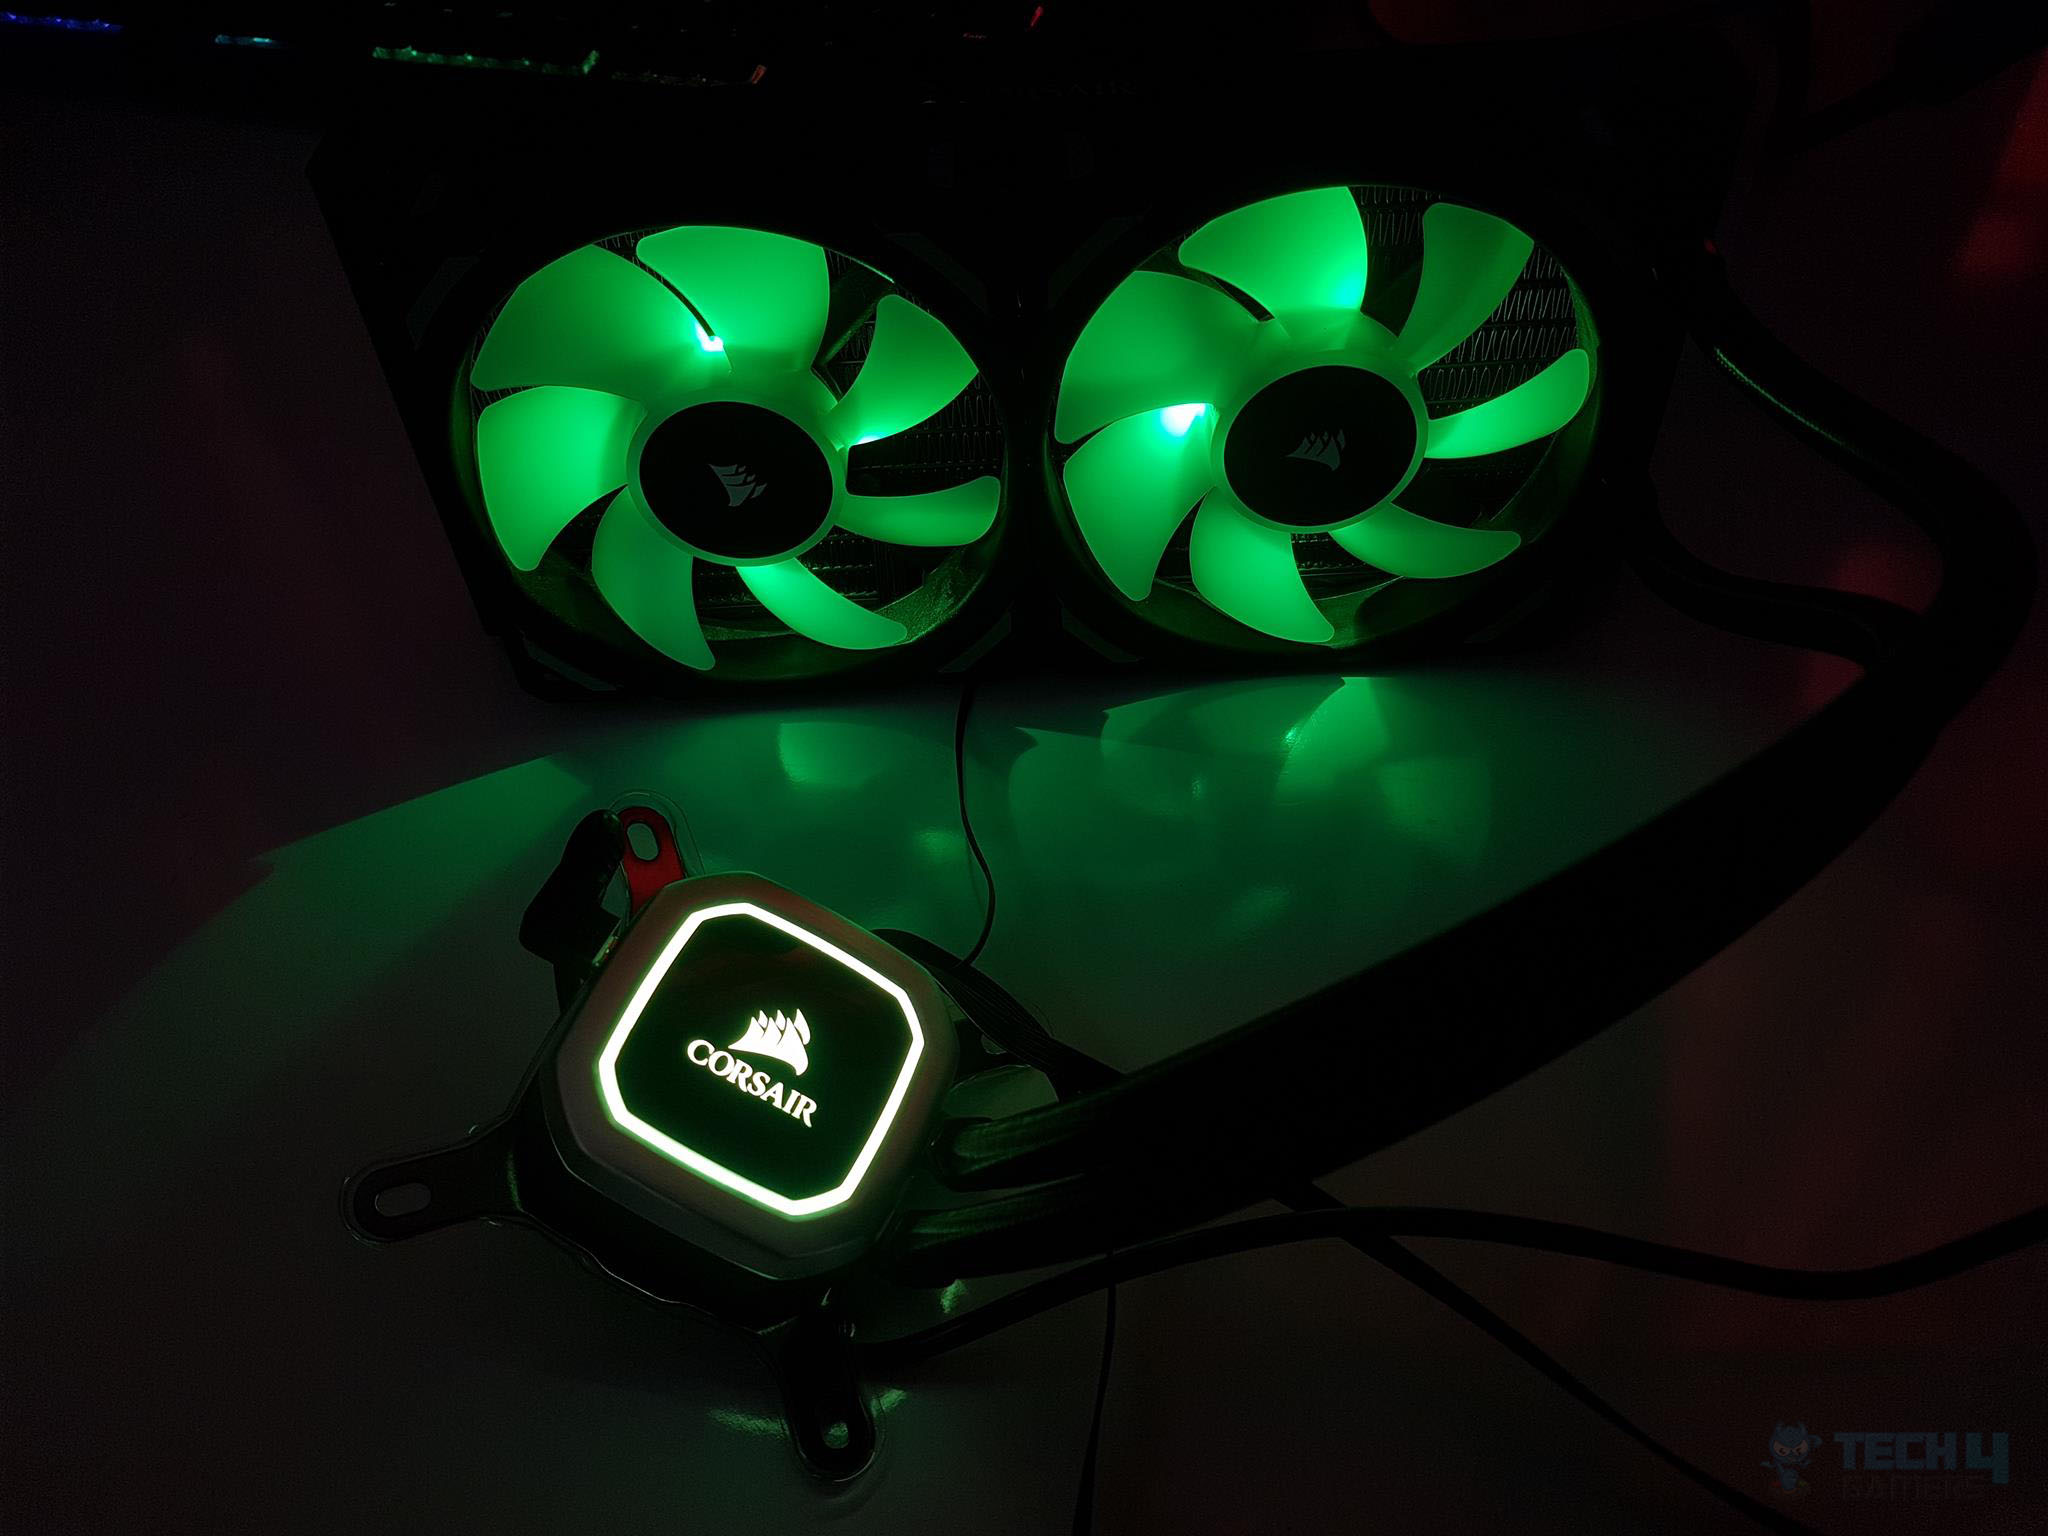
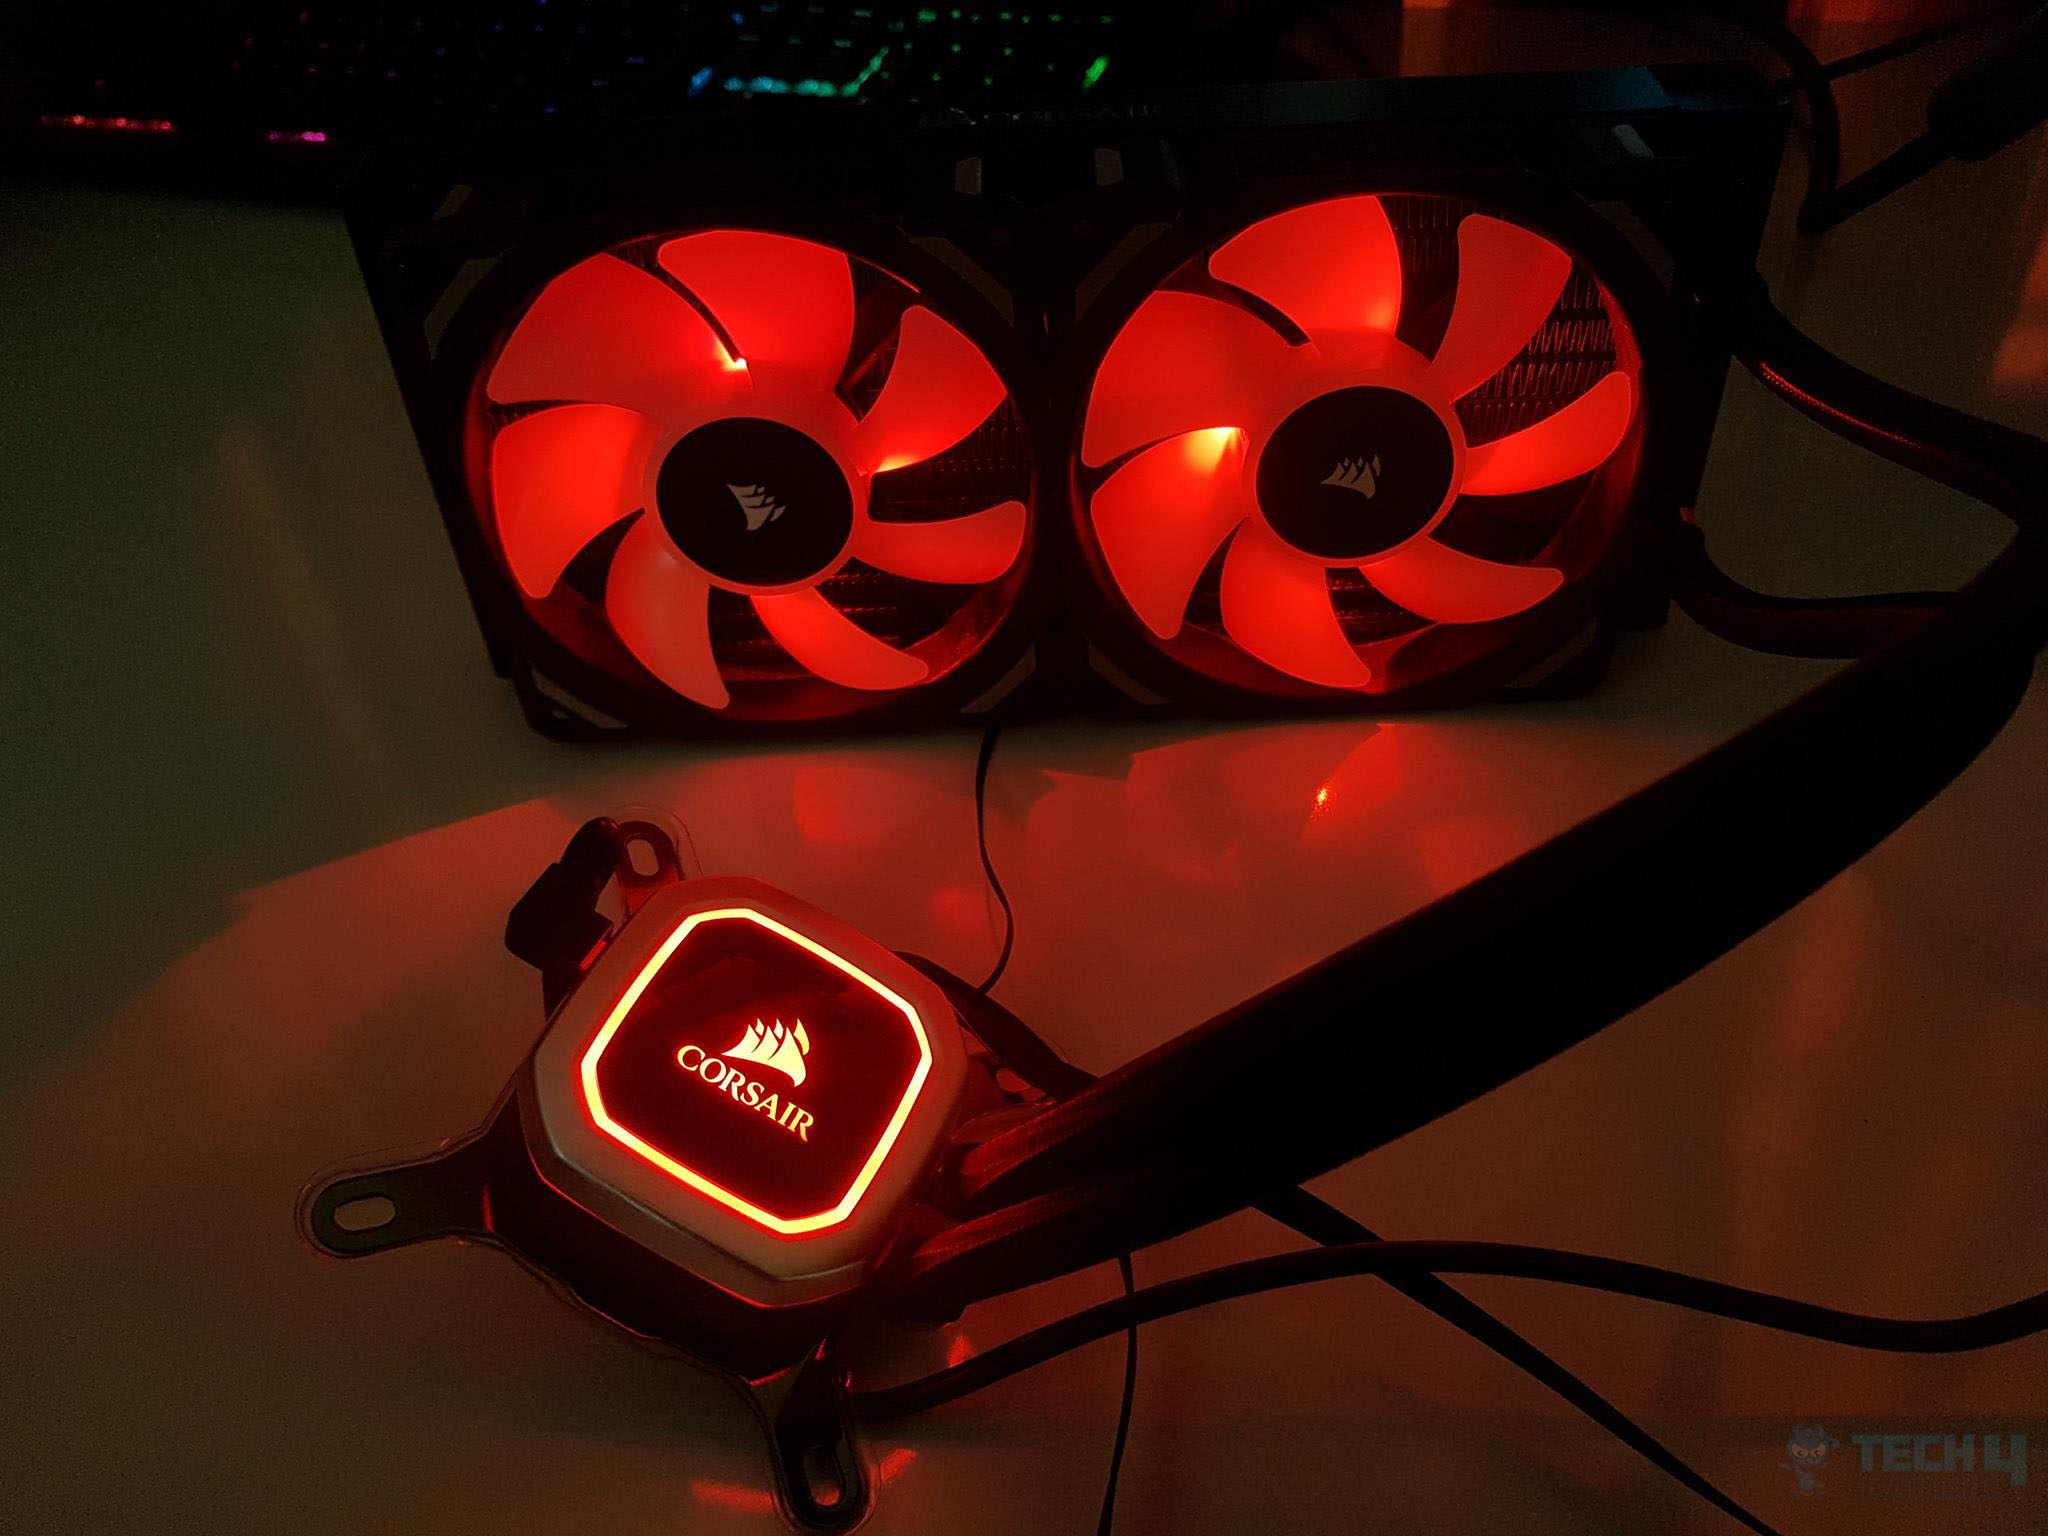
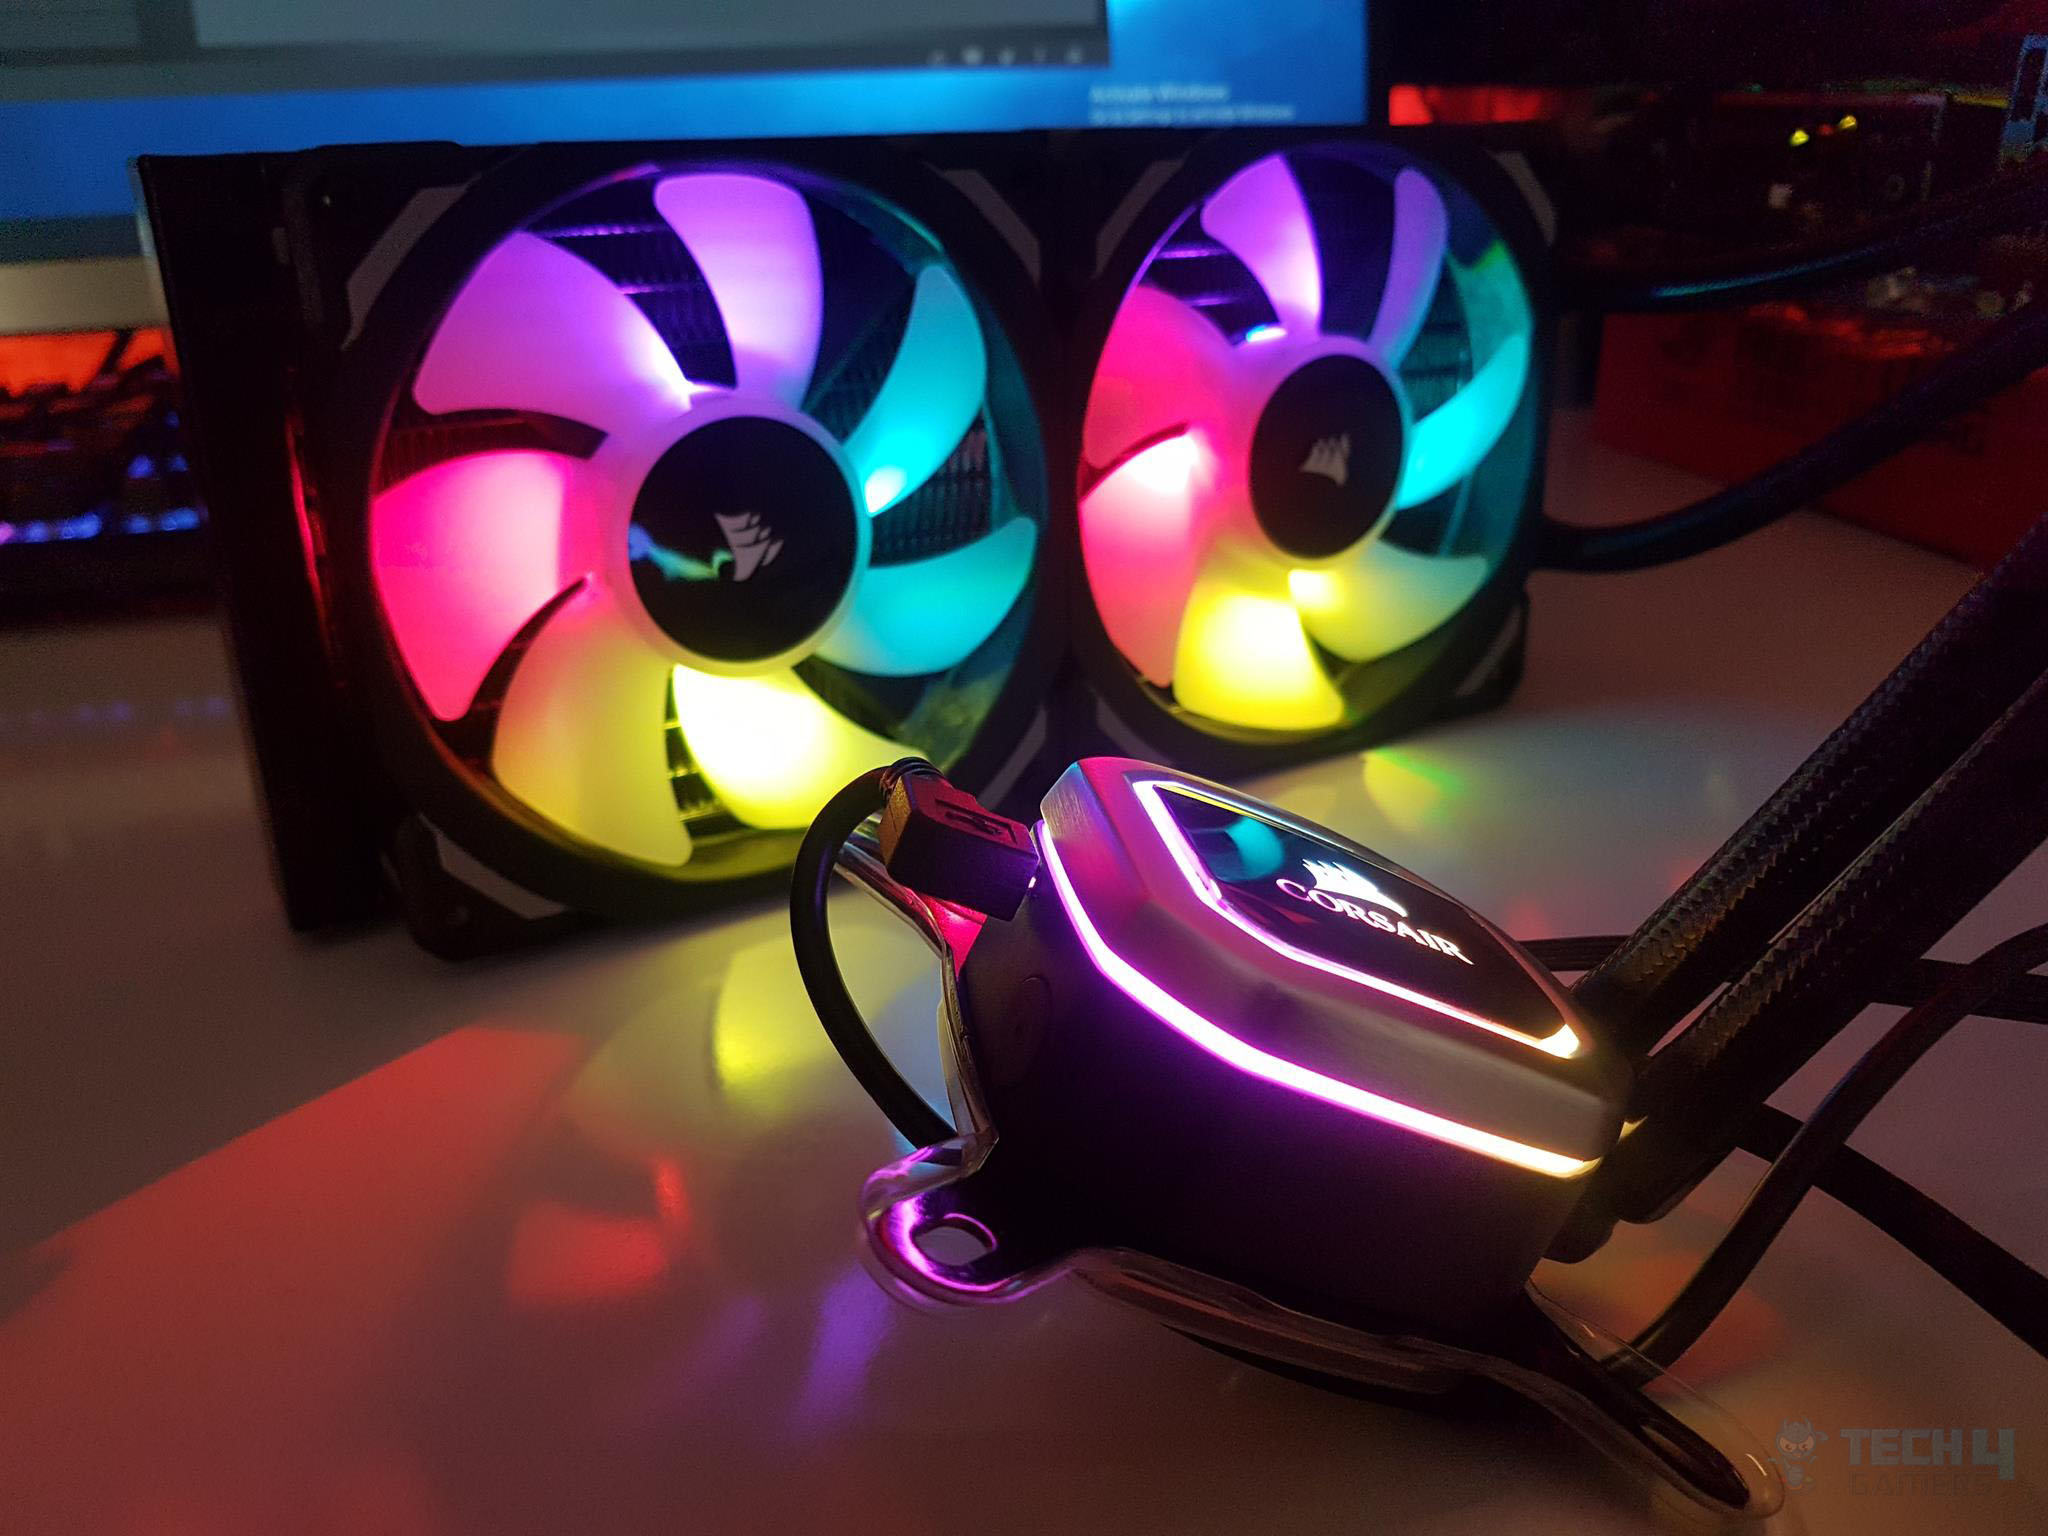
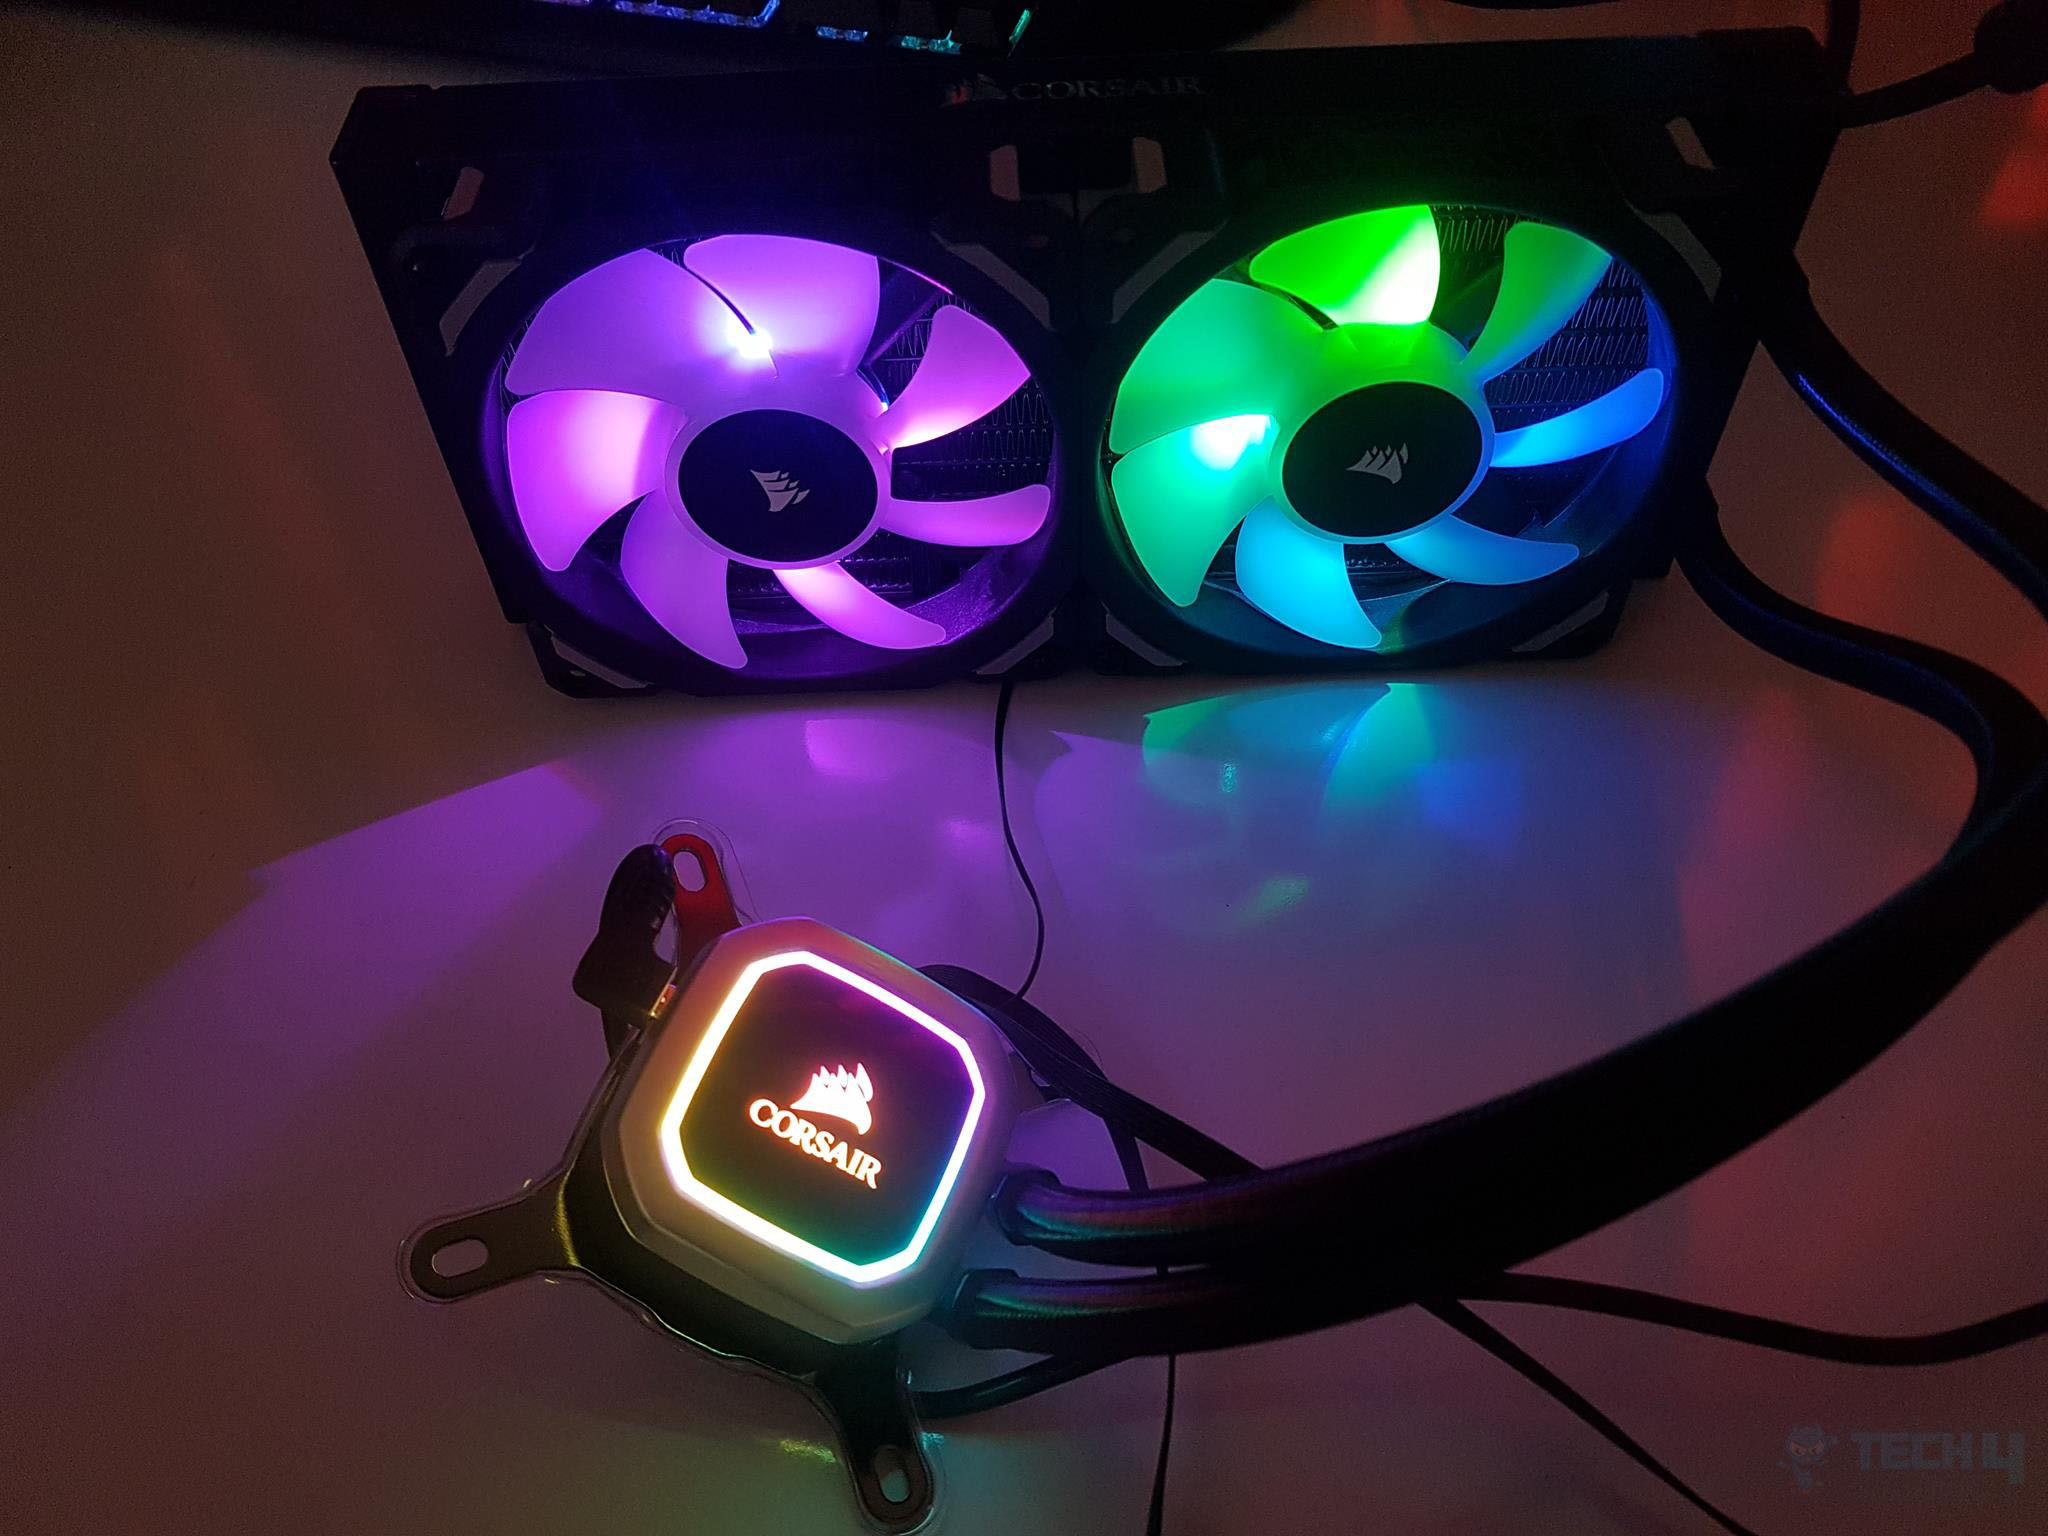
The CORSAIR H100i RGB PLATINUM packs multi-zone RGB lighting which creates some stunning and vivid effects. The overall lighting is not overly done and the ability to control each LED allows the users to create and customize their preferred lighting effects.
iCUE
Now, let’s talk control. To unleash the full potential of the pump and fans, grab the iCUE software from the CORSAIR website. Once downloaded, connect the bundled USB cable to the cooler and slot it into the handy 9-pin USB 2.0 header on your motherboard.
Once hooked up to the motherboard, Windows works its magic, automatically detecting and listing the unit in connected devices – just like the snapshot above.
In my setup, the CORSAIR H100i RGB Platinum and the CORSAIR Vengeance RGB Pro 16GB DDR4 kit popped up on the list. These snaps are hot off our AMD-based test bench, featuring CORSAIR-sponsored DDR4.
Click on the CORSAIR H100i RGB PLATINUM cooler pic, and – you’re on its default page. The block’s pic is front and center, showcasing the current lighting gig. Fan and pump speeds? Yep, they’re right there, ready for your tweaking pleasure.
To look for more control over the functionality of the fans and the pump, click on the Performance tab on the leftmost side. It will show the pre-defined 4 profiles, which are:
- Quiet
- Balanced
- Extreme
- Zero RPM
Zero RPM is a cool feature that pauses fans when thermal parameters are met; they resume once the thermal junction is crossed. Change profiles by clicking and setting for fans and pumps individually or on all devices.
Customize the fan curve or set a fixed speed. Graphing monitors speeds and parameters. Create notifications based on CPU temp, and tweak LED colors for defined thermal points. Your cooling, your way.
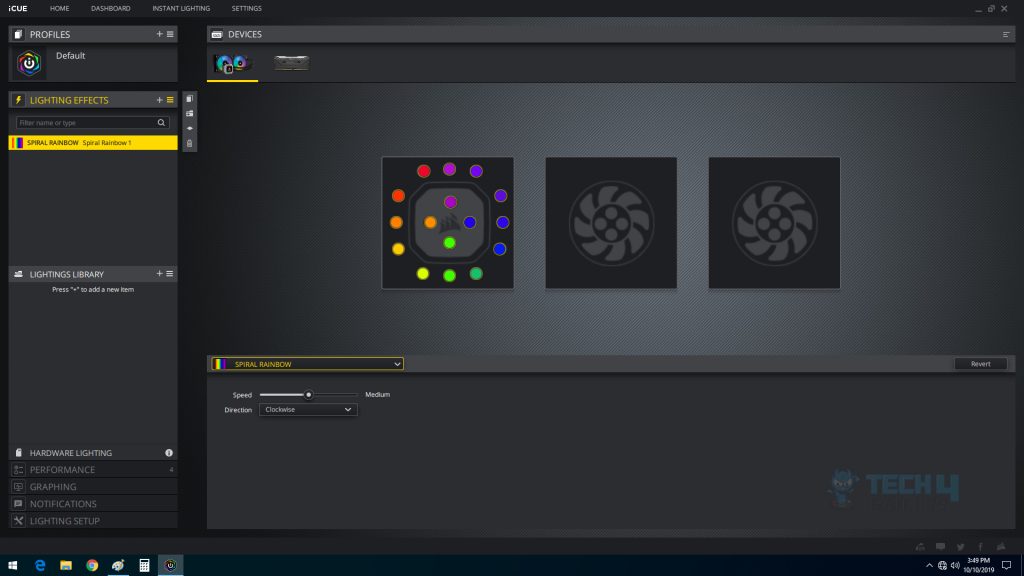
Dive into the lighting vibes by hitting up Lighting Effects. The pump, with its 16 LEDs, takes the spotlight, followed by the two fans flaunting 4 LEDs each.
Explore a world of possibilities in the dropdown list – a plethora of lighting effects at your command. Wanna get precise? Control all 24 LEDs individually. Feeling static? Set your favorite colors straight on the devices.
Benchmarks
The following test benches have been used:
- Asus Rampage V Edition 10
- Intel i7 6850k
- Corsair Vengeance RED LED 16GB @ 2666MHz
- GIGABYTE GeForce GTX 1060 6G Gaming G1
- Samsung 840 EVO 250GB SSD
- Thermaltake TP iRGB 1250W PSU
- PrimoChill Praxis WetBench
AMD Test Bench:
- Asus Strix X470-F Gaming
- AMD Ryzen 2700X
- Corsair Vengeance Pro RGB 16GB @ 3200MHz
- Colorful GeForce GTX 1050Ti Vulkan
- HyperX 120GB SSD
- Antec HCP1300
The following software was used for testing and monitoring.
- Asus Real Bench v 2.44 (Intel)
- Real Temp GT v 3.70 (Intel)
- AIDA64 6.0 (AMD)
Here is the settings table for testing:
| Intel | Stock Voltage (V) | 1.130 |
| Stock Clock (MHz) | 3600 | |
| OC Voltage (V) | 1.350 | |
| OC Clock (MHz) | 4300 | |
| AMD | Stock Voltage (V) | 1.1125 |
| Stock Clock (MHz) | 3700 | |
| OC Voltage (V) | 1.3250 | |
| OC Clock (MHz) | 4100 | |
| Turbo Boost | Disabled | |
| C-States | Disabled | |
| Speed Step | Disabled | |
| XFR/PBO | Disabled | |
| Thermal Paste | Noctua NT-H1 | |
| Test Run Time | 60 minutes | |
| Idling Time | 15 minutes | |
| Fan Speed | Set to run at 100% speed | |
| Pump Speed | Connected to the AIO Pump header to run at 100% speed | |
I have used Noctua NT-H1 thermal paste consistently across all coolers on the test bench to ensure standardized results. Delta temperatures are graphed, and testing is conducted on an open-air bench system, acknowledging potential temperature variations once inside a chassis due to airflow.
Results may vary due to factors like mounting pressure, thermal paste application, ambient temperature, and silicon differences among chips. Therefore, transparency in testing methodology and specifics is crucial.
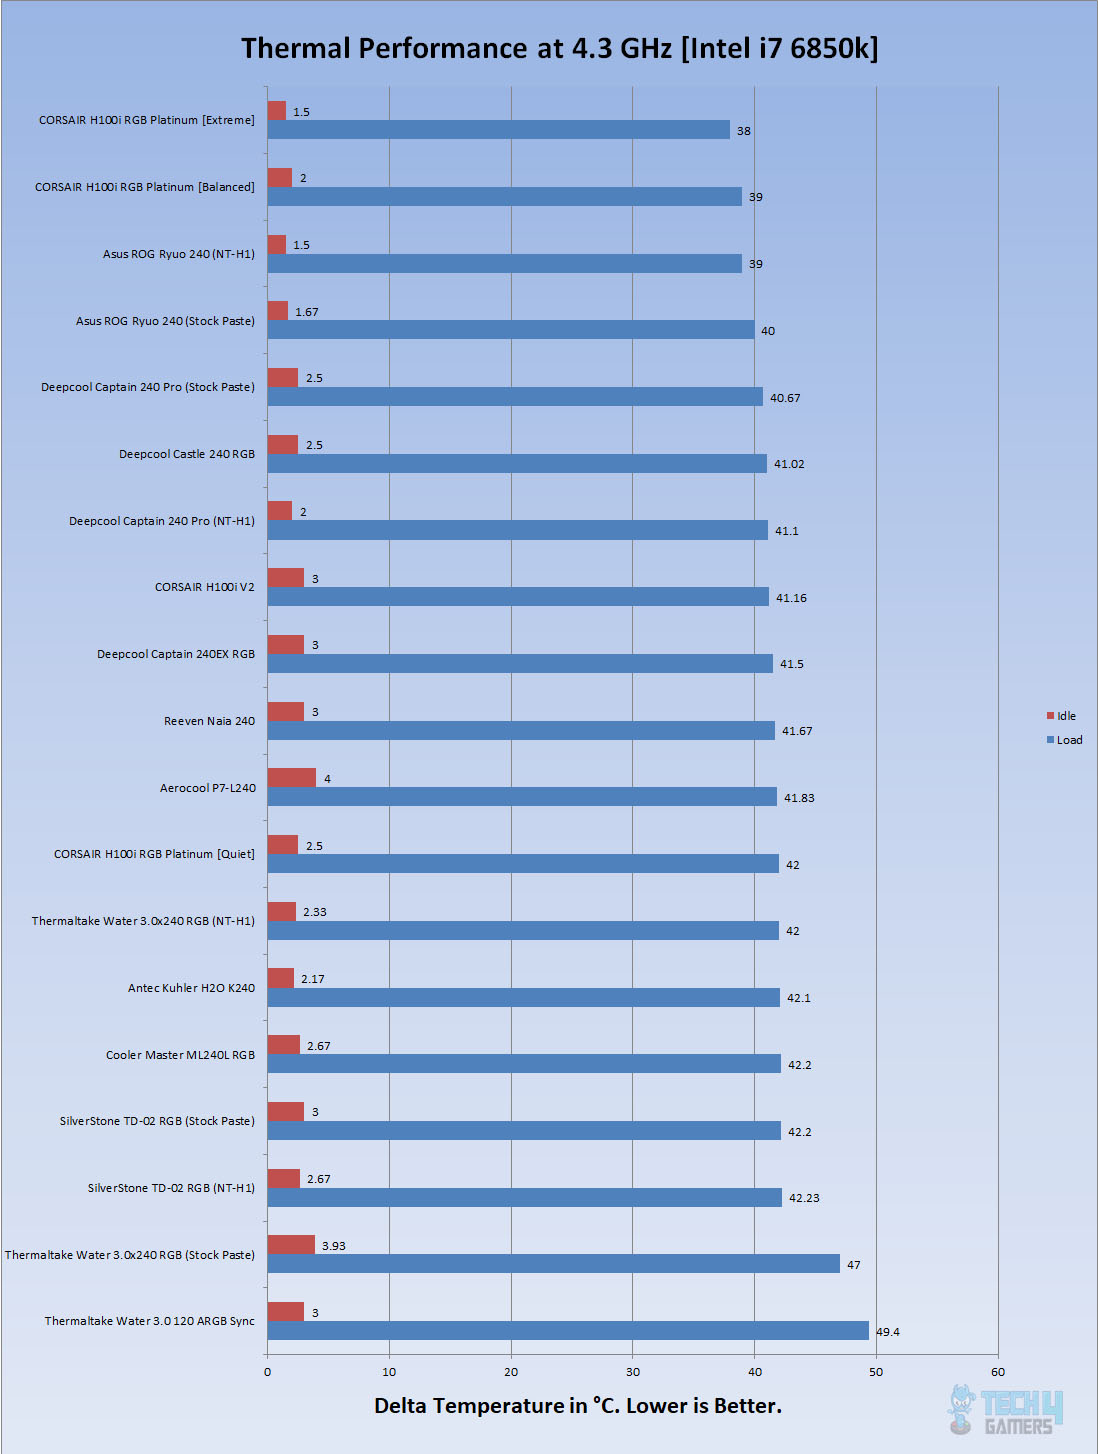
The CORSAIR H100i RGB PLATINUM underwent testing with Quiet, Balanced, and Extreme profiles/modes, overclocked on an Intel i7 6850k to 4.3GHz.
Thermal Performance
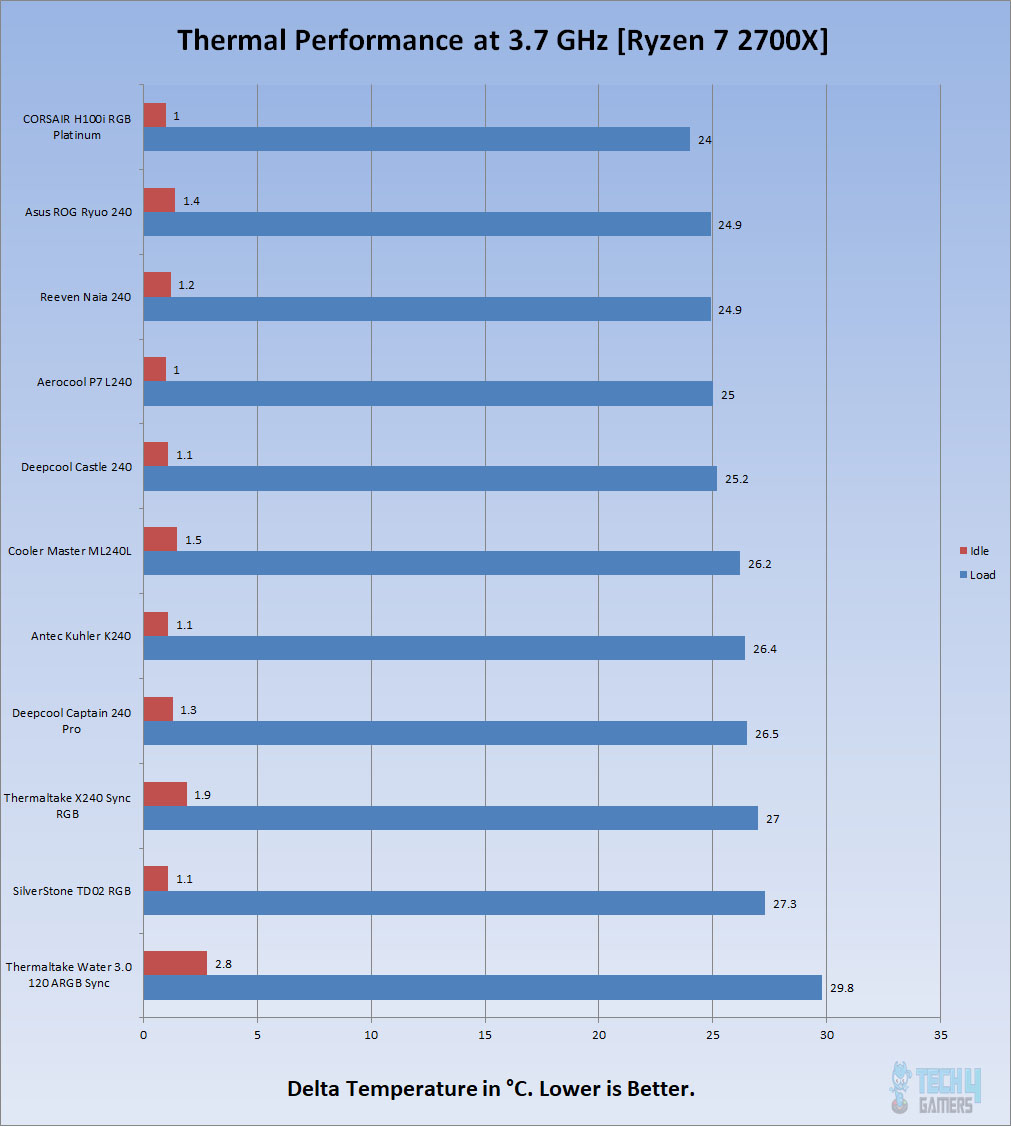
Let’s take a look at the results:
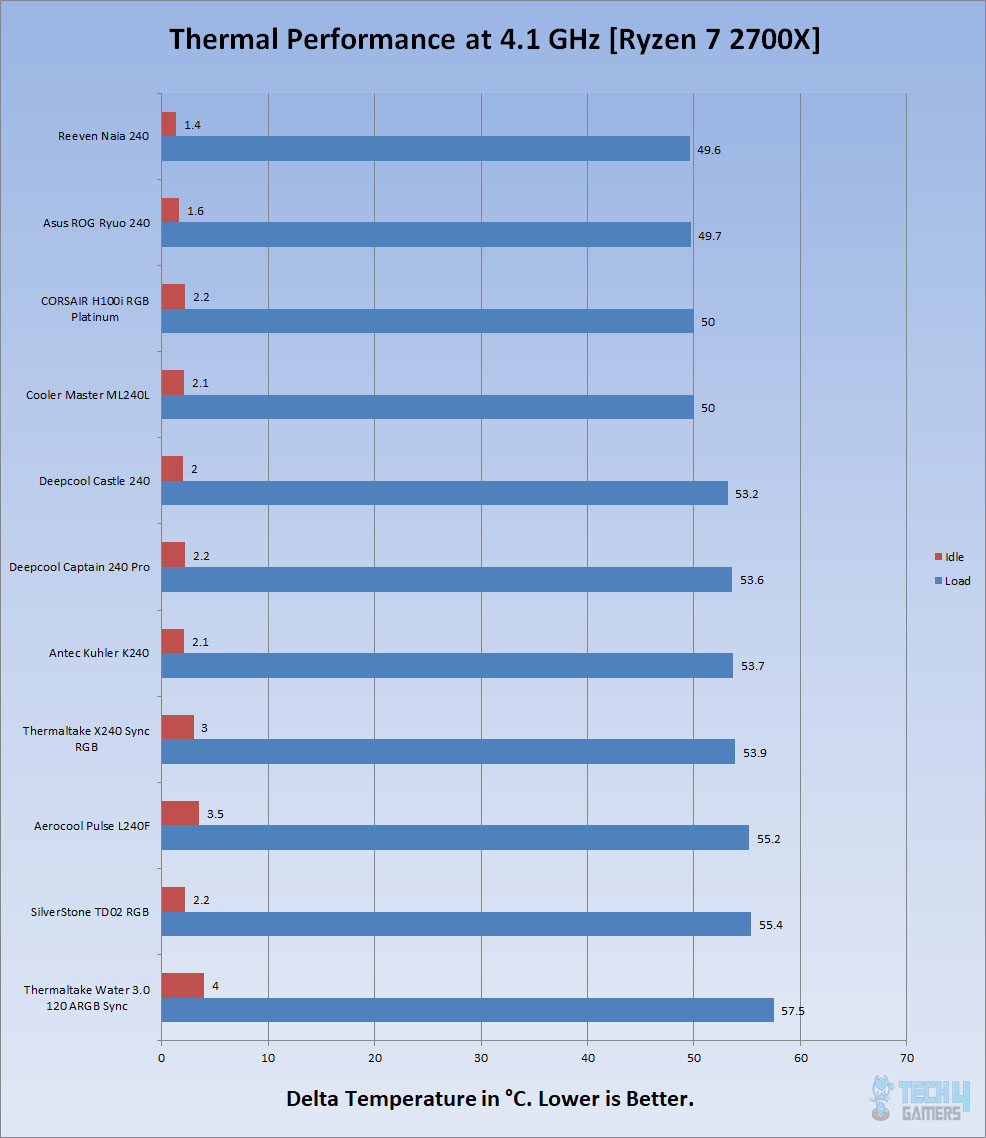
During testing, both UEFI/BIOS platforms displayed the pump running at a speed of around 52xx, with frequent fluctuations, even reaching 10000 RPM at one point. On the Extreme profile in iCUE, the reported maximum pump speed was around 29xx RPM.

Individually connecting fans to the motherboard’s PWM fan header (Asus Rampage V Edition 10) showed maximum speeds of 2352 RPM for one fan and 2335 RPM for the other, both slightly below the 2400 RPM mark. This variance might be due to manufacturing tolerances.
However, when connected to the unit, the fans reached higher speeds, hitting around 26xx RPM in the Extreme profile.
Acoustic
I could not measure the sound level of the unit due to uncontrollable environmental noise which would invalidate the actual sound level. Based on my experience with the fans and coolers testing so far, the ML120RGB fans were loud under the Extreme profile.
They were quiet under the Quiet mode. With a Balanced profile, the noise level was a bit reduced from the Extreme profile level.
Should You Buy It?
After thoroughly reviewing the Corsair H100i, who would I suggest this for:
Buy It If:
✅You prioritize top-notch cooling performance: The CORSAIR H100i RGB PLATINUM consistently performs well in thermal benchmarks, making it a solid choice for users who prioritize efficient cooling.
✅You prioritize Aesthetics: With 16 digital RGB LEDs on the pump and four LEDs on each fan, the H100i RGB PLATINUM offers vivid and customizable lighting effects.
✅Compatibility with various CPU sockets: Whether you have an Intel LGA115X/20XX or AMD’s AM4/3/2/FM2 and TR4 sockets, the cooler has you covered.
Don’t Buy It If:
❌Noise levels are a concern: While the cooling performance is excellent, the ML120 RGB fans can be loud at higher speeds. If noise is a significant factor for you, consider a quieter alternative.
❌You are not interested in extensive RGB customization: If RGB lighting is not a priority for you and you’re looking for a more straightforward cooler without the need for complex lighting control, there are simpler alternatives in the market.
Conclusion
In conclusion, my journey with the CORSAIR H100i RGB PLATINUM has been nothing short of impressive. Having extensively tested it on both Intel and AMD platforms, this cooler has consistently delivered top-notch cooling performance, earning it a well-deserved spot among the best CPU coolers for various processors.
The sleek design of the RGB PLATINUM series, coupled with the stunning RGB lighting effects, adds a vibrant touch to any setup. The aluminum radiator, braided hoses, and thoughtfully designed pump housing contribute to both aesthetics and functionality.
Installation is a breeze, thanks to the comprehensive accessory kit provided in the box. CORSAIR’s attention to detail is evident in the user-friendly packaging, ensuring a hassle-free unboxing experience.
While the noise levels can be on the higher side, especially under extreme profiles, the ability to customize fan curves through the iCUE software allows users to find a balance between performance and acoustic comfort.
In the realm of liquid coolers, the CORSAIR H100i RGB PLATINUM stands out, offering compatibility with a range of CPU sockets, robust build quality, and efficient cooling capabilities.
Awards Received By CORSAIR H100i RGB PLATINUM
Here are the Tech4Gamers awards received by CORSAIR H100i:
Recent Updates
- December 15, 2023: A few text changes to improve readability.
Thank you! Please share your positive feedback. 🔋
How could we improve this post? Please Help us. 😔
[Hardware Reviewer & Editor]
Meet Nauman Siddique, a highly experienced computer science graduate with more than 15 years of knowledge in technology. Nauman is an expert in the field known for his deep understanding of computer hardware.
As a tech tester, insightful reviewer, and skilled hardware editor, Nauman carefully breaks down important parts like motherboards, graphics cards, processors, PC cases, CPU coolers, and more.
- 15+ years of PC Building Experience
- 10+ years of first-hand knowledge of technology
- 7+ years of doing in-depth testing of PC Hardware
- A motivated individual with a keen interest in tech testing from multiple angles.
- I majored in Computer Science with a Masters in Marketing
- Previously worked at eXputer, EnosTech, and Appuals.
- Completed Course in Computer Systems Specialization From Illinois Tech
Get In Touch: nauman@tech4gamers.com


