- The error may arise due to corrupt files, inaccurate system settings, disabled location services, and more.
- Allow location access, enable Windows Location Provider, and tweak Group Policy to solve the issue.
- Do not mess unnecessarily with the Registry Editor and Group Policy settings. If something goes wrong, the system may malfunction.
Method Difficulty Rating
Rated: 3/10
Rated: 6/10
Rated: 6/10
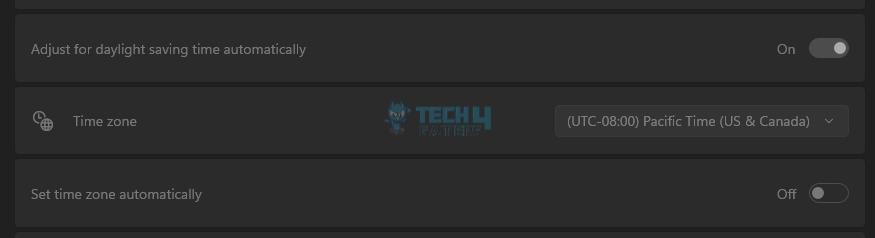
Try power cycling the PC and updating Windows before moving on to other fixes.
Allow Location Access
It is necessary to give the computer permission to track your location for better performance and uninterrupted usability of its features. I believe it is an invasion of privacy if a user is forced to enable their location to use basic Windows features, such as the time zone settings.
Nonetheless, turn on the location services in the Settings interface, which will ultimately fix the problem as it did for others in the Microsoft Community. So, enable apps and Windows to access your physical location via the following technique.
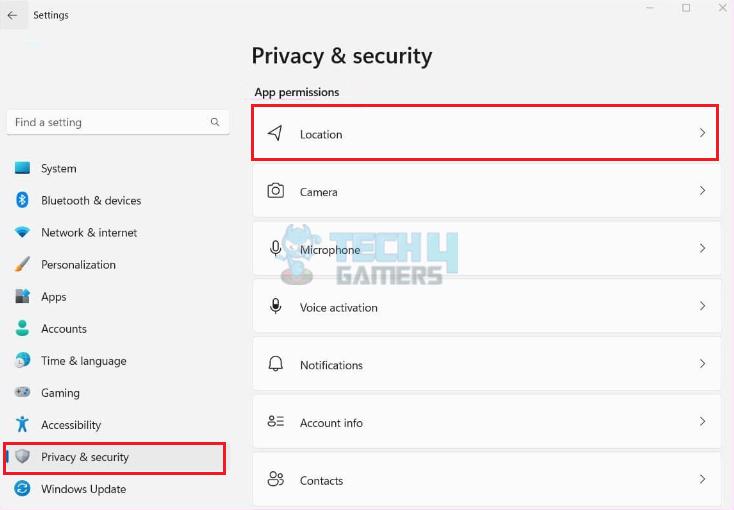
- Head To Location Menu: Launch the Settings > Highlight Privacy And Security on the left > Location.

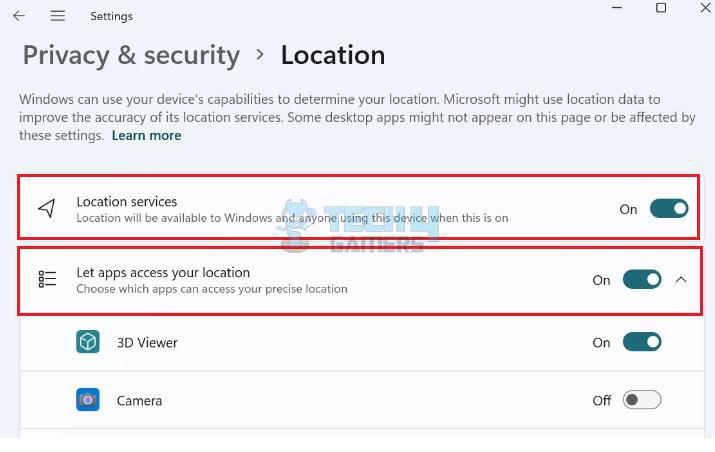
Select Location Settings (Image By Tech4Gamers) - Enable Location Access: Turn on Location Services and Let Apps Access Your Location features via the respective toggle switches > Restart the computer.

Turn On Location (Image By Tech4Gamers)
Use The Windows Registry Editor
Registry Editor contains the user configurations and other settings related to the OS and its installed apps. You can change the system/app permissions and other features by tweaking the relevant registries.
Hence, using the Registry, I set the computer’s time and date settings based on the current location data. After making the necessary changes, I performed a restart and got the time zone option back in my control.
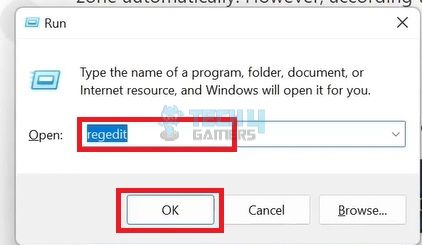
- Execute Run Code: Simultaneously press Windows+R > Type regedit > OK.

Type regedit (Image By Tech4Gamers) - Type Address: In the Registry Editor, enter the address in the search bar:
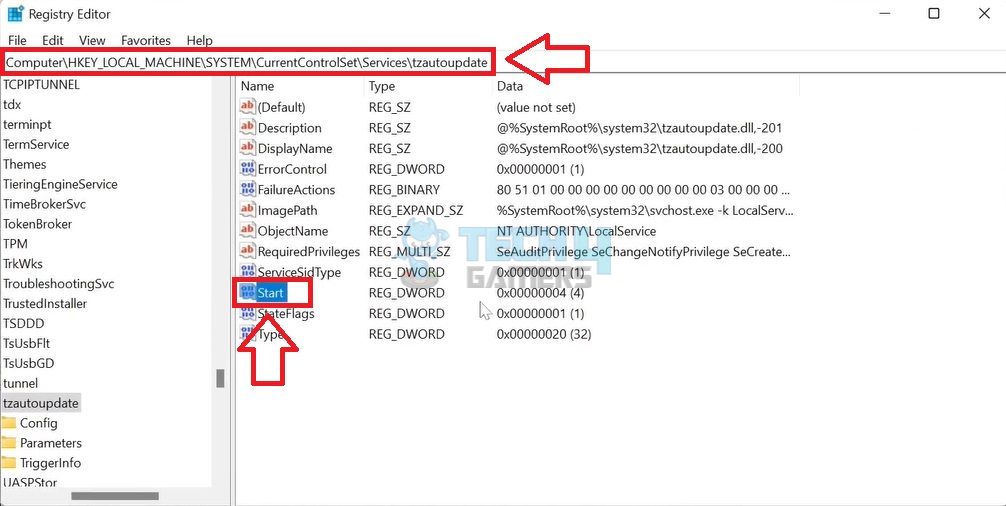
Computer\HKEY_LOCAL_MACHINE\SYSTEM\CurrentControlSet\Services\tzautoupdate
- Locate Start DWORD: Find Start and double-click on it.

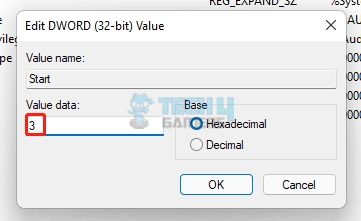
Select Start (Image By Tech4Gamers) - Modify Value Data: Change the Value Data to 3.

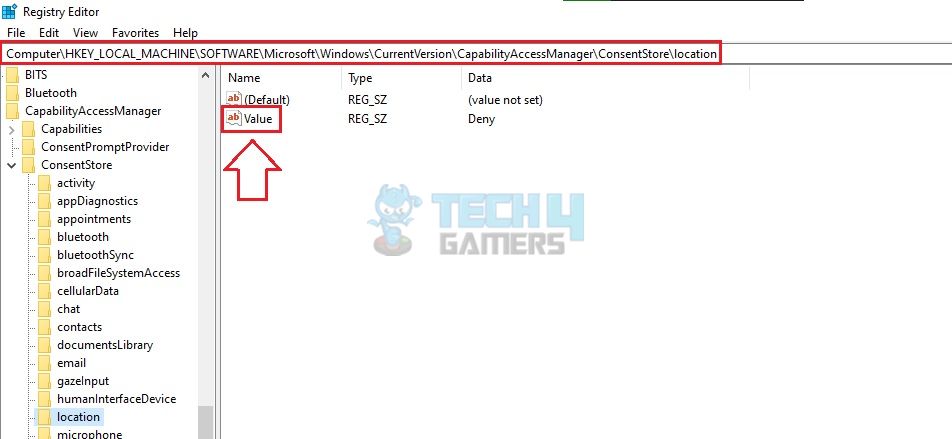
Change Value Data (Image By Tech4Gamers) - Get Location Update: Next, verify if the computer is allowed to access your current location. Go to the search bar and write:
Computer\HKEY_LOCAL_MACHINE\SOFTWARE\Microsoft\Windows\CurrentVersion\CapabilityAccessManager\ConsentStore\location
- Select Registry: Double-click Value.

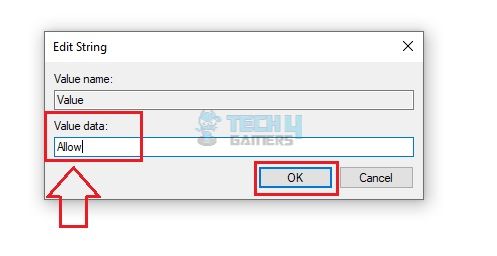
Press Value (Image By Tech4Gamers) - Allow Location Access: Set it to Allow > OK.

Resort To Local Group Policy
The Local Group Policy is a database of different policies that you can use to configure system behavior. By altering the location-related settings to Not Configured or Disabled for the particular policy, the programs can use Windows Location Provider to fetch your computer’s current location.
During my research, I found this method in Microsoft Learn initially tailored for Windows 10, but I tested it on Windows 11, and the results were positive.
- Search In Run Box: Again, open the Run > Execute gpedit.msc.
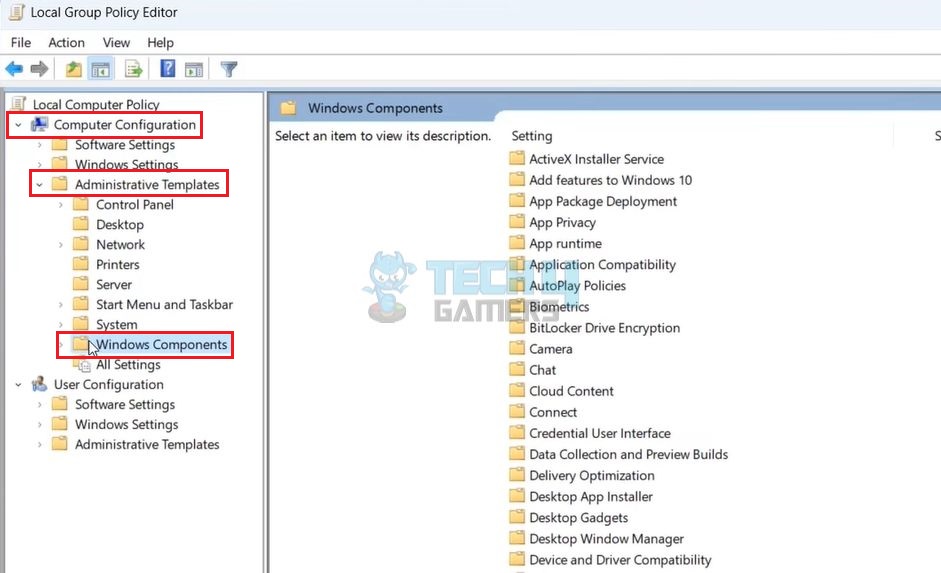
- Navigate To Windows Components: Go to Computer Configuration > Administrative Templates > Windows Components.

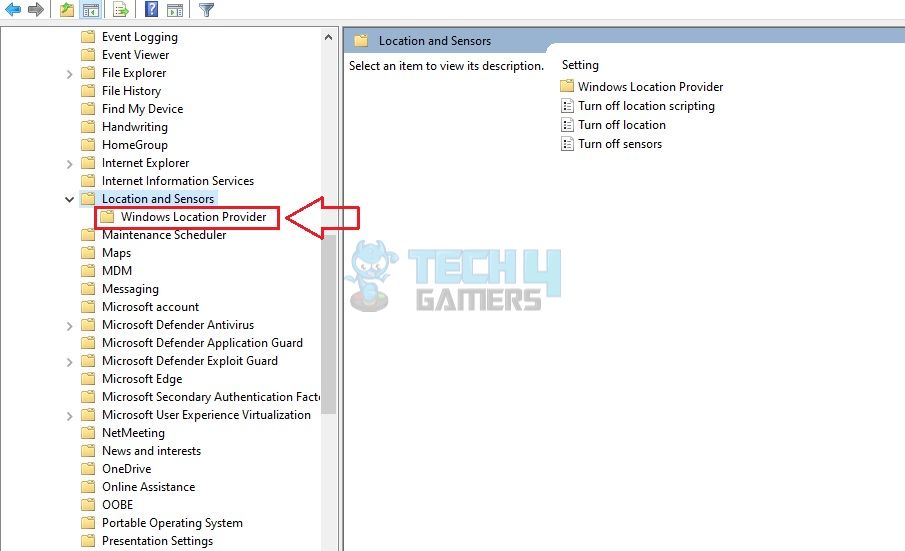
Navigate To Windows Components (Image By Tech4Gamers) - Pick The Setting: Choose Location And Sensors > Windows Location Provider.

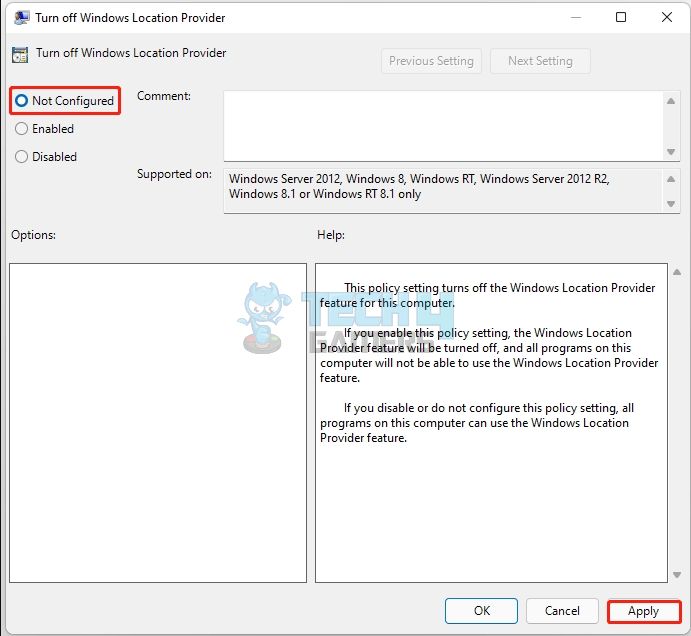
Choose Location Provider (Image By Tech4Gamers) - Choose Relevant Policy: Double-click on Turn Off Windows Location Provider.

Turn Off Location Provider (Image By Tech4Gamers) - Authorize Windows Location Provider: Modify to Not Configured by marking the circle beside it > Apply > OK.

Mark Not Configured (Image By Tech4Gamers)

Final Words
This has been a recurring problem for users across Windows 11, as seen in threads on Reddit and Tech Support Forum. Still, there has been no official response by Microsoft to tackle the user complaints.
Plus, Windows 10 users experienced the same issue and had to resort to workarounds similar to those mentioned above to change the time on their computers.
Until the company releases newer patches aimed at solving the time zone greyed-out issue in Windows 11, use the solutions I discussed since they were effective for me and my team in bringing back the control over time settings.
Ensure that time-related Services are running properly, modify Registry settings, or enable location services to change the time zone. Incorrect computer settings, faulty cache/user profile, restrictive location access, and Group Policies are some reasons for this error. Reach out to Microsoft Support or take your computer to a technician to diagnose the underlying problem.Frequently Asked Questions
Other Errors In Windows 11:
- How To Fix Shift F10 Not Working In Windows 11
- How To Fix Device Settings Not Migrated On Windows 11?
- 4 Ways To Fix Docker Desktop Starting Forever In Windows 11
- Windows 11: Computer Won’t Wake Up From Sleep [SOLVED]
- SOLVED: Bluetooth Keeps Disconnecting In Windows 11?
Thank you! Please share your positive feedback. 🔋
How could we improve this post? Please Help us. 😔
[How To Guides Specialist]
Dayan Shahid is a skilled mechanical engineer passionate about technology. With certifications in various programming languages and subjects ranging from microcontrollers to aerial robotics, Dayan can effortlessly present complex technical topics in an engaging way. His ability to bridge the gap between theory and practical applications sets him apart as he continues to inspire others through their insightful content.