The Dell Command Update is a popular software among the Dell community. Windows 11 users may find it of great help once they install it on their PCs. Knowing how much the software offers its users will be much to miss. Therefore, learning all you can about Dell Command Update for Windows 11 is better.
Key Takeaways
- Dell Command Update in Windows 11 is a software that is an all-in-one space for updates of every Dell-related component.
- It offers features like Update history, setting periods for automatic updates, and a system information list.
- Users may encounter incompatibility issues at times.
What’s Dell Command Update In Windows 11?
The Dell Command update is software provided by Dell to its users. The software is an all-in-one space for Dell components’ and drivers’ updates. Dell command update offers users multiple features, including the following.
- It gives users the option to update their drivers. The drivers could be for any component. They can also be used to replace the outdated drivers in your PC. Moreover, the Dell command update lists all available driver updates so users can easily install them.
- It also provides users with regular BIOS updates to improve system stability and performance consistently.
- Hardware components of the PC are also provided with firmware updates. Therefore, you can update components like hard drives, SSDs, and GPU.
- It provides regular updates for any Dell peripherals that you have as well.
- Any Dell-supported software will also have its updates available in the Dell command update.
- It is a hub for managing a person’s Dell devices, allowing them to update their devices and make custom changes to the settings according to their liking.
Also Read: Windows 11 Stuck On Restarting Screen
How To Install Dell Command Update In Windows 11?
Here’s how you can install the Dell Command update in Windows 11:
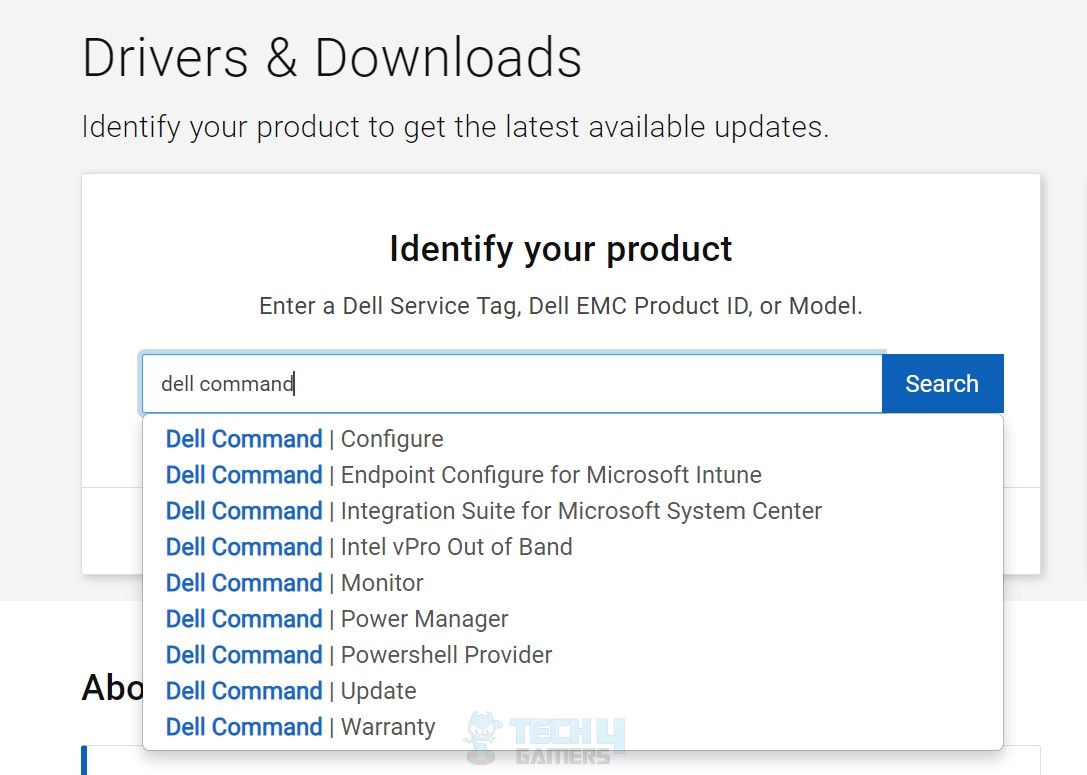
- Head to the Dell’s ‘Drivers and Downloads‘ link and search for ‘Dell Command | Update.’
Search for ‘Dell Command | Update.’ – Image credits (Tech4Gamers) - Download the software that appears after searching it up.
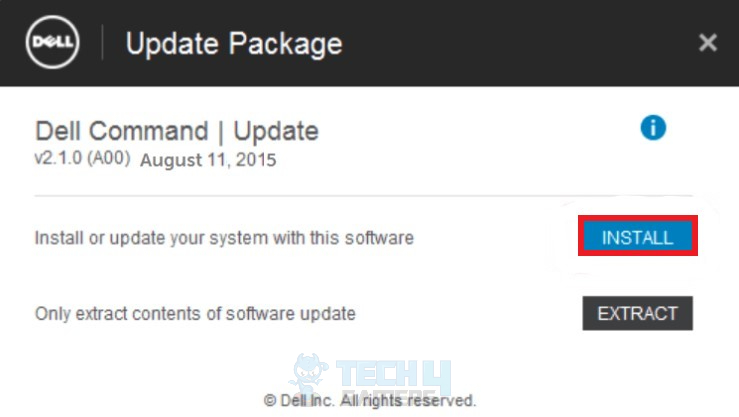
- Click ‘Install’ once you are shown the ‘Update Package’ to proceed with further software setup.
Click on ‘Install.’ – Image credits (Tech4Gamers) - Click on ‘Finish’ once you are done installing the software.
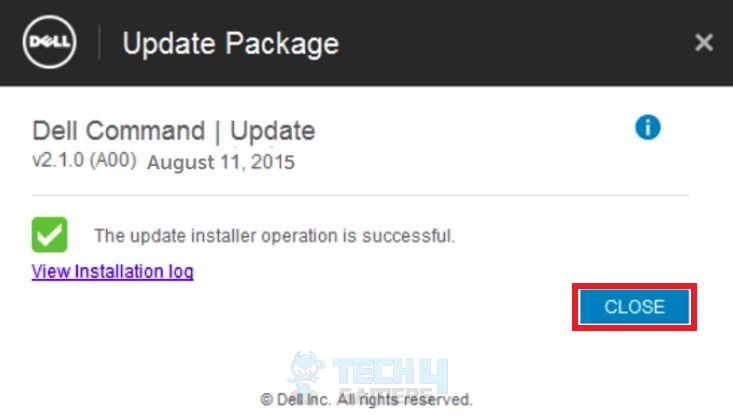
- Close the ‘Update Package’ window.
Click on ‘Close.’ – Image credits (Tech4Gamers) - Open the Dell Command Update app.
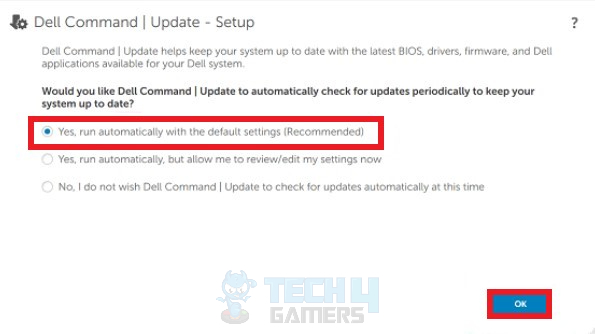
- Initiate the further setup by selecting ‘Yes, run automatically with the default settings (Recommended).’
Select the first option. – Image credits (Tech4Gamers) - Click ‘OK’ to confirm.
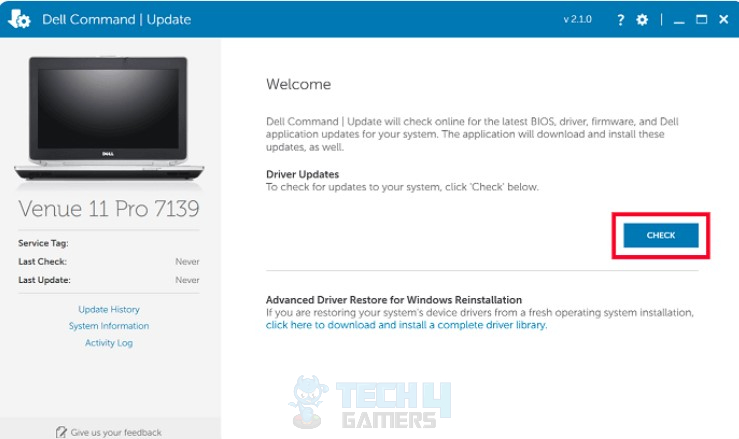
- Once you’ve accessed the software, click the ‘Check’ tab. This will scan your PC and look for any required updates.
Check for updates. – Image credits (Tech4Gamers) - Once the software is done scanning, it will display you with the updates available. From the updating options, choose ‘Recommended Updates.’
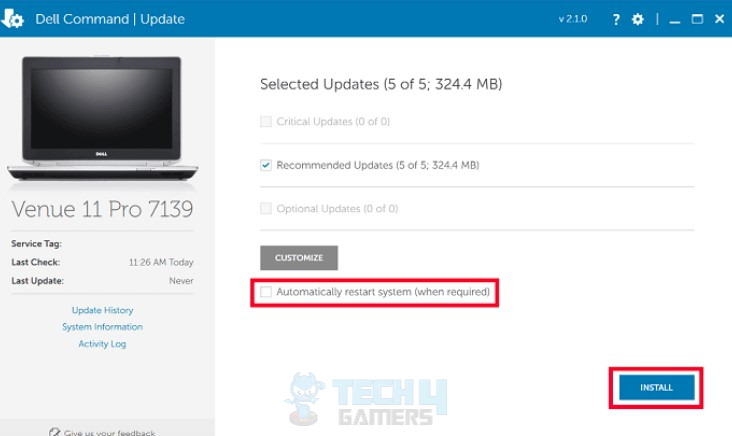
- Select the option below, ‘Automatically restart computer (when required).’
Install the available updates. – Image credits (Tech4Gamers) - Click on ‘Install’ to begin updating your Dell PC.
What Else Does The Dell Command Update Offer?
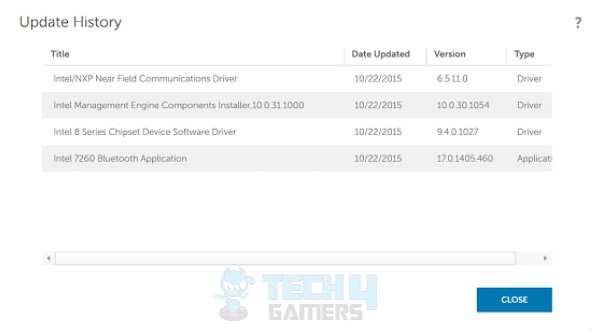
The Dell Command Update software is not limited to updating your Windows 11. Moreover, after a thorough research, I have found some useful features the software offers its users. These features can be very handy.
Firstly, the software lets users list every update installed on the PC. Users can easily look up the ‘Update History‘ by clicking on its tab in the left panel of the application.
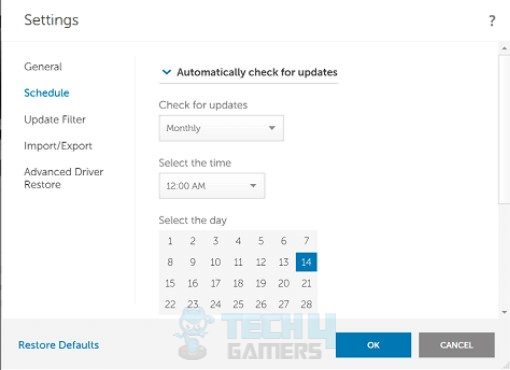
Secondly, many users have trouble remembering to update their PCs regularly. Therefore, Dell has a feature that sets periods to update the PC to offer them ease. Users can set the period they want, and the Dell Command Update software will automatically install the update once it passes.
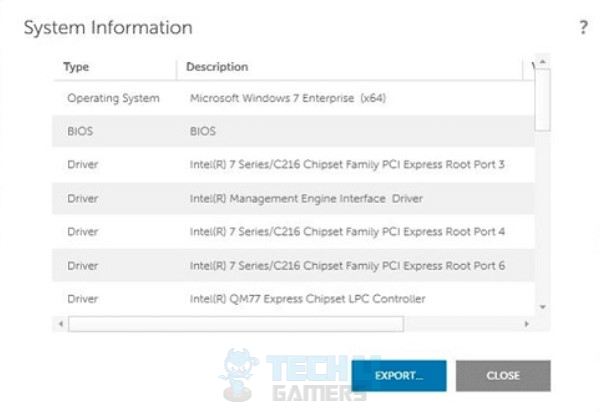
Lastly, it stores all the essential information regarding drivers’ firmware and BIOS versions. Knowing how information like this is scattered all over the PC and is a hassle to find, users might find it convenient for it to be listed and stored in one place.
Also Read: How To Turn Off Mouse Acceleration In Windows 11
What Are Some Issues Users Might Face With Dell Command Update?
Although the software is a great help, some users might have difficulties or face issues using the app. Firstly, many users have reported that the software isn’t very compatible with the latest Windows 11 version. Unfortunately, users may have to switch to the older version to fix this issue by uninstalling the update.
Moreover, the software may have compatibility issues with the hardware. Not all hardware components of the PC may be supported by the software. This will cause the users to be unable to update those components or peripherals. Not all driver updates are guaranteed to give you a better and smoother performance.
Sometimes, the software may update the drivers to what may not be compatible with the hardware installed on the PC. This may cause hardware to either function poorly or not function at all.
Important: Always keep your drivers updated for smooth flow of operations.Also Read: Windows 11 Error “No Such Interface Supported”
Thank you! Please share your positive feedback. 🔋
How could we improve this post? Please Help us. 😔
[Wiki Editor]
Ali Rashid Khan is an avid gamer, hardware enthusiast, photographer, and devoted litterateur with a period of experience spanning more than 14 years. Sporting a specialization with regards to the latest tech in flagship phones, gaming laptops, and top-of-the-line PCs, Ali is known for consistently presenting the most detailed objective perspective on all types of gaming products, ranging from the Best Motherboards, CPU Coolers, RAM kits, GPUs, and PSUs amongst numerous other peripherals. When he’s not busy writing, you’ll find Ali meddling with mechanical keyboards, indulging in vehicular racing, or professionally competing worldwide with fellow mind-sport athletes in Scrabble. Currently speaking, Ali’s about to complete his Bachelor’s in Business Administration from Bahria University Karachi Campus.
Get In Touch: alirashid@tech4gamers.com


 Threads
![How To Fix CapCut Network Error In Windows 11 [Our Detailed Guide]](https://tech4gamers.com/wp-content/uploads/2023/11/How-TO-8-218x150.jpg)
![PS4 Fan Not Working [Our Recommended Fixes] PS4 Fan Not Working](https://tech4gamers.com/wp-content/uploads/2023/06/HOW-TO-15-218x150.jpg)
![XBOX Series X Won’t Turn On [Our Ultimate Guide 2024]](https://tech4gamers.com/wp-content/uploads/2023/12/Xbox-X-Error-218x150.jpg)
![Xbox Series X: No Sound Error [Our Tested Fixes] Xbox Series X No Sound Error](https://tech4gamers.com/wp-content/uploads/2024/01/xbox-series-x-no-sound-error-218x150.jpg)