 Threads
Strong Airflow and Style!
Review Summary
The XPG Valor Air Pro case gives you strong airflow, smart design, and great value at a budget price. With four ARGB fans, roomy support for big parts like E ATX boards and 360mm radiators, the chassis delivers solid cooling and easy building without costing much. For the price, it offers a balanced mix of features, cooling power, and style that should satisfy most builders looking for performance and airflow.
Hours Tested: 11

Overall
-
Design - 9/10
9/10
-
Build Quality - 8.5/10
8.5/10
-
Features - 9/10
9/10
-
Cooling - 9/10
9/10
-
Storage - 7.5/10
7.5/10
Pros
- Perforated Stylish Panel
- Adequate Dust Filtration
- Vertical Mount of PCIe Bracket
- Up to 360mm radiator on top
- Up to 360mm radiator on front
- 4x ARGB 120mm Pre-Installed Fans
- Total 9x Fan mounts
- USB 3.2 Type-C Port
- Rail Mount System for fans/radiator
- Price
Cons
- None


So far, I have tested Valor and Valor Air Nano cases from XPG. This time, I am taking a look at Valor Air Pro. This is XPG’s budget segment series that comes packed with enough features to make it stand out from the competition.
The XPG Valor Air Pro is available in white and black. It is a mid-tower that comes with 4x ARGB fans and supports a vertical mount for the graphics card out of the box. It is spacious enough to house a 360mm AIO and provides adequate storage provision with support for up to an E-ATX form factor motherboard.
This case has an MSRP of $89.99.
| Dimension | 490x215x467mm |
| Motherboard Form Factor | Up to E-ATX |
| Storage Drive Mount |
|
| Expansion Slot | 7x |
| GPU Support | Up to 400mm Length |
| CPU Cooler Support | Up to 167mm |
| PSU Support | Up to 200mm in length |
| Fan Size Support |
|
| Radiator Size Support |
|
| Weight | 7.9 KG |
Packaging And Unboxing
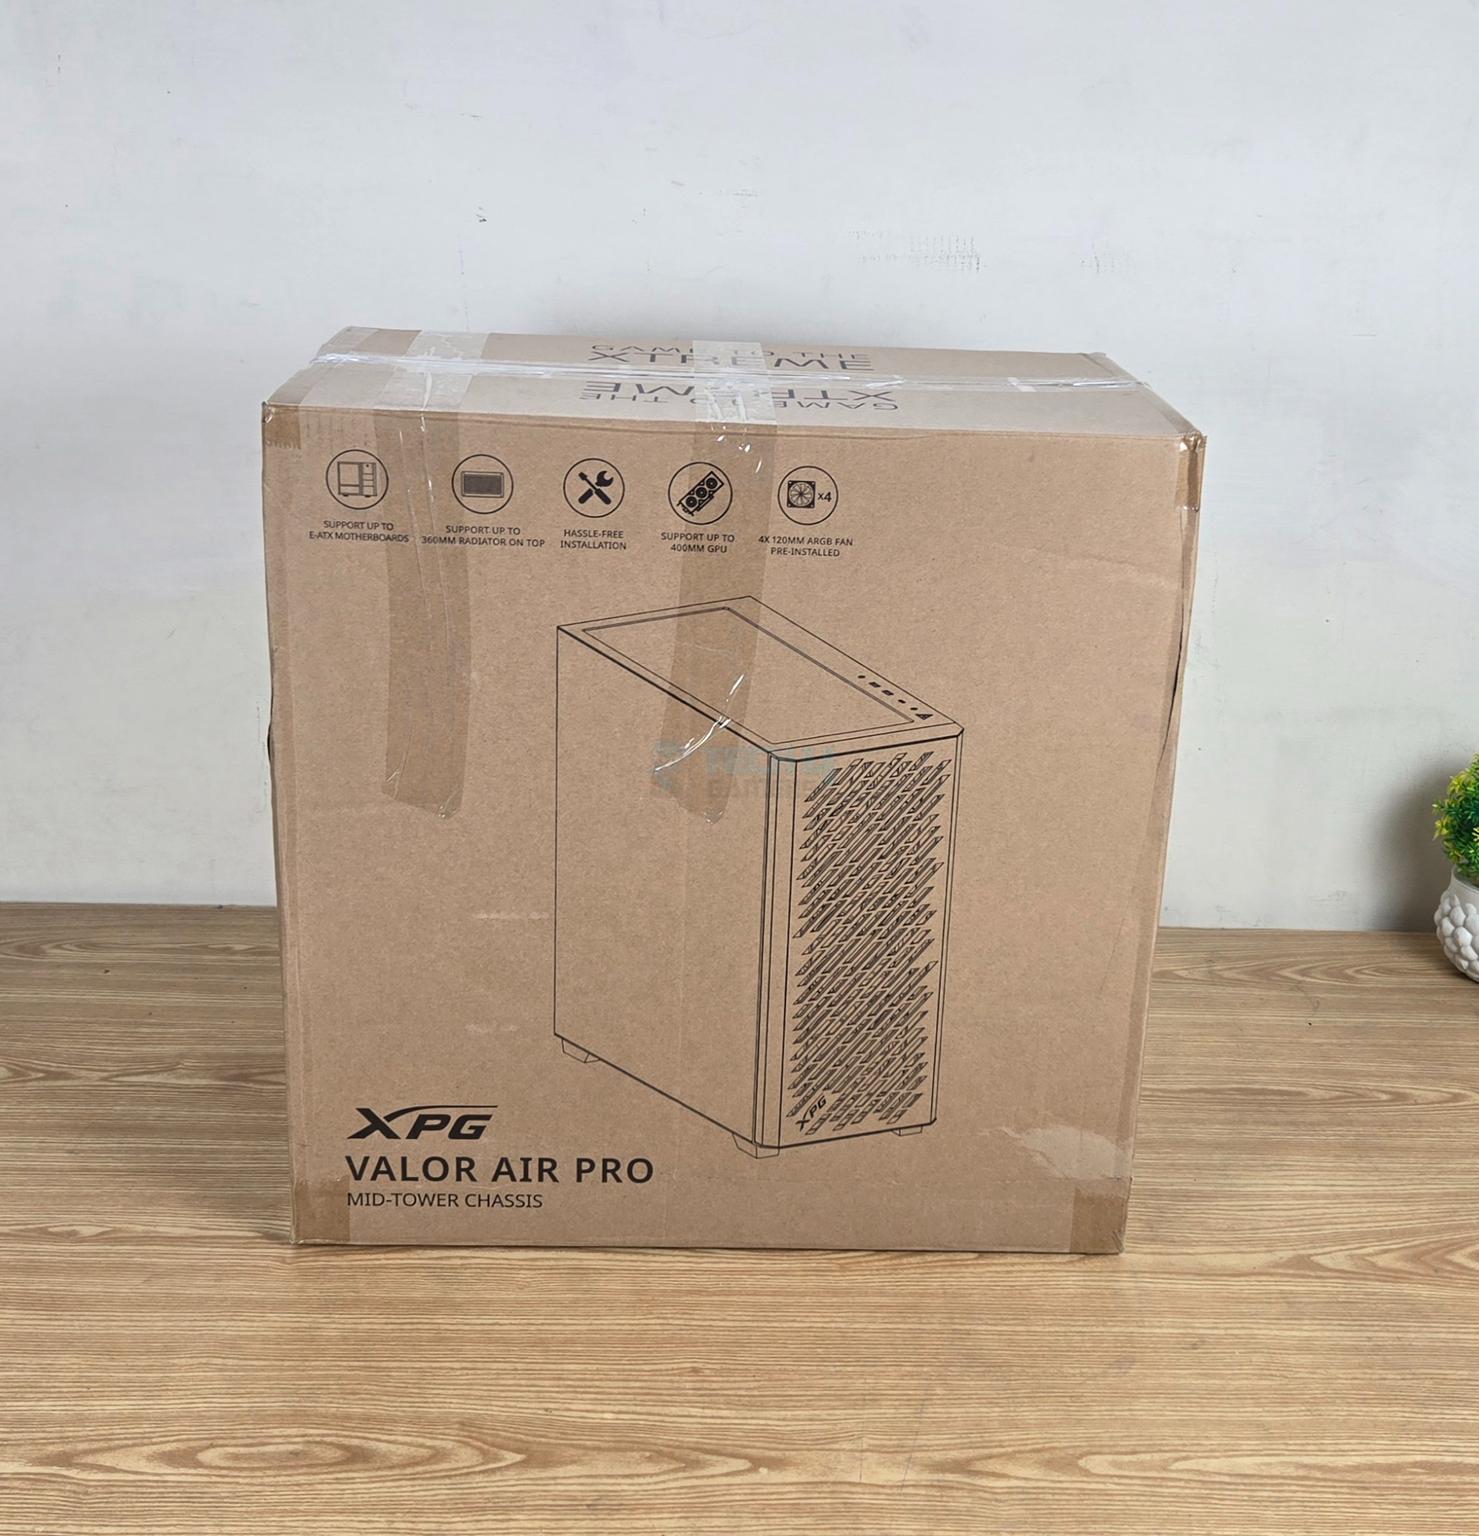
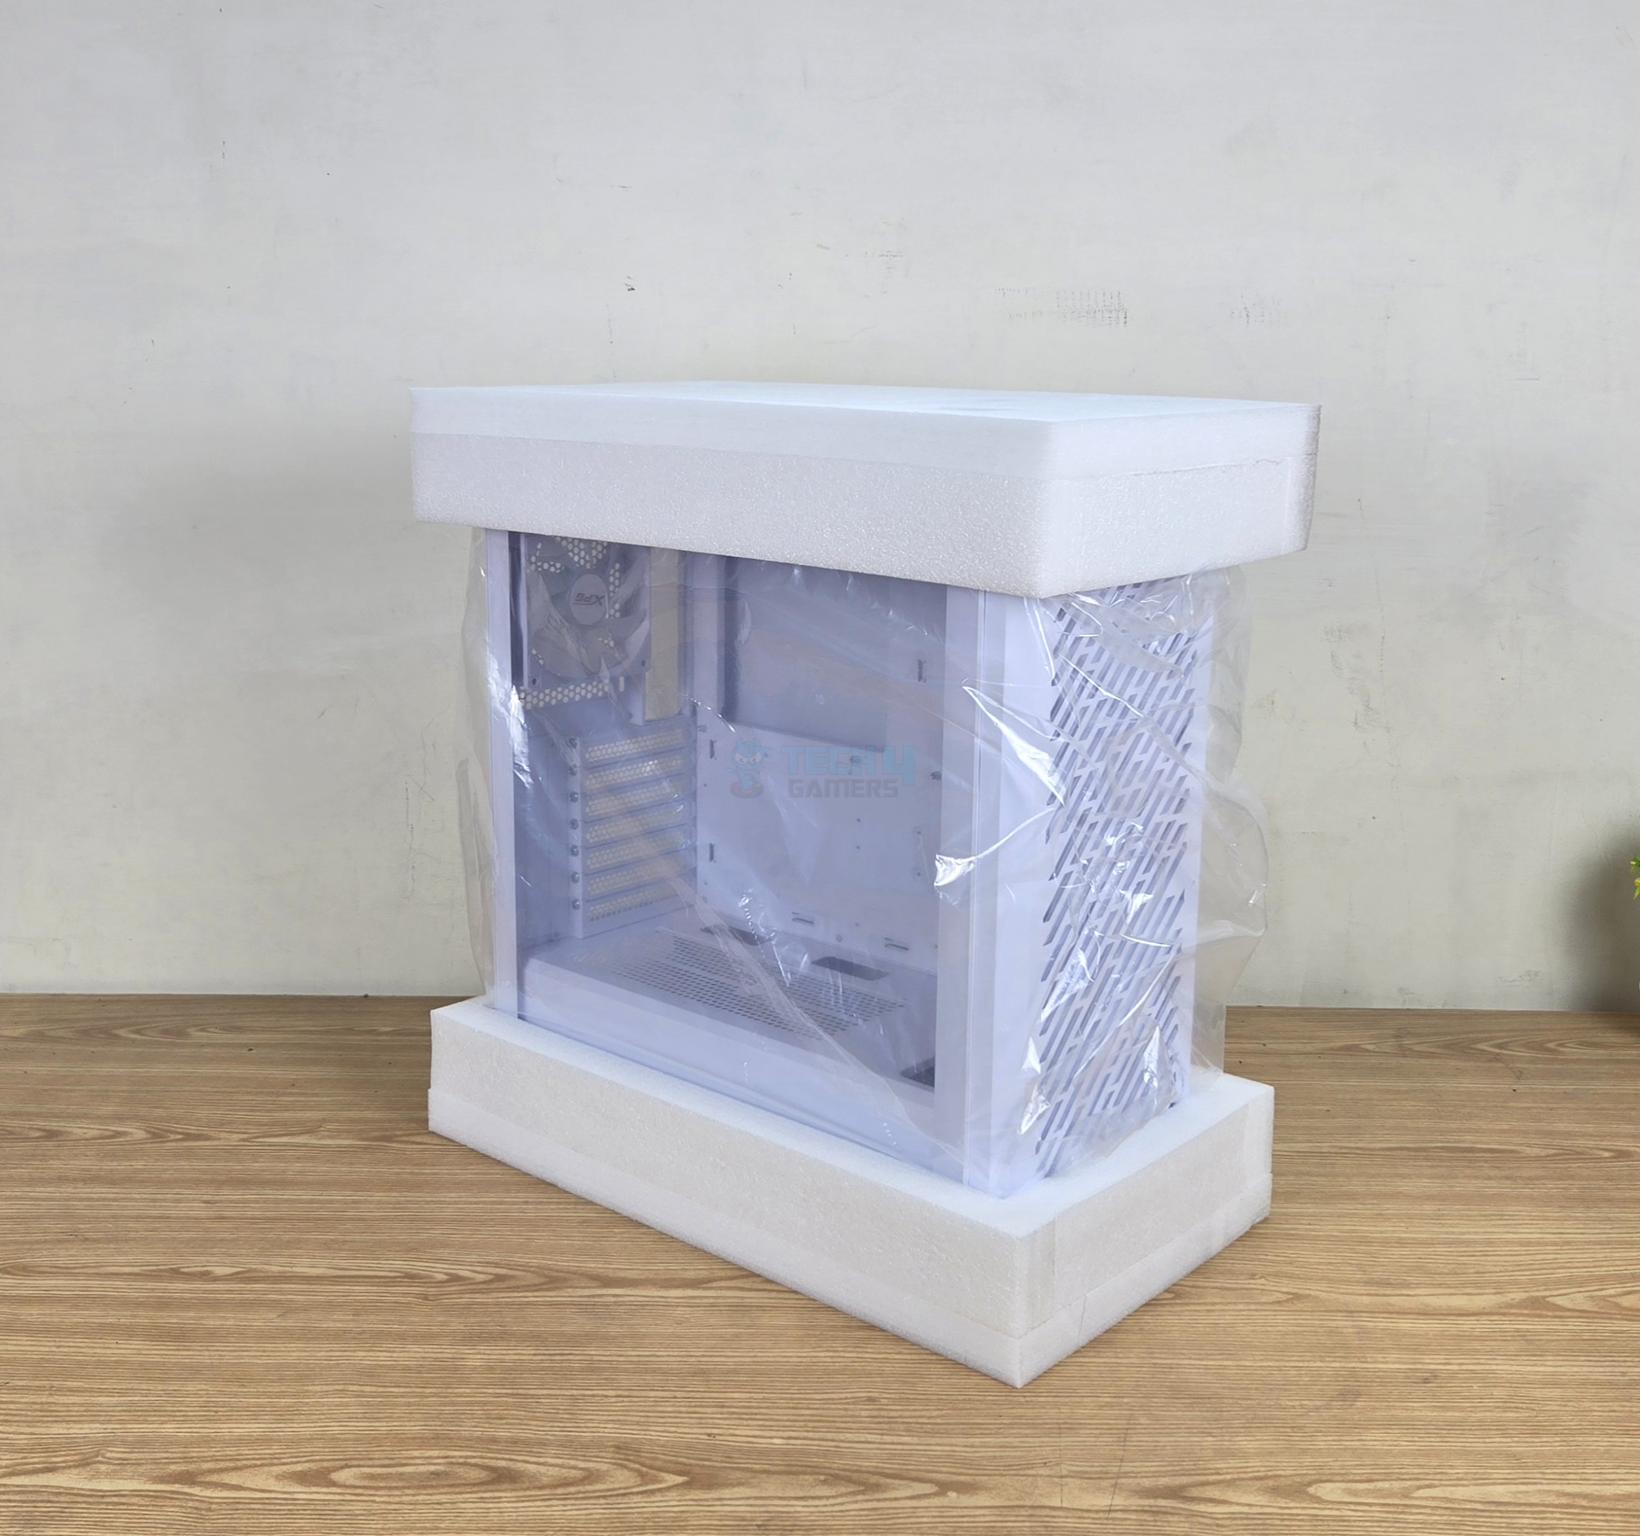
XPG ships the case in a standard brown cardboard box. A picture of the PC Case can be seen on the front. The salient features and specifications are listed on the packing box. Two Styrofoam pads encapsulate the case.
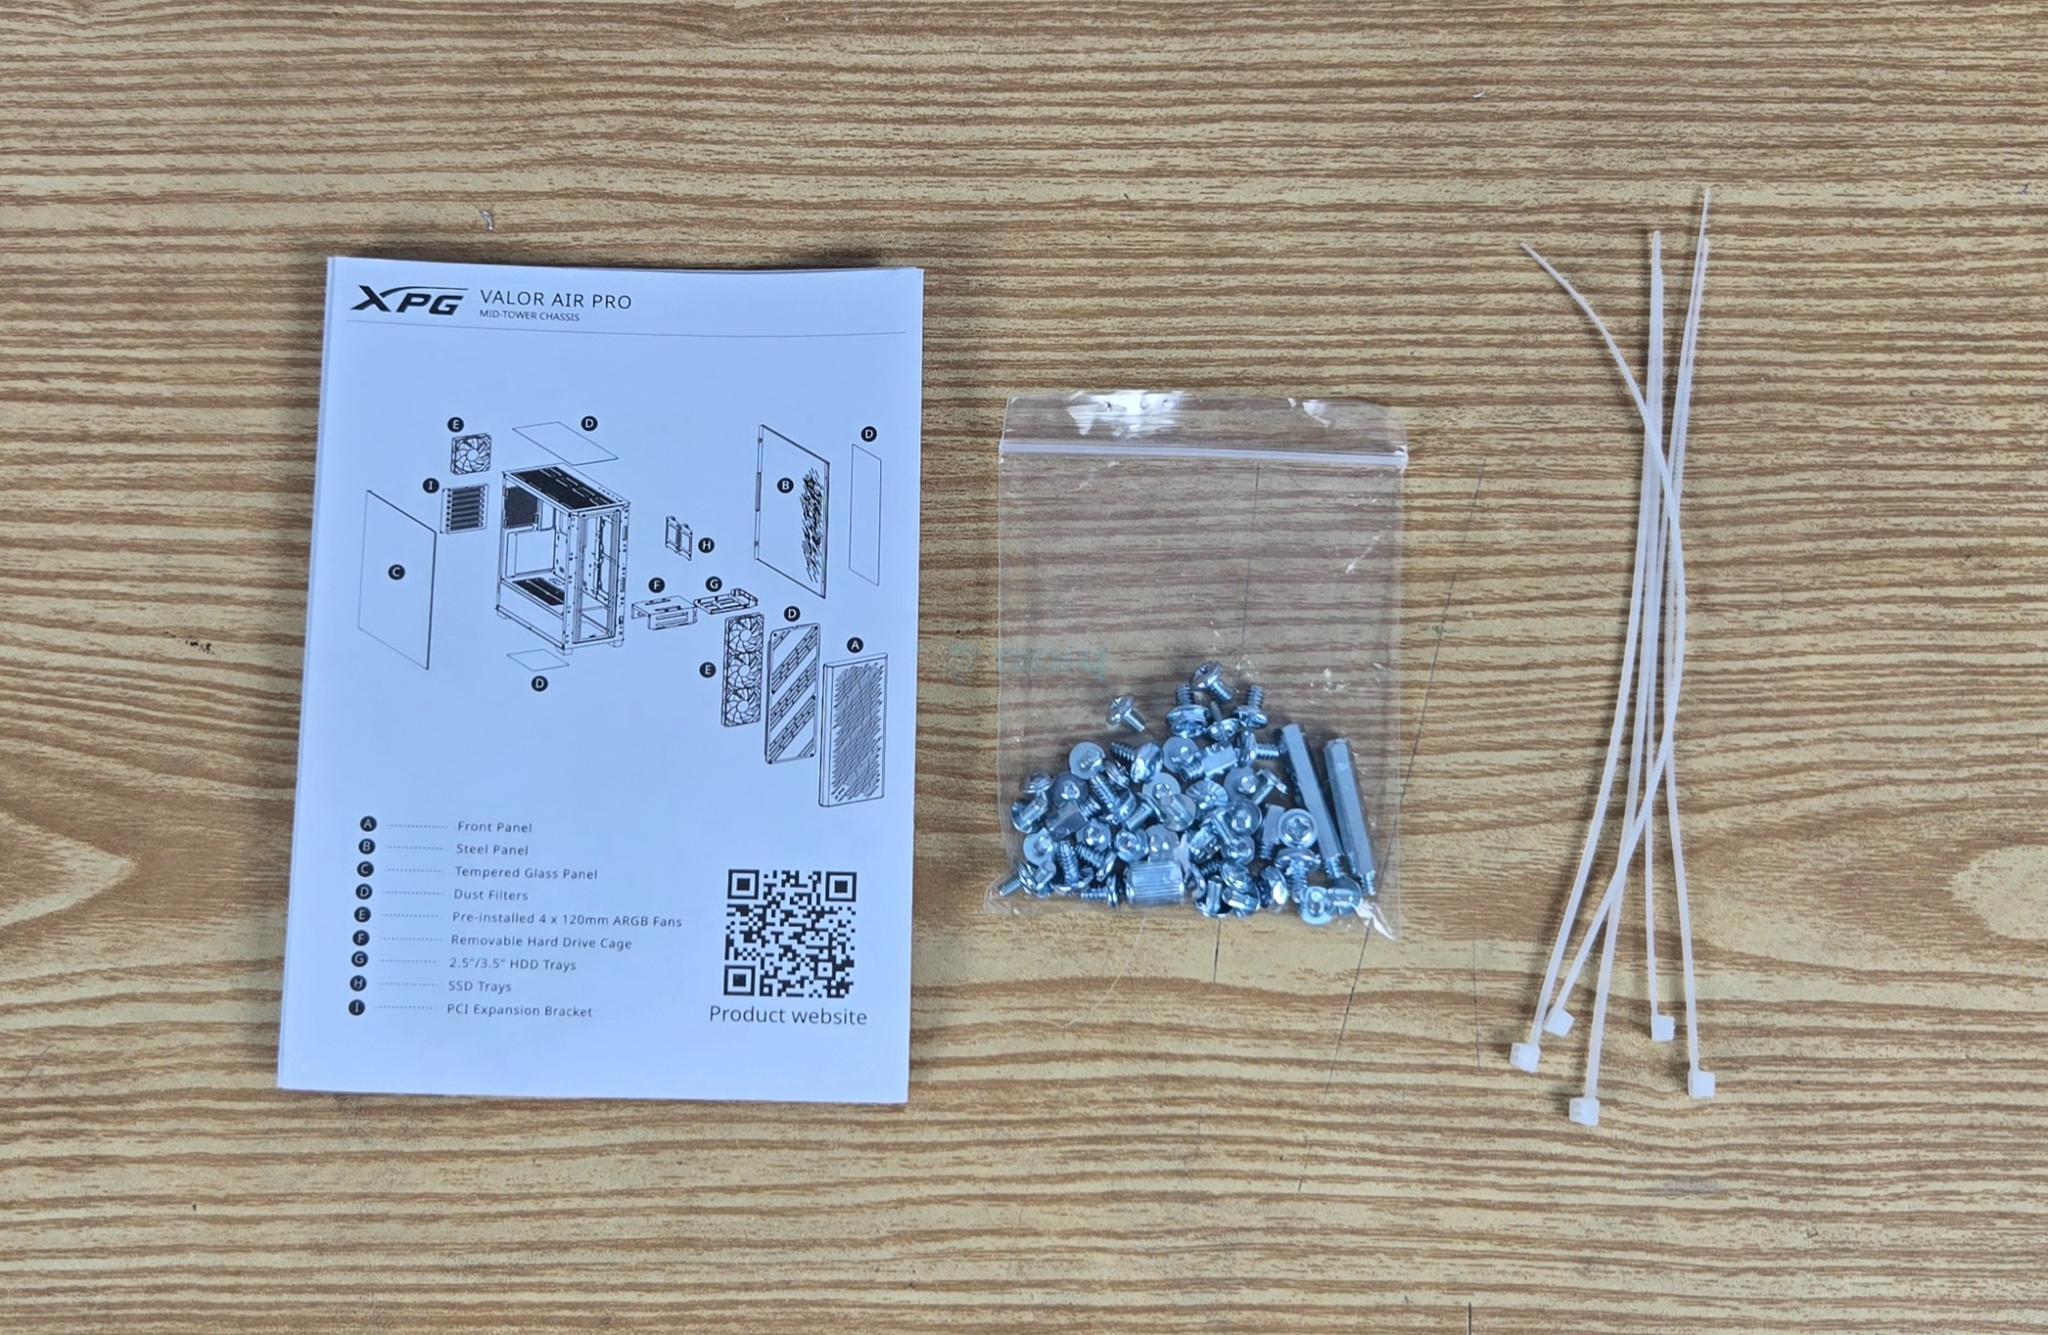
The following are provided with the case:
- 1x Quick Installation Guide
- 5x Zip-Ties
- Motherboard Tray Stand-off Screws
- Storage drive screws Screws
- PSU Screws
- Motherboard Screws
- Long Standoff Screws for GPU Vertical Bracket
Exterior Design
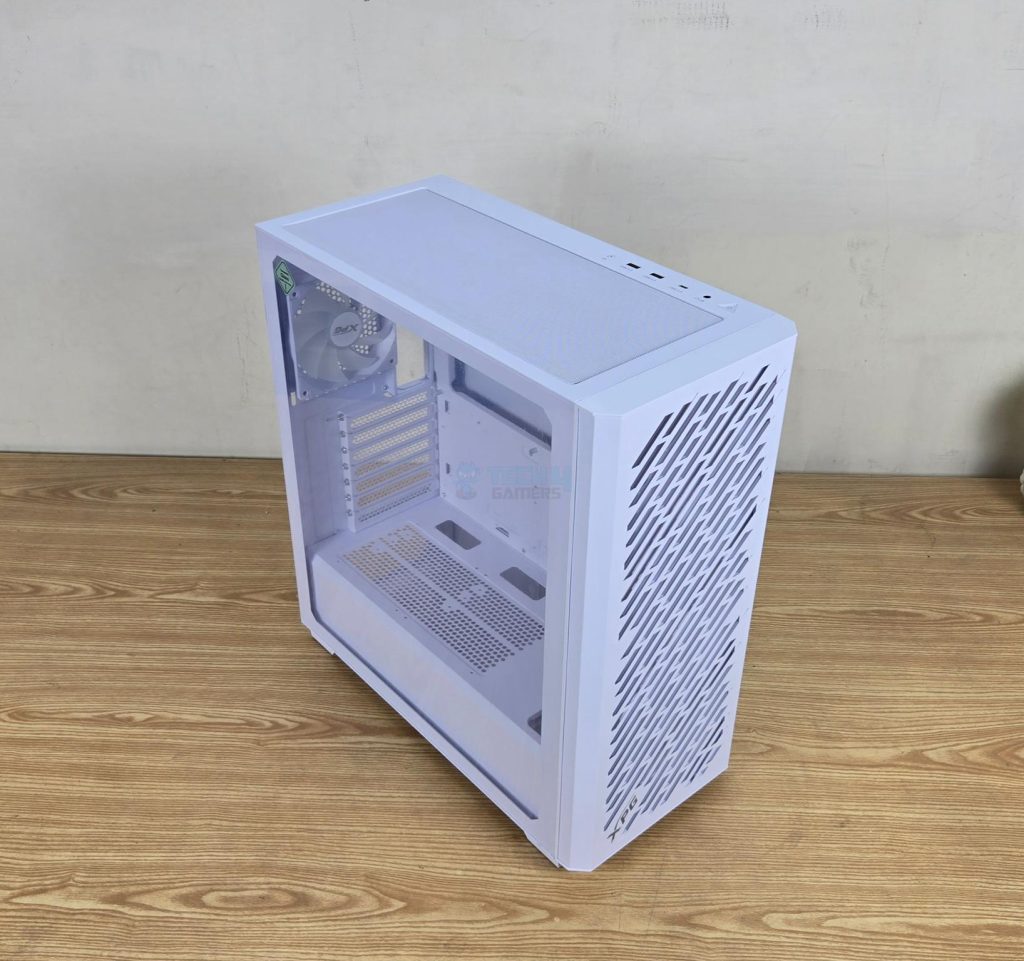
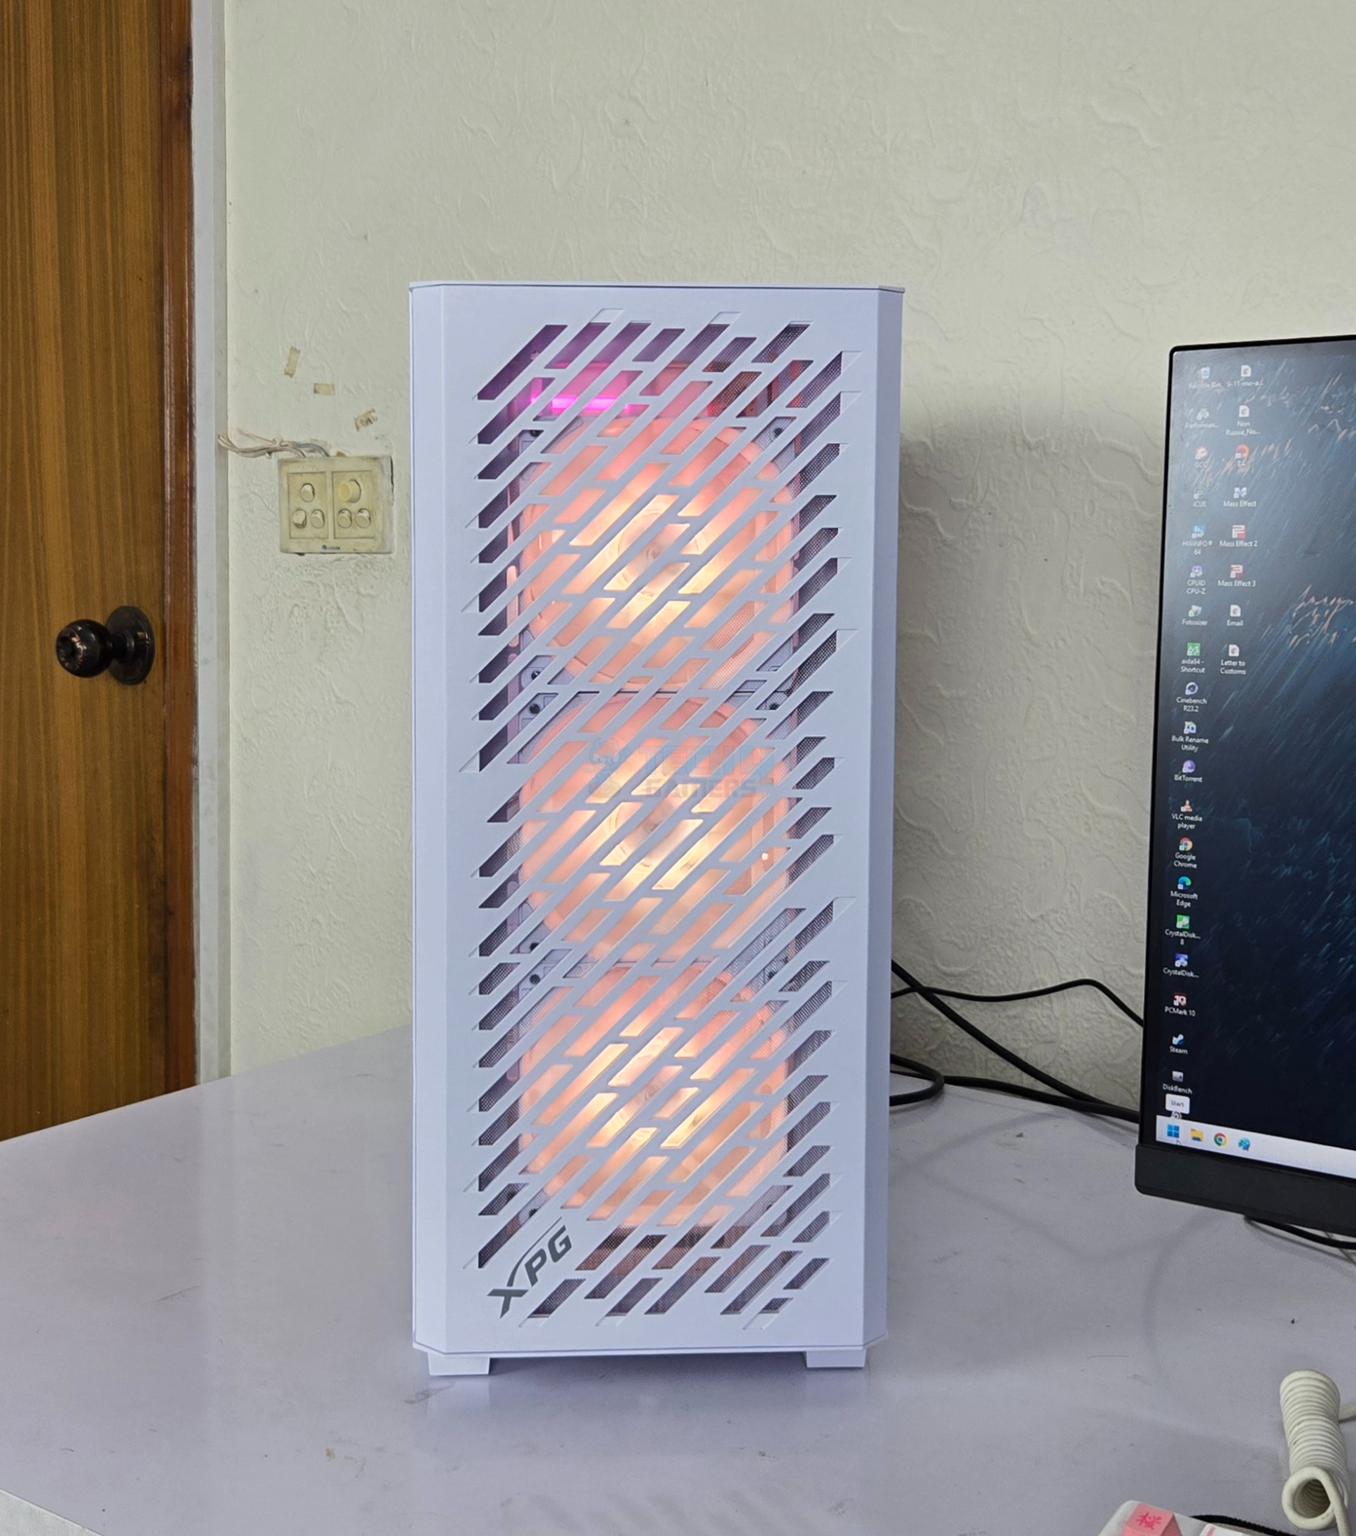
XPG Valor Air Pro is the highest echelon of the Valor Air series. It is made of SPCC material and has a weight of 7.9Kg. Its dimension is 490x215x467mm, and its volume is a little over 49 liters. The core design element is perforated panels all around with dust filters, hence the name Air. The case comes equipped with a GPU support bracket that can be mounted vertically as well. However, the riser cable is not provided.
Let’s start taking a closer look at the Inside and Outside views, being our major categories.
Front Panel
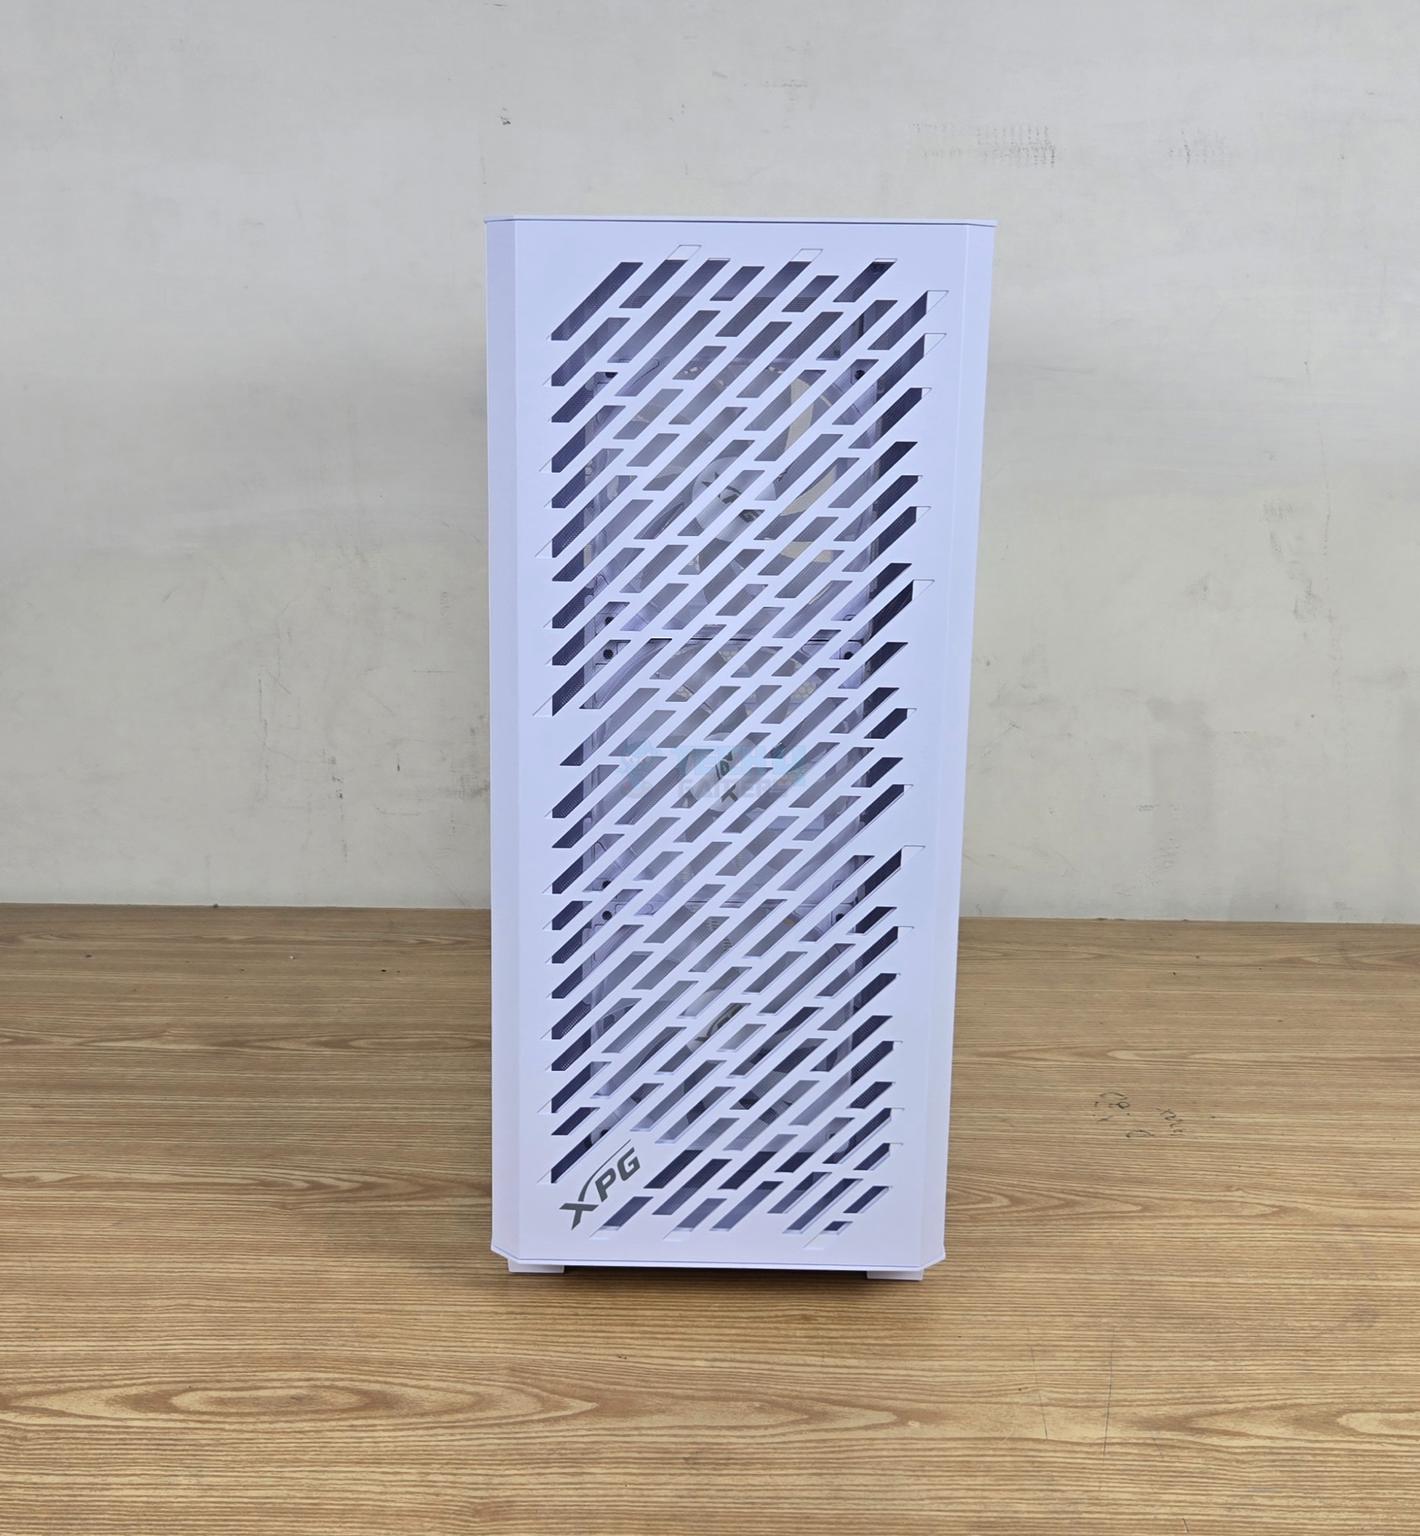

This case has a stylish perforated metallic panel on the front. The large size cutouts provide enough space for sufficient air inflow, and they are done in a particular style to provide a pleasing outlook of the case. However, it is not a tool-less design. You need to undo a screw on the bottom of the case.
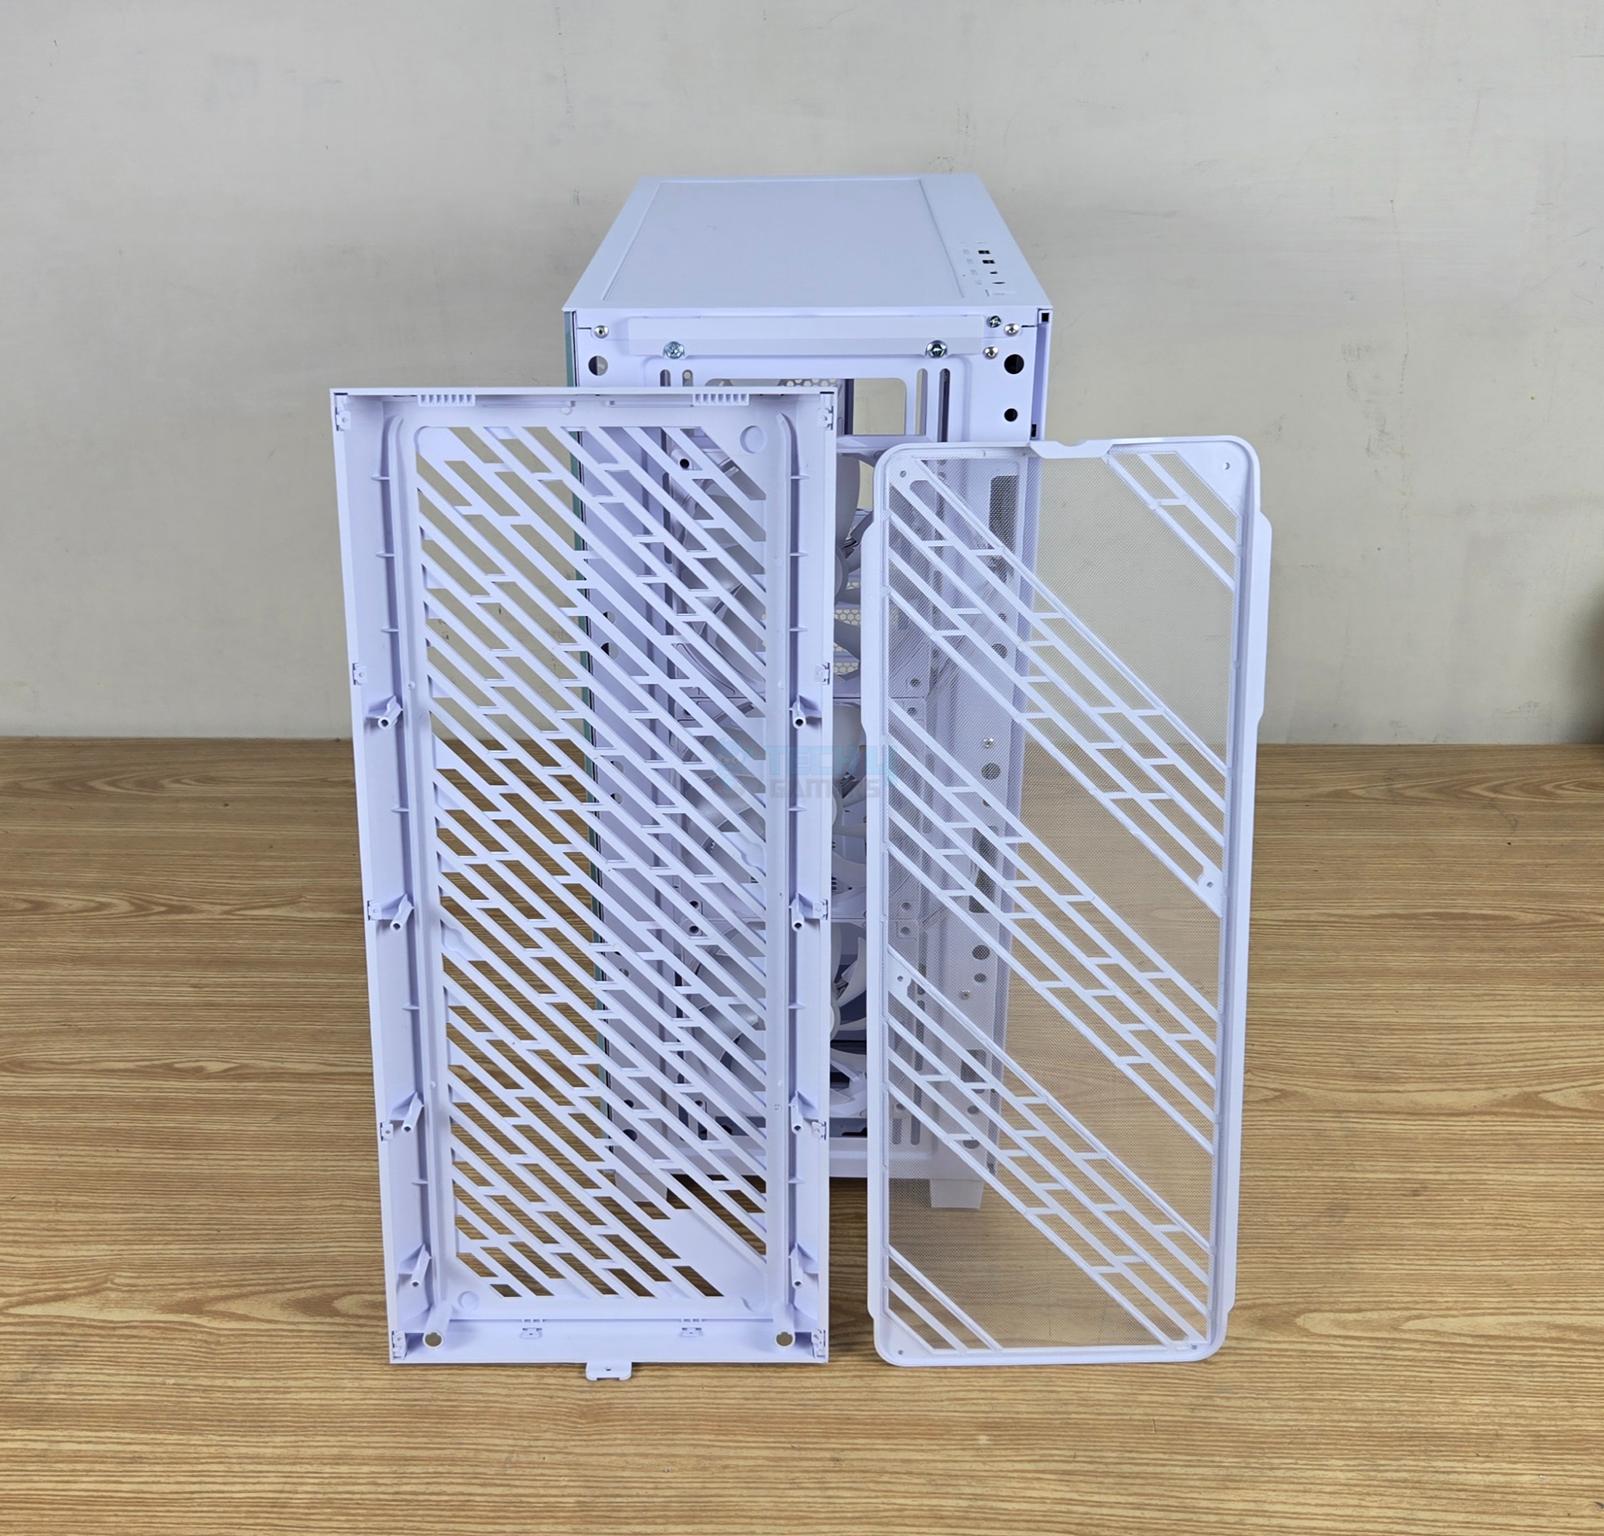
What is not visible is a magnetic dust filter with a fine mesh behind the front panel. XPG has provided a rail mount design for the fans. You can install:
- 3x 120mm or 3x 140mm fans
- 120mm/140mm/240mm/280mm/360mm radiator*
The top plastic insert is removable, and it has insets on which the front panel rests.
*The chassis has a gap on the front from inside; the thickness of the radiator and fan is dependent on that gap and the placement of the storage cage.
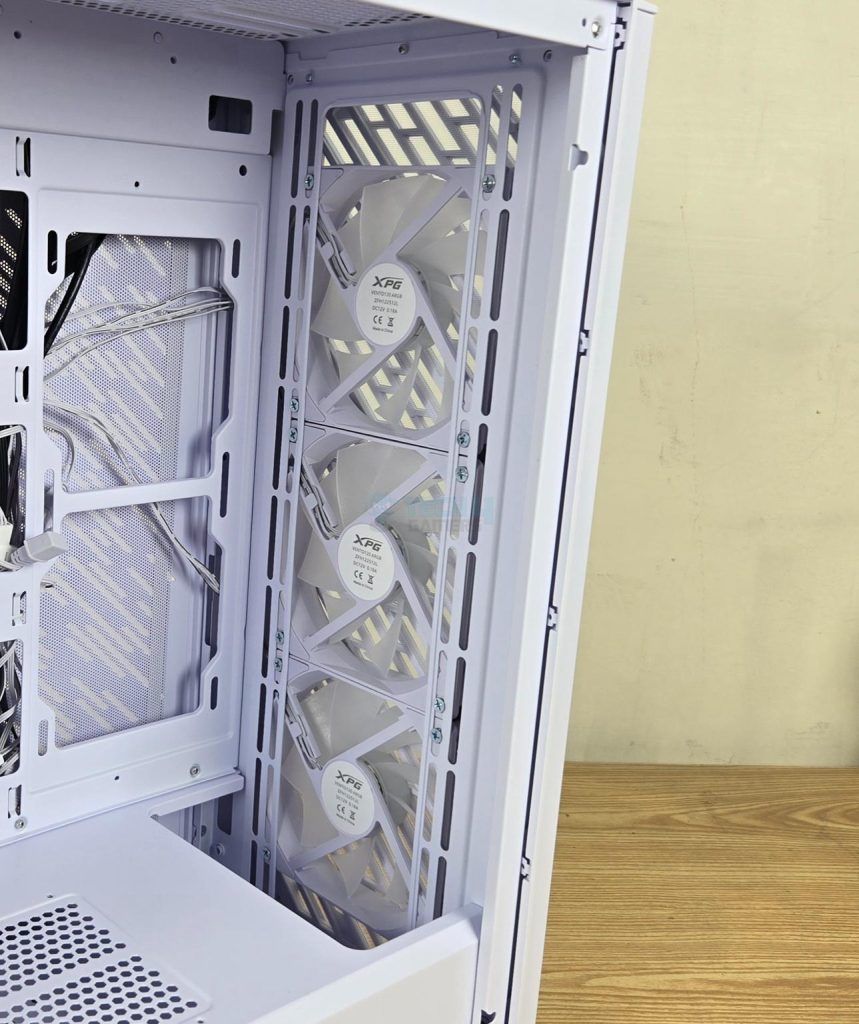
Top Panel
The top of the case does not have a removable panel. You can see a perforated structure with a rail mount design. You can install:
- 3x 120mm or 2x 140mm fans
- 120mm/140mm/240mm/280mm/360mm radiator
XPG has provided a magnetic dust filter on top. The case IO panel is also located on the top.
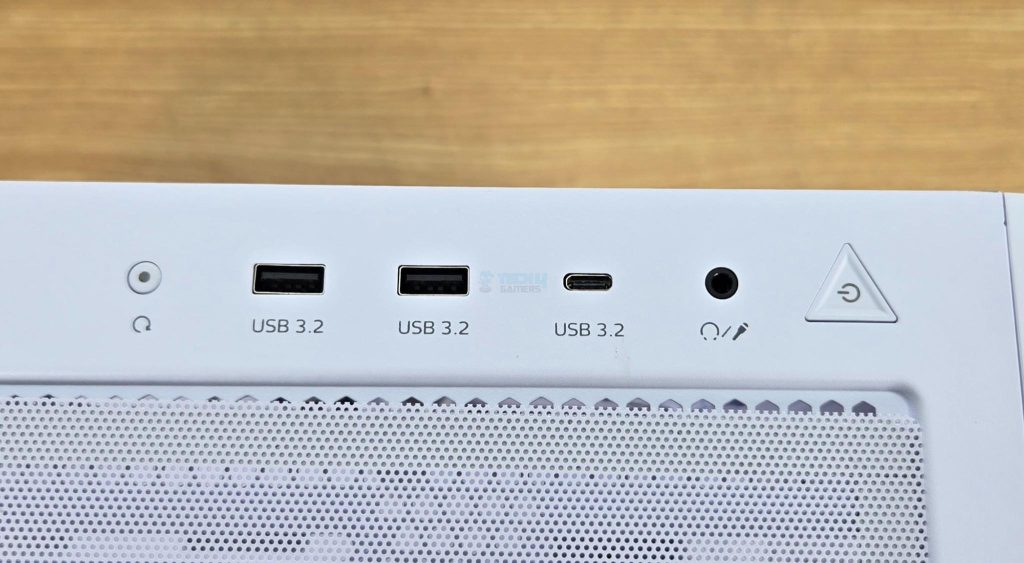
The IO ports include:
- 1x USB3.2 Type-C Port
- 2x USB3.2 Type-A Port
- 1x Hybrid Audio Port
- 1x Power Button
- 1x Reset Button
The power button has a nice click to it, and it does not wobble.
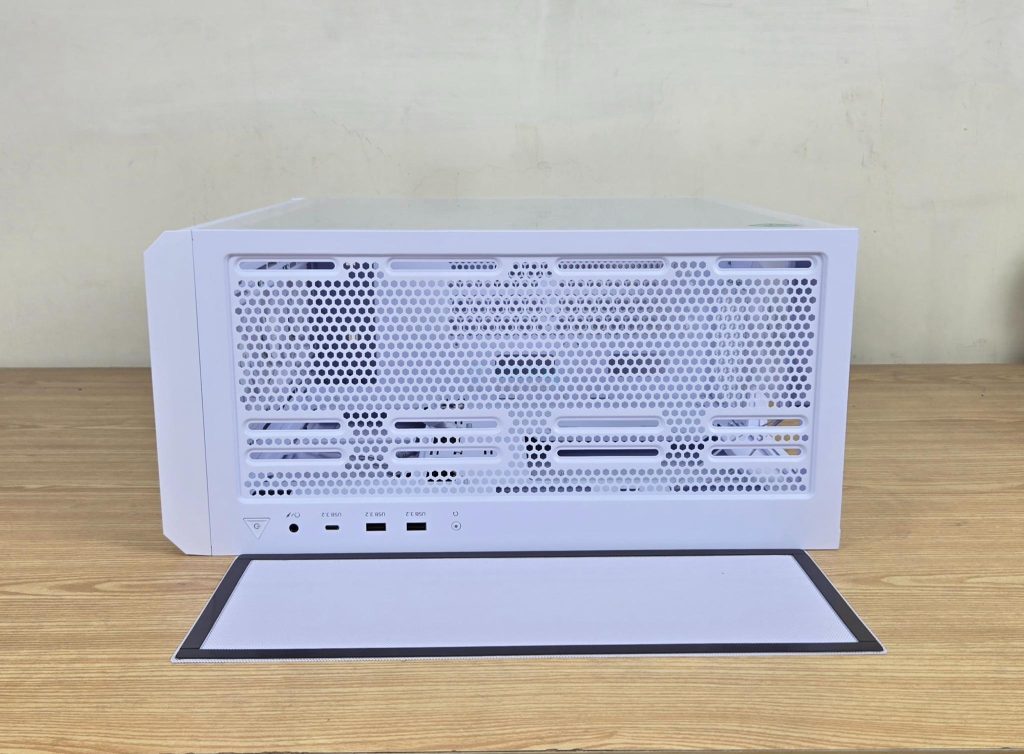
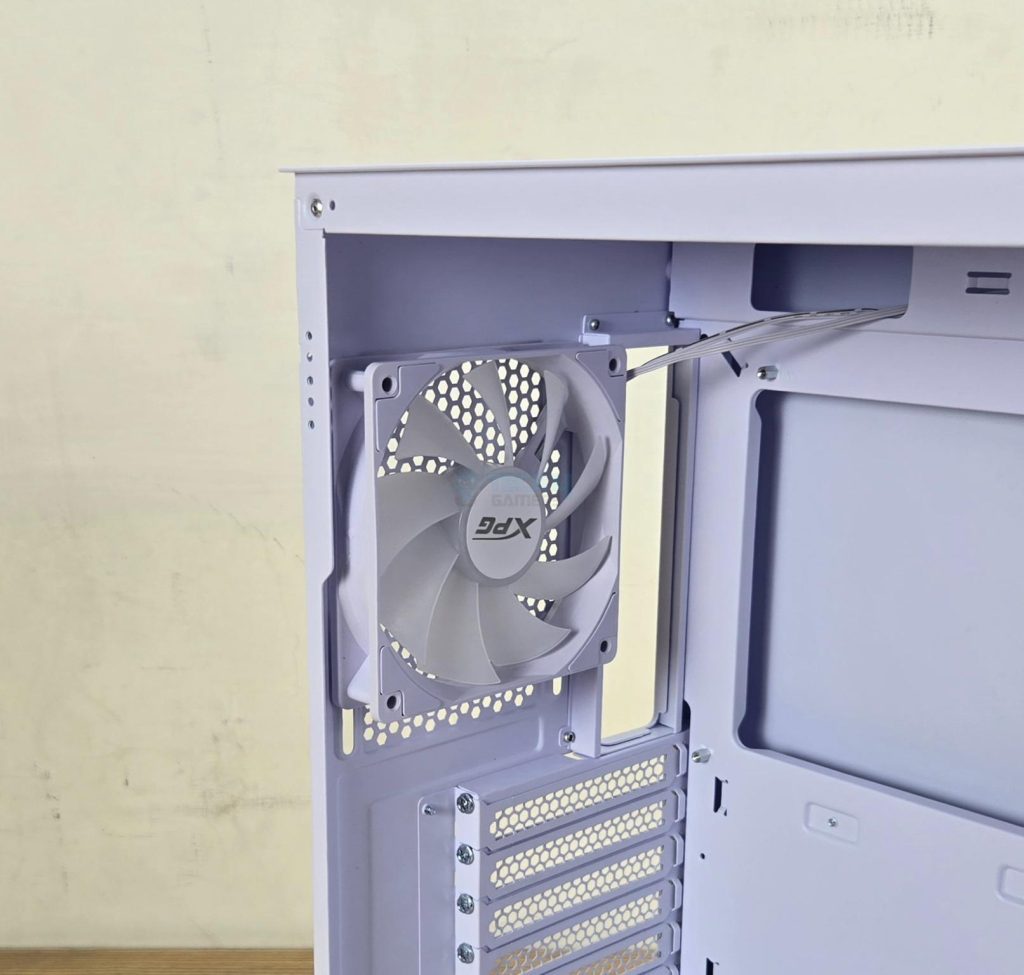
Rear Panel
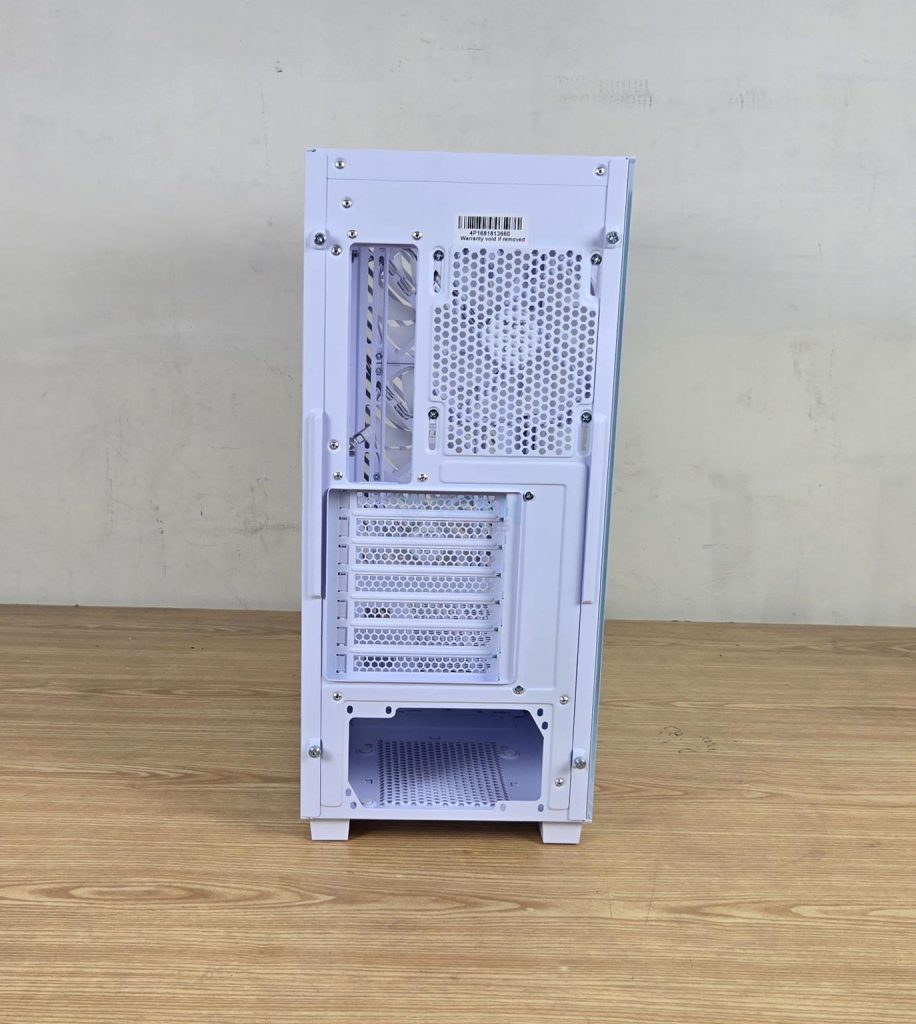
The backside of this case has a standard layout. You can see a large cutout on the top left, which is where the motherboard’s rear IO panel sits. On its right is a rail mount for a 120mm fan. You can adjust the height of the fan. The bottom has a mount for a standard ATX PSU.
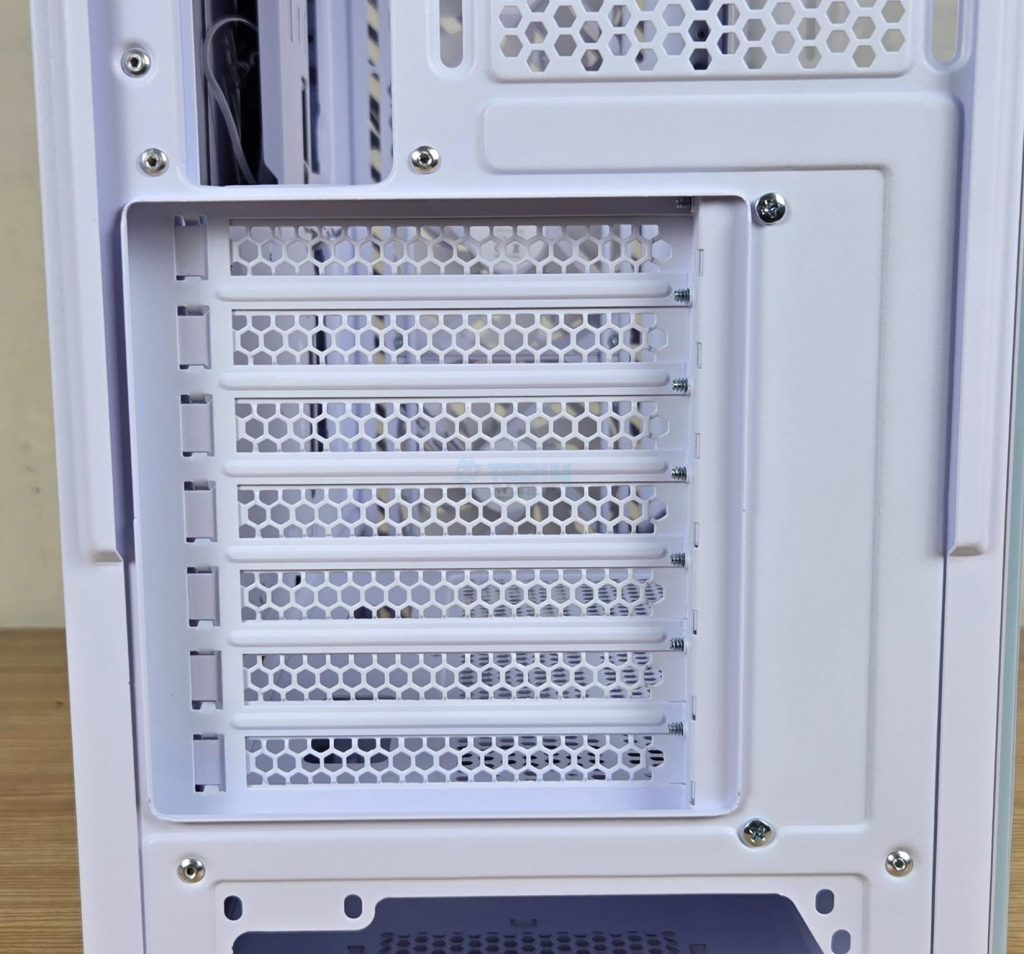
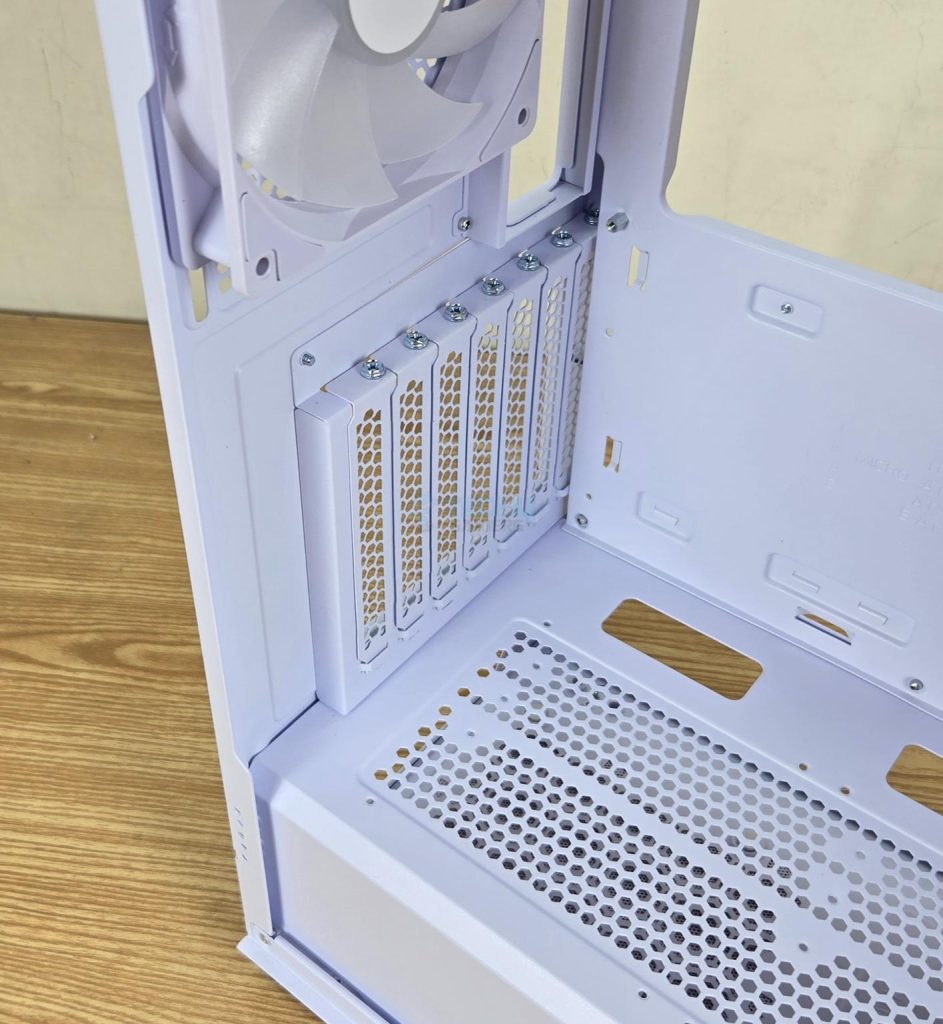
The mid-section has a PCIe bracket, which is removable and rotatable. It has 7x expansion slots with reusable vented covers. On a closer look, you can see that the screws of these overs are on the inside of the case, not outside. Two screws are used to install the bracket.
Bottom Panel
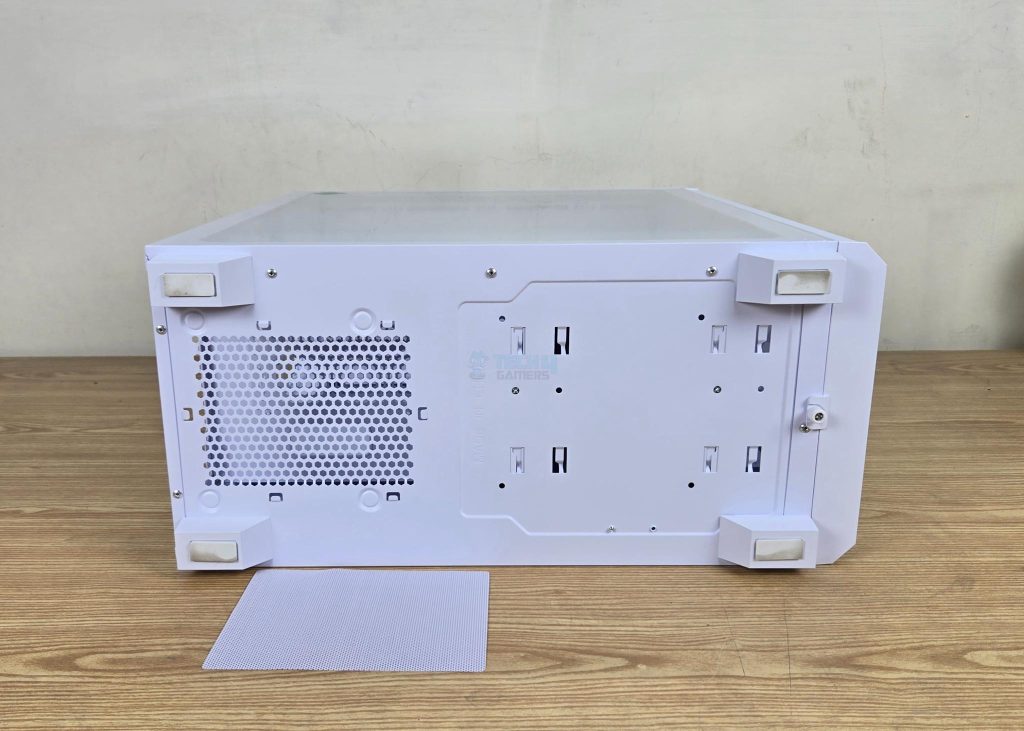
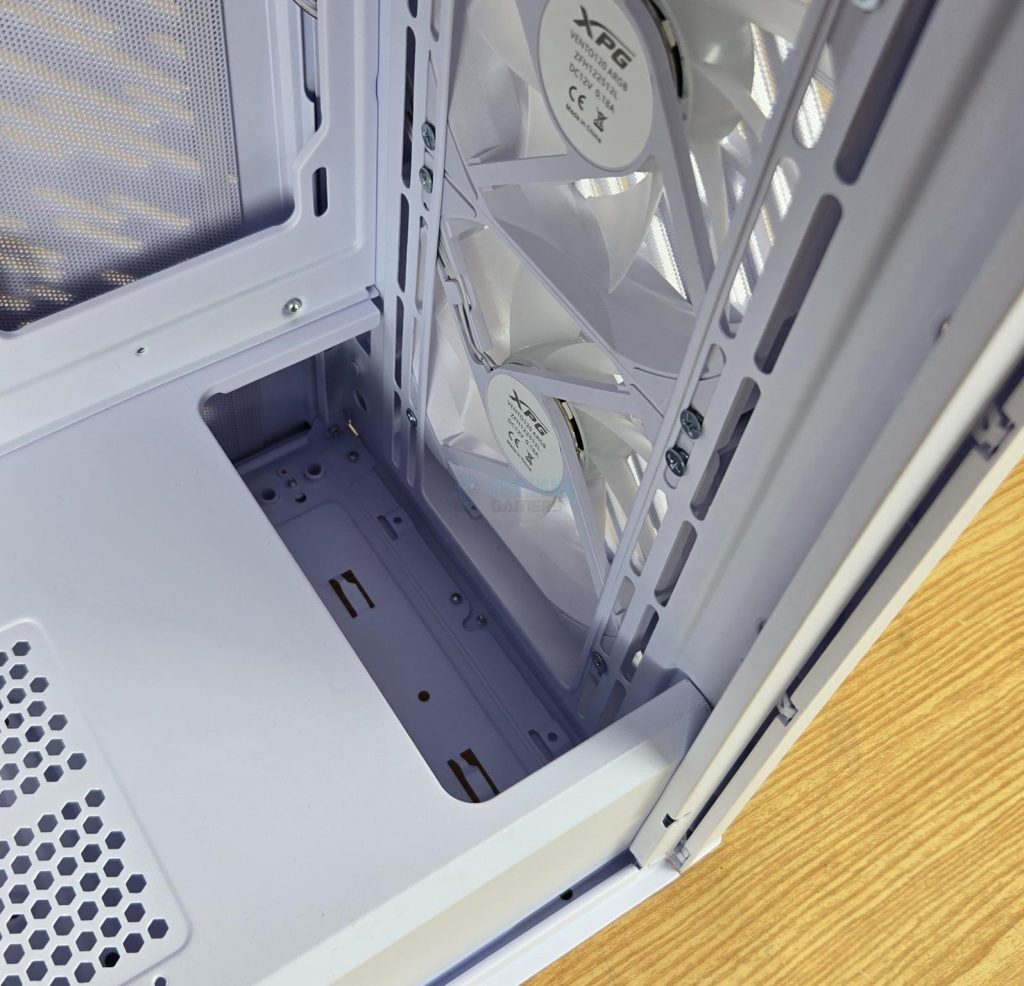
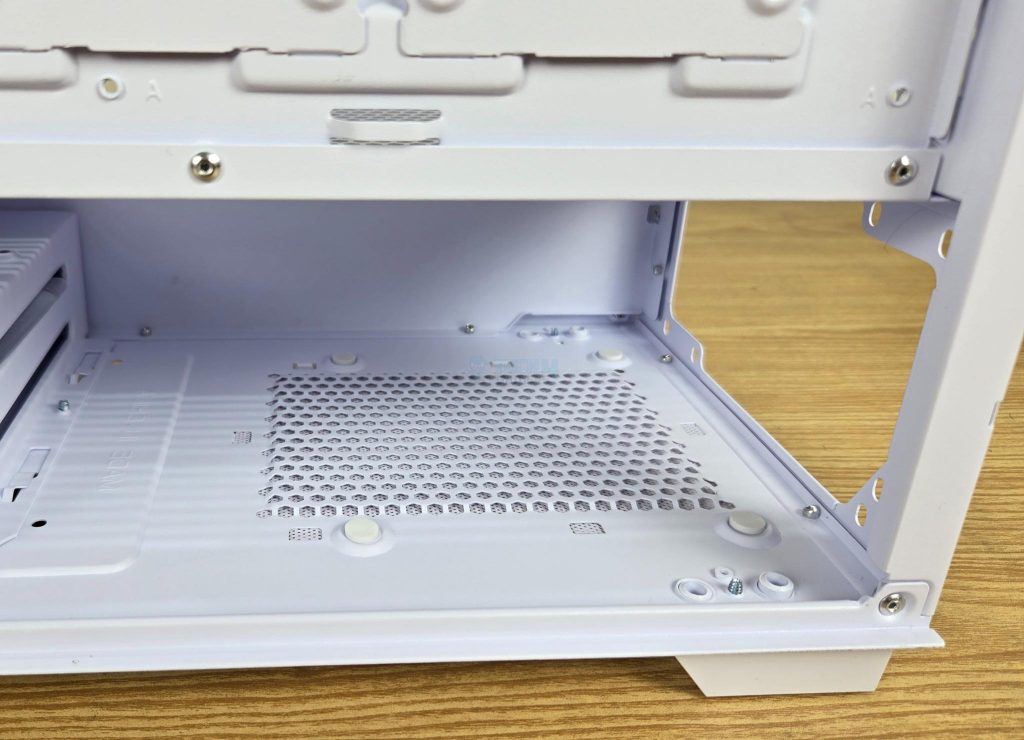
The bottom side of the case has a non-magnetic dust filter over the PSU bay. You can see channels indicating that a storage cage can be installed in two places.
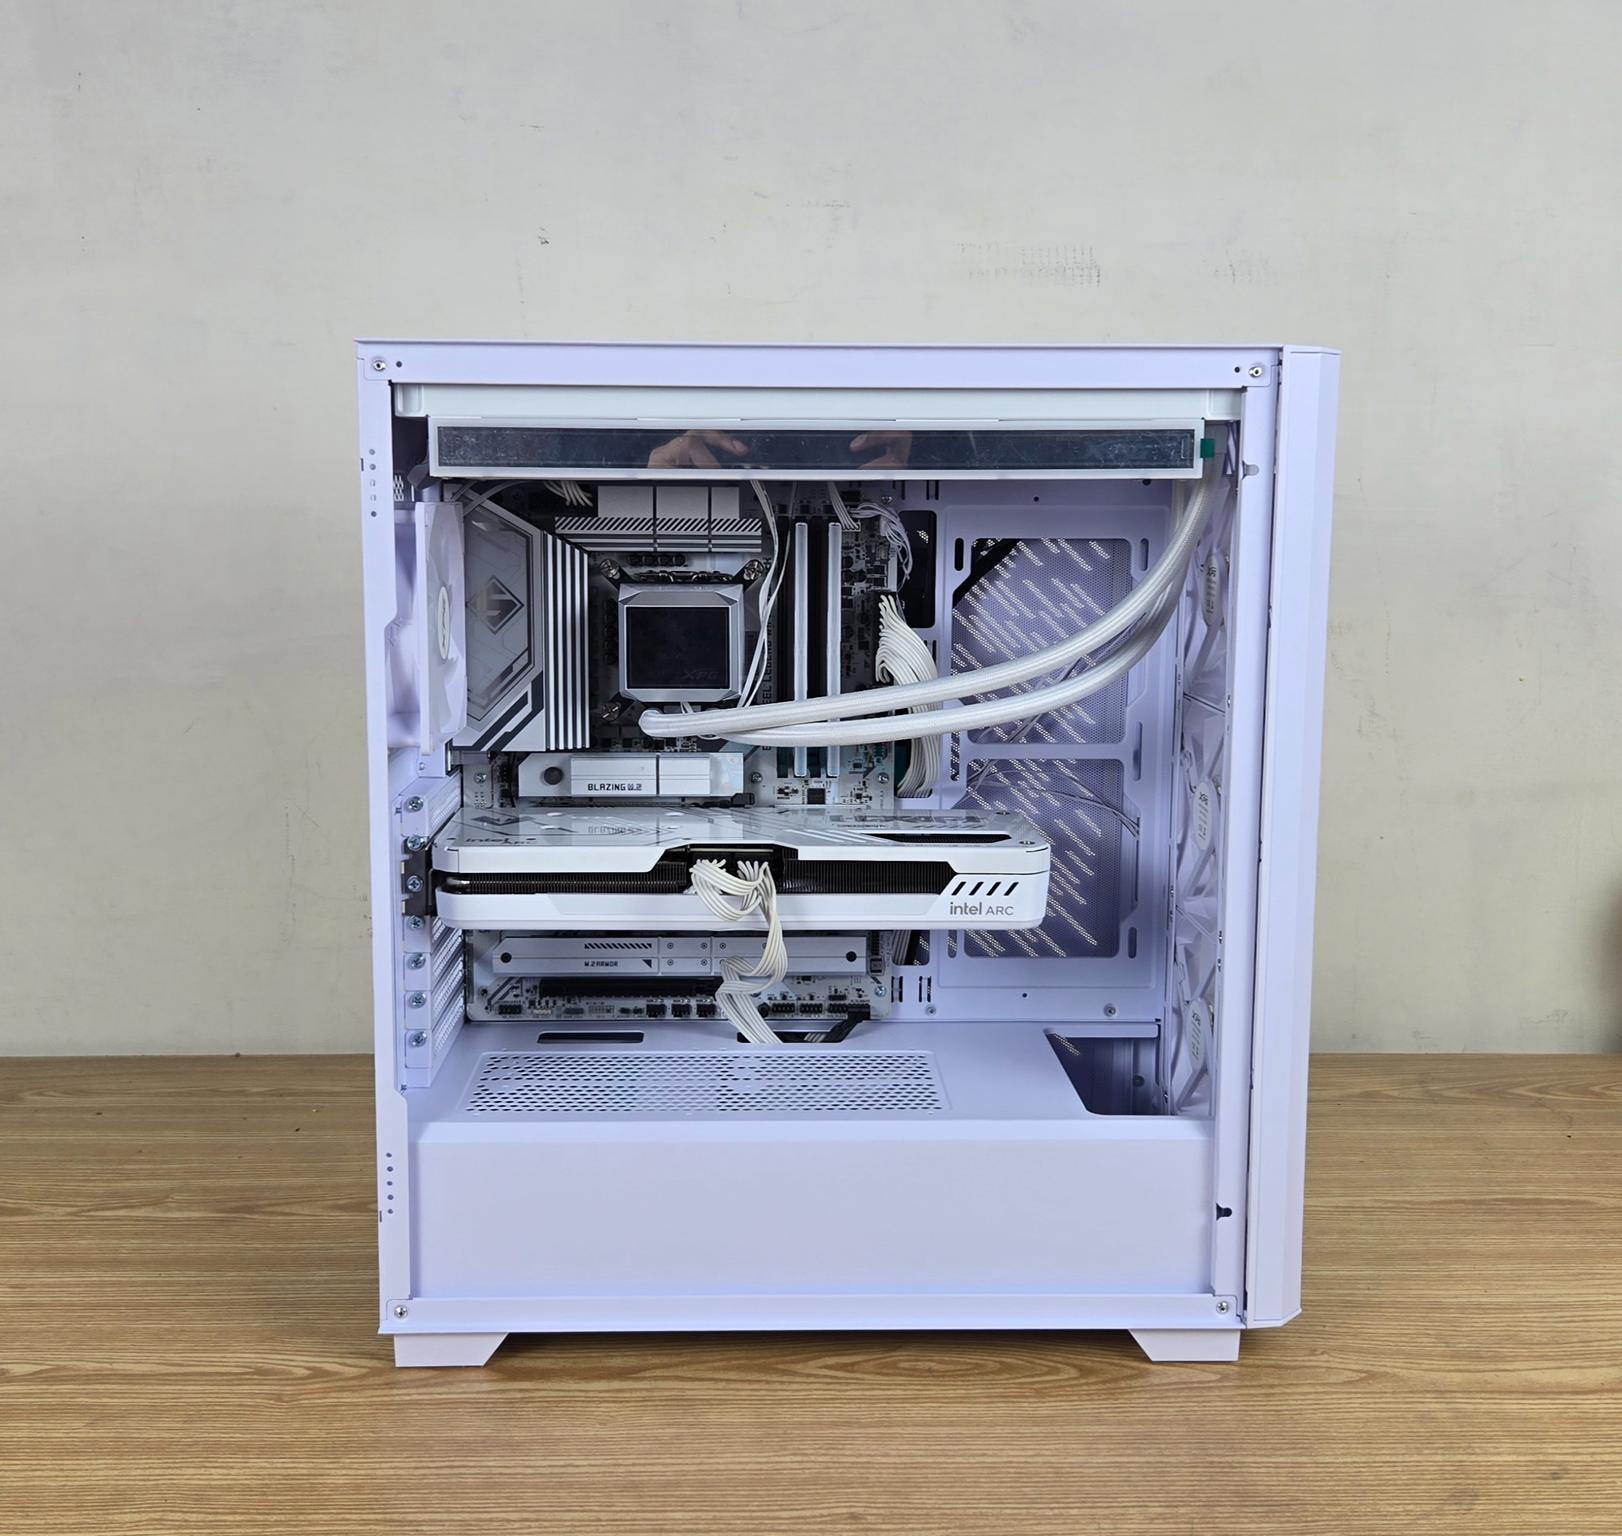
Interior Design
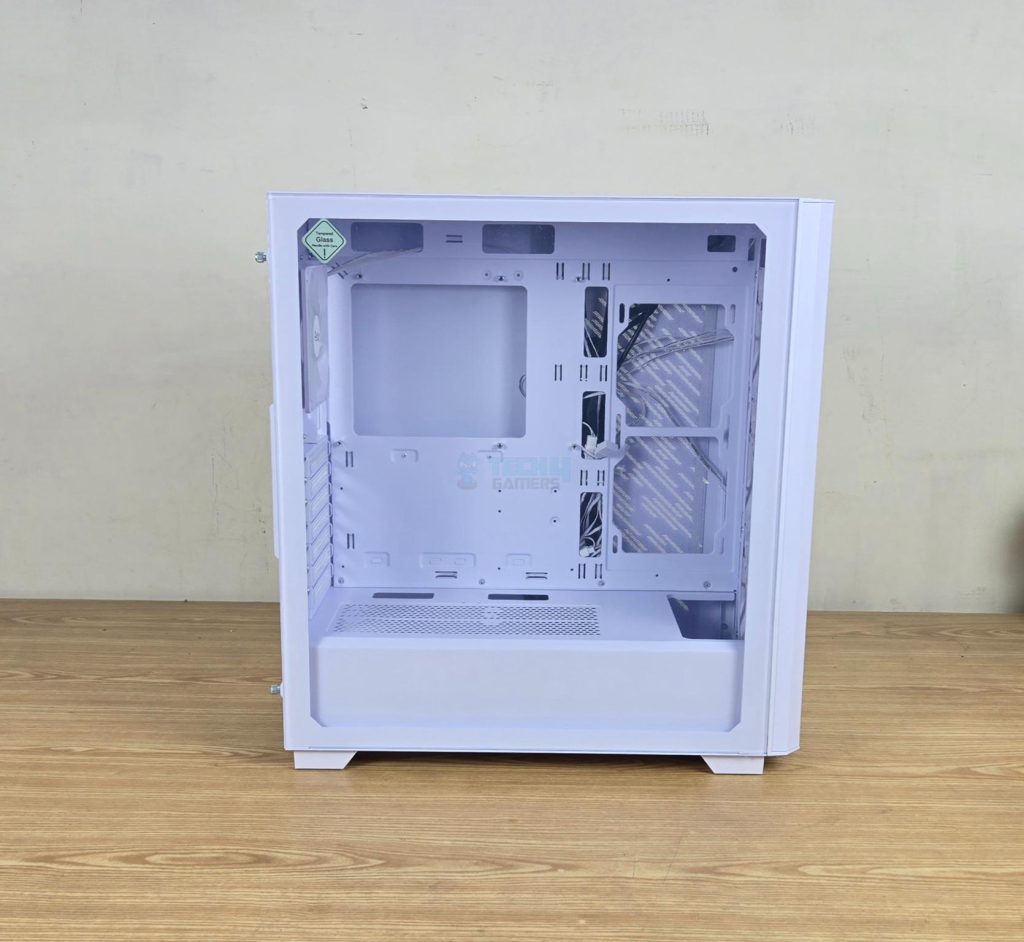
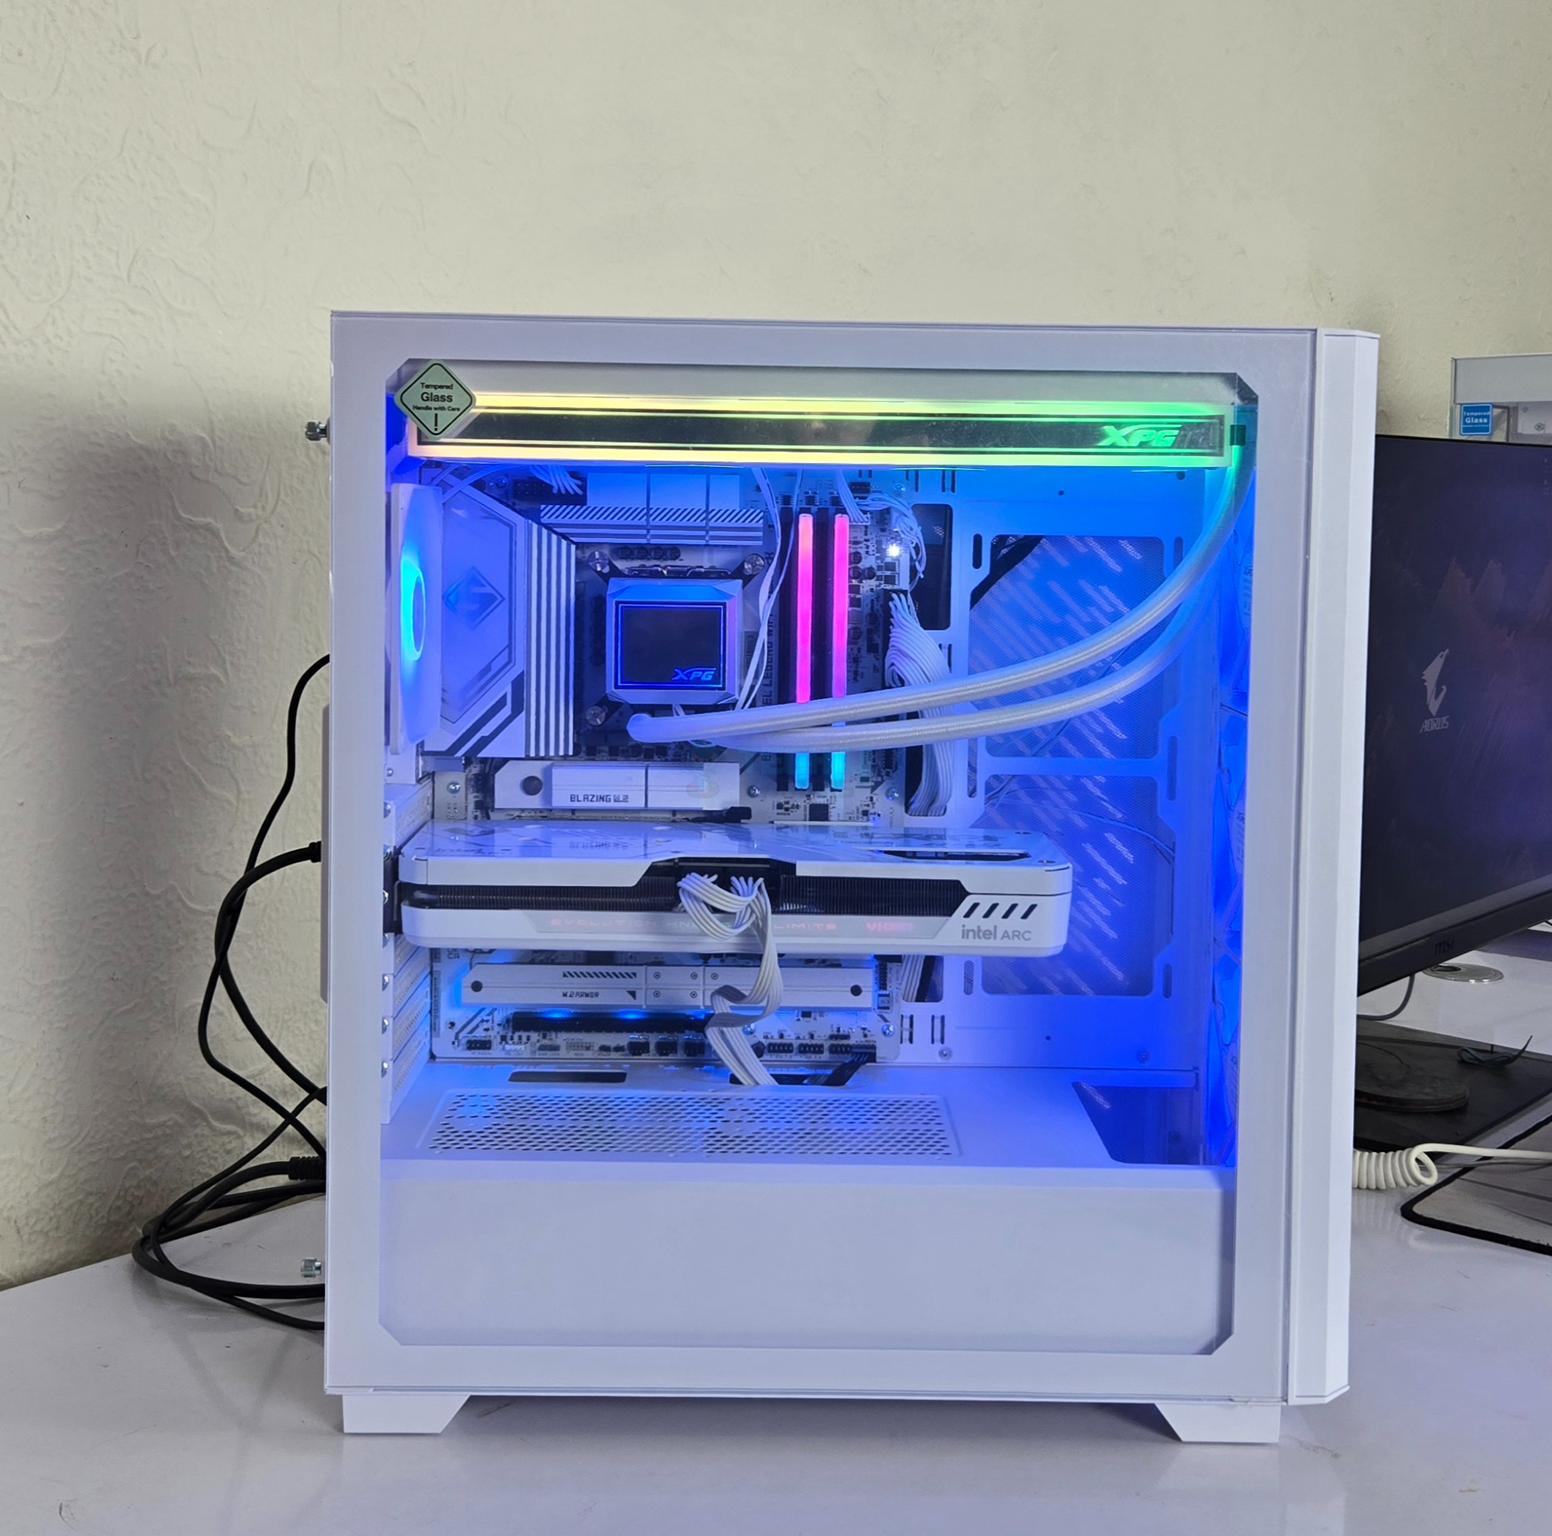
XPG has used a tempered glass side panel on this case. It is not tinted, and you can see through it completely. It is secured using two thumb screws on the rear of the case.
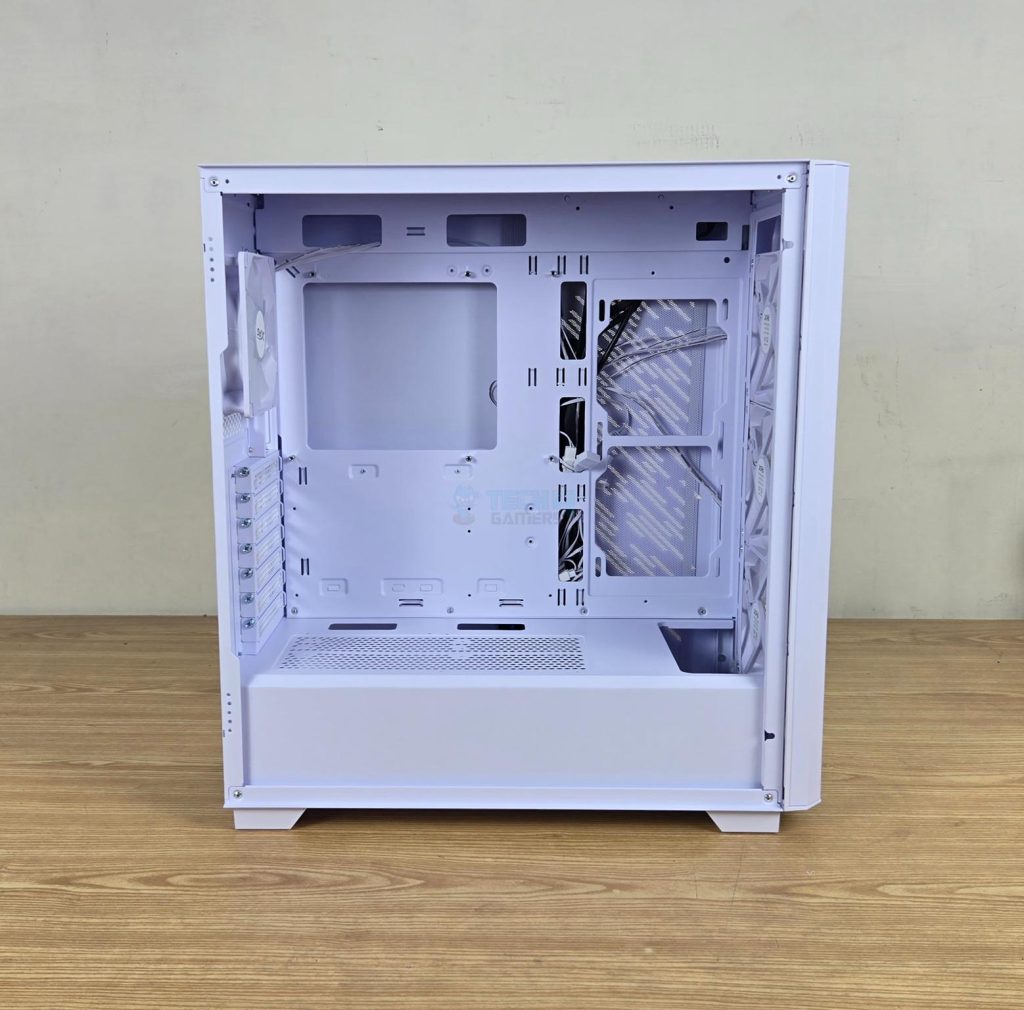
Looking at the main area of the case, you can spot a motherboard tray that can house a maximum of an E-ATX-sized motherboard. We have a spacious layout, so plan your build accordingly. However, if you are not using the fans on the side, then cable management needs to be top-notch, as the backside area is visible from the side fan mount.
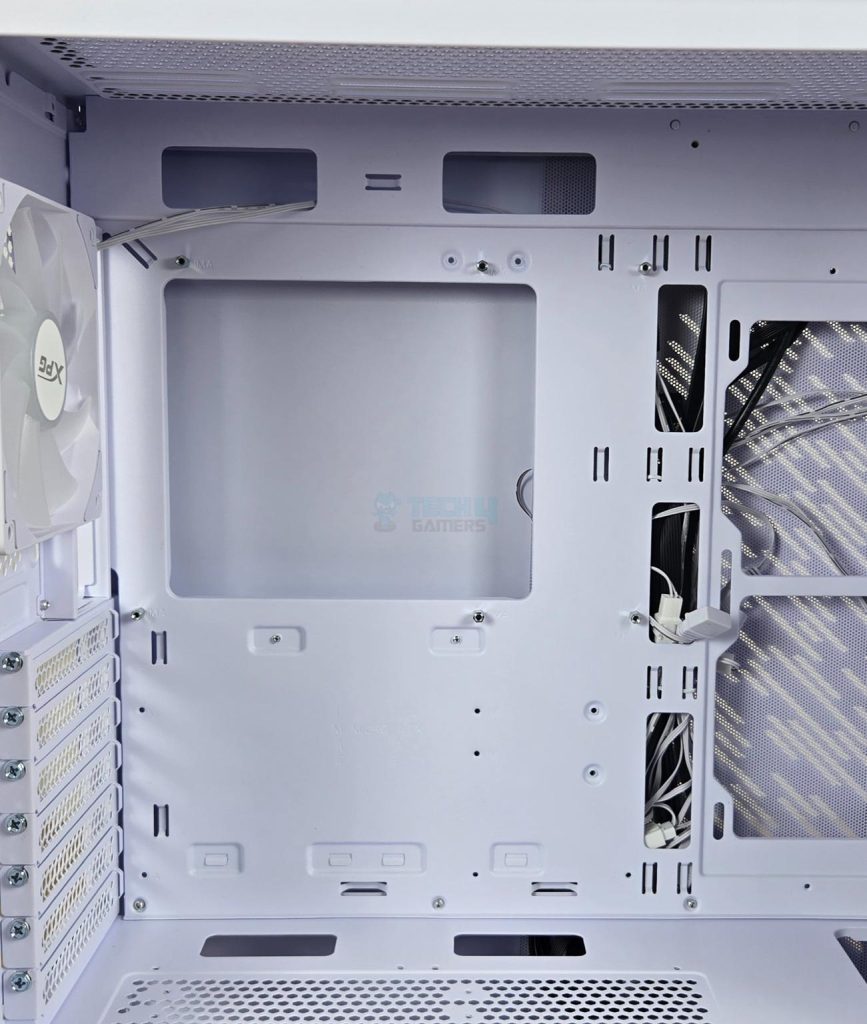
The motherboard tray is solidly built. It comes with 6x standoff screws. You need to install the 3x standoff screws if using ATX/E-ATX form factor motherboard. The tray has 2x cut-outs on the top and 3x on the right through which the cables are passed. In the case of an E-ATX motherboard, the right side cutouts will be covered by the motherboard PCB. The case has approximately 60mm or so clearance from the top, which is an excellent figure. Backplug motherboards are not supported.
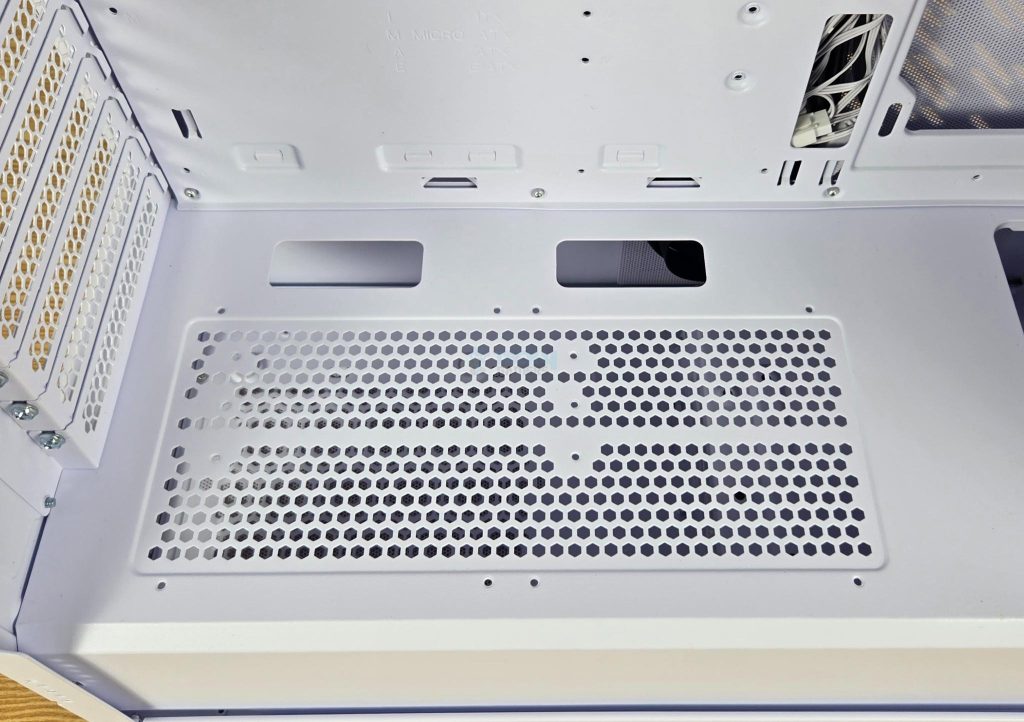
PSU cover is vented using perforations. You can see fan mounts there as well, though XPG has not mentioned fan support over the PSU cover. Two cutouts are visible near the base of the motherboard tray. Use these for the bottom connectivity on the motherboard.
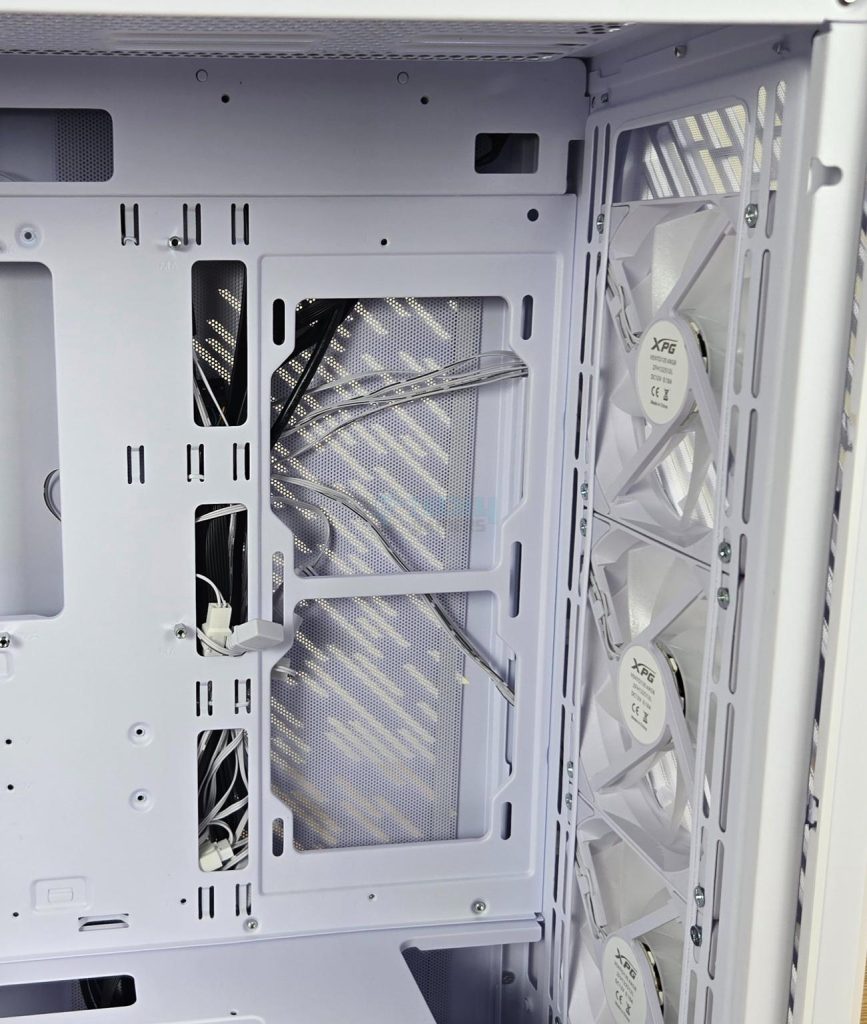
The case provides a fan mount on the side of the motherboard tray. You can install up to 2x 120mm fans here. But they will have an impact on the front clearance for the radiator/fan mount as well as on the graphics card length.
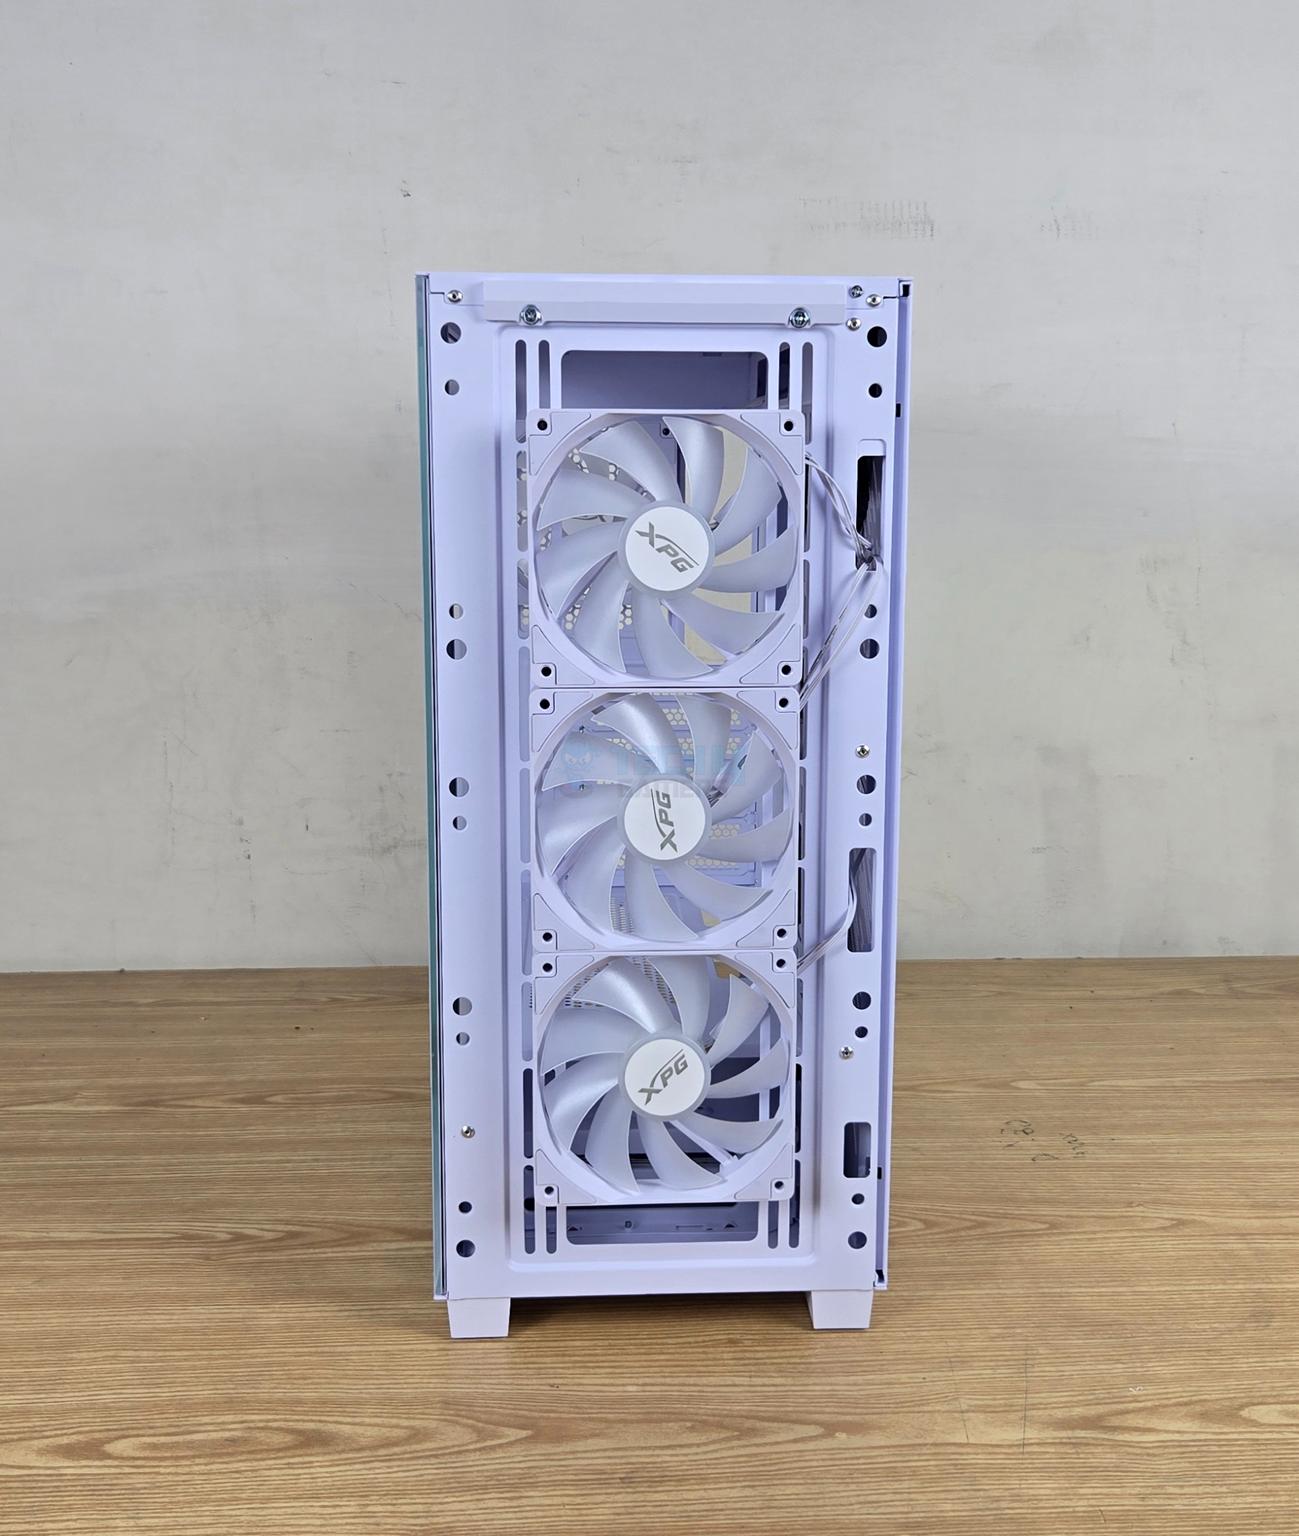
XPG has provided 3x 120mm ARGB white fans on the front. These fans are installed on the outer side of the frame, providing good clearance for the thicker radiator.
The case has a gap of roughly 70mm on the front side. The placement of the storage cage and this gap play a key role in the permissible thickness of the radiator.
XPG has used 1x 120mm ARGB white fan on the rear. It is regulated with a 3-pin DC connector.
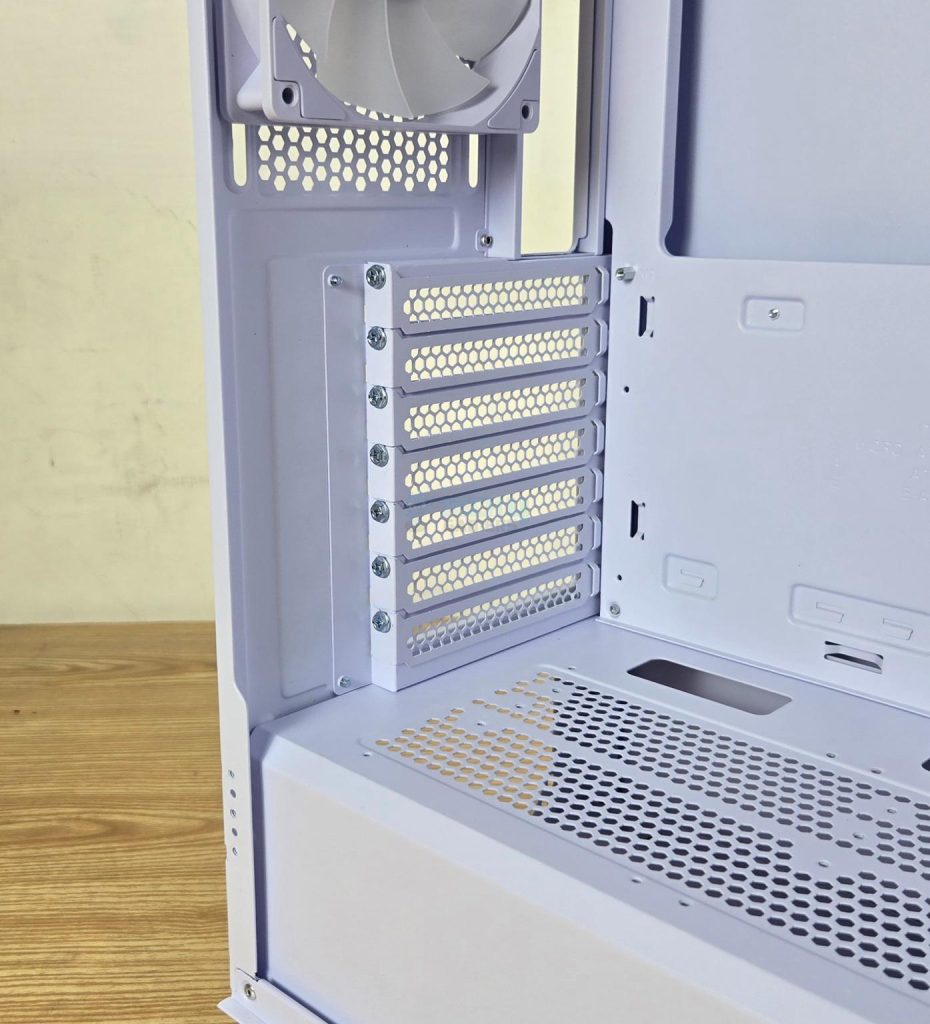
The case comes equipped with a removable PCIe bracket. This bracket has 7x slots with reusable covers.
I have installed the bracket in vertical layout. This poses a challenged since the screws are on the inner side of the case. You would need a short length screw driver or need to remove the top fan. Still the clearance for the screwdriver is less. Alternatively, you can install the riser cable and the graphics card out of the case on the bracket and then install the fully assembled bracket in the case.
Clearance
While we are at it, let’s talk about the clearance:
- The maximum CPU Cooler height is 167mm.
- The maximum length of a graphics card is 400mm which is subject to the front clearance. This limitation will be less if using radiator and fan combination on the front. Also this is limited by the side fans.
- The maximum length of a PSU is 200mm.
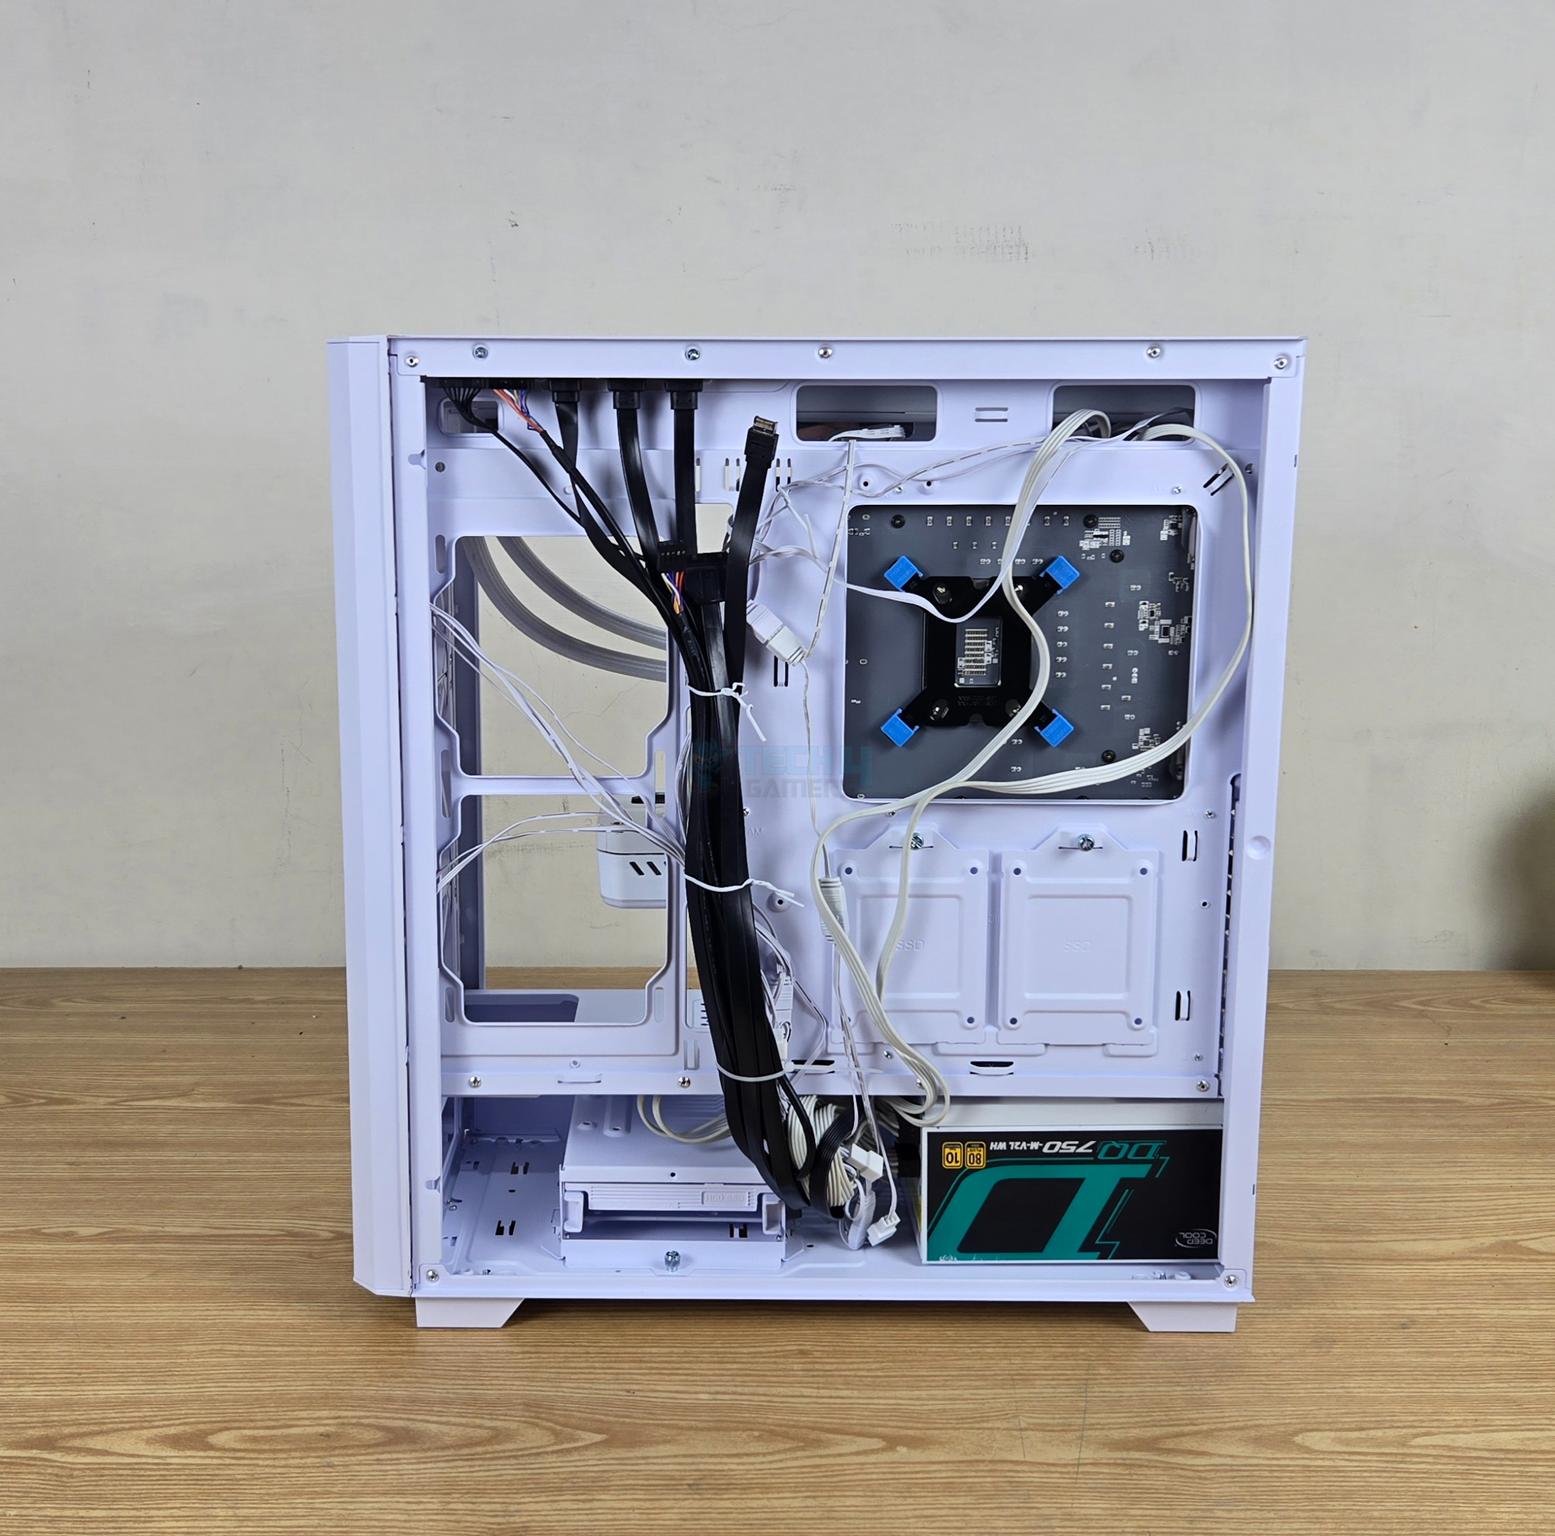
Backside
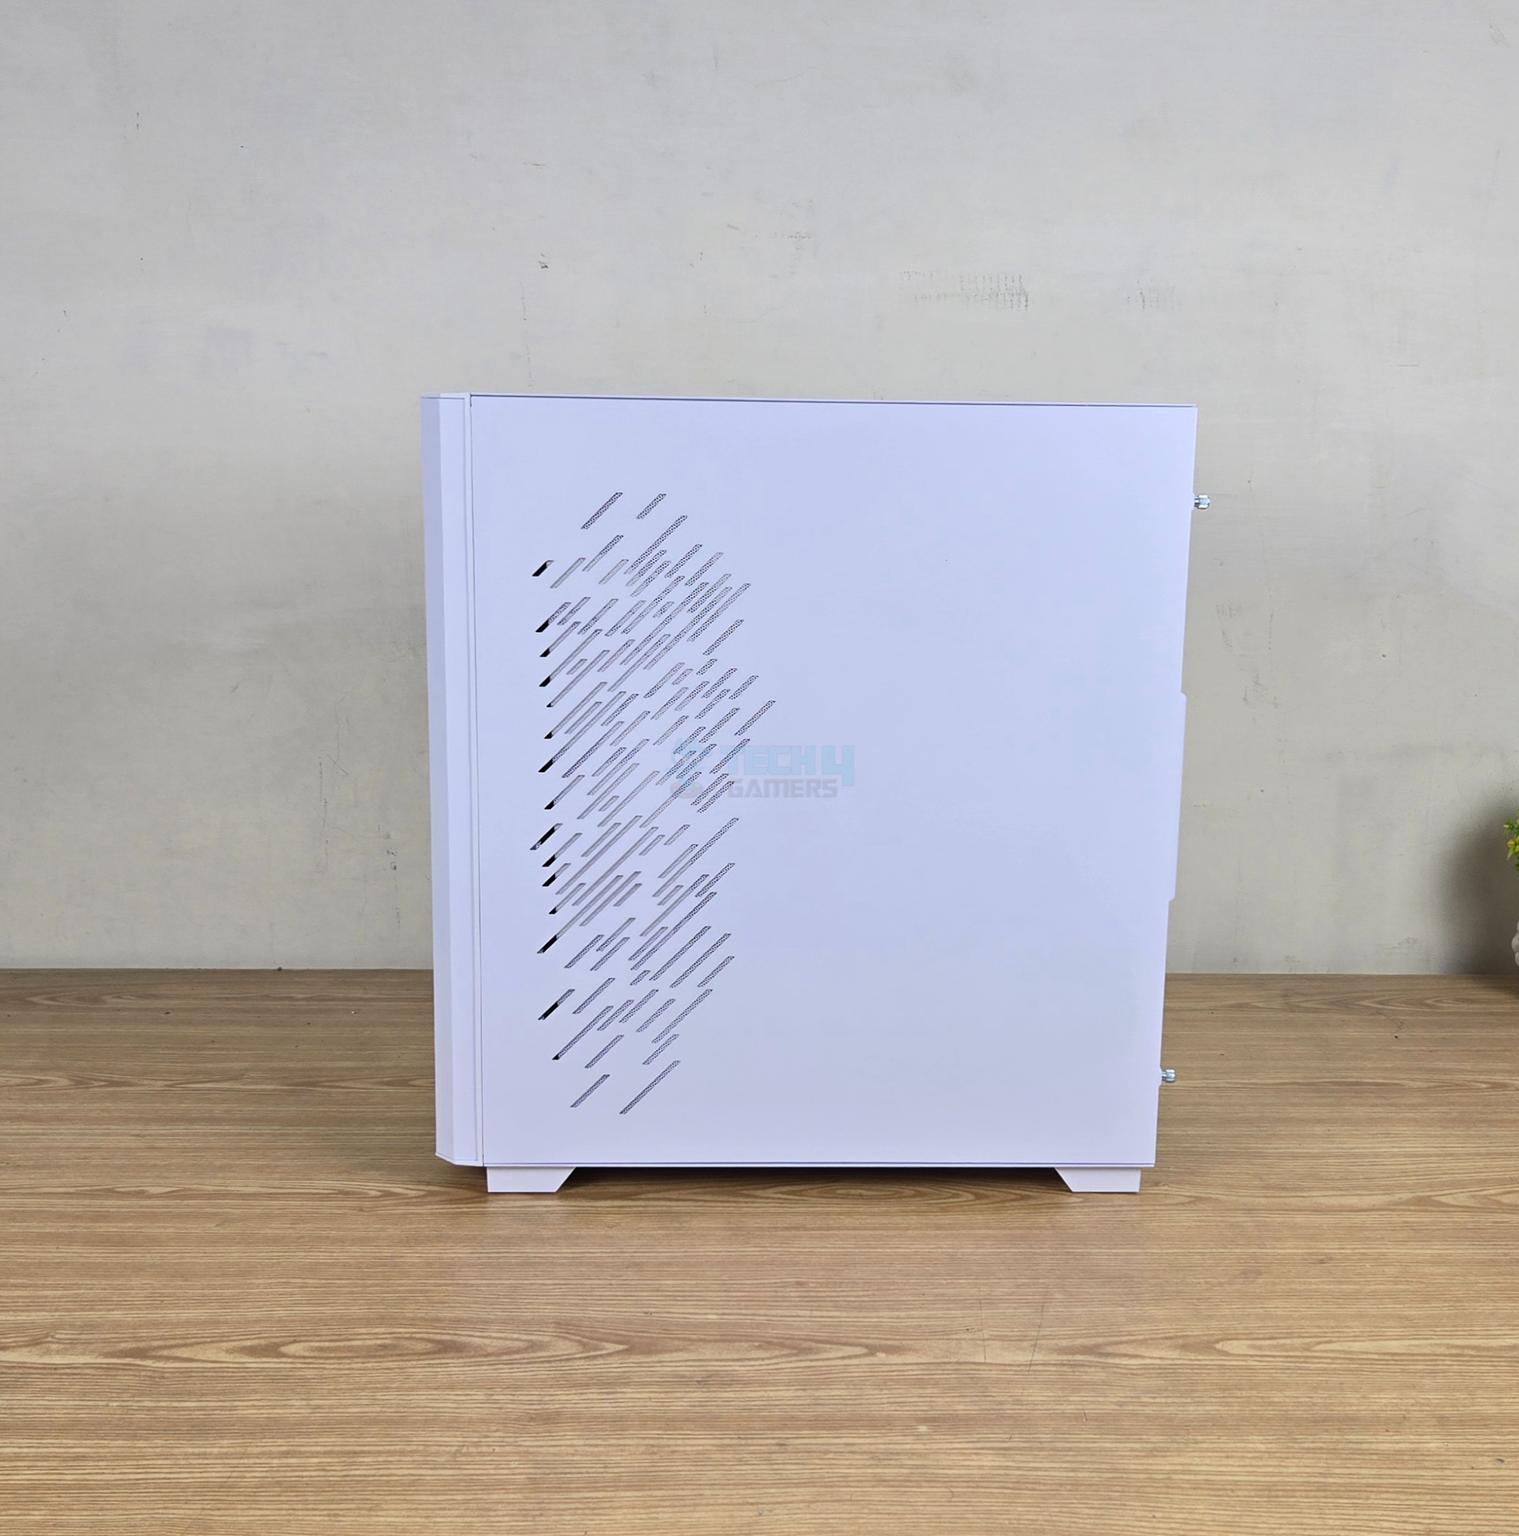
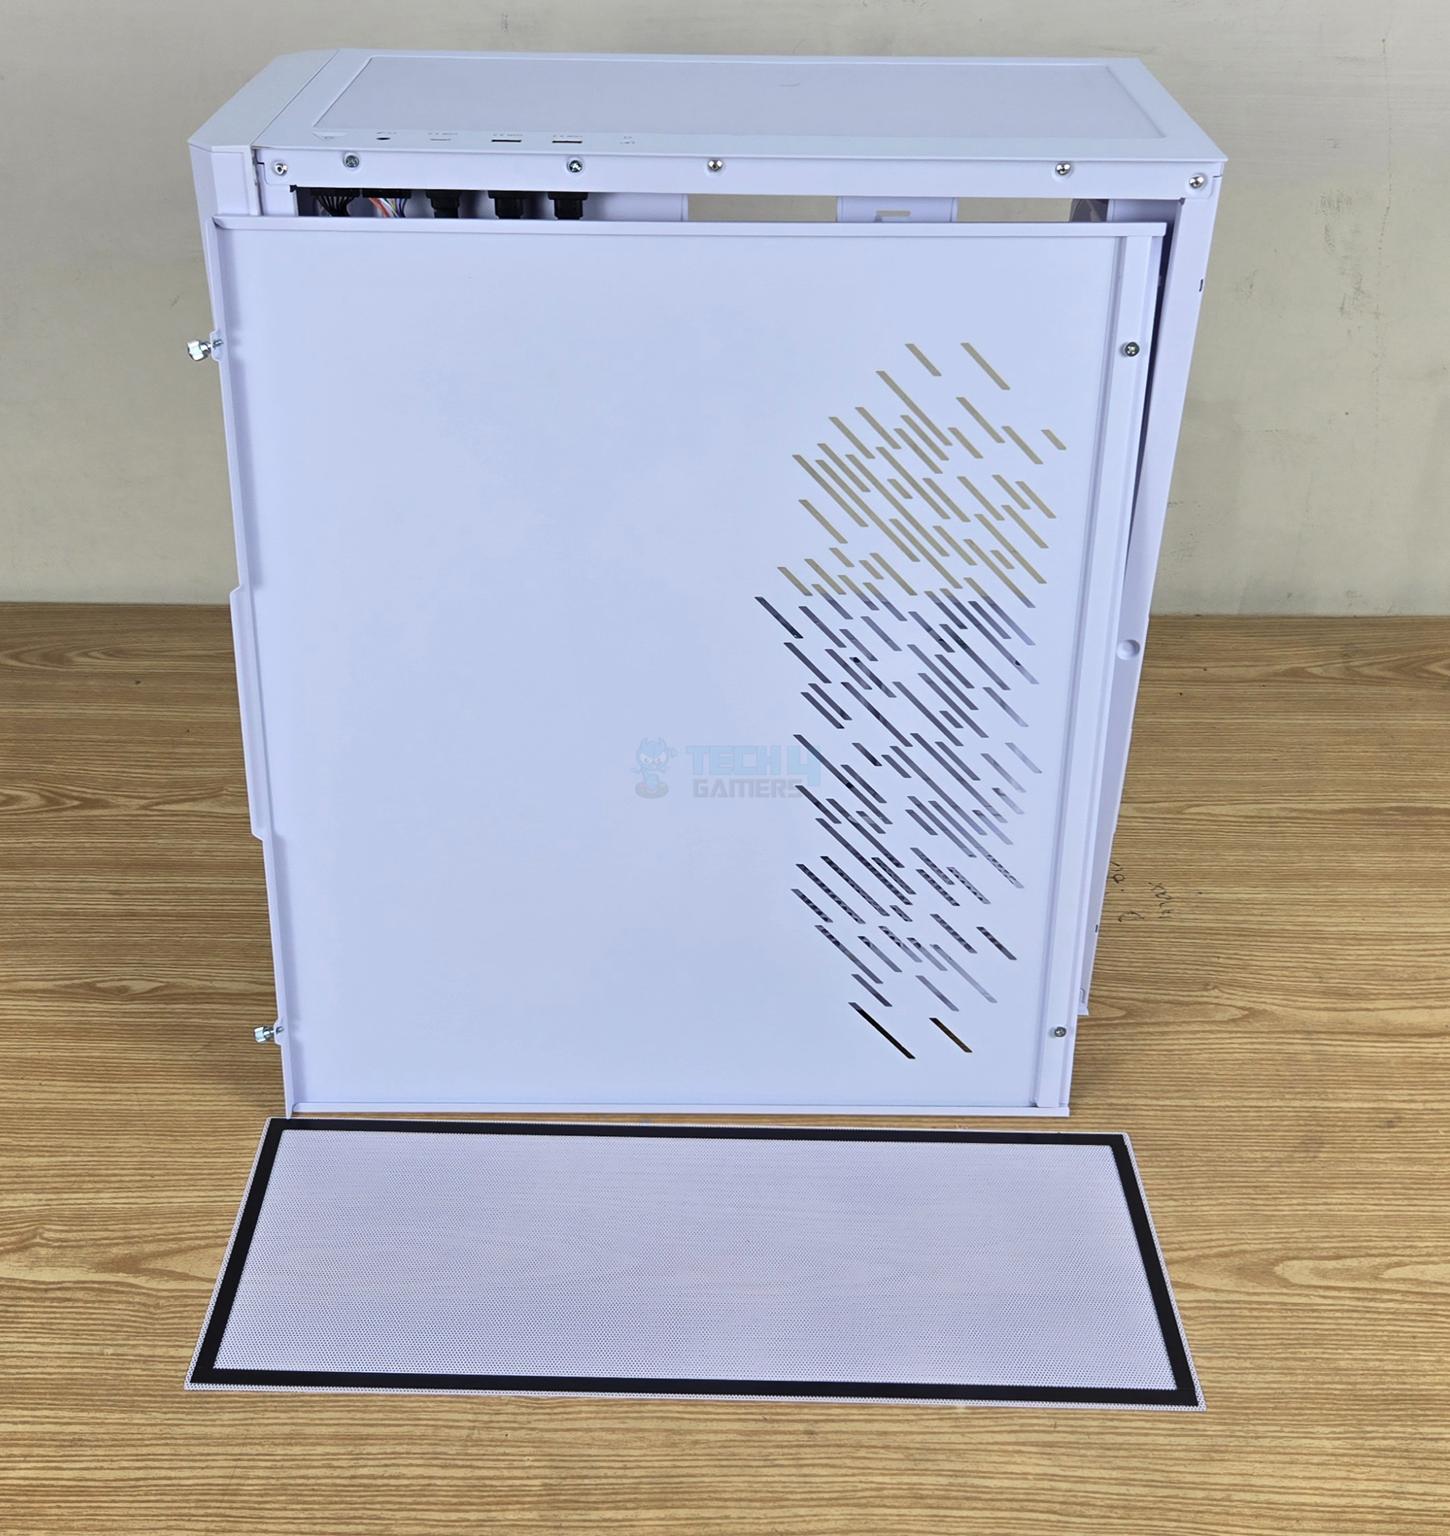
The backside panel is made of steel material and has same perforated angular stripe design towards the front. This perforated area faces the side fan bracket on the main frame. Hence airflow is ensured with this design.
XPG has used magnetic dust filter on the back panel to cover the perforated area for dust filtration.
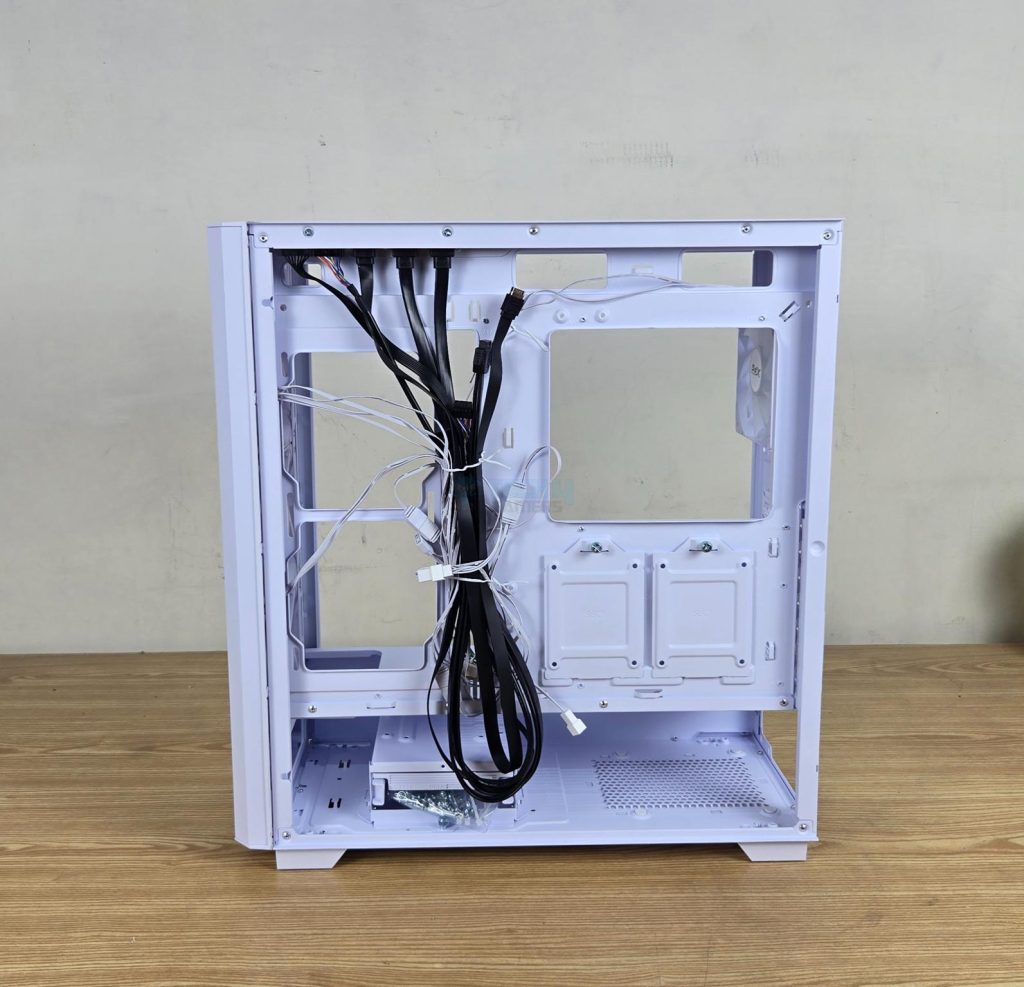
The overall layout is simple and clean on the backside. However, the overall cable management space particularly in the mid-section is less. The cables can be seen tied up in a bundle on the center.
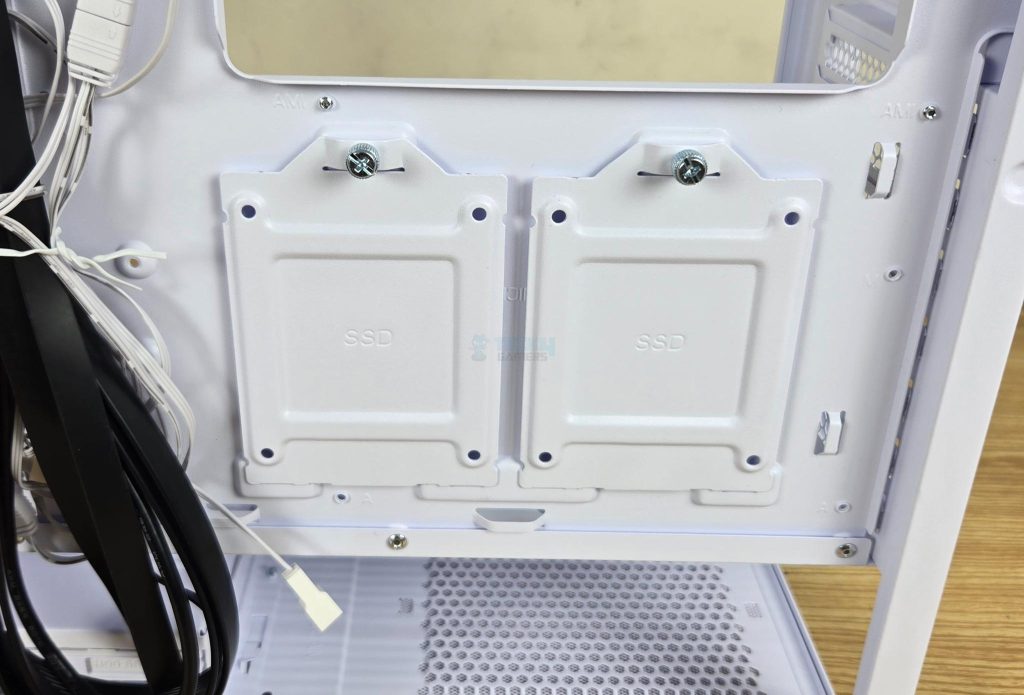
XPG has provided two 2.5” drive brackets on the backside of the motherboard tray below the large size CPU cutout.
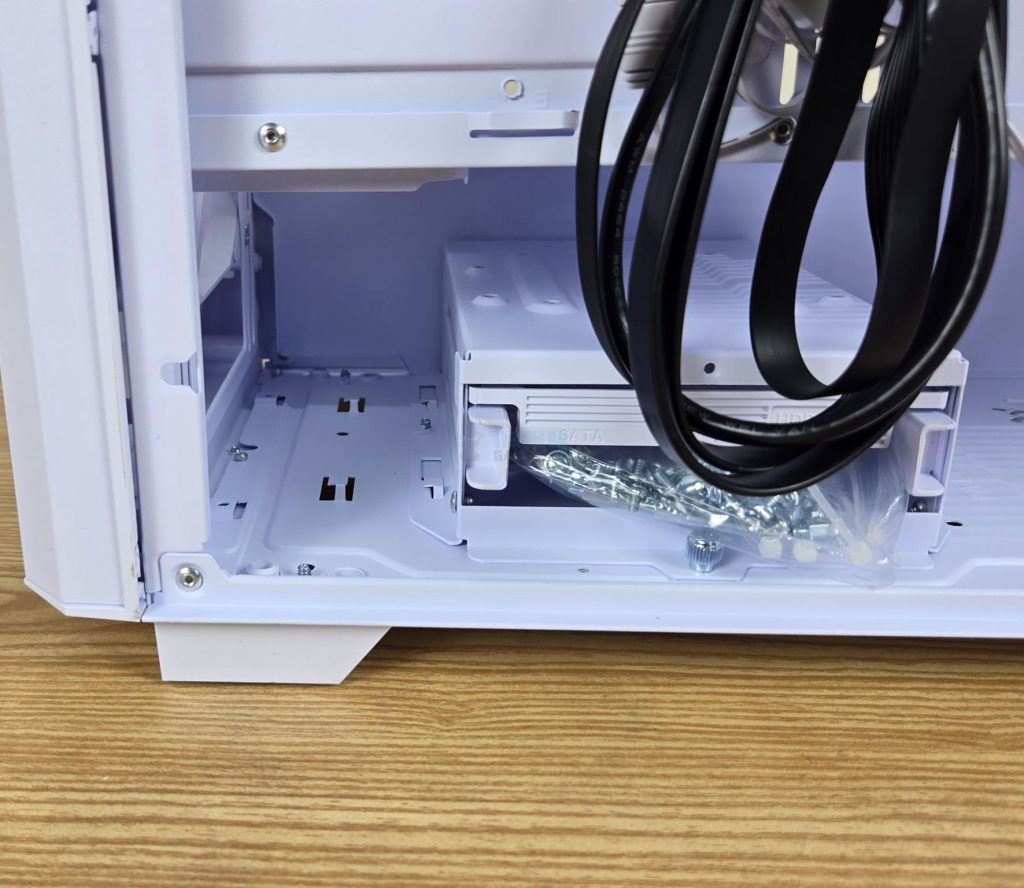
XPG has provided a HDD cage with a single caddy. This cage can be shifted towards front making more room for the PSU and its cables. However, this would restrict the 360mm radiator installation on the front.

The drive caddy is not tool-less.
PSU bay has 4x anti-vibration pads over the protruded areas on which the PSU is rested. PSU is slided from the side of the case.
IO Cables
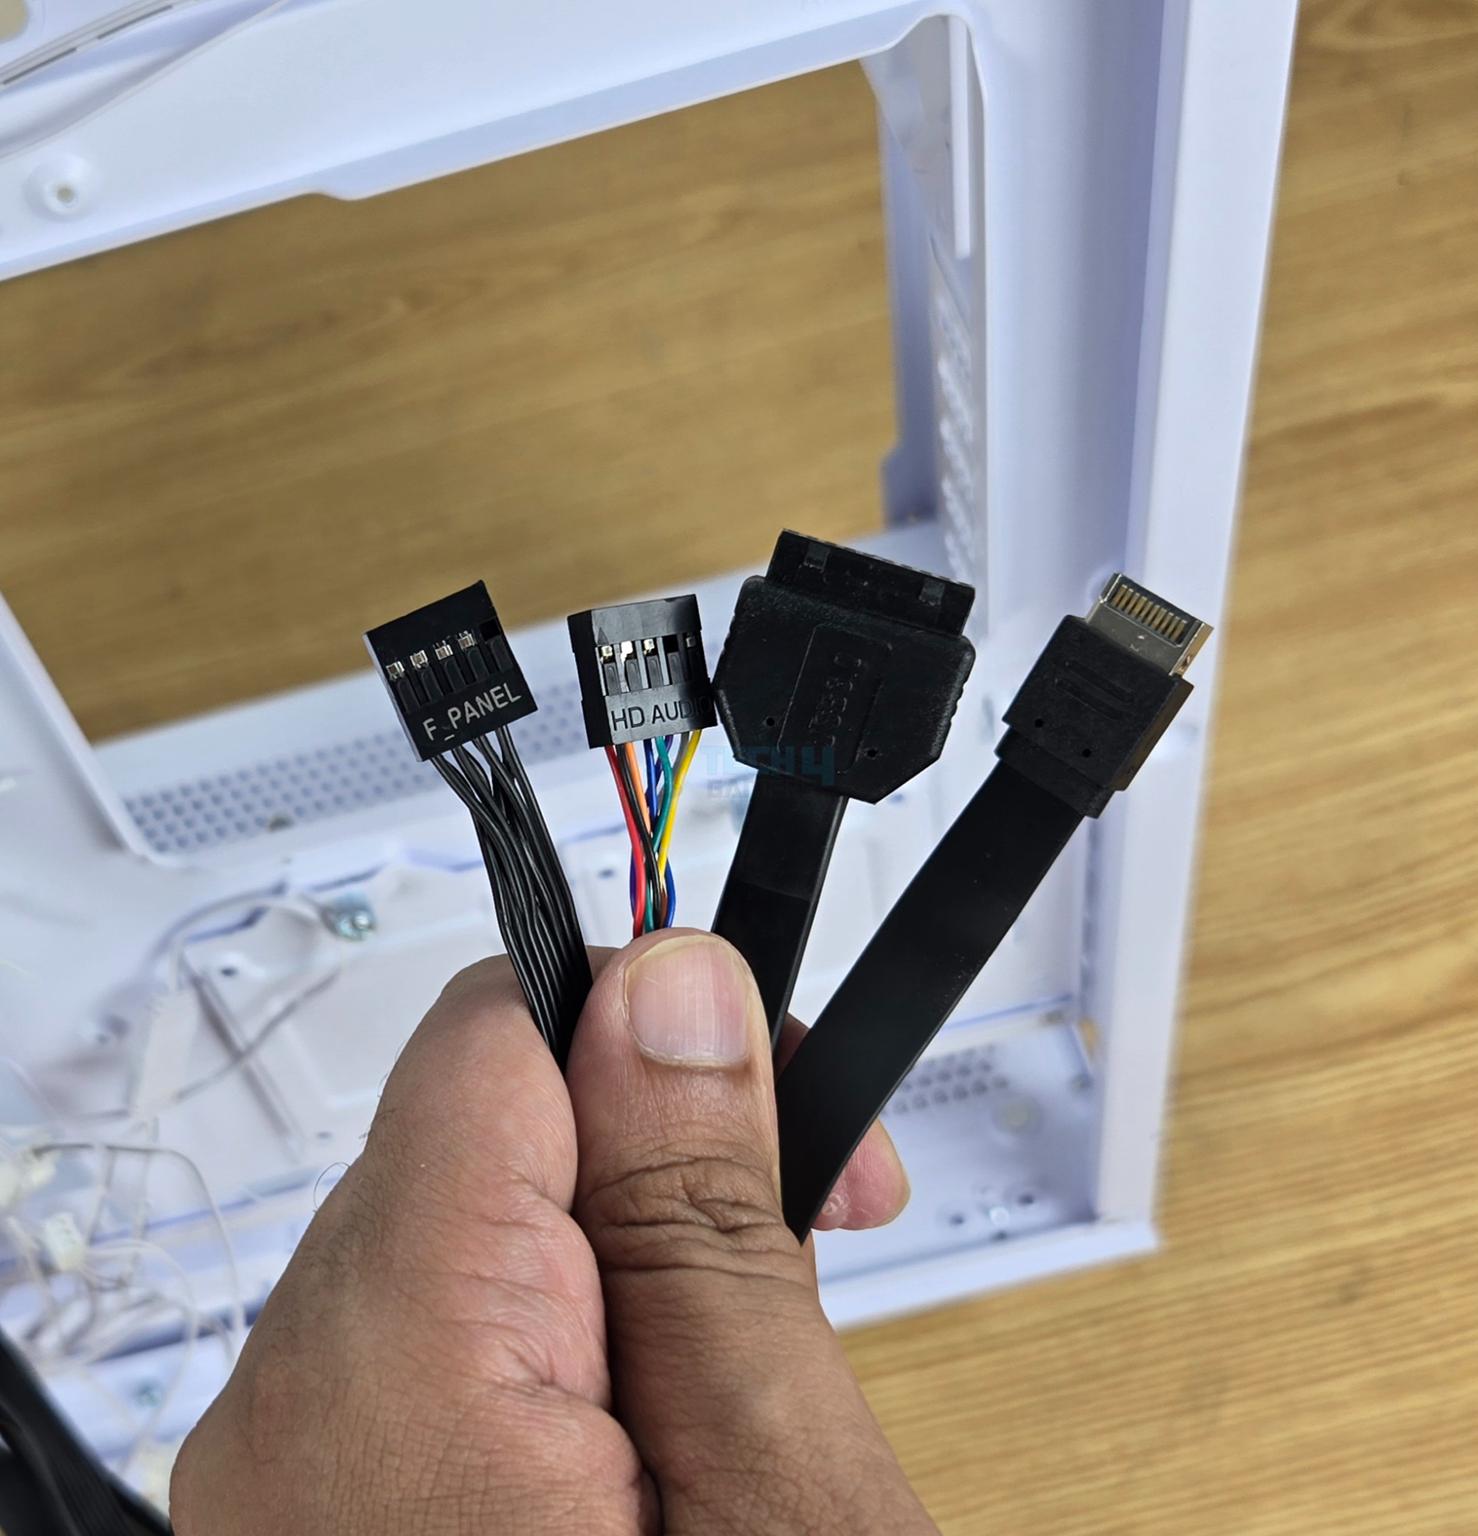
The following are provided:
- 1x Front Panel Connector
- 1x USB Type-E 3.2 Connector
- 1x USB3.2 Connector
- 1x HD Audio Connector
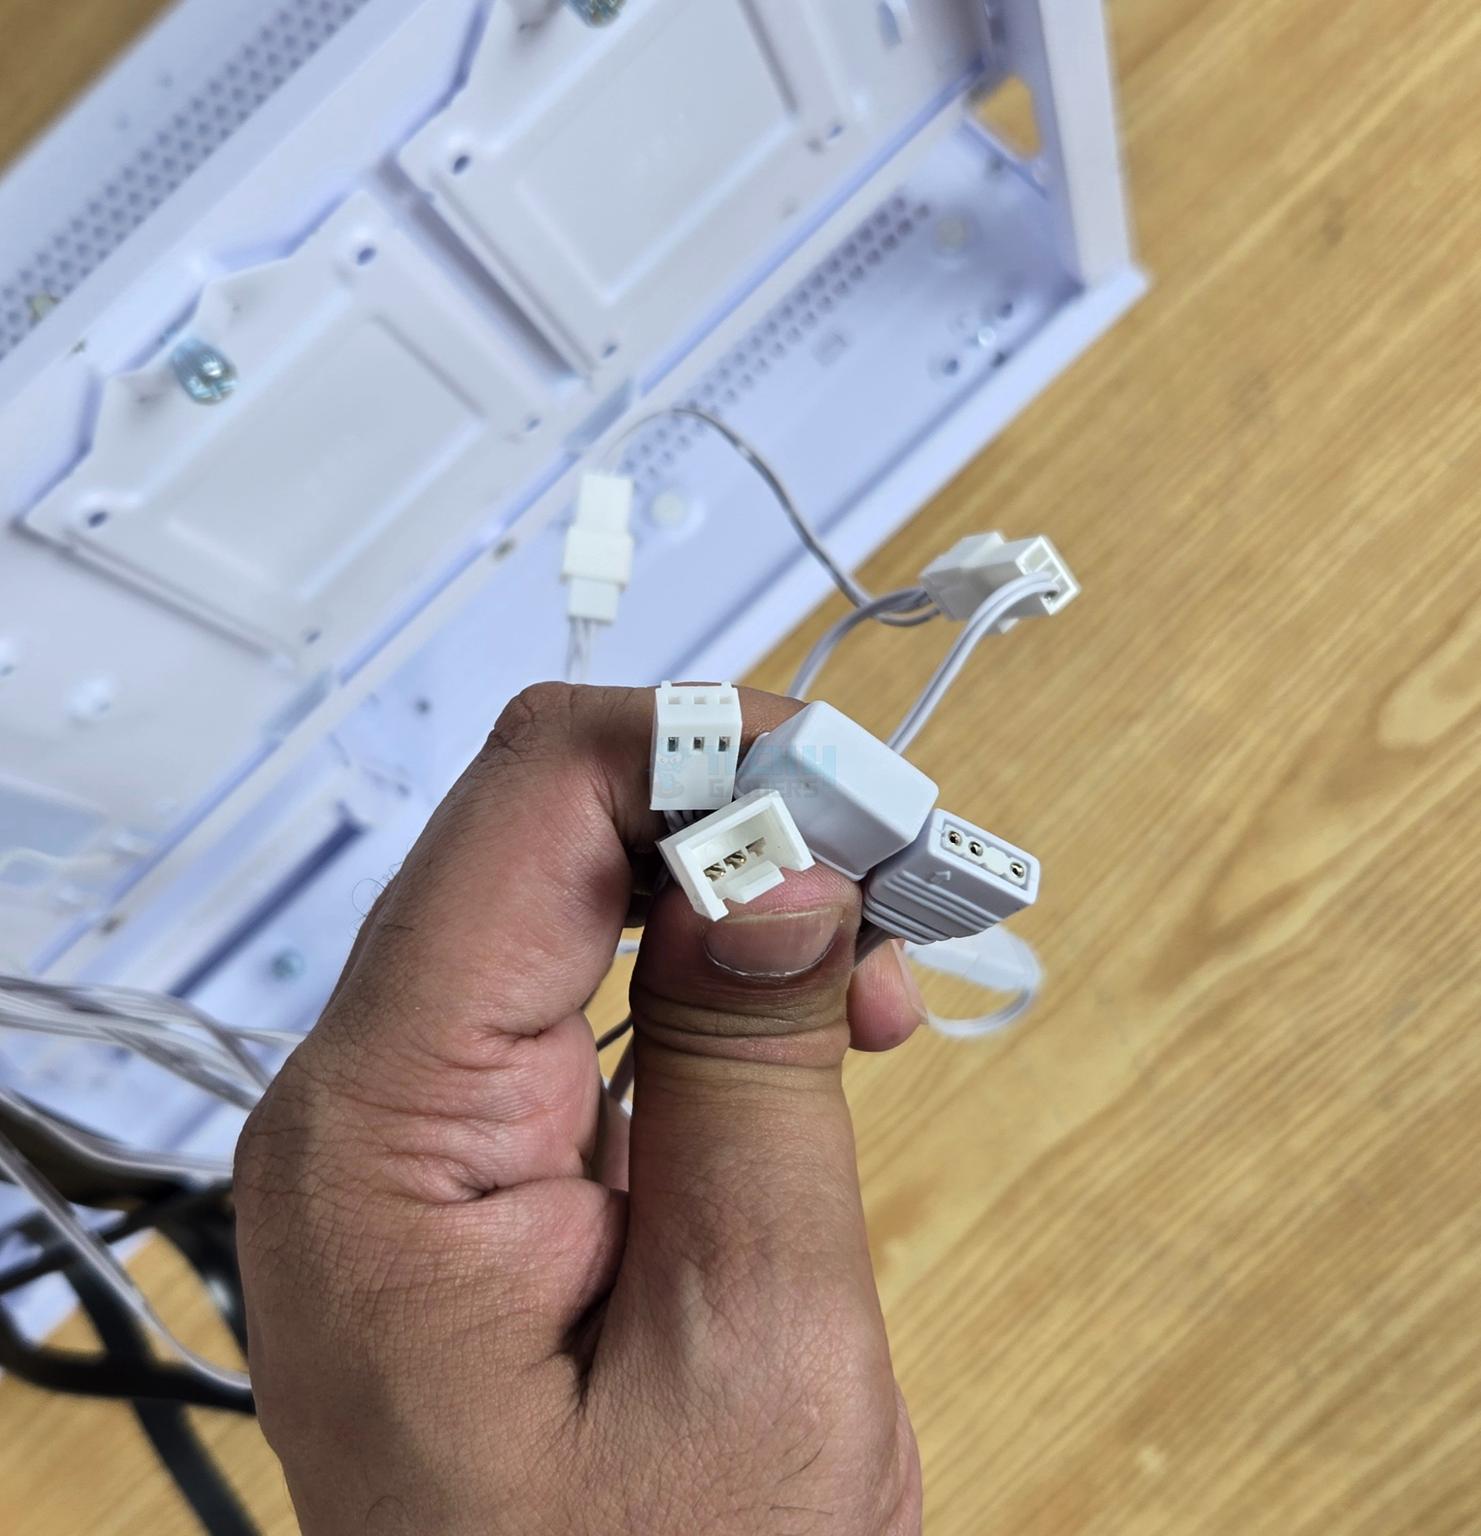
- 3-pin Power Connectors/Sockets for the fans
- 3-pin ARGB Connectors/Sockets for the fans
The pre-installed fans are daisy-chained.
Test Build And Experience
I have used the following configuration for testing this case:
- Intel Core Ultra 265k [Auto, Stock]
- ASRock B860 Steel Legend WiFi
- XPG Levante II 360 White
- V-Color RGB 32GB DDR5 5600MHz CL26 Kit
- Intel Arc B580 Graphics Card
- Sabrent Rocket 1TB NVMe SSD [OS]
- DeepCool 750W Gold PSU
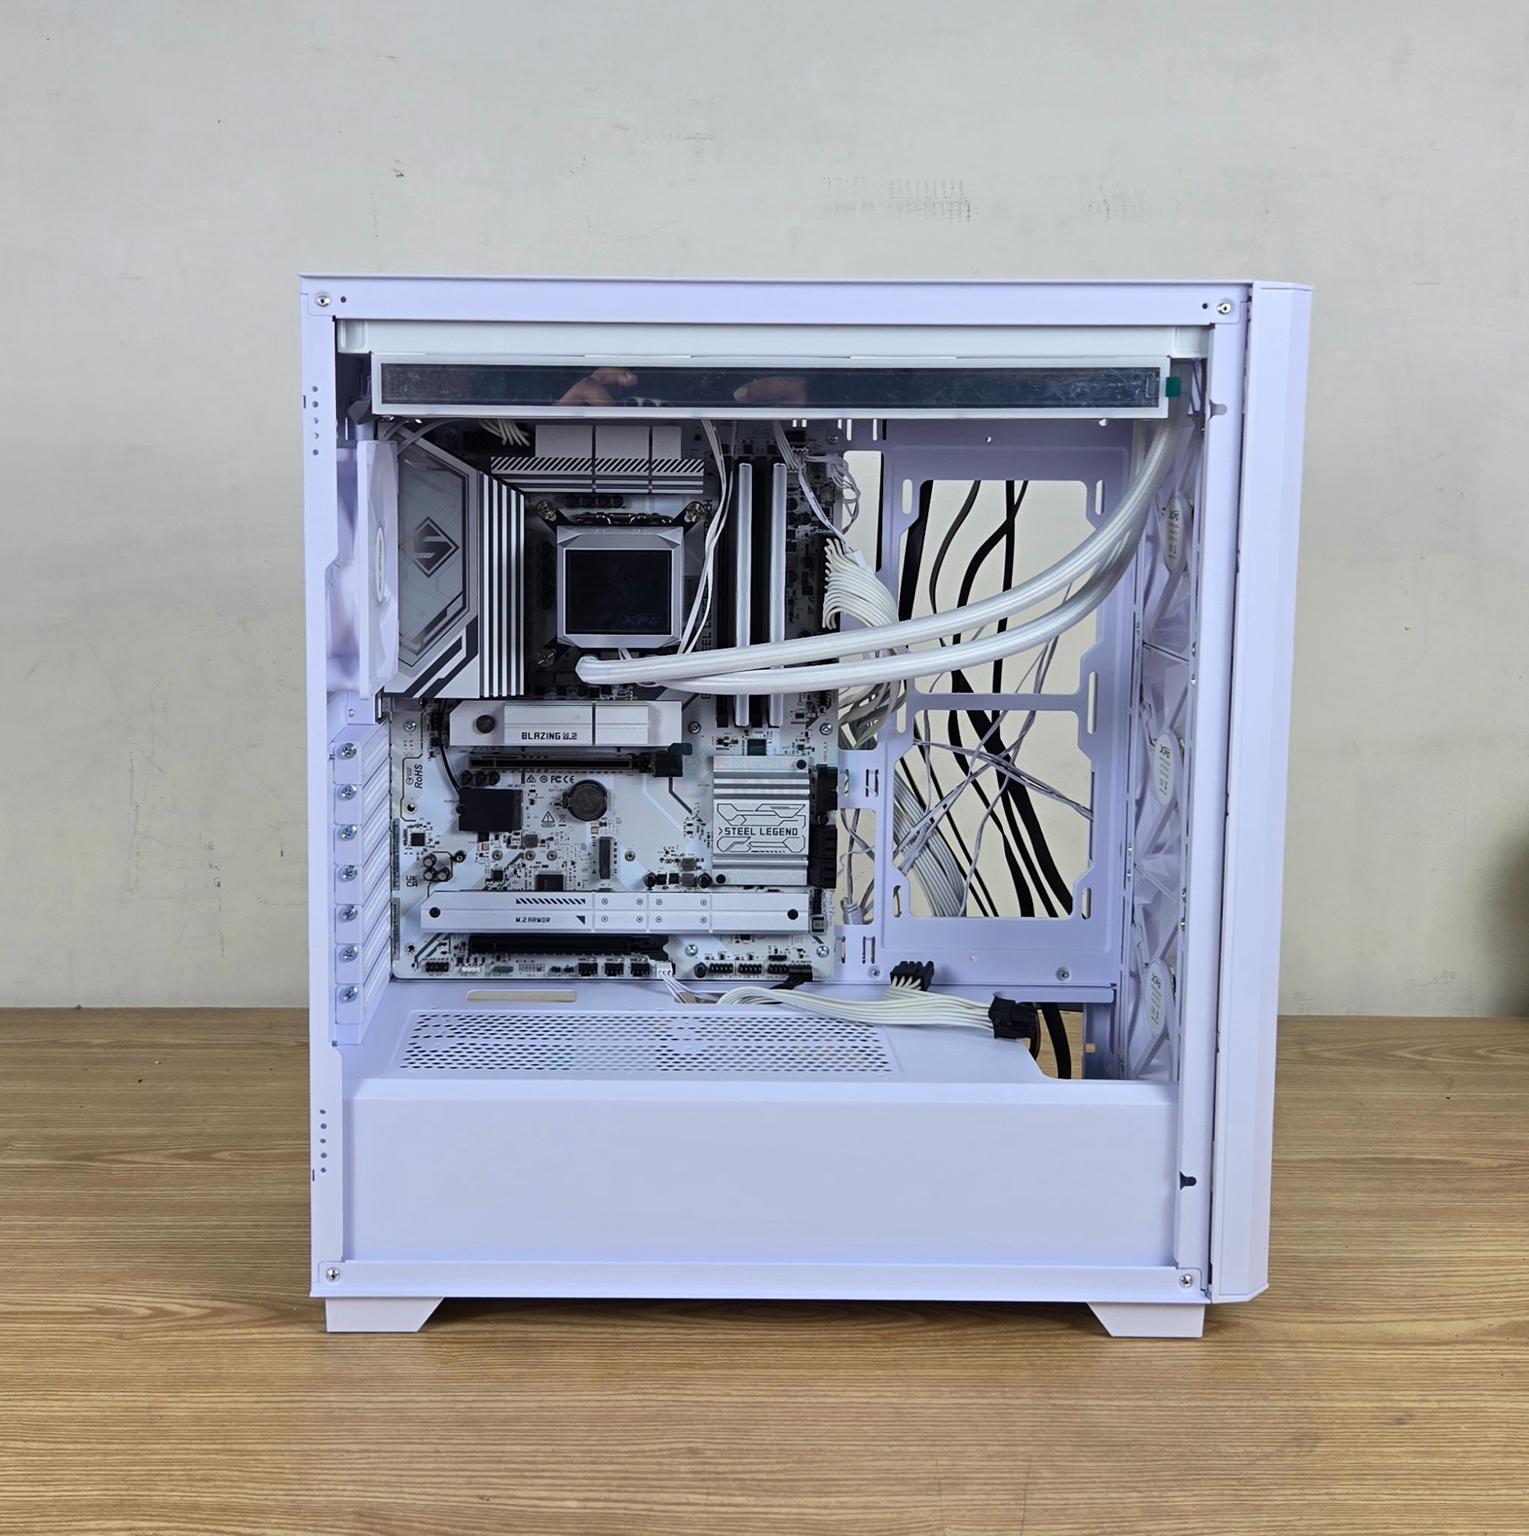
I started the build with motherboard’s installation. Then I connected the EPS cables before installing the AIO on the top. The AIO could not be placed by default and I had to lower the height of the rear fan so that radiator can easily go inside of the case.
The cable connections were done next and PSU was installed followed by the graphics card installation. The overall process was buttery smooth and I did not face any issue a such except that cable management needs to be done with patience and planning otherwise you will face issue closing the side panel.
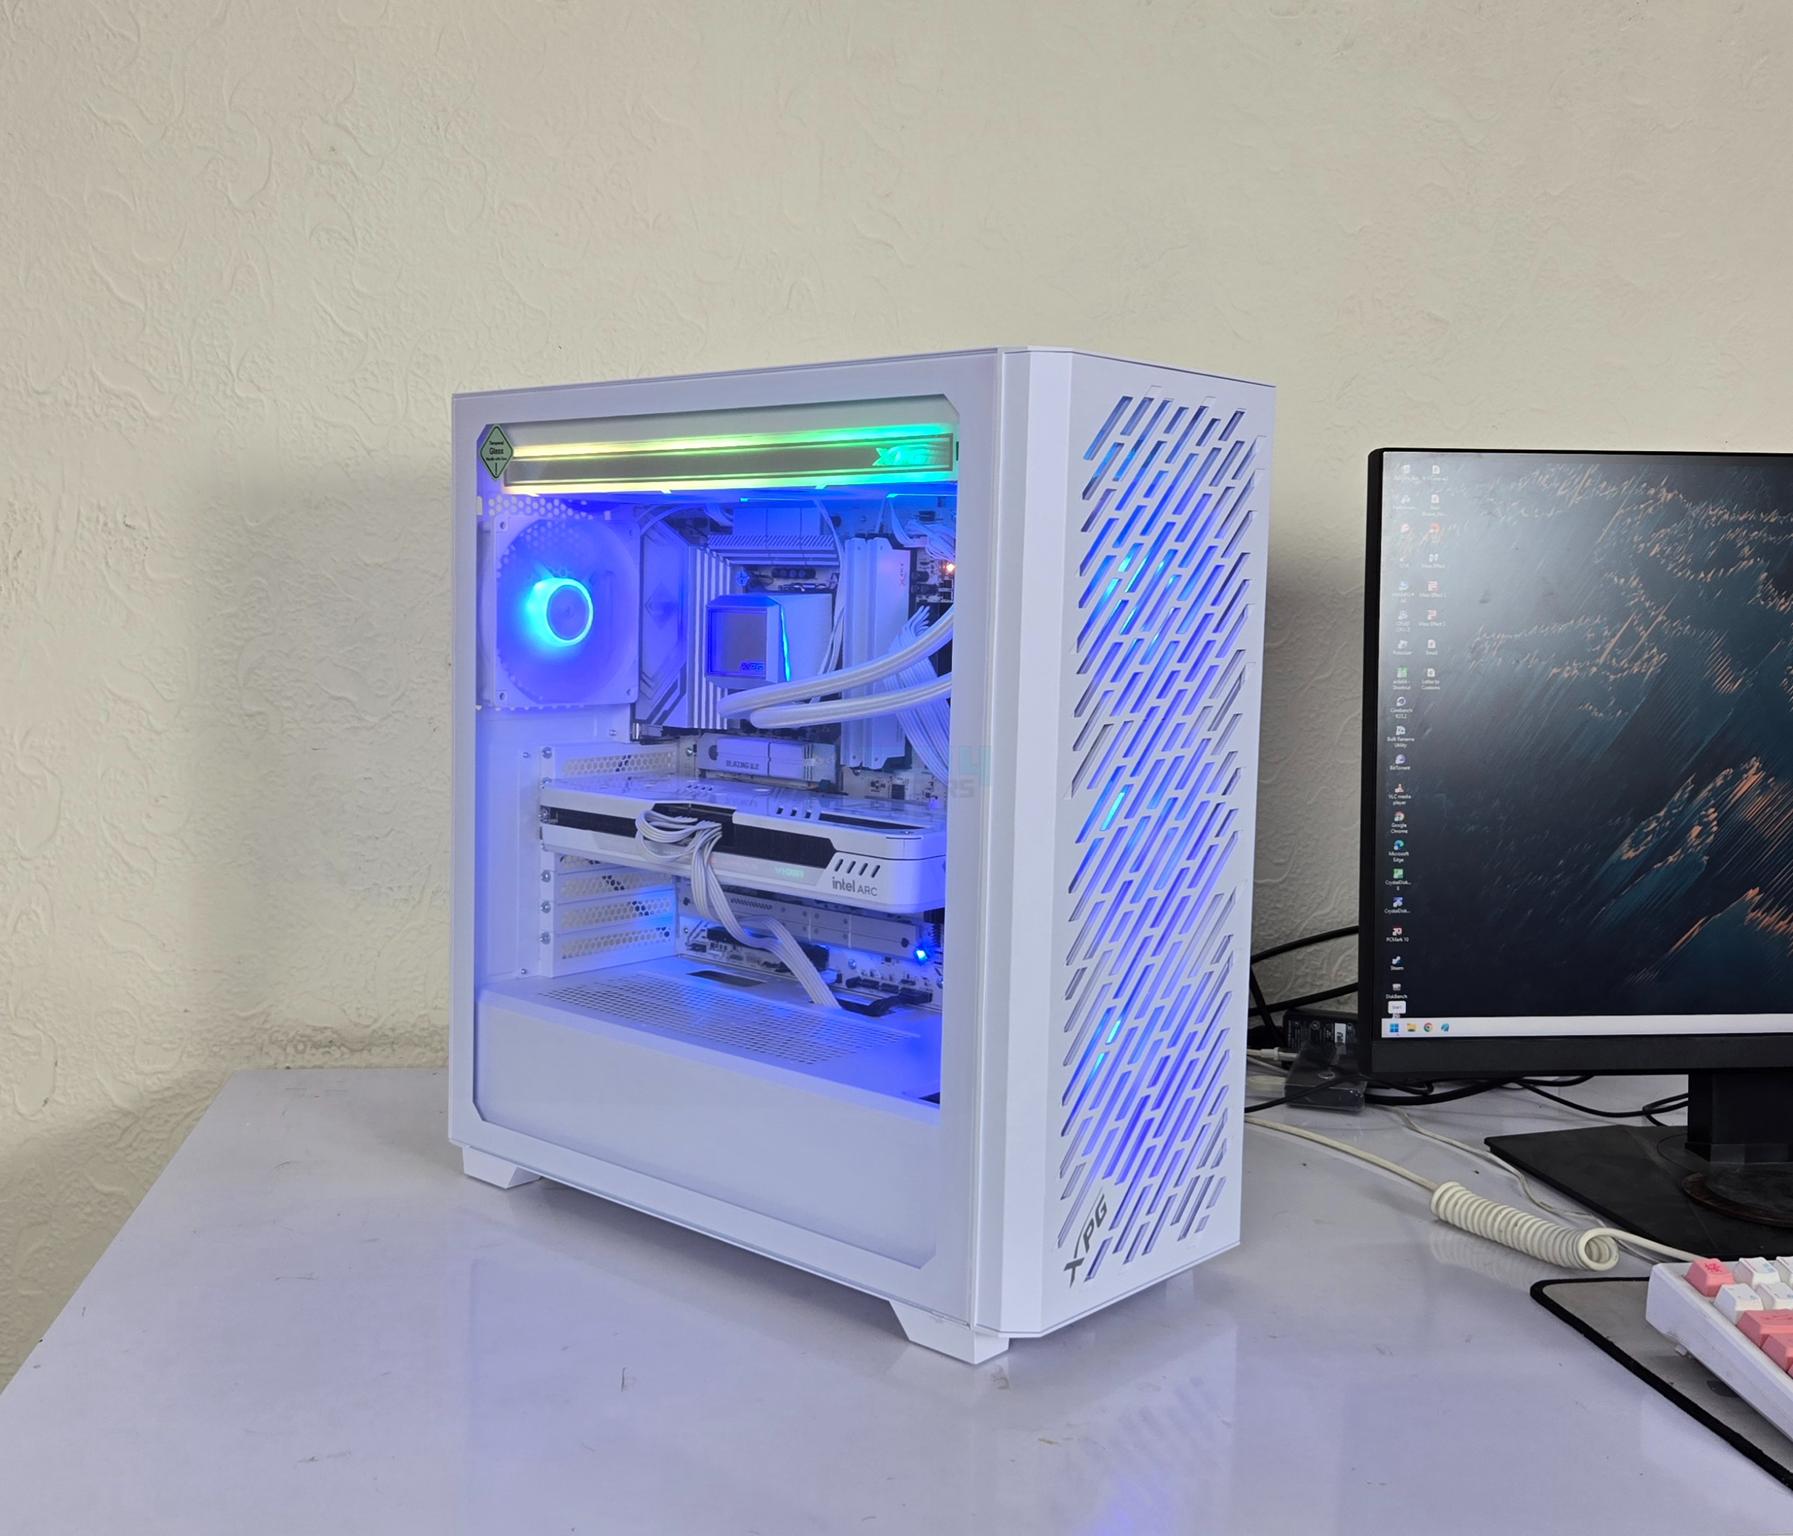
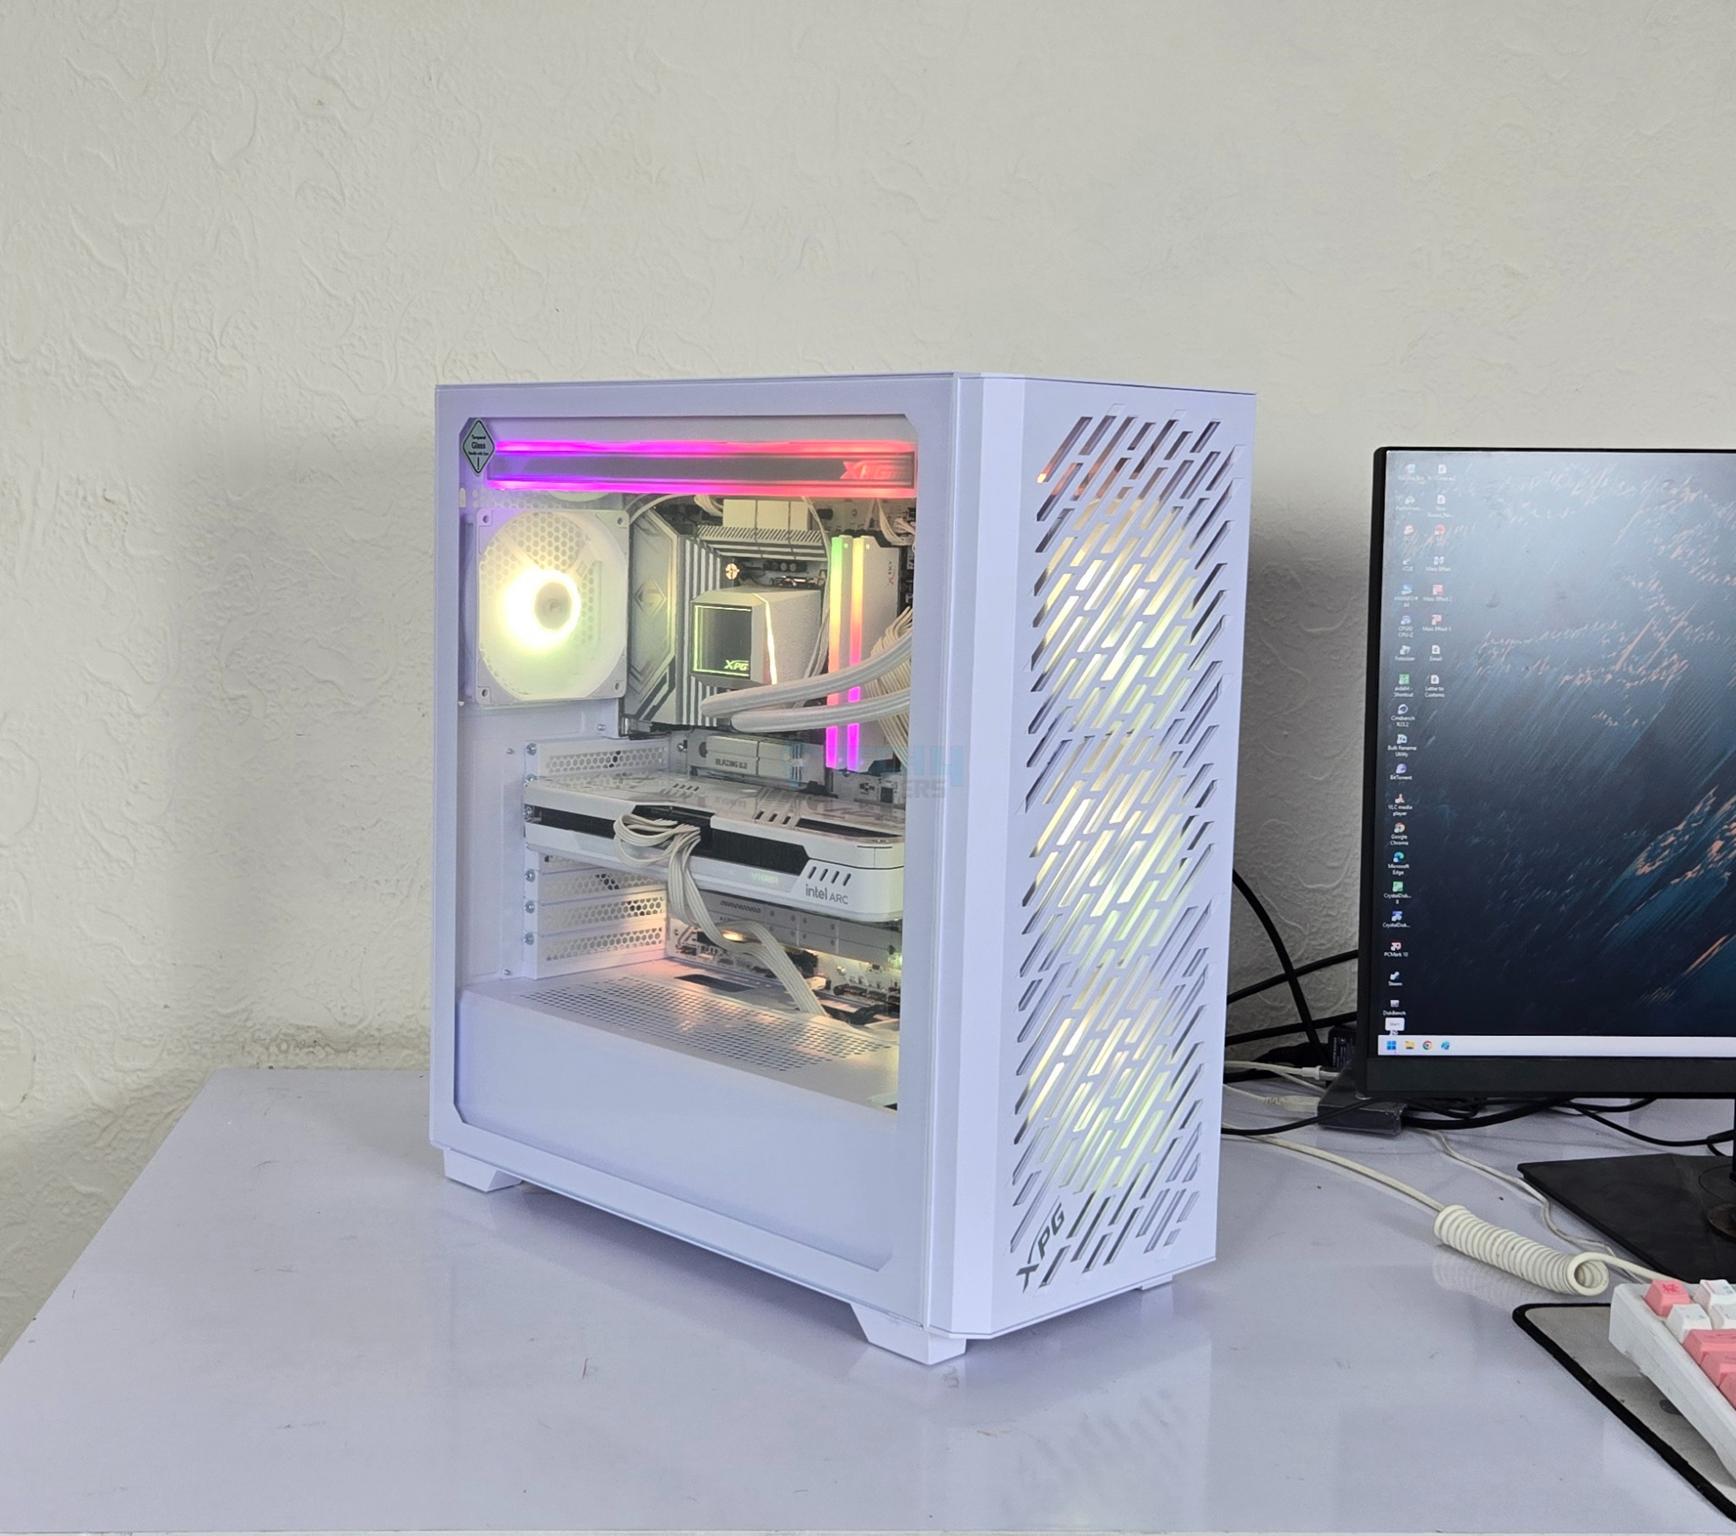
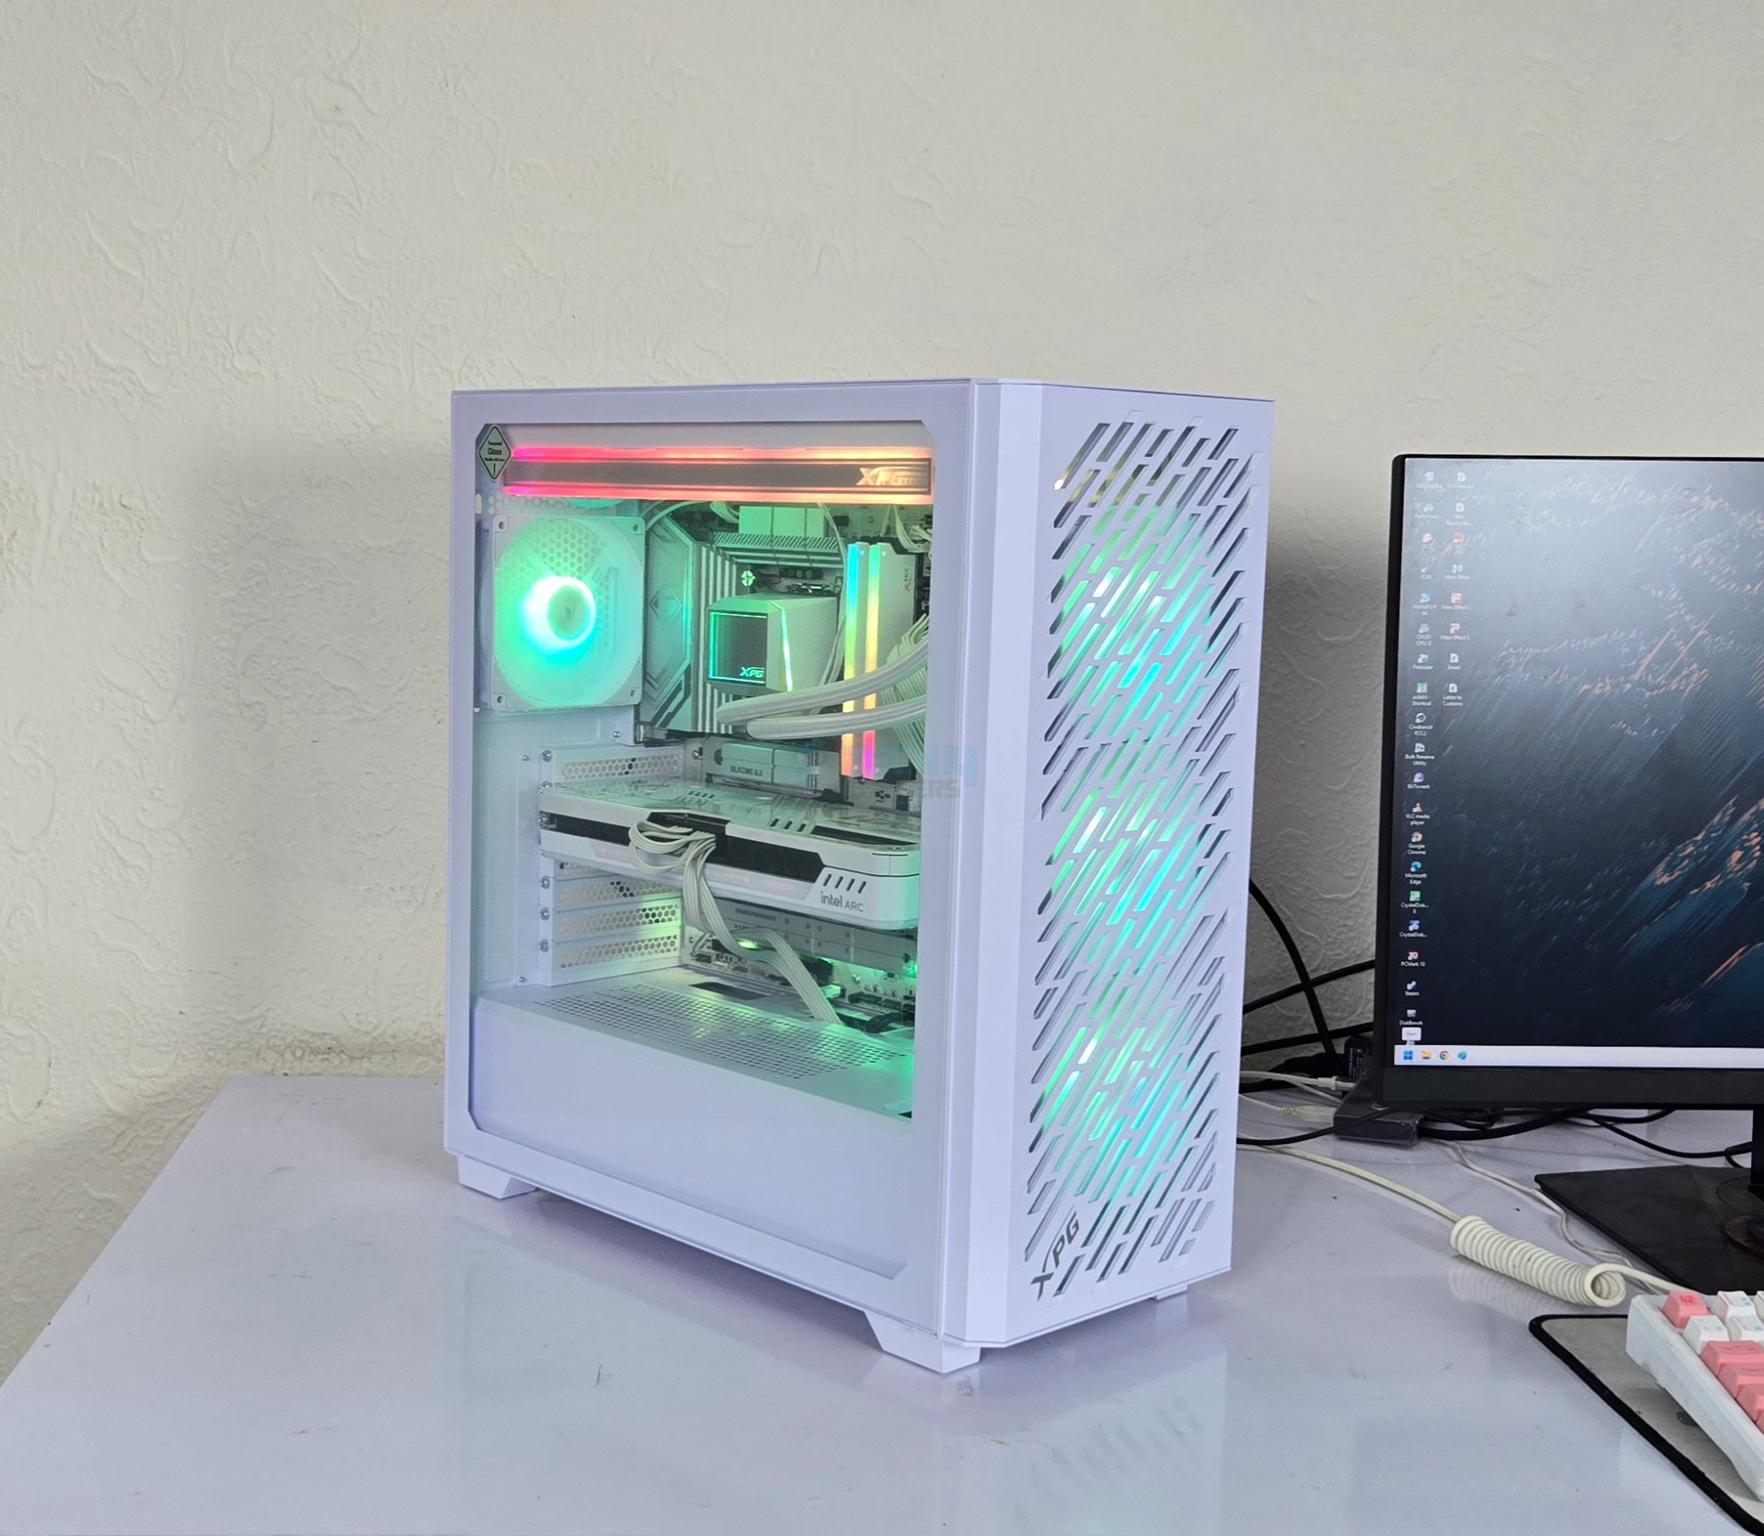
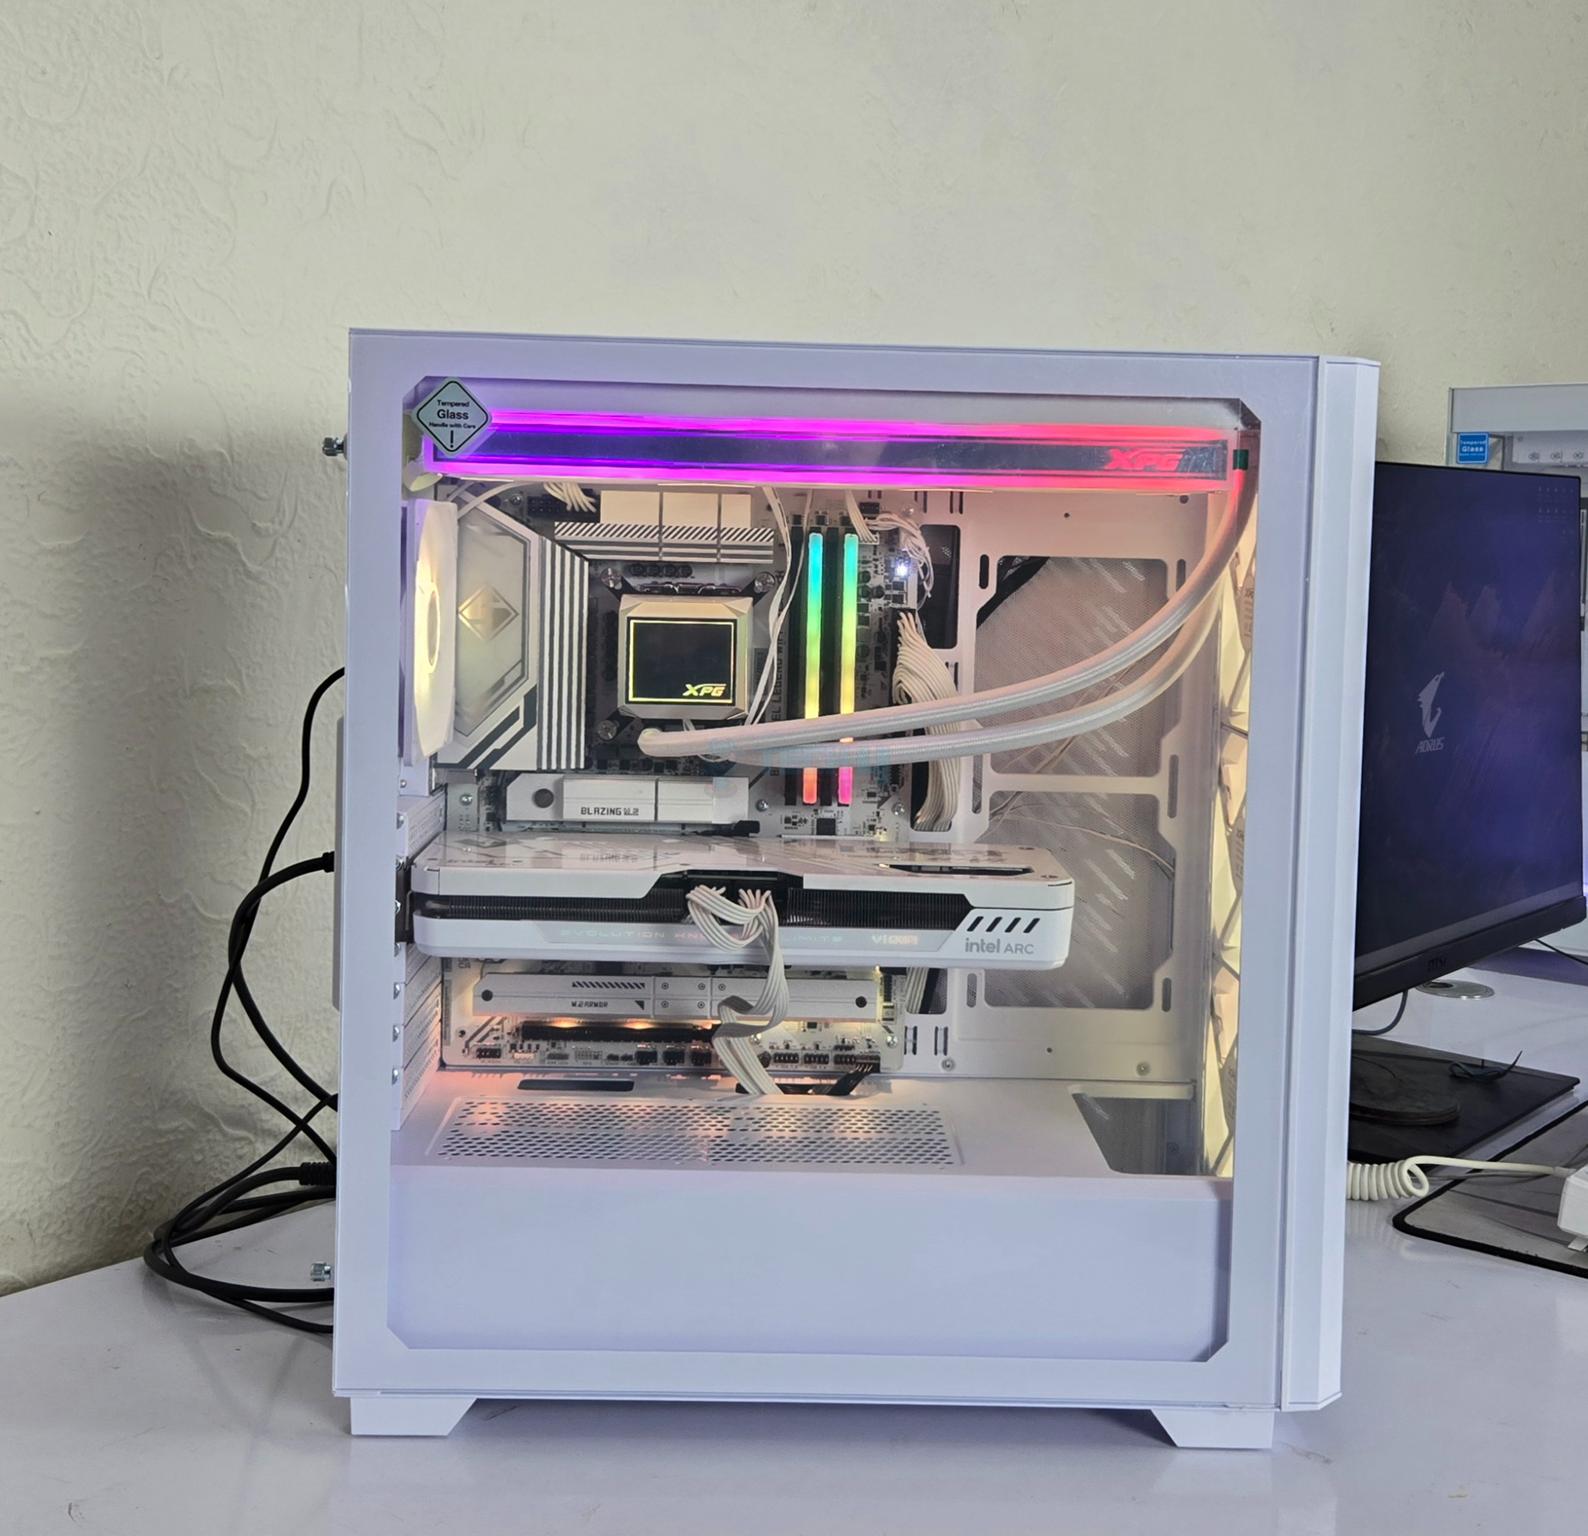

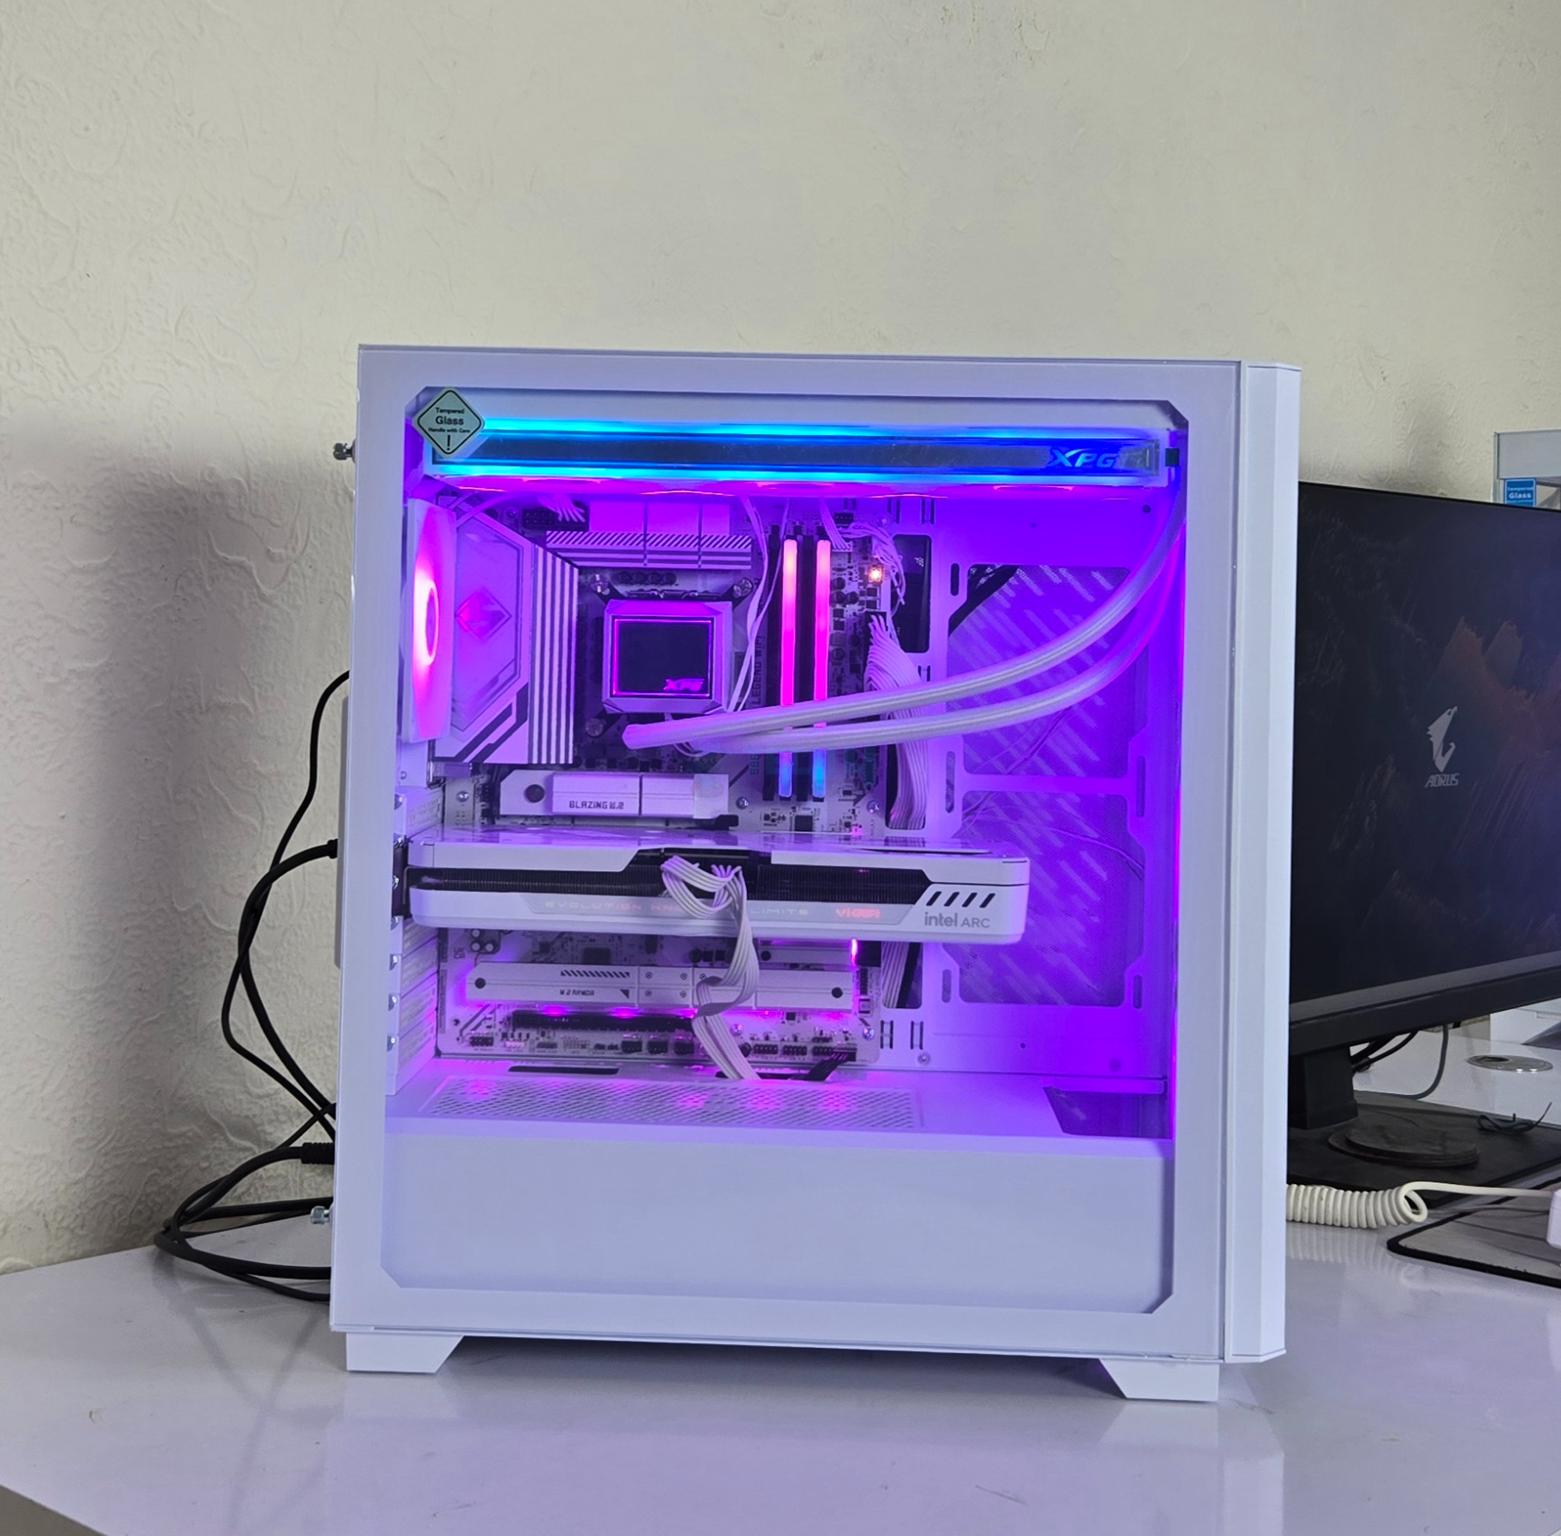
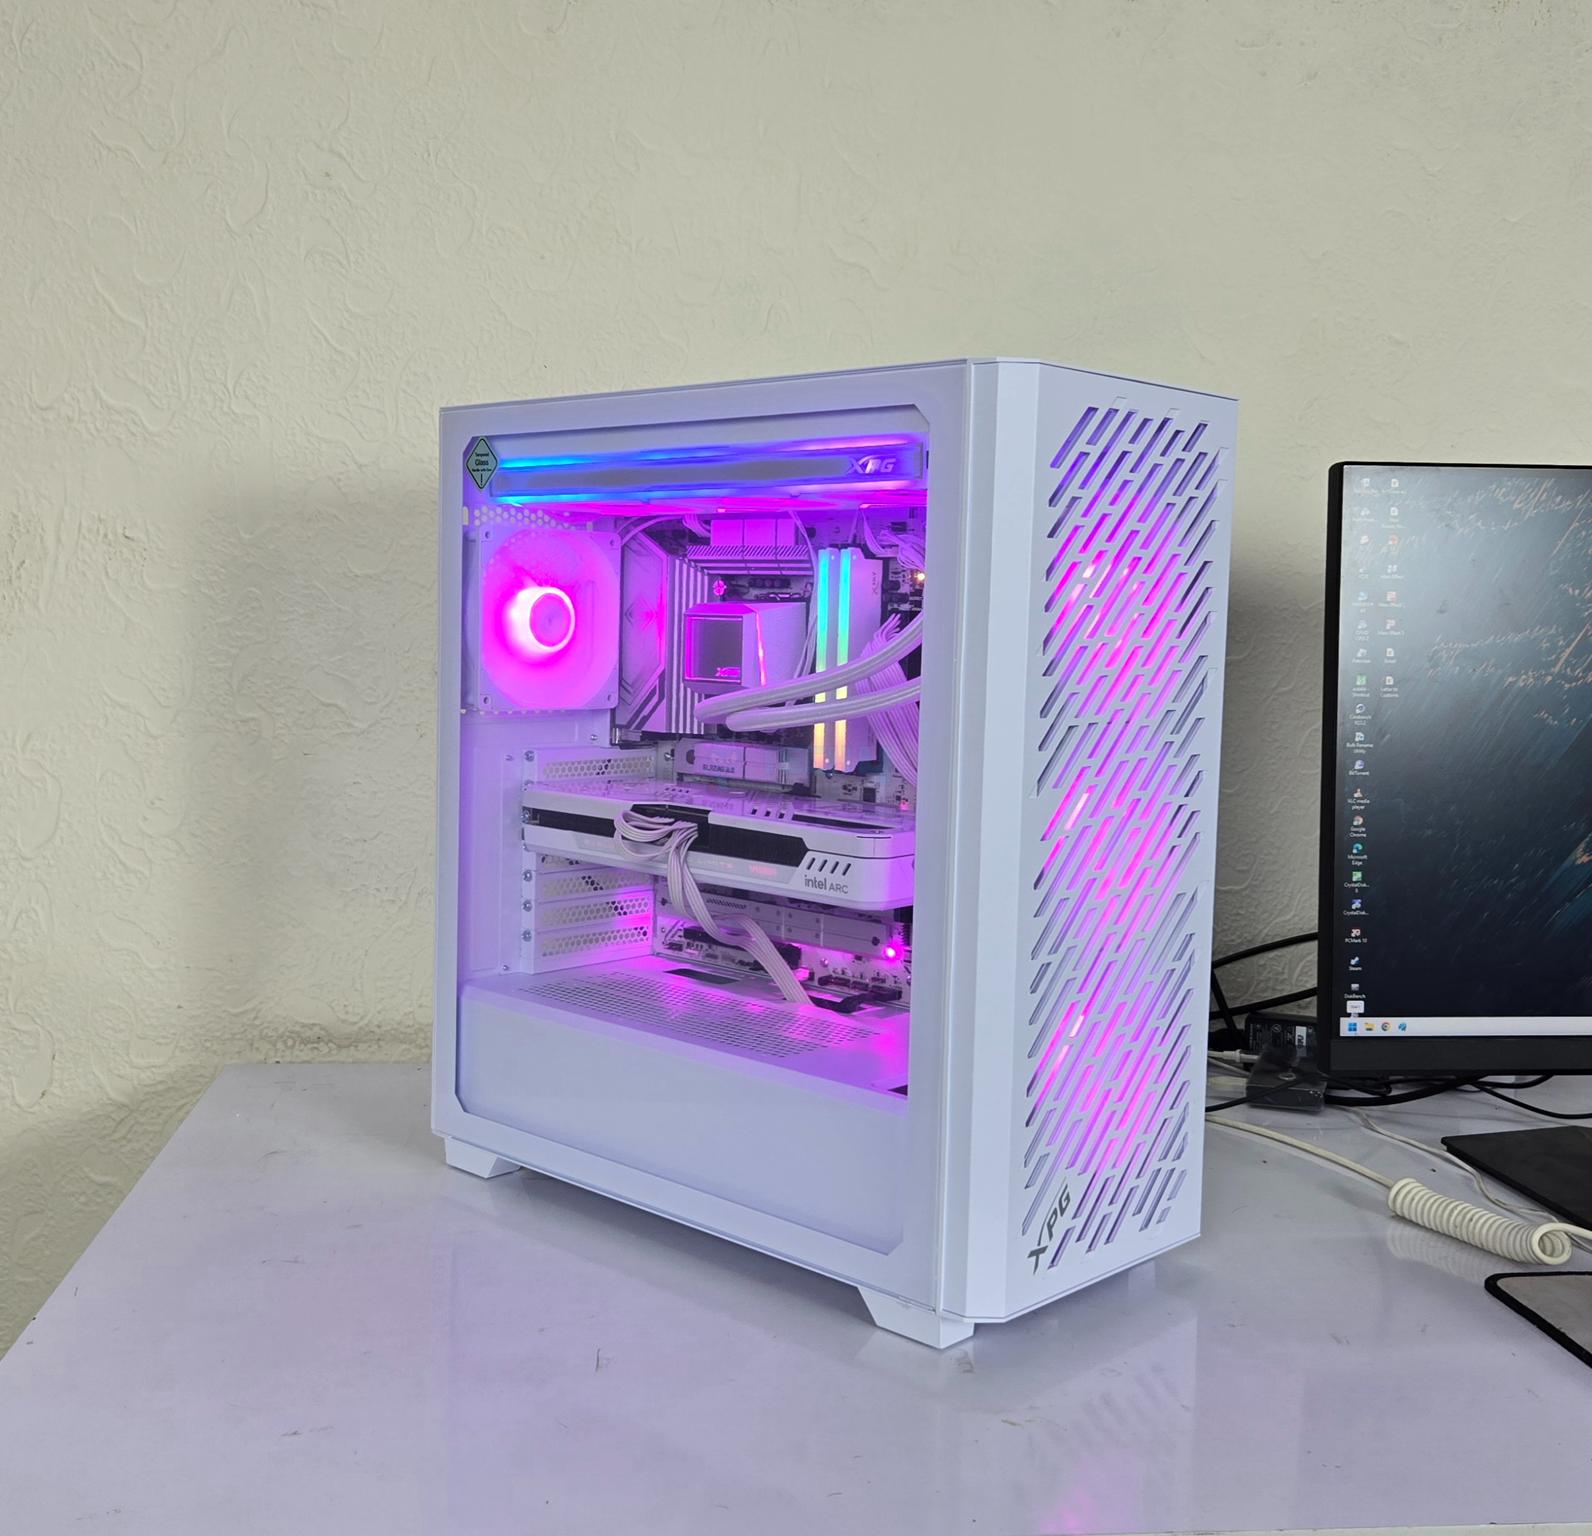
The above are a few pictures of the test build in action.
Thermal Testing
The thermal testing was done with an ambient temperature of 26ᵒC and I have used AIDA64 Engineering Stress Test software for this purpose using FPU and GPU.
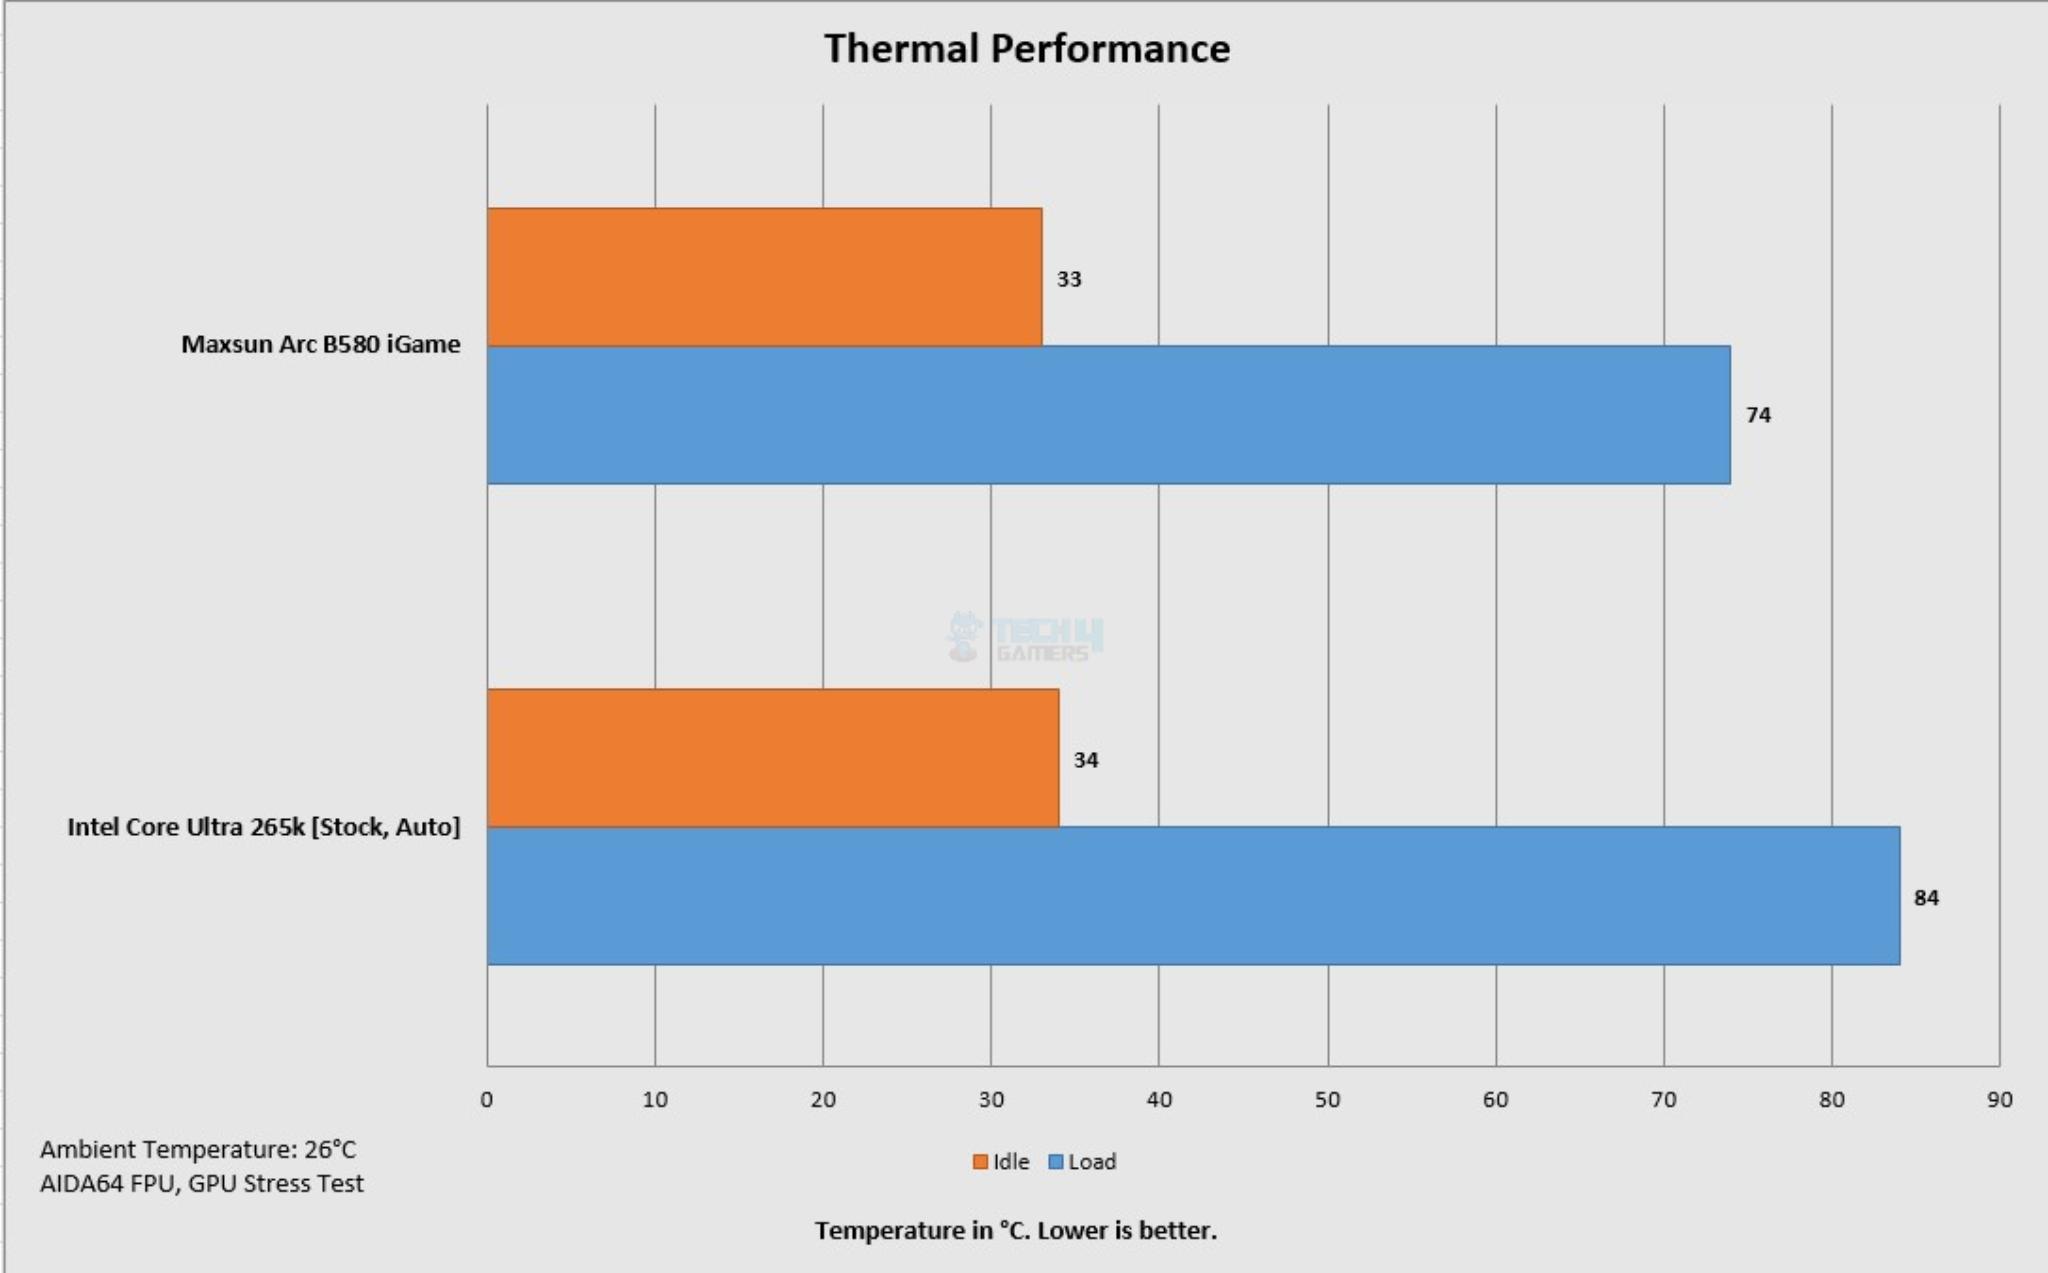
The overall temperatures of the CPU and graphics card are satisfactory. The case provides good ventilation using open style and 4x pre-installed fans.
Should You Buy It?
Buy It If
If you need a good spec case: The XPG Valor Air Pro supports radiator of up to 360mm with up to 400mm length for the graphics card. This case also supports vertical PCIe bracket.
Looking for an airflow case: The Valor Air Pro is designed around maximum ventilation in mind. This is why this case has perforated steel panel on the front with 3x pre-installed 120mm fans with dust filtration.
If you need a budget friendly case: The XPG Valor Air Pro comes in at around USD 90. The value it creates comes from the pricing, 4x pre-installed fans, E-ATX motherboard support and balanced features.
Don’t Buy It If
If you already have a good spec case: If you are using a PC Case that is serving you well, you may skip this case.
If you need a case with backplug motherboard support: This case does not support backplug motherboard. It is not a Con as such.
Final Words
The Valor Air Pro is a flagship PC case of this series from XPG. It is a mid tower designed around maximum ventilation for good airflow. This is achieved by using stylish striped designed cutouts on the front panel and the side panel. These panels are not tool-less unlike the Valor Air NANO.
This case can house a maximum of E-ATX size motherboard. The case provides spacious layout for your build and its removable PCIe bracket can be installed vertically or horizontally. However, you would need to arrange a riser cable separately as it is not bundled.
The cooling provision is:
- 3x 120mm or 2x 140mm fans on top
- 1x 120mm fan on rear [ARGB Fan Pre-Installed]
- 3x 120mm or 3x 140mm fans on front [3x 120mm ARGB fans pre-installed]
- 2x 120mm fans on the side
- Up to a 360mm radiator on the top
- Up to a 360mm radiator on the front
- 120mm radiator on rear
This case can house 2x 2.5” drives and 2x 2.5”/3.5” drives. Storage cage can be installed in either of two locations. The default location provides ample clearance to install radiator of up to 360mm size on the front. However, this gap is reduced with storage cage moved towards front. Plan well for the cable management as well.
You can install a CPU air cooler of maximum 167mm height, a graphics card of maximum 400mm length (subject to clearance from front and side fans/radiator) and ATX PSU of 200mm length.
I did not face any issue during assembling a test build except that you need to lower the height of the rear fan so that AIO can be placed and installed on the top.
Thank you! Please share your positive feedback. 🔋
How could we improve this post? Please Help us. 😔
[Hardware Reviewer & Editor]
Meet Nauman Siddique, a highly experienced computer science graduate with more than 15 years of knowledge in technology. Nauman is an expert in the field known for his deep understanding of computer hardware.
As a tech tester, insightful reviewer, and skilled hardware editor, Nauman carefully breaks down important parts like motherboards, graphics cards, processors, PC cases, CPU coolers, and more.
- 15+ years of PC Building Experience
- 10+ years of first-hand knowledge of technology
- 7+ years of doing in-depth testing of PC Hardware
- A motivated individual with a keen interest in tech testing from multiple angles.
- I majored in Computer Science with a Masters in Marketing
- Previously worked at eXputer, EnosTech, and Appuals.
- Completed Course in Computer Systems Specialization From Illinois Tech
Get In Touch: nauman@tech4gamers.com


