Electronic Arts (EA) offers a treasure of gaming experiences through its EA App. However, after updating my Windows to the most recent version, the installation would not go through and crash midway. Despite several attempts, the EA app was not installing on my Windows 11. Later, I tested solutions to eliminate the issue, like uninstalling C++ redistributables.
- Common causes for EA App installation issues on Windows 11 include software conflicts, insufficient disk space, outdated Windows, and more.
- Troubleshooting involves booting Task Manager and turning off Unicode UTF-8, among others.
- Ensure your system meets the minimum requirements for EA App installation.
Method Difficulty Rating
Remove C++
Rated: 4/10
Disable Unicode UTF-8
Rated: 3/10
Use Task Manager
Rated: 1/10
Use Same Drive
Rated: 2/10
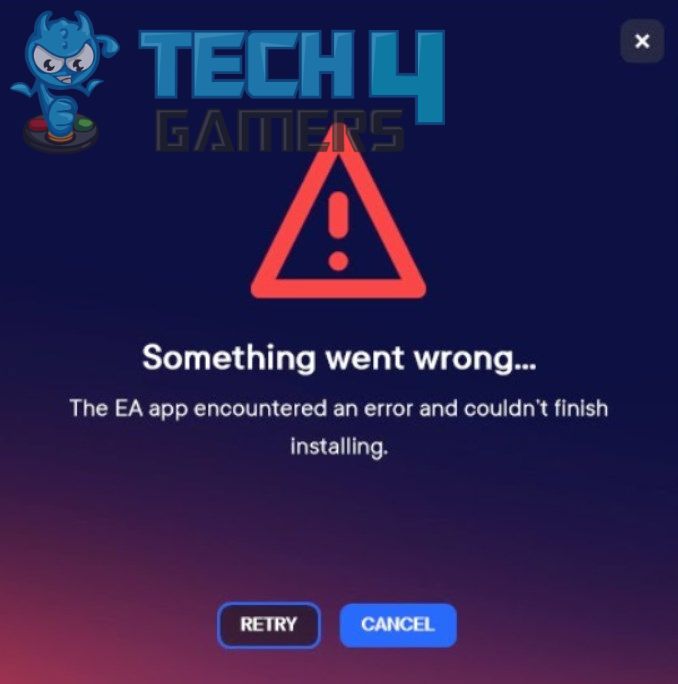
The following error message appears when the issue arises:
Uninstall Microsoft C++ Files
Uninstalling the Microsoft C++ Redistributables is one way to free up storage on the hard disk to make space for newer apps like EA. Users on EA Answers were stuck in a similar situation until they completely uninstalled the Microsoft C++ files, although repairing them worked for one user in the same thread.
I tested this fix on my PC and performed a restart after uninstallation. The Windows took a few minutes longer to boot up, but the problem was gone. Here are the complete steps to help you proceed.
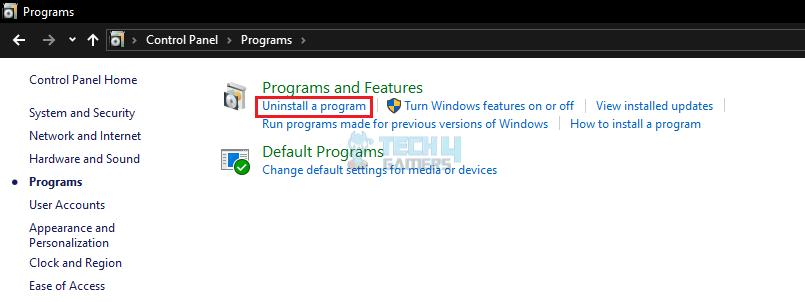
- Go To Programs: Open Control Panel > Programs.
- Expand Menu: Click on Uninstall A Program under Programs And Features.
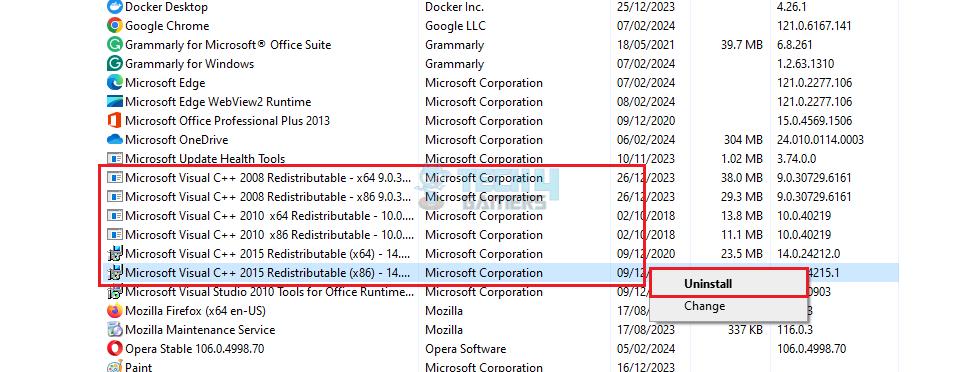
Select Uninstall Under Program And Features (Image By Tech4Gamers) - Uninstall Microsoft C++: Right-click on each Microsoft Visual C++ Redistributable installation > Uninstall > Restart PC.
Uninstall Microsoft Visual C++ Redistributables (Image By Tech4Gamers)
Disable Unicode UTF-8
Enabling UTF-8 allows Windows to support different languages and characters in UTF-8 encoding. However, it may cause applications to glitch or malfunction if they are incompatible with UTF-8 encoding. So, turn off the feature using the following method and proceed to install the EA app.
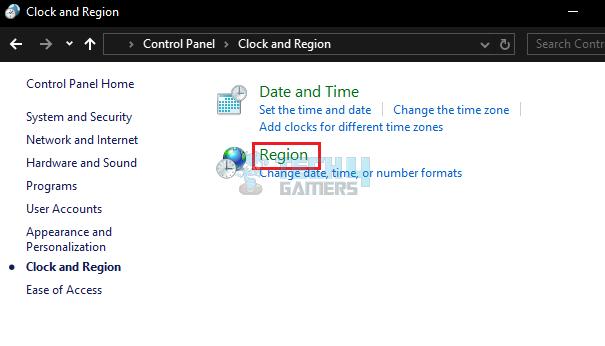
- Navigate To Region: Launch Control Panel > Clock And Region > Region.
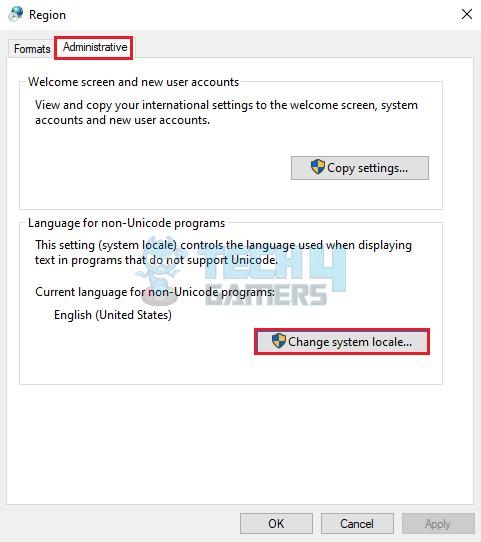
Select Region In Control Panel (Image By Tech4Gamers) - Open Administrative Settings: Click the Administrative tab > Press Change System Locale.
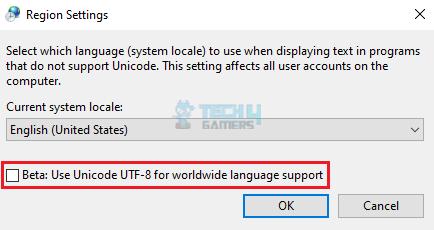
Click On Change System Locale (Image By Tech4Gamers) - Disable Unicode: Remove the mark beside Beta: Use Unicode UTF-8 For Worldwide Language Support > OK.
Mark Use Unicode UTF-8 Box (Image By Tech4Gamers)
When no other solution worked, this method became a lifesaver for users across this thread on EA Answers HQ.
Use Task Manager
This is an interesting fix because all I did was keep the Task Manager dialog box on my window while the EA app finished installing to monitor the CPU usage and terminate the process if it took excessive resources. The installation finished smoothly without the error message.
Install On The Same Drive As Windows
Another effective way to get through the EA app installation was to install the app file on the same drive where my Windows OS folder was present. For example, if the Windows files are located in Local Disk C, download the app on the same, as also done by a user on Microsoft Community.
Last Words
Others on Reddit threads and X encountered the same problem when installing the EA App in Windows 11. But despite being a prevalent issue, neither EA nor Microsoft has addressed the problem directly nor provided an authentic fix.
@EAHelp hey guys! I'm already sick of your EA desktop app. I cant install the app, I already tried EVERYTHING.
— Silver Hawk (@SilverHawk_506) April 13, 2022
Therefore, users have been resorting to various workarounds, such as the ones detailed above, that were personally effective for me in resolving EA installation. In case the error persists, refer to EA Help or Microsoft Support.
Frequently Asked Questions
Navigate to the “System” settings in Windows. You’ll find information about your system specifications. Compare these specifications to the minimum requirements specified by EA for the specific app you’re trying to install.
Booting Windows 11 in Clean Boot would only start the system with minimal drivers and software needed for its running. Therefore, any conflicting apps causing the issue will be removed, which can solve the trouble.
A “DLL not found” error typically indicates a missing or corrupted system file. To resolve this, try running Windows Update to ensure your system is up-to-date.
Fix Other Windows 11 Troubles:
- FIXED: Critical Process Died In Windows 11
- Quick Fixes For Kernel Security Check Failure In Windows 11
- 5 Ways To Fix No Power Options Available In Windows 11
- 5 Ways To Fix File Explorer Crashing In Windows 11
- FIXED: Local Security Authority Protection Is Off In Windows 11
Thank you! Please share your positive feedback. 🔋
How could we improve this post? Please Help us. 😔
[Errors Troubleshooting Expert]
Arsalan Shakil (aka GuyThatDoesEverything on YouTube) is a PC Tech Enthusiast and Electronic Geek. With over 10+ years of experience in Electronics, he then decided to explore Software Engineering to design embedded products and automate existing hardware solutions.
When he started tearing down old cameras to understand how they worked, he was shocked (literally, when he got zapped by a flash discharge capacitor), giving him the power (debatable) to fall in love with videography/photography. He also started making some fun videos that later became YouTube tech reviews.
Skills:
- 10+ years of experience in Electronics design, embedded solutions, and prototyping
- Majored in Software Engineering
- Research paper publication in IEEE for Embedded Military Uniform & LoRa WAN wireless technology
- Specialized in IoT Solutions
- PC Enthusiast & PC Modder
In his local region, he’s known to expose cheap PSU brands, often claiming fake certification or false claims on the box. He’s a true nerd and needed some friends in his life. Then he met some guys who work at Tech4Gamers, and they also came out to be equal nerds who suggested he join Tech4Gamers as a Hardware Expert.


