")


The widespread reporting of Xbox One Controller button malfunctions highlights the frustrating impact they can have on gaming experiences. When buttons become unresponsive or fail altogether, it can significantly disrupt gameplay. Various factors such as weak batteries, outdated firmware, faulty motherboards, connection problems, or software glitches may contribute to this issue.
- Xbox One controller buttons become unresponsive or jammed and won’t let you play games.
- This issue can arise due to a buildup of dirt and debris that is jamming the keys, outdated firmware, an issue in the controller’s hardware, or a temporary glitch in pairing.
- Fix the issue by power cycling the controller and console, re-pairing the controller to the console, updating the controller’s firmware, or restoring the default settings of the console that will remove any bugs from the system.
Method Difficulty Rating
Power Cycle
Rated: 2/10
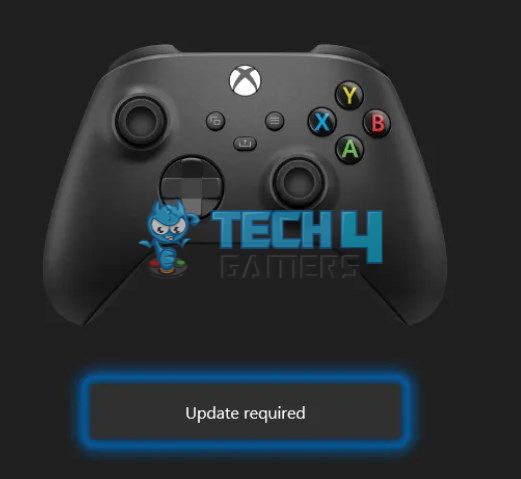
Firmware Update
Rated: 4/10
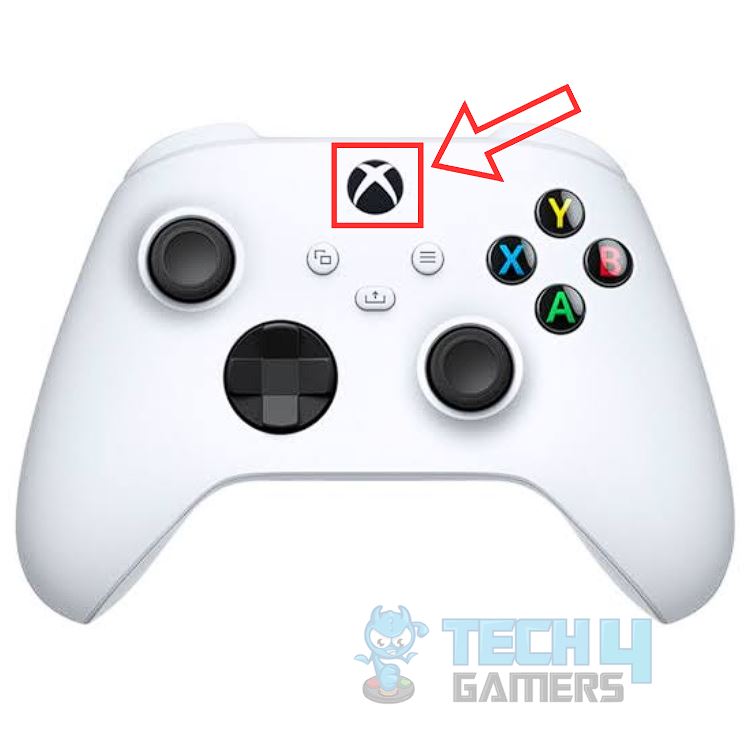
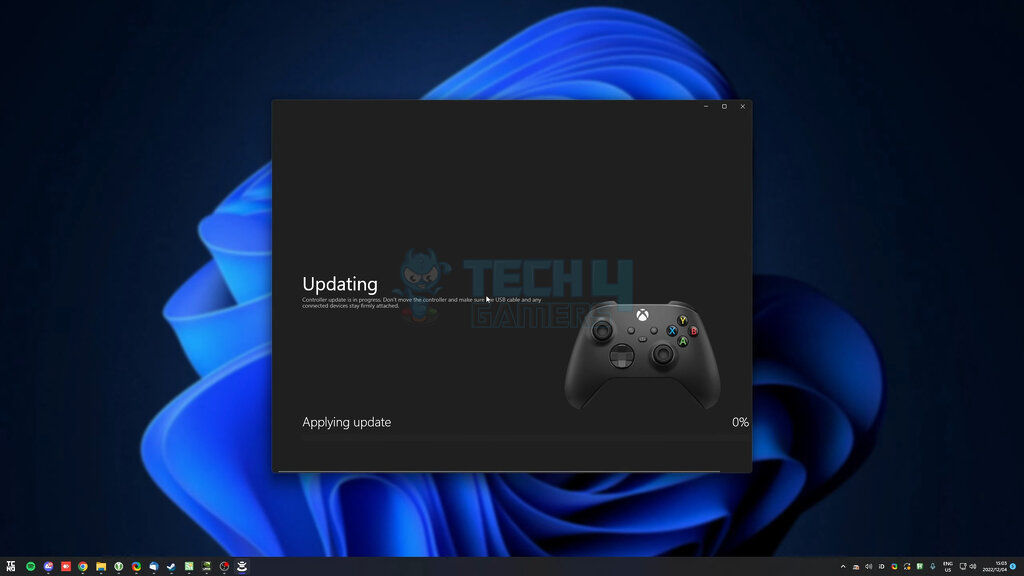
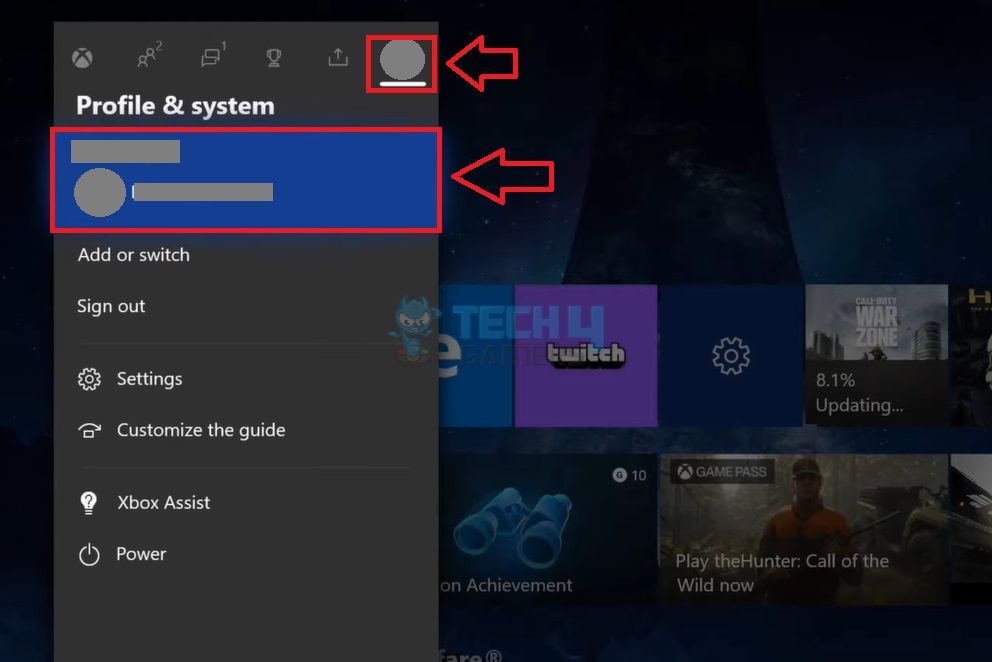
I have realized that power cycling is the first thing to do in hardware related issues like this. If the buttons on your Xbox controller are unresponsive, initiating a power cycle should be your initial step in troubleshooting. Here is how to power cycle it: Press the Xbox button in the controller’s center > hold it for 10-15 seconds until it turns off. Pull the AA batteries from the controller > let it rest for 30 seconds. After waiting for a while, you need to put back the batteries inside your controller. Press the Xbox button > hold it until the controller switches on. It will fix your controller’s problems and restore its button functionalities. If I find my Xbox buttons not responding, it might suggest a firmware issue. That’s why I think updating the firmware is a reasonable step in such situations. Outdated firmware on Xbox controller can cause the buttons to stop working. To prevent such issues, it’s advisable to regularly check for and install available updates. To update the Xbox One controller, you must have the Xbox Accessories app in your system. If not, please download it first, then follow these steps: Switch on your PC > connect the Xbox controller to it >Turn on the controller. On your computer, open the Xbox Accessories app > Look for the three-dot icon > click on it. Next, click on any available updates if there are any > If the controller’s firmware is already updated to the latest version, you will see a notification saying, “No update available.” Another method through which you can update firmware of your controller is using your Xbox console. Make sure the controller is connected to your console, then update through the following steps: Hit the Xbox button to open the guide in the middle of the controller. Now, Jump to the option Profile & System > click Settings. Go to Devices & Connections > Hit the Accessories option. Look for the … icon, click on it > you will see the version. If you find any updates, click on it > comply with the instructions. After you have installed and updated your controller, press all the buttons and check if the controller is working now; otherwise, move to the next method. Many Xbox users have reported issues with non-functional buttons on their Xbox One controllers, causing frustration and prompting users to seek alternative solutions. However, workarounds exist to restore functionality to the controllers with some effort. Who can recommend me a good controller for xbox? The Microsoft ones aren’t great, I have 2 xbox one controllers, 2 xbox series x controllers, and 1 xbox elite controller in the house, all have miscellanious buttons not working or sticking. — Prowl8413 (@Prowl8413) July 26, 2023 One potential solution involves power cycling the Xbox controller, and in some cases, the problem may be related to firmware issues. Updating the firmware can often resolve the issue. Related Articles Thank you! Please share your positive feedback. 🔋 How could we improve this post? Please Help us. 😔 [Errors Troubleshooting Expert] Arsalan Shakil (aka GuyThatDoesEverything on YouTube) is a PC Tech Enthusiast and Electronic Geek. With over 10+ years of experience in Electronics, he then decided to explore Software Engineering to design embedded products and automate existing hardware solutions. When he started tearing down old cameras to understand how they worked, he was shocked (literally, when he got zapped by a flash discharge capacitor), giving him the power (debatable) to fall in love with videography/photography. He also started making some fun videos that later became YouTube tech reviews. Skills: In his local region, he’s known to expose cheap PSU brands, often claiming fake certification or false claims on the box. He’s a true nerd and needed some friends in his life. Then he met some guys who work at Tech4Gamers, and they also came out to be equal nerds who suggested he join Tech4Gamers as a Hardware Expert.
Power Cycle Xbox Controller
Press Xbox Button
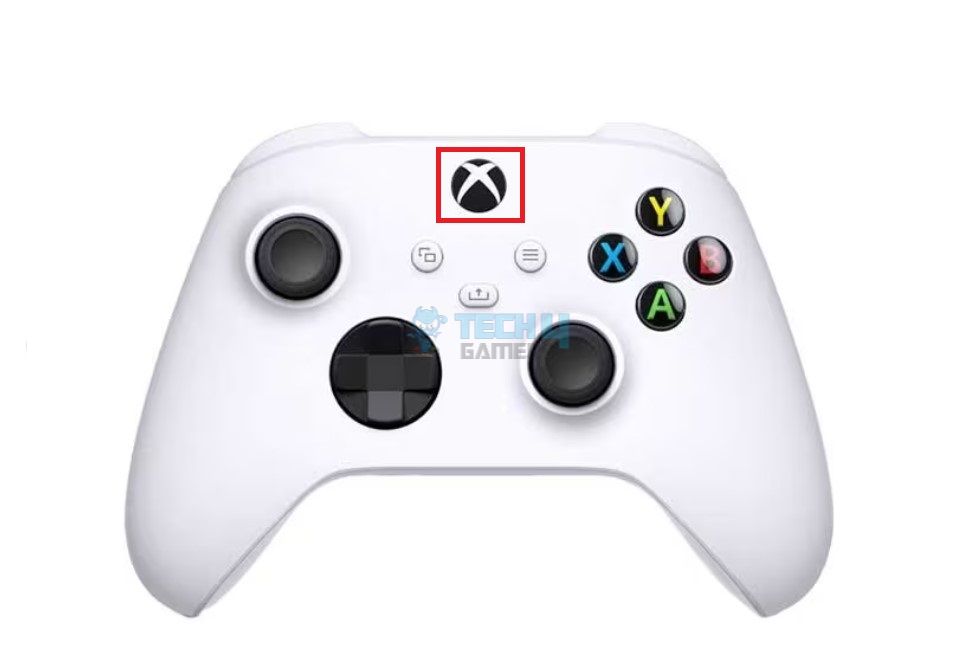
Take Batteries Out
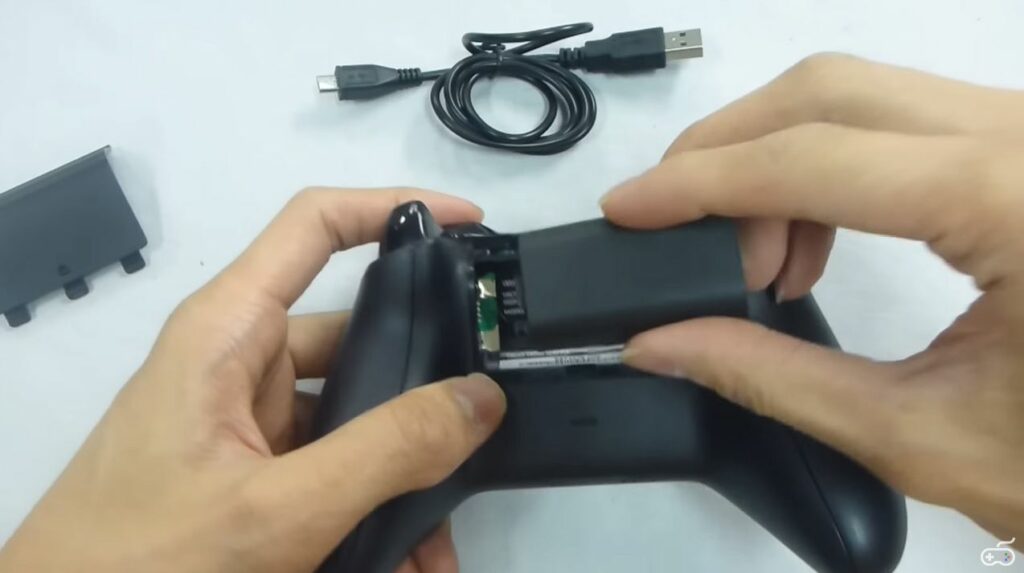
Put Batteries Back
Press Xbox Button
Update Controller’s Firmware
Through PC
Turn on PC
Open Xbox App
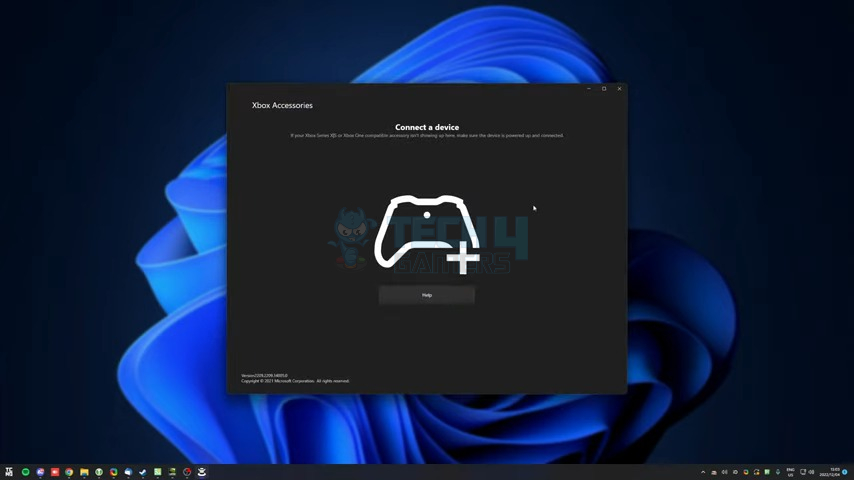
Update Controller
Through Console
Hit Xbox Button
Go to Profile & System
Click on Accessories
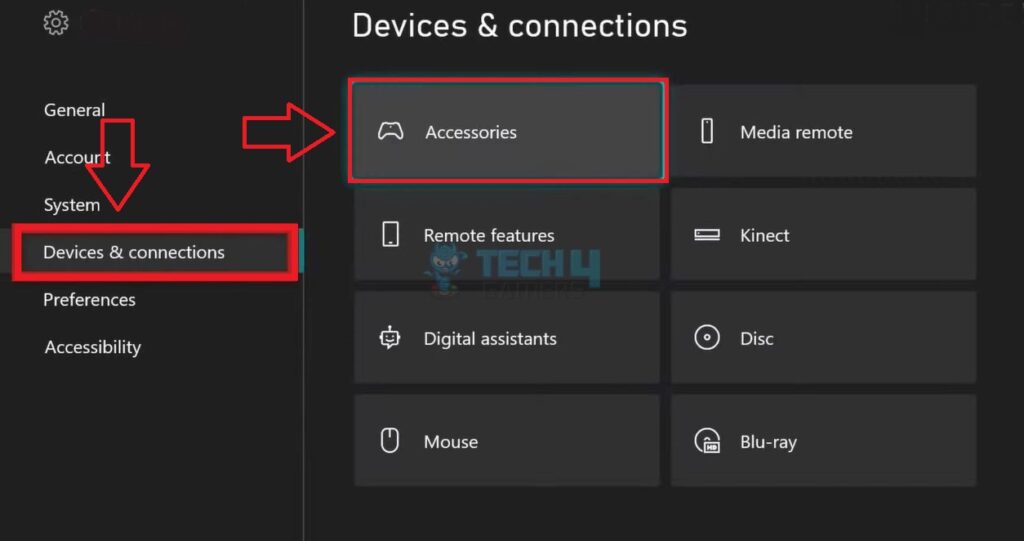
Update Controller
Final Thoughts
![]()


