

One of the PS Vita’s features is the option to connect to your computer for things like media transfer and software updates. Nevertheless, users often get the “PS Vita could not connect to the PC” error. Several factors, such as poor network connectivity, outdated software, or compatibility problems, may bring this on.
Key Takeaways
- PS Vita can connect to the PC via Wi-Fi or a USB cable utilizing the Content Manager Assistant.
- Failure to connect to the PC may be a result of issues like a faulty USB cable, incompatible USB port, Wi-Fi connection issues, outdated firmware, or drivers.
- This issue can be fixed by checking the Wi-Fi connection, USB cable/port, updating the Vita firmware, and the Content Manager Assistant.
Why Can’t PS Vita Connect To The PC?
Trying to connect your PS Vita to your PC and constantly failing can be very frustrating, especially when you don’t want your gaming experience spoiled. This is a common yet annoying issue that may arise due to several factors. Users usually receive an error message saying, “Could not connect to the device.”
Also, you might be interested in reading about how to fix the issue of Aura sync not detecting the motherboard.
There could be multiple reasons behind this problem, such as obsolete firmware, network connectivity issues, driver issues on your computer, firewall or antivirus software interfering with the connection, etc. But you don’t need to be disappointed, as there are multiple ways to successfully fix this issue and connect your Vita to your PC.
How To Fix The Issue
Without any further due, let’s take a look at how you can fix the “PS Vita could not connect to the PC” error.
Check Your Internet Connection
If you are trying to connect your PS Vita to your PC over the internet, the first and foremost thing to check while troubleshooting this issue is your internet connection. This error is commonly generated when there is some issue with your internet connection that may lead to the failure of Vita to find and connect to your PC.
Sometimes, there can be some unknown issue related to the Wi-Fi router, so it is advised to turn off your Wi-Fi router, wait for a few minutes and then turn it on. Most of the time, this step will solve the issue. Also, ensure that your PS Vita and PC are on the same connection.
Use A Different USB Cable/ USB Port
Sometimes the reason behind the failure to connect your PS Vita to the PC can simply be a broken or faulty USB cable. So it is recommended first to try connecting your PS Vita to the PC using a different USB cable. This way, you can start isolating the problem and avoid going through all the other advanced steps.
Some users have also reported issues while connecting PS Vita to a USB 3 port. Try to connect the Vita to another USB port. It is always advised to use a high-quality USB cable to prevent such issues from happening.
We also have a detailed guide on how to fix the CPU fan error in Asus, in case you ever face this issue too.
Use Content Manager Assistant (CMA) Via USB
The PS Vita and a computer can exchange data thanks to the Content Manager Assistant application. It offers features like game data backing up, transferring media files, and updating the Vita firmware. To use CMA via a USB, follow the instructions given below:
- Connect the PS Vita to your PC using the USB cable.
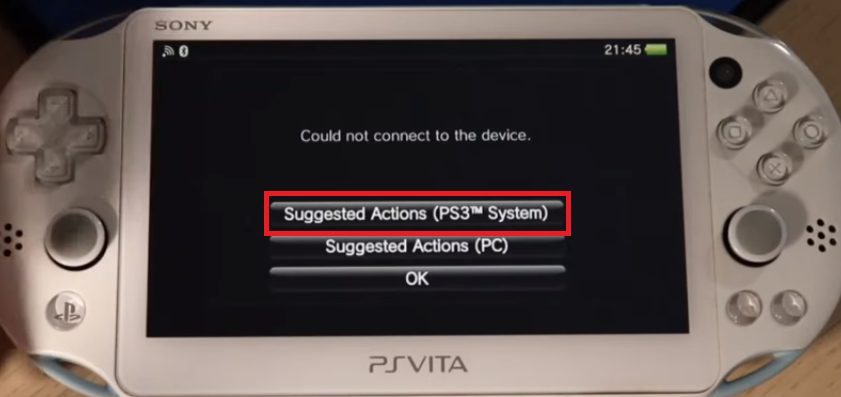
- If you see the “Could not connect to the device” error message on the Vita display, click on “Suggested Actions (PC).”

The system suggests these actions on connection failure. - The system will prompt you to install the CMA.

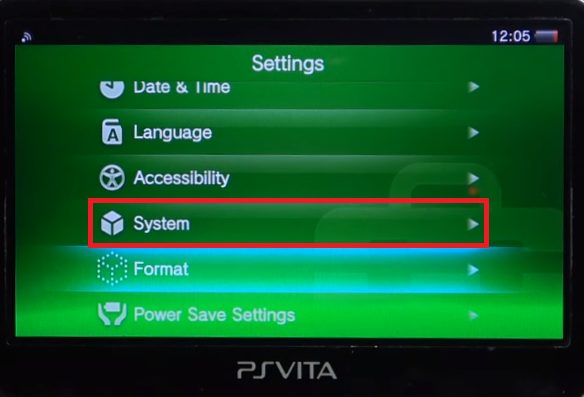
Install CMA prompt - Go to “Settings” and then to “System.”

System Settings - In System settings, uncheck the option of “USB Power Supply.”
- Now go back to the home screen and open the “Content Manager.”
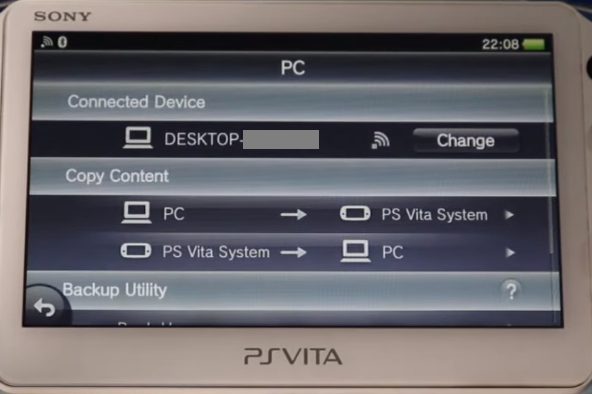
- Select the option of “Copy Content.”
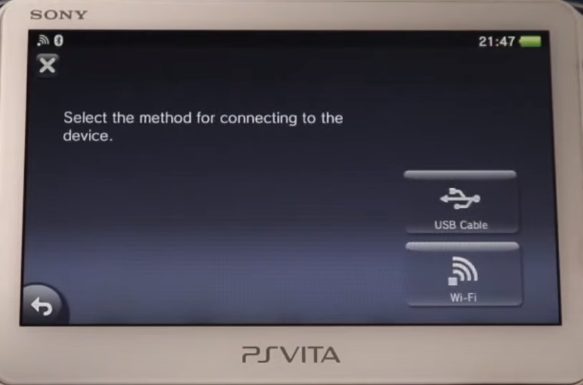
- Under the option of selecting the device, select “PC” and choose to connect via USB Cable on the next page.

USB or Wi-Fi connection options - Hopefully, the device will be connected to the PC.
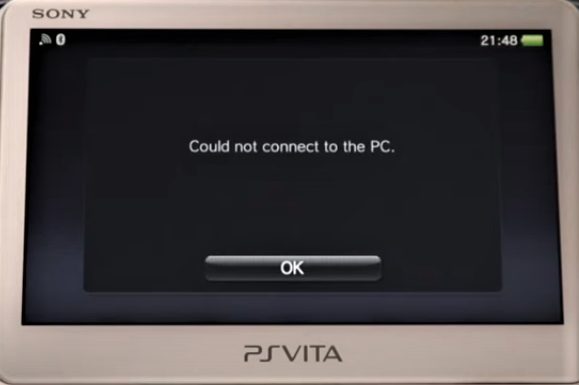
- If the system gives the error “Could not connect to the PC,” tap on OK.
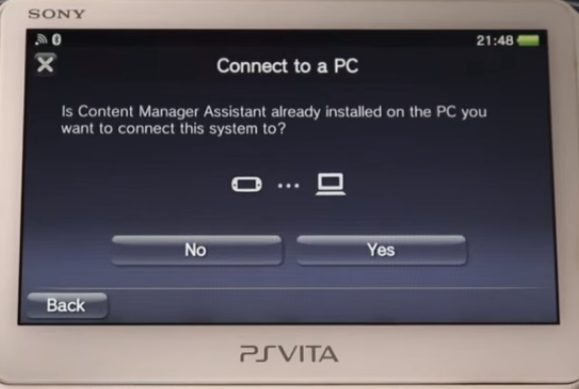
- A new window will appear, asking whether the CMA is already installed on the PC.

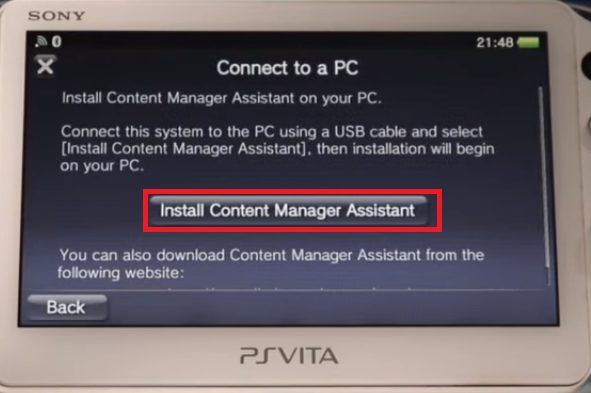
The system inquires whether CMA is installed on the target PC or not - If your PC doesn’t have CMA installed, tap NO, and a new window will open, prompting you to install CMA using the instructions.
- Click on “Install Content Manager Assistant.”
Install CMA prompt - Open the prompt on your desktop or go to My PC to open up Vita’s drive (It will have a CD Drive icon).
- Complete the installation process by following the installation wizard.
- Once the installation is complete, tap “Connect to PC” on your PS Vita, and hopefully, it will get connected.

Also Read: Your PC Device Needs To Be Repaired
Use Content Manager Assistant Via Wi-Fi
To use CMA via Wi-Fi, do the following steps:
- Follow the same steps as given above till step 7.
- Instead of selecting connect via USB Cable, tap on the option of “Wi-Fi.”
USB or Wi-Fi connection options - The Vita will be connected to your PC.
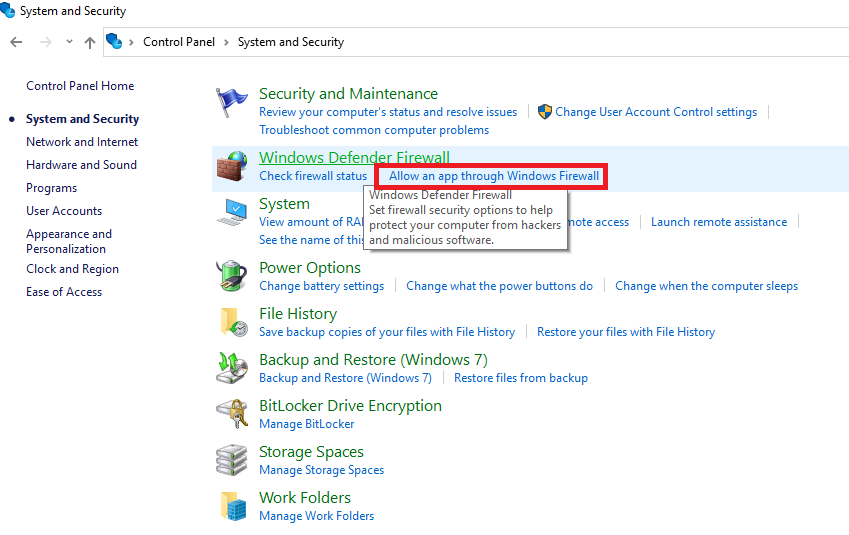
- You need to check your firewall settings if the connection fails to establish.
- Open Control Panel and go to System and Security.
- Under Windows Defender Firewall, select “Allow an app through Windows Firewall.”

Windows Defender Settings - Click on the Change Settings, scroll down to find the option of Content Manager Assistant, and select the check box of “Public.”

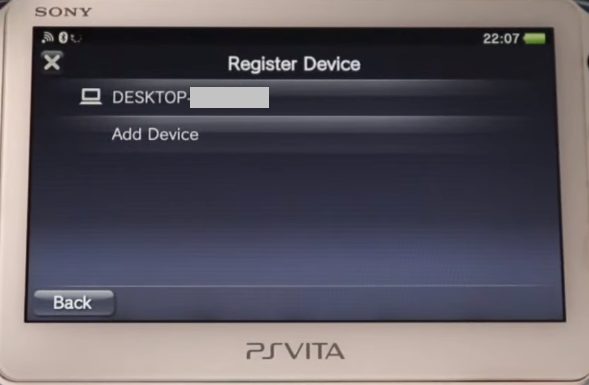
Change settings to public - Now your PS Vita will be able to detect your PC (make sure that your Vita and PC are on the same network).

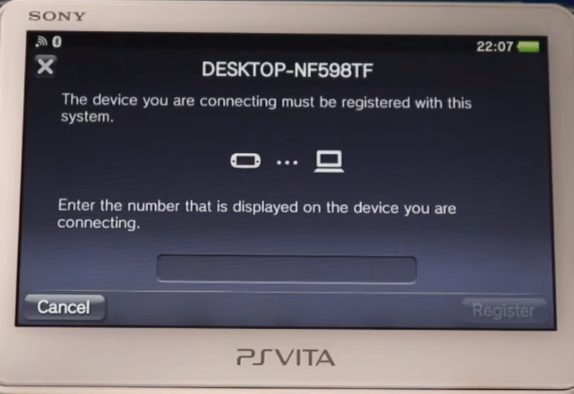
PS Vita now detects a PC - Click on your PC’s name, and a prompt will appear to enter the registration number displayed on your PC.

Registering the device requires entering the registration code - Enter the registration number on your PS Vita, and you will see a message saying, “The device is registered.”
- Click on Next to complete the connection process.

Successfully connected to PC

If the Vita can still not connect to the PC, chances are that the CMA on your PC is outdated. Try the following steps to update the CMA.
Install the Latest Version Of Content Manager Assistant
The connectivity issue with the PC often arises due to outdated CMA applications. Hence it can be resolved by updating the CMA to its latest version. To download the latest version of CMA:
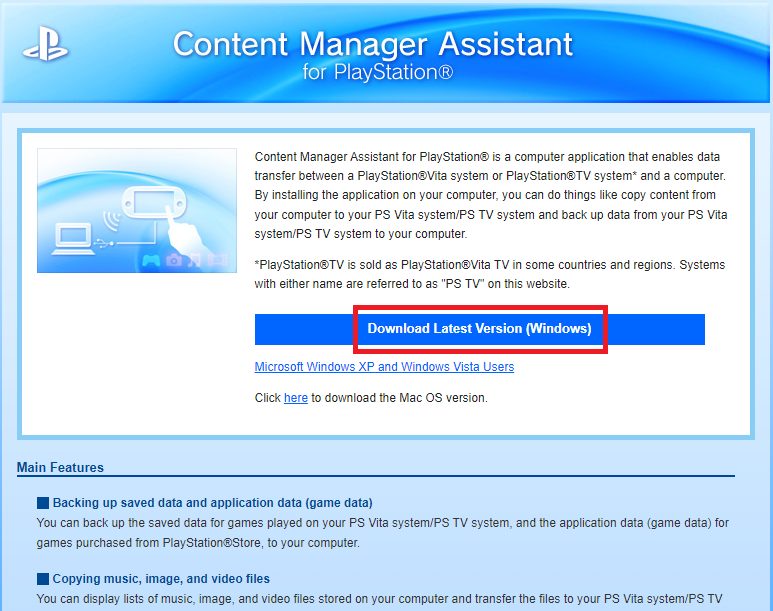
- On your PC, open the browser and go to https://cma.dl.playstation.net/cma/win/en/index.html
- This will open the Content Manager Assistant home page from where you can download the Latest Version of the application.

CMA can be downloaded from its official website - Once the file has been downloaded, you need to run it as administrator.
- Complete the installation process by following the steps given by the wizard.
- Restart your PC once the installation is complete, and try to connect your Vita again.
Update QCMA Driver
This issue might also occur due to a missing or outdated QCMA Driver. To install this driver:
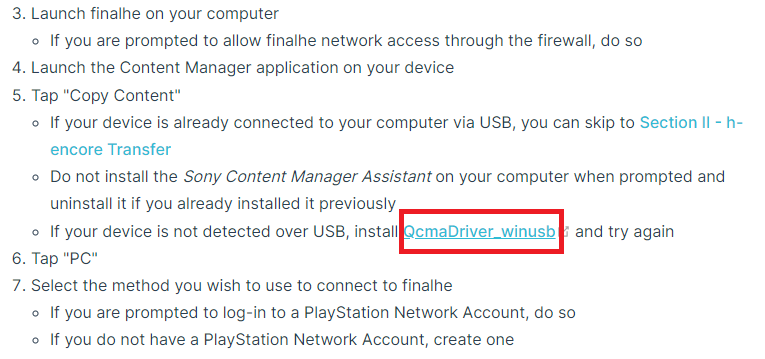
- Open the browser on your PC and go to https://vita.hacks.guide/installing-h-encore.html.
- Scroll down to the instructions section and find the link to download the QcmaDriver_winusb.

QcmaDriver_winusb download link - Once the file has been downloaded, Run it to begin the installation process.
- Follow the installation guidelines given by the wizard to complete the installation.
- Restart the PC once the installation is complete, and try to connect your PS Vita again.
Update Your PS Vita
Usually, your PS Vita will notify you whenever an update is available. However, if you have missed the notification, you can always update your device manually.
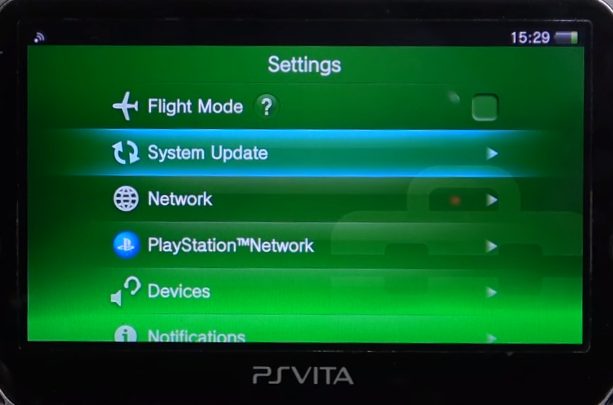
- Go to Settings and select System Update.
System settings - Select Update Using Wi-Fi.

System Update - If an update is available, the system will notify you about it.
- Tap on Next and select Yes when the system prompts you.
- Accept the user agreement and tap on Next on the next window that shows the latest features the update has.
- Select Update, and the system will start downloading the update file.
- Once your Vita has been updated, restart it and try the connection procedure again.
Similar Guides: Couldn’t Install Updates Because The PC Was Turned off
Reset Your PS Vita
Resetting your device can typically remove a lot of annoying issues and bugs, so if nothing else seems to work, you always have the good old option of resetting your device.
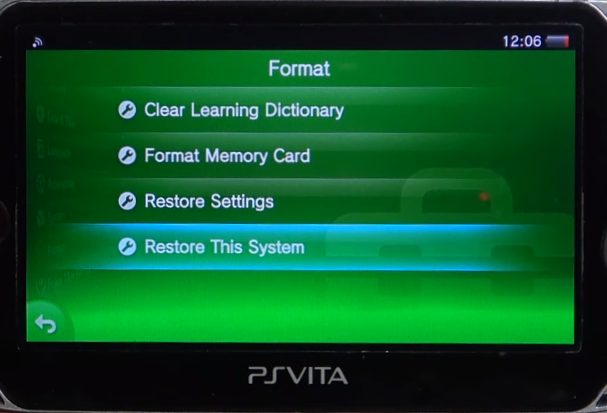
- Go to Settings and select the option of Format.
- In the new window that opens up, tap on Restore This System and select Restore when the confirmation prompt appears.

System restore settings - Tap on Yes in the next two prompts that appear on the screen.
- Wait for the system to reset your PS Vita and try the connection procedure again.
Rebuild Database
Often the cause behind such issues might be a corrupted database. Rebuilding the database has reportedly helped some users in solving multiple issues. To rebuild the database:
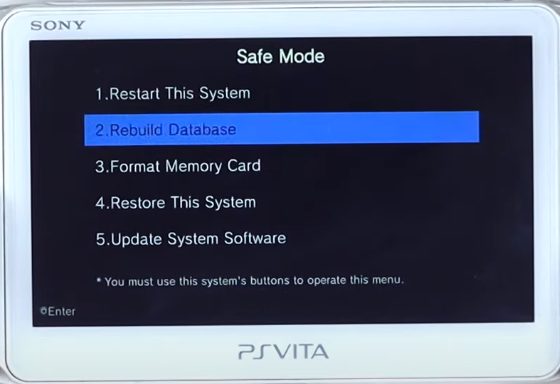
- Press and hold the Right Trigger button, PS button, and Power button simultaneously and wait for the PlayStation logo to appear.
- Release the buttons when the logo appears.
- Scroll down to the Rebuild Database option and select it.

Rebuild Database in system Safe Mode - Wait for the rebuild process, and try connecting your PS Vita to your PC again.
Final Words
This was everything you needed to know about resolving the “PS Vita could not connect to the PC” error. Hopefully, by following these steps, this issue will be resolved. You may contact PlayStation support if the issue is not going away. Before leaving, make sure to read our guide on how to fix the “Your PC ran into a problem” error.
FAQs
There might be a few reasons, such as a faulty USB cable, incompatible USB port, outdated firmware, or drivers.
You can connect your PS Vita to the PC in several ways, including connecting via USB or Wi-Fi using CMA or QCMA.
Thank you! Please share your positive feedback. 🔋
How could we improve this post? Please Help us. 😔
[Hardware Reviewer]
Hi! I’m Ali Tauseef, and I have been writing for Tech4Gamers since 2022. I love all things computer hardware but am particularly fond of CPUs and motherboards, and I like to stay up-to-date about the latest advancements in these worlds, and when possible, write about it. When I’m not doing that, I like to get into a little FPS action in CS2 or get lost in the vast world of RDR2.
Get In Touch: ali@tech4gamers.com


")
