


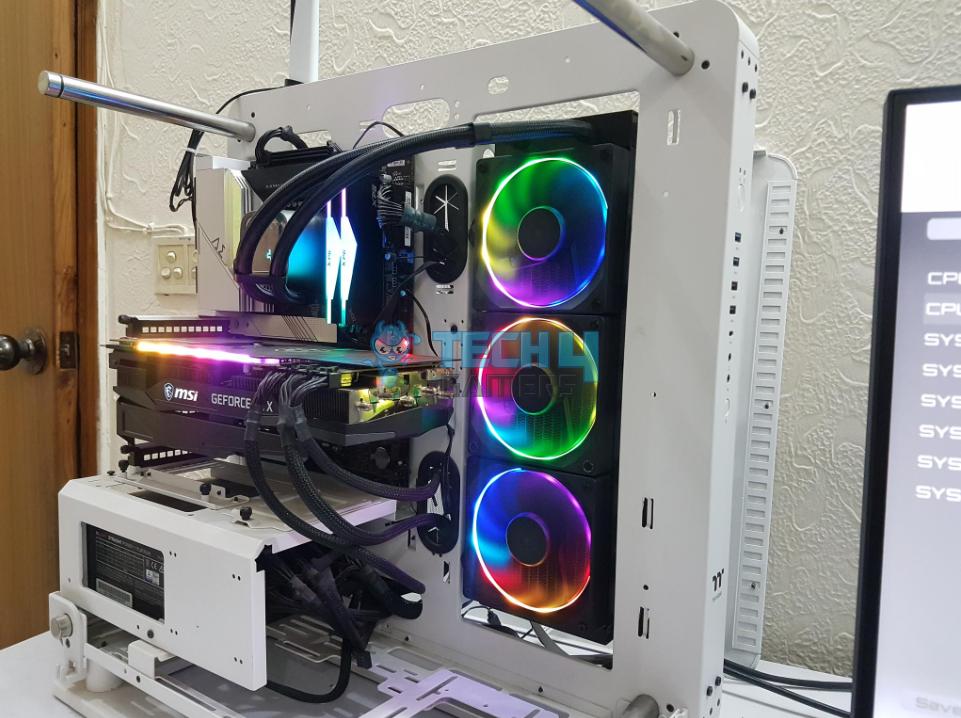
RGB fans allow you to customize the look of your computer, but they are also necessary for cooling the internal components. You must find suitable connectors to connect an RGB fan to your motherboard. Furthermore, compatibility research before connecting a fan is necessary for a safe connection.
- Before purchasing an RGB fan for your PC, ensure your motherboard can handle it.
- You will also have to check which type of fan you have and find the appropriate pins.
- To connect an RGB fan without an RGB header, you must connect an RGB controller to your motherboard.
Different Types Of RGB Fan Connections
We will discuss the steps to connect three different types of RGB fan connections to the motherboard, which are:
- 3-Pin RGB Fans.
- 4-Pin RGB Fans.
- RGB Fans Without Headers.
Steps For Connecting 3-Pin RGB Fans To A Motherboard
To connect 3-pin RGB fans to a motherboard, follow these steps:
Connecting The RGB Cable
Connecting the RGB cable to 3-pin fans can be tricky, but the following steps will make it easy.
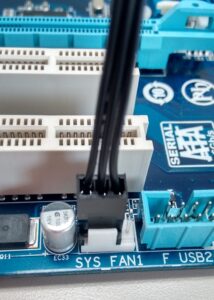
Connect RGB Cable: Find the appropriate port on your motherboard > Match the end of your RGB cable > After locating the port, plug it into it until it clicks securely into place.
Installing Motherboard Software
Installing motherboard software to connect 3-pin RGB fans to the motherboard is straightforward and requires minimal setup for controlling and syncing up lights. You’ll easily customize and control your RGB lighting on compatible fans with the correct setup.
Software Installation: Install the correct driver or software > Configure the settings > Customize the lights as required.
Changing BIOS Settings
You’ll need to make some changes to the BIOS. Here’s how to do it:
- Open Graphics Configuration: Start your system > Press Delete or F2 > Select Advanced Mode > Head to the Advanced tab > Find the System Agent Configuration option > Select Graphics Configuration.
- Enable Options: Look for Primary Display Port or PCI Express Slot State and Internal Graphics Mode options > Enable both > Save your changes by hitting F10 > Press Enter.
Test The Fan Speed
Connecting 3-pin RGB fans to your motherboard can provide additional cooling power and help reduce system heat buildup. We recommend regularly testing the fan speed to ensure these fans function correctly by following steps:
Test Fan Speed: Check all the cables > Ensure they are securely connected to the PC and fan > After verification, use SpeedFan or HWMonitor app > Check the individual fan speed within your system settings.
Assigning Color Modes
Users must know how to correctly assign color modes after connecting a 3-pin RGB fan to the motherboard. First, you should download and install software from the manufacturer onto their PCs if they do not receive one with the product.
Software such as MSI Mystic Light Sync or ASUS Aura Sync can be used for this. It provides access to an interface where various colors and lighting effects can be selected for each fan.
Steps For Connecting 4-Pin RGB Fans To A Motherboard
To connect 4-pin RGB fans to a motherboard, follow these steps:
Research Compatibility
PC builders must research compatibility when connecting 4-pin RGB fans to a motherboard. The 4-pin connection has been the standard for RGB fans, and it is compatible with most motherboard RGB headers.
It is essential to know what type of connection your motherboard supports and if it supports the fan you plan on using. Whether you have a basic setup or something more advanced, research can ensure all components work together seamlessly from start to finish.
Fortunately, many computer manufacturers provide detailed specifications online and in user manuals so users can determine if their equipment is compatible before purchasing.
Connecting The RGB Cable
Wiring up 4-pin RGB fans to the motherboard can be done in just a few steps:
Connect Cable: Find a 4-pin connection on your motherboard > Take the corresponding 4-pin RGB cable > Plug it into the fan’s port at one end > Plug the other end into your motherboard or controller.
Connect Fan To Power Supply
The most important part of this process is connecting the fan to a power supply before you even start.
Connect Power Supply: Connect two of the pins on your 4-pin RGB fan into an available header > Connect its other two pins to a 12V or 5V SATA connector from your PC’s power supply unit (PSU).
Install Software And Configure Settings
Installing and configuring software and settings to connect 4-pin RGB fans to your motherboard is essential for optimal performance. The following are the steps:
Configure Settings: Download the correct software from the manufacturer’s website > Follow all instructions carefully to install it > Configure settings to work with your specific motherboard model.
Steps For Connecting RGB Fans To Motherboard Without Headers
To connect RGB fans to a motherboard without headers, you must use a fan control hub or an RGB controller. Here are the steps:
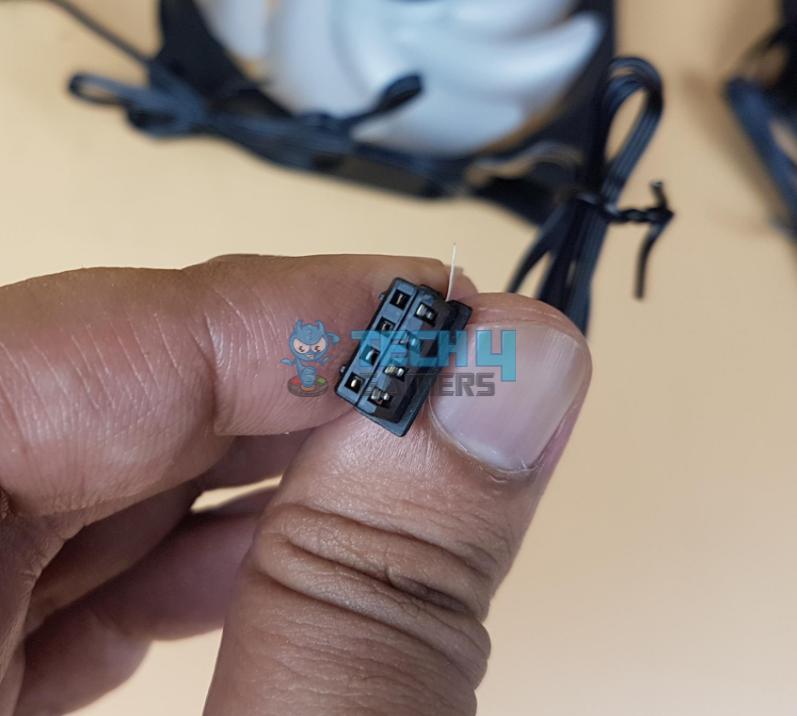
Check Fan’s Type & Compatibility
First, you must determine which type of RGB fans you have. There are two main types: 4-pin RGB fans and 3-pin RGB fans, which can be connected directly to an RGB controller or a fan control hub.
If you have 4-pin RGB fans, connect them to your motherboard using a fan control hub. This device connects to a standard 4-pin fan header on the motherboard and allows you to control the RGB lighting on your fans. Some fan control hubs have additional features like temperature sensing and fan speed control.
If you have 3-pin RGB fans, you must use an RGB controller to connect them to your motherboard.
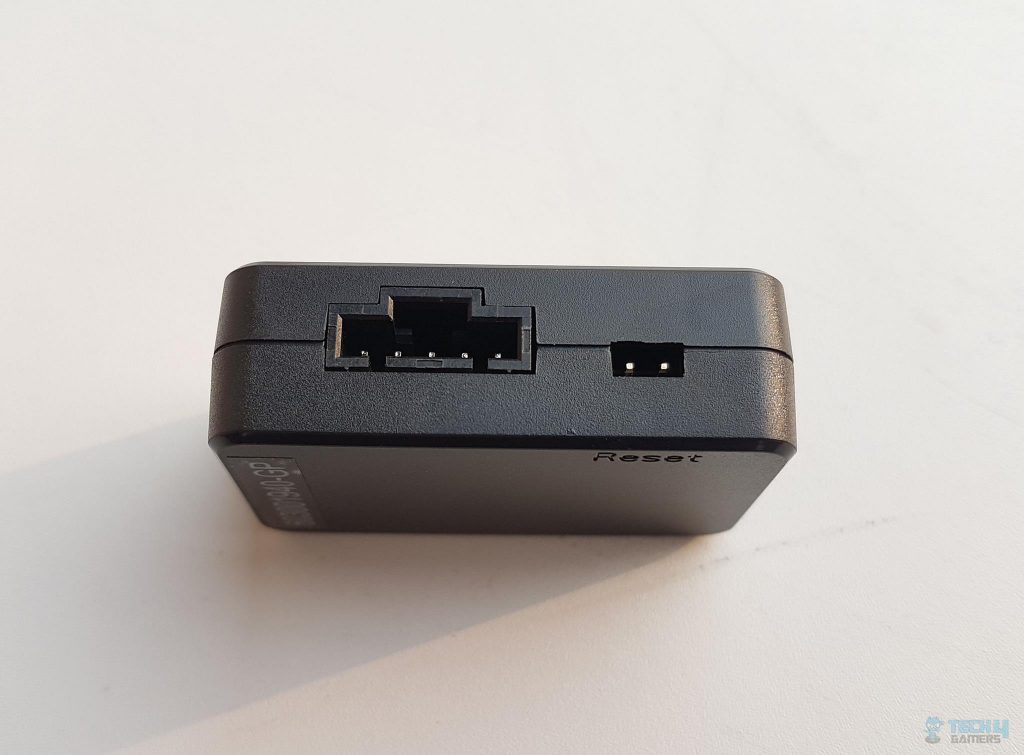
Install The Fan Control Hub Or RGB Controller
Once you have determined which pin type you have, move on to the connection process:
Customize Settings: Install the fan control hub or RGB controller according to the manufacturer’s instructions > Connect the RGB fans to the fan control hub or RGB controller using the appropriate cables > Customize the light settings using the BIOS or software utility.
Final Verdict
Ensure that you are using compatible parts and have selected the appropriate connection type for your system. Double-check all connections before powering on your device. Finally, take some time to experiment with connecting the RGB fans in different ways for a unique look. Moreover, while on my run to research this topic, I found a Reddit user talking about it.
FAQs
Most RGB fans require a compatible motherboard with 4-pin RGB headers and an RGB controller or software from the manufacturer to control the colors and effects.
RGB fans typically connect to the motherboard using a 4-pin header. The pinouts are as follows: Pin 1 is +12V, Pin 2 is the tachometer (speed sensor), Pin 3 is ground, and Pin 4 is the control signal for controlling the fan’s speed and RGB lighting.
Yes, you can control the speed of each RGB fan independently using a controller or software.
More Articles On Fans:
- How To Fix Case Fan Not Spinning, But Light Works
- How To Remove Intel CPU Fan/Cooler?
- What Is CFM In Fans? [Explained]
Thank you! Please share your positive feedback. 🔋
How could we improve this post? Please Help us. 😔
[Error Fix Expert]
Hello, I’m Uzair Shabir, a tech enthusiast pursuing a Bachelor’s in Electrical Engineering. At Tech4Gamers, I’m an Error Fix Expert, crafting articles on different issues and how to fix them. With a Google IT Support Certificate, I navigate tech complexities to deliver insightful perspectives.
Get In Touch: UzairShabir@tech4gamers.com


Feedback By: