![Host Does Not Support 'Intel EPT' Hardware-Assisted Error [FIXED]](https://tech4gamers.com/wp-content/uploads/2023/06/Error-Fixes-14-1068x580.jpg "Host Does Not Support 'Intel EPT' Hardware-Assisted Error [FIXED]")


While configuring virtual machines, users may sometimes encounter an error message stating that “this host does not support ‘Intel EPT’ hardware-assisted MMU virtualization.” This issue can be frustrating but is not uncommon. Some hosts do not support particular virtualization technologies.
- The error is caused by the outdated system BIOS or virtualization platform, processor incompatibility, active antivirus or firewall.
- The occurrence of the “This host does not support ‘Intel EPT’ hardware-assisted MMU virtualization” error is relatively limited among users.
- Updating BIOS, deactivating firewall/antivirus, turning off Virtualization-Based Security, and stopping Hyper-V services are potential fixes for the error.
- Hardware-assisted MMU virtualization allows users to run multiple OS and their applications/programs on a single system.
Method Difficulty Rating
Rated: 7/10
Rated: 9/10
Rated: 9/10
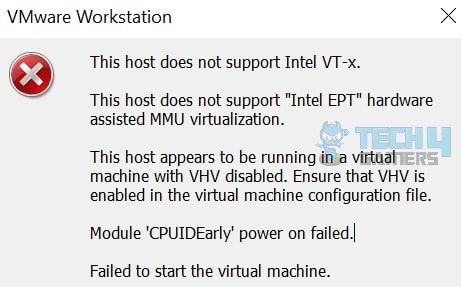
You will see the following error message:
Enable VT-x And EPT In BIOS Settings
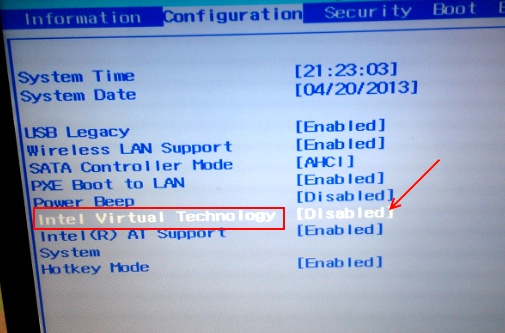
To begin with, check if VT-x (Virtualization Technology) and EPT are turned on in your BIOS settings if you receive the error message. EPT allows direct access to physical memory in virtualized systems, whereas VT-x provides CPU virtualization.
People on Github.com claimed that it solved the issue for them, and we confirmed that it did indeed solve the error. Here are the steps to enable VT-x and EPT in BIOS:
- Boot Device: Restart your computer > Access the BIOS settings > Find the VT-x setting in the BIOS > Turn it on > Next, find and enable the EPT setting > Exit BIOS.

Intel Virtual Technology Settings – Image Credits (Tech4Gamers)
Update BIOS Firmware
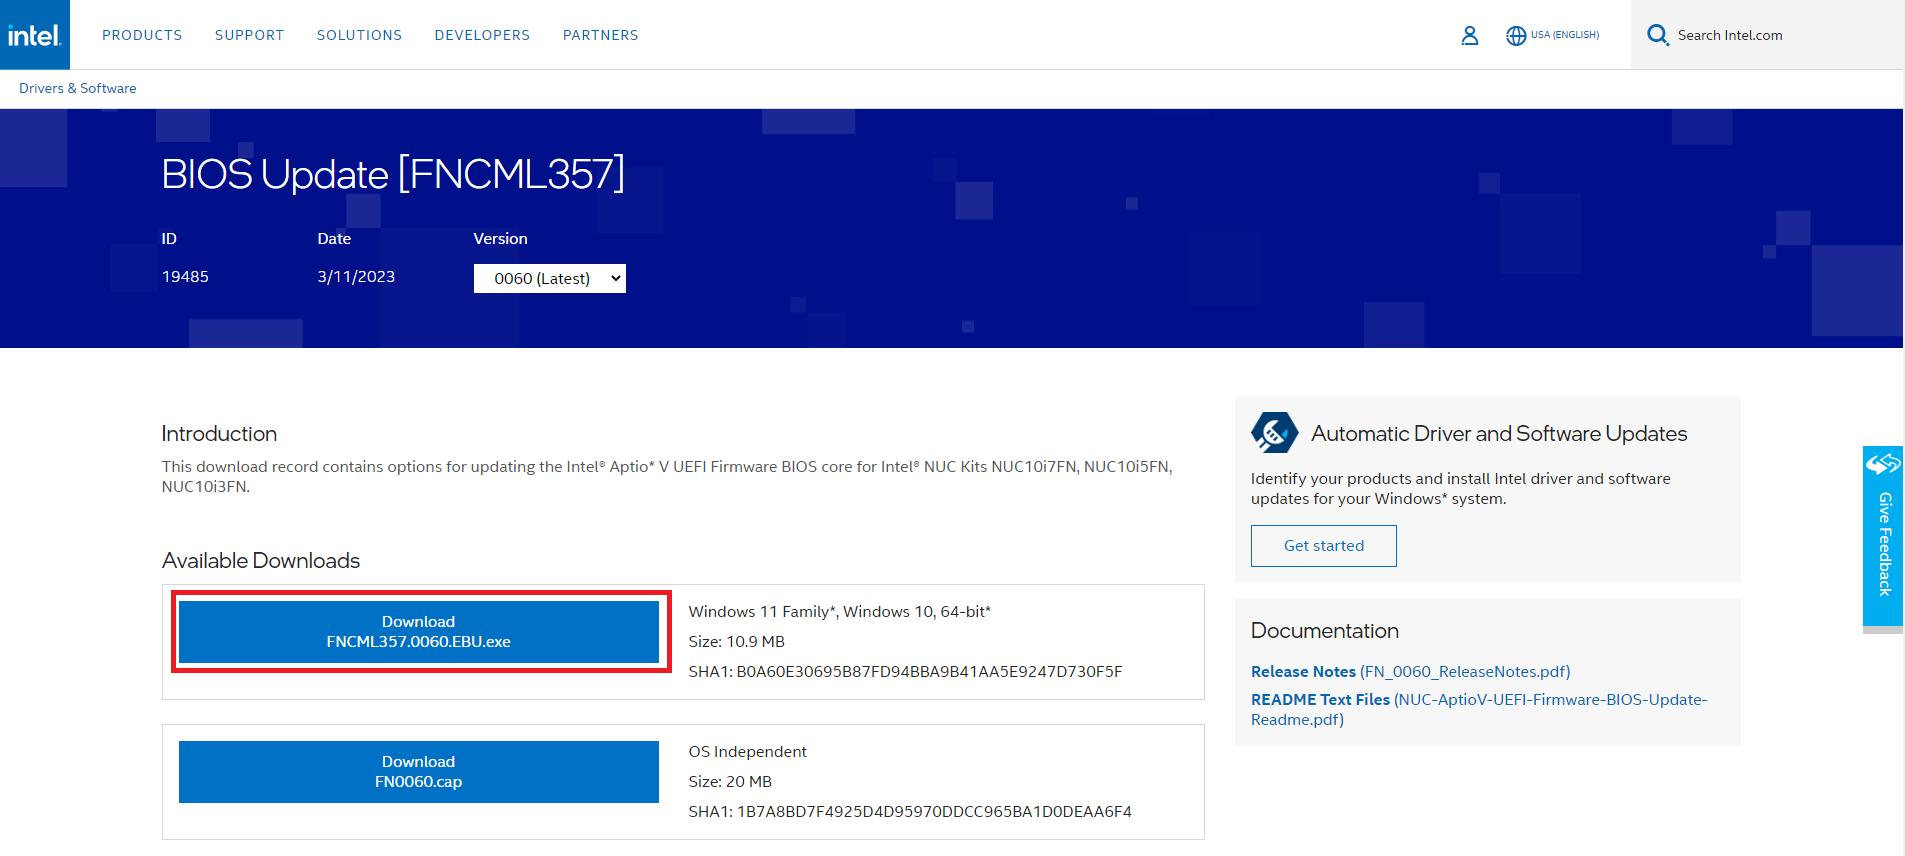
Hardware-assisted virtualization technology like EPT may have problems if the BIOS firmware needs to be updated. To support EPT, you must ensure your computer’s BIOS firmware is updated. This helped fix the issue for us and people on the Microsoft forum. Here is how to update BIOS:
- Update BIOs: Go to Intel’s website > Download recent BIOS firmware > Follow on screen instructions to install.
Disable Hyper-V
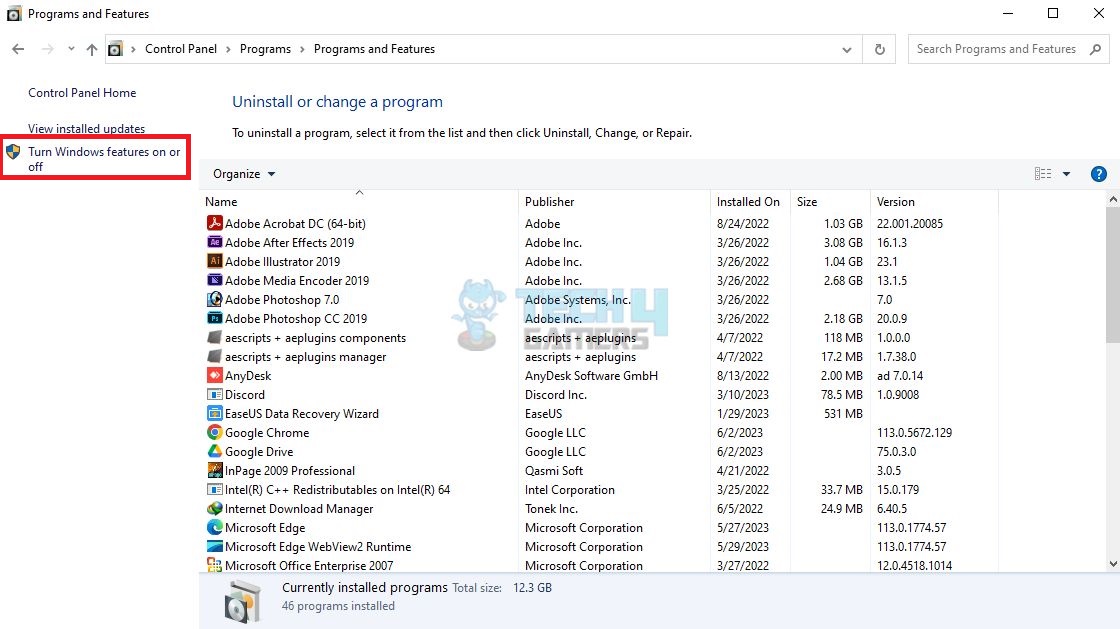
VMware Workstation Pro cannot run on a Windows host with enabled Hyper-V. It would be best to deactivate Hyper-V in Windows Optional Features to resolve this problem. This troubleshooting method helped us solve the issue. Following are the steps to disable Hyper-V:
- Open Window Features On or Off: Access Control Panel > View by > Choose Category > Programmes > Programmes and Features > Click Turn Windows features on or off.

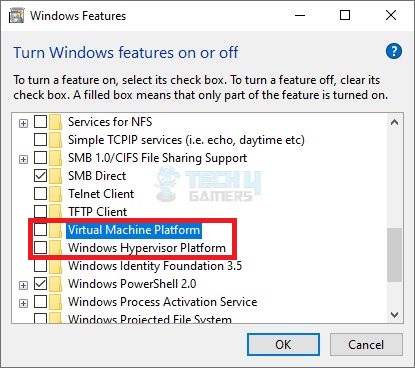
Programs and Features – Image Credits (Tech4Gamers) - Turn Off Hyper-V: Uncheck the boxes next to Virtual Machine and Windows Hypervisor Platform > Turn off the Hyper-V checkbox if it appears instead of these two, and click OK > Apply changes > Restart.

Virtual Machine – Image Credits (Tech4Gamers)
Disable Virtualization-Based Security (VBS)
Our findings indicate that VBS technology can also trigger the issue. You won’t be able to use VMware Workstation Pro if your Windows host system has VBS activated. Disabling VBS solved the error for us. Following are the steps to determine whether VBS is enabled on your system if you are not sure about it:
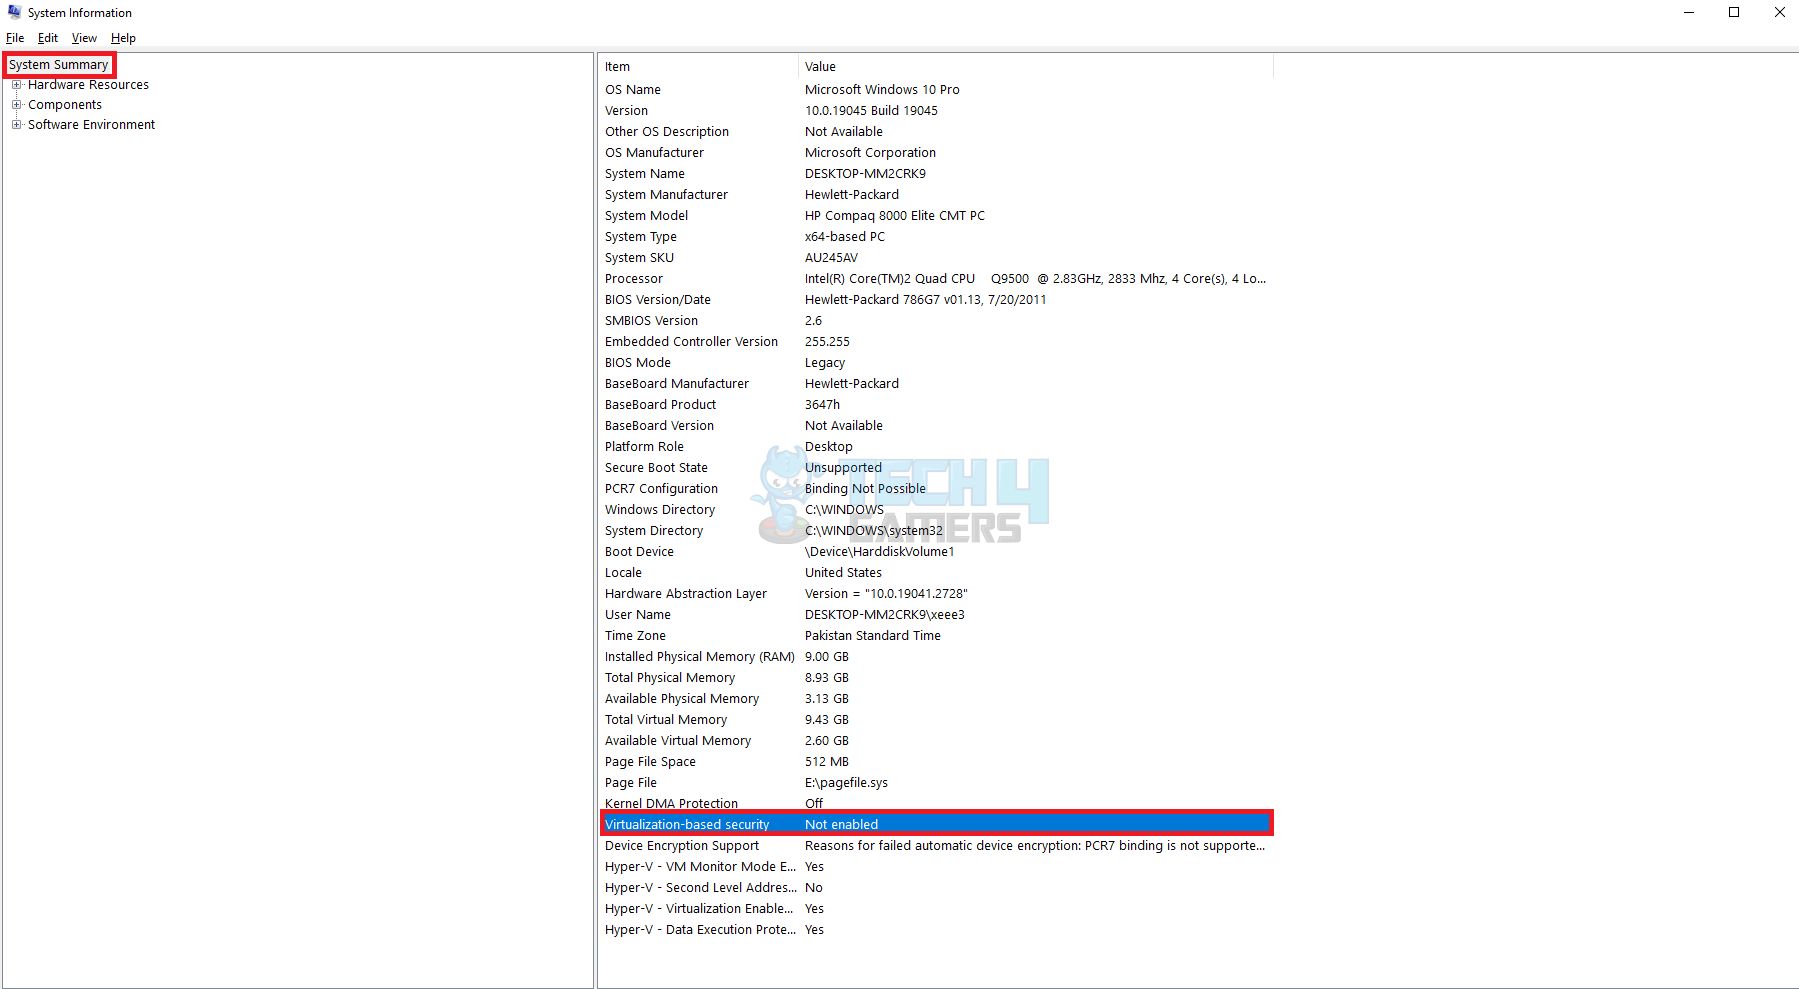
- Access System Summary: Type “System Information” into Windows Search > Press Enter > System Summary > View VBS status.

VBS Security – Image Credits (Tech4Gamers)
Turn Off VBS
You need to turn off the VBS technology if it is currently active. Here’s how to turn it off:
- Access Computer Configuration: Open the Run application > Type command gpedit.msc in the Run box > Hit enter > The Local Group Policy Editor will launch > Expand the branch Computer Configuration.
- Disable: Navigate to Administrative Templates > Click on System > Device Guard > Virtualization-Based Technology > Disable > Restart system.
Also Read
Thank you! Please share your positive feedback. 🔋
How could we improve this post? Please Help us. 😔
[Errors Troubleshooting Expert]
Arsalan Shakil (aka GuyThatDoesEverything on YouTube) is a PC Tech Enthusiast and Electronic Geek. With over 10+ years of experience in Electronics, he then decided to explore Software Engineering to design embedded products and automate existing hardware solutions.
When he started tearing down old cameras to understand how they worked, he was shocked (literally, when he got zapped by a flash discharge capacitor), giving him the power (debatable) to fall in love with videography/photography. He also started making some fun videos that later became YouTube tech reviews.
Skills:
- 10+ years of experience in Electronics design, embedded solutions, and prototyping
- Majored in Software Engineering
- Research paper publication in IEEE for Embedded Military Uniform & LoRa WAN wireless technology
- Specialized in IoT Solutions
- PC Enthusiast & PC Modder
In his local region, he’s known to expose cheap PSU brands, often claiming fake certification or false claims on the box. He’s a true nerd and needed some friends in his life. Then he met some guys who work at Tech4Gamers, and they also came out to be equal nerds who suggested he join Tech4Gamers as a Hardware Expert.


