 Threads
A Good Choice!
Review Summary
The XPG Valor Air Nano is a compact yet spacious tower case designed with airflow and ventilation as its main strengths. With perforated steel panels, tool-less design, and good dust filtration, it offers support for micro-ATX and mini-ITX motherboards, a 360mm radiator, GPUs up to 370mm, and CPU coolers up to 170mm in height. While it balances compact size with solid hardware support, users may face clearance issues with larger PSUs and tight cable routing, but overall it remains a well-built, airflow-focused case for those wanting a small footprint without losing modern hardware compatibility.
Hours Tested: 13

Overall
-
Design - 8.5/10
8.5/10
-
Build Quality - 9/10
9/10
-
Features - 8/10
8/10
-
Supported Cooling - 9/10
9/10
-
Supported Storage - 7/10
7/10
Pros
- Perforated Stylish Panels
- Tool-Less Panels
- 5x Dust Filters
- PSU Bracket
- Multi Side Bracket
- GPU Support Arm
- 240/360mm size AIO on top
- Fan mounts on the floor of the case
- USB 3.2 Type-C Port
- ARGB Fan
- VALOR AIR NANO is NVIDIA SFF-Ready certified
- Price
Cons
- Limited Storage Provision
- SFX PSU EPS Cable might not reach 12V CPU Connectors

I am taking a look at a compact tower case from XPG, which is the Valor Air Nano. The word Nano indicates its small footprint compared to the regular case, and Air indicates it is an air edition with a lot of ventilation all around, unlike the glass edition.
This case is built around the new SFF concept from Nvidia, which XPG has also released new SFF PSUs based on. This case supports mATX and mini-ITX size motherboards. Its volume is approximately 34 liters.
This case has an MSRP of USD 69.99 and comes with a 2-year warranty from the manufacturer.
The salient specifications are:
| Dimension | 357x220x436mm |
| Motherboard Form Factor | Micro-ATX
Mini-ITX |
| Storage Drive Mount | 2x 2.5”
1x 3.5” |
| Expansion Slot | 5x |
| GPU Support | 370mm Length |
| CPU Cooler Support | 170mm |
| PSU Support | 170mm length |
| Fan Size Support |
|
| Radiator Size Support |
|
| Weight | 5.15 KG |
Make sure to read my review of the XPG Valor Mesh as well if you’re interested in a bigger option.
Packaging And Unboxing
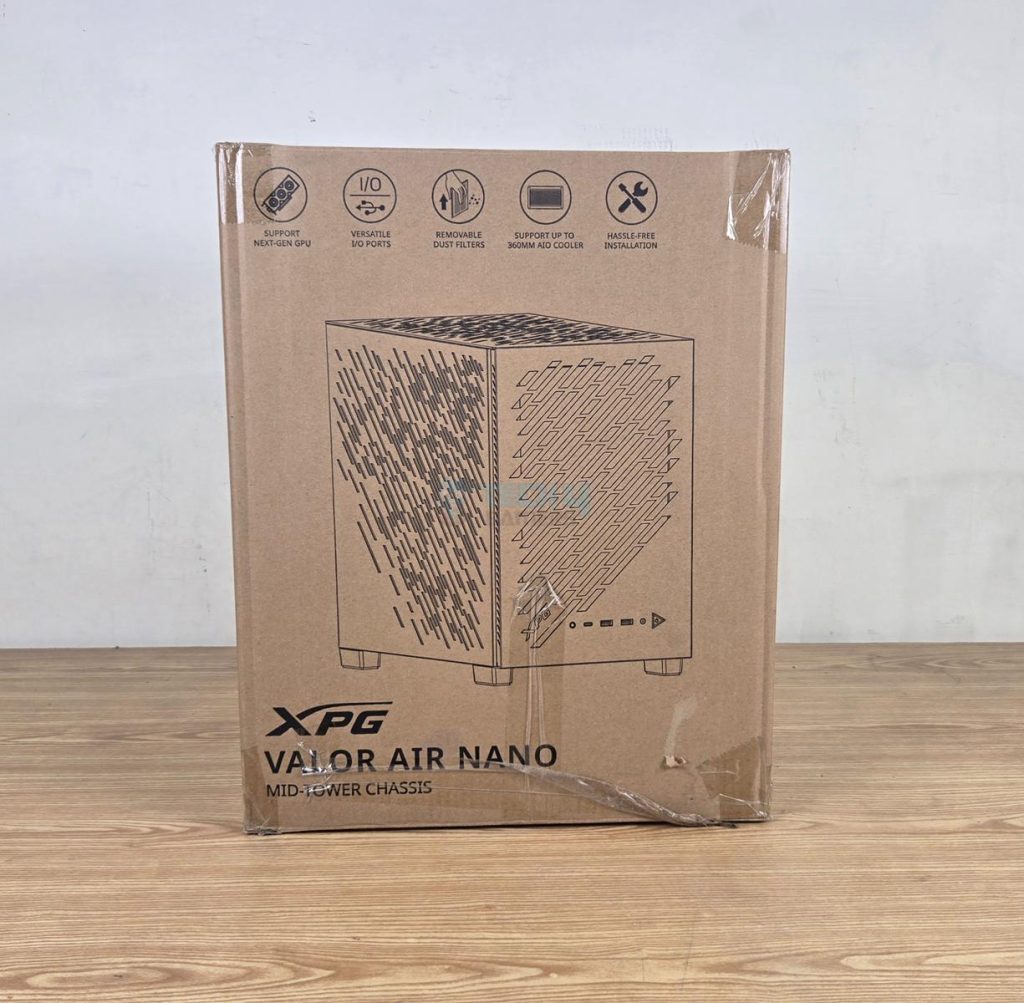
XPG has shipped the case in a standard brown cardboard box. A picture of the PC Case can be seen on the front. The salient features and specifications are listed on the packing box.
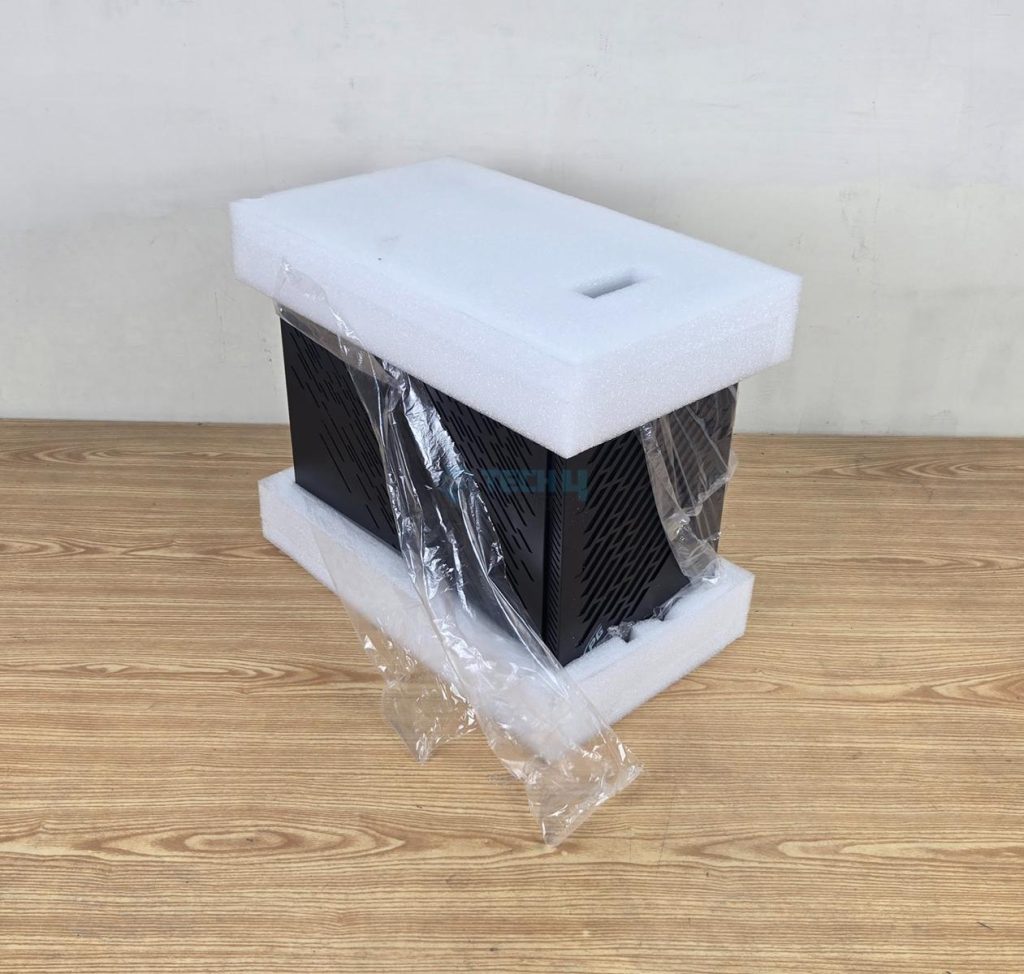
The thick black color Styrofoam pads encapsulate the PC Case for safe shipping.
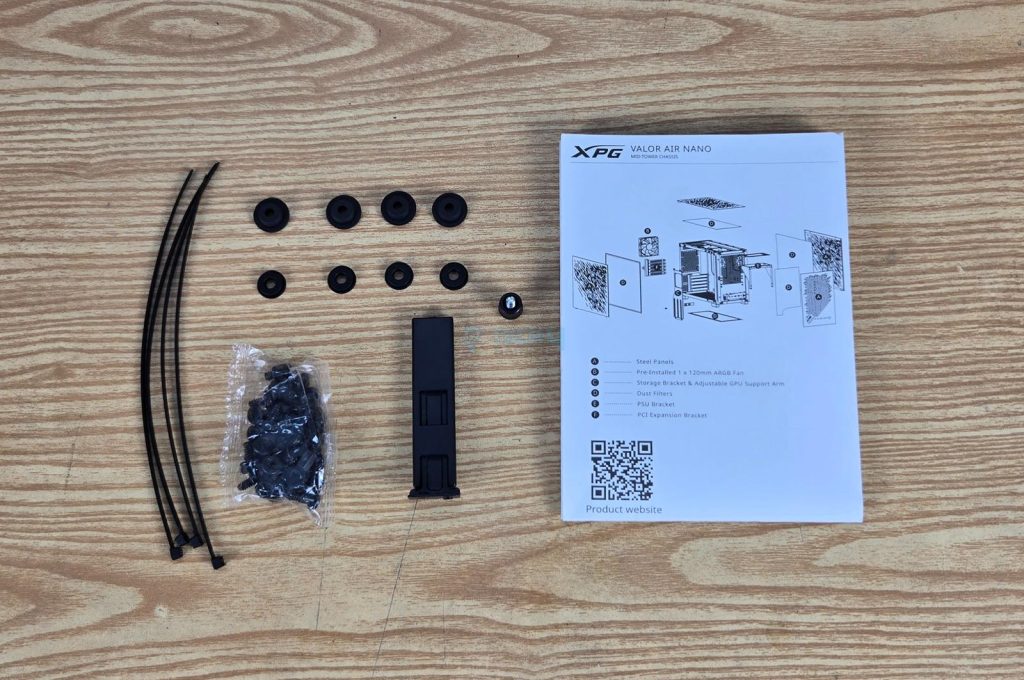
The following are provided with the case:
- 1x Quick Installation Guide
- Stand-off Screws
- Storage drive screws Screws
- PSU Screws
- Motherboard Screws
- 1x GPU Support Bracket Arm
- 8x Rubber inserts for the storage drives
- Zip Ties
Design
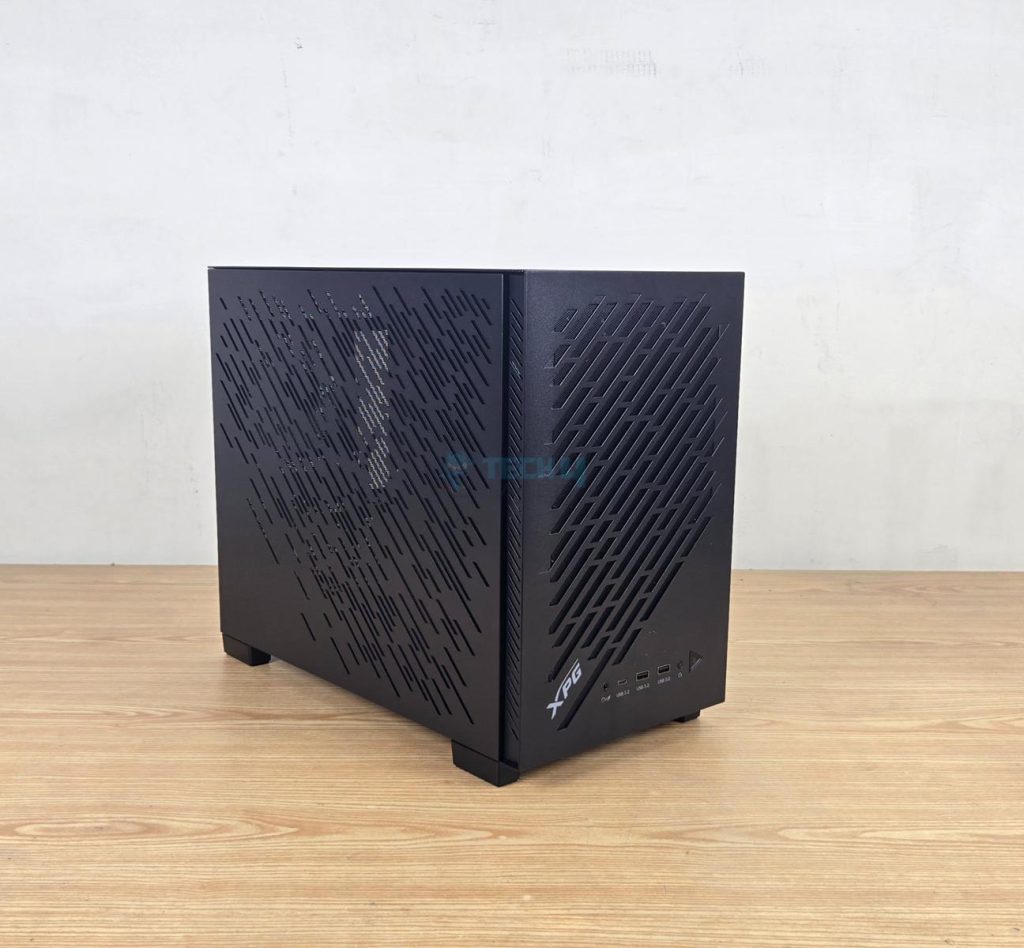
XPG Valor Air Nano is available in white and black. It is made of SPCC material and has a weight of 5.15Kg. Its dimension is 357x220x436mm, and its volume is a little over 34 liters. The core design element is perforated panels all around with dust filters, hence the name Air. The case comes equipped with a GPU support bracket, as it is NVIDIA SFF-Ready certified chassis.
Let’s start taking a closer look at the Inside and Outside views, being our major categories.
Front Panel
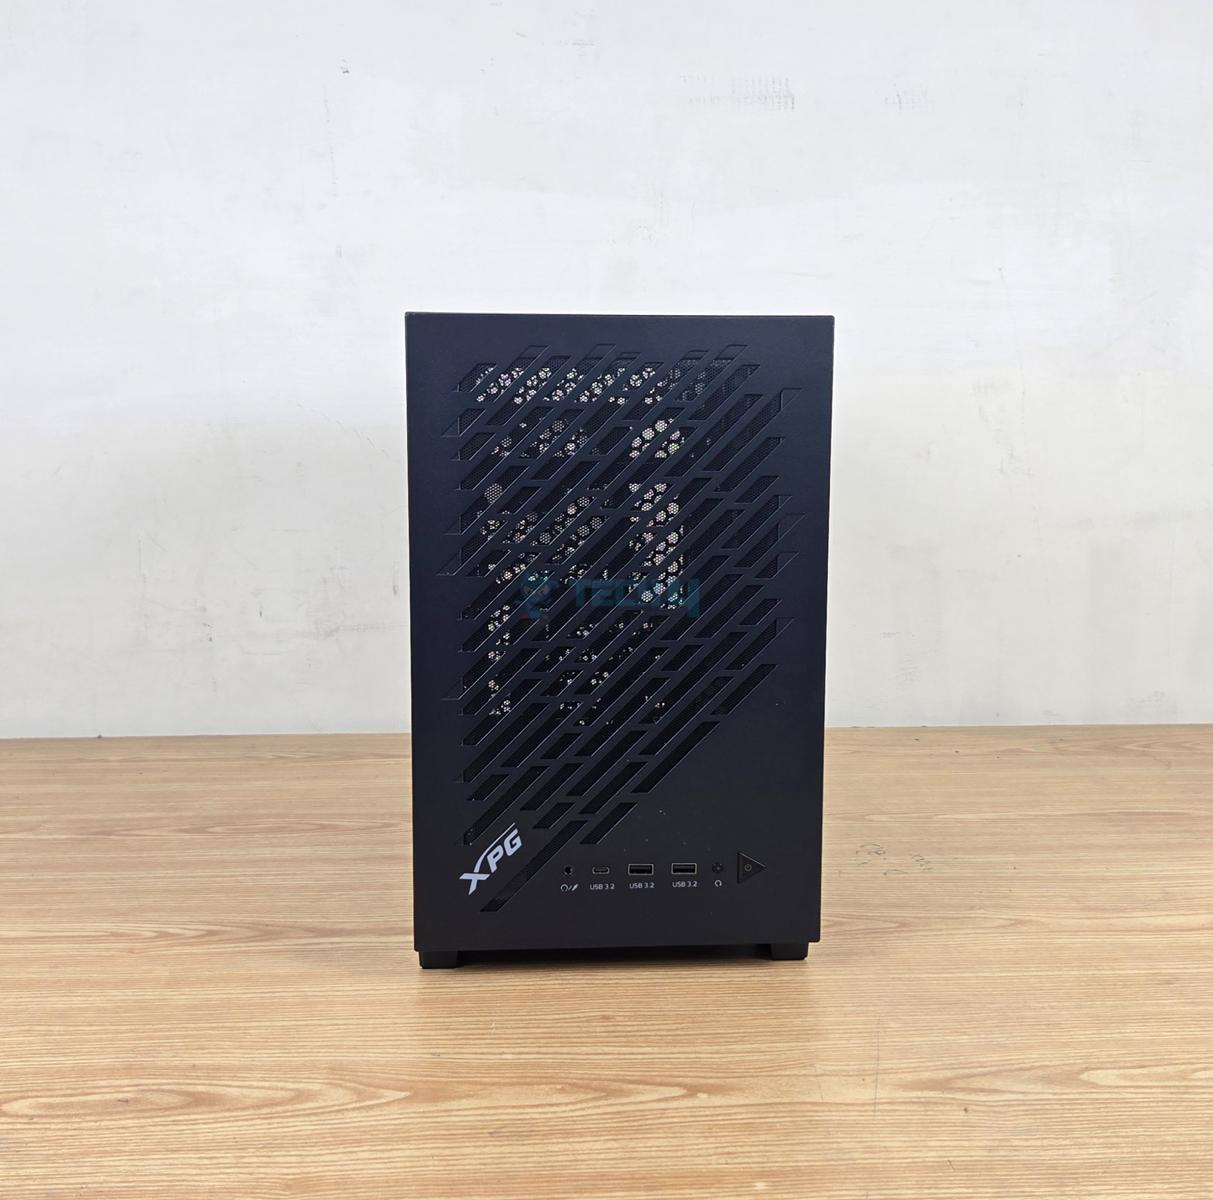
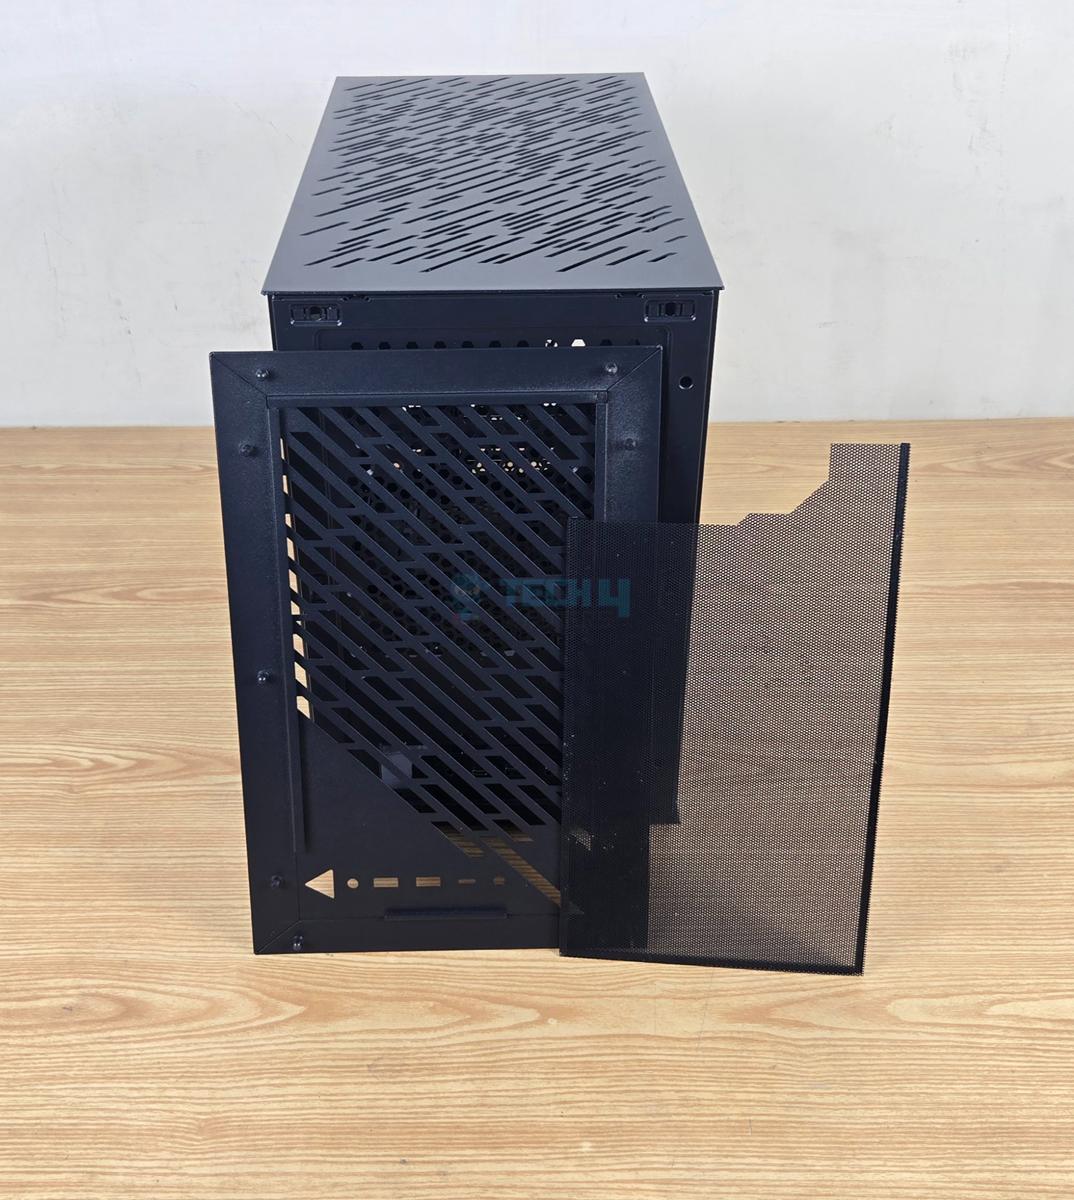
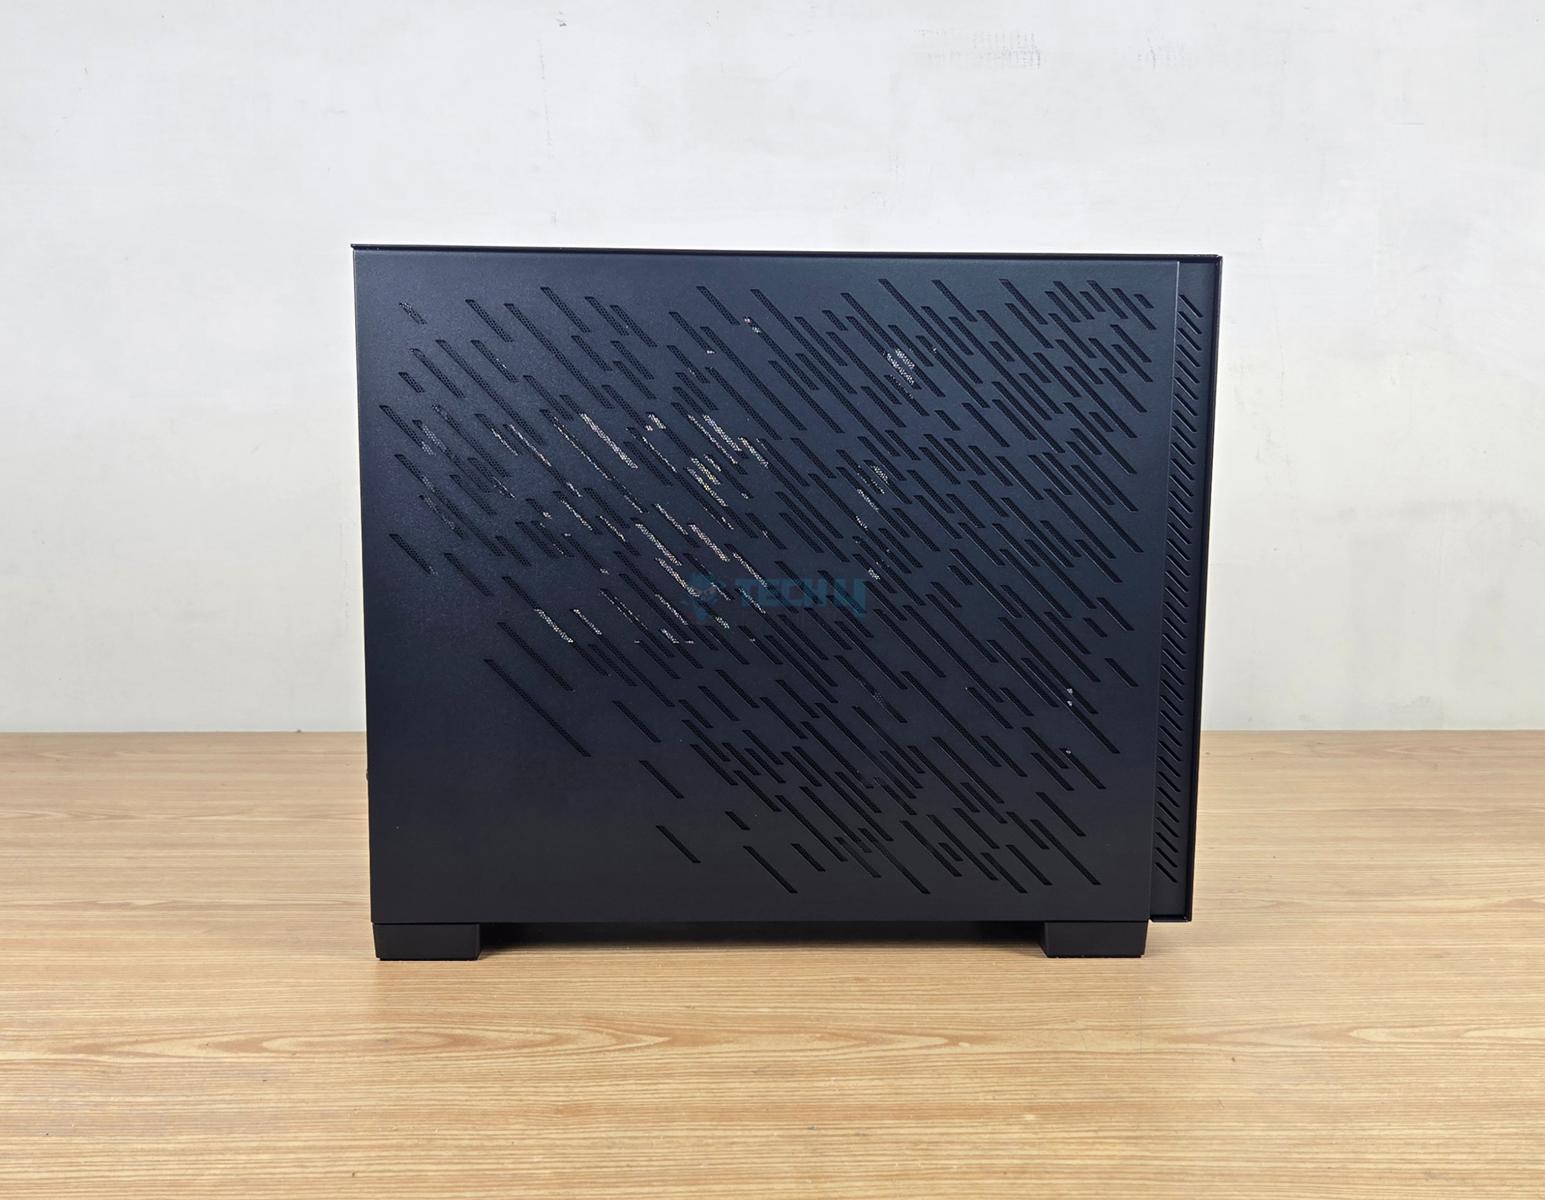
This case has a stylish perforated metallic panel on the front. It is a tool-less design. XPG branding in white is at the bottom. XPG has provided a desk-friendly IO port placement on the front. The panel has a magnetic dust filter as well. You can see that the front panel does not fully flush against the main housing of the case.
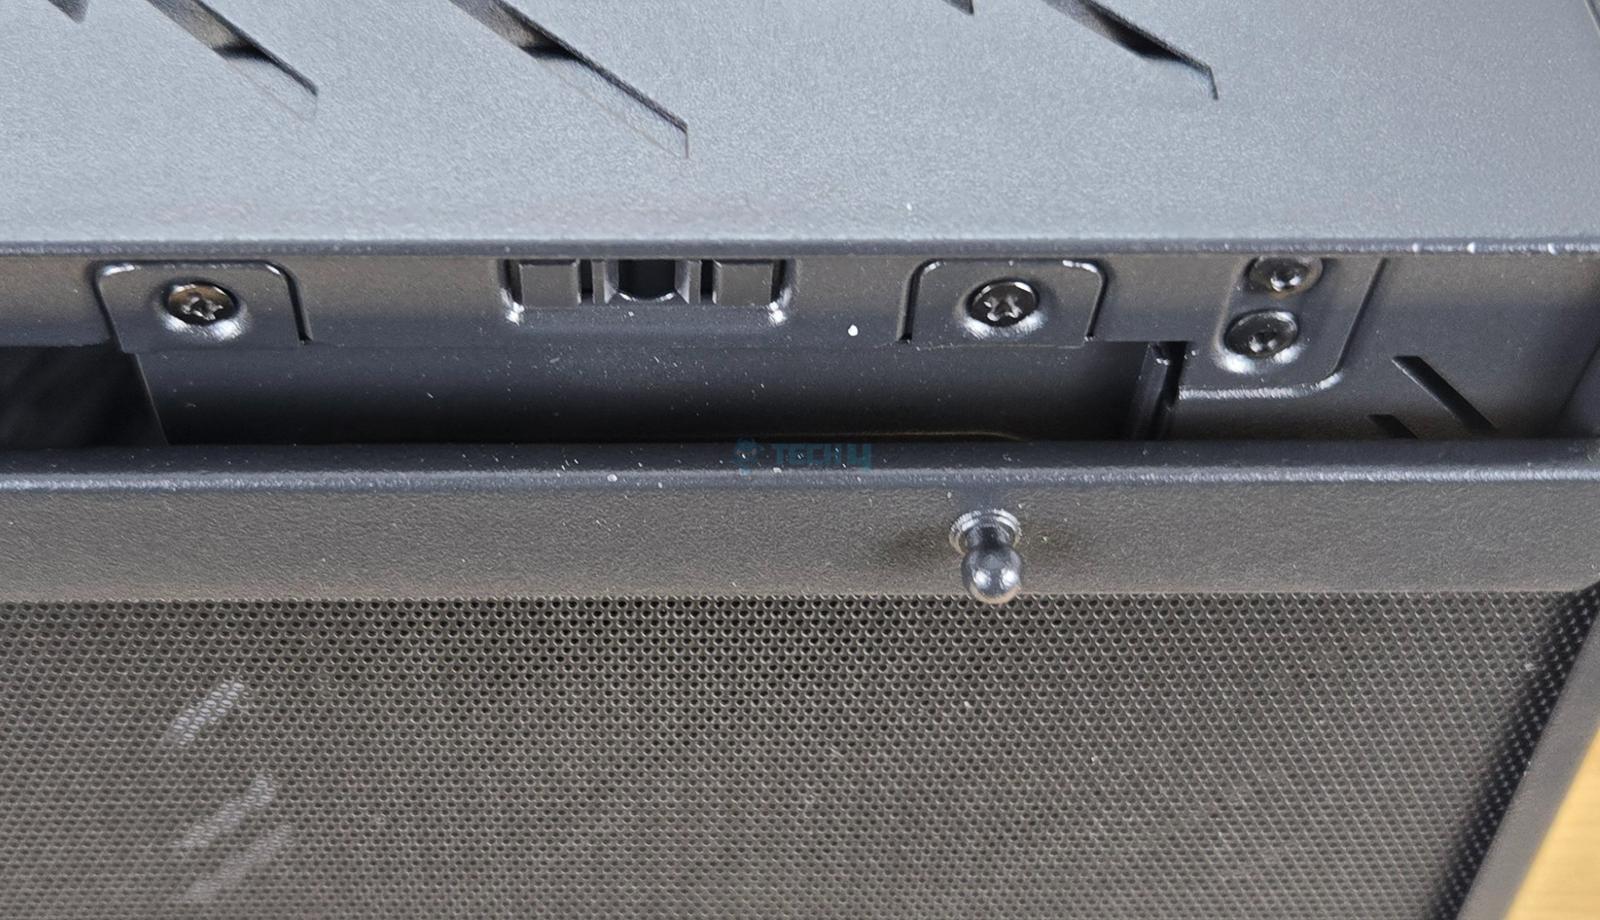
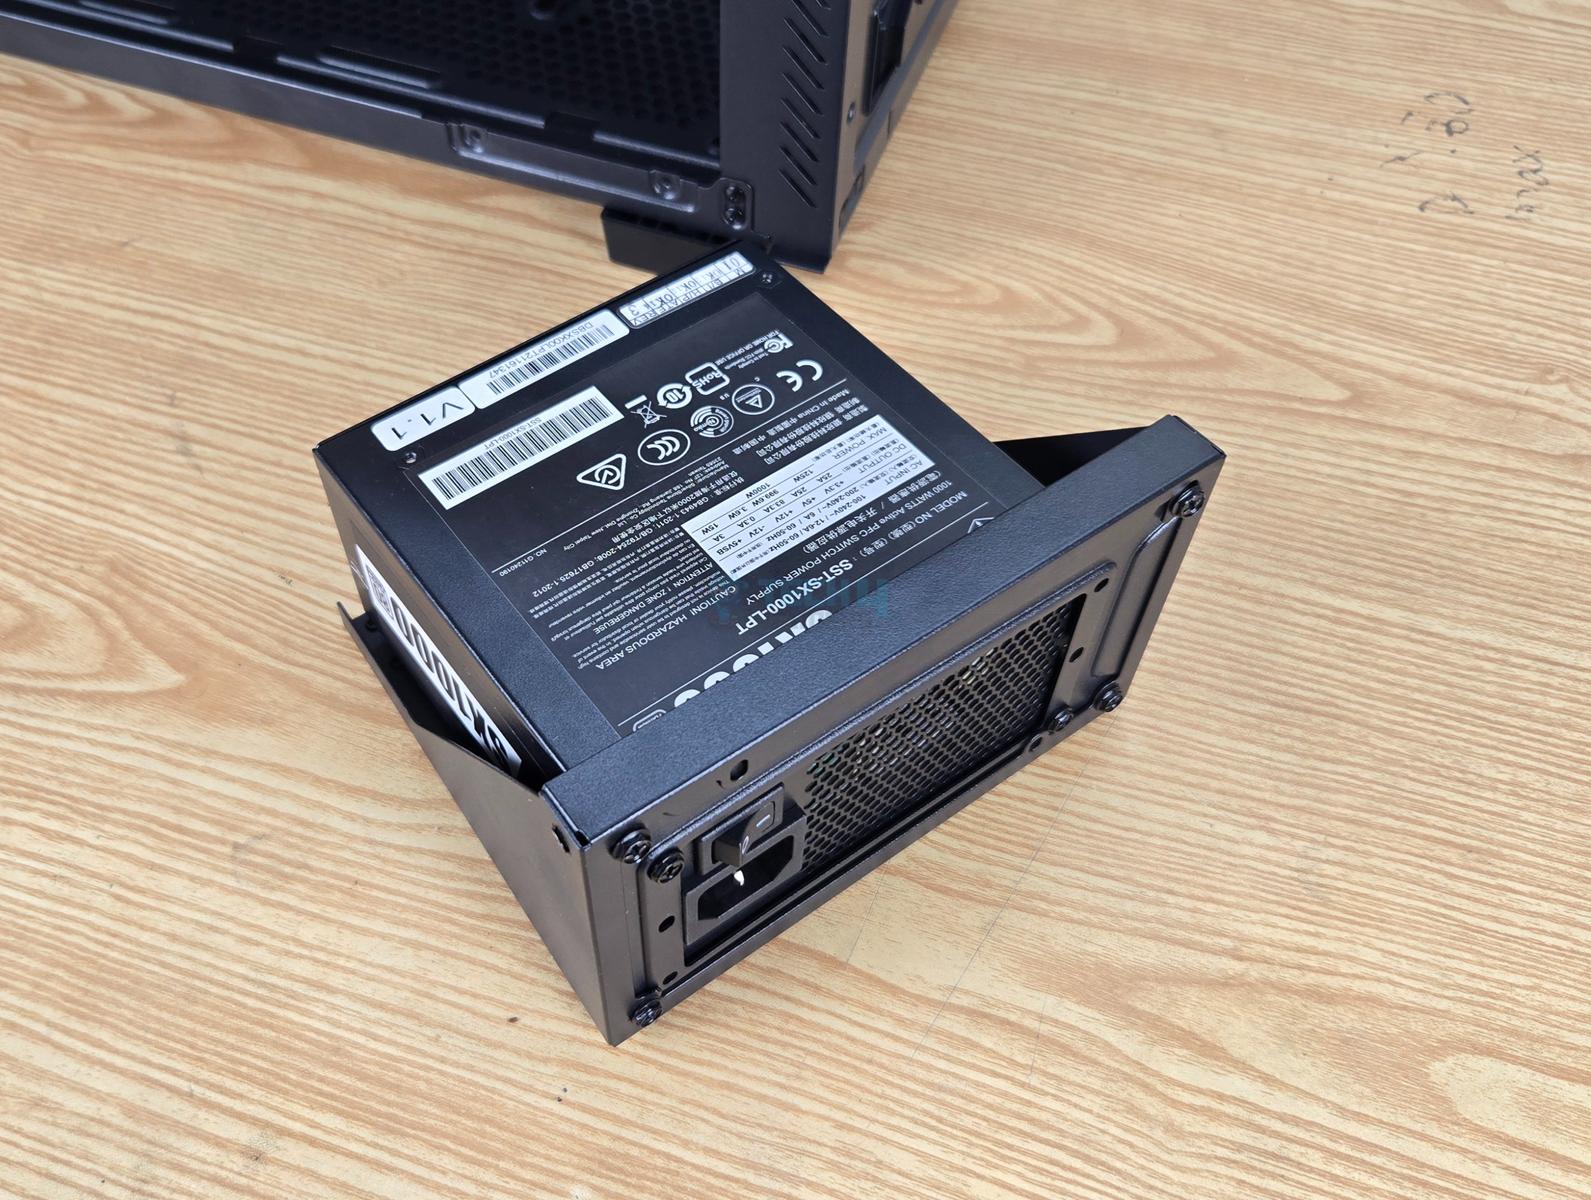
The main housing on the front does not have any rail mount or mount for any fan. Instead, the PSU is placed on the front from the inside. Why is that so? I have mentioned earlier that this is an NVIDIA SFF-Ready certified case, so XPG needed to utilize the internal space wisely, and this case has no chamber design.

Looking closely, you can see 4x screws that are holding the PSU bracket on the front housing. However, the left top screw is fixed and can’t be unscrewed. The legs of the bracket are flexible and can be pressed or pulled slightly so that the holes on the legs can align with the holes on the main housing. Keep that in mind, as the user guide does not provide any hint about it.
– Nauman Siddique
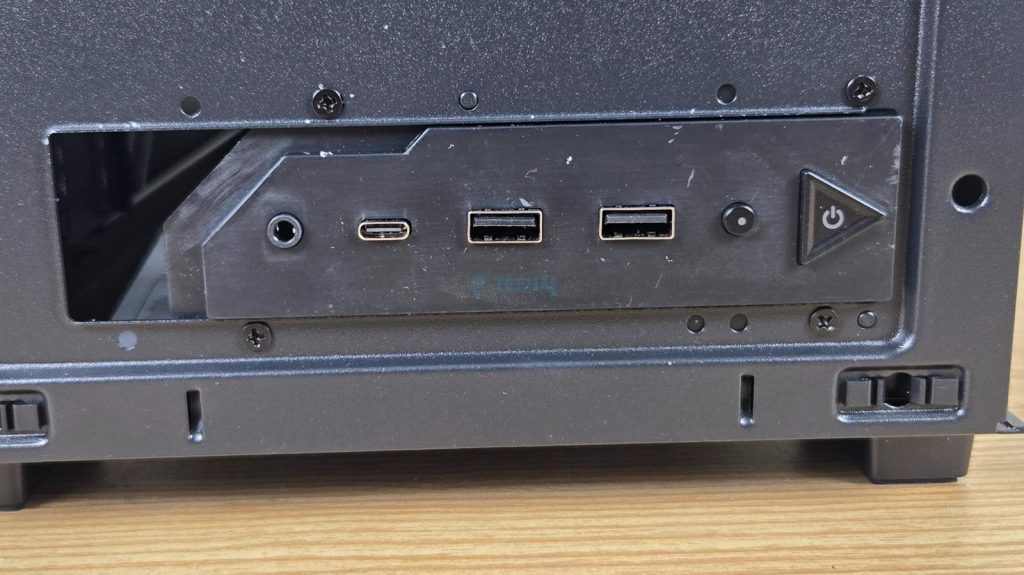
The IO ports include:
- 1x USB3.2 Type-C Port
- 2x USB3.2 Type-A Port
- 1x Hybrid Audio Port
- 1x Power Button
- 1x Reset Button
The power button has a nice click to it, and it does not wobble.
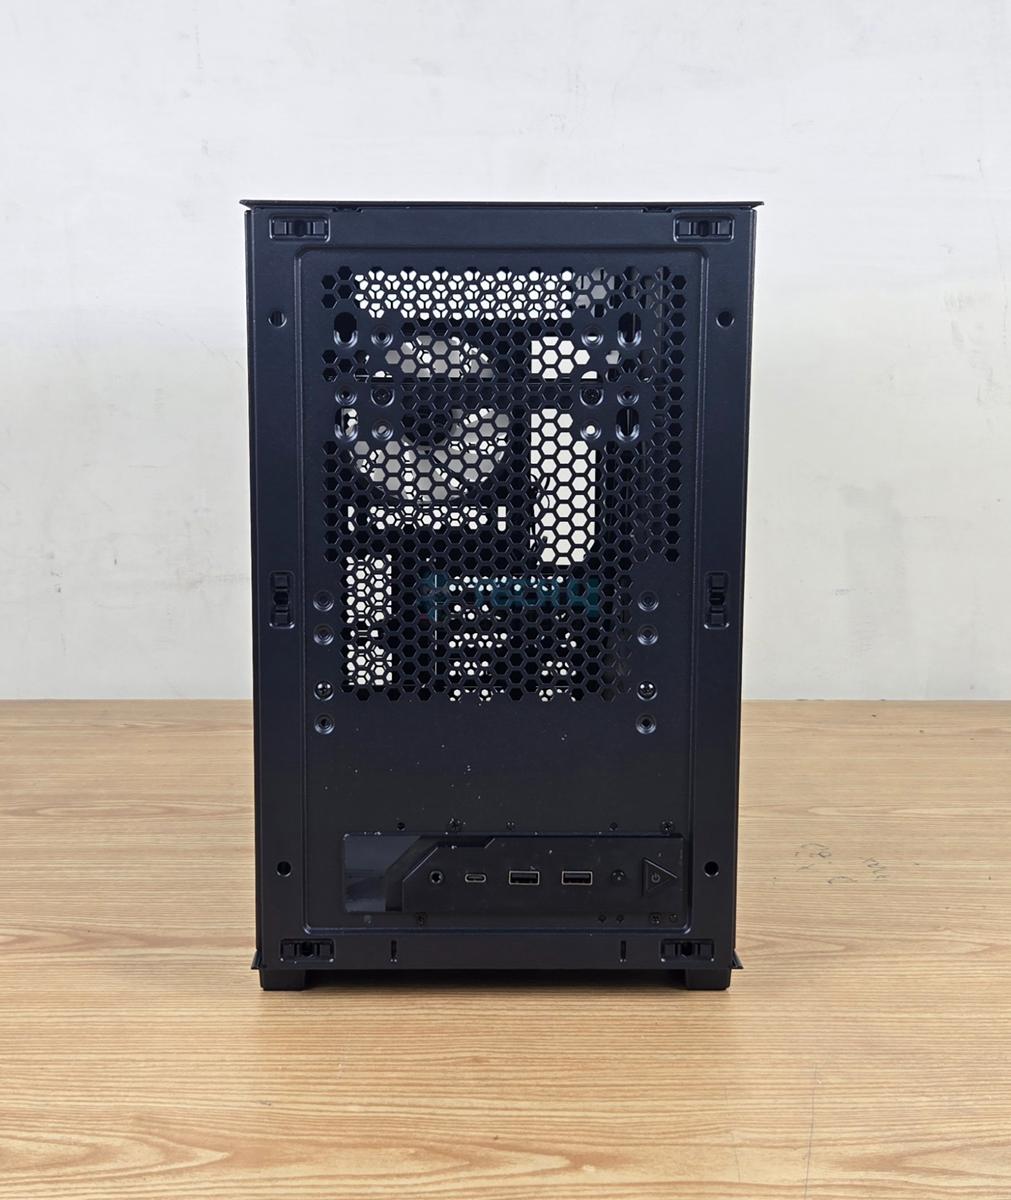
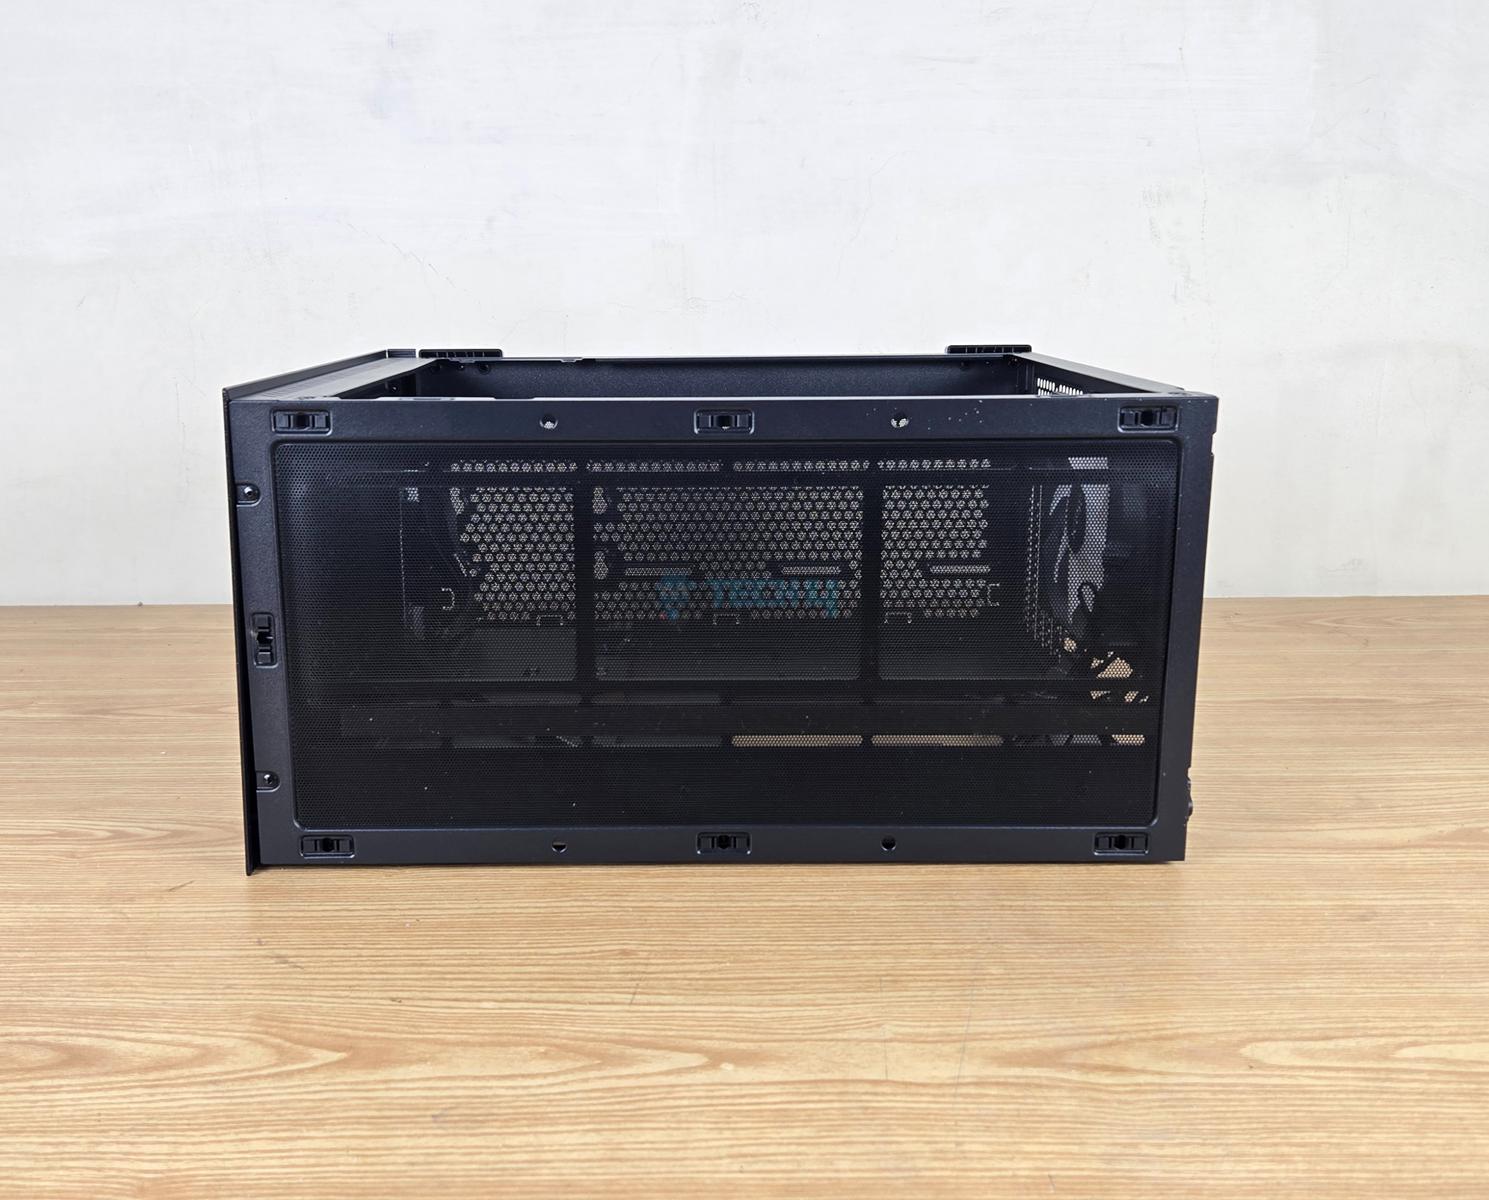
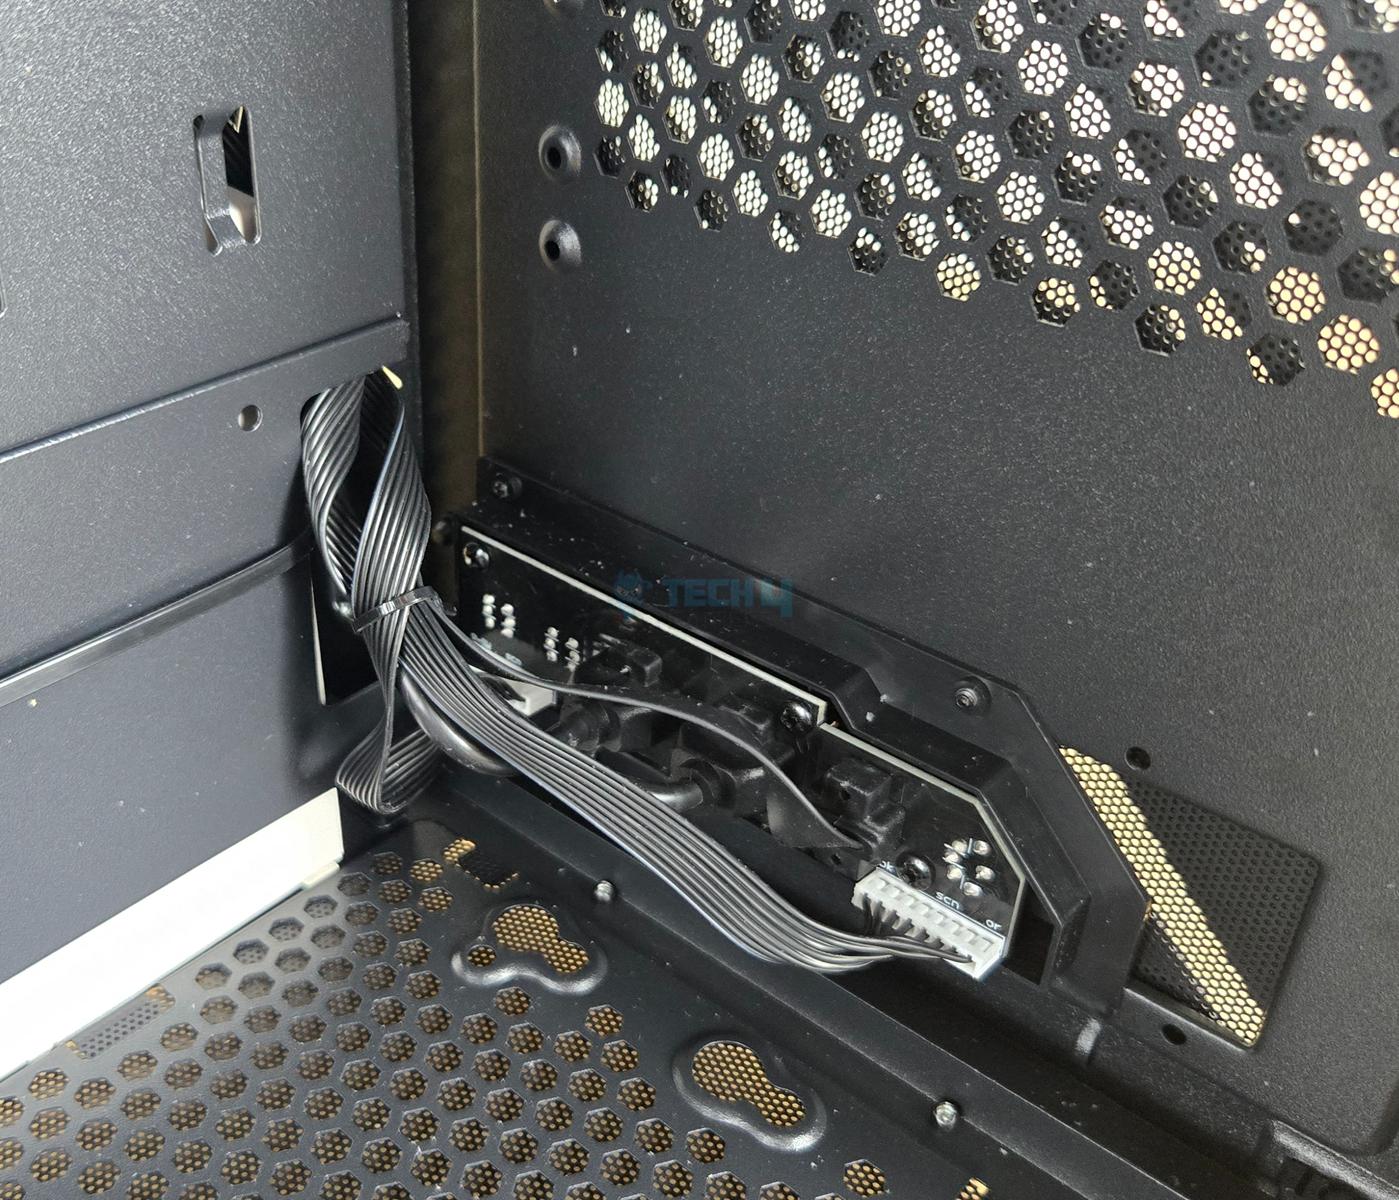
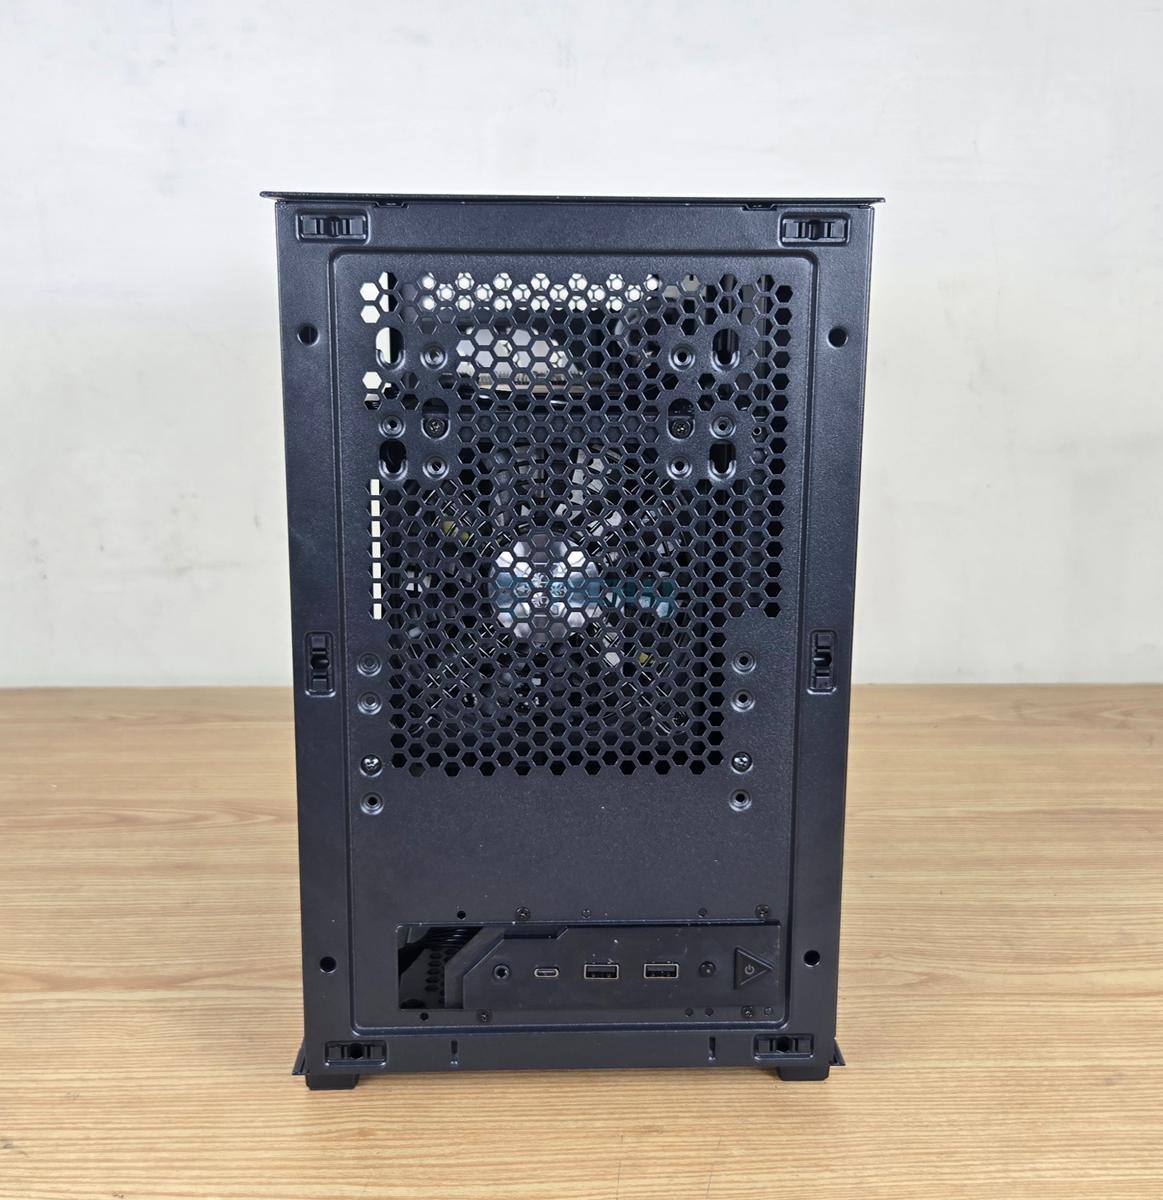
Rear Panel
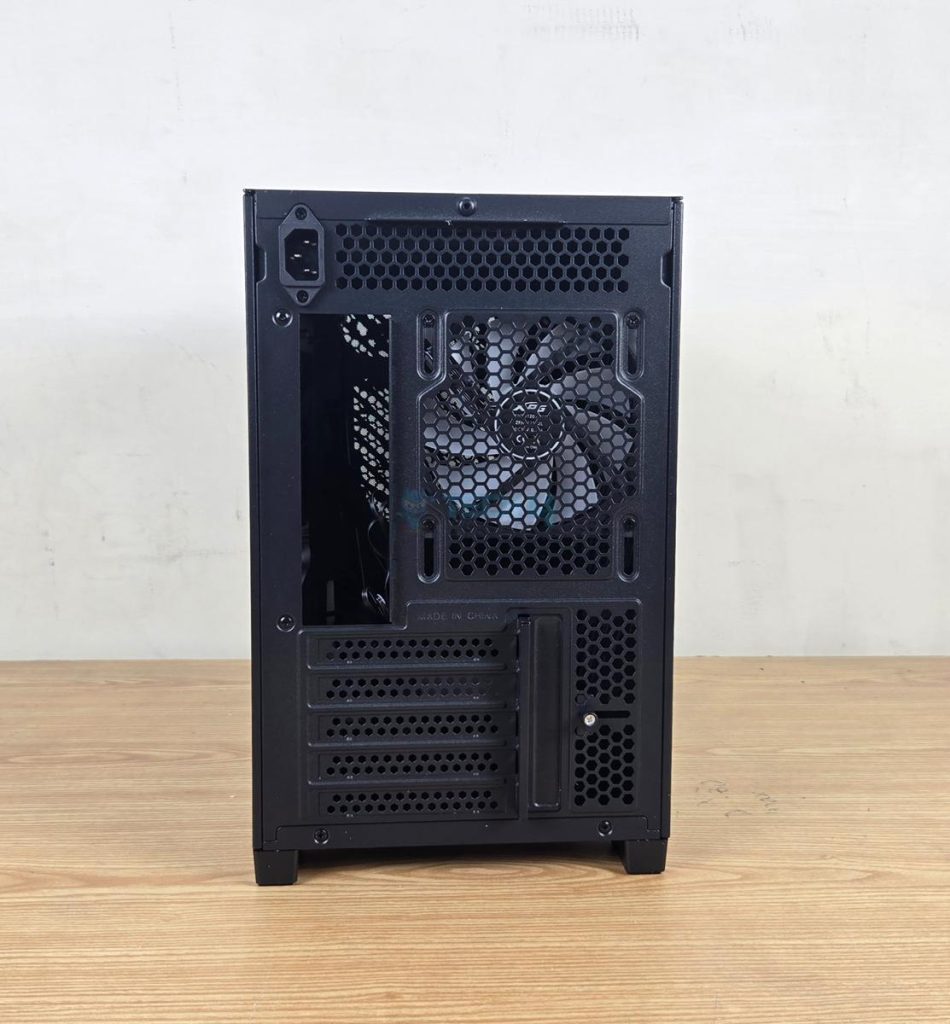
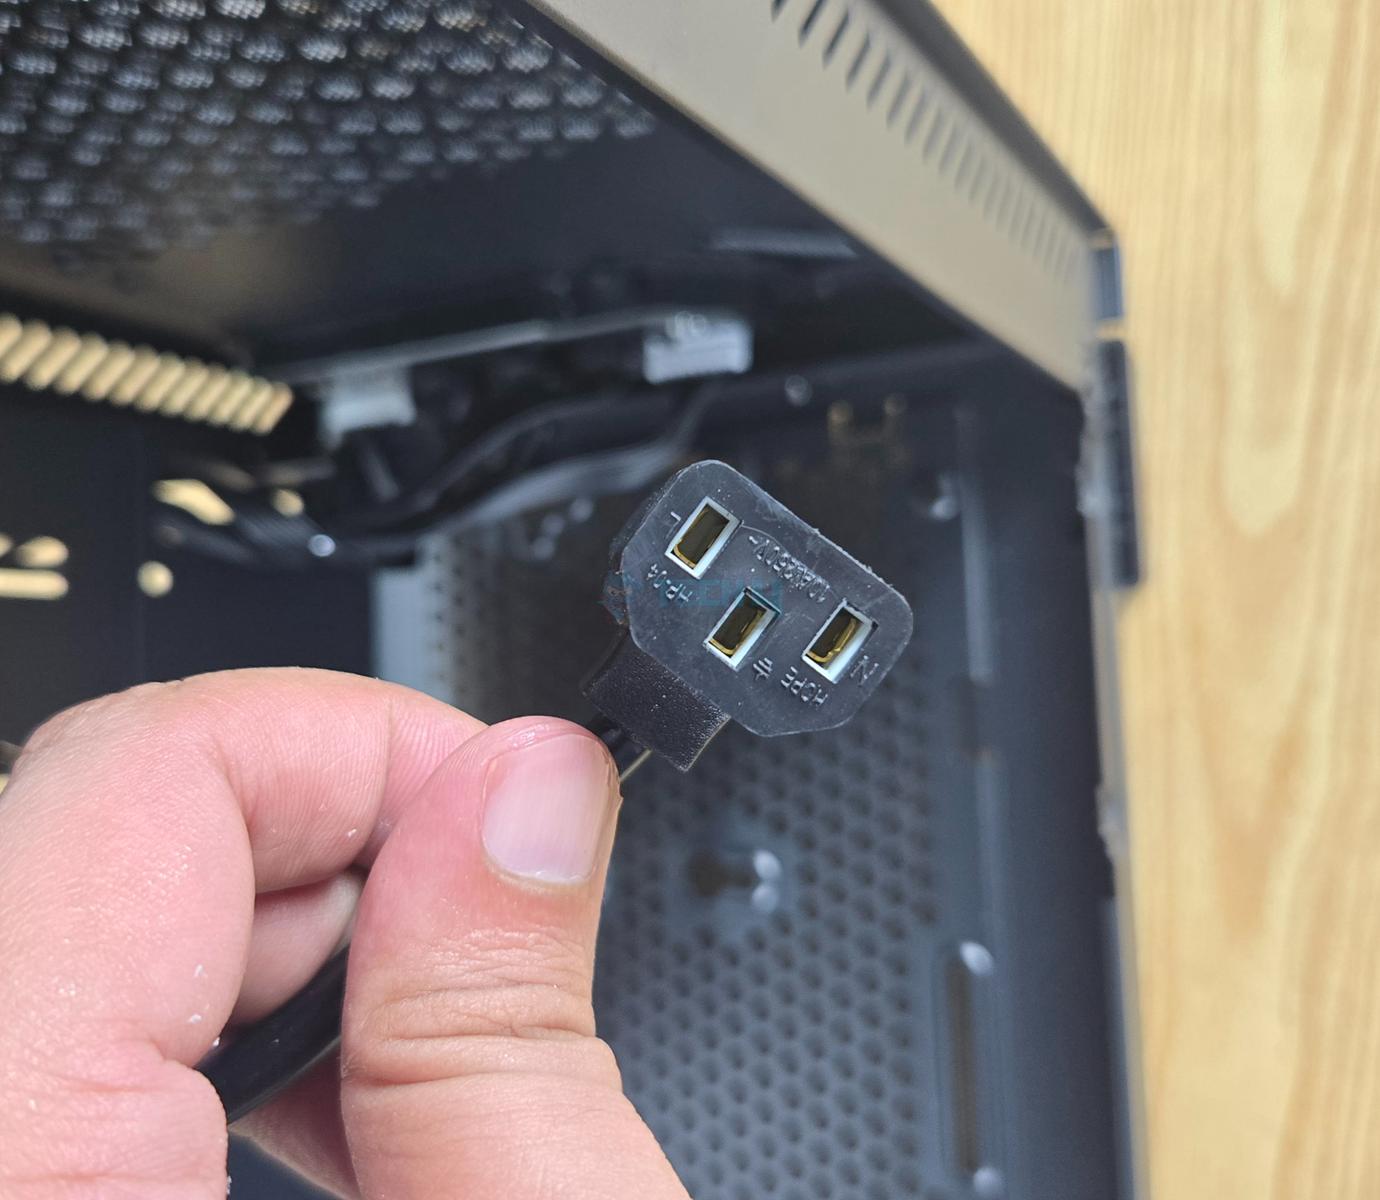
You can see a 3-pin socket over the top left. This case follows the design element of SSF cases, hence this implementation. Since the PSU will be on the front of the case, an interconnect cable is provided from the rear to the front. The area next to the socket is perforated.
A cutout is provided for the rear IO panel of the motherboard. A rail mount design can be seen for the pre-installed ARGB 120mm fan. This case has 5x non-reusable PCIe slot covers. You can also see a cover in vertical layout for the PCIe slots.
Bottom Panel
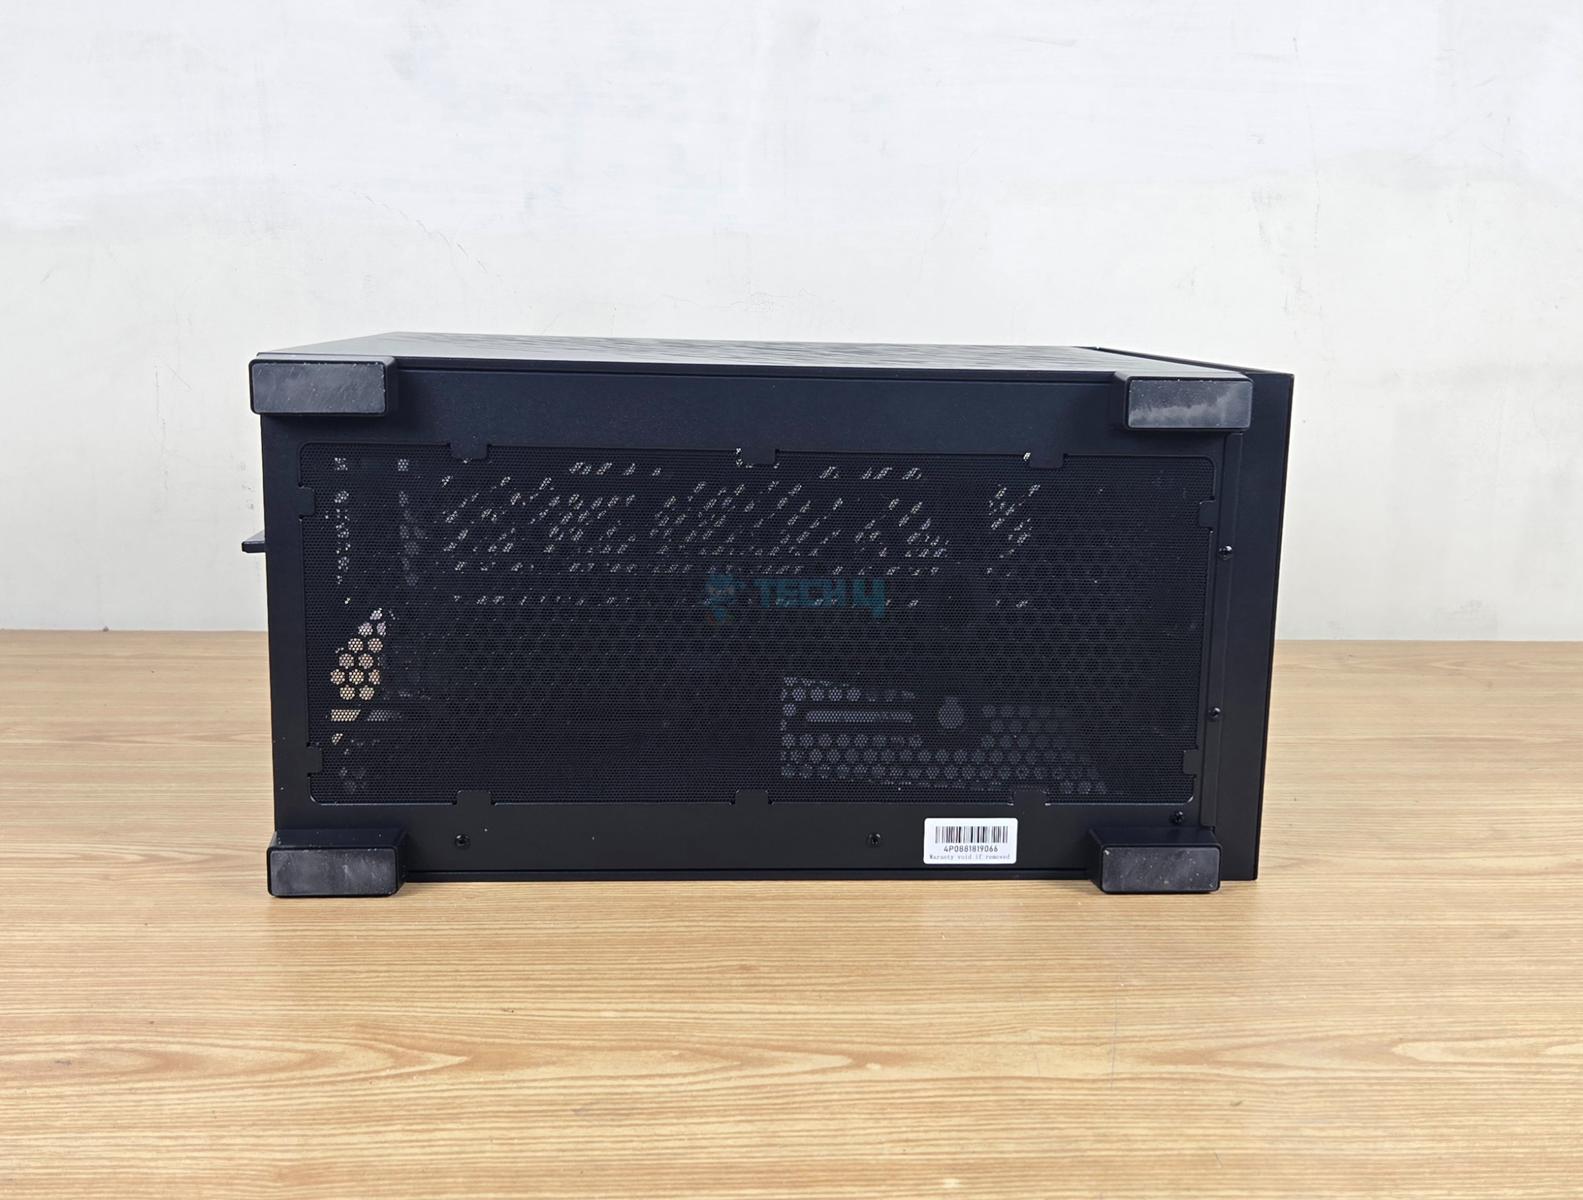
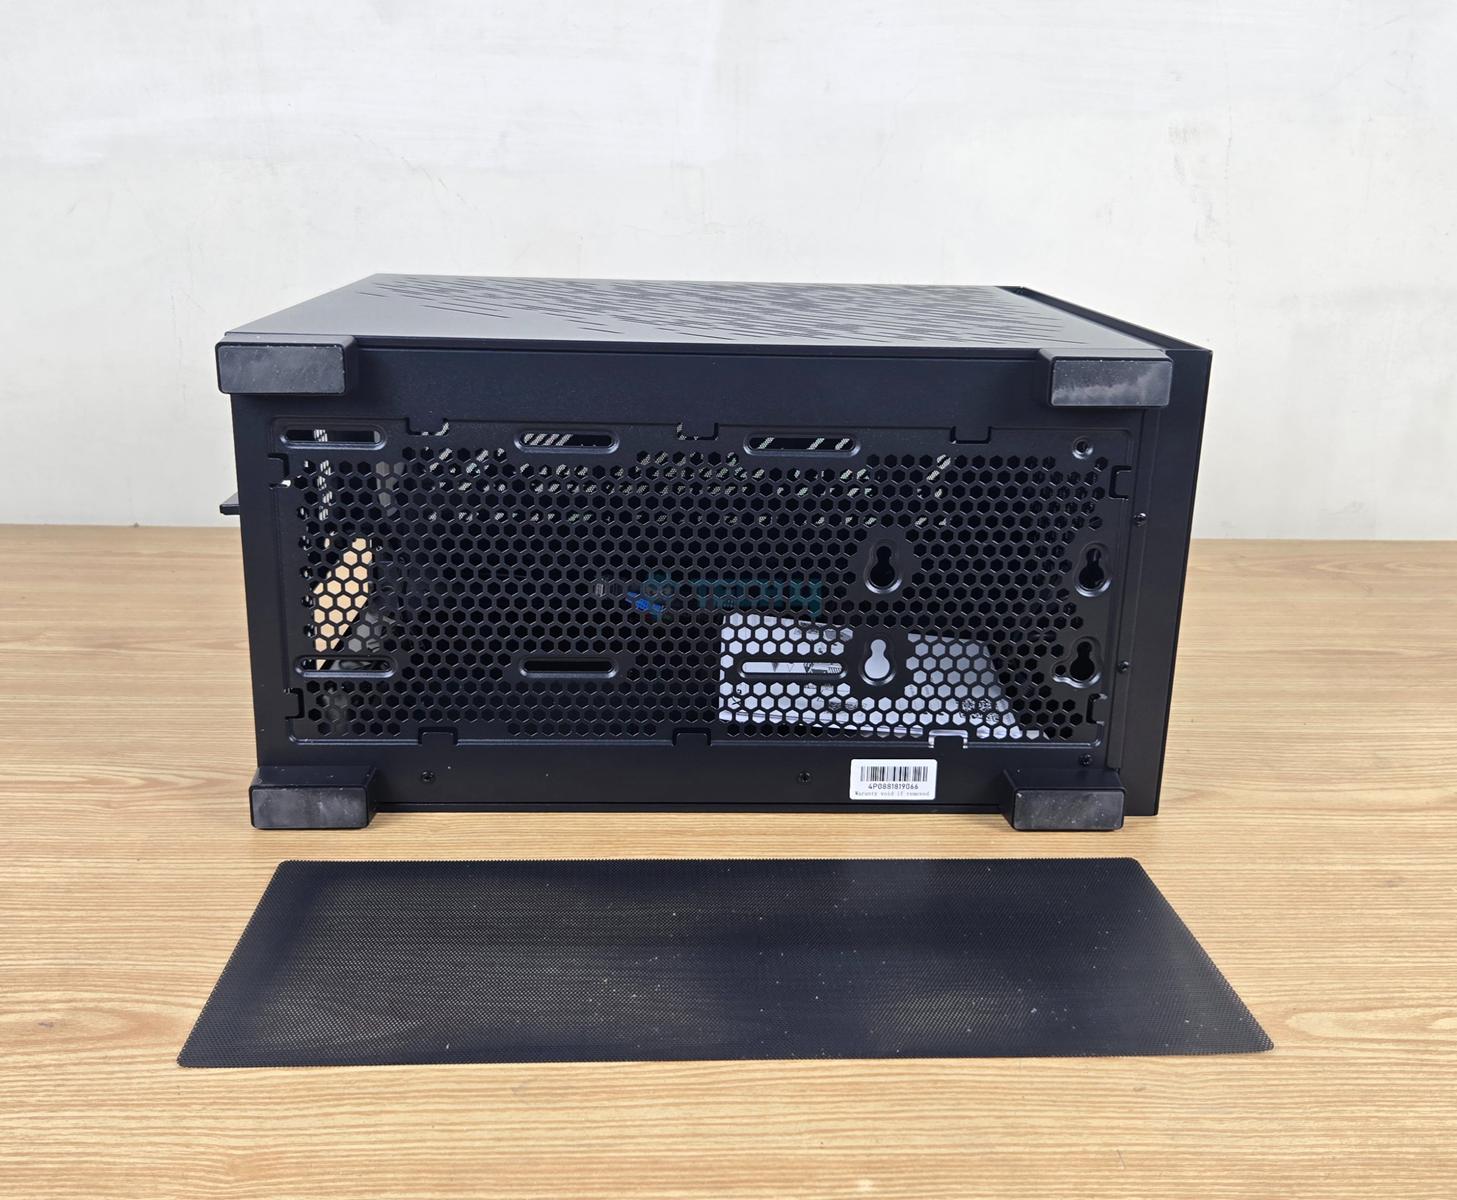
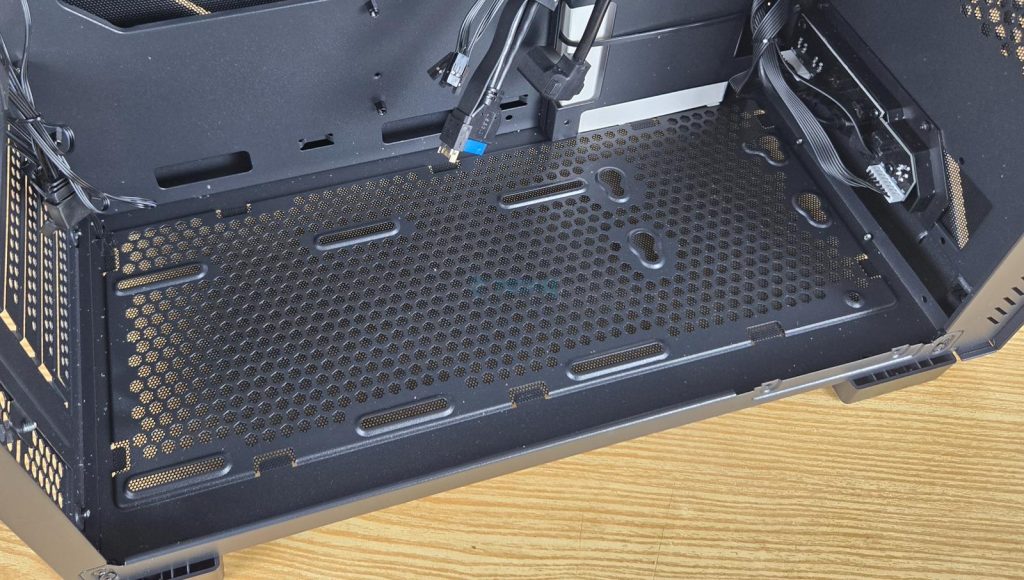
The bottom side of the case has a full-length non-magnetic dust filter. Removing that filter, you can see that the case floor has mounts for up to 2x 120mm fans and a 3.5” disk drive.
Top Panel
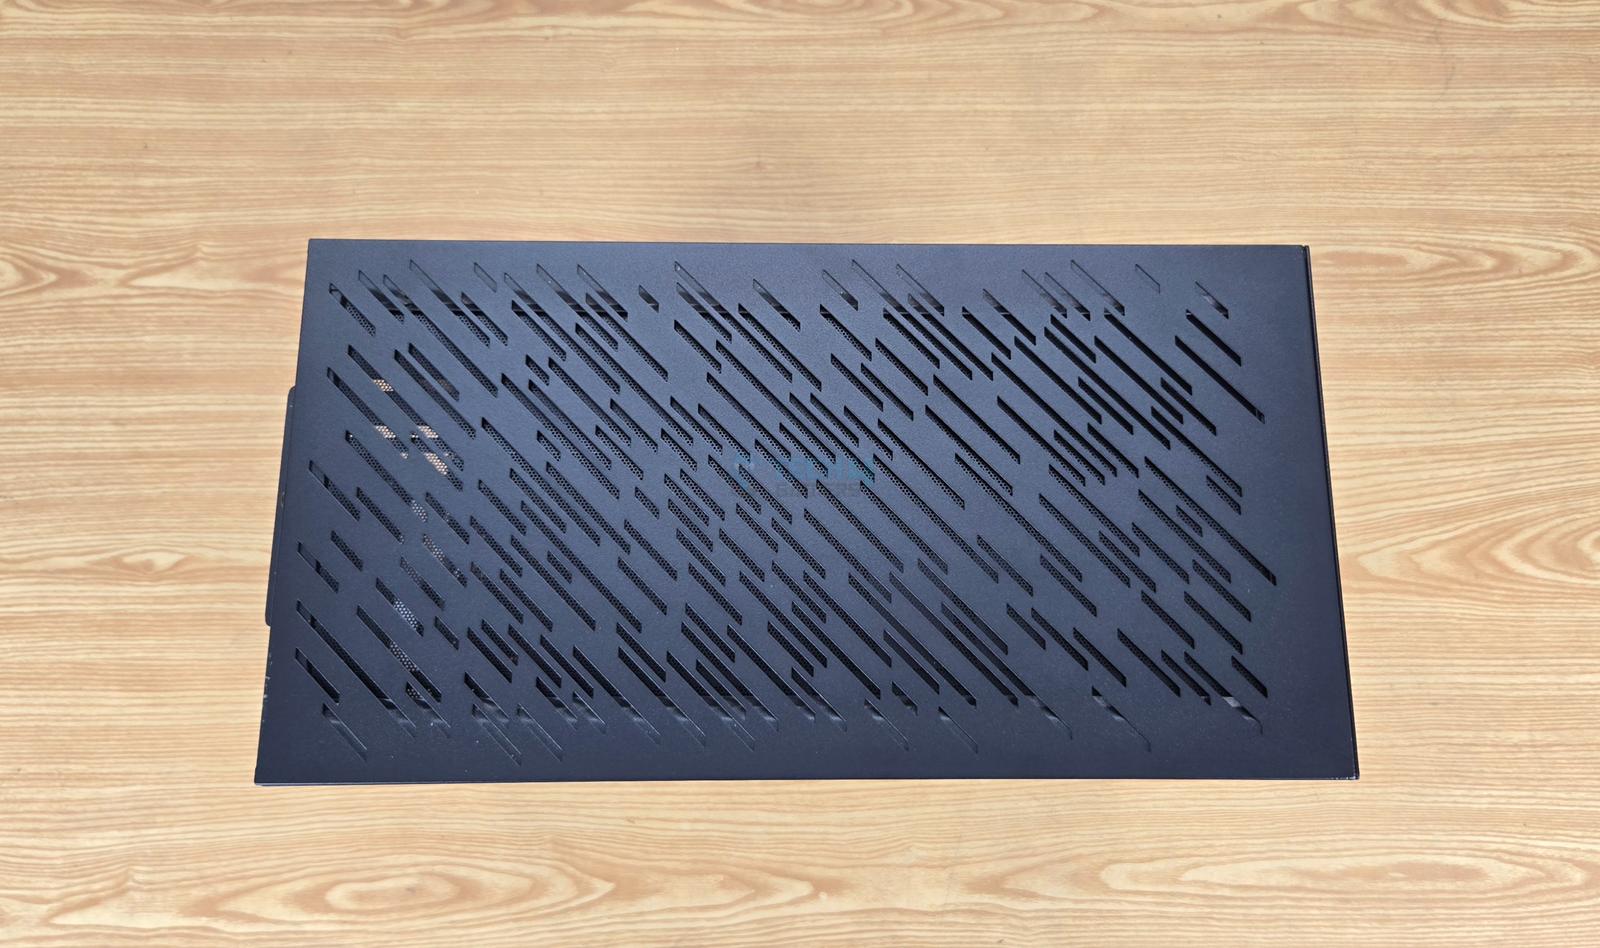
The top panel has the same perforated, stylish design as the other panels. This panel is also tool-less. Removing this panel shows a large magnetic dust filter. However, this filter feels cheap in the hand and can easily bend.
The rail-mount bracket for the fans/radiator is now visible. It is not removable. You can either install 3x120mm or 2x140mm fans and a 240mm or a 360mm radiator. The provision of a 360mm radiator is a plus for this size case.
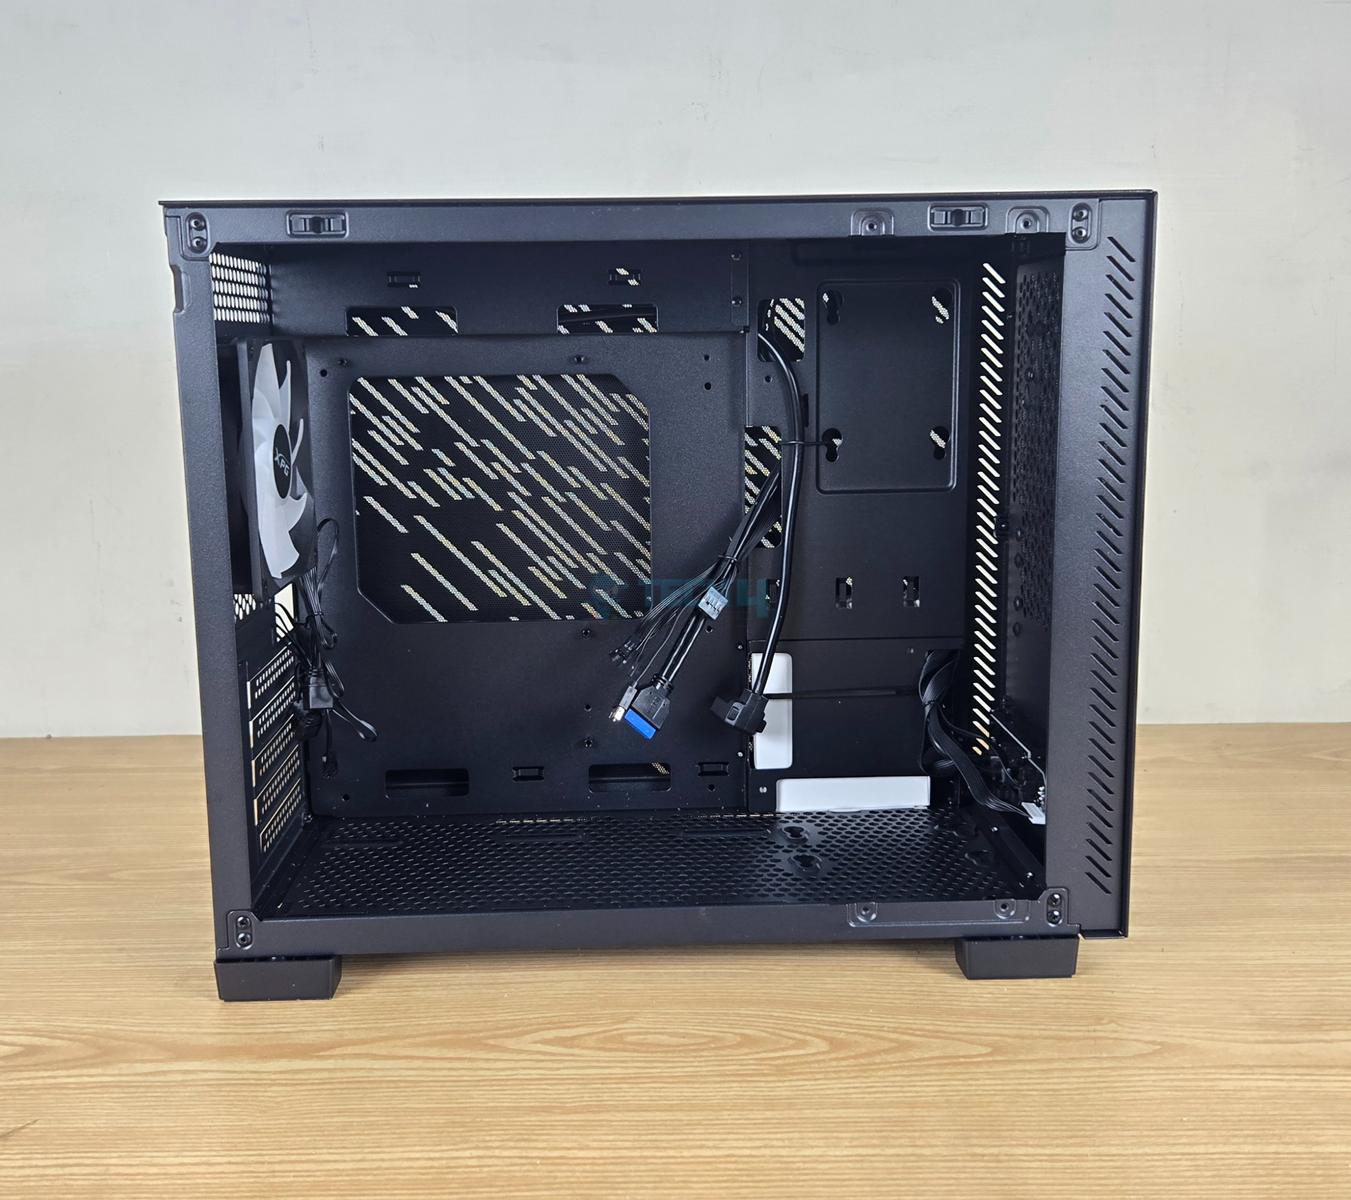
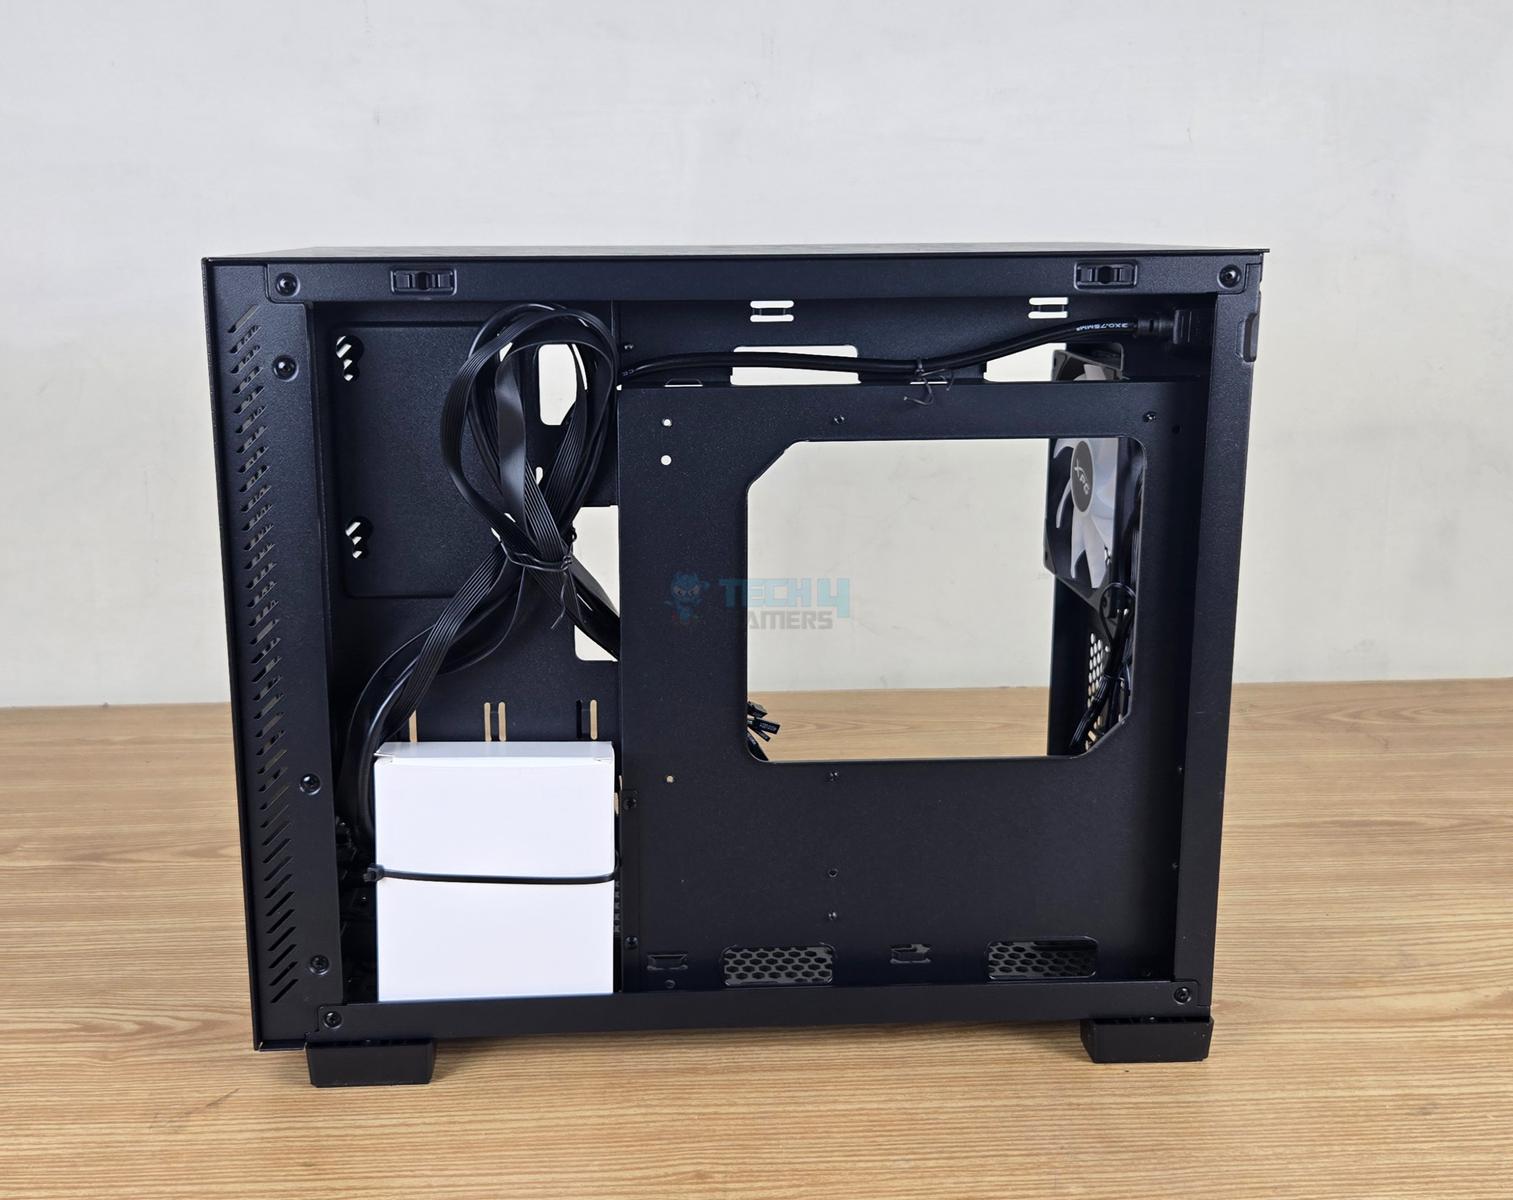
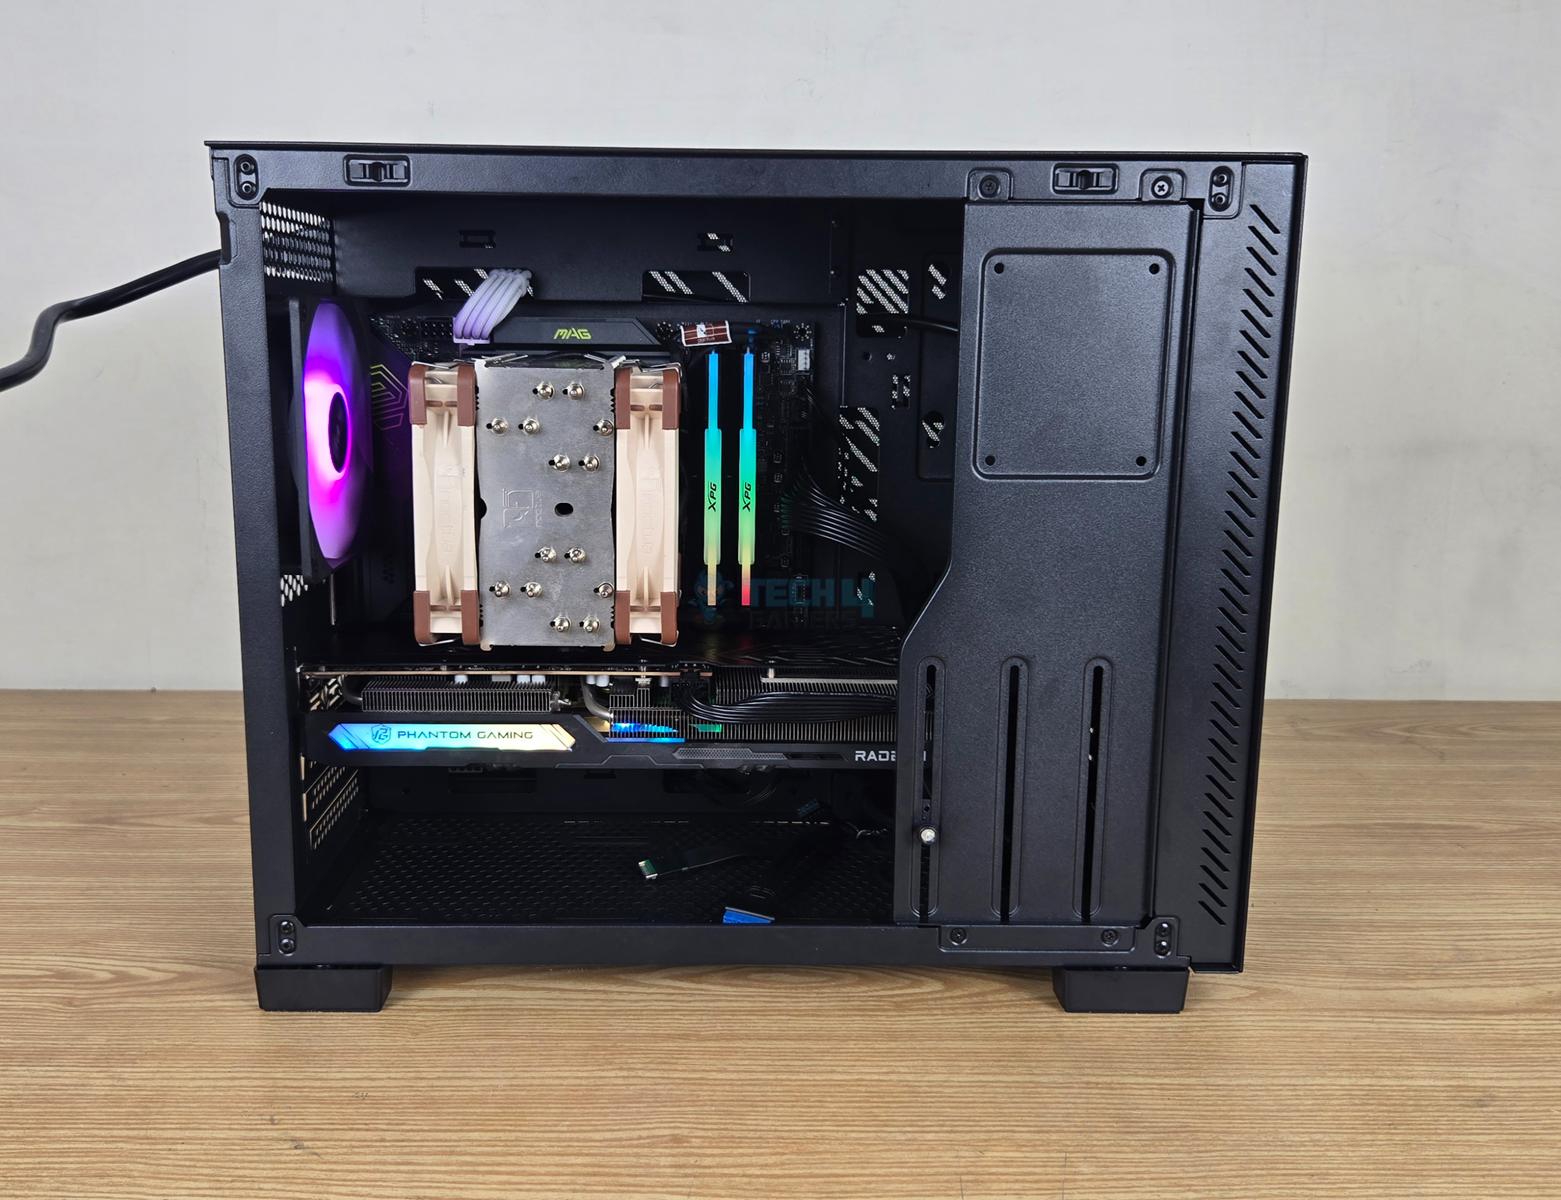
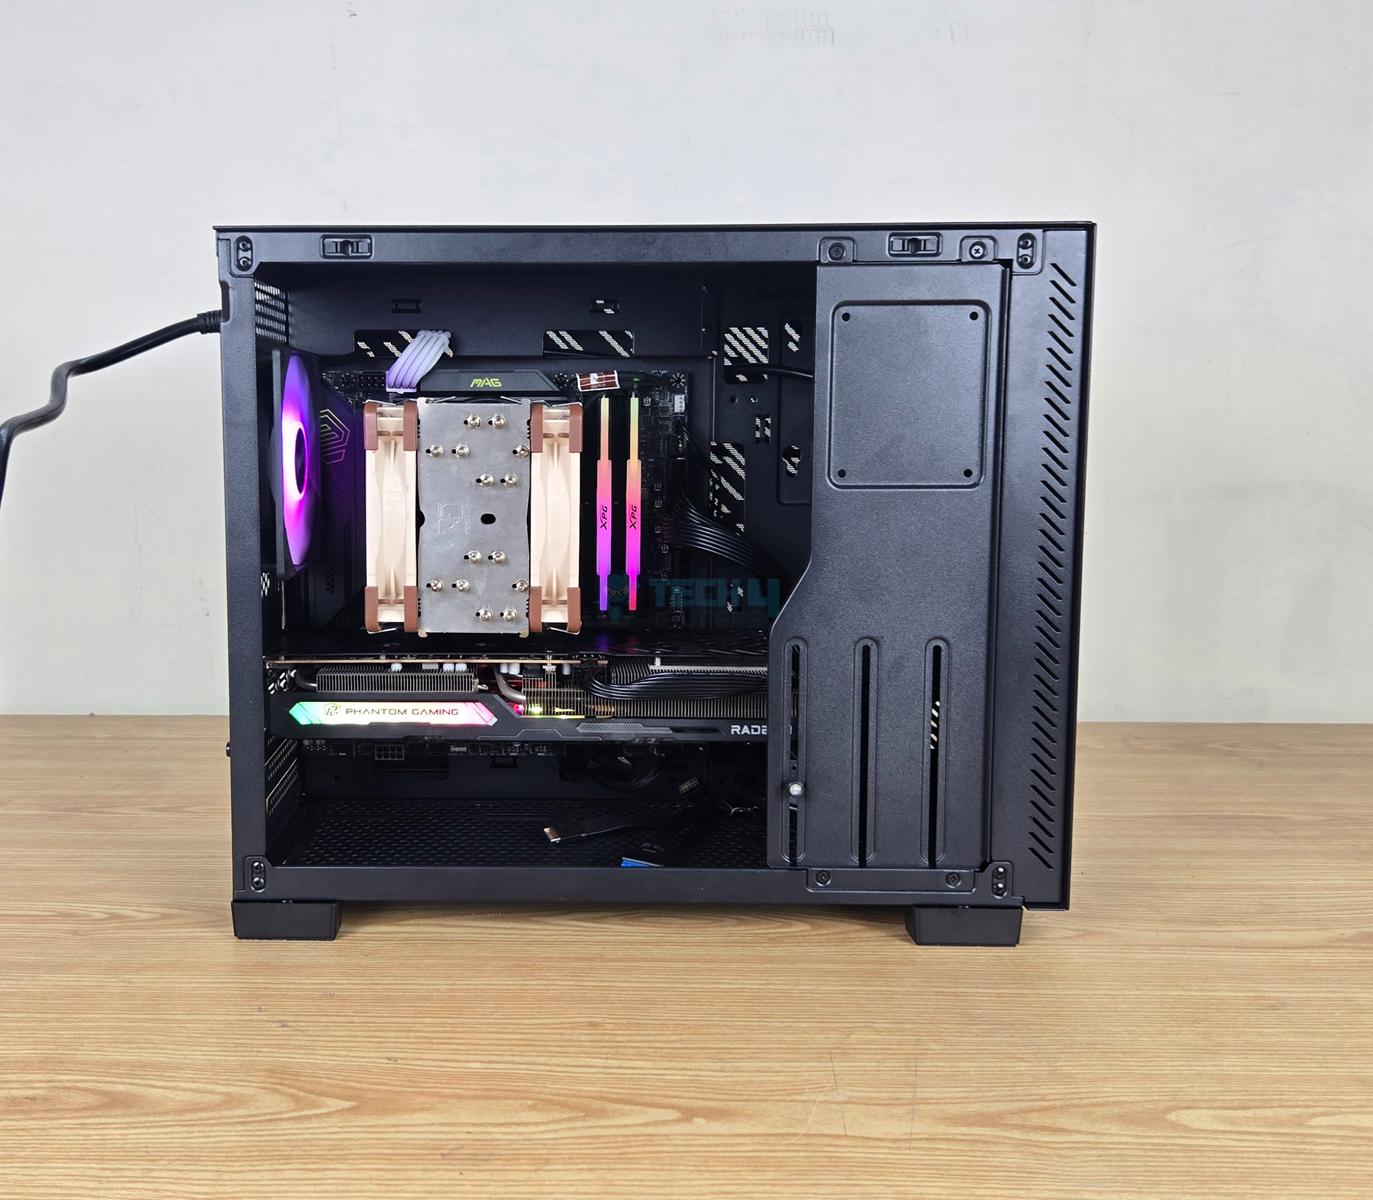
Internal Design

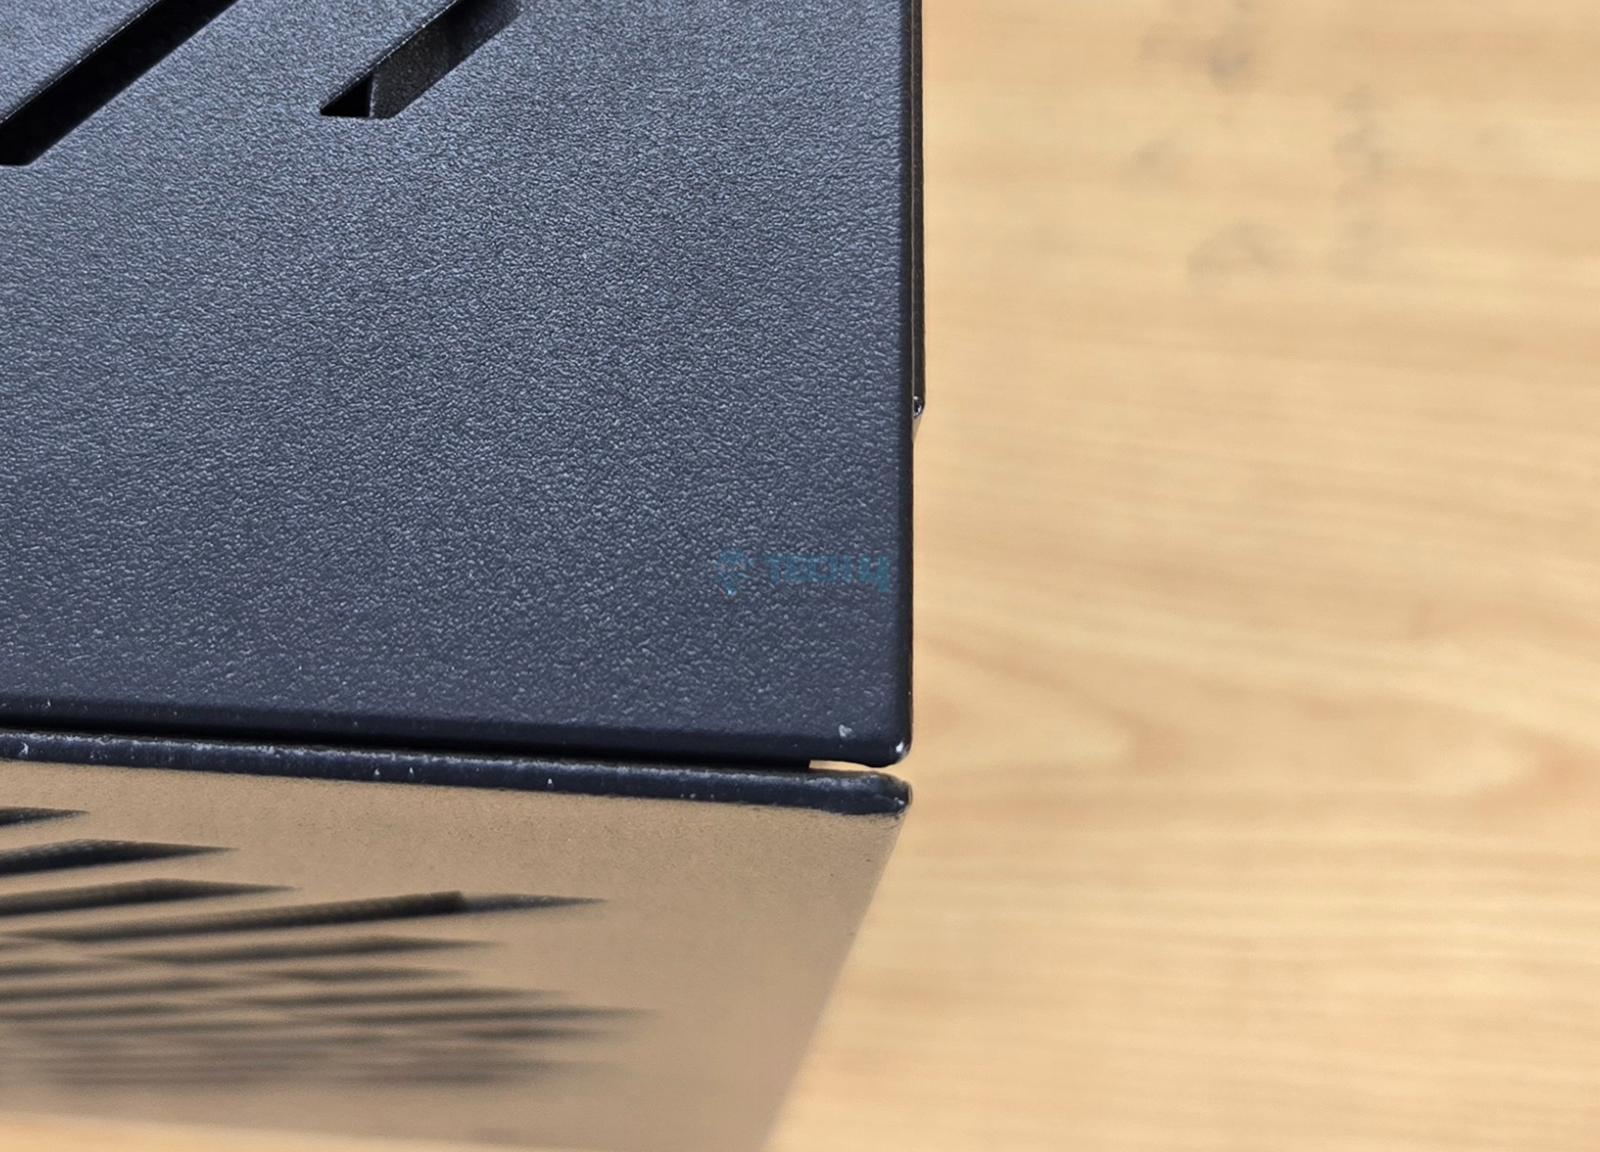
The side panel is non-glass and it is not thick. I have observed quite a flex in it and on the back panel. It has the same stylish perforated design, which is the main theme of this case. The underside of the panel has a magnetic dust filter. The panel uses a latch and bolt for convenient tool-less handling.
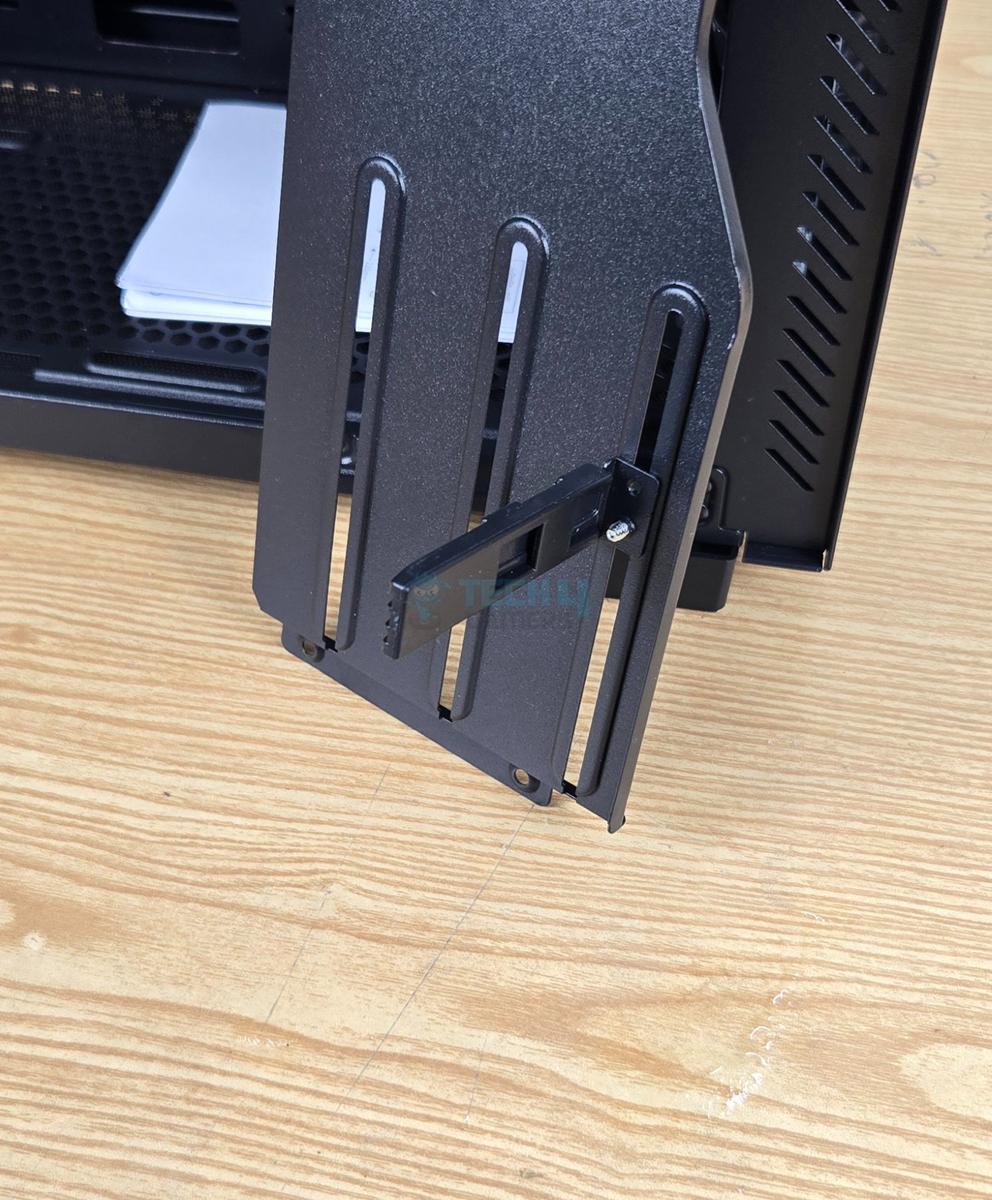
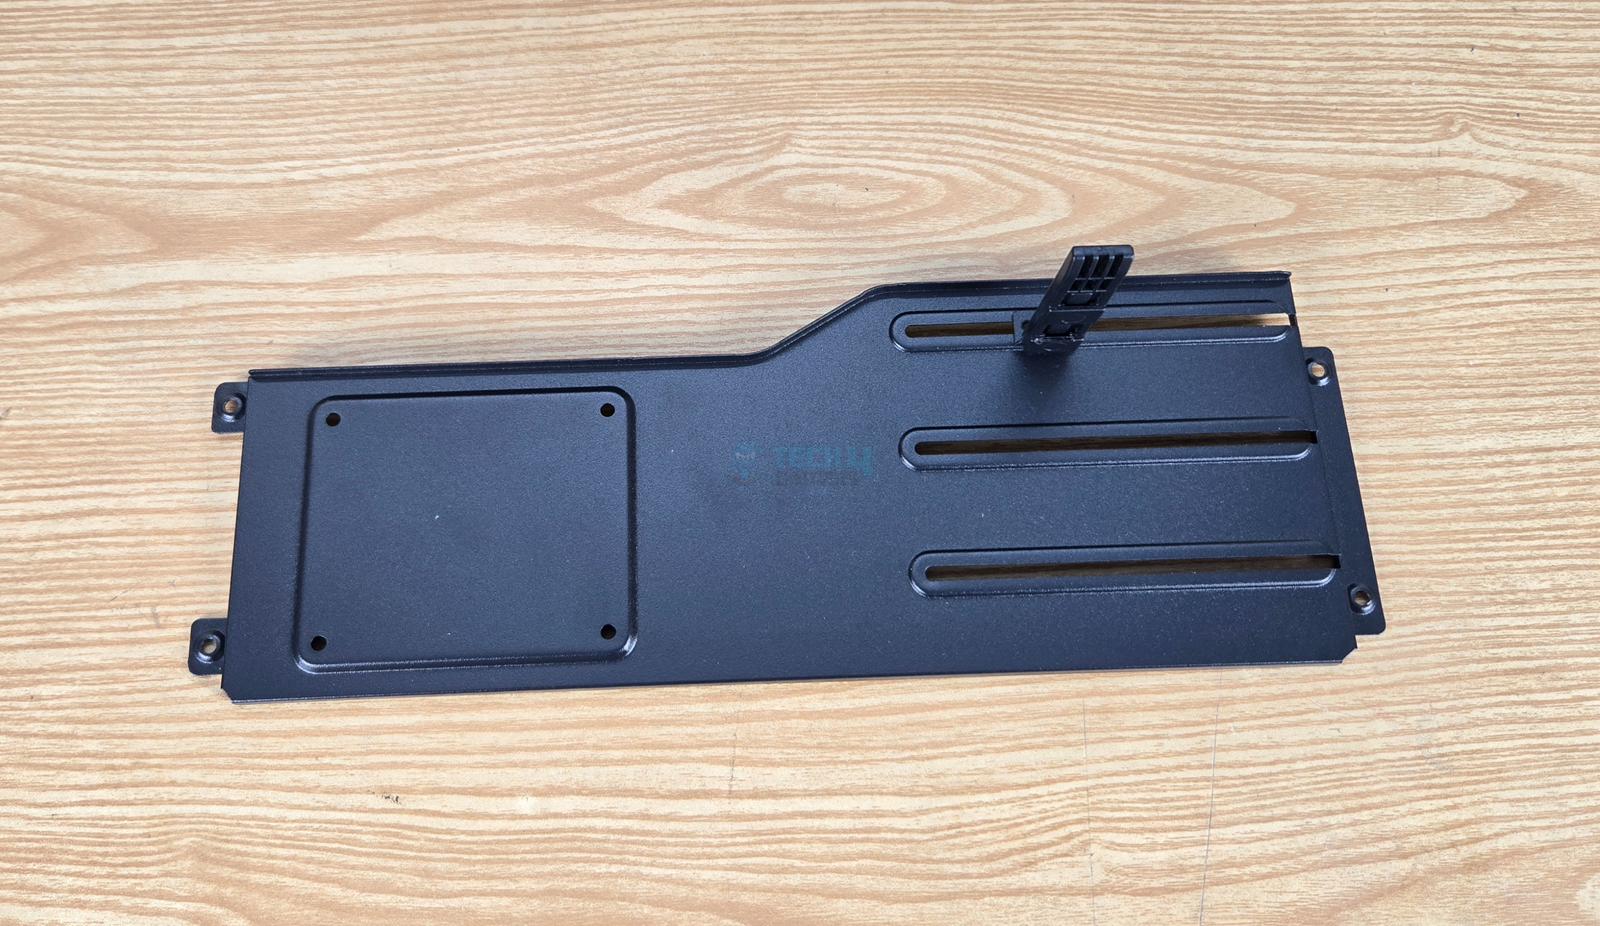
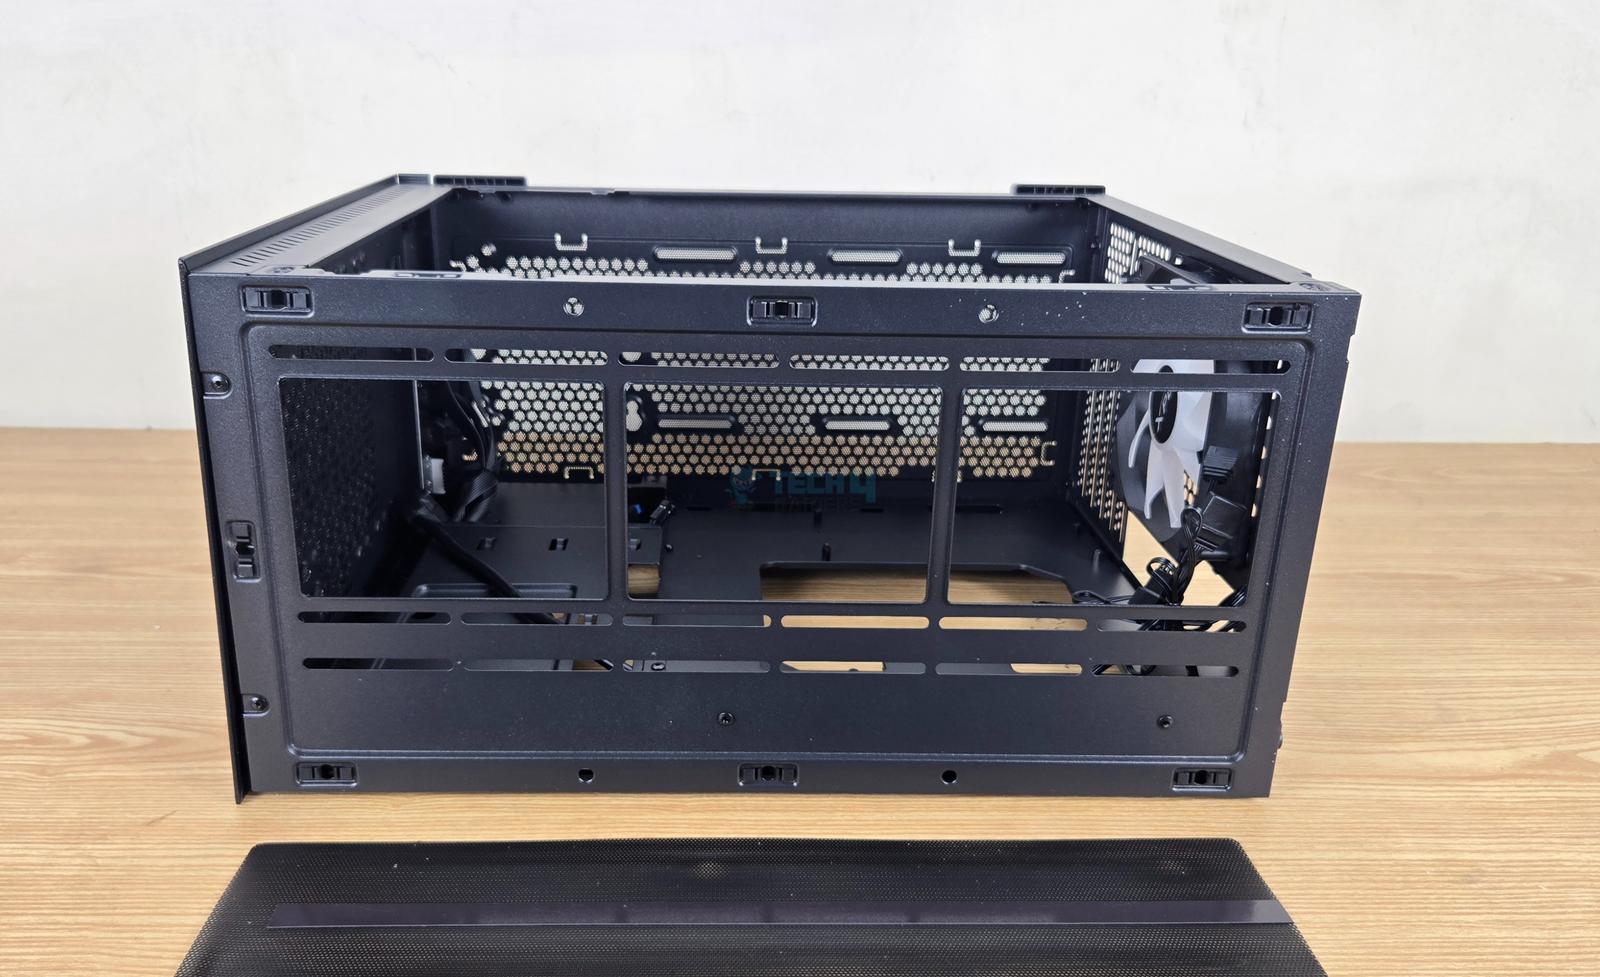
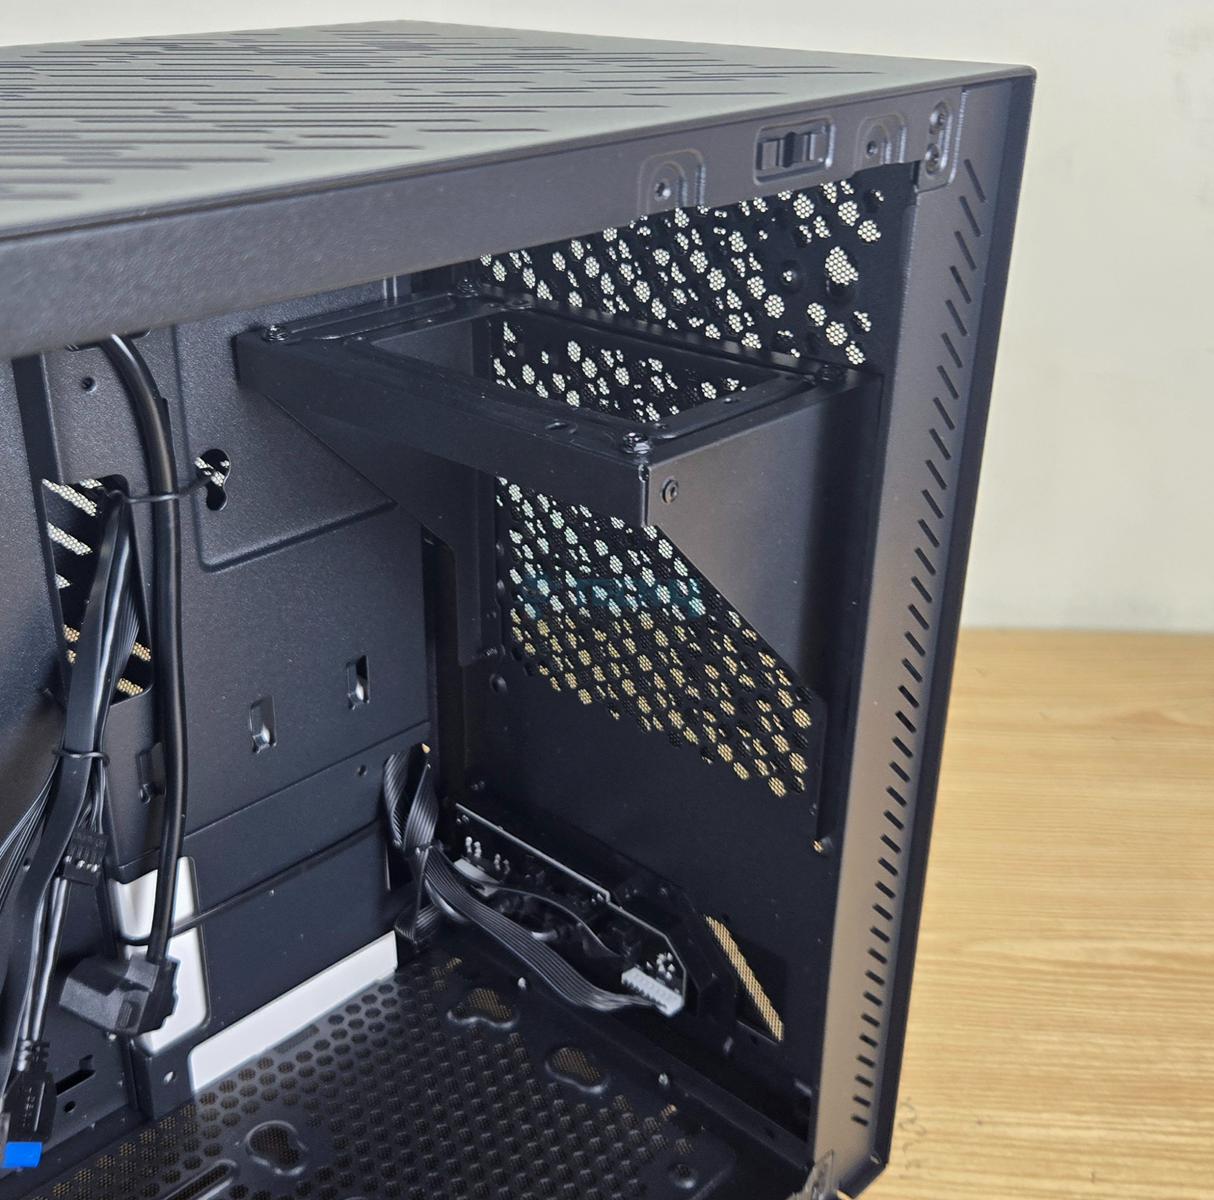
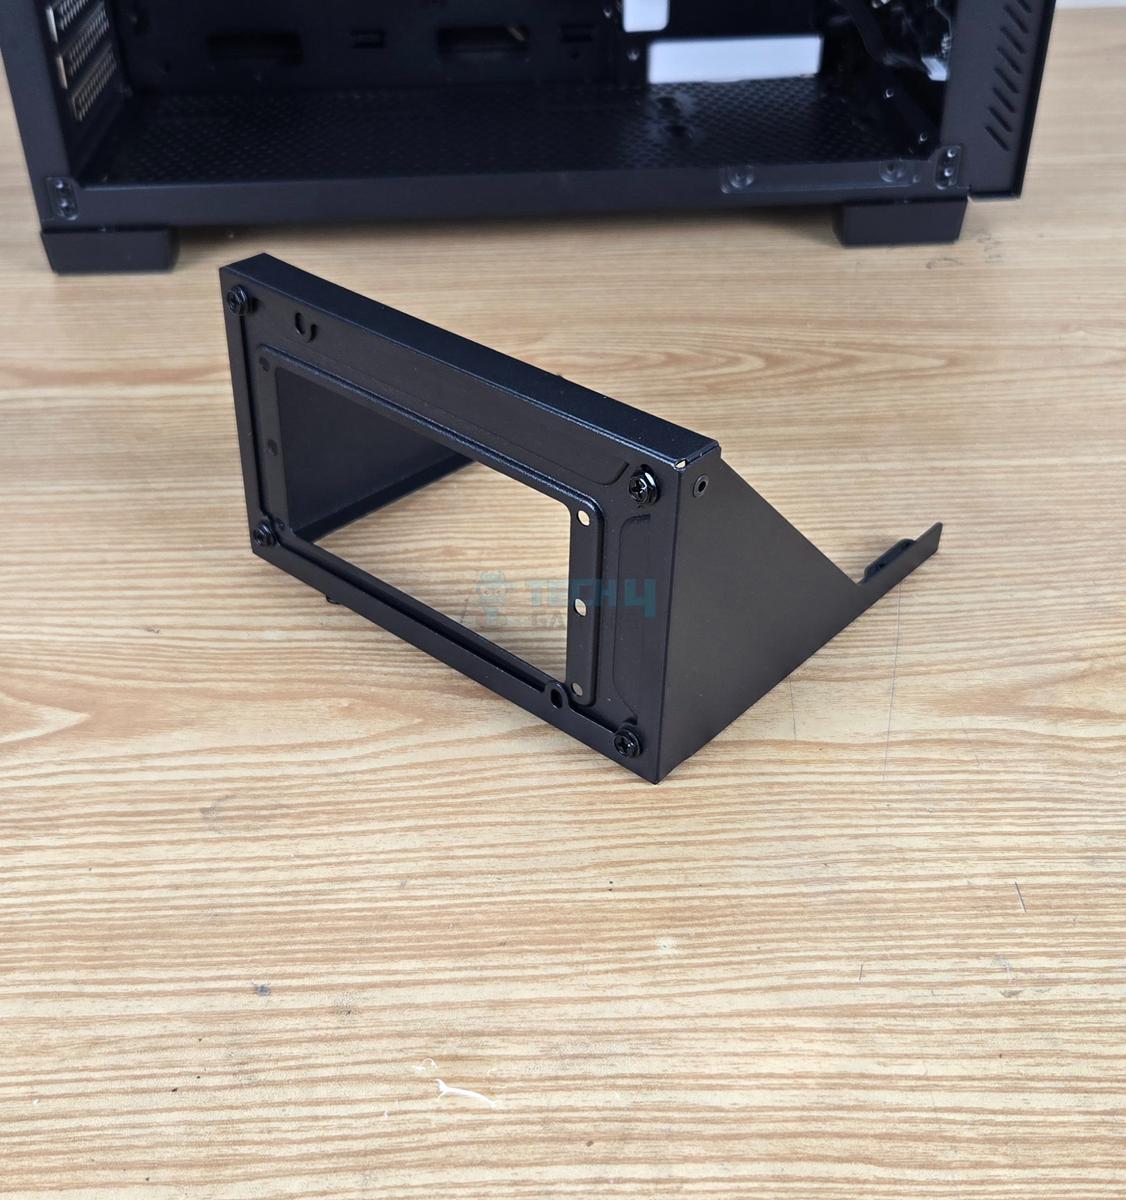
Looking at the main area of the case, you can spot a motherboard tray that can house a maximum of an mATX-sized motherboard. A side bracket can also be seen. It serves three purposes:
- Covers the PSU area, hence hiding the cable mess.
- Comes with a provision of 1x 2.5” drive mount.
- Comes with a GPU Support Bracket that can be installed in either of three vertical cutouts, as per the length of the graphics card, and can also be adjusted vertically, as per the height of the graphics card.
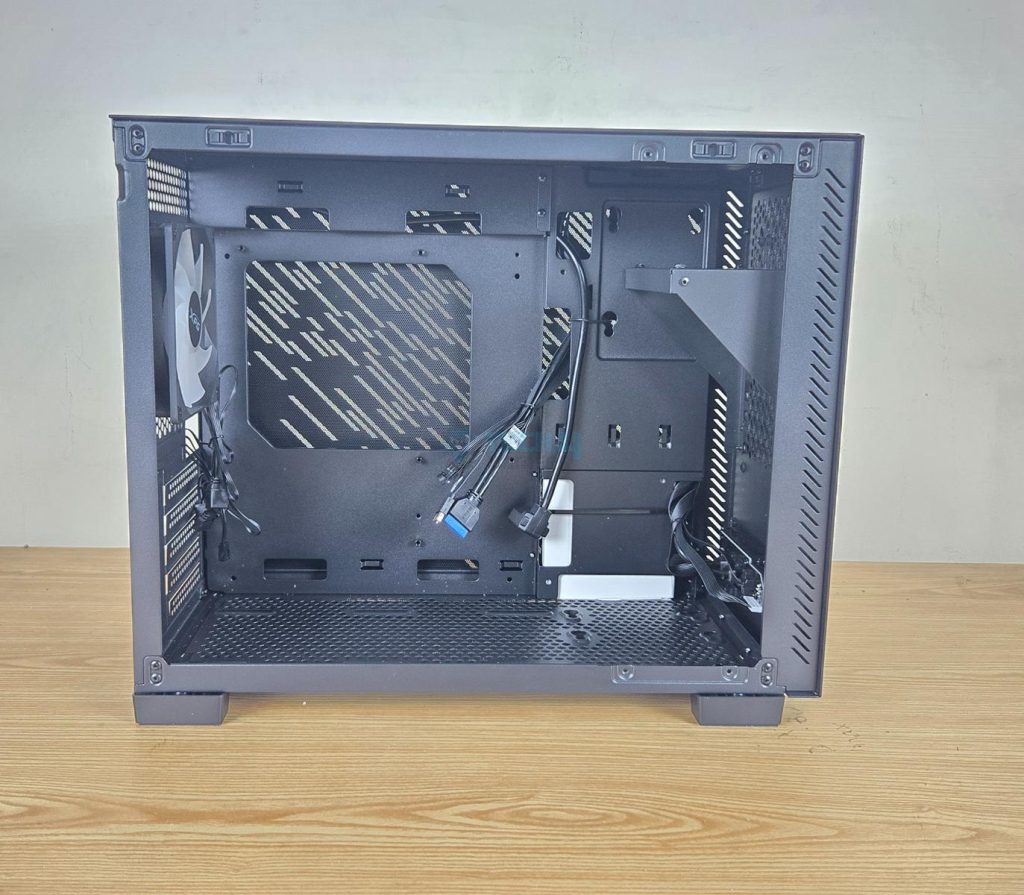
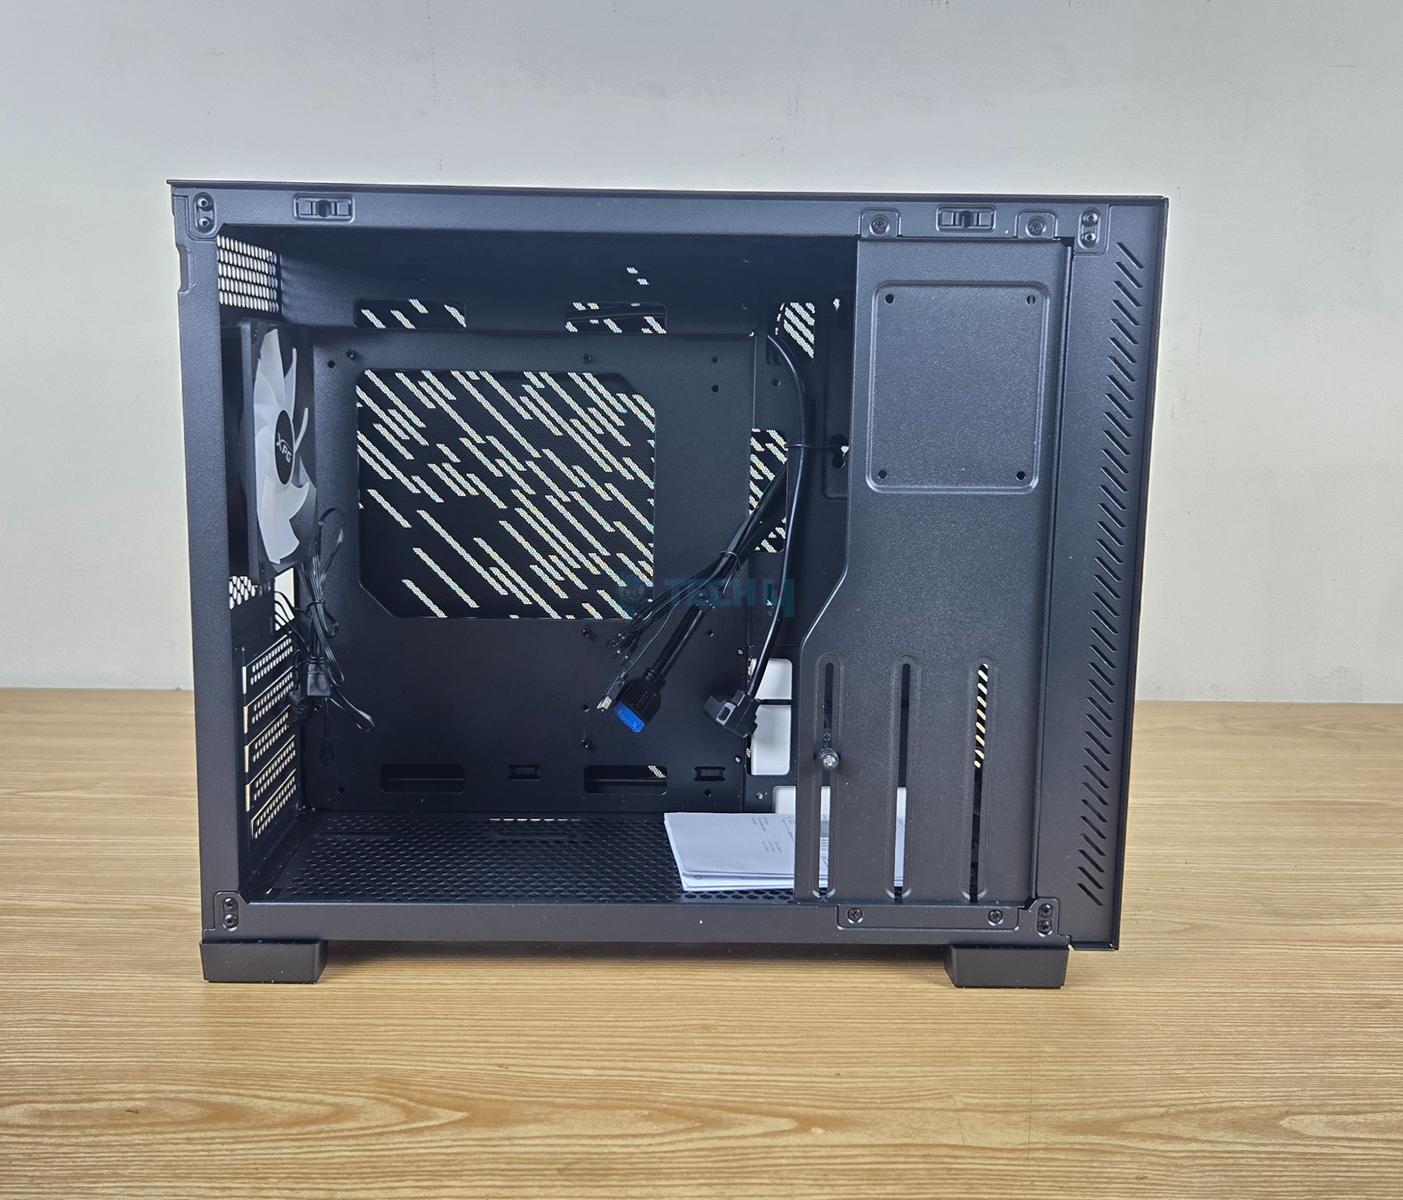
I have removed the side bracket, and now you can see the entire case. It is apparent that it does not have a chamber layout. The bracket visible on the front is for the PSU. This case supports motherboards in ITX and mATX form factors. It does not support a backplug motherboard. The motherboard tray is placed in an offset (inset) compared to the side frame.
You can see 7x cutouts around the motherboard tray for the cable routing. A large-sized cutout in the main tray is for the CPU cooler’s convenient installation. Only 6x standoffs are installed. You need to install the remaining. You can spot a cutout under the side frame for the storage drive cable routing.
Clearance
While we are at it, let’s talk about the clearance:
- The maximum CPU Cooler height is 170mm, which is actually quite good given this compact case.
- The maximum length of a graphics card is 370mm, which is subject to the type of PSU installed on the front and its cables.
- The maximum length of a PSU is 170mm.
The PSU bracket is mounted vertically on the front. It is obvious that you should install the PSU with the fan facing the front grill or the case for fresh air intake. This bracket is secured using 3x removable screws and 1x fixed screw. Please see Editor’s Note above.
The bracket is designed in a manner that it can house ATX as well as SFX PSUs. However, there is a catch. The SFX PSUs have short cables, and it is possible that the EPS cable can’t reach the motherboard’s 12V EPS connectors. Keep that in mind.
I have removed the PSU bracket and side bracket. You can see the spacious layout available in this case. The front-mounted IO panel’s cables are located towards the floor of the case and routed outward via a vertical cutout on the side frame.
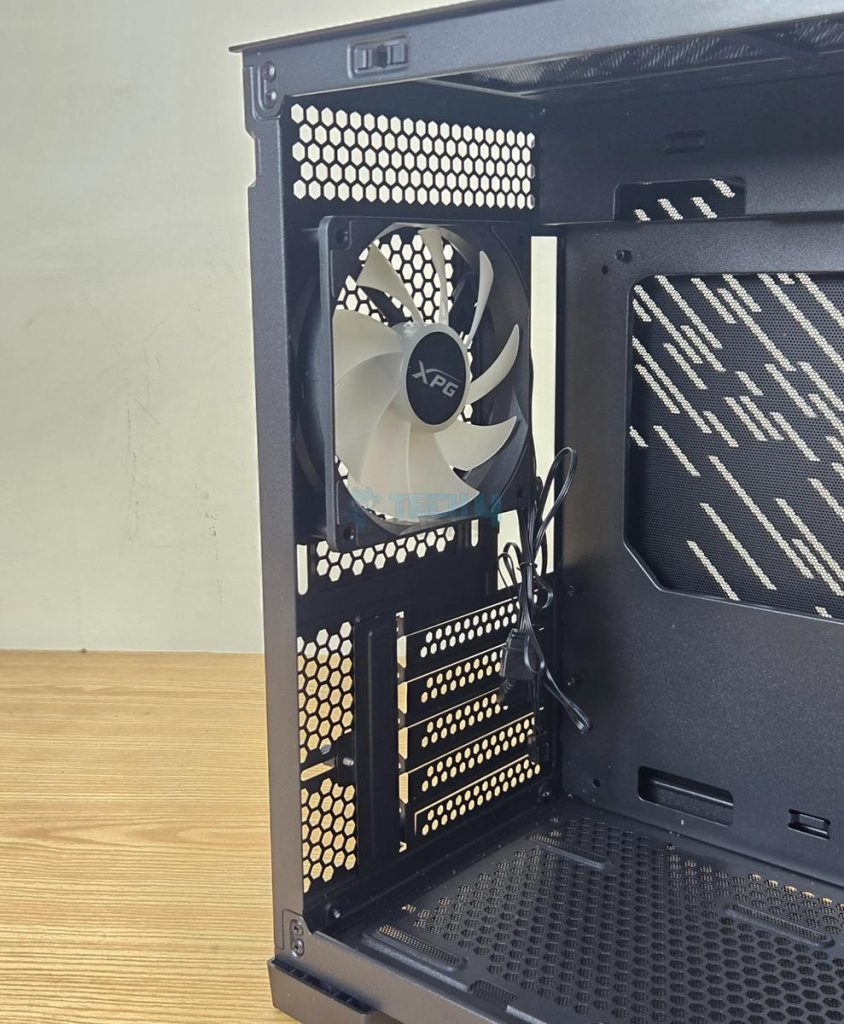
This case has 5x PCIe slots that are not reusable. Remove the desired number of covers before installing the motherboard. These are vented. XPG has provided a 120mm ARGB fan on the rear of the case. This is the only fan available with the case.
The floor of the case can house up to 2x 120mm fans to draw fresh air. But these fans are subject to the height of the graphics card. A 4-slot card may not allow installing 25mm thick fans. You can also install a 3.5” drive towards the front.
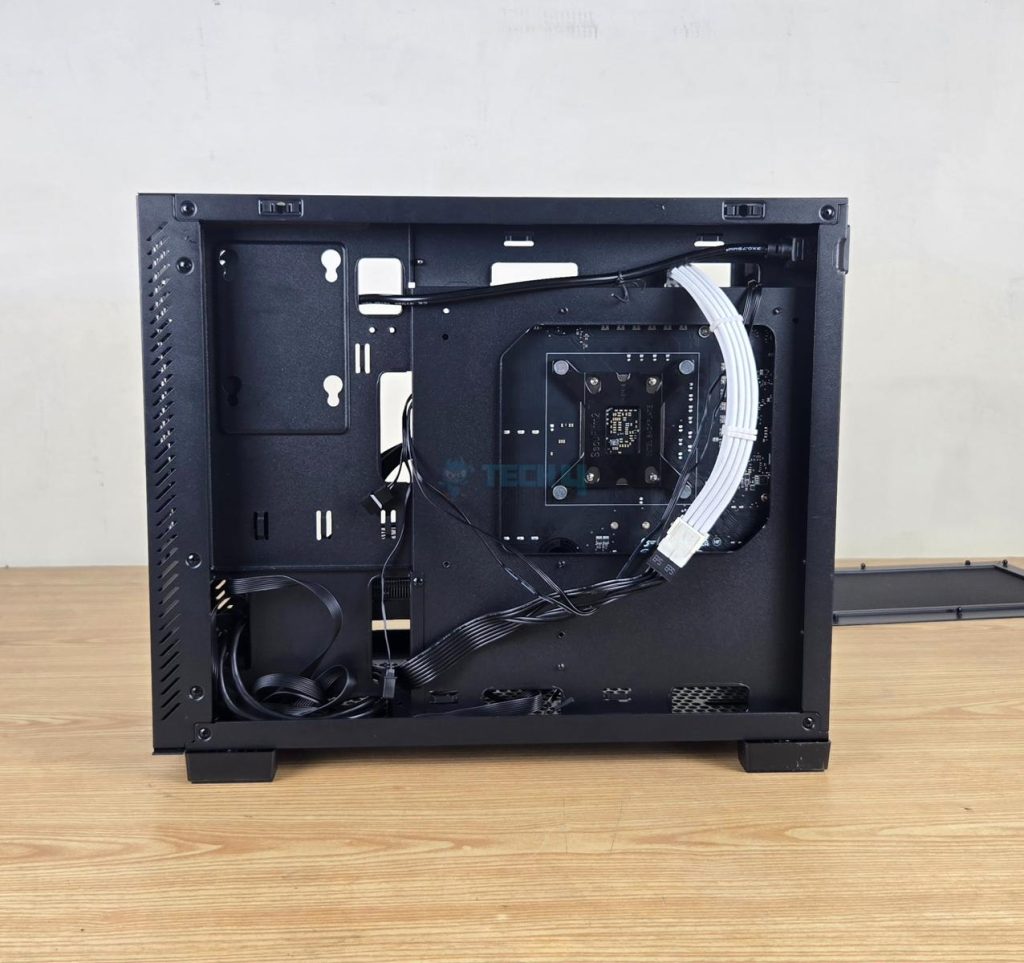
Backside
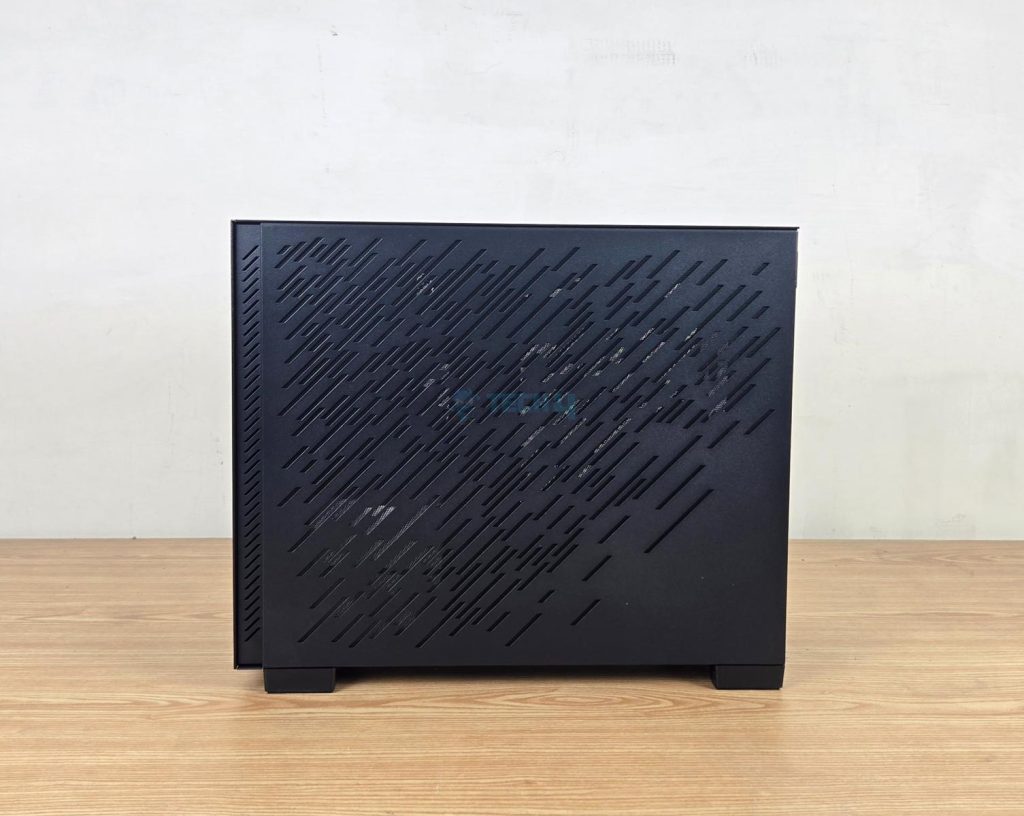
The backside panel is made of steel material and has same perforated angular stripe design as is on the other panels. It also has magnetic dust filter on the inner side.
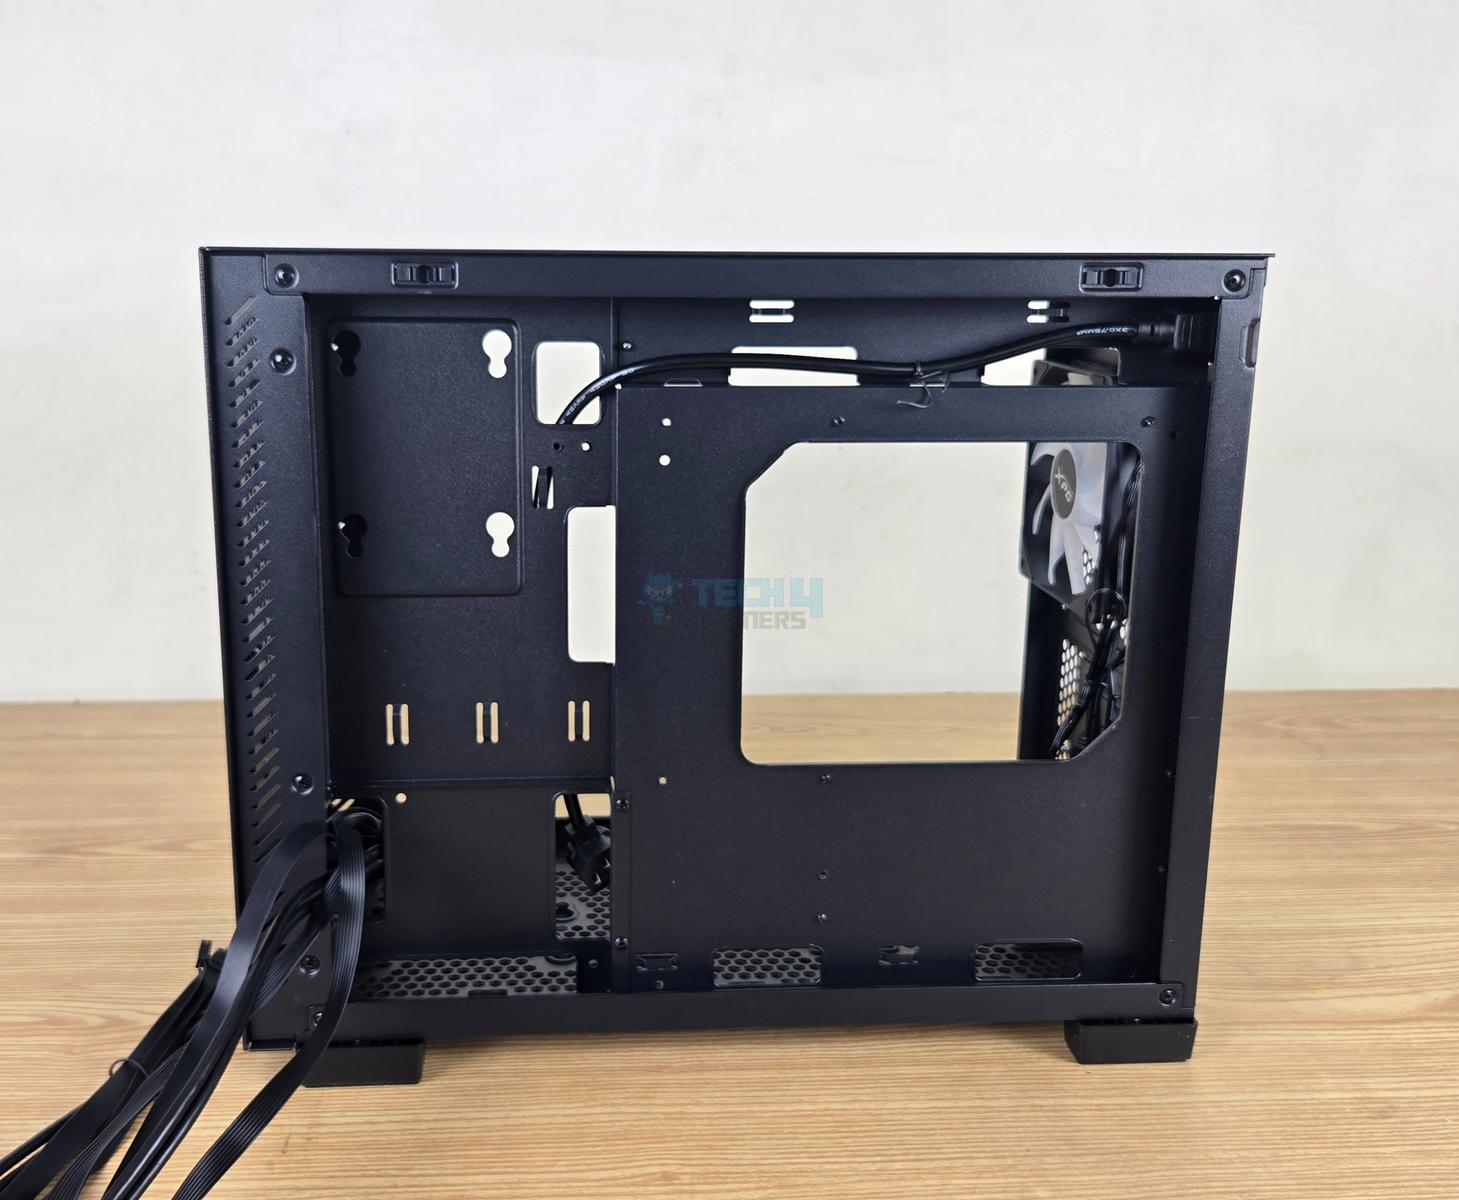
A white box secured on the bottom left contains accessories. Removing this box shows the complete backside view of the case. The side frame is inset compared to the motherboard tray. XPG has mentioned the available cable management space of 35mm. However, this is only applicable for the side frame. There is a tight space behind the motherboard tray.
Multiple cable tie points are provided at various locations for cable management. You can install a 2.5” drive on the top side of the side frame.
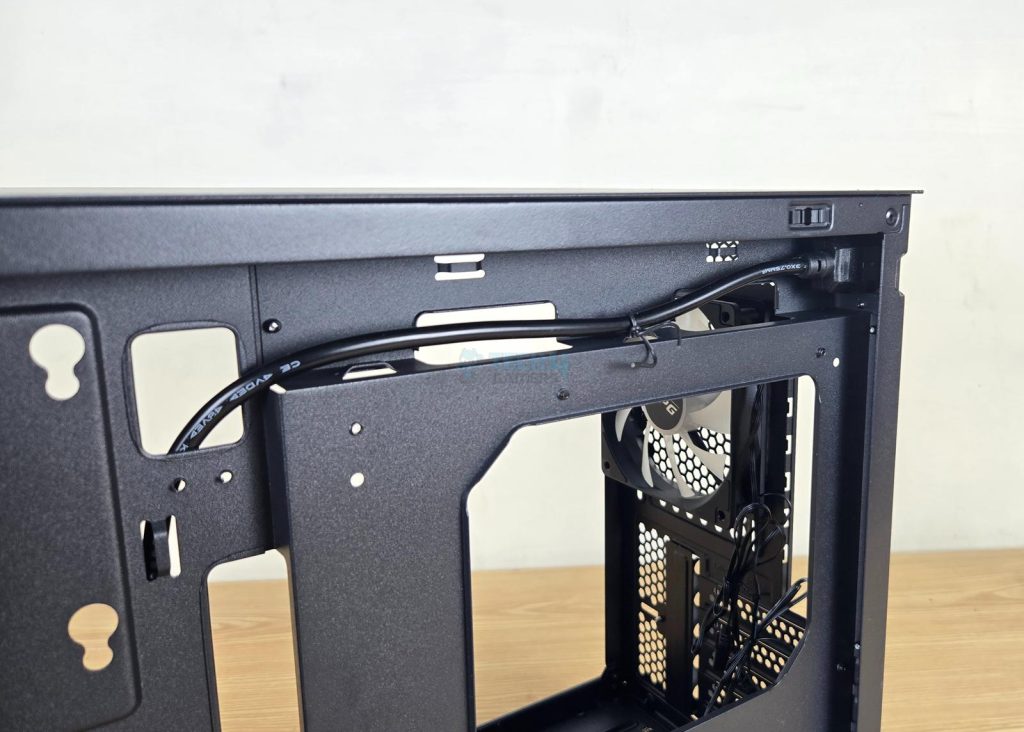
The power cable is routed from the rear to the front of the case. This is a standard SFF case design.
IO Cables
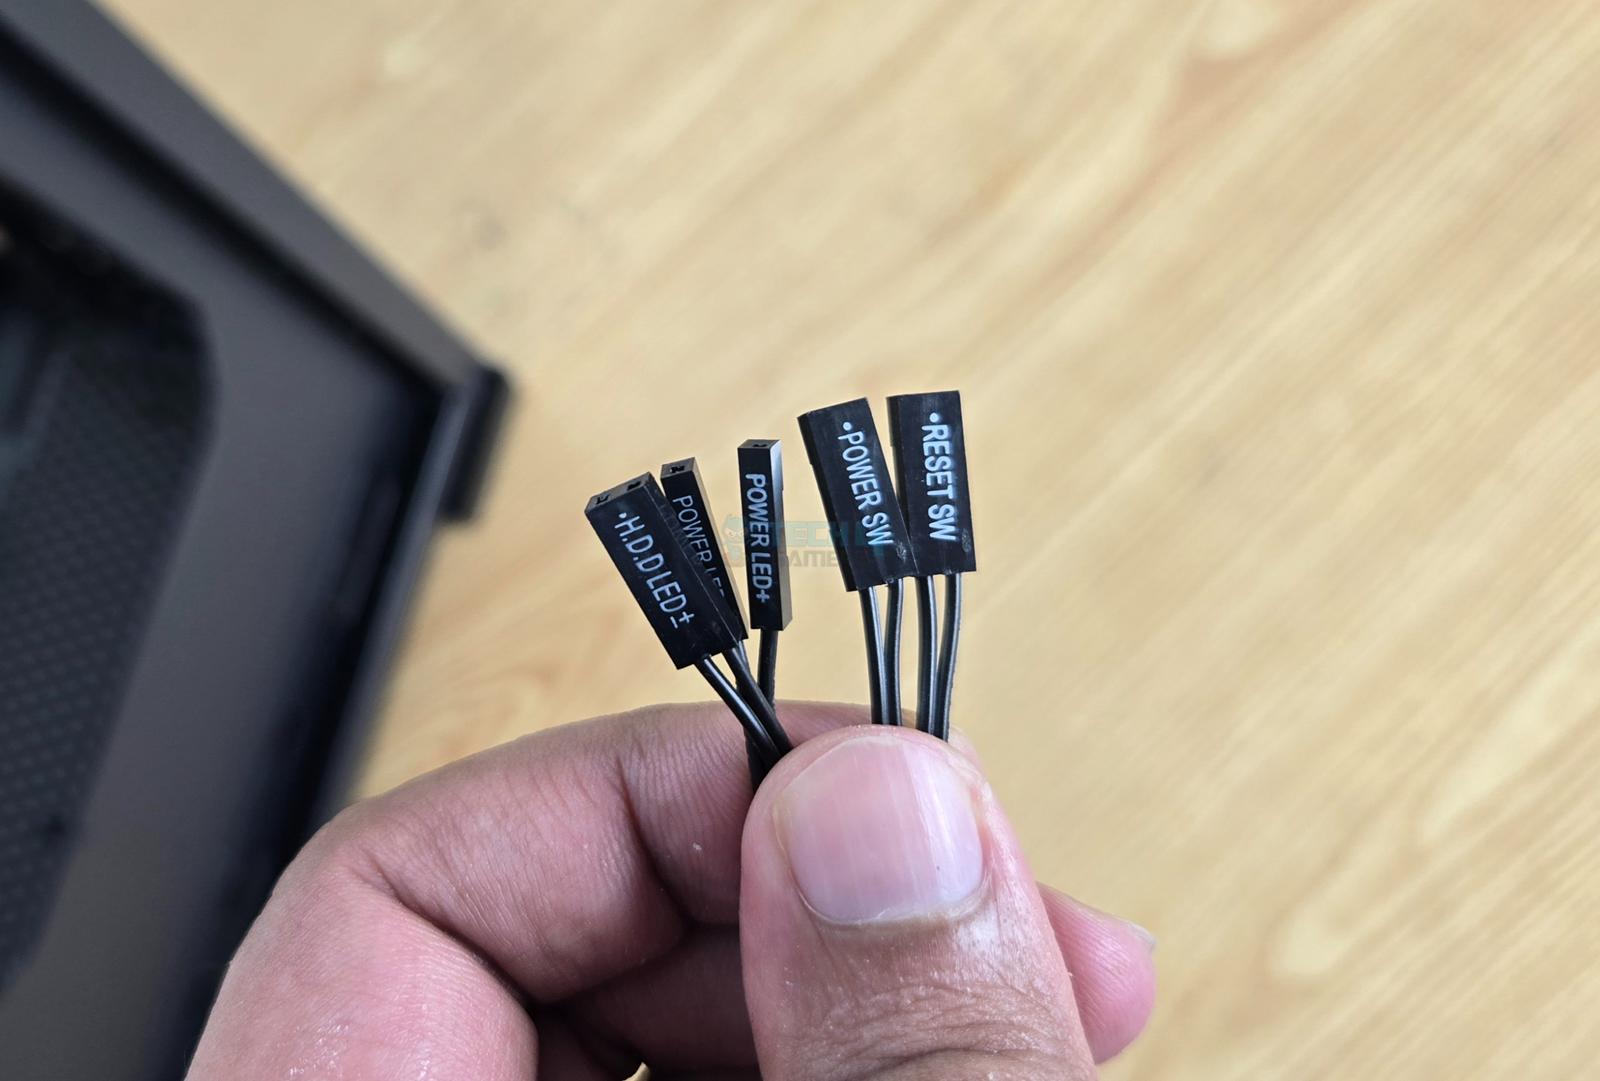
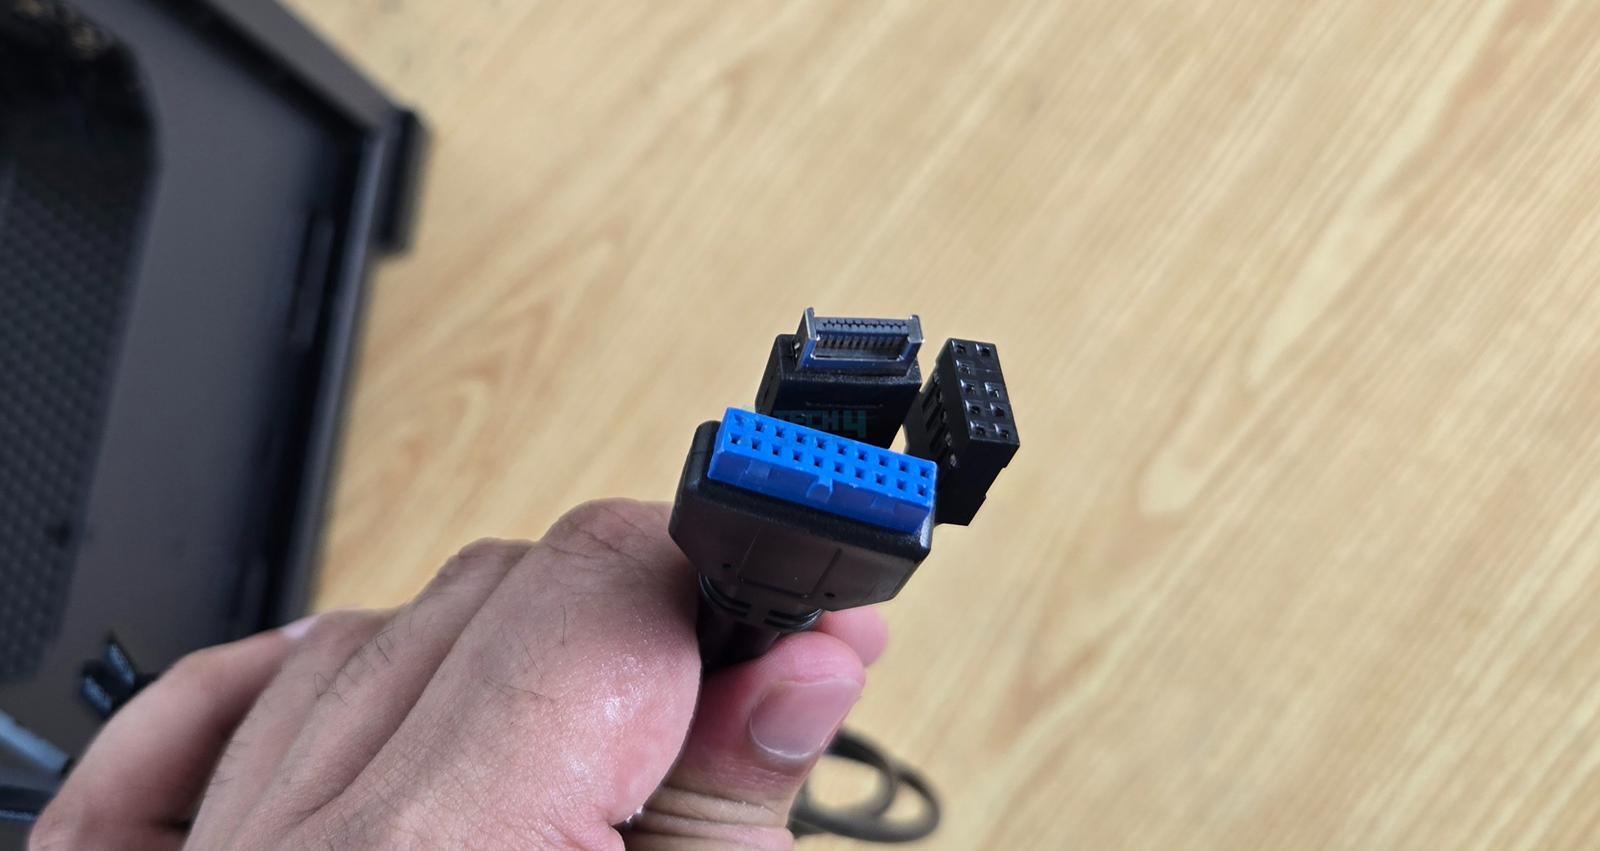
The following are provided:
- Front Panel Connectors
- 1x USB Type-E 3.2 Connector
- 1x USB3.2 Connector
- 1x HD Audio Connector
- 1x Power Plug for PSU
Test Build And Experience
I have used the following configuration for testing of this case:
- Intel Core Ultra 7 265k [Auto, Stock]
- MSI B860M Mortar WiFi
- Noctua NH-U12A
- XPG Lancer RGB 32GB DDR5 6000MHz CL40
- ASRock PG Radeon RX 7600 8G OC
- Sabrent Rocket 1TB NVMe SSD [OS]
- SilverStone SX1000 SFX-L Platinum PSU
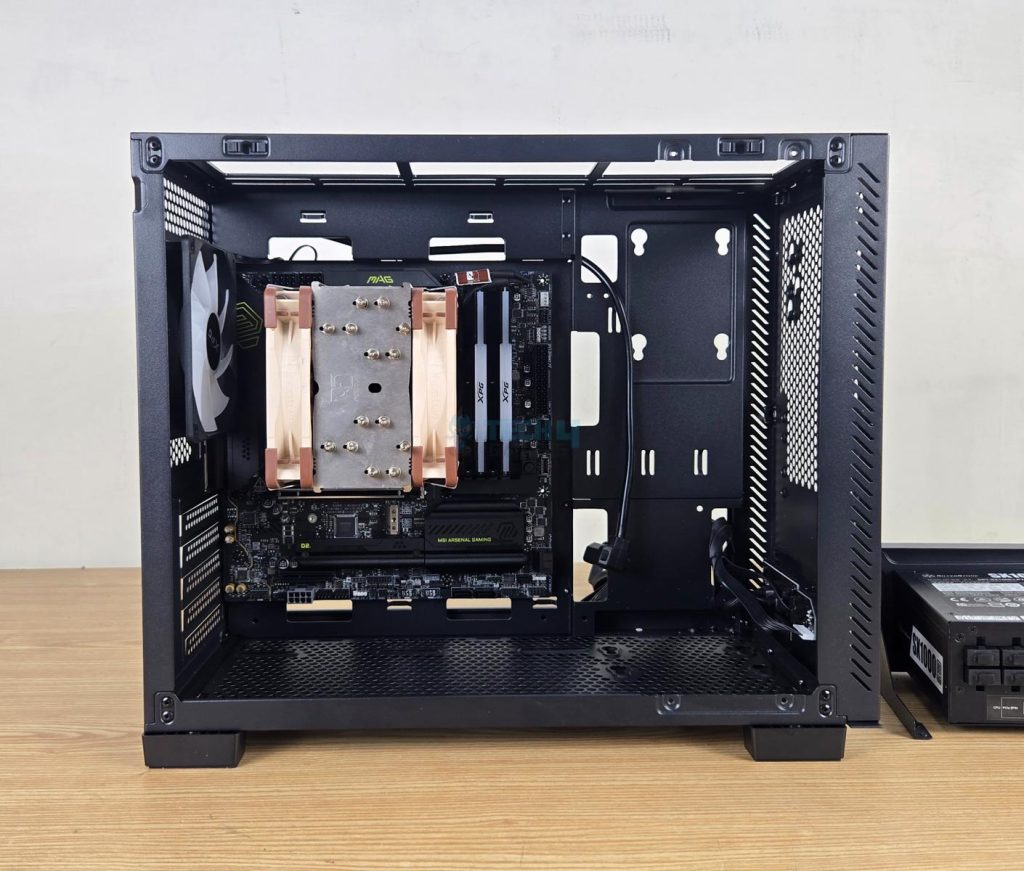
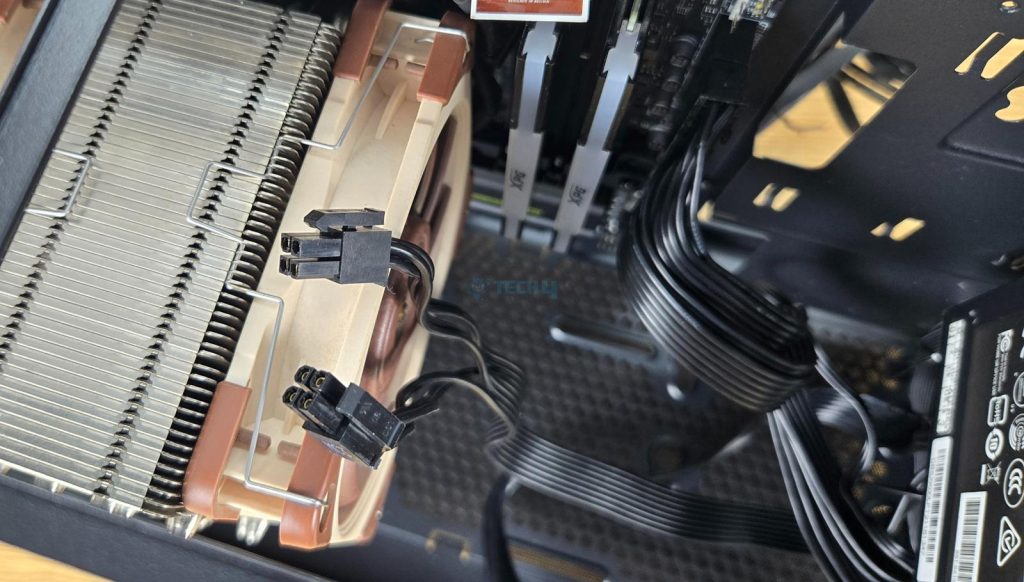
I started the build with the motherboard’s installation. You need to remove the non-reusable PCIe covers first before installing the motherboard. The RAM and CPU Cooler were installed next, and I did not face any issues since the case provides ample space for your hand movement.
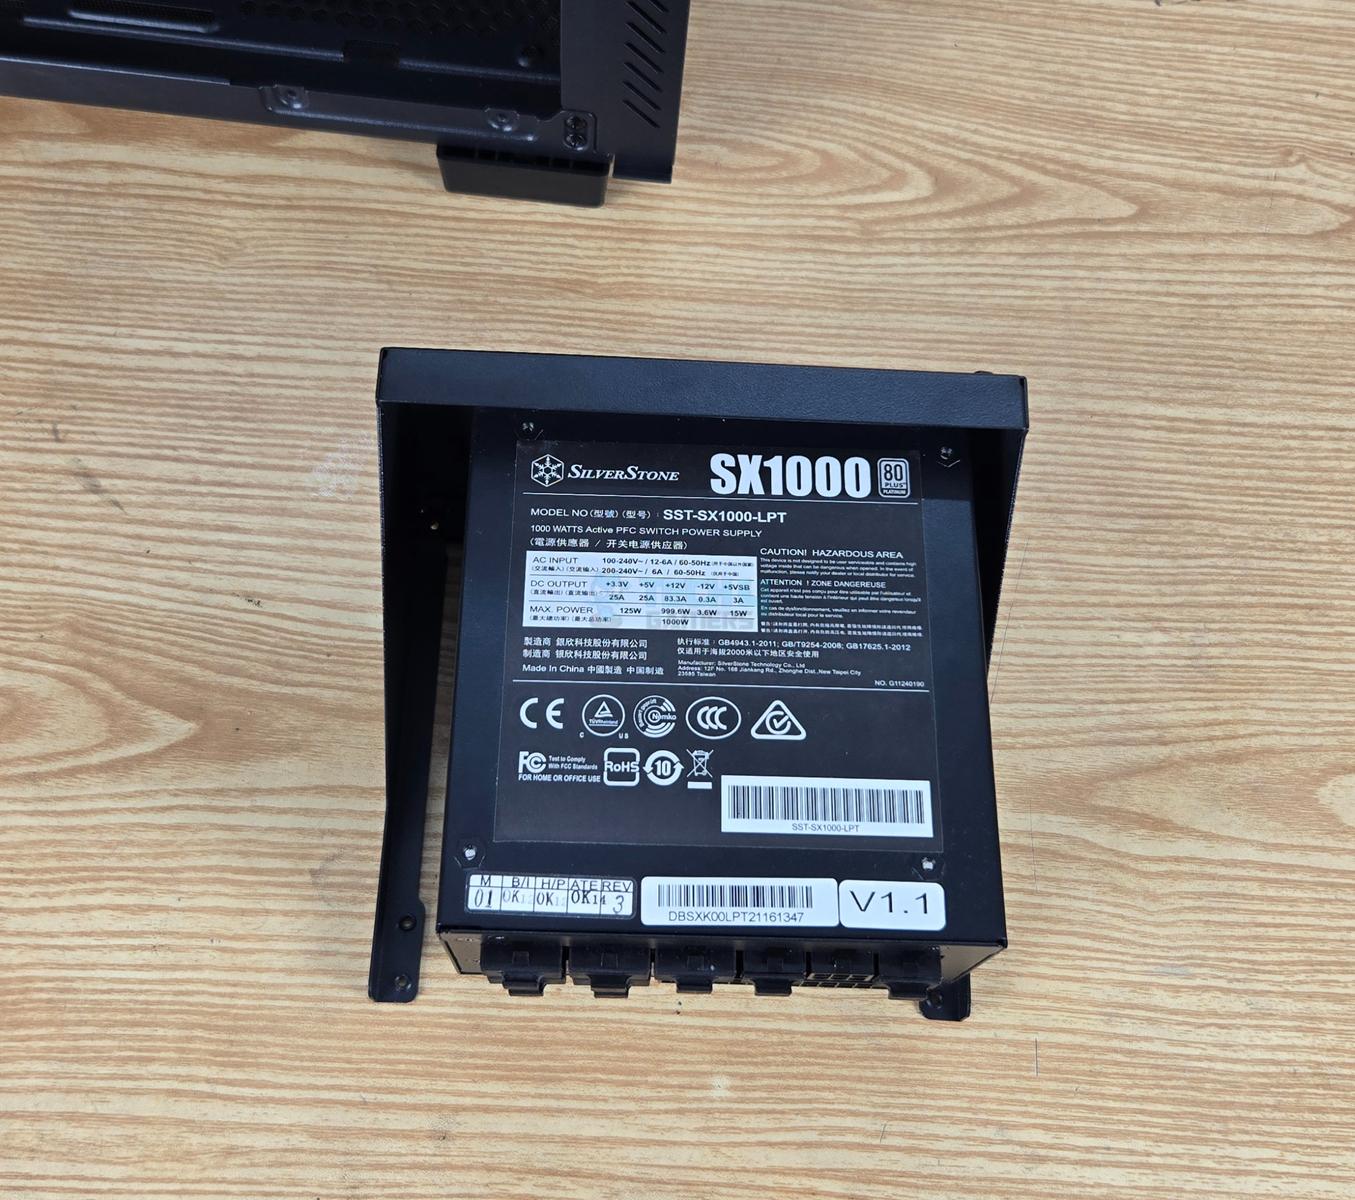
I would suggest installing the PSU before the graphics card. The PSU was installed on the bracket. You need to remove the bracket to install the PSU. I installed the PSU so that the fan faces the front of the case for fresh air intake.
I encountered an issue where the EPS power cable could not be routed to reach the EPS 12V connectors on the motherboard. Either I had to change the PSU or use an extension cable. I have used a custom extension cable available to me.
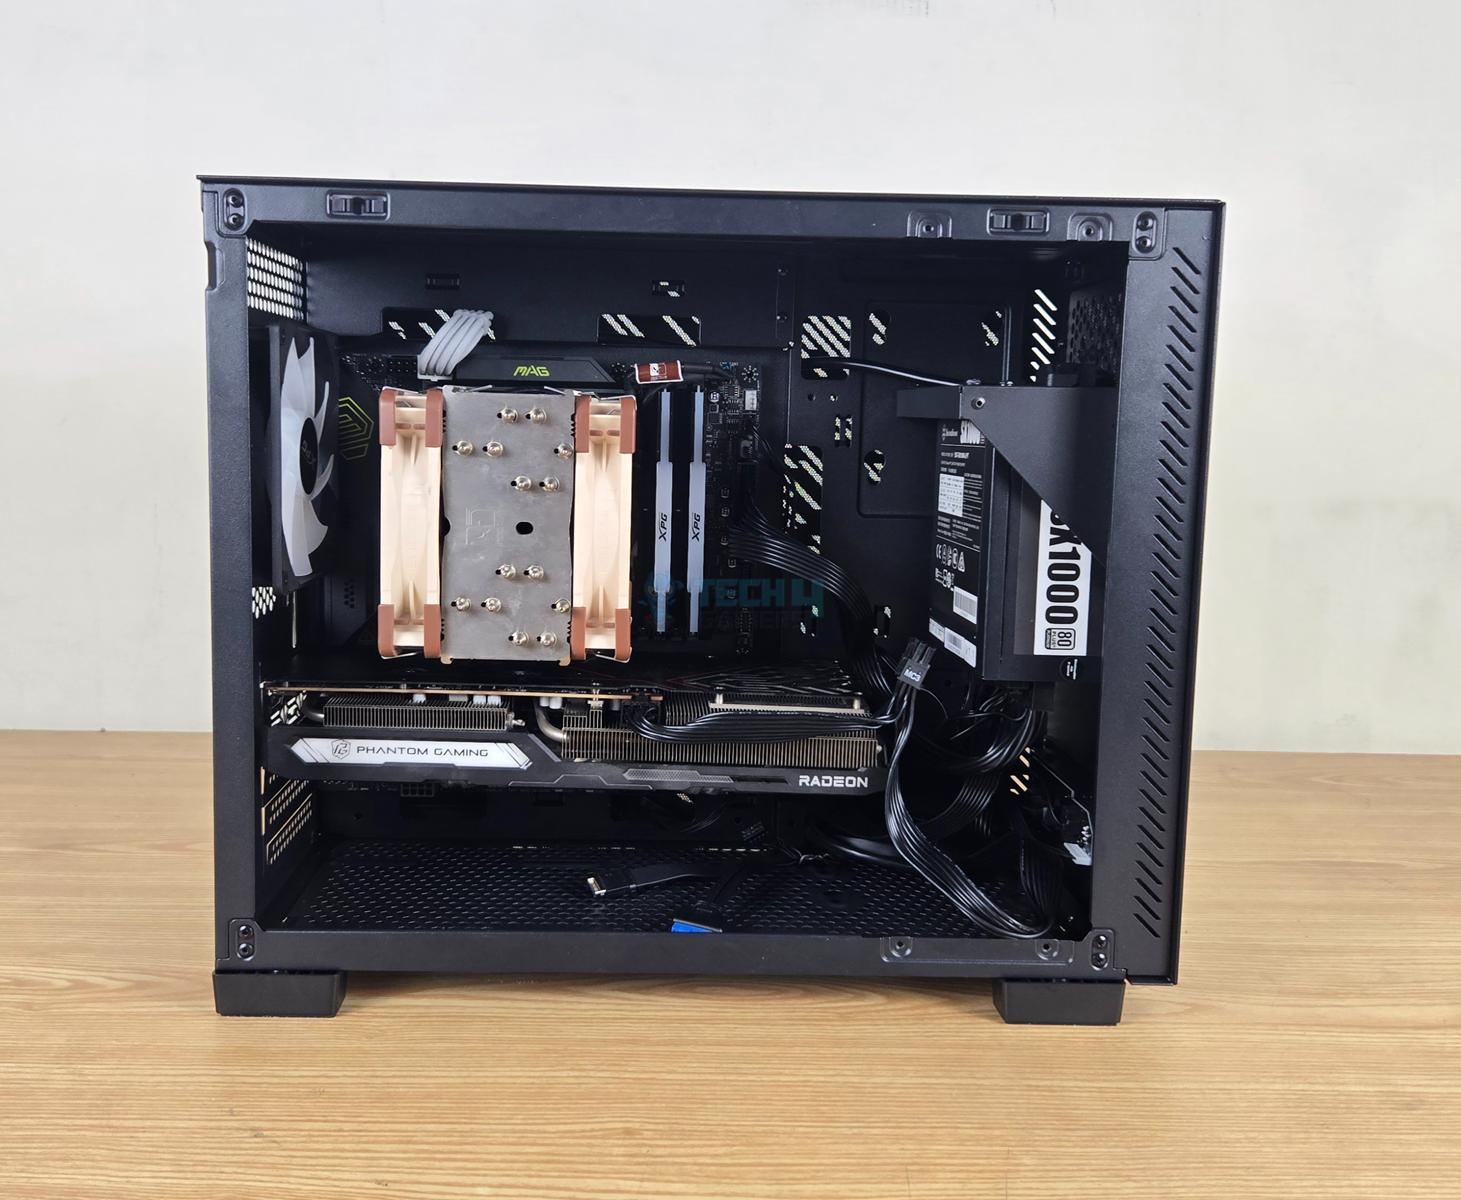
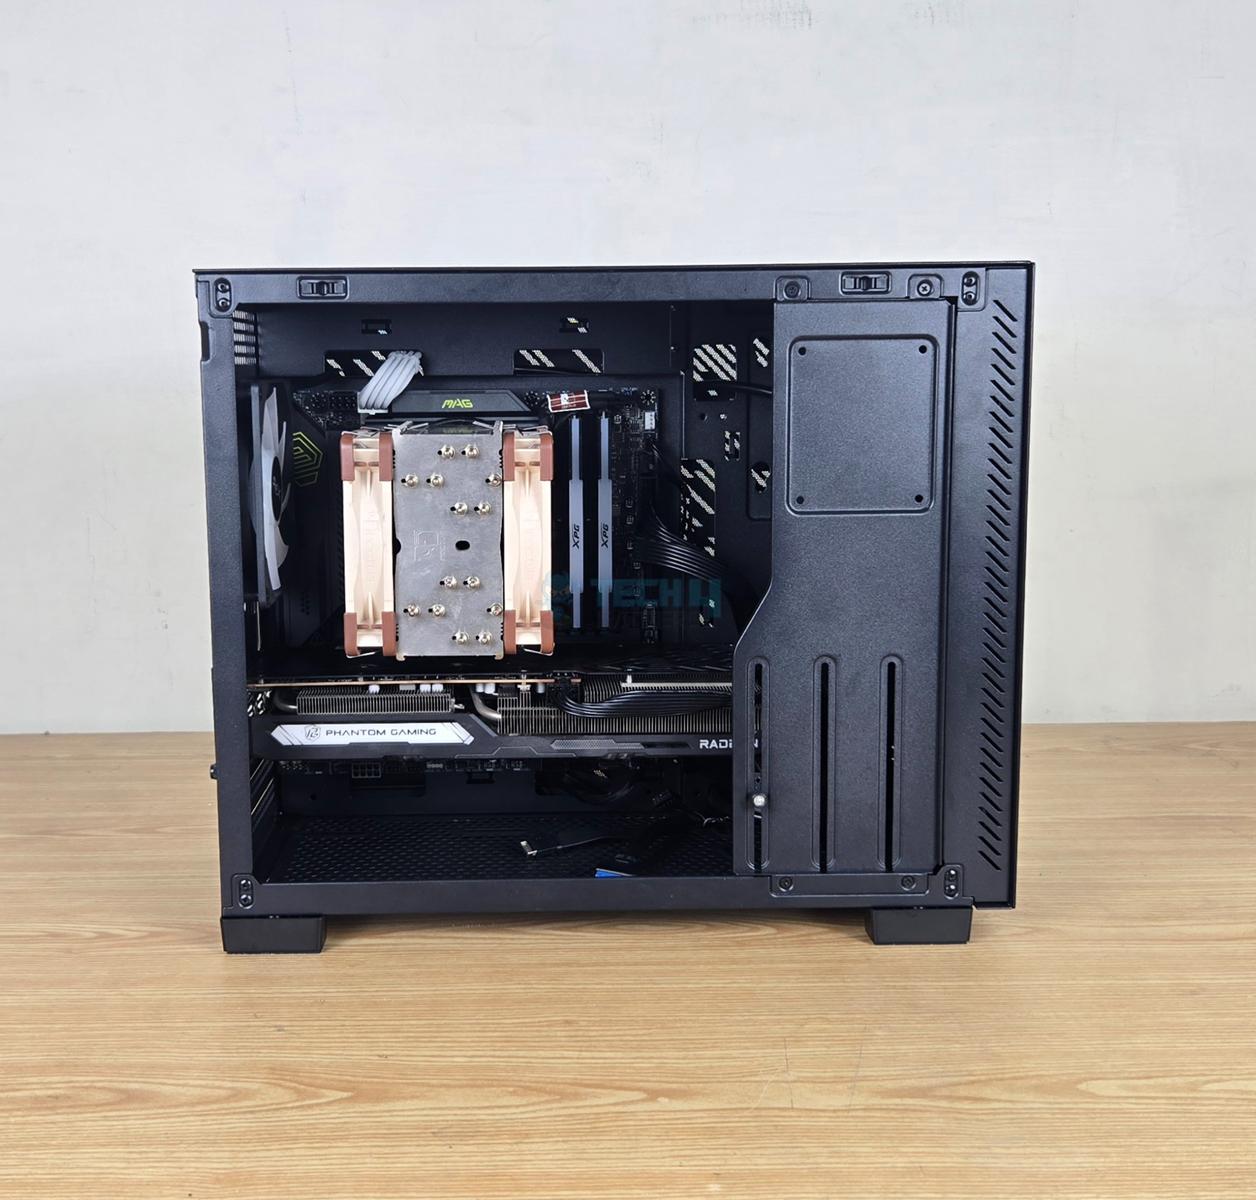
Then, I installed the graphics card. One thing that I noted is the difficulty of routing the storage drive cables from the PSU to the SSD mounted on the backside. This is when you install a liquid cooler on the top; otherwise, it is not an issue. Lastly, the side bracket was installed, and the GPU support bracket was configured to serve its purpose.
Cable management is not an issue in this case with a simple build.
The above are a few pictures of the test build.
Thermal Test Results
The thermal testing was done with an ambient temperature of 24ᵒC, and I have used AIDA64 Engineering Stress Test software for this purpose, using FPU and GPU.
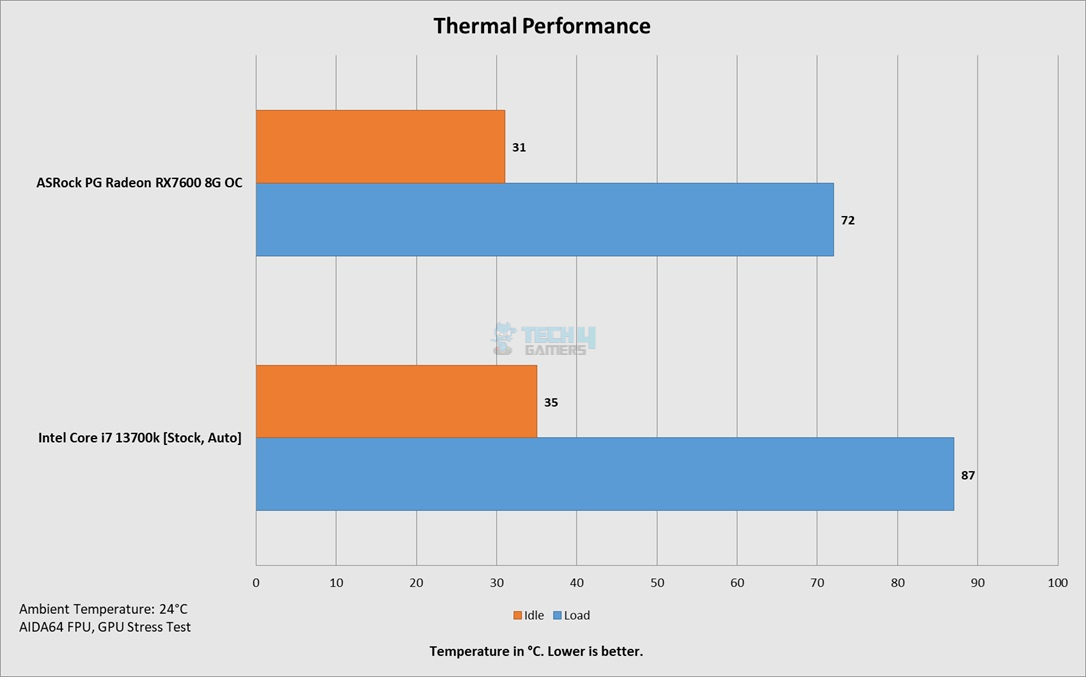
Despite not having air intake fans, the CPU and graphics card temperatures are within acceptable limits, albeit higher than in a case with fans.
Should You Buy It?
Buy It If
✅You need a highly compact case: This case has a volume of 34 liters, and comes under the NVIDIA SFF-Ready certified case category, and provides enough space for modern hardware.
✅You are looking for an airflow case: The Valor Air Nano is designed with maximum ventilation in mind. This is why this case has perforated steel panels all around with strong dust filtration.
✅You want good specs: The Valor Nano RGB, despite being a compact case, supports a 360mm AIO on the top and the graphics card with up to 370mm length. The CPU cooler height clearance is 170mm.
Don’t Buy It If
❌You have a clearance problem: The 370mm supported length is subject to the clearance from the PSU. If you are using an ATX PSU, there is a chance that the PSU might obstruct the card. Do your homework.
Final Words
XPG Valor Air Nano is a highly compact but efficient tower case that is designed around maximum ventilation for good airflow. This is achieved by using stylish, striped, designed cutouts on all steel panels backed by good dust filtration. These panels are a tool-less design. This case does not have a glass panel.
This case can house a micro-ATX or mini-ITX-sized motherboard. VALOR AIR NANO is NVIDIA SFF-Ready certified. Its volume is a little over 34 liters. The PSU mount is on the front, whereas the power cable socket is provided on the rear. An internal power extension cord is supplied, which is a standard SFF design.
No fan mount is provided on the front, which is a clever design since the PSU mount is provided on the front. This implies that the case does not have a dual-chamber layout. However, this case has limited storage provision, and oddly, these are all at staggered locations. It can house 2×2.5” and 1×3.5” drives.
You can install a CPU air cooler of maximum 170mm height, a graphics card of maximum 370mm length, and a PSU of 170mm length. ATX and SFX/SFX-L PSUs are supported, but graphics card length is subject to PSU form factor.
Assembling a PC in this case is not a trivial task. However, keep in mind that small length of EPS cable from the SFX/SFX-L PSU will not reach the EPS connectors on the motherboard. Other than that, I did not face any issues as such.
Thank you! Please share your positive feedback. 🔋
How could we improve this post? Please Help us. 😔
[Hardware Reviewer & Editor]
Meet Nauman Siddique, a highly experienced computer science graduate with more than 15 years of knowledge in technology. Nauman is an expert in the field known for his deep understanding of computer hardware.
As a tech tester, insightful reviewer, and skilled hardware editor, Nauman carefully breaks down important parts like motherboards, graphics cards, processors, PC cases, CPU coolers, and more.
- 15+ years of PC Building Experience
- 10+ years of first-hand knowledge of technology
- 7+ years of doing in-depth testing of PC Hardware
- A motivated individual with a keen interest in tech testing from multiple angles.
- I majored in Computer Science with a Masters in Marketing
- Previously worked at eXputer, EnosTech, and Appuals.
- Completed Course in Computer Systems Specialization From Illinois Tech
Get In Touch: nauman@tech4gamers.com


