")


As an experienced Xbox One user, I’ve encountered the frustrating issue that the Xbox One Controller Won’t Stay On with New Batteries. This unwelcome glitch can impede gaming sessions and disrupt the overall experience.
This can occur due to corroded battery contacts, faulty batteries, firmware issues, electrical inconsistencies, issues with the power cable, or physical wear and tear.
- Xbox One users experiencing controller power loss with new batteries might face challenges stemming from fresh batteries, which can be solved quickly.
- Dirty battery contacts, faulty batteries, outdated firmware, internal circuitry problems, or worn-out power cables can cause this problem.
- Solving the Xbox One controller power issue involves cleaning battery contacts, replacing batteries, updating firmware, or repairing power cables.
Method Difficulty Rating
Rated: 5/10
Rated: 6/10
Rated: 7/10
Clean, Dirty, Or Corroded Battery Contacts
Mostly overlooked, dirty, or corroded battery contacts can prevent your Xbox controller from turning on due to poor electrical connection between the batteries and the internal components. Here’s how you can clean the Xbox One battery compartment and get rid of this issue:
- Take Dry Cloth: You need a cotton swab, rubbing alcohol (isopropyl alcohol), and a clean, dry cloth.
- Take out Batteries: Take out the batteries from the controller to access the battery compartment. Examine the battery contacts inside the compartment. Look for any signs of dirt, debris, or corrosion on the metal surfaces.
- Deep Clean: Dip a cotton swab into a small amount of rubbing alcohol. Gently rub the dampened cotton swab against the battery contacts. Remove any dirt or corrosion. Allow a few minutes for the rubbing alcohol to evaporate. Use a dry cotton swab to help speed up the drying process.
- Turn on the Controller: Insert new charged batteries into the controller’s battery compartment once it dries. Ensure they are aligned with the positive (+) and negative (-) markings. Turn on the controller to check if it powers up without any issues. Press the Xbox button to see if it responds.
Corroded batteries disrupt the flow of power, causing the controller to lose power or fail to turn on altogether intermittently; hence to work around this thing,
Replace Faulty Batteries
Faulty batteries, even if they are new, can lead to multiple issues. As per my experience, they may lack the power capacity to operate the controller’s internal components effectively.
This results in an insufficient energy supply, preventing the controller from powering up consistently or at all. Following are the steps to do that:
- Buy good Batteries: Take out the current set of batteries from the controller. Opt for high-quality alkaline batteries from a reputable brand.
- Put in the Batteries: Insert the new batteries into the battery compartment, ensuring they align correctly with the positive (+) and negative (-) markings > Close the battery compartment securely to ensure proper contact between the batteries and the controller’s internals.
- Run the Controller: Attempt to turn on the controller by pressing the Xbox button. If it powers on without any issues, your Xbox One controller won’t stay on, and the new battery issue will likely be solved.
Perform Firmware Updates
When my controller’s firmware was outdated, it wouldn’t turn on with new batteries because of compatibility or software glitches, causing the Xbox One Controller Won’t Stay On with the New Batteries issue. The following steps will help you update your Xbox controller firmware and have a smooth gaming experience:
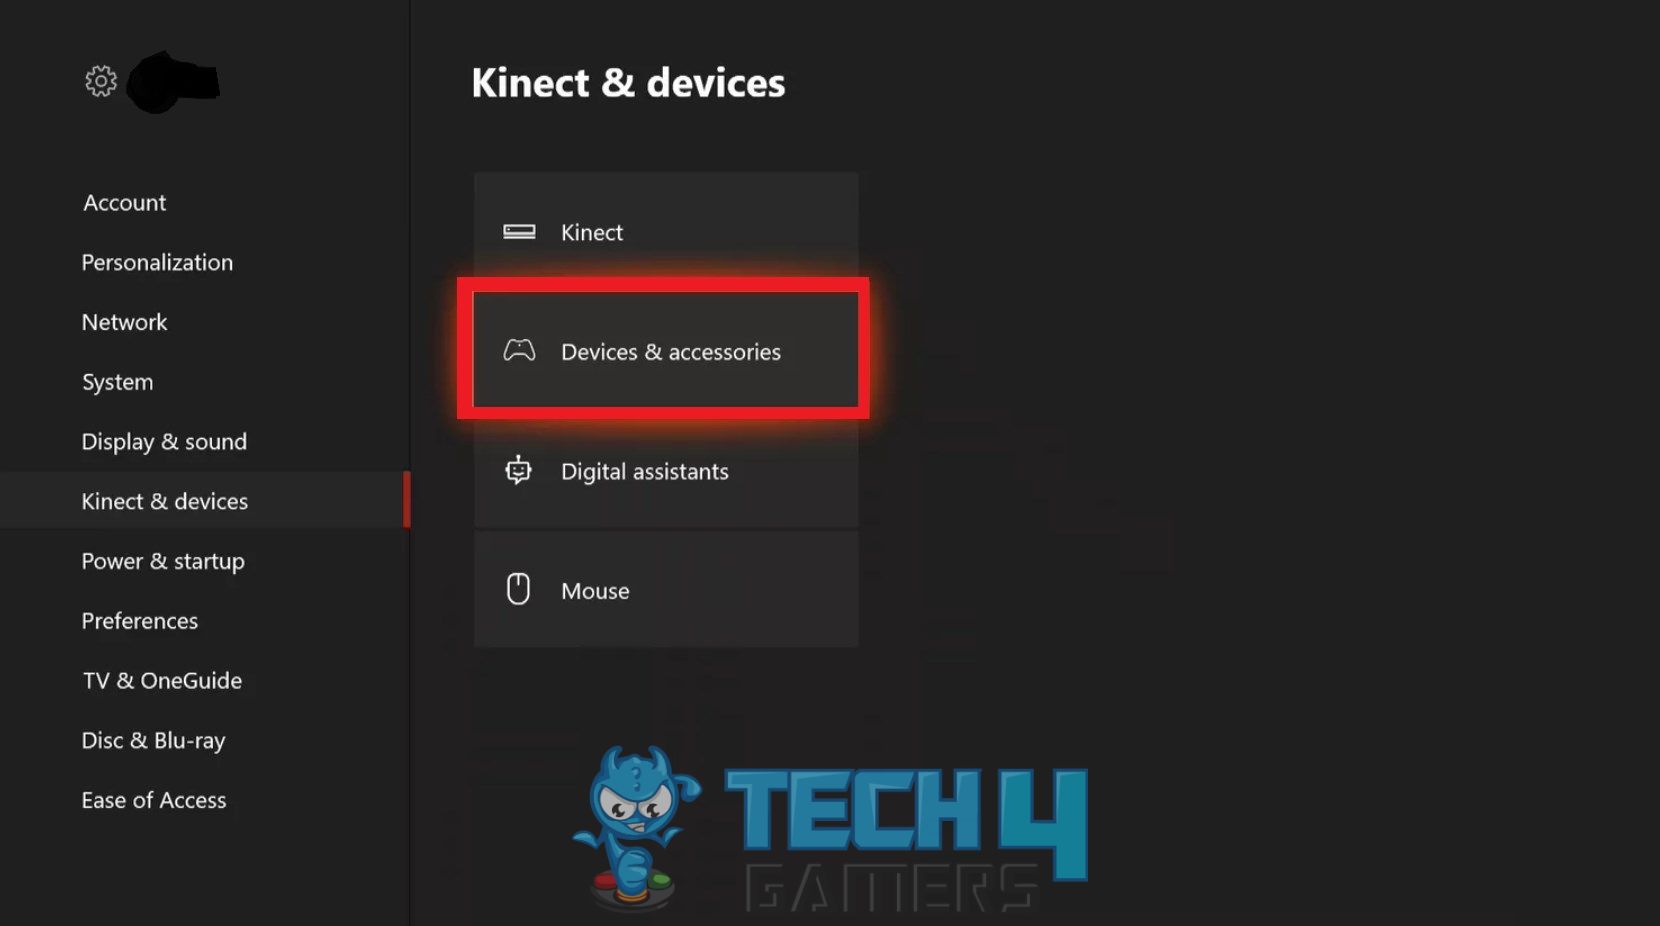
- Access Settings: Turn on the Xbox console > Press guide > “Settings” > “Kinect and Devices,” > “Devices and Accessories.”

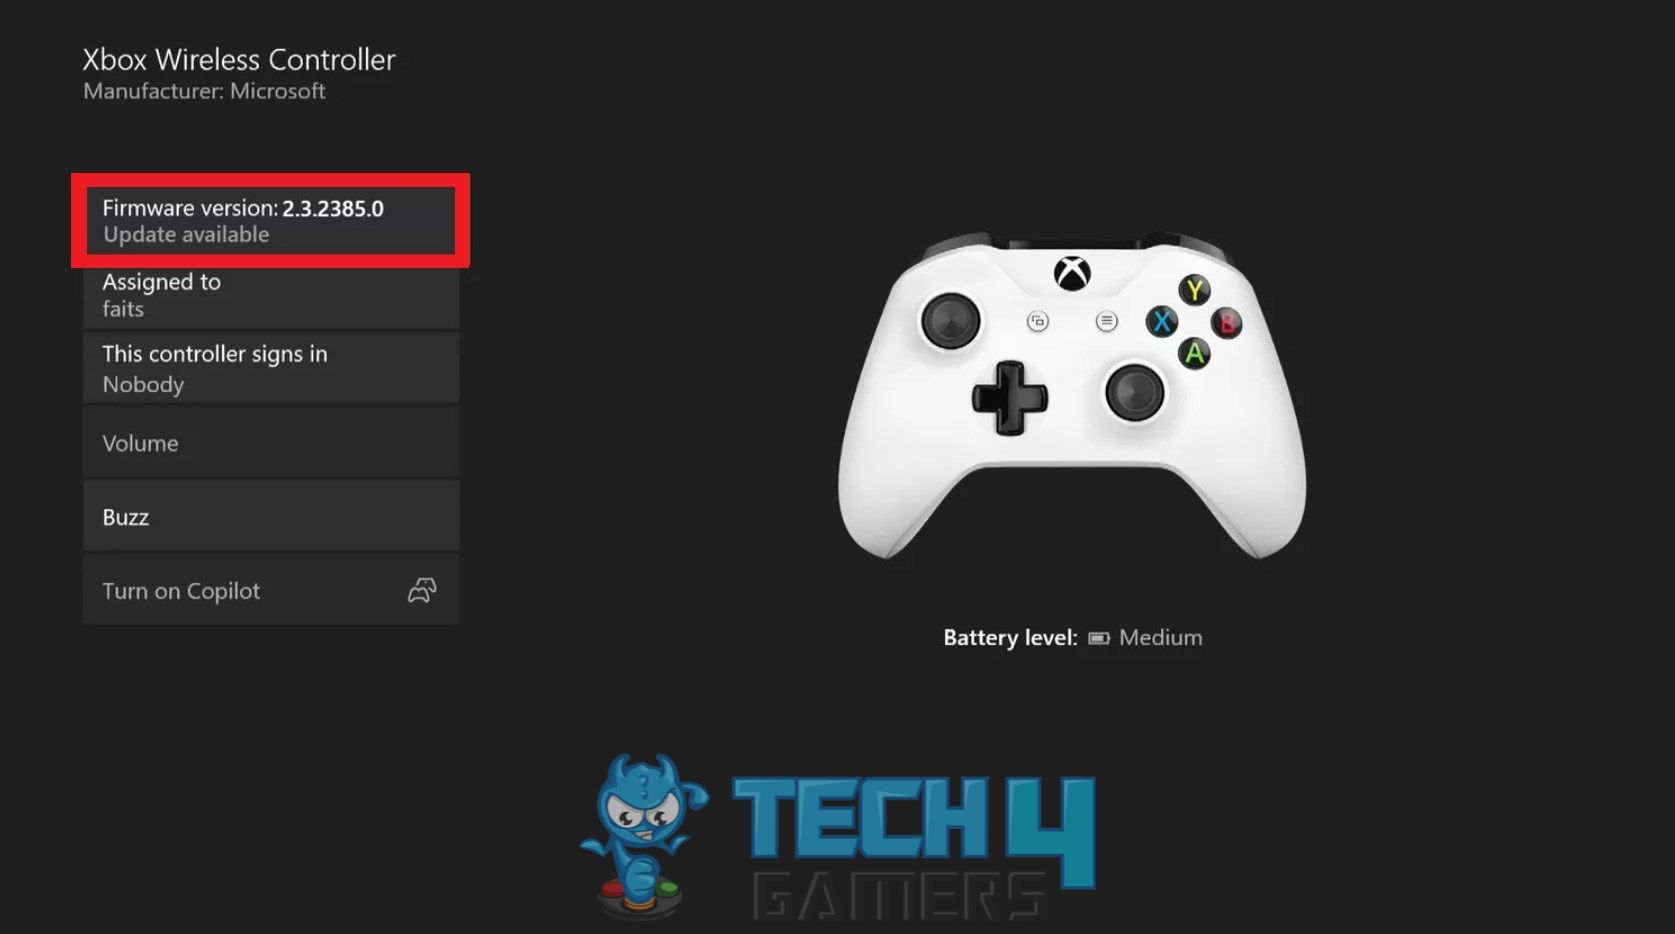
Devices and Accessories – (Image by Tech4Gamers) - Firmware Updates: Tap the three dots below the controller image >.

Update for Controller – (Image by Tech4Gamers) - Update Now: Hit the “Update Now” option to start the process.
Updates are suitable for nullifying errors of any sort, and firmware updates increase the possibility of removing the error by a high percentage, as I have experienced this myself.
Last Words
Dealing with an Xbox One controller that refuses to stay on despite fresh batteries is a source of frustration for many users. This issue has prompted users to seek assistance on online platforms, where the shared tales of annoyance and pleas for solutions echo across digital spaces.
Users find themselves caught in a loop of inserting fresh batteries, only to have the controller power down again unexpectedly.
need help😭😭 my controller flashes the big X button then just dies with new batteries with cable and wont stay on😭😭 help what do i do #xboxone #controller
— ClumsyBubbl3 (@AjjClaudia) October 31, 2022
This guide serves as a beacon for those facing the vexing challenge of a disobedient Xbox One controller. By exploring potential reasons behind the issue and offering straightforward solutions, this guide aims to empower users to regain control over their gaming experiences.
Frequently Asked Questions
Relevant Articles:
- How to Change NAT type in Xbox One
- How to Reset Xbox One
- Xbox One Controller Button Not Working
- How To Reset Xbox [All Versions]
- How to Sync Xbox One Controller?
Thank you! Please share your positive feedback. 🔋
How could we improve this post? Please Help us. 😔
[How-To Guides Expert]
Laiba, our tech guru at Tech4Gamers, simplifies and crafts How-To Guides with a Google IT Support Certificate. Beyond tech, she captures the city’s aesthetics through her lens. Join her journey where tech meets creativity!
Get In Touch: Laiba@tech4gamers.com


