


One frustrating situation that many computer users encounter is when their PC fans spin, but it won’t boot. Various factors, ranging from simple to complex, can cause your computer to respond lacklusterly when you eagerly press the power button.
- This problem can stem from various factors, including power supply issues, faulty connections, hardware or software conflicts, and other potential sources.
- The issue is relatively common among users with many that face it.
- Try checking the power supply and connections, verifying monitor connections, inspecting RAM modules, and testing the graphics card, to resolve the booting problem and restore your PC’s functionality.
- When your PC fans spin, but the system won’t boot, it indicates a booting issue where the computer fails to complete the start-up process, leaving you stuck with spinning fans and no display.
Method Difficulty Rating
Inspect RAM
Rated: 5/10
Clear CMOS
Rated: 4/10
Check Graphics Card
Rated: 6/10
Test Power Button
Rated: 3/10
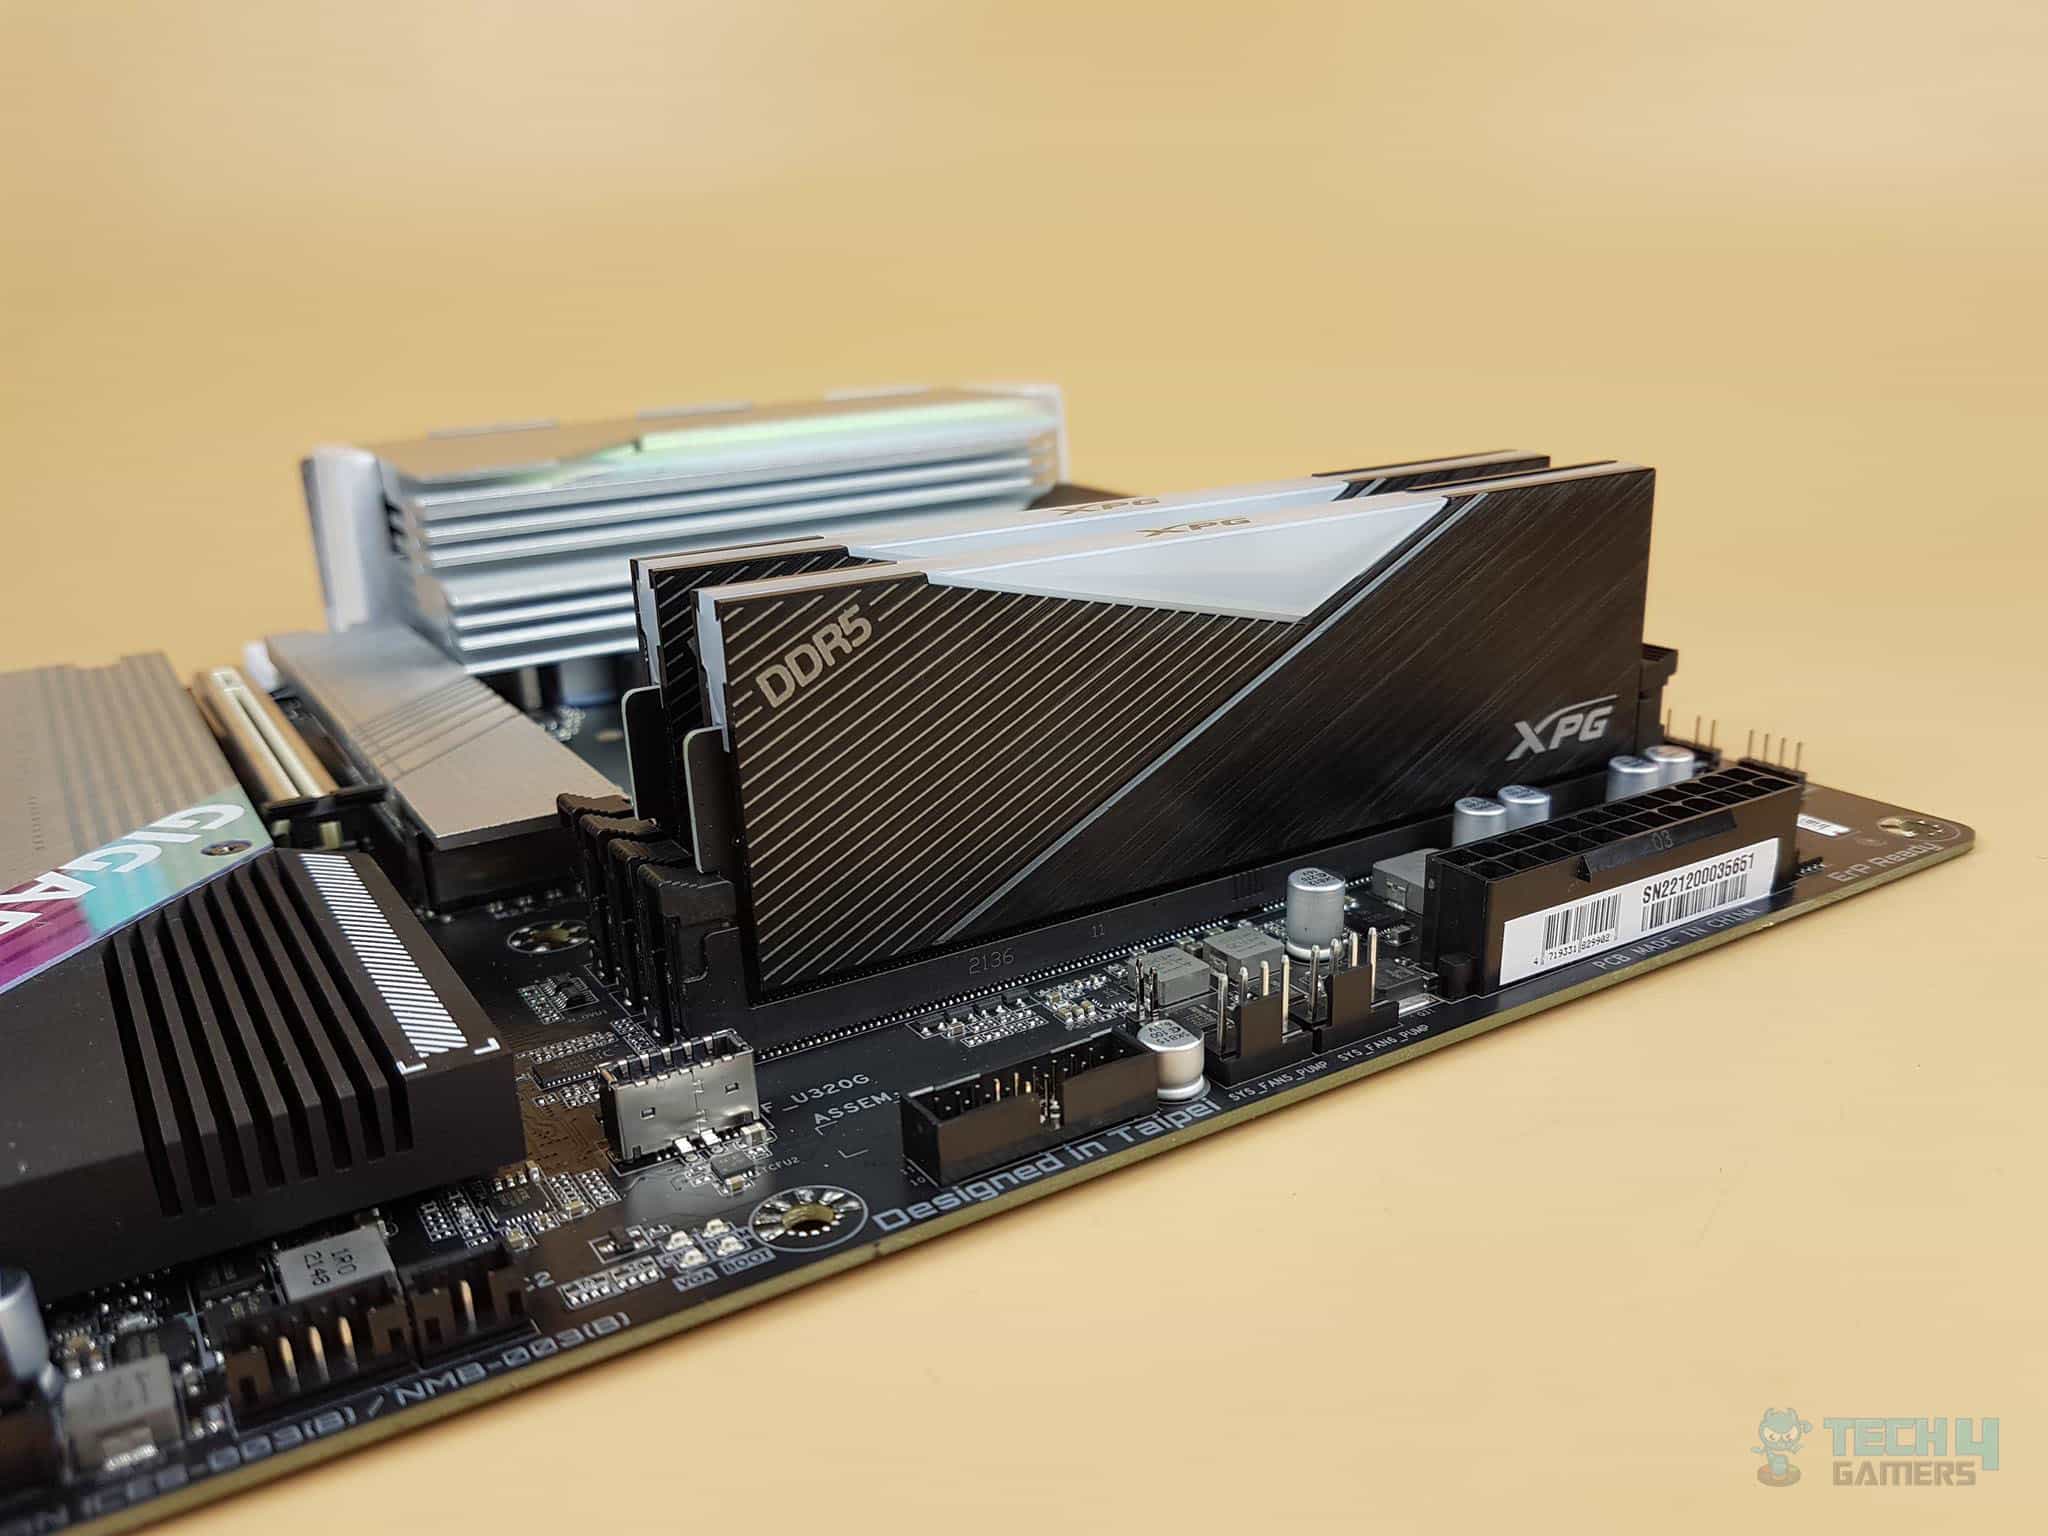
Inspect RAM Modules
Faulty or improperly installed RAM modules can prevent your computer from booting. Ensure that your RAM is not damaged and is properly seated in its respective slot; when we faced the issue, we noticed improper installation of the RAM resulting in the error. Here is how to inspect RAM:
- Checking RAM: Turn off the PC > Disconnect the power cable > Access RAM modules > Ensure each RAM seating.
- If Multiple Modules: Try booting the system with only one module at a time.

XPG DDR5 Ram On Motherboard. Image Credits (Tech4Gamers)
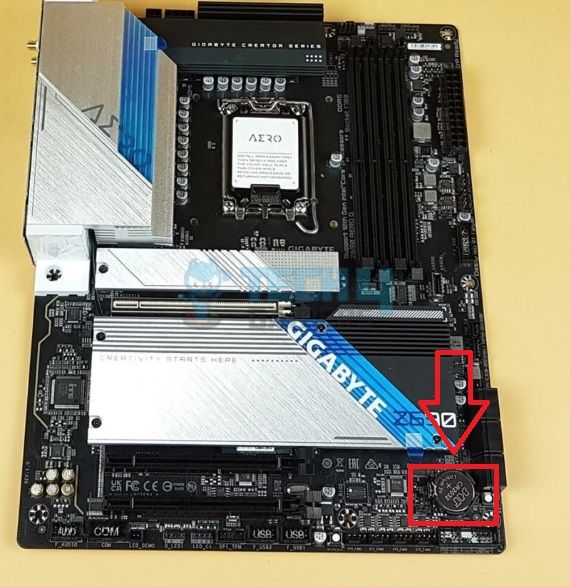
Clear CMOS
The CMOS (Complementary Metal-Oxide-Semiconductor) stores the BIOS settings of your computer. Resetting the CMOS can sometimes resolve booting issues related to incorrect or corrupted settings. Users on the LevelOne tech forum mentioned that they resolved this error using this step, doing so also helped us. Here is how to clear CMOS:
- Clear CMOS: Turn the computer off > Remove the power cable > Locate the CMOS battery on the motherboard > Remove the battery carefully > Wait for a few minutes > Reinsert the battery > Reboot the system.
Check Graphics Card
If your PC fans spin, but it won’t boot, check your graphics card. Ensure that you properly seat the dedicated graphics card in its slot. A damaged graphics card can lead to many issues booting issues being amongst them. This step helped people online to solve the error, we also recommend checking your graphics card for any faults. Follow these steps to check the graphics card:
- Access Graphics Card: Turn off the device > Remove the power cable > Open the case and locate the graphics card.
- Check Graphics Card: Remove the graphics card > Inspect the gold contacts on the bottom of the card > Gently clean the contacts using a soft cloth > Reinsert.

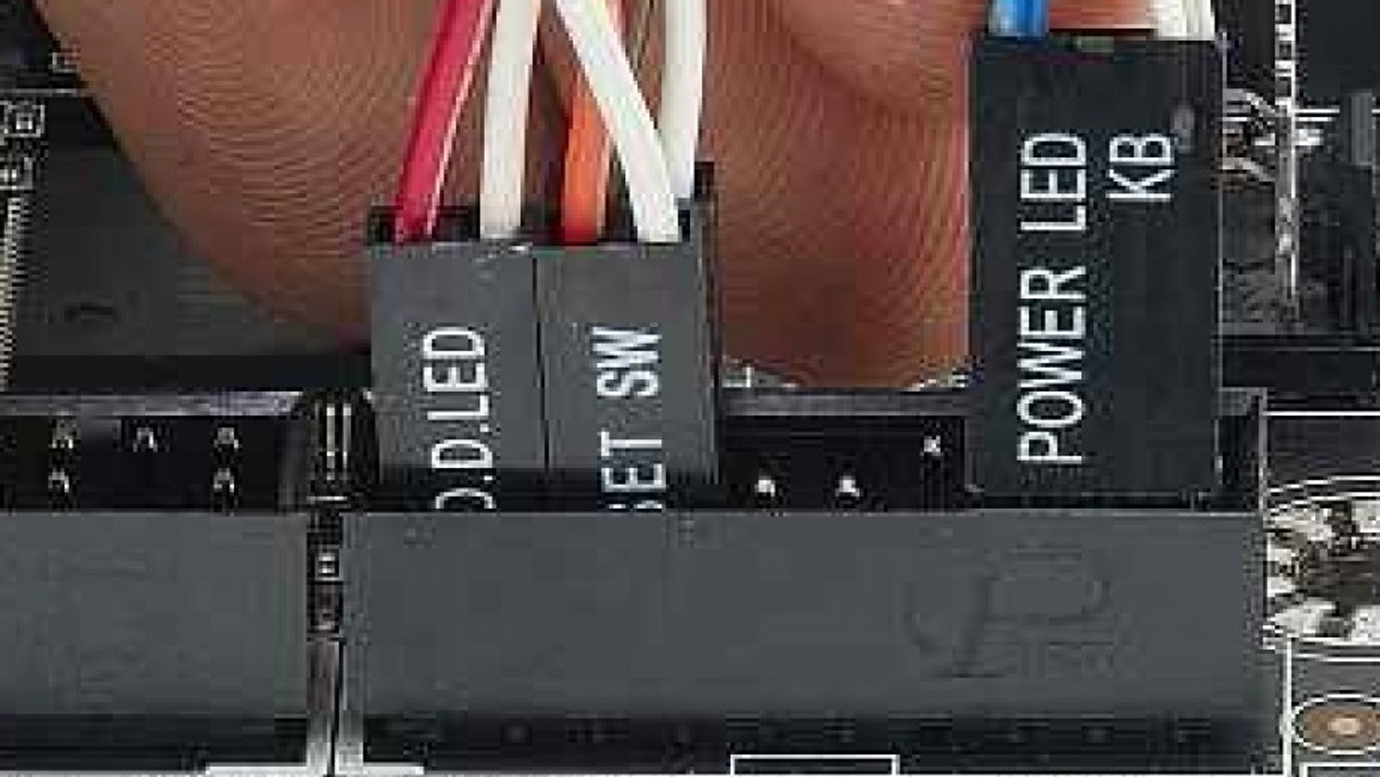
Test The Power Button
A faulty power button can also be the culprit behind booting issues. We recommend you check if you have damaged power button internals. Take these steps to test the power button:
- Locate Power Pins: Turn off the computer > Disconnect the power cord > Open the > Locate power pins.
- Examine Pins: Carefully short the two pins > If the system powers on when shorting them, it indicates a problem.

Power Pins on Motherboard Where Power Button Connects. (Image Credits: Alp)
Consider taking your computer to a certified technician or a reputable computer repair shop. They have the expertise and specialized tools to diagnose and repair more complex hardware issues that may be causing the booting problem.
Final Words
The issue of the PC not booting but fans spinning may get annoying to many users, but is very easy to fix. When on Twitter I came across threads of people mentioning that they don’t even get as far as the BIOs screen when facing the issue.
Hmm, my PC won't boot. Fans spin but it doesn't even get as far as the BIOS screen.
— Ed Jeavons (@edjeavons) June 18, 2009
One user stated that they could force start their PC with a button on the motherboard and asked if it was safe. We would not recommend doing so as it may damage internal components.
PC won't boot. Fans spin for a second then it restarts. But i can force it to boot with a button on the motherboard. Is it safe to do this?
— George PM (@ARestlessForest) March 17, 2015
Frequently Asked Questions
This issue can be caused by various factors, such as power supply problems, faulty connections, hardware conflicts, or software issues, among others.
Verify the monitor connections, including the video and power cables. Try connecting the monitor to another computer or using a different monitor to determine if the issue lies with the monitor or the computer.
Faulty or improperly seated RAM modules can prevent your computer from booting. Remove the RAM modules and reseat them firmly in their slots, ensuring they are properly aligned.
Ensure that the power supply is properly connected and receiving power. You can also try using a different power outlet or testing the power supply with a known working system.
Also Read:
- How To Replace GPU Fans
- How To Fix Graphics Card Fans Not Spinning
- How To Connect Power Button To Motherboard
- Motherboard Not Getting Power
- How To Check Insufficient Power Supply
Thank you! Please share your positive feedback. 🔋
How could we improve this post? Please Help us. 😔
[Errors Troubleshooting Expert]
Arsalan Shakil (aka GuyThatDoesEverything on YouTube) is a PC Tech Enthusiast and Electronic Geek. With over 10+ years of experience in Electronics, he then decided to explore Software Engineering to design embedded products and automate existing hardware solutions.
When he started tearing down old cameras to understand how they worked, he was shocked (literally, when he got zapped by a flash discharge capacitor), giving him the power (debatable) to fall in love with videography/photography. He also started making some fun videos that later became YouTube tech reviews.
Skills:
- 10+ years of experience in Electronics design, embedded solutions, and prototyping
- Majored in Software Engineering
- Research paper publication in IEEE for Embedded Military Uniform & LoRa WAN wireless technology
- Specialized in IoT Solutions
- PC Enthusiast & PC Modder
In his local region, he’s known to expose cheap PSU brands, often claiming fake certification or false claims on the box. He’s a true nerd and needed some friends in his life. Then he met some guys who work at Tech4Gamers, and they also came out to be equal nerds who suggested he join Tech4Gamers as a Hardware Expert.


