In our previous contents of the ORICO products, we have been testing their portable 2.5” SATA to USB adapter enclosures. This time around we are looking into their mainstream Night Stalker series dock/storage station. It is NS100C3 which is a 3.5” Hard Drive Enclosure.
ORICO 3.5″ HDD Drive Enclosure NS100C3 Review
This is not a portable solution. It is yet another tool-less assembly to convert any 3.5” SATA based HDD of up to 10TB into a ready USB 3.1 Gen 1 Type-C external drive. It is compatible with Microsoft Windows XP / 2000/ 7 / 8 / 10, Linux, Mac OS 9.1 or above and does not need any driver. It is one heck of a beautiful enclosure to speak of and it does compliment the overall look of the table of your PC setup.
It is made of 3mm thick Aluminum and features a patented magnetic front door. This Orico 3.5 Hard Drive Enclosure Review supports only one drive though there are multibay enclosures available as well. It is as simple as opening the cover, putting the drive in, closing the cover and plug n play! The dedicated PCB has enabled the Orico to bring in some protection features like over current protection, over voltage protection, overheat protection to name a few.
- Item: Orico 3.5 Hard Drive Enclosure Review
- Manufacturer: ORICO
- Price: Check Price on Amazon
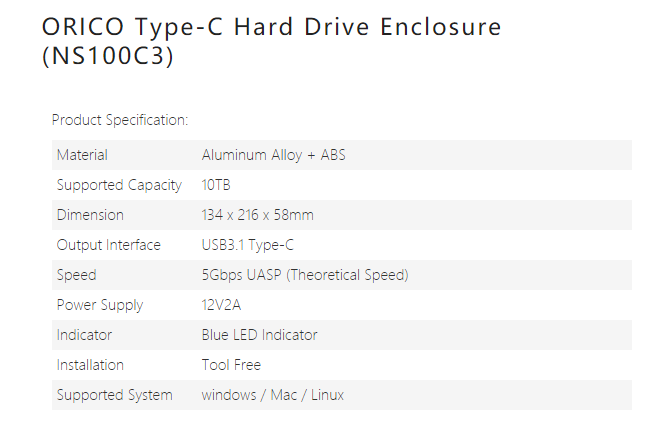
3.5” Hard Drive Enclosure Specifications
Hard Drive Packaging and Unboxing
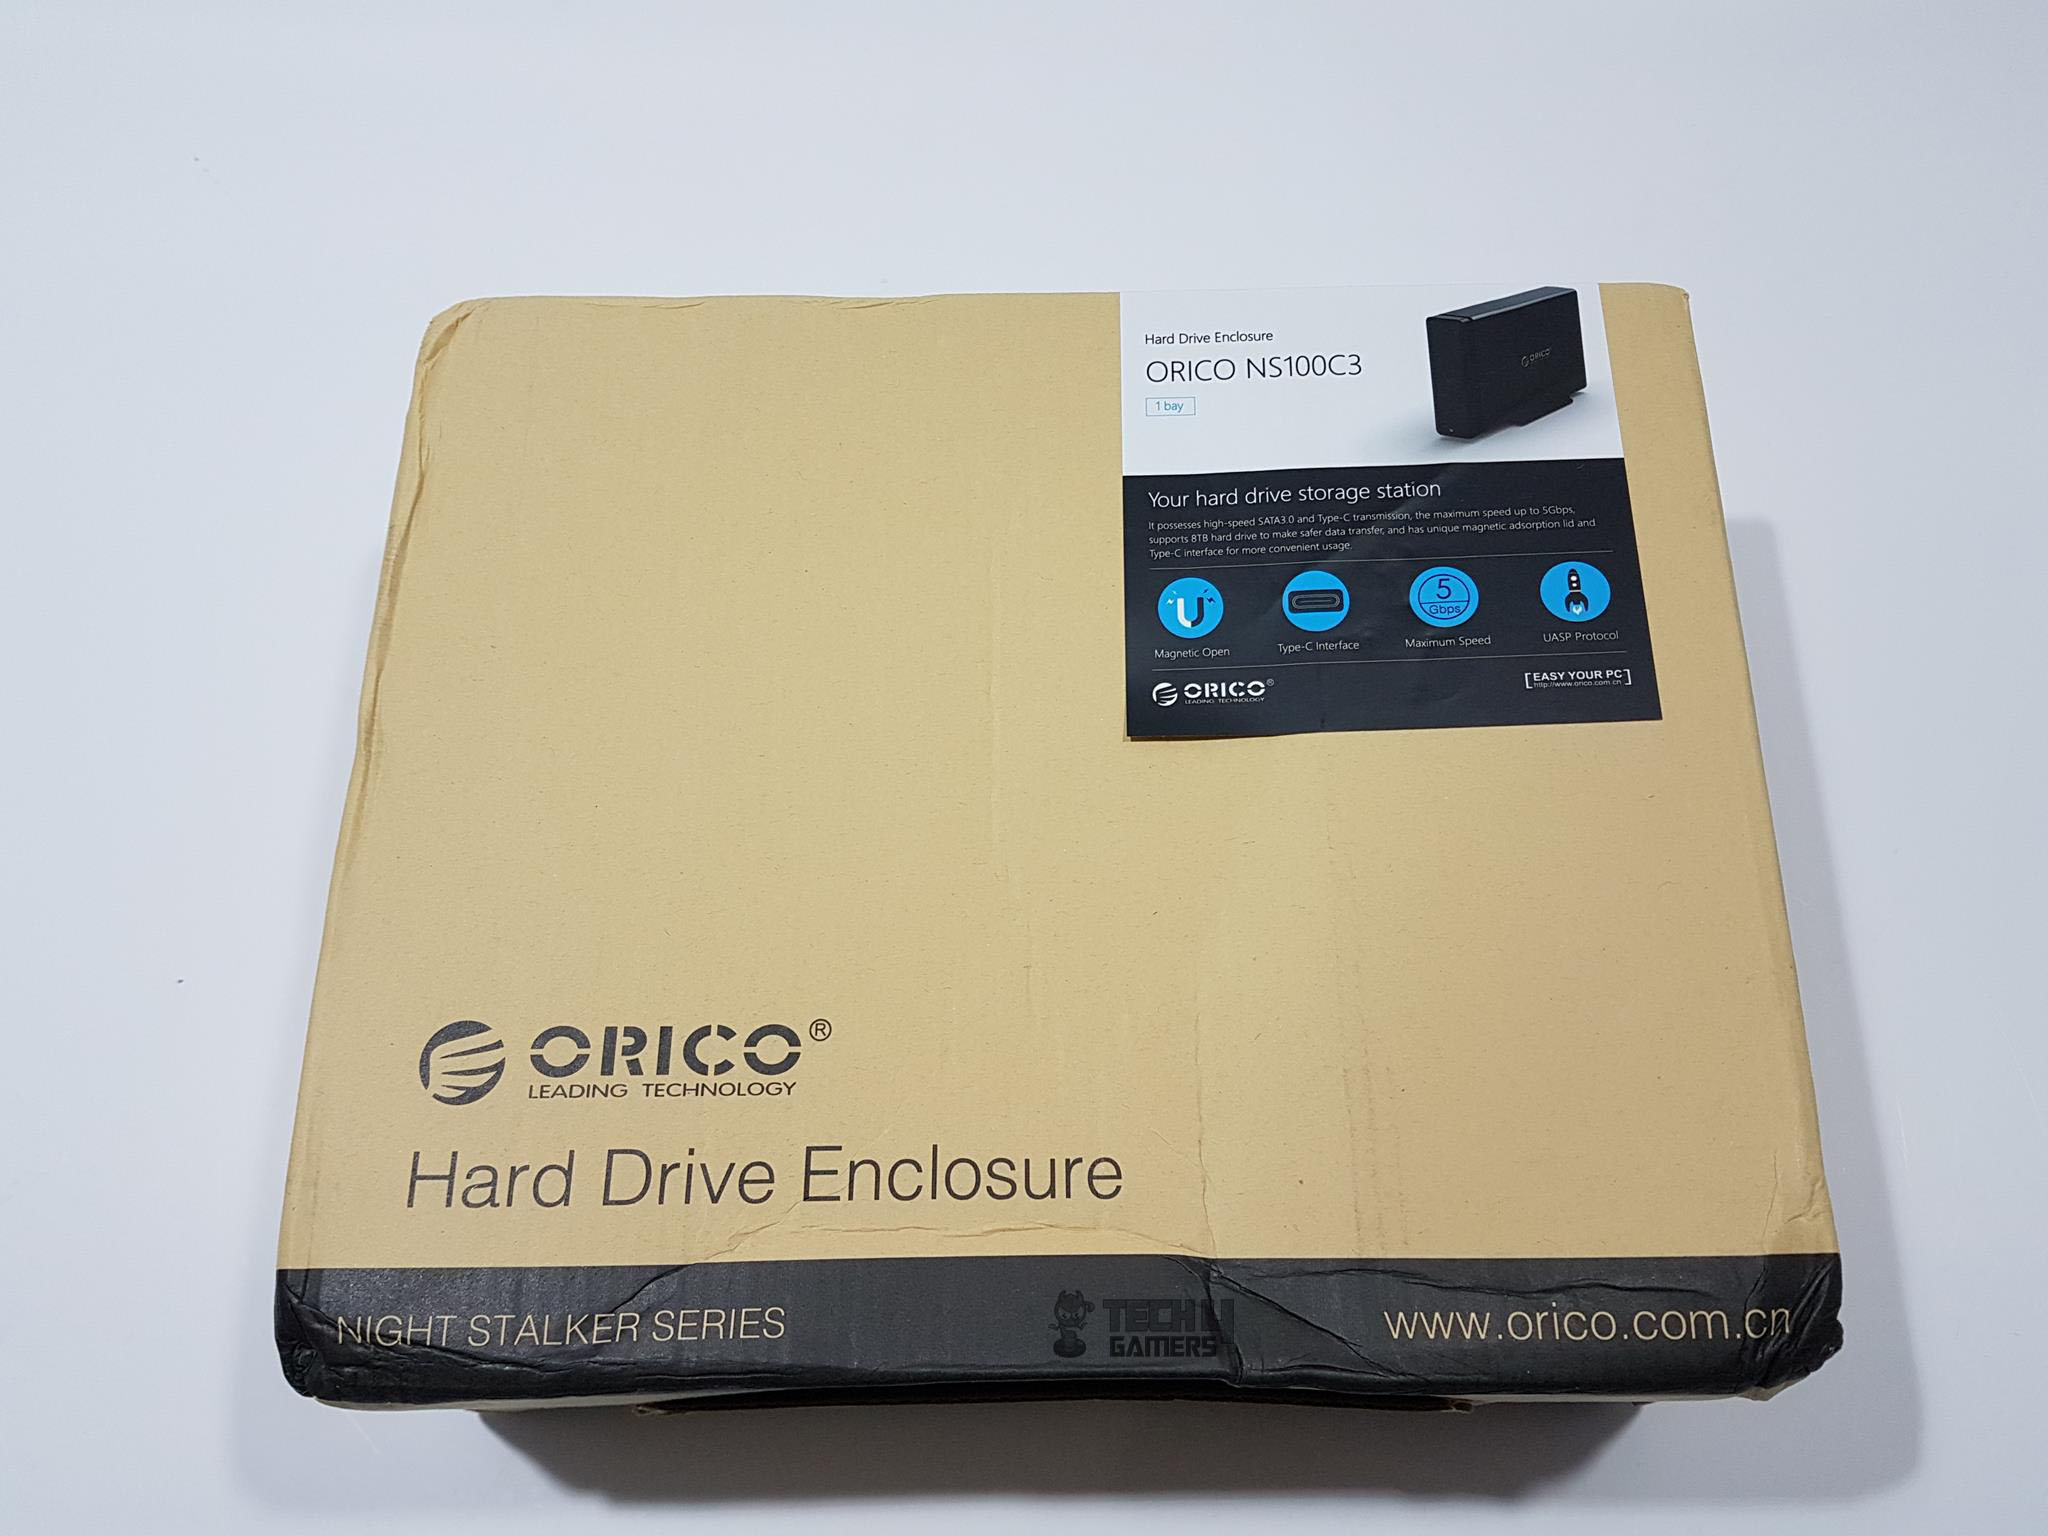
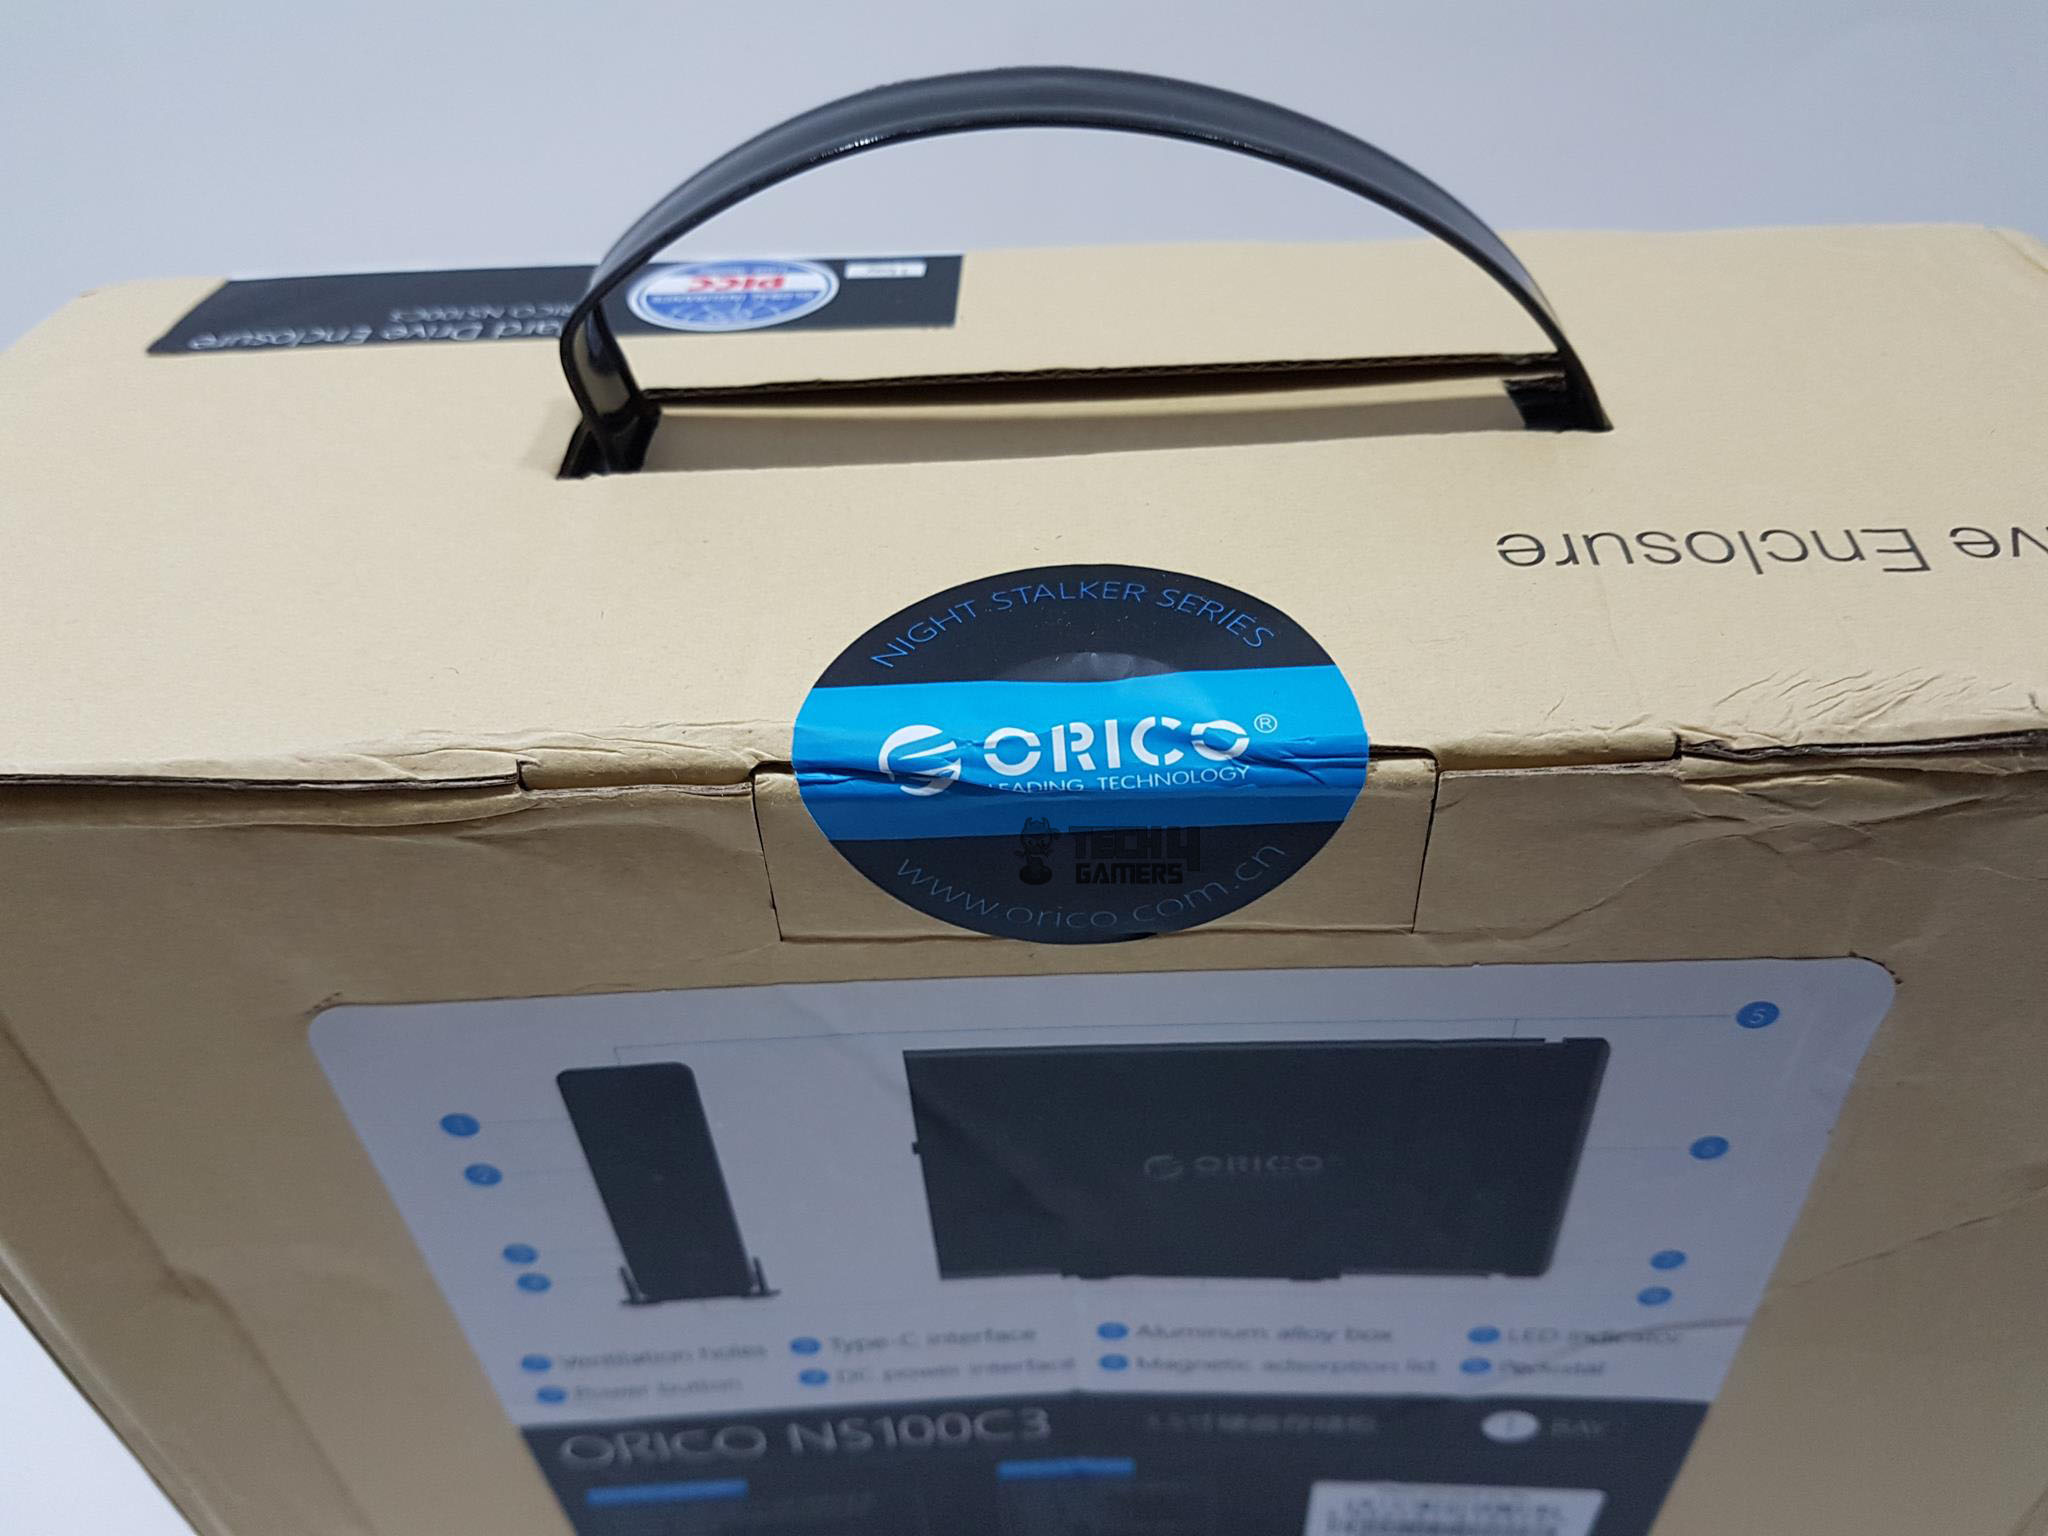
The product is shipped inside the cardboard box. The overall layout of the packing box is identical to the Synology DS 218+ that we are reviewing at the moment. The front side has a sticker pasted on the right side which is overhanging from the top side. ORICO NS100C3 is printed on top of this sticker with salient features of the storage station. ORICO brand logo and name are printed on the bottom left.
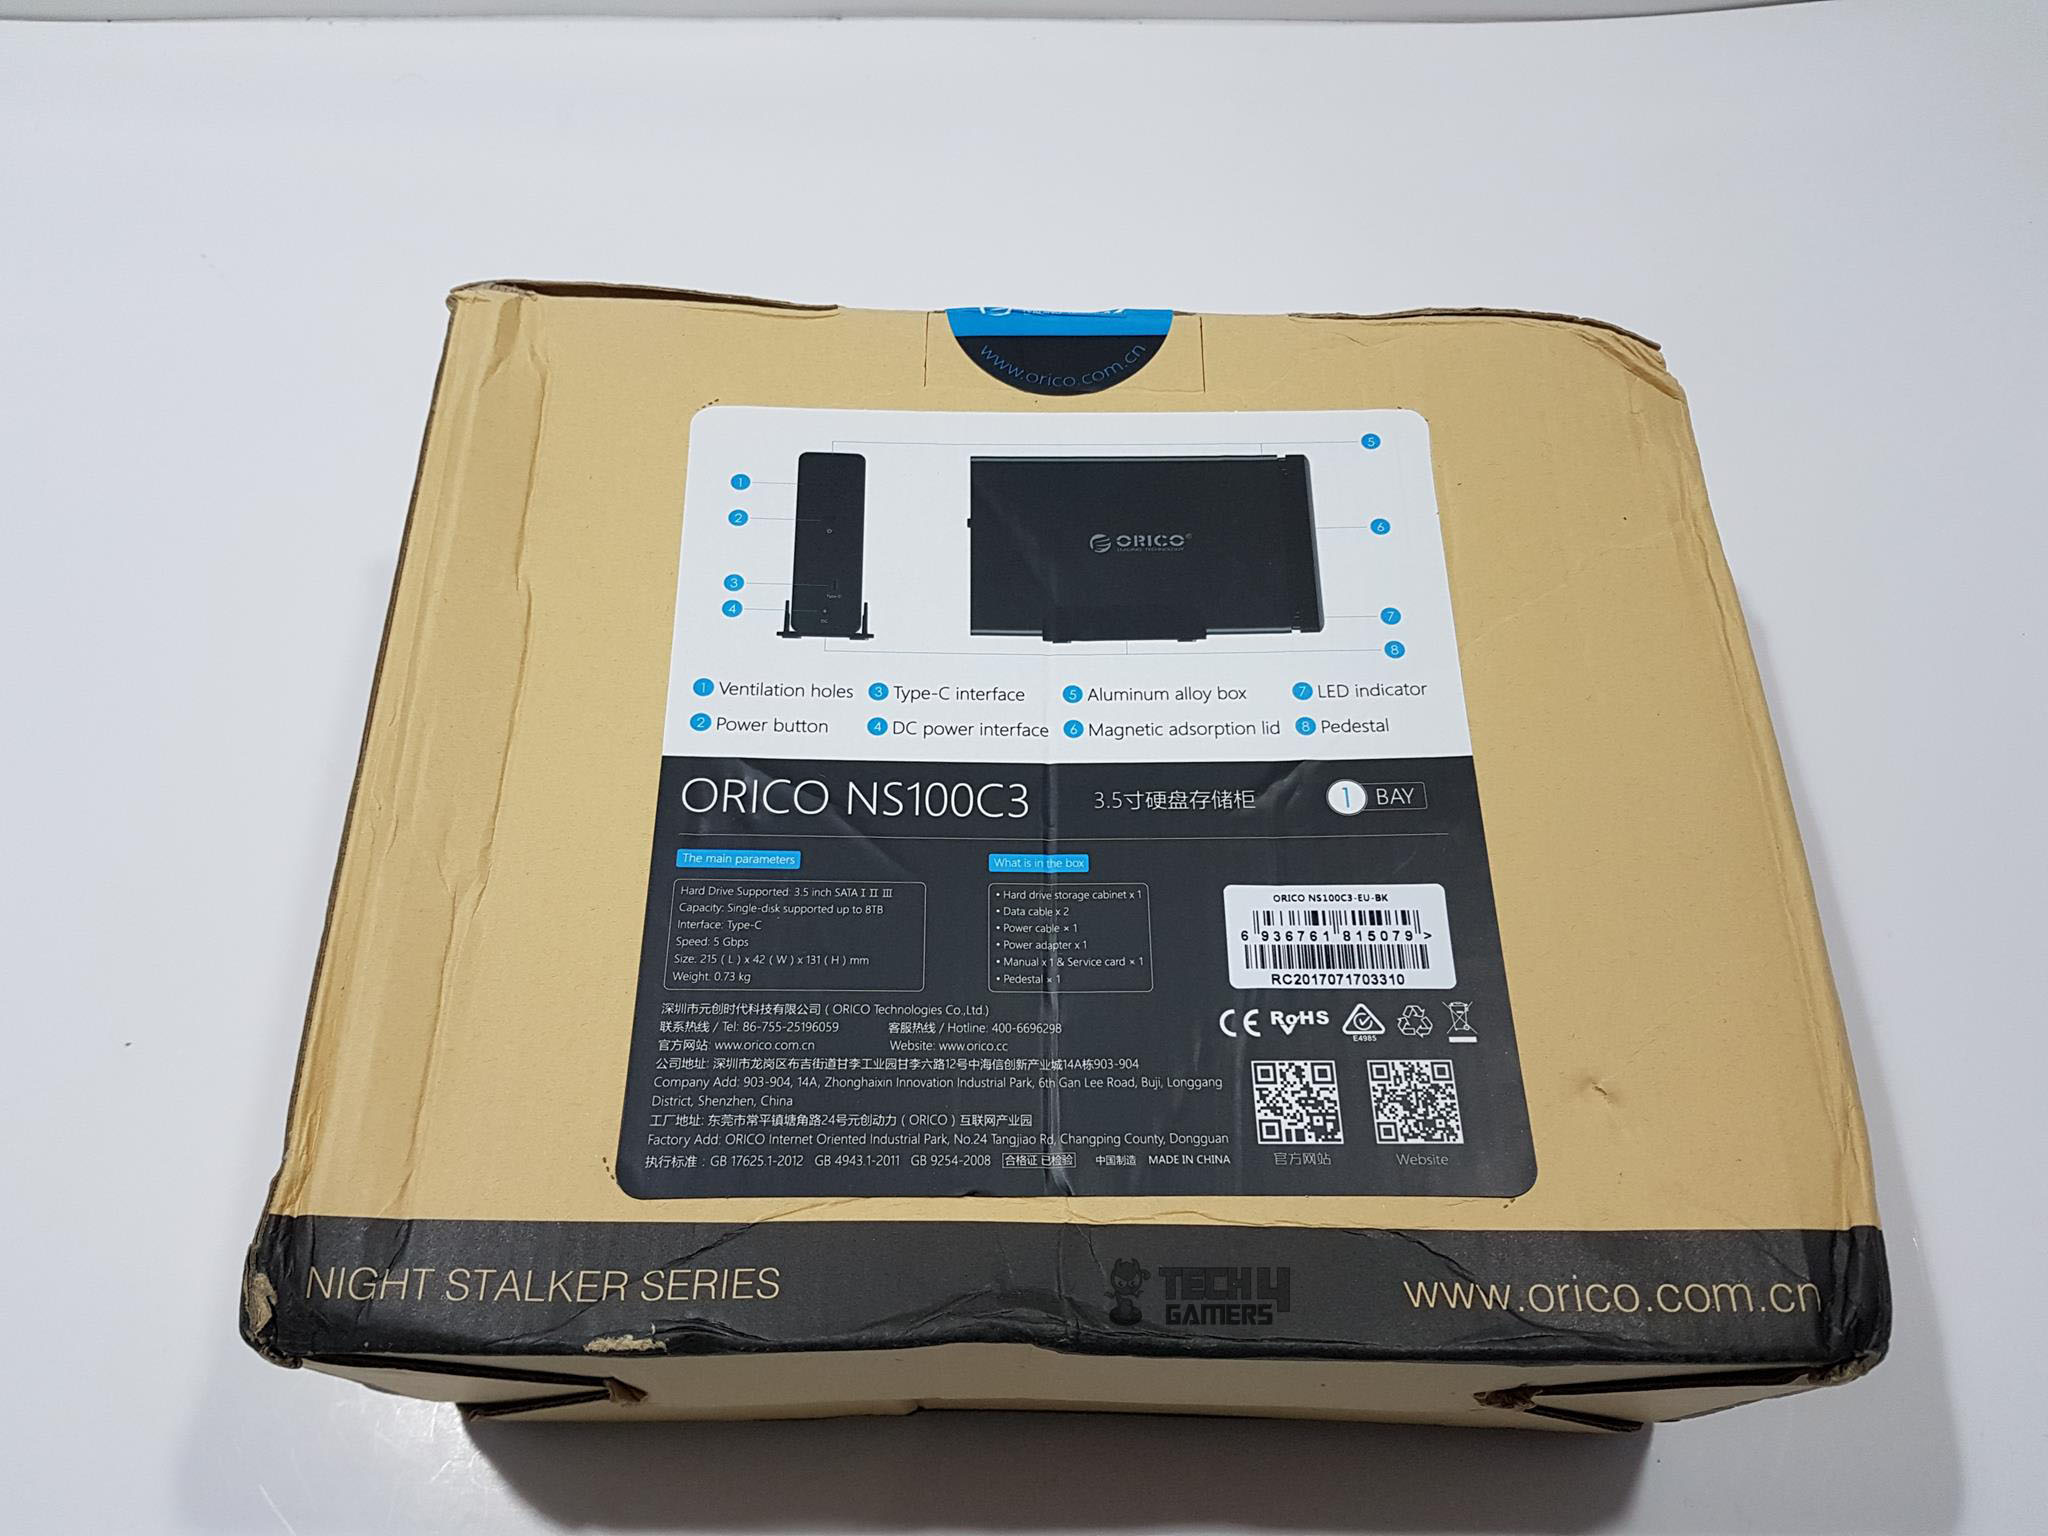
The backside of the packing has another large size sticker pasted on it. There are two labeled pictures of the unit. Below these pictures are the main specifications of the unit in two languages. There is a small size sticker on the right side of the specifications area showing the serial no and model of the unit.
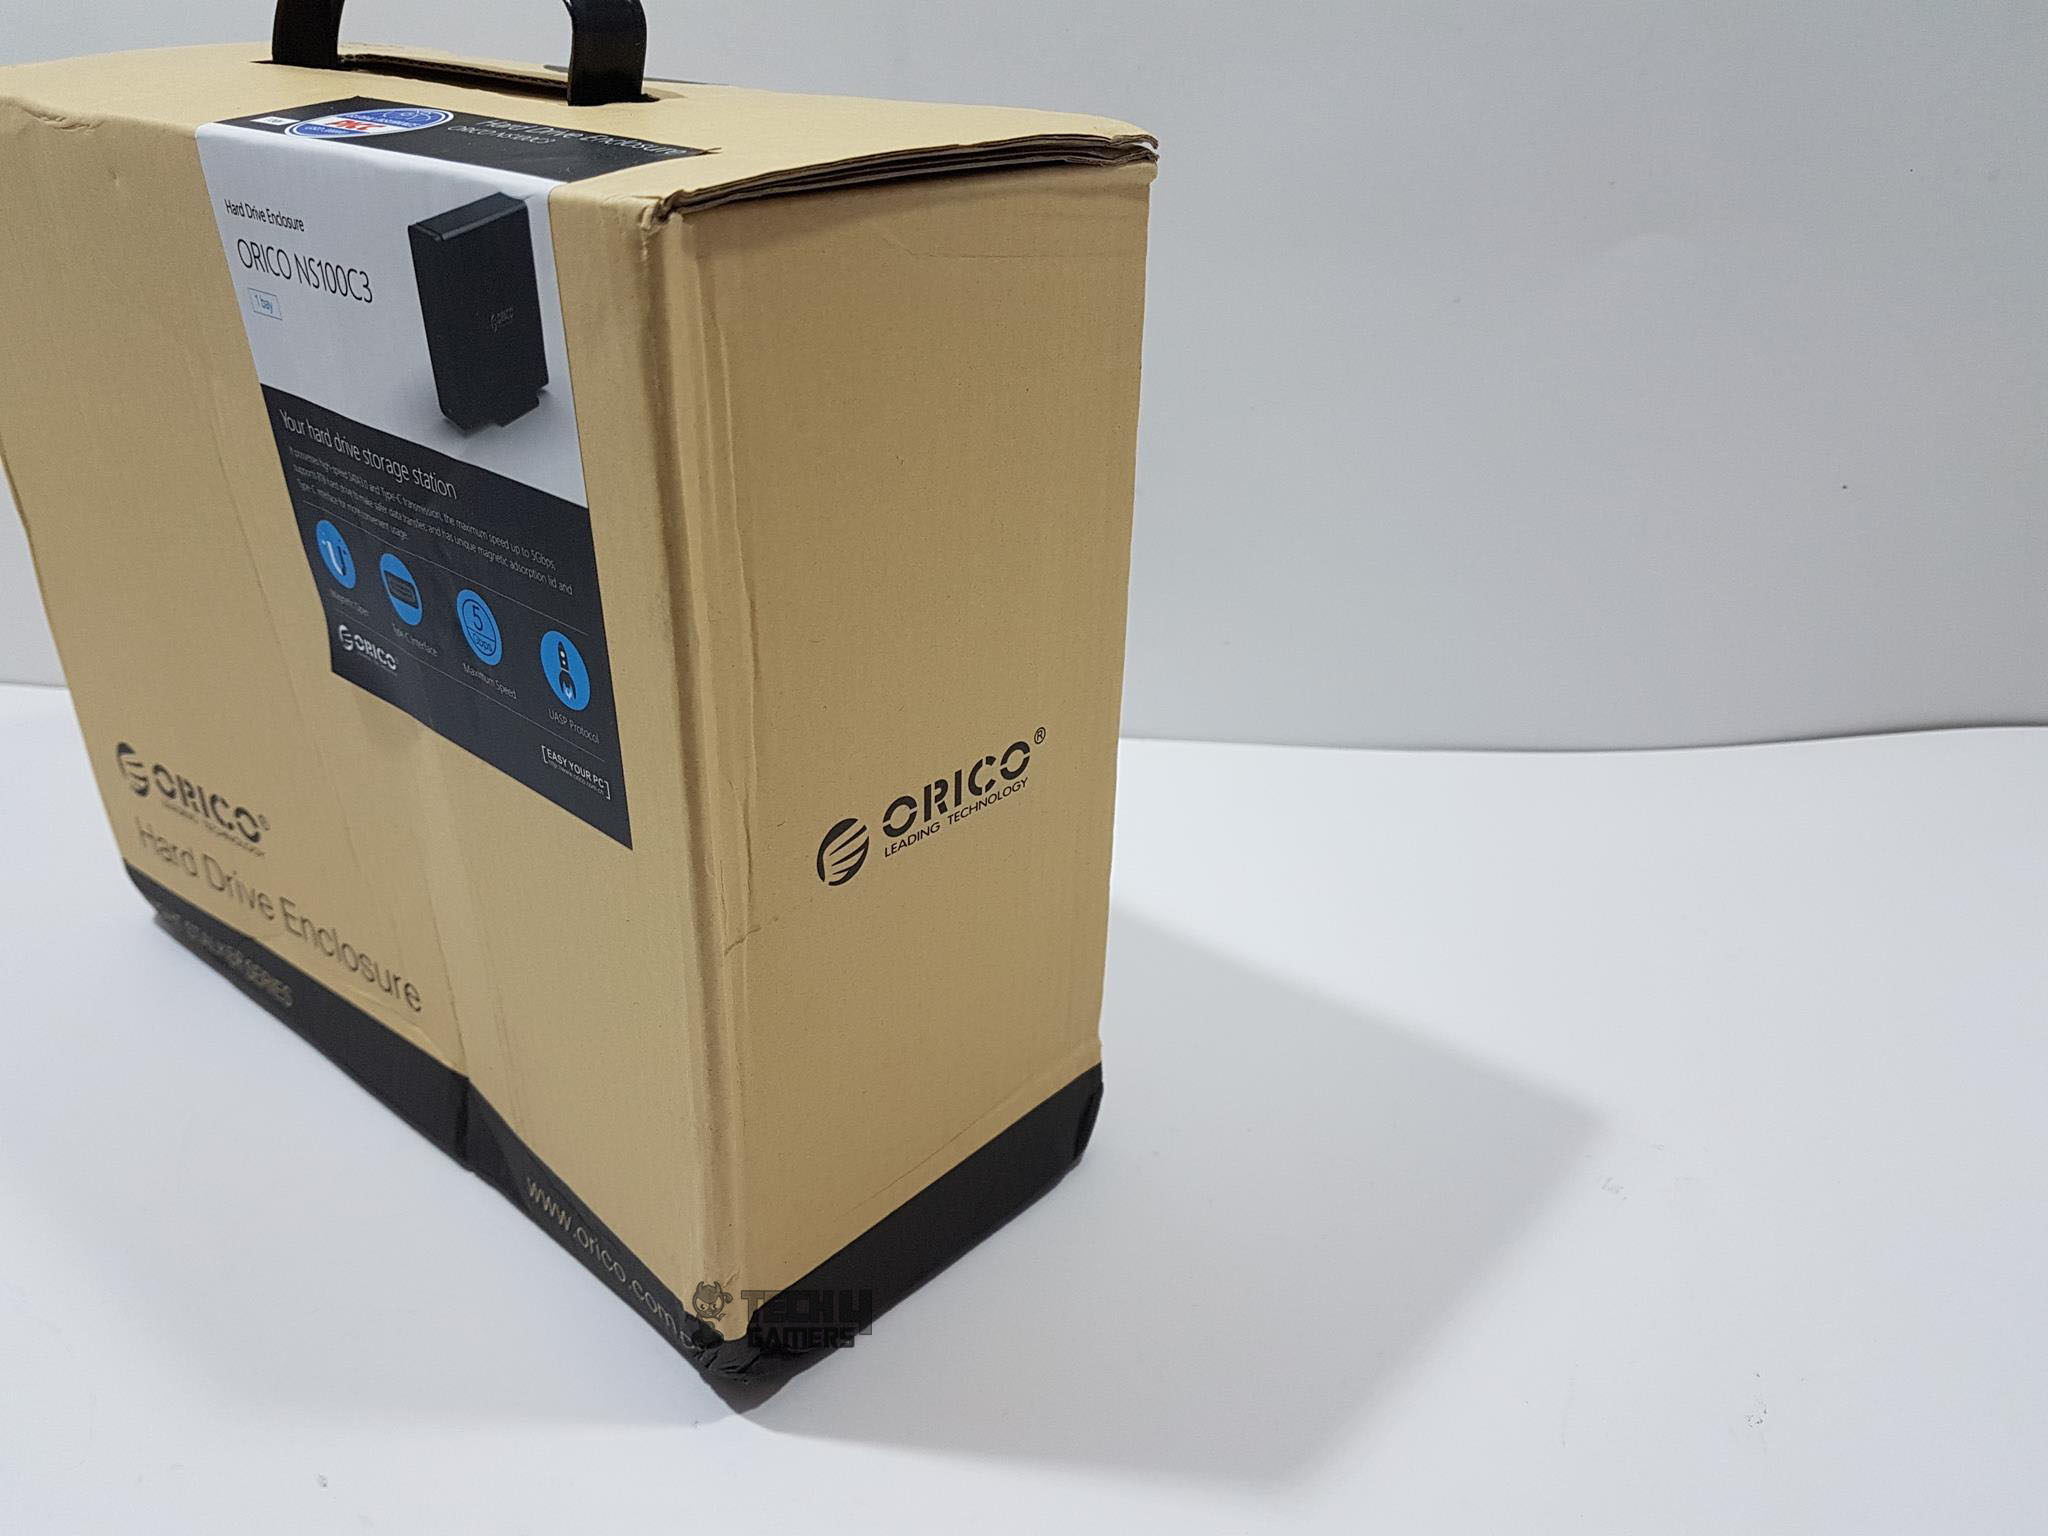
The left and the right sides are identical having ORICO orico 3.5 hard drive enclosure review brand logo and name printed in the center.
Looking at the top, we could see a black color handle in the middle. There are ORICO brand logo and name printed on the top left. We can see a certain portion of the sticker at the bottom right side showing the key elements of the unit which are model of the unit and its bay information. In our case, it is a single bay drive storage station.
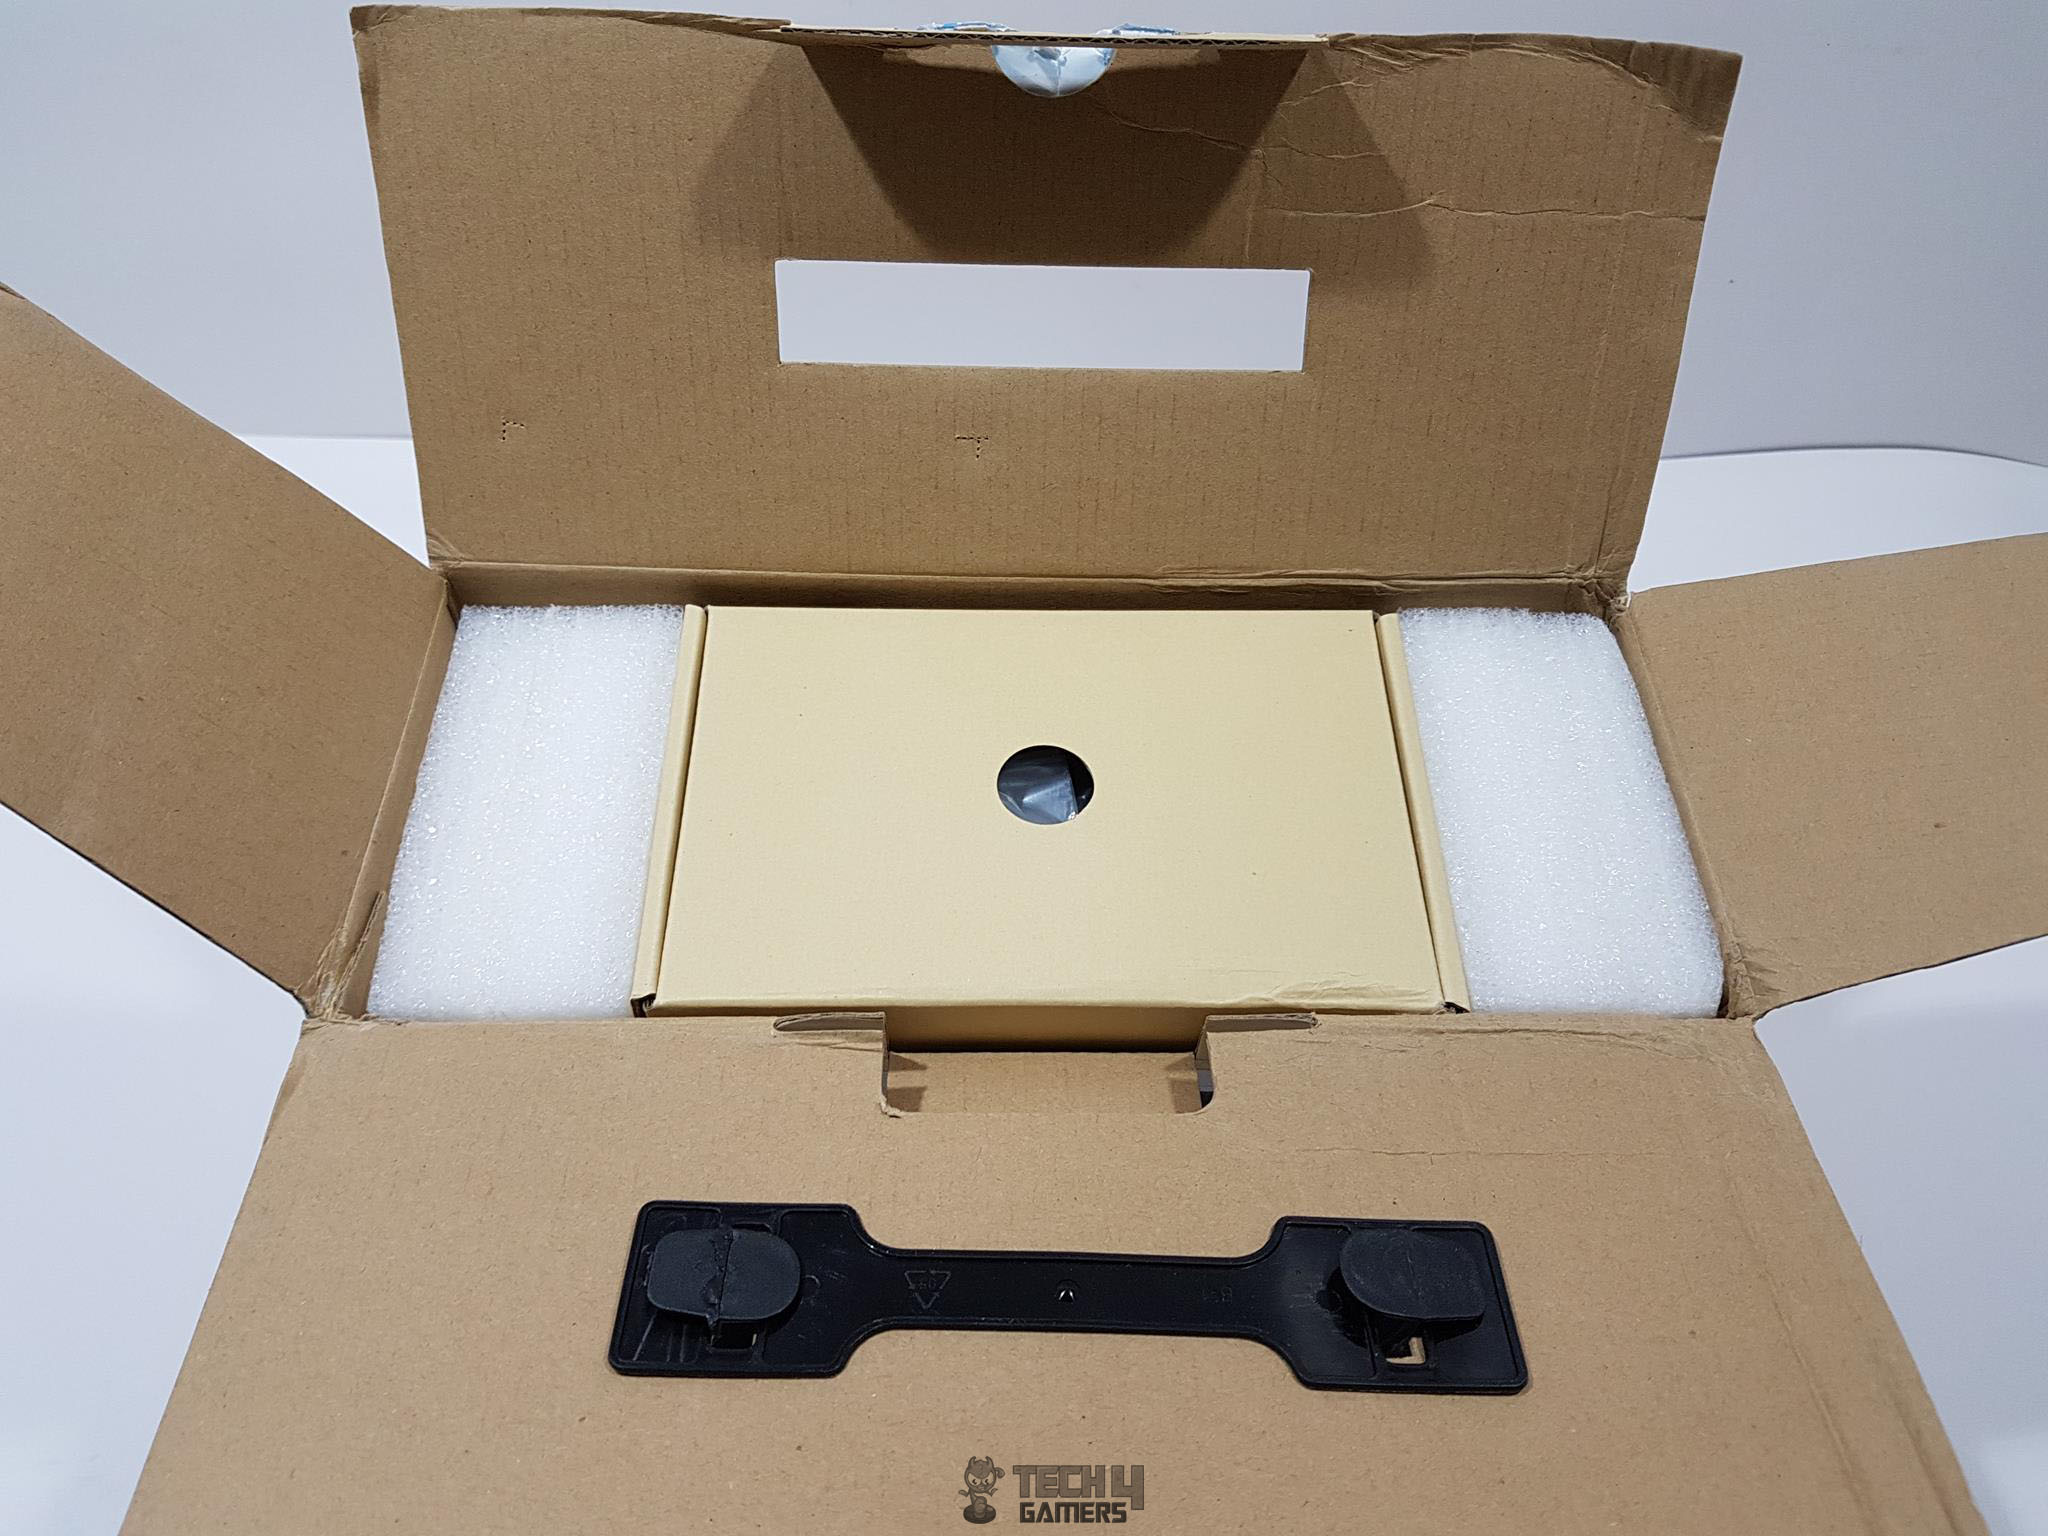
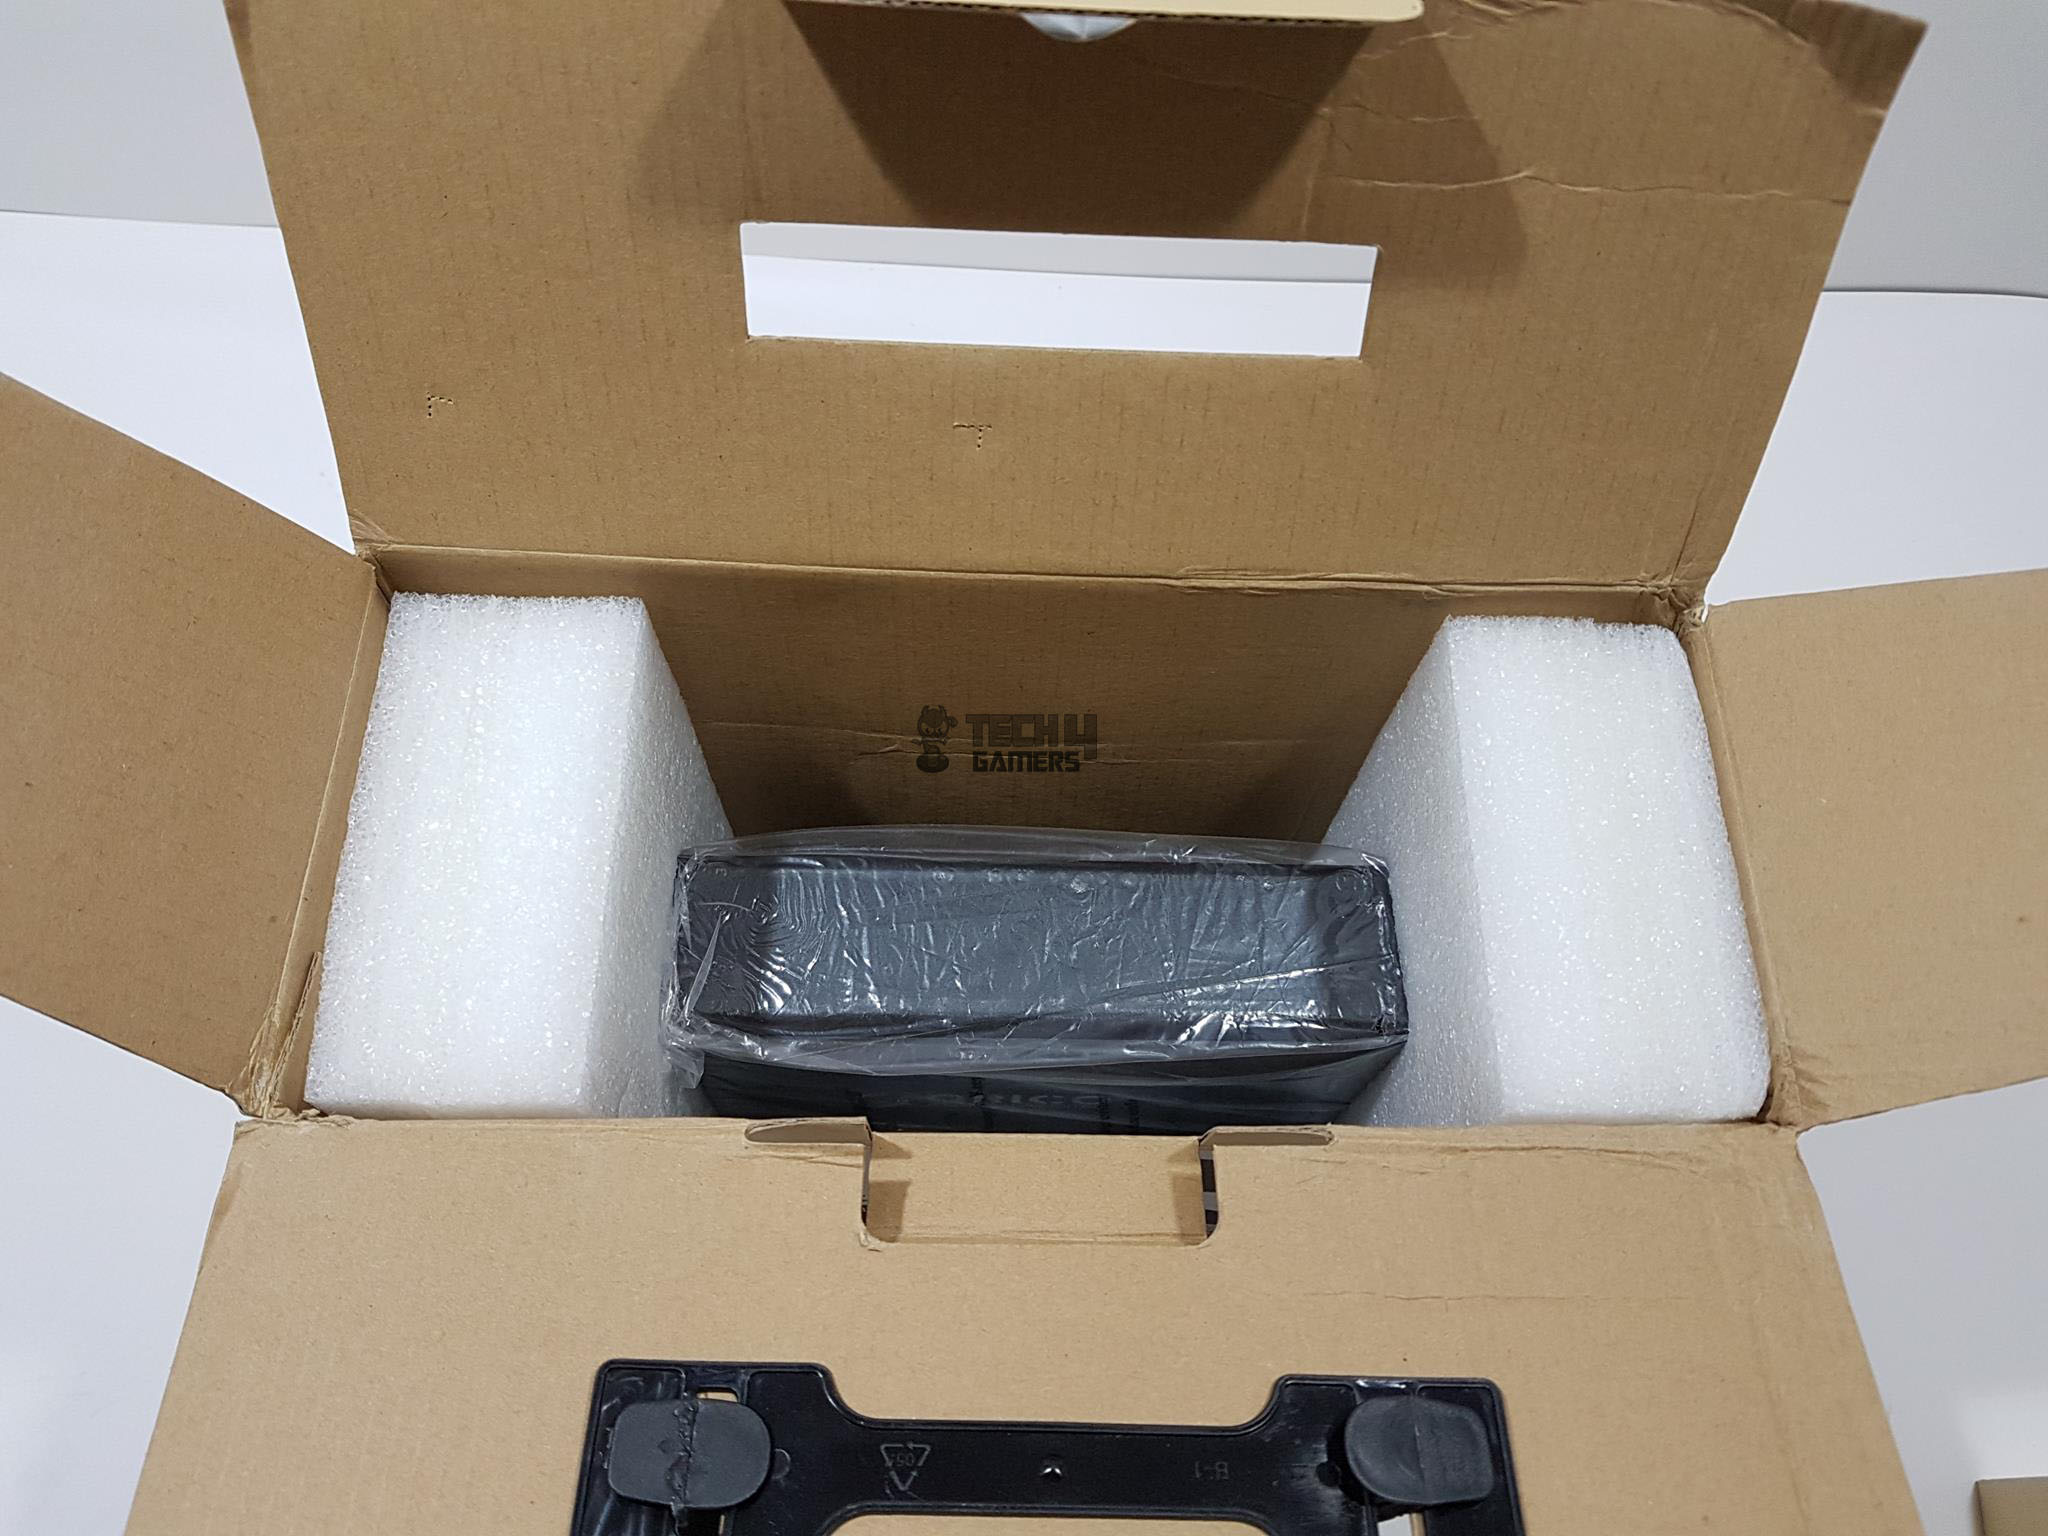
Opening the top cover would reveal the accessory box placed between two thick white color Styrofoam pads. Taking it off will show the main unit tucked between these foams.
ORICO Box Contents
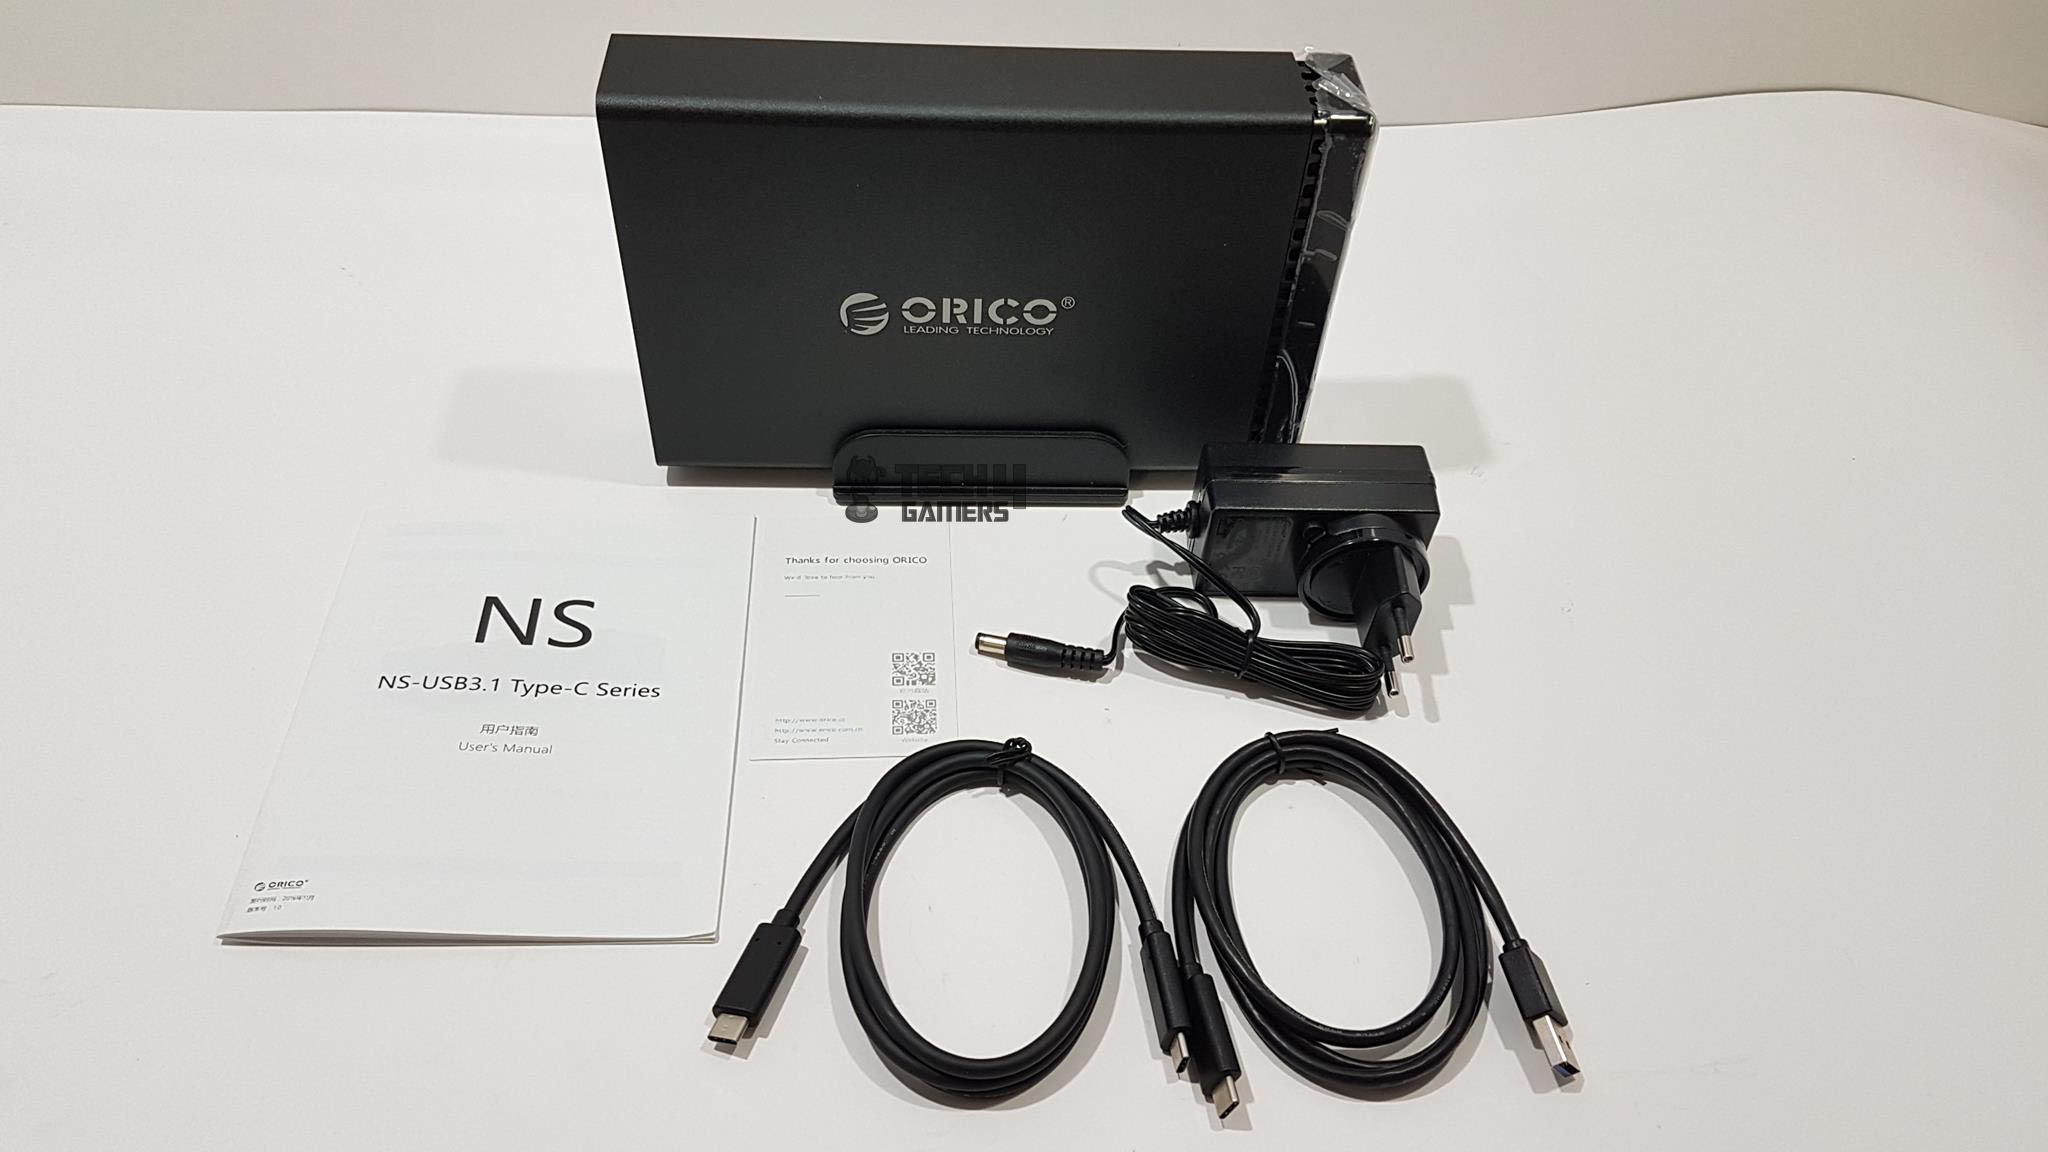
The ORICO has provided following items in the box:
- 1x External Enclosure
- 1x USB Type-C to USB 3.1 Adapter Cable
- 1x USB Type-C to Type-C Adapter Cable
- 1x User Guide
- 1x Power Adapter
- 1x Base
ORICO Closer Look
Finally, we get to test the serious hardware from the ORICO. This is the first in the series of upcoming ORICO contents on T4G. NS100C3 is Night Stalker series 3.5” hard drive external storage station using the USB 3.1 Type-C interface. Mind you it is Gen 1! These units are available in multiple bays configuration and the one we are reviewing is single bay design. Another variation is from the USB interface.
Their U3 series is using USB 3.0 interface whereas the C3 series is using the USB 3.1 Type-C interface so pay attention to the model no and the specifications before buying. The NS100C3 is made of 3mm thick Aluminum alloy material which speaks for itself. While it is solid build much thanks to Aluminum frame, there is another special touch on the front panel. It is using what ORICO calls Four-Chip Magnetic type unique panel. Without further ado let’s dive in.
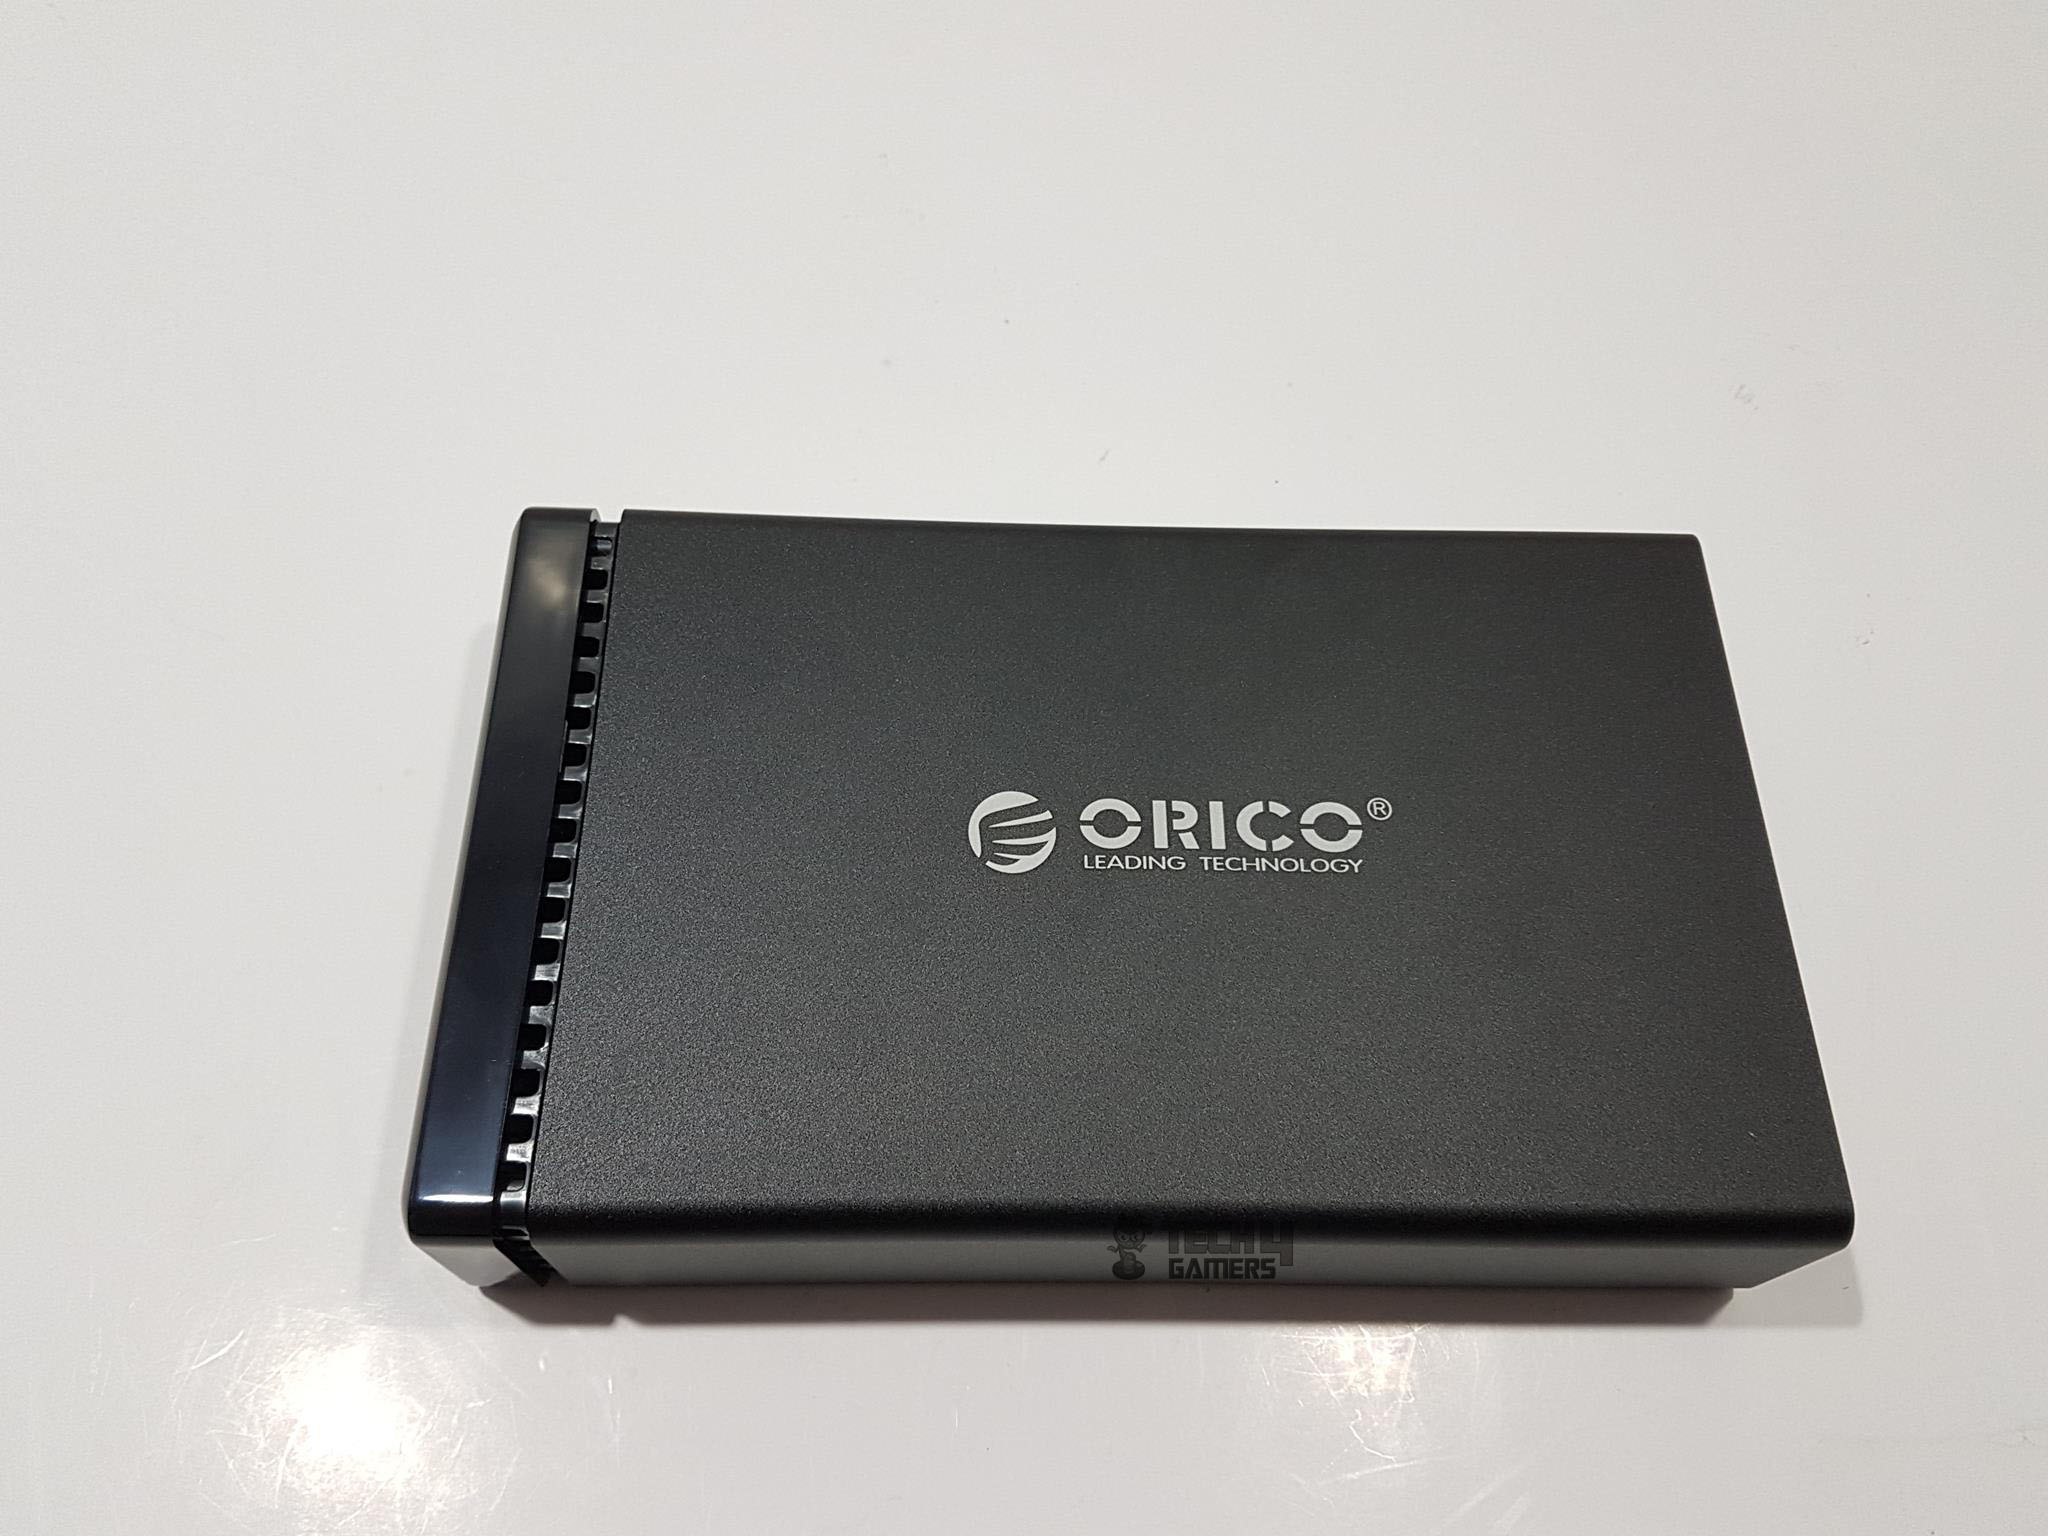
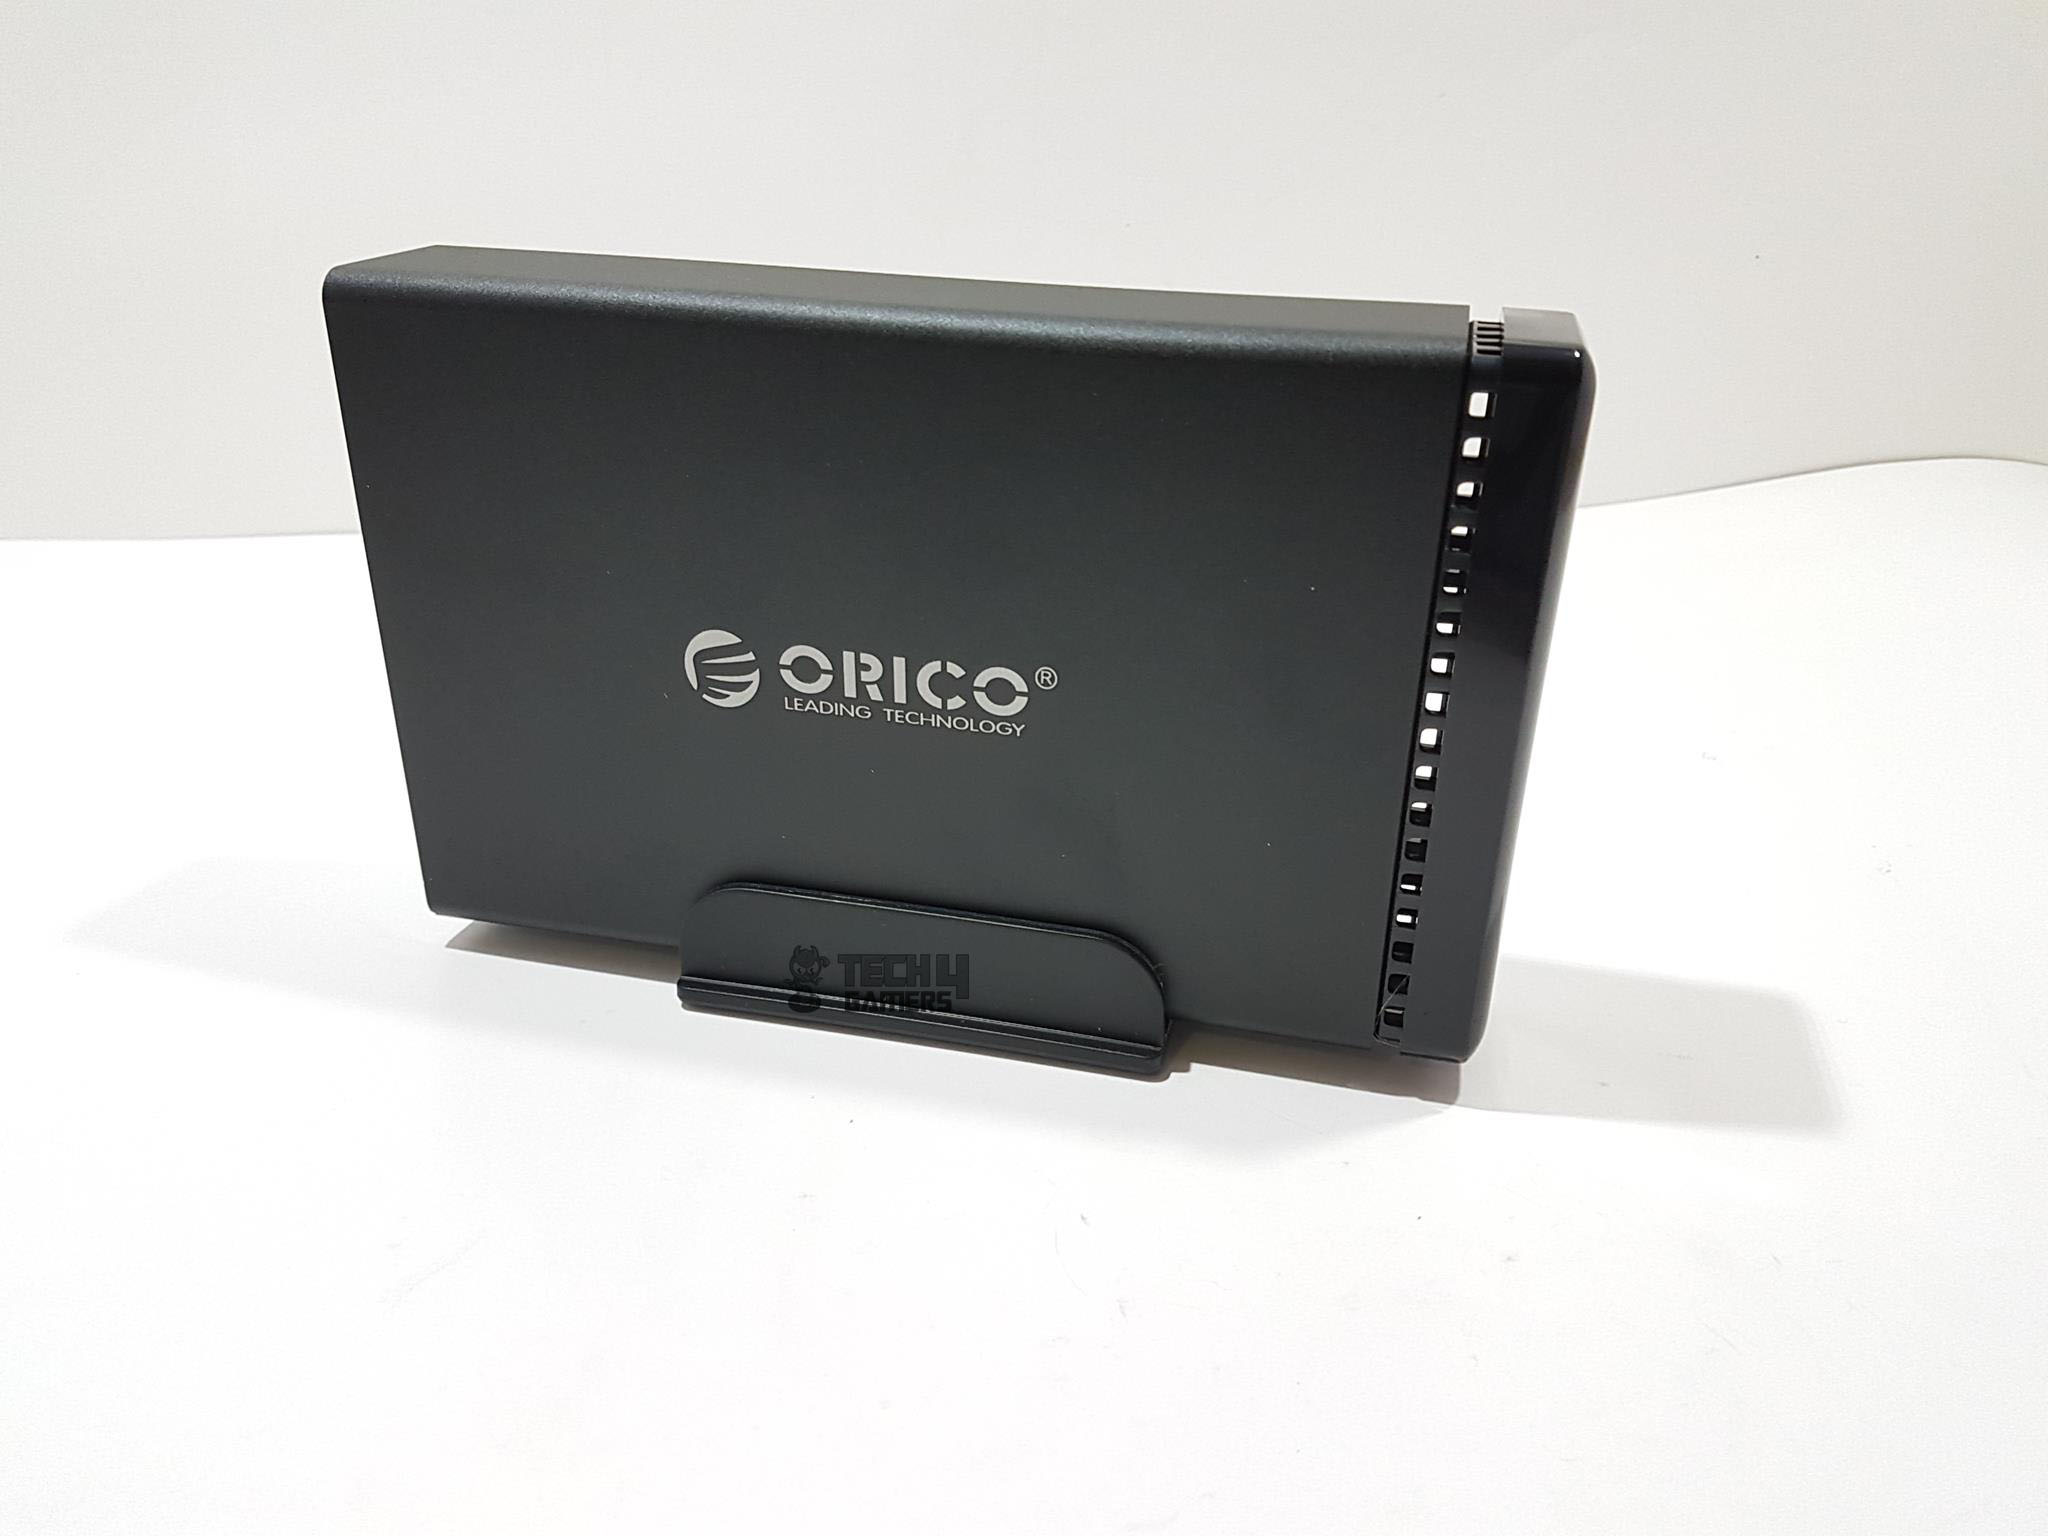
The dimension of the unit is 134x216x58mm where 58mm is the overall width of the unit and 134mm is the height. The left and right sides of the unit are identical. The complete frame is made of a single aluminum alloy material of 3mm thickness and finished in matte black. It is heavy! There are ORICO brand logo and name in the middle on each side printed in the white color. The frame is somewhat fingerprint magnet. So, keep that in mind while handling it.
The top and the bottom sides are plain black without any branding. This is understandable given the overall layout of the unit. The edges are not straightened but are curvy and quite smooth. The overall layout of the frame is coherent and fits in with perfection.
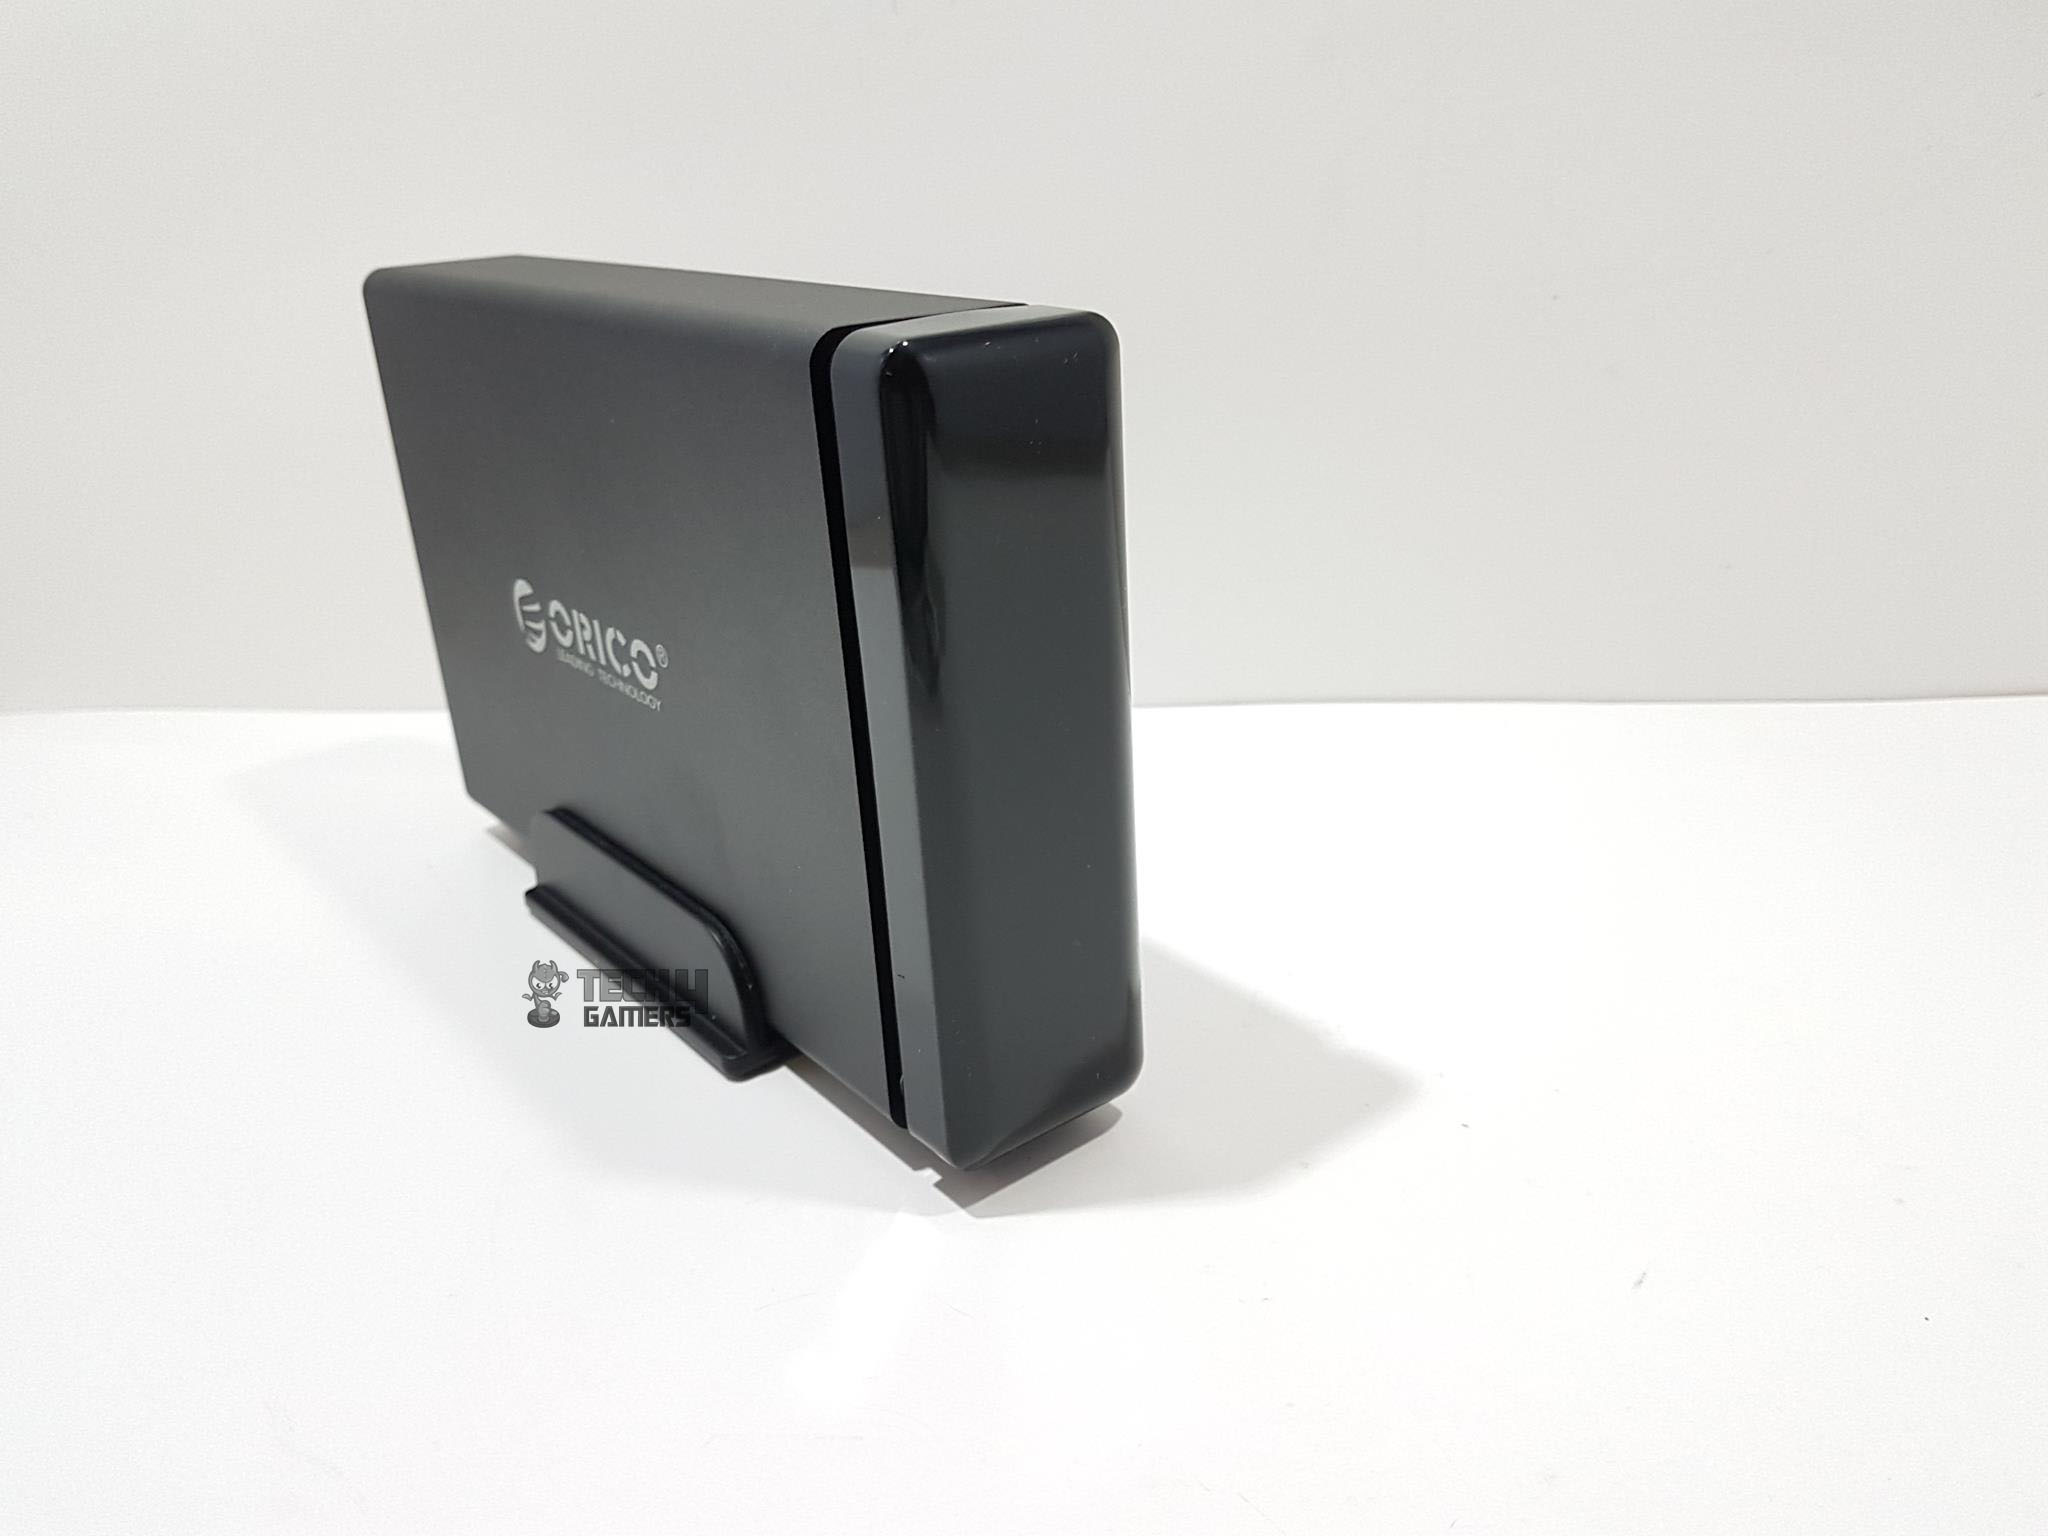
The front side of the unit is where ORICO has used four-chip magnetic type panel which is their patented design. The front panel is made of plastic with the outer shell finished in glossy black. It is highly reflective and equally fingerprint magnet.
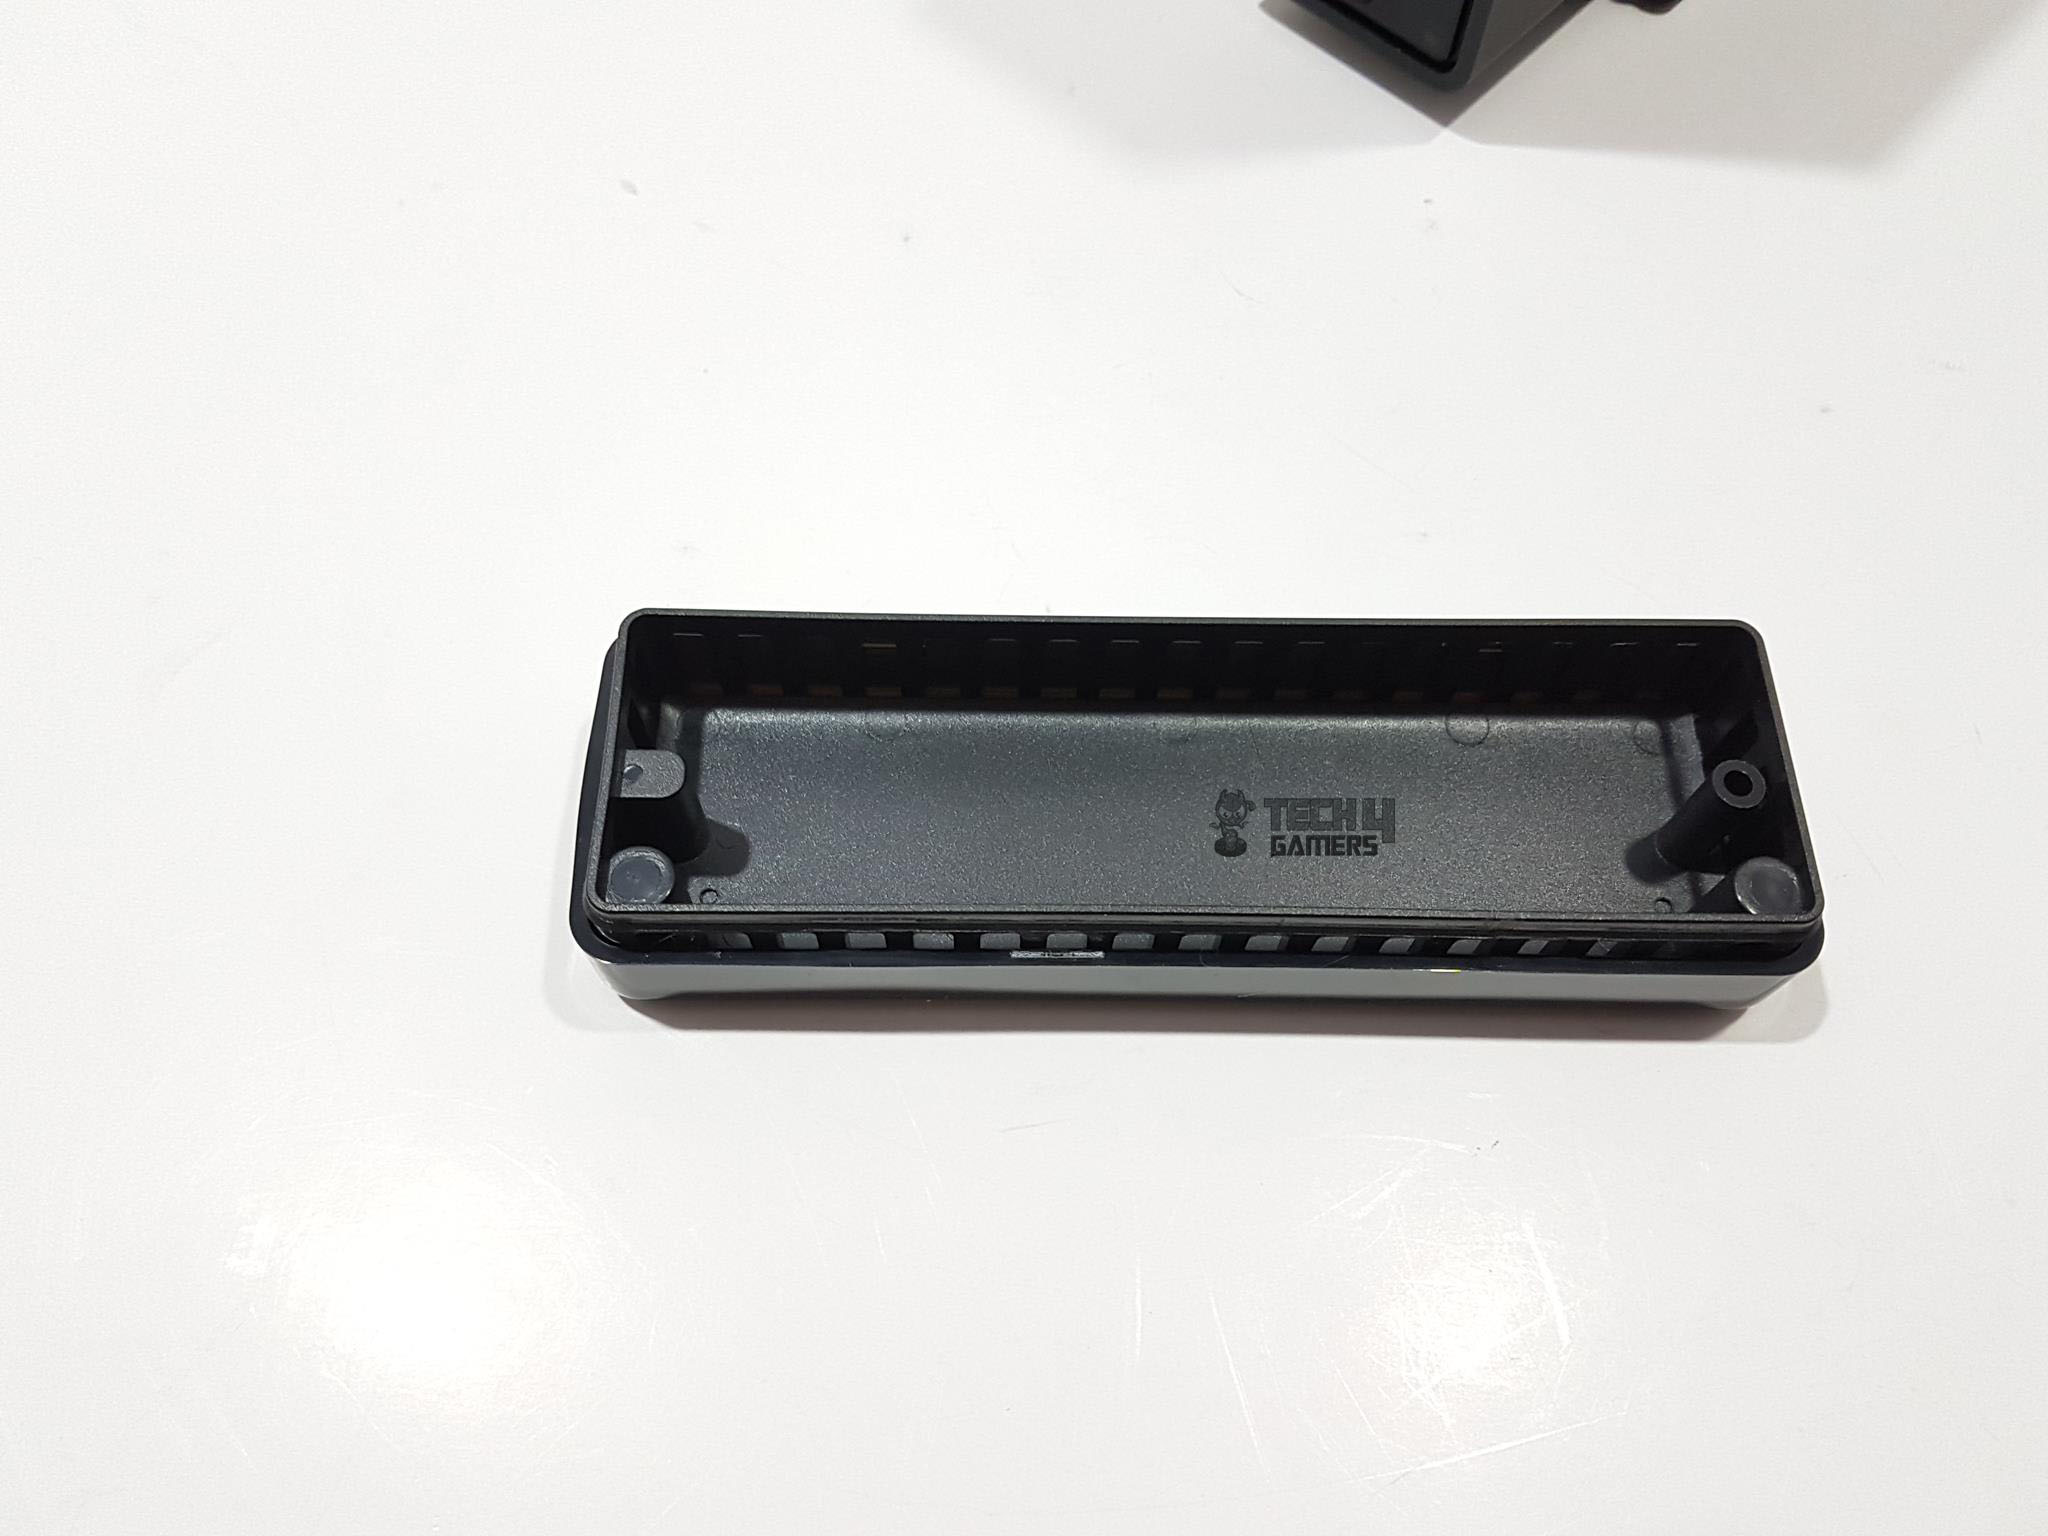
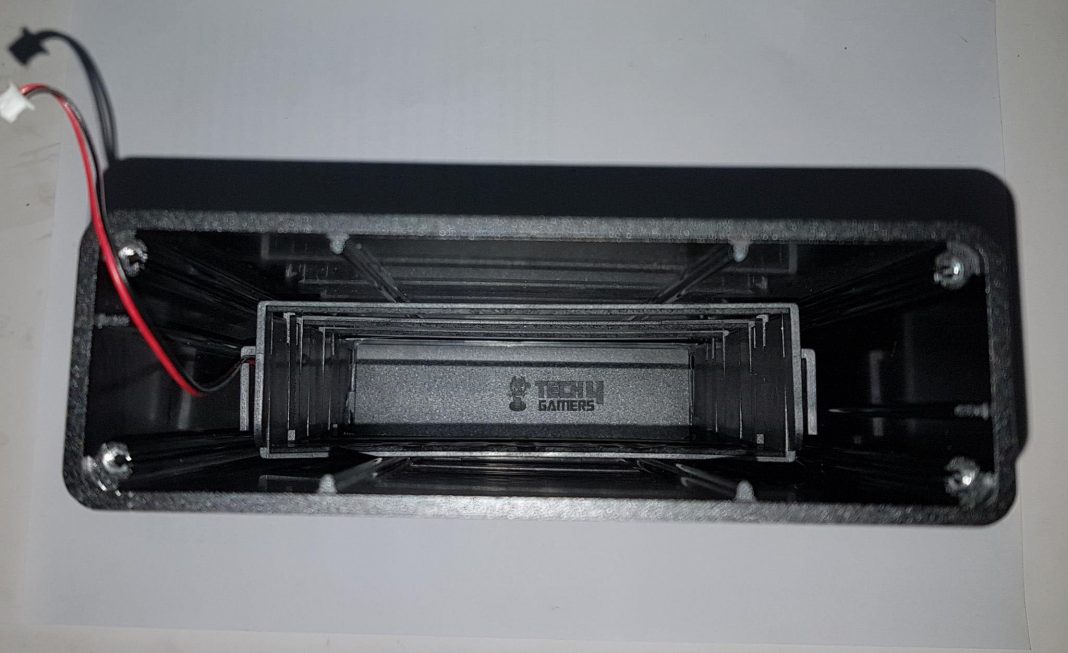
Looking at the inner side of the front panel, we could see two circular tabs on the top and at the bottom of the rightmost side. These have magnets in them which make contact with the other magnets located inside the inner frame of the main unit. The magnetic bond is quite strong but only on one side where the magnets are located.
The other side has a loose bond and it could be felt in person. Nevertheless, it is an impressive outlook and feature. The outer most portion of the front panel has vents which serve the ventilation purpose.
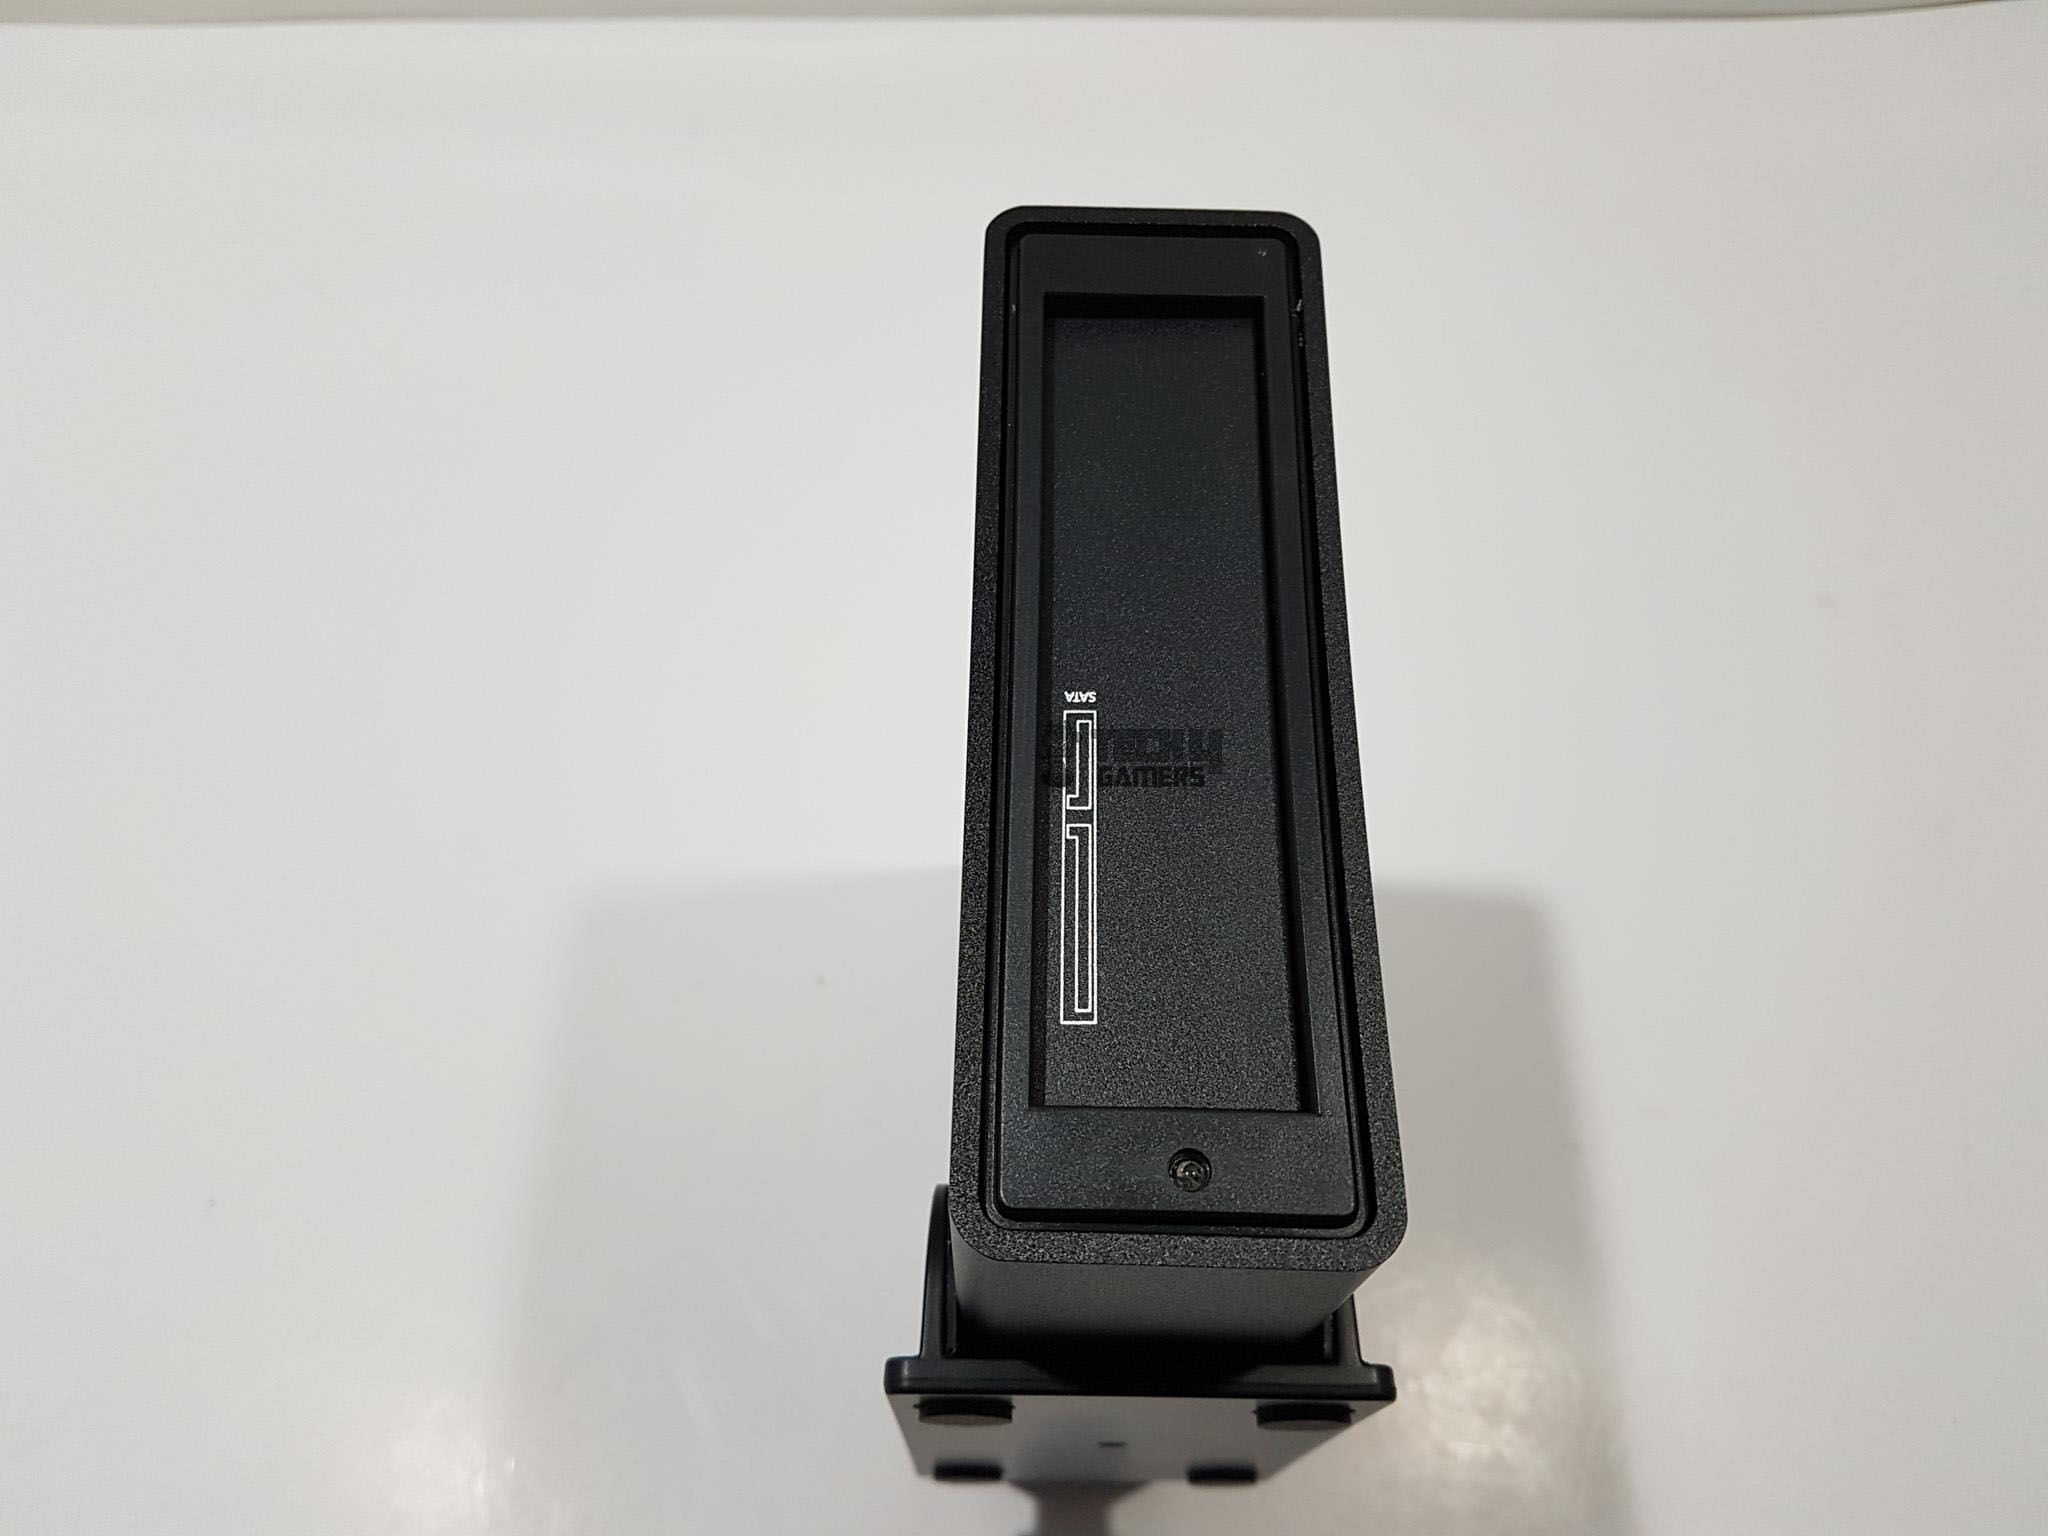
Now, let’s take a look at the front side of the main unit with the panel removed. There is a black color cover which is hinged to the one side and slides inside making room for the drive. There is a diagram of the SATA connectors at the bottom left portion drawn in the white color. This is for a visual aid to help the user with the direction of drive placement before sliding it inside the station. Again kudos to the ORICO orico 3.5 hard drive enclosure review design team for paying attention to the details.
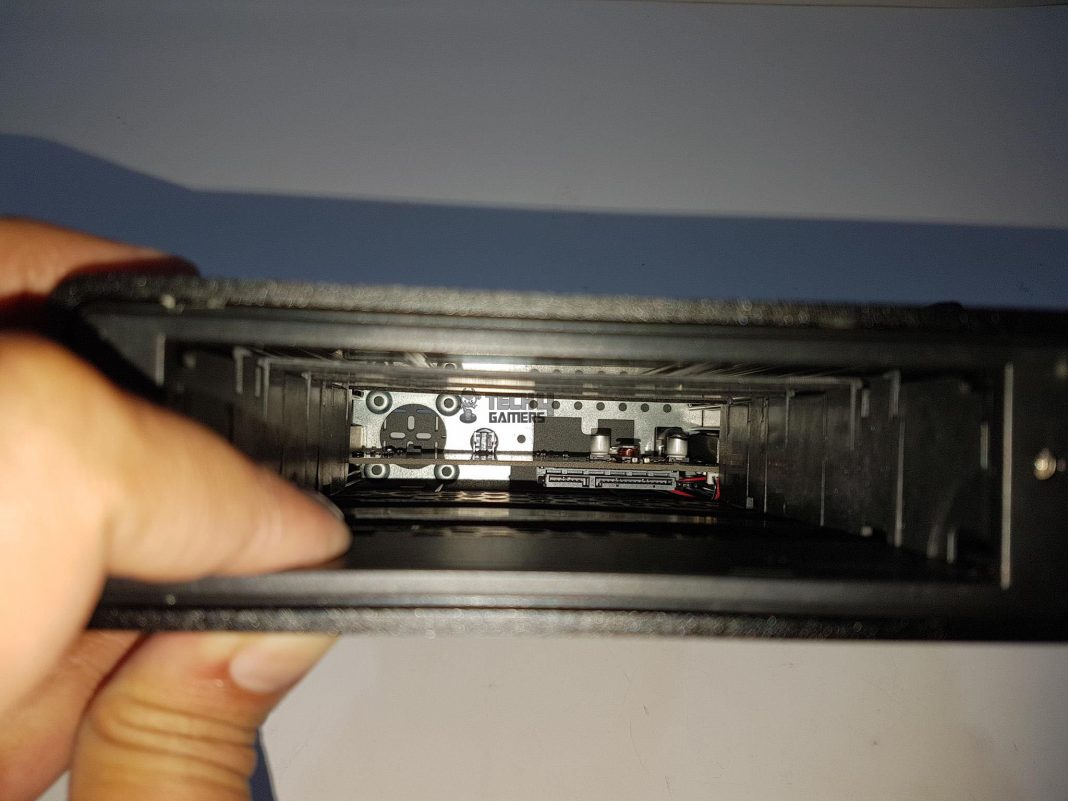
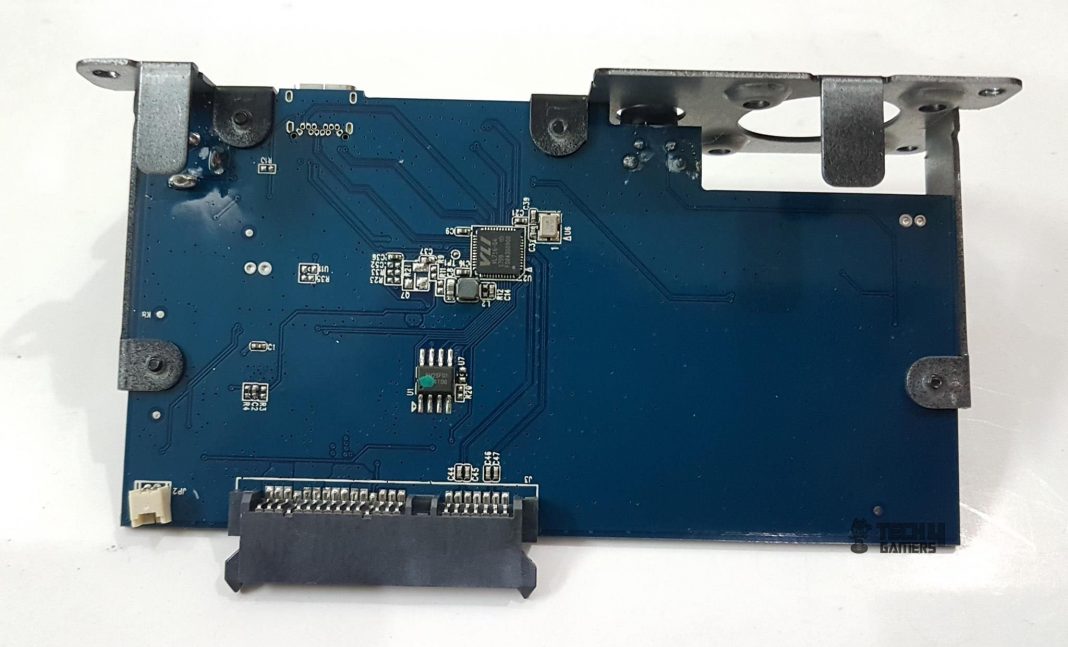
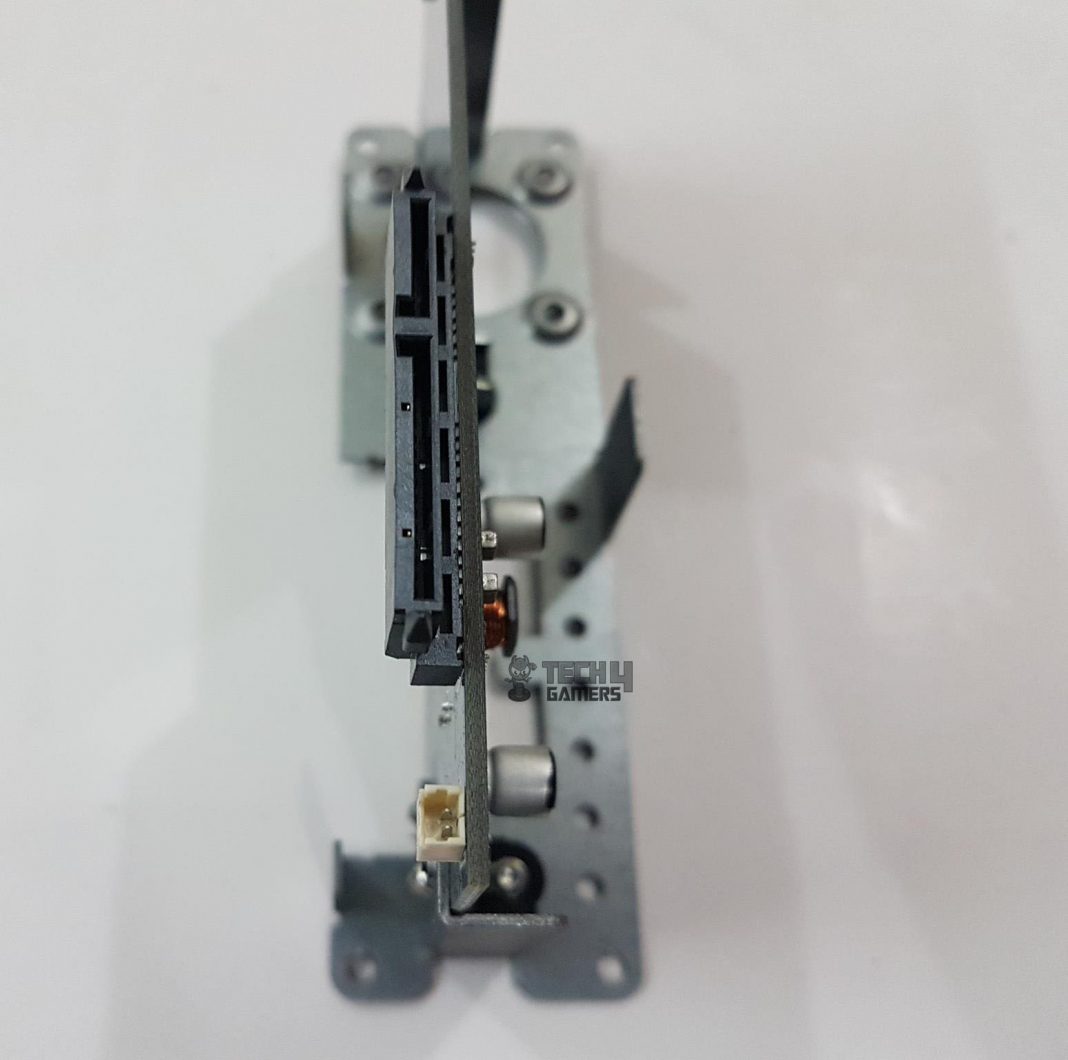
Sliding the cover inside, we can see the inner side of the station. The PCB seems to be having a much large size and the SATA connectors are clearly visible. There is a reason for such PCB as this storage station does not rely on the USB power but uses dedicated power which is rated at 100V to 230V and consuming 24W. This has allowed the ORICO to increase the supported capacity of the drive which is up to whopping 10TB.
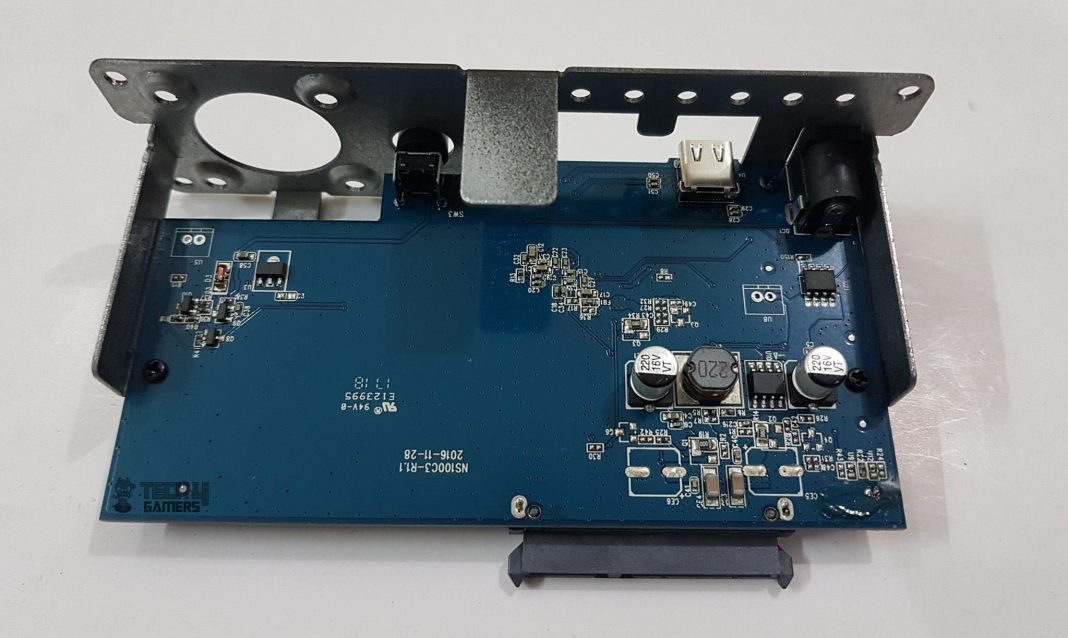
Looking closely inside the station, there is a supporting bracket that is designed to support the 3.5” drives only and it is there to help the users placing the drive correctly. You simply can’t go wrong with this design. The PCB itself is in blue color. The two pin connector is for the blue LED located on the front side of the frame. The wires are running all the way to the front for this LED.
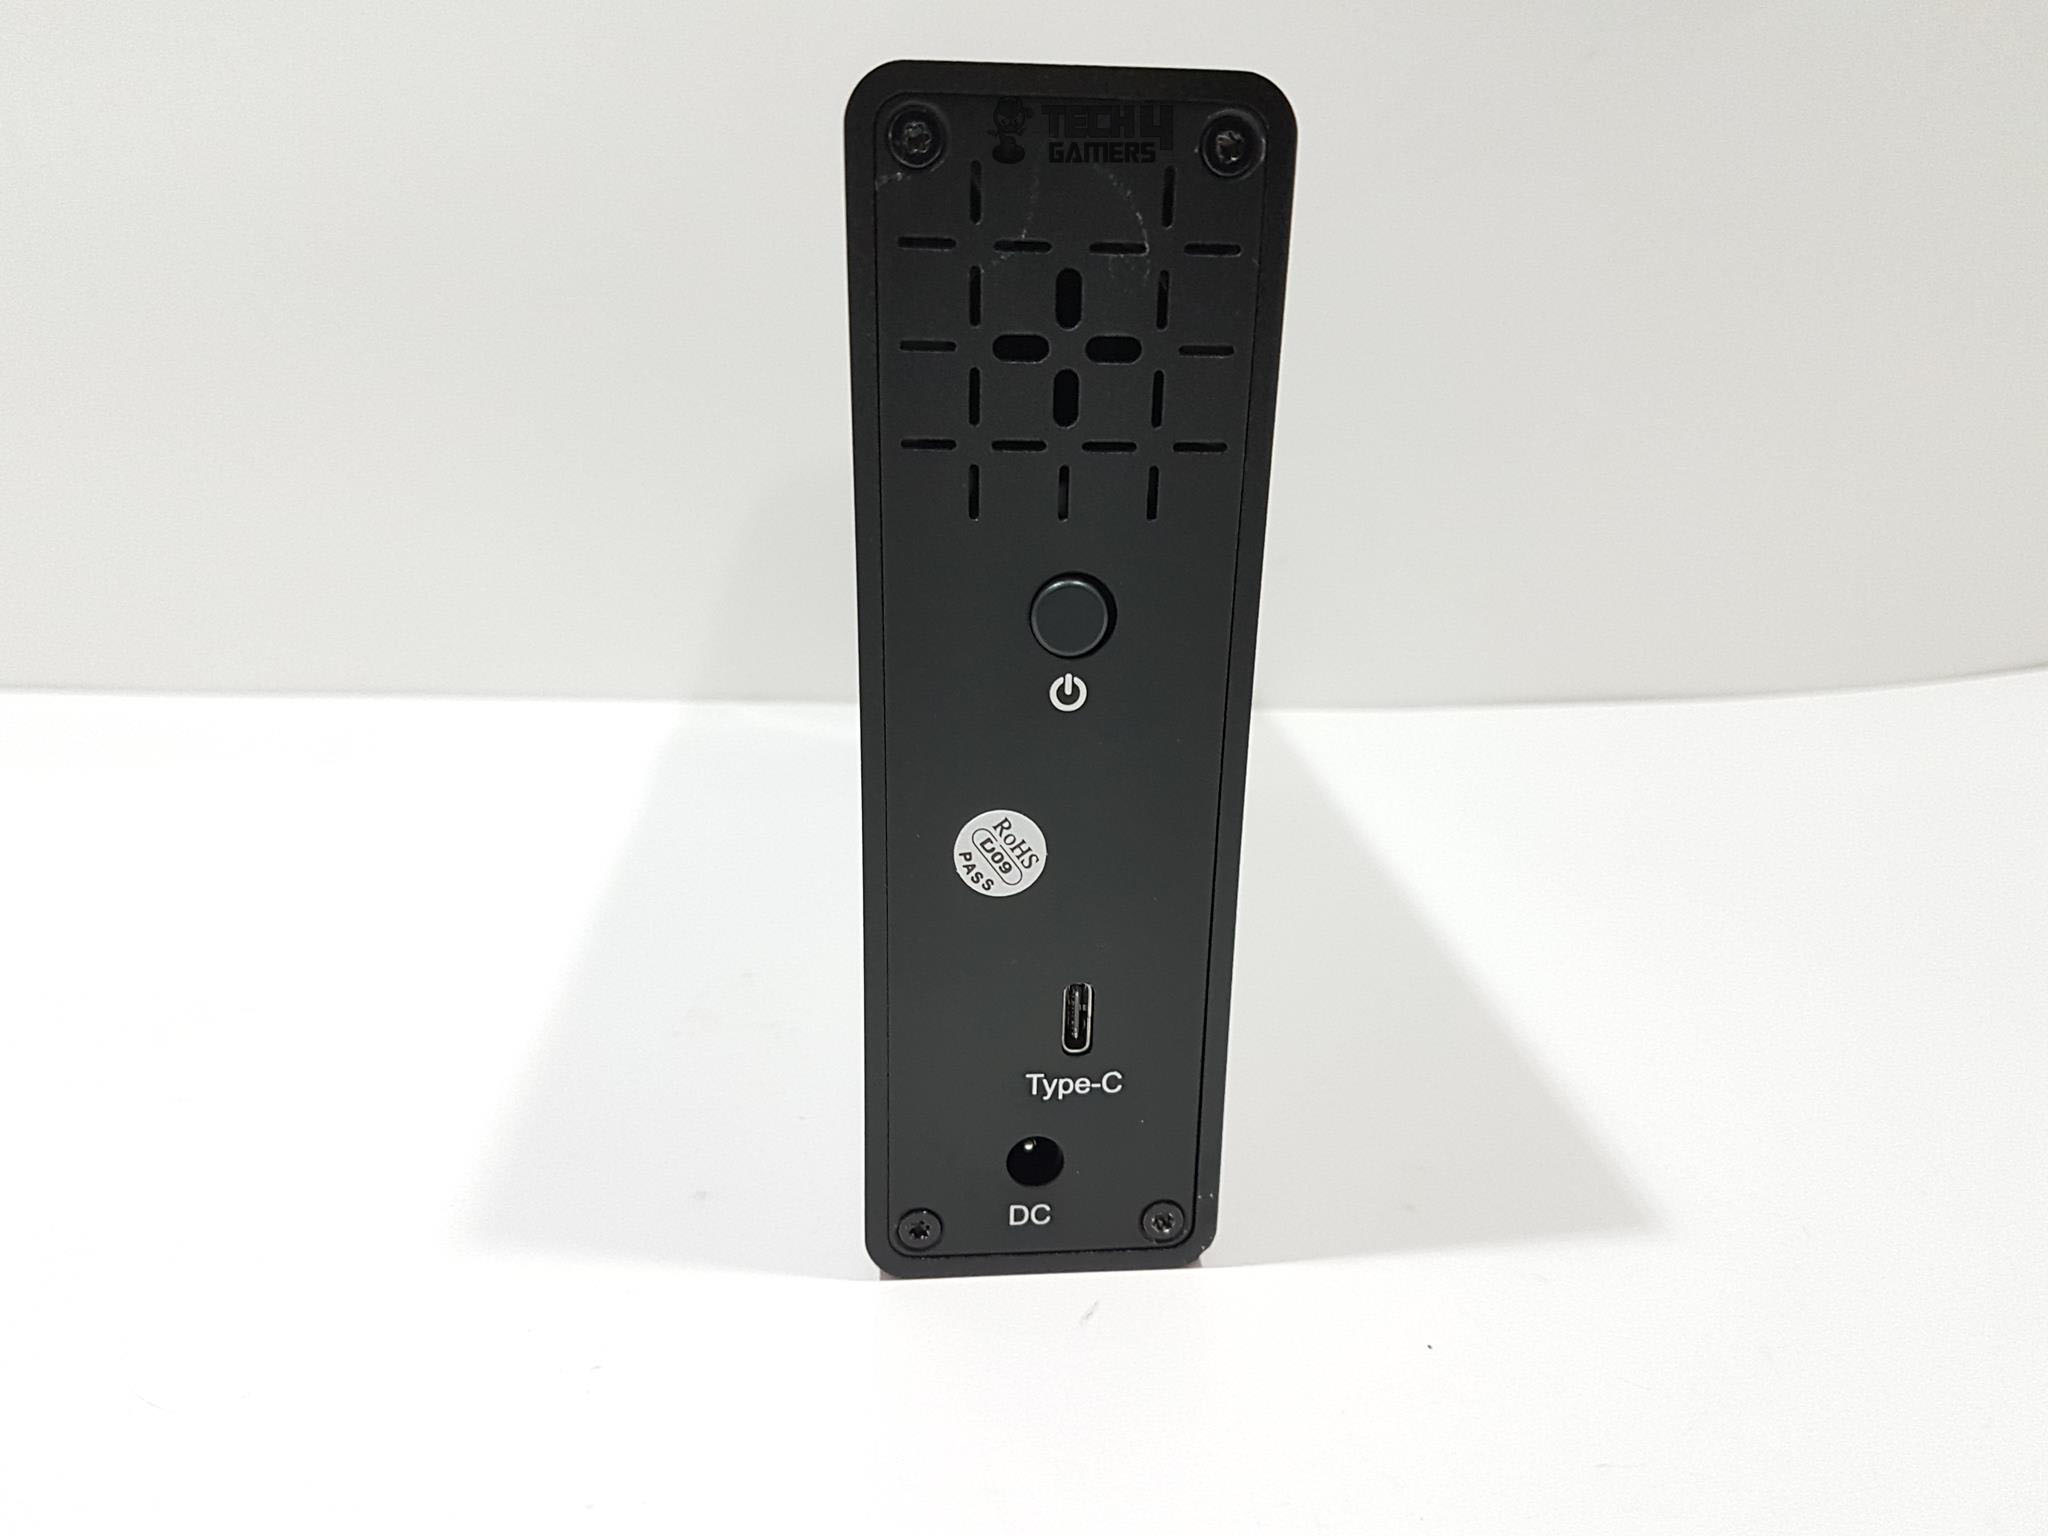
Looking at the unit from the rear side, we can see the vented portion up on the top for better ventilation to cool the drive while in operation. We will be testing the thermals of the test drive in the testing section. This portion is in particular layout design of + symbols. Below this patterned vented portion, we have a power off/on button which sounds hollow clicky on pressing.
The Type-C port is near the bottom. DC power port is at the bottom. There are four screws that can be taken out to open the station and take out the PCB. Our unit has coerced screws!
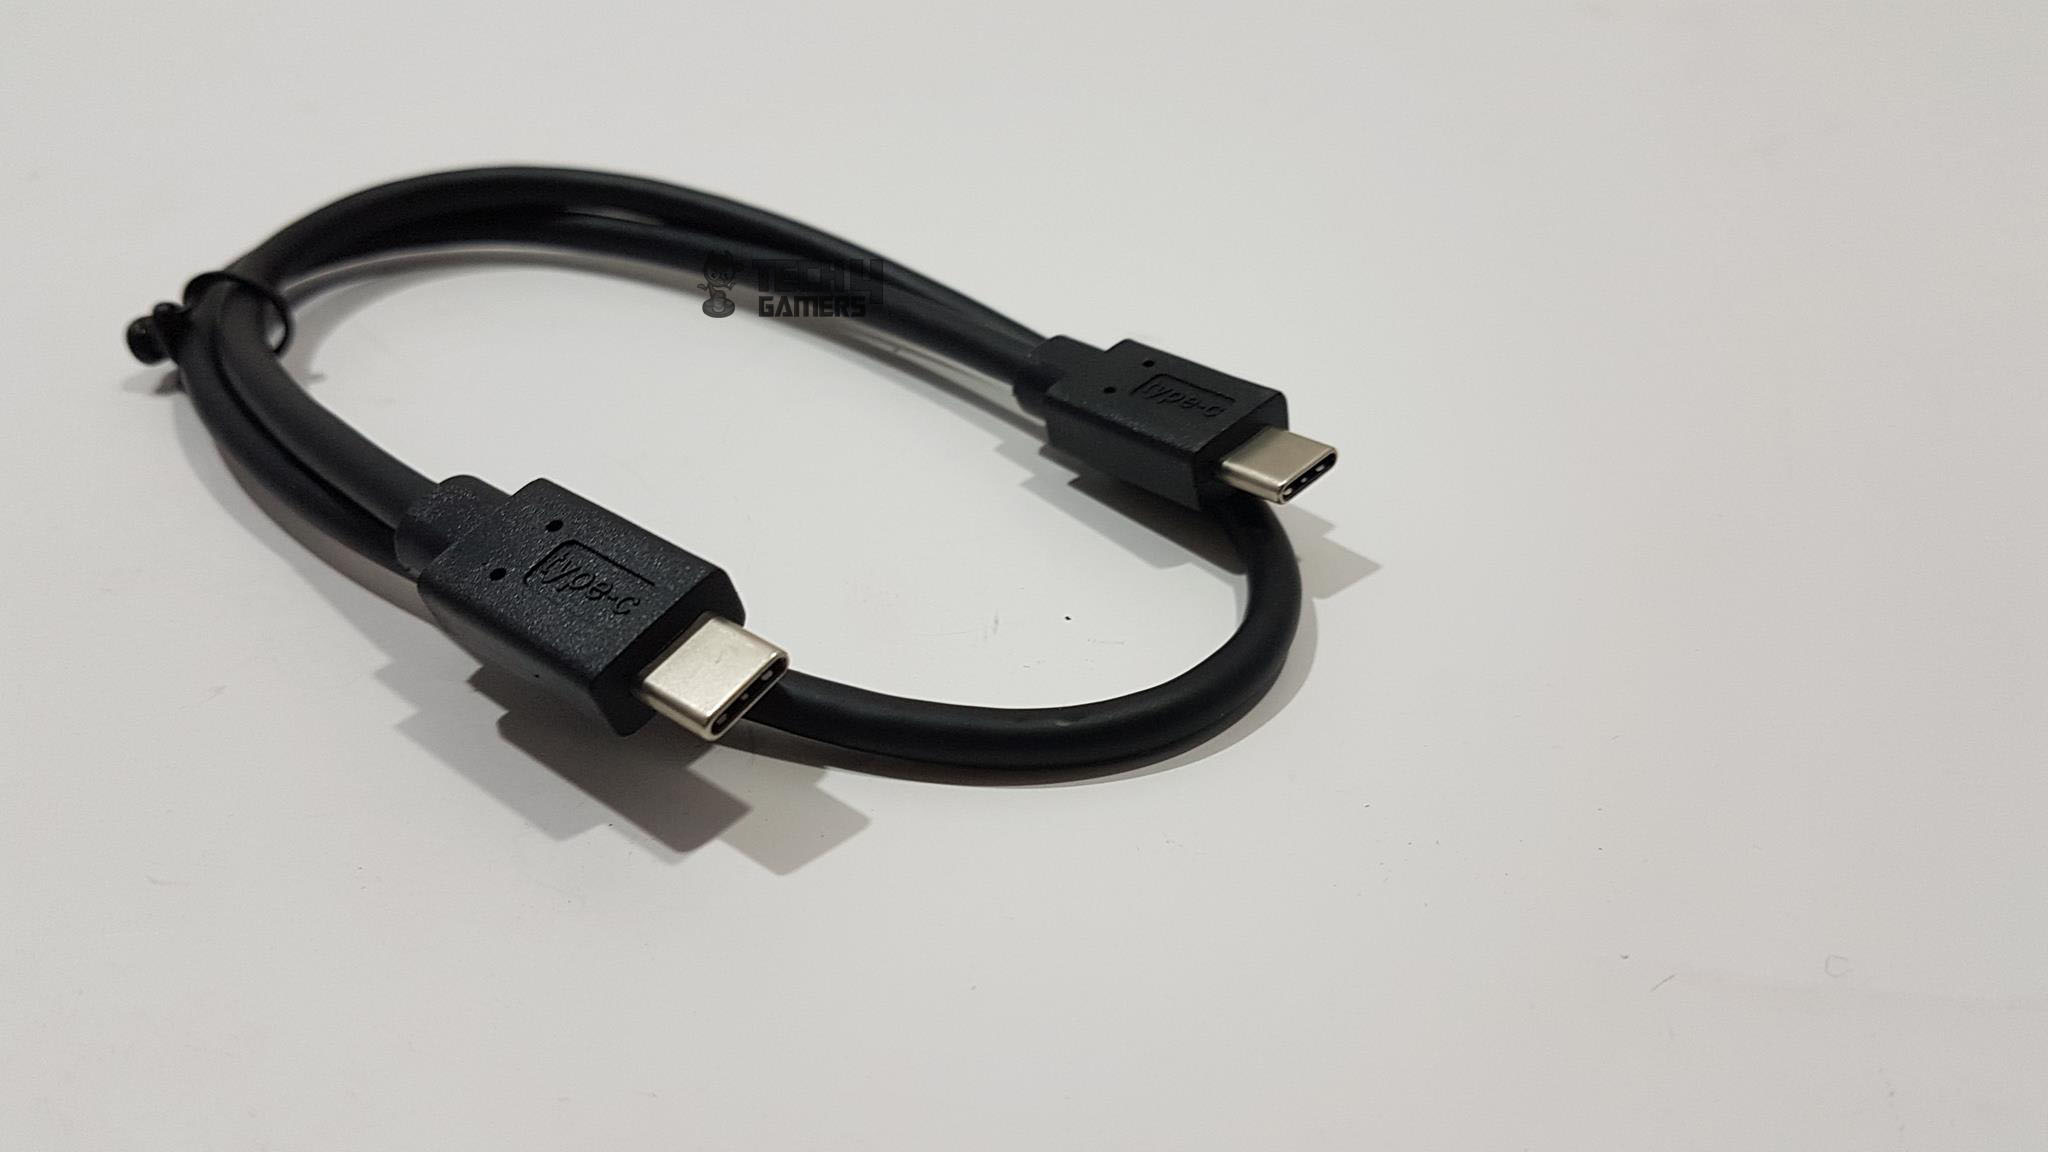
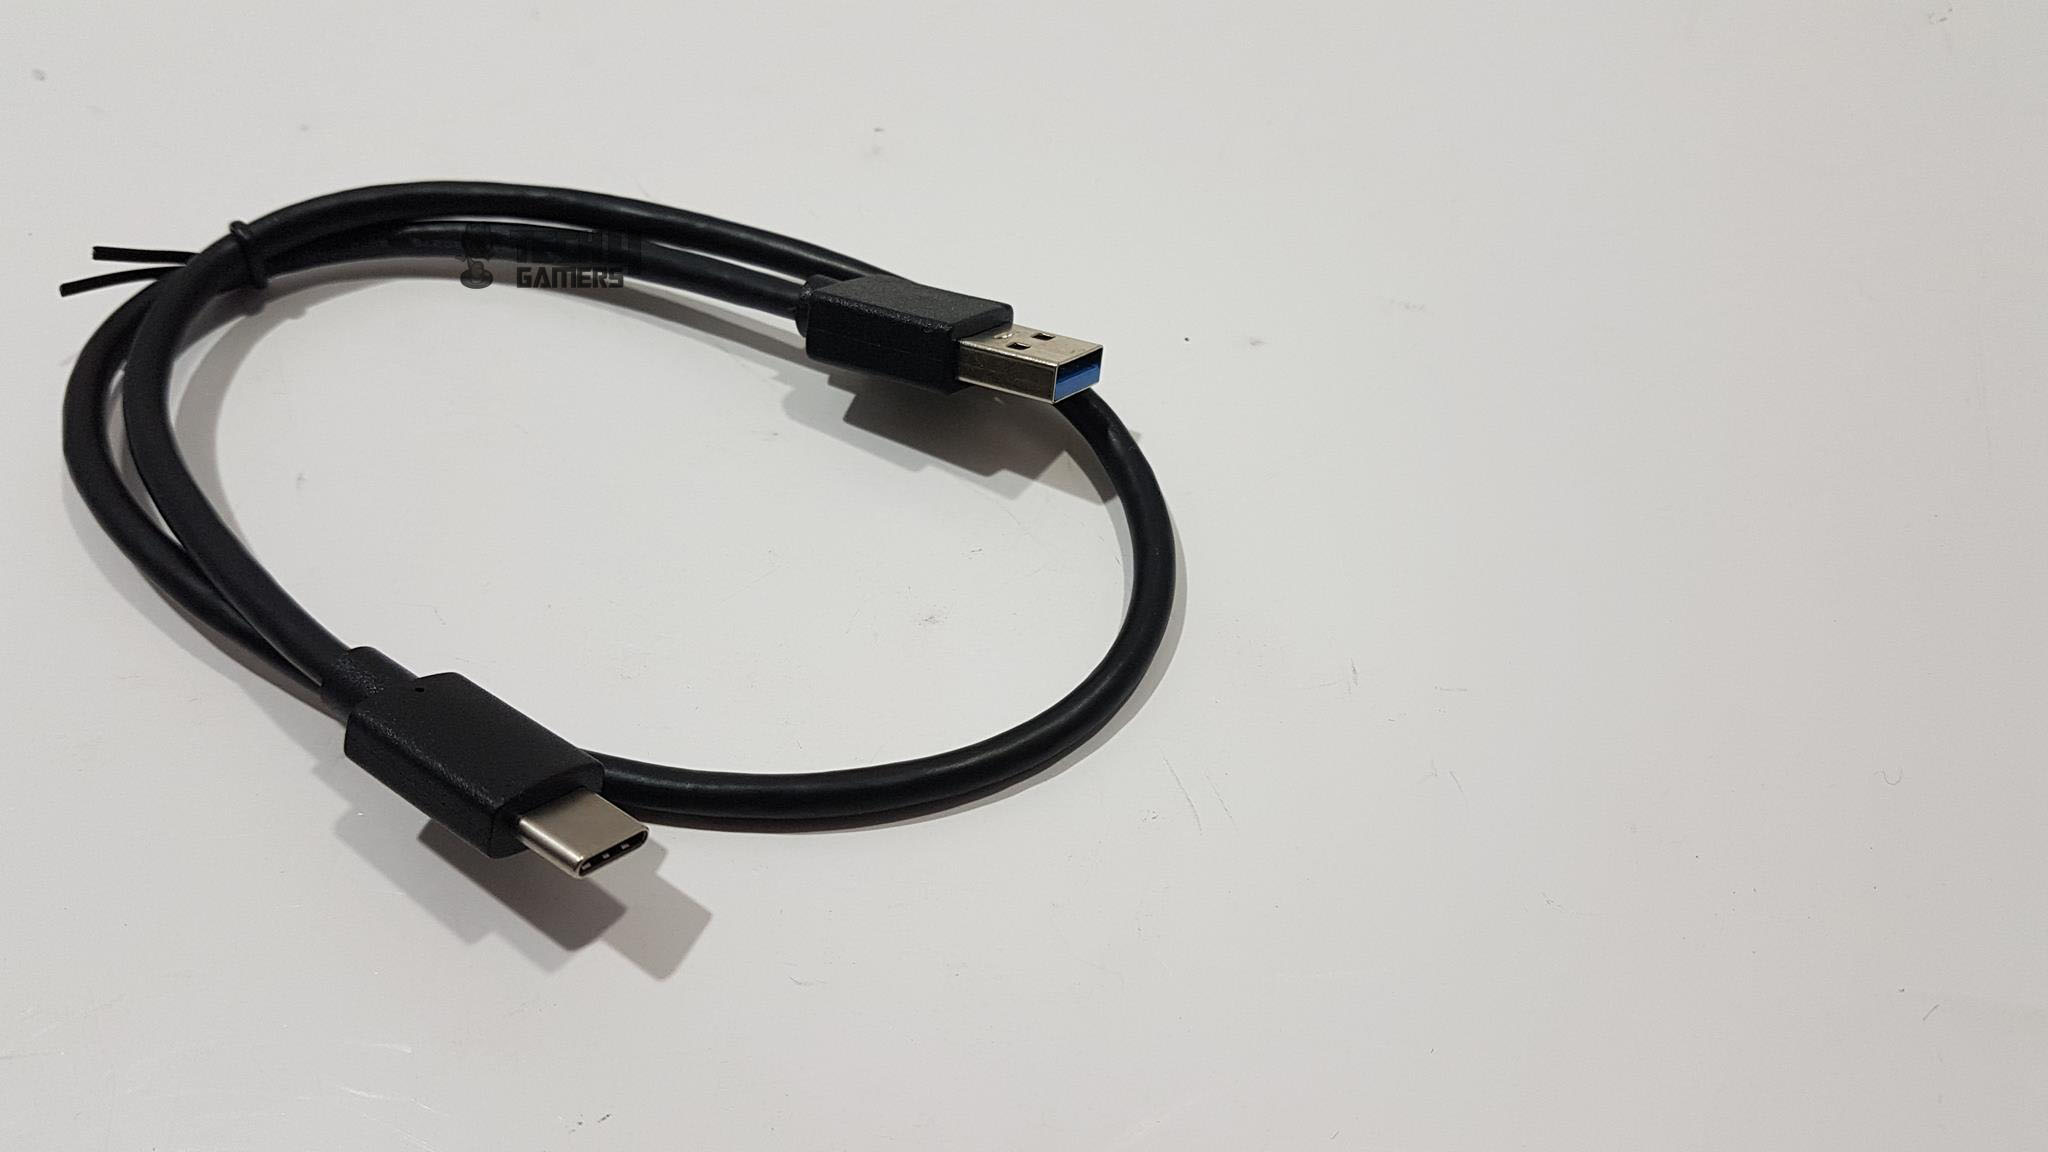
ORICO has bundled two USB cables. One is Type-C to Type-C cable having a length of approximately 937mm. the second cable is Type-C to USB 3.1 cable having the same length. This is an adequate length for these cables and I would like to see this much length on the cables that are provided with the ORICO 2139C3.
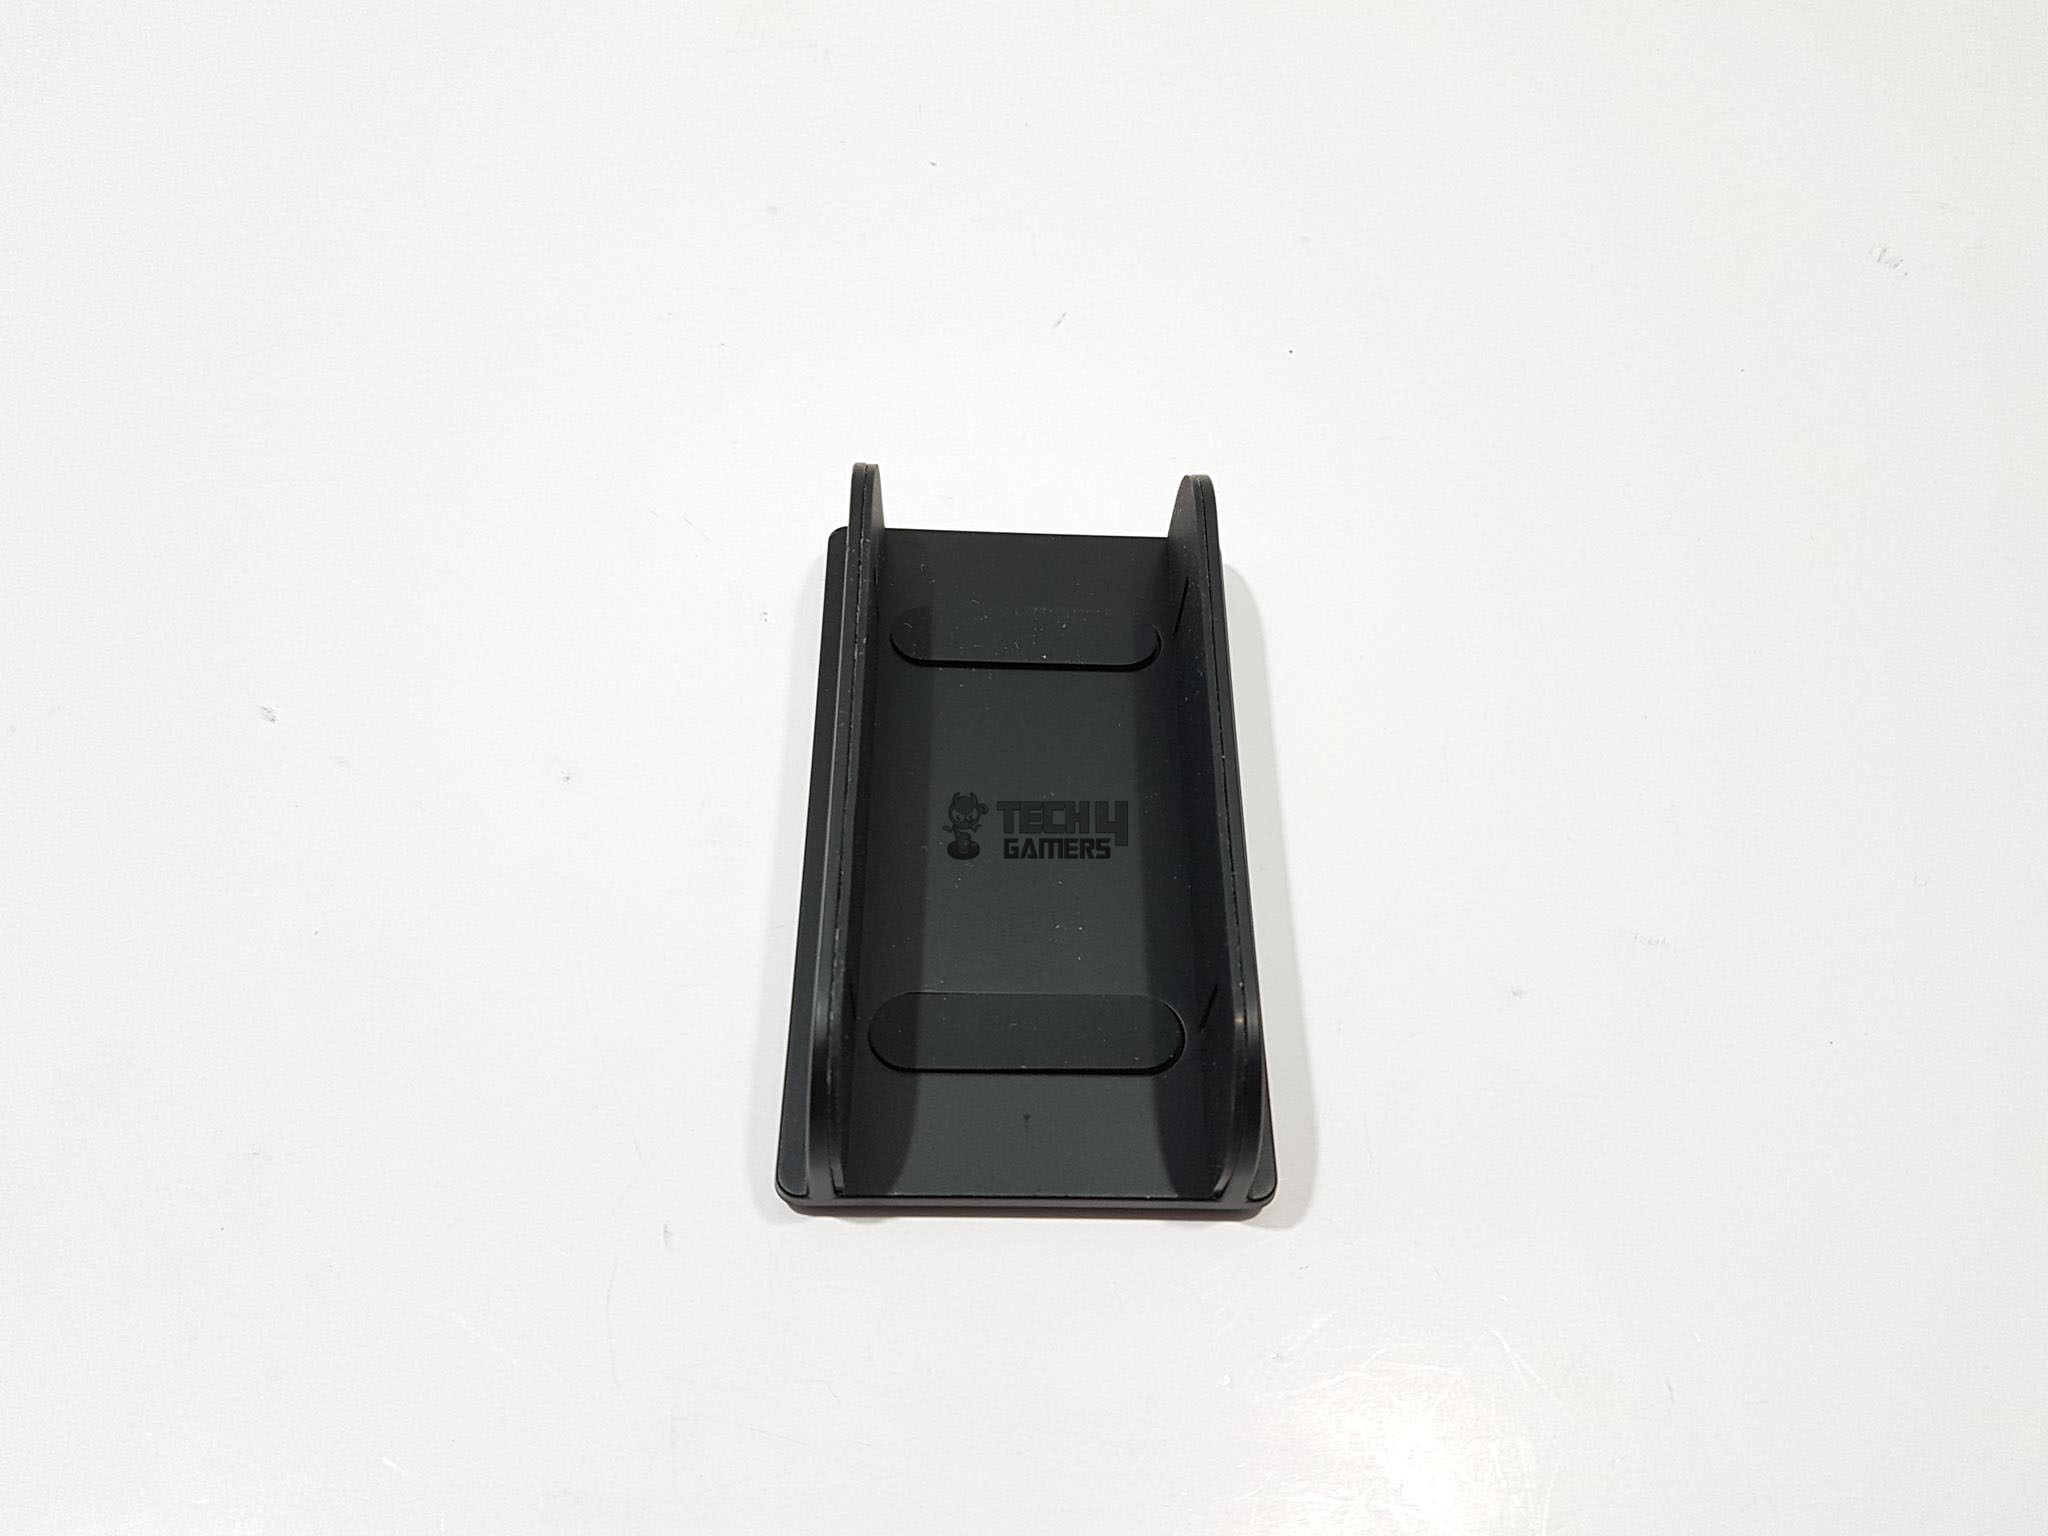
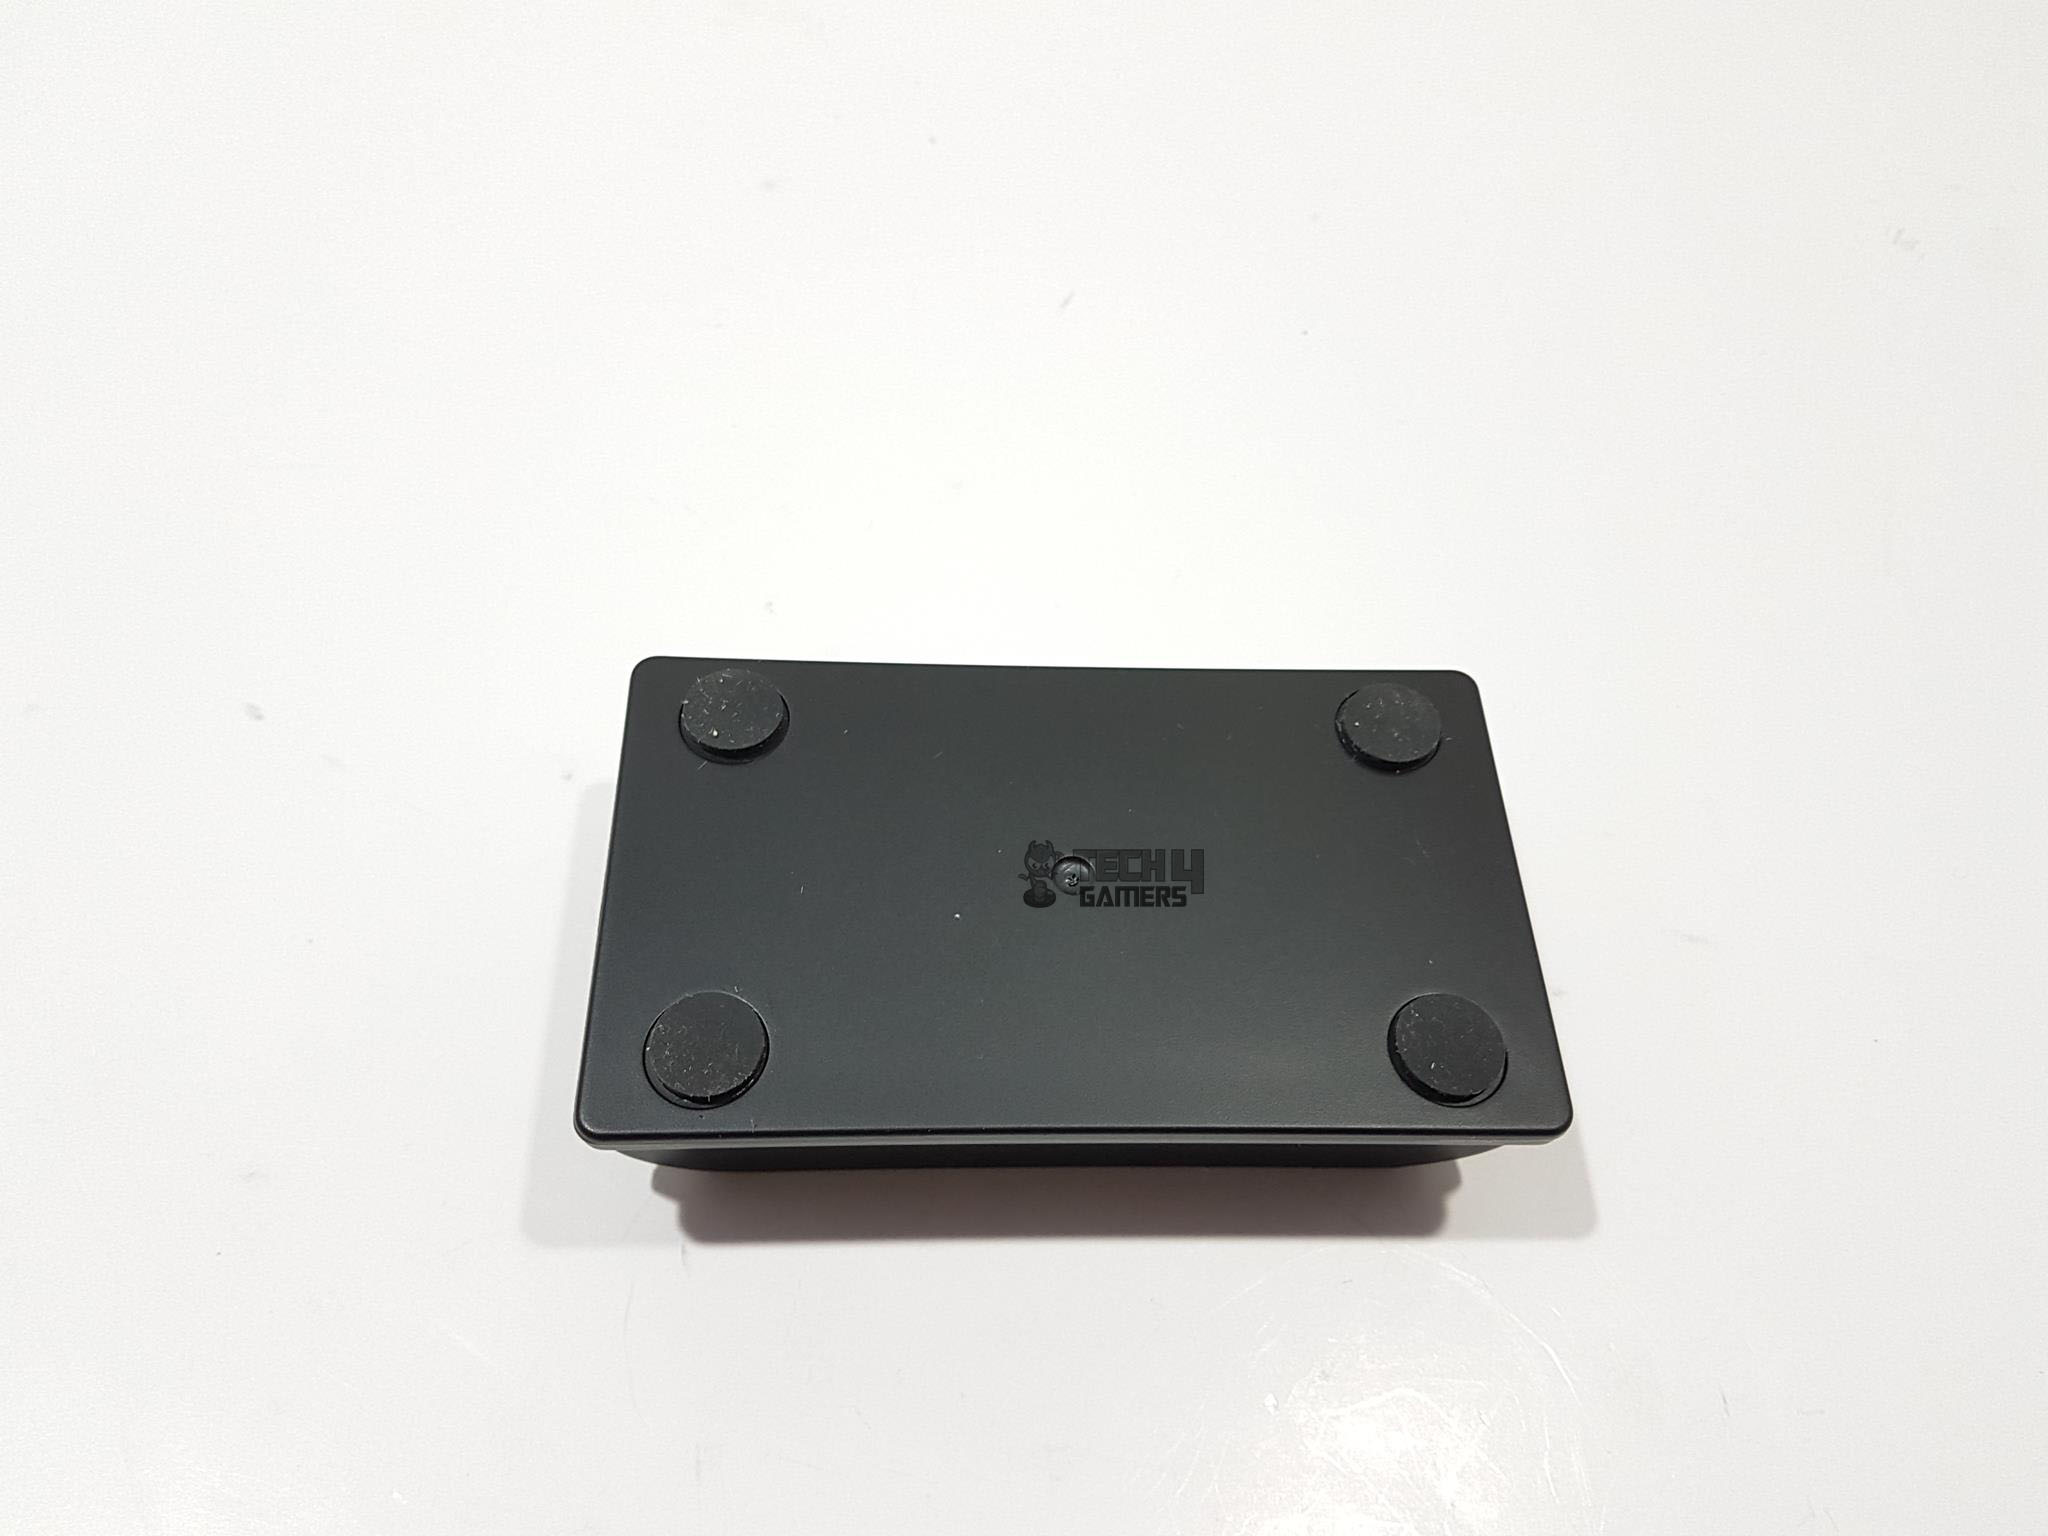
If you are wondering how to make this unit stand on the table safely and sound then worry not as ORICO has provided a dedicated stand which is removable and can be found in the accessories box. The bottom of this stand measures 99x57mm. It has four rounded rubber mounts on the exterior which serves to avoid scratching and added anti-vibration support.
There are two black color anti-vibration pads mounted on the inner side of this stand. This is the area where the unit makes its contact with the base. In our testing, we found this unit not making any sound coming from vibration that we could feel on our table. Indeed the anti-vibration support is right on the money. This stand makes the unit stand tall and adds a subtle touch to the overall look and feel. I absolutely admire this design.
This enclosure harnesses the SATA 3 bandwidth over the USB 3.1 Gen 1 interface. The bandwidth of the SATA III is 660MB/s running at 6 Gbps whereas it is 625MB/s for the USB 3.1 running at whopping 5 Gbps. This enclosure carries a multi-protection safety system which includes:
- Over Current Protection
- Electric Leakage Protection
- Short Circuit Protection
- Over Voltage Protection
- Clutter Protection
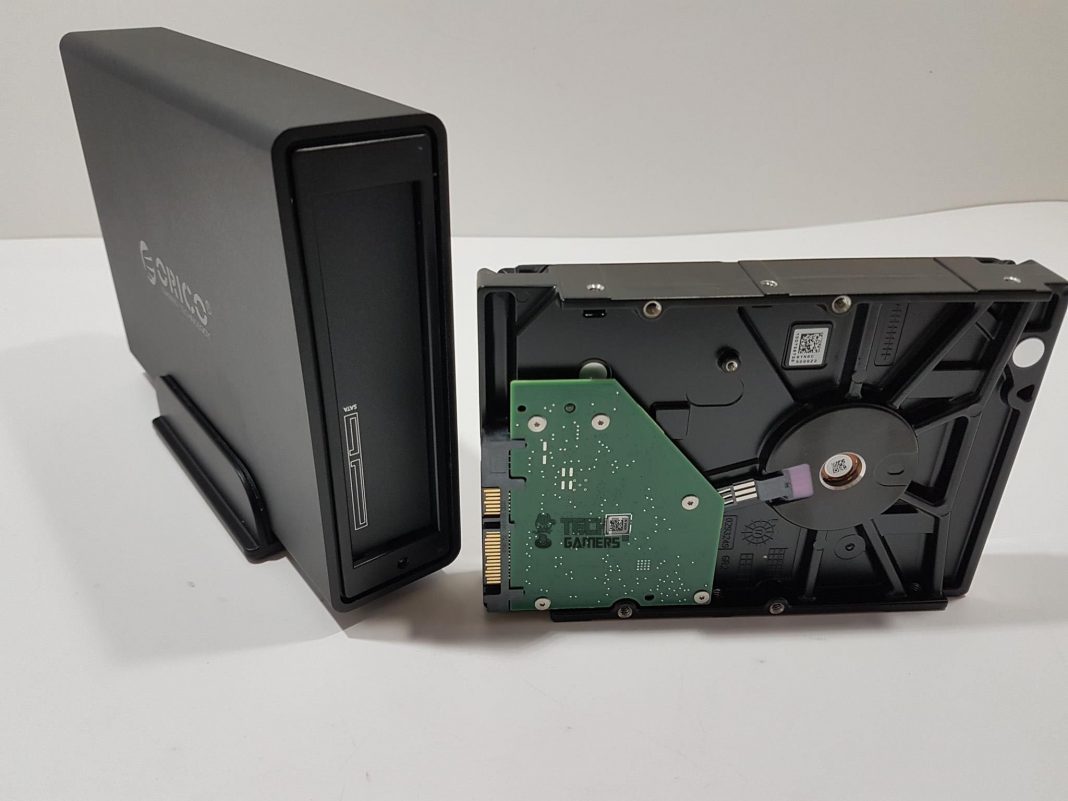
We could not get any information about the operating temperature range of this enclosure. Installing the drive is that simple. Take off the magnetic panel and align the drive with the diagram on the lip of the inner clip. Slide the drive in till you hear the click indicating that the drive has made solid contact with the SATA port. Put the front panel back on. Connect the DC power adapter to the socket and connect the station to the PC using the bundled USB cable. Voila!
Testing
Following test bench was used to test the drive:
- Intel i7 6850k
- Asus ROG Rampage V Edition 10
- Ballistics Elite 4x4GB @ 3000 MHz
- Noctua NH-U12S CPU Cooler
- Nvidia GeForce GTX 1080 FE
- Corsair AX1200i
- Samsung 840 EVO 250GB for OS
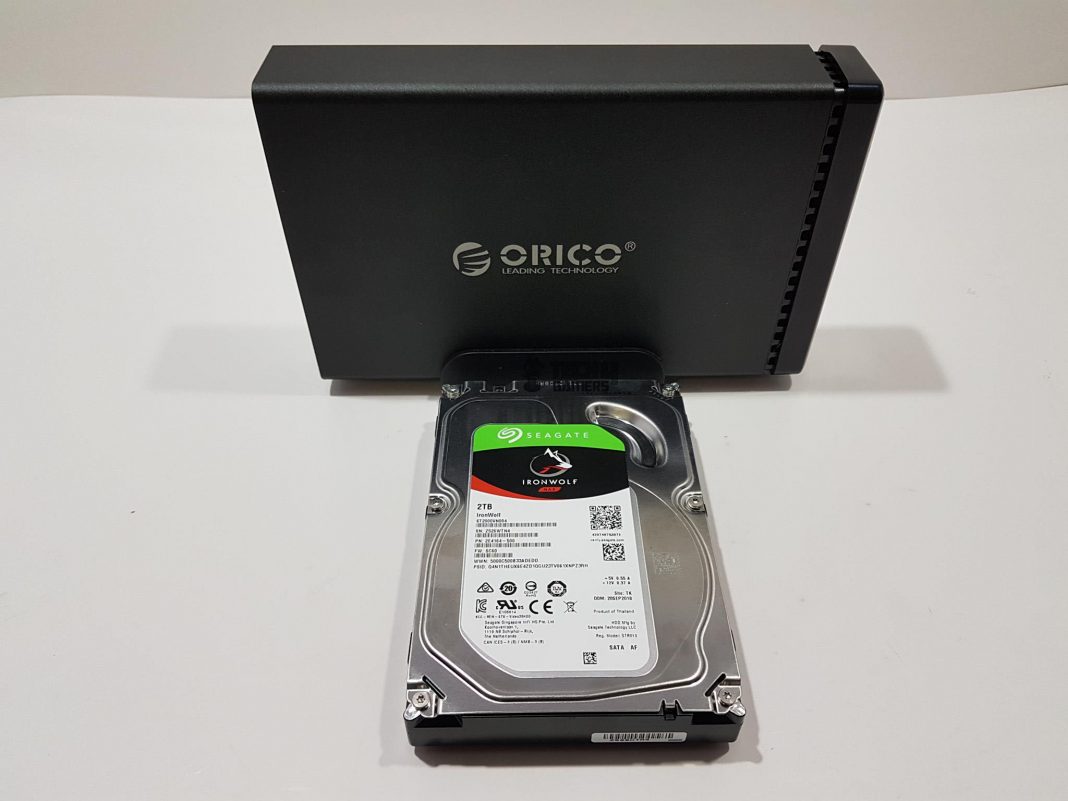
- Seagate IronWolf 2TB [Test Drive]
- PrimoChill Praxis WetBench
In order to measure the read and write speeds, following software were used:
- ATTO Disk Benchmark v3.05
- AS SSD v1.8.5636.37293
- Crystal Disk Mark 6.0.0 x64
The idea is simple, first, we connected the Seagate IronWolf 2TB to the PC using the SATA III port and ran the above-mentioned tests. Then the same HDD was installed inside the ORICO NS100C3 Hard Drive Enclosure and connected using the USB 3.1 Type-C port on the rear I/O of the motherboard.
Tests were repeated afterward. The pictures in the test results are categorized using the USB 3.1 and SATA III nomenclature to avoid any confusion. Let’s take a look at the results.
ATTO Disk Benchmark
On a transfer length of 8GB using default transfer length, the test drive did a read speed of 180MB/s maximum and write speed of 172MB/s maximum at 64MB transfer size. When the test drive was tested on the PC using the same settings using the SATA III port, the maximum read speed was 180MB/s and maximum write speed was 179MB/s at 64MB transfer size. Clearly, the USB 3.1 Gen 1 Type C interface is delivering the closing performance to the SATA III.
Crystal Disk Mark
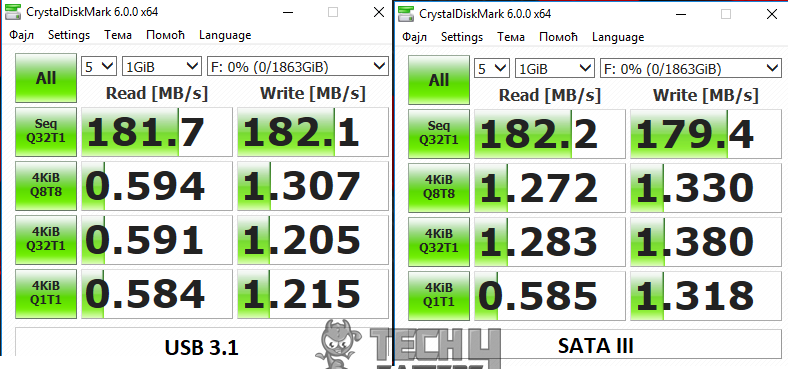
Using the CrystalDiskMark the maximum read speed (sequential) of the test drive was 181.7 MB/s and the sequential write speed was 182.1 MB/s on USB 3.1 Interface. With the test drive’s testing on the SATA III port, the sequential read speed was 182.2MB/s and write speed was 179.4 MB/s. Again, we are seeing marginal performance delta.
AS SSD Benchmark
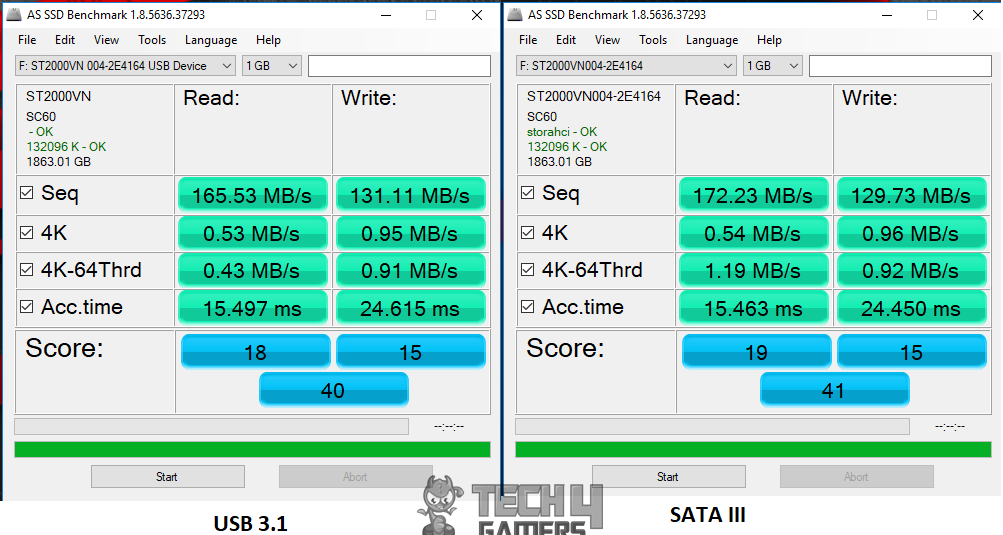
Next, we ran the AS SSD software to test the sequential read and write performance of the drive. The sequential read speed using the USB 3.1 was 165.53 MB/s and write speed was 131.11 MB/s. When the test drive was tested on the PC using the SATA III port, the read speed was 172.23 MB/s and the write speed was 129.73MB/s. We are seeing a slight advantage on the SATA III in the reads whereas the USB 3.1 has a marginal lead in the writes.
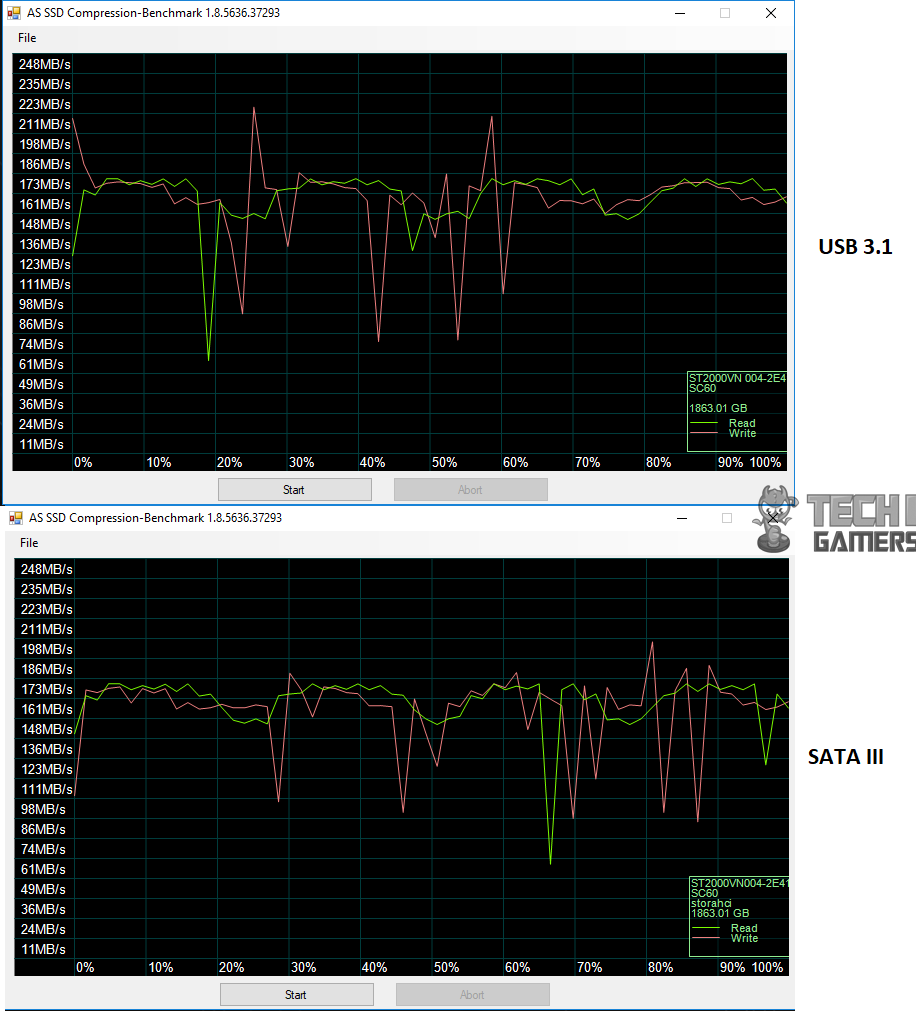
Next, we ran the Compression benchmark tool of the AS SSD software. The read speed started from approximately 130MB/s for the USB 3.1 and went up to 180MB/s with regular ups and downs. The write speed started from the 218MB/s approximately and saw a sudden drop to 175MB/s. Maximum write speed was 225MB/s and the lowest was 80 MB/s approximately.
With the drive connected to the PC using SATA III port, the read speed started from 150MB/s and reached 180MB/s with regular ups and downs along. The write speed started from 111MB/s and went straight up to 175MB/s. The maximum write speed was approximately 200MB/s and minimum speed was approximately 92MB/s.
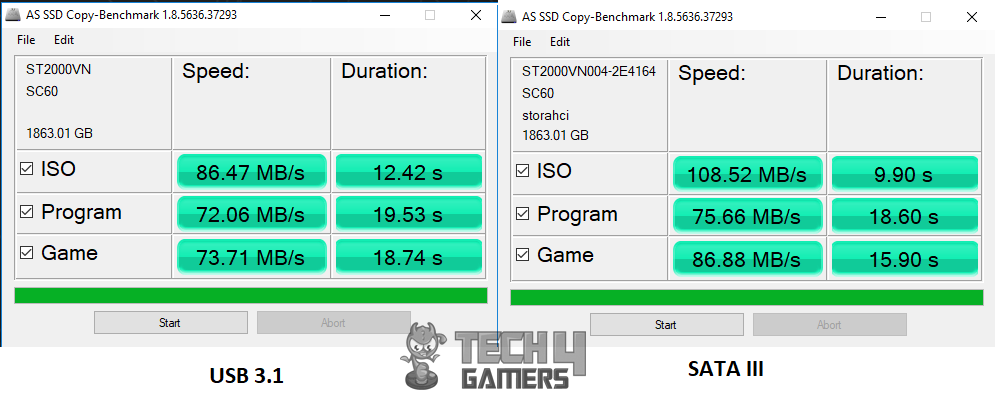
Next, we ran the copy benchmark of the AS SSD software. Overall the SATA III gives relatively better performance though it was marginal in the Programs category.
Thermals
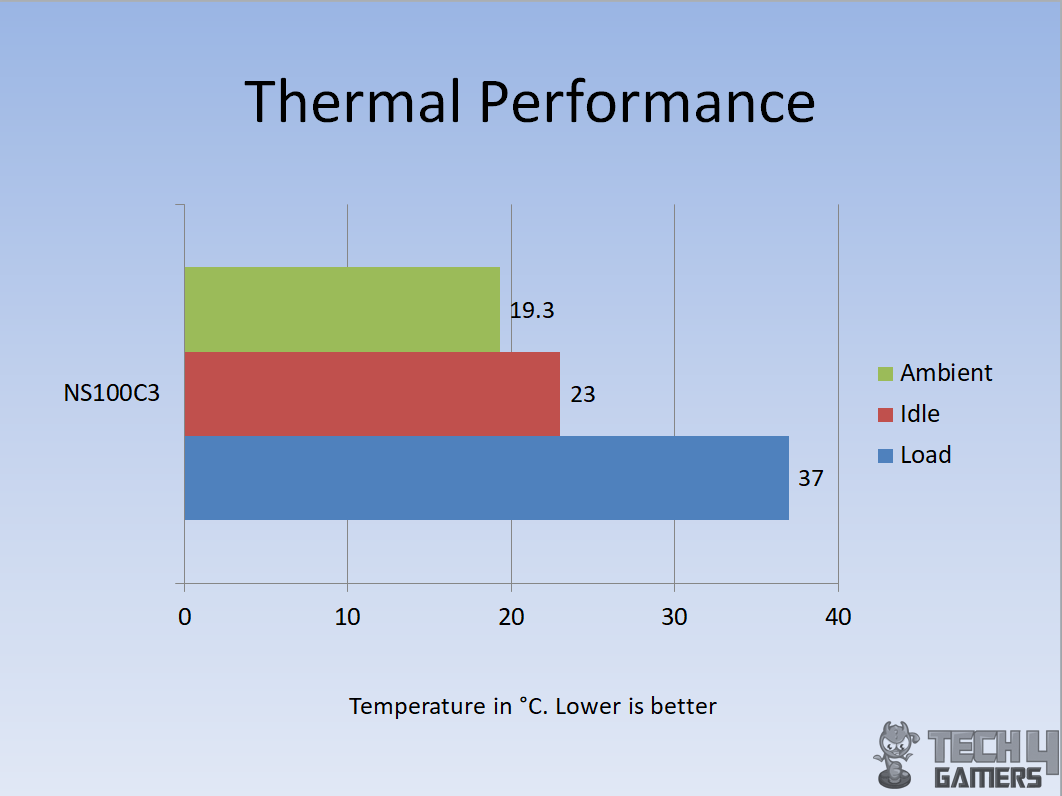
The drive was put under stress test for a continuous 1.50 hours. During this time the maximum temperature on the drive was 37°C with the ambient temperature of approximately 19.3°C. There is a delta of 17.7°C. I am looking forward to returning to this content during summer when ambient temp averages around 45°C and see how this station handles the heat of the drive in the hot up environment.
The idle temperature of the drive was 23°C. Keep in mind that this orico 3.5 hard drive enclosure review has sort of passive cooling in the form vents without any fan pulling the hot air out.
Conclusion
The ORICO NS100C3 is a 3.5” hard drive storage station/dock which converts any SATA III (backward compatible) into a USB drive using the USB 3.1 Gen 1 Type-C interface. The dimension of the unit is 134x216x58mm (HxLxW). The station is made of the Aluminum alloy and ABS materials. This dock is from the Night Stalker series.
This station is available in multiple bays configuration and the one we have tested is the single bay enclosure. Also, these enclosures come in USB 3.0 and USB 3.1 interfaces. U3 in the model indicates the USB 3.0 and C3 indicates the USB 3.1 Type C interface. Keep that in mind while looking for them. This is hot-swappable, plug-n-play design with user convenience written on its face.
The main frame is made of 3mm thick aluminum alloy which is finished in matte black color with a smooth surface and curvy edges. It seems the complete frame is made from a single aluminum sheet. ORICO is using what they call Four-Chip Magnetic type unique panel on the front of the unit. It is connected to the mainframe using 4 magnets.
This panel is made of the ABS plastic and it has a gloss finish which reflective and fingerprint magnet. There are two magnets on the inner right side of this panel who bond with the two magnets installed in the frame of the unit. It is obvious that we have a strong bond on the right side but not so strong bond on the left side.
The lip on the main frame’s front side has a diagram of the SATA ports at the bottom right side. This is a visual aid to the user to orient their drive while installing in the unit. This lip is hinged on the one side and all that the user is required is to orient the drive with the diagram and slide the drive in. It will open the lip and the drive will be slided in all the way until it makes contact with the SATA connectors and produces a click sound.
This station does not have active cooling as there is no fan. There are patterned vents on the rear top side for heat dissipation. There is a power off/on button below these vents followed by the USB 3.1 Type C port. DC power port is at the bottom. The drive is not taking power from the USB connector rather is using dedicated power in the range of 100V to 230V with 24W consumption.
The enclosure has multiple protections built-in like over current protection, over voltage protection, electric leakage protection, short circuit protection, and clutter protection. It supports up to 10TB drive much thanks to its dedicated power source. This orico 3.5 hard drive enclosure review does not need any driver support and is compatible with Microsoft Windows XP/2000/7/8/10, Linux, and Mac OS 9.1 and above.
The ORICO 3.5” SATA USB 3.1 Gen 1 Type C HDD External Storage Station is listed at $99.99 at the time of the review. The price seems to be on the high side but given its aluminum-based body with dedicated power source, built-in protection features, stylish and bold looks, anti-vibration stand definitely makes it worthwhile. In our testing, this enclosure has performed very well though temperatures seem to be on a high side.
We will be returning to this content in the summer season and will test the thermals again in the hot environment with average ambient of 45°C. I am thankful to the ORICO for giving the opportunity to review their 3.5” SATA USB 3.1 Gen 1 Type C HDD Storage Station NS100C3.
Thank you! Please share your positive feedback. 🔋
How could we improve this post? Please Help us. 😔
[Hardware Reviewer & Editor]
Meet Nauman Siddique, a highly experienced computer science graduate with more than 15 years of knowledge in technology. Nauman is an expert in the field known for his deep understanding of computer hardware.
As a tech tester, insightful reviewer, and skilled hardware editor, Nauman carefully breaks down important parts like motherboards, graphics cards, processors, PC cases, CPU coolers, and more.
- 15+ years of PC Building Experience
- 10+ years of first-hand knowledge of technology
- 7+ years of doing in-depth testing of PC Hardware
- A motivated individual with a keen interest in tech testing from multiple angles.
- I majored in Computer Science with a Masters in Marketing
- Previously worked at eXputer, EnosTech, and Appuals.
- Completed Course in Computer Systems Specialization From Illinois Tech


