If you’ve noticed your PS4 fan not working correctly, causing increased temperatures or system malfunctions, it’s time to take action. Overheating can potentially damage your console.
Key Takeaways
- Common causes of a non-functioning PS4 fan include dust accumulation, mechanical issues, software problems, power supply/connection problems, overheating, and physical damage.
- For troubleshooting a PS4 fan issue, ensure proper ventilation, clean the console, restart the system, check for software updates, test the fan manually, and replace the fan if needed.
- It is advisable to check your warranty terms or consult the official support channels before attempting any repairs that may void the warranty.
Common Causes Of PS4 Fan Not Working
Here are the common causes of a non-functioning PS4 fan:
- Dust accumulation leads to fan blockage.
- Mechanical issues with the fan motor or blades.
- Software-related problems affecting fan control.
- Power supply or connection problems.
- Overheating due to excessive console temperature.
- Physical damage to the fan or related components.
Signs Of A PS4 Fan Not Working
By identifying the signs of a non-working PS4 fan, you can precisely identify the problem and take the necessary actions to rectify it. Here are vital aspects to consider when determining a malfunctioning PS4 fan:
- Unusual fan noises, such as grinding, rattling, or loud buzzing.
- Overheating warnings or shutdowns due to insufficient cooling.
- Inconsistent fan speed or complete lack of fan activity.
- Overheated external casing or hot air expelled from the console.
- Error codes or system messages related to fan issues.
Troubleshooting A PS4 Fan Issue
When your PS4 fan is not working, taking immediate action is crucial to prevent potential damage to your console due to overheating. Here are some steps you can follow to troubleshoot a PS4 fan issue:
Ensure Proper Ventilation
Proper ventilation is crucial for maintaining the optimal functioning of your PS4 and preventing overheating. Here are some essential points to consider for ensuring adequate ventilation:
Placement Of The Console
Choosing a well-ventilated location for your PS4 is essential. Position the console on a stable surface that promotes the free circulation of air around it.
This practice facilitates proper ventilation and effectively reduces the risk of heat buildup. Additionally, ensure sufficient clearance on all console sides, especially those equipped with vents.
Distance From Walls And Other Objects
Maintaining a reasonable distance between your PS4 and walls or other objects is essential for proper ventilation. This ensures ample airflow space around the console, preventing heat from getting trapped.
Avoid placing the console near heat sources, such as radiators, heaters, or direct sunlight, as these can increase temperatures.
Obstructive Objects
To facilitate proper airflow, ensure that there are no obstructive objects near the vents of your PS4. Check the area surrounding the console and remove any items such as books, papers, or decorations that could block the airflow.
Clearing these obstructions allows the cooling fan to breathe fresh air and efficiently expel hot air.
Elevated Surfaces
Elevated surfaces avoid airflow obstruction, ensuring excellent air reaches the console from all sides while allowing hot air to dissipate quickly. This promotes optimal operating temperatures, extending the console’s lifespan and facilitating smooth gameplay.
Cooling Aids
Sometimes, you may want to use additional cooling aids to enhance airflow around the console. Cooling pads or external fans are popular options that can be placed near the PS4.
By utilizing these accessories, you can enhance the dissipation of heat and effectively maintain a cooler operating temperature for your console.
Restart The Console
Sometimes, a simple system restart can resolve minor software glitches that might impact the fan’s performance. Restarting the console helps refresh the system and can potentially resolve the issue.
Here’s how you can continue your PS4:
- Hold down the PS4 power button on the front panel until you hear a beep
- The console will enter standby mode, and the power indicator light on the front will turn off.
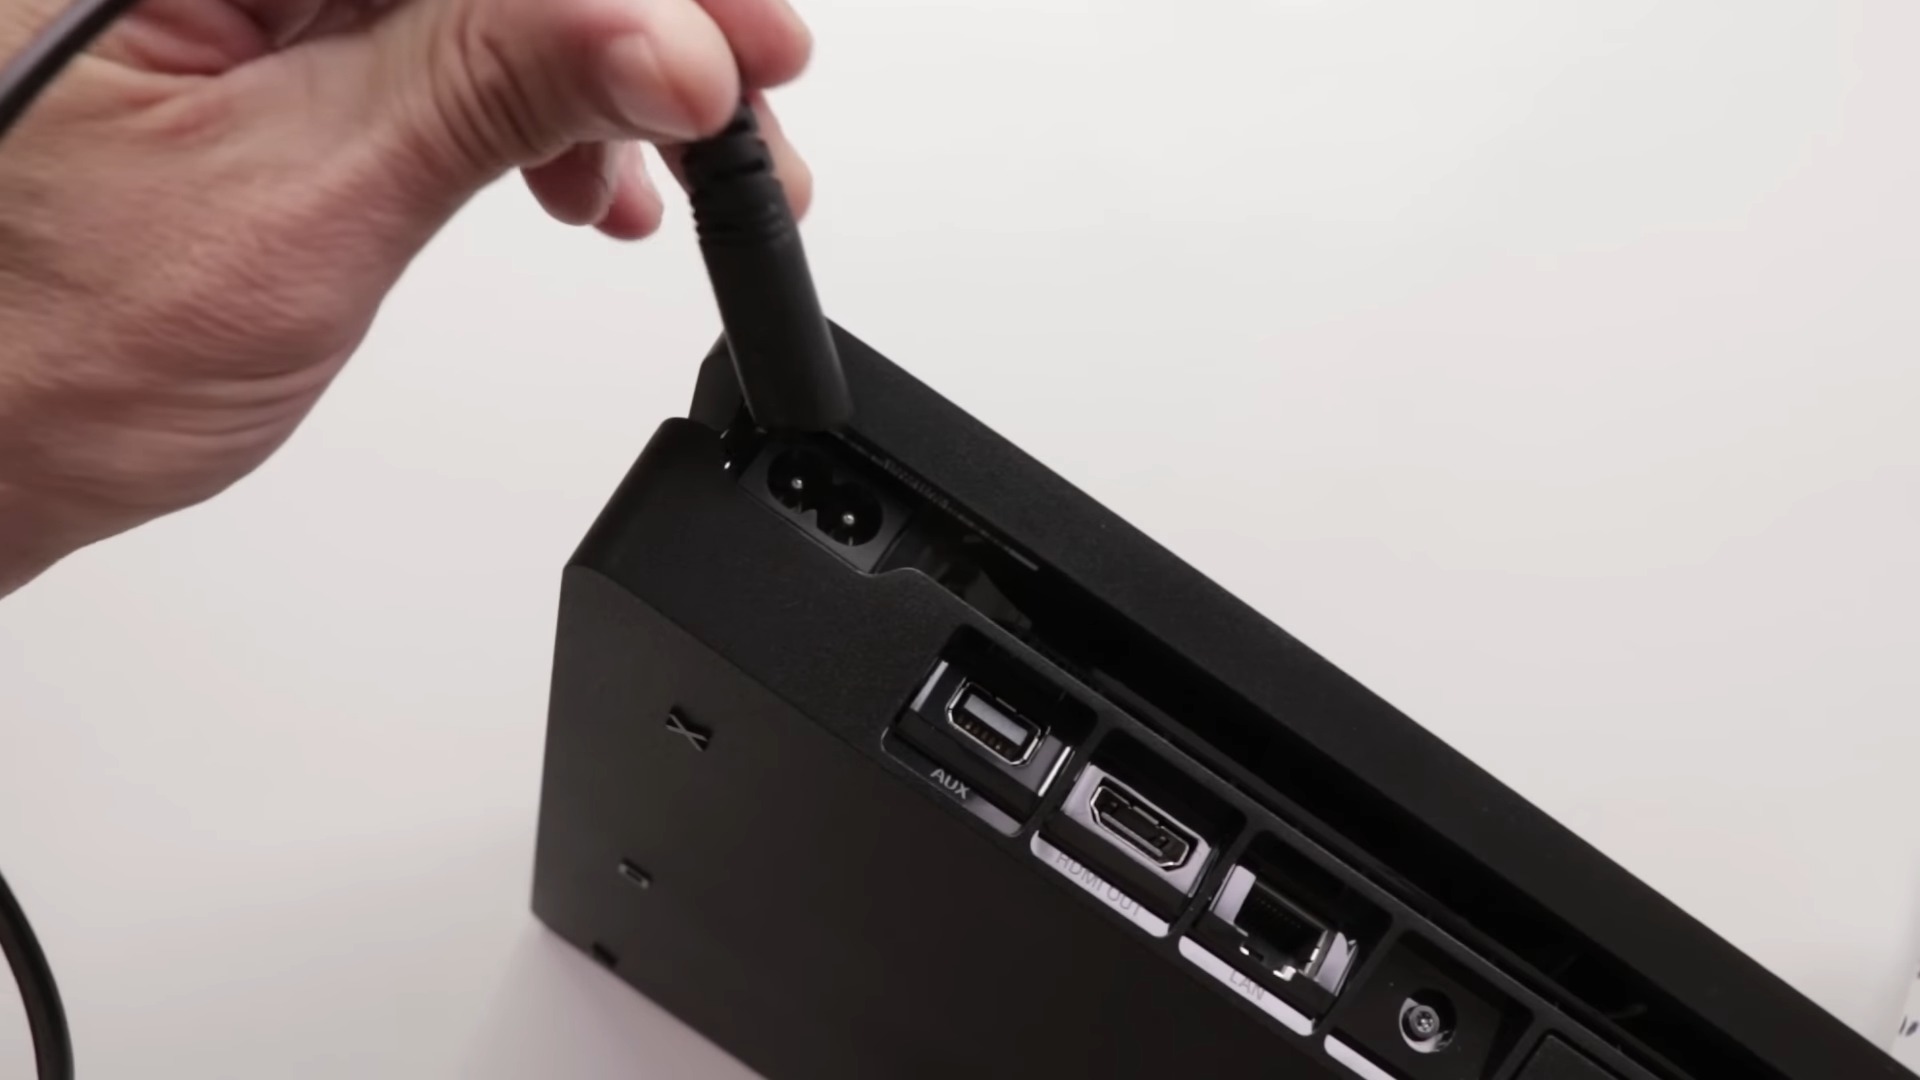
- Unplug the power cord from the back of the PS4 and remove any other connected cables.
Remove The PS4 Power Cable – Image Credits [YT/TronicsFix] - Wait for 5-10 minutes.
- Insert the power cord back into the PS4 and reattach any previously disconnected cables.
- Switch on the console.
- Please pay attention to the sound of the fan spinning or observe the airflow near the vents to confirm its operation.
- The fan should start running shortly after the console powers on, helping to regulate the internal temperature.
- Further troubleshooting may be necessary to address the issue if the fan doesn’t work after the restart.
Clean The PS4
Regular cleaning of your PS4 is essential to ensure optimal performance and prevent the accumulation of dust and debris that can hinder the fan’s efficiency.
Here are the steps you can follow to clean your PS4 effectively:
Power Off And Unplug The Console
Before cleaning your PS4, power it off completely and unplug it from the power source.
Gather The Necessary Cleaning Tools
To clean the console, ensure the use of a soft, lint-free cloth that won’t cause scratches on its surface. In addition, using compressed air can be helpful for removing dust and debris from hard-to-reach areas. Cotton swabs help clean small crevices and delicate components.
Vent And Port Cleaning
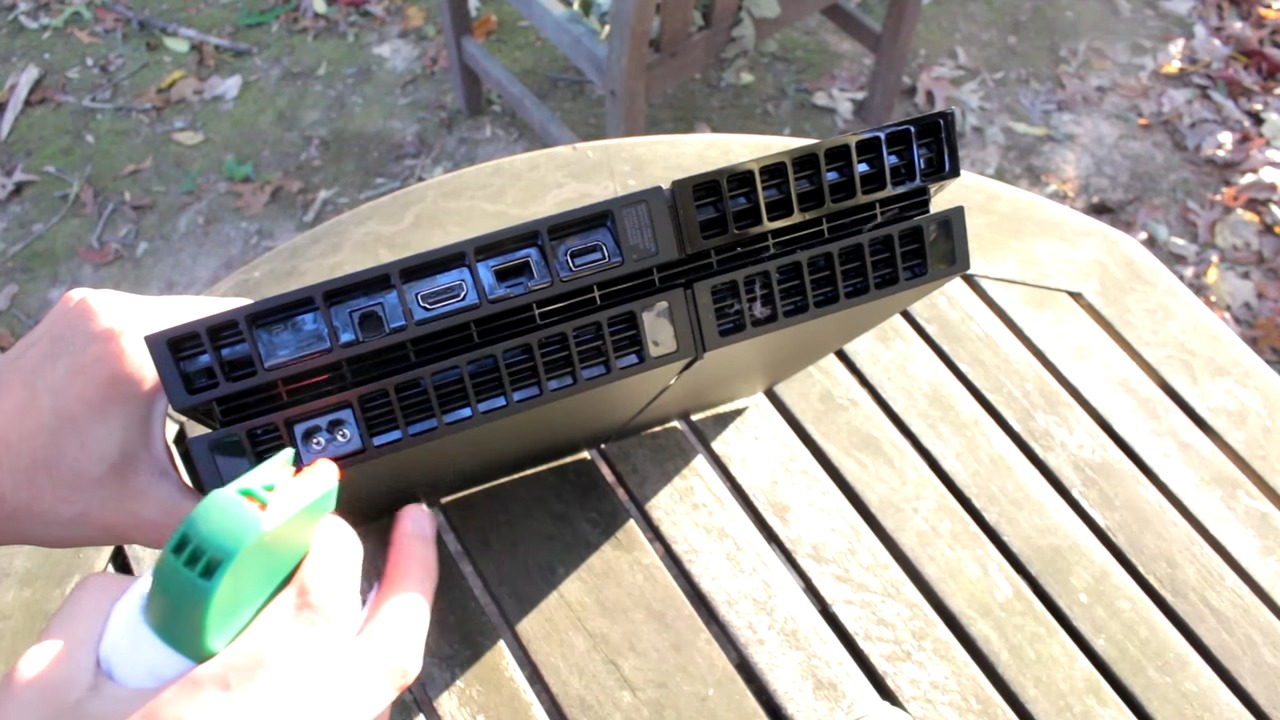
Take the compressed air canister and hold it upright. To effectively remove dust and debris from the console’s vents and ports, use short air bursts to blow them away. Direct the airflow into the ducts from various angles to ensure thorough cleaning.
Cleaning The Fan
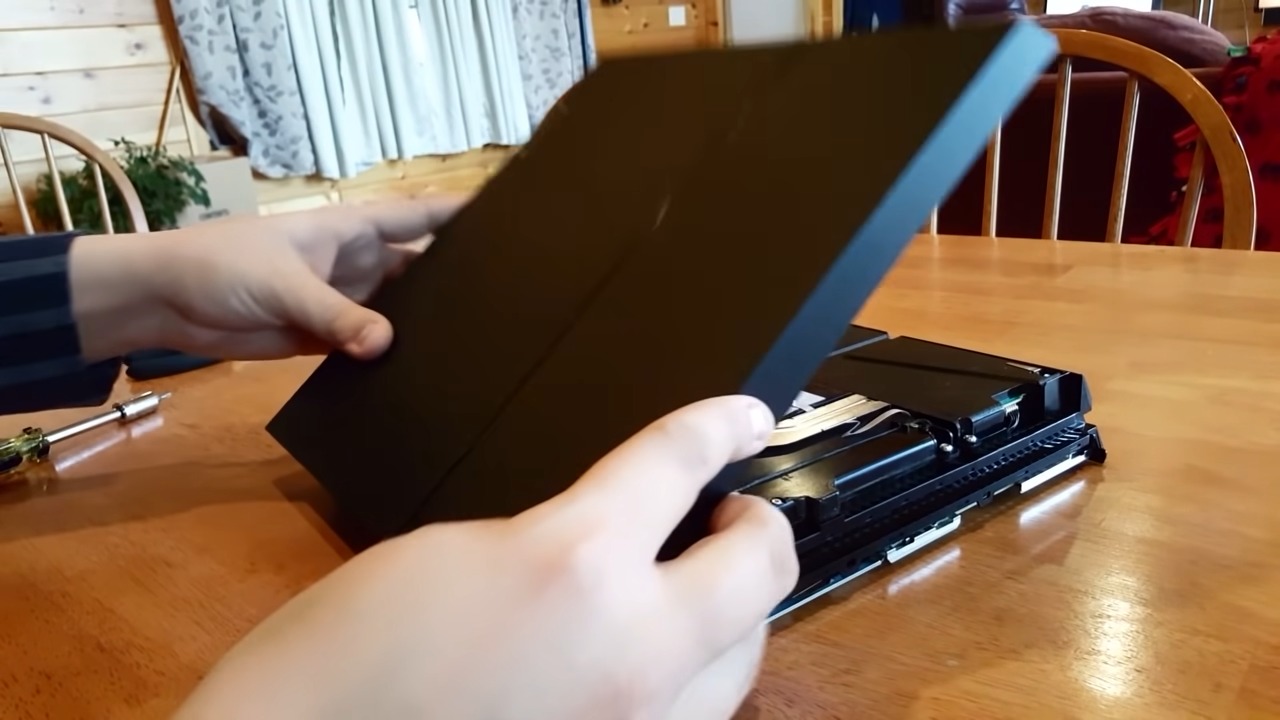
You may need to unscrew the top cover to clean the fan from the inside.
Follow these steps to clean the fan after opening your PS4:
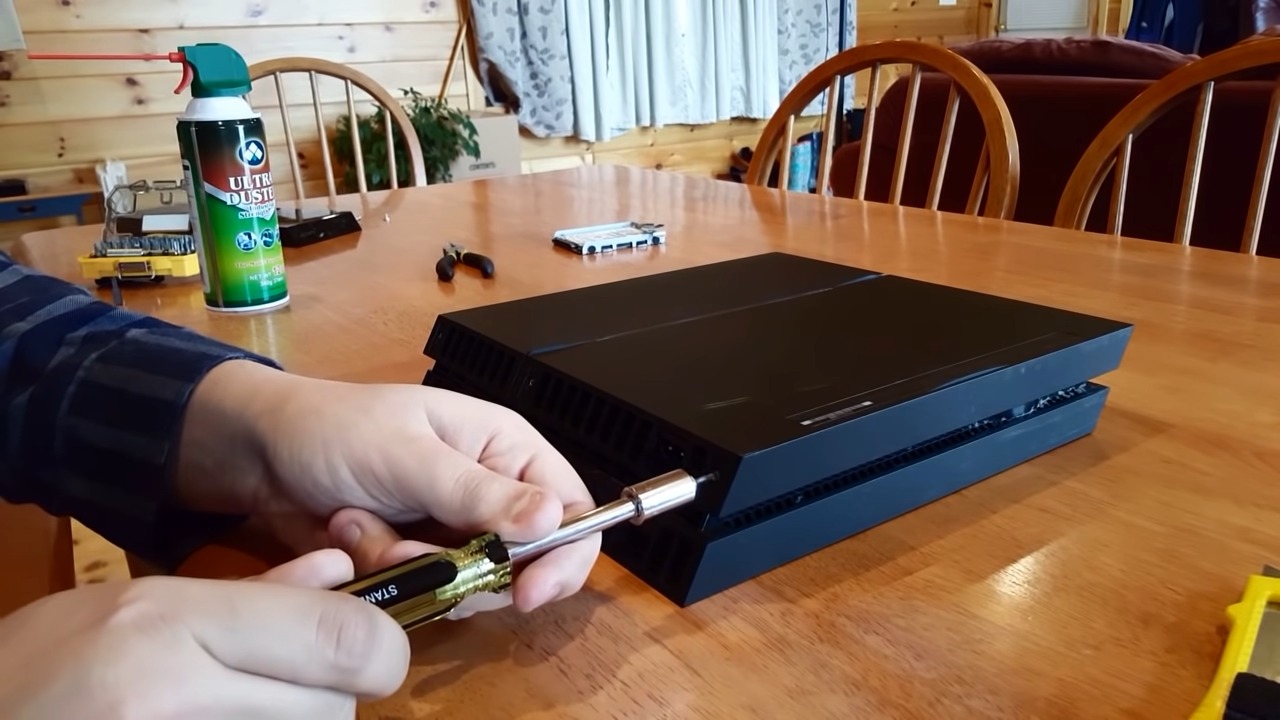
- Remove the entire case using a screwdriver.
Unscrew The Top Case – Image Credits [YT/Disorderly Gamers] - Locate the fan inside the PS4.
- Inspect the fan for dust and debris accumulation.
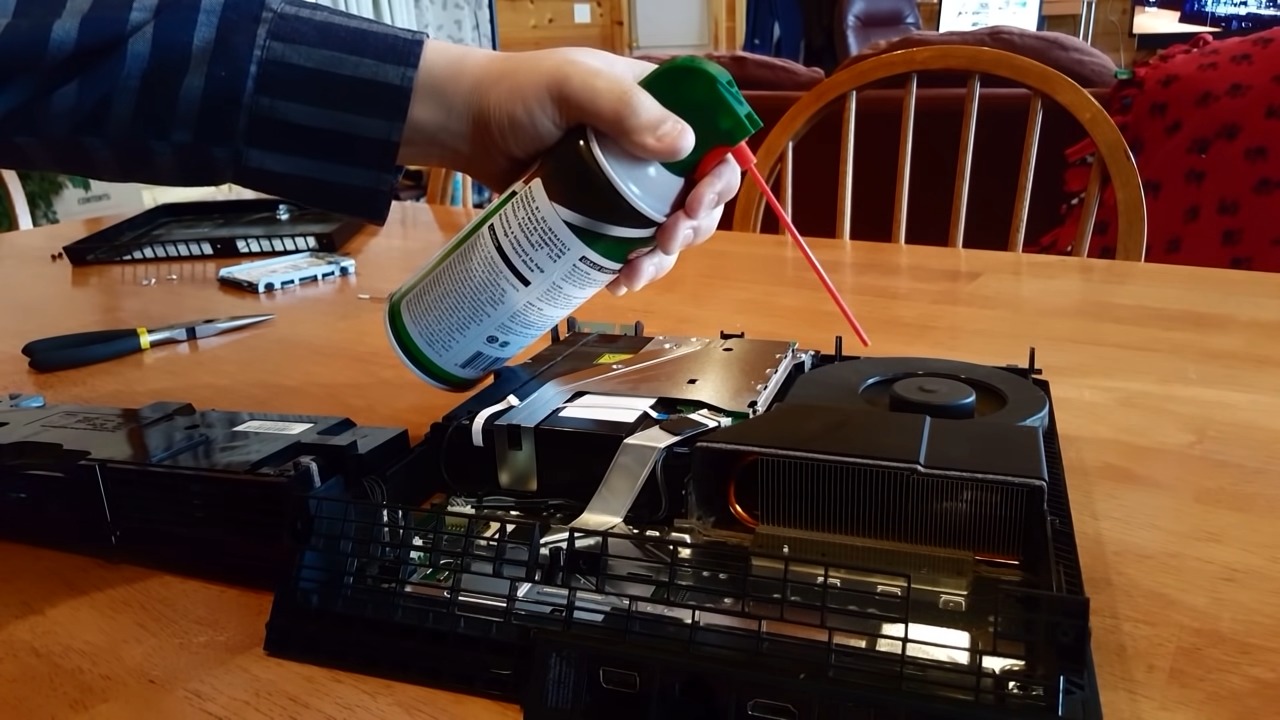
- Clean the fan using compressed air, holding the canister upright and at a safe distance.
Clean using Compressed Air – Image Credits [YT/Disorderly Gamers] - Use brief air bursts to blow away dust and debris from the fan blades.
- Direct the airflow through the fan blades from different angles for thorough cleaning.
- Wipe the fan blades with a soft cloth dampened with alcohol for stubborn stains or residue.
- Check other internal components for dust or dirt and clean them as necessary.
- Reassemble the PS4 by placing the outer casing back and securing it with screws.
Close The Console – Image Credits [YT/Disorderly Gamers] - Plug the PS4 back into the power source and power it on.
- Monitor the fan’s operation to ensure it is running smoothly and quietly.
Check For PS4 Software Updates
System software updates frequently incorporate bug fixes, performance enhancements, and optimizations that address fan-related issues.
Here’s how you can check for and install system software updates:
- Turn on your PS4 and navigate to the home screen.
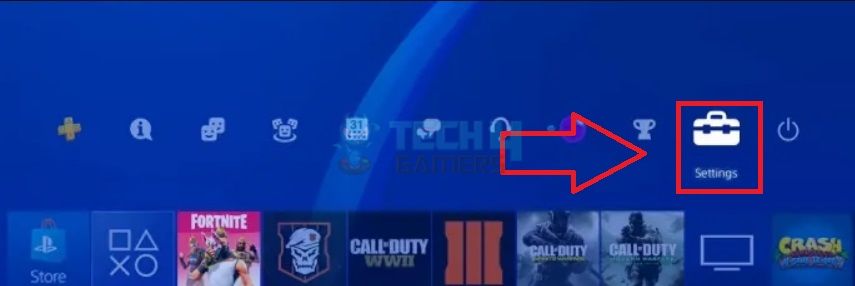
- Scroll to the right to highlight the “Settings” icon.
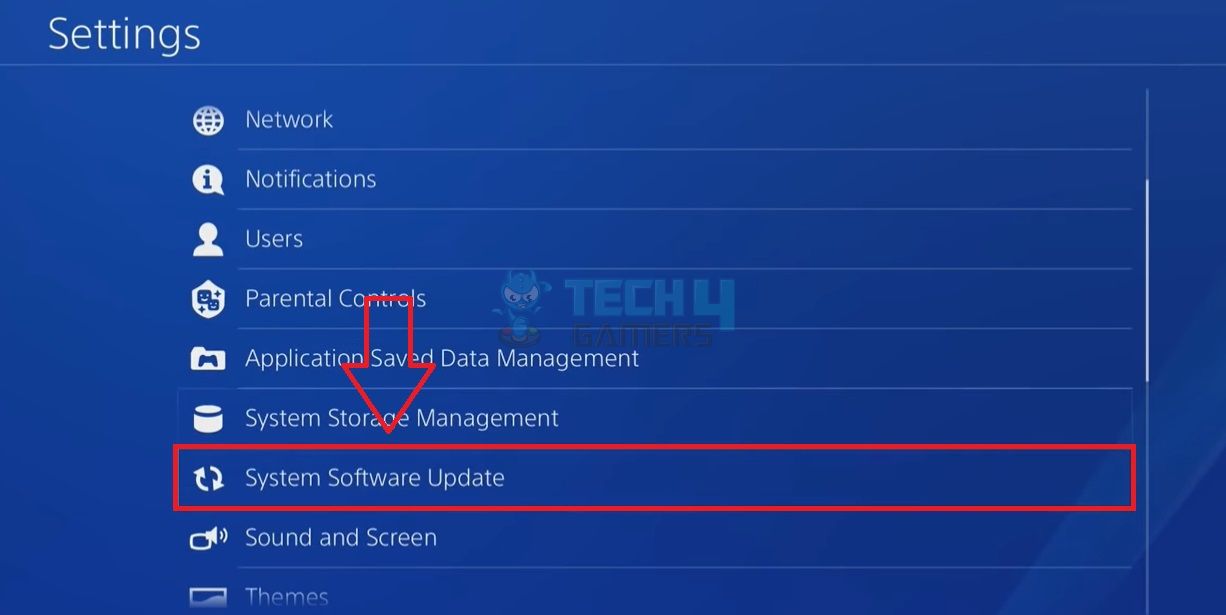
Settings – Image Credits [Tech4Gamers] - In the Settings menu and choose “System Software Update.
System Software Update – Image Credits [Tech4Gamers] - If there are any system software updates available, they will be displayed.
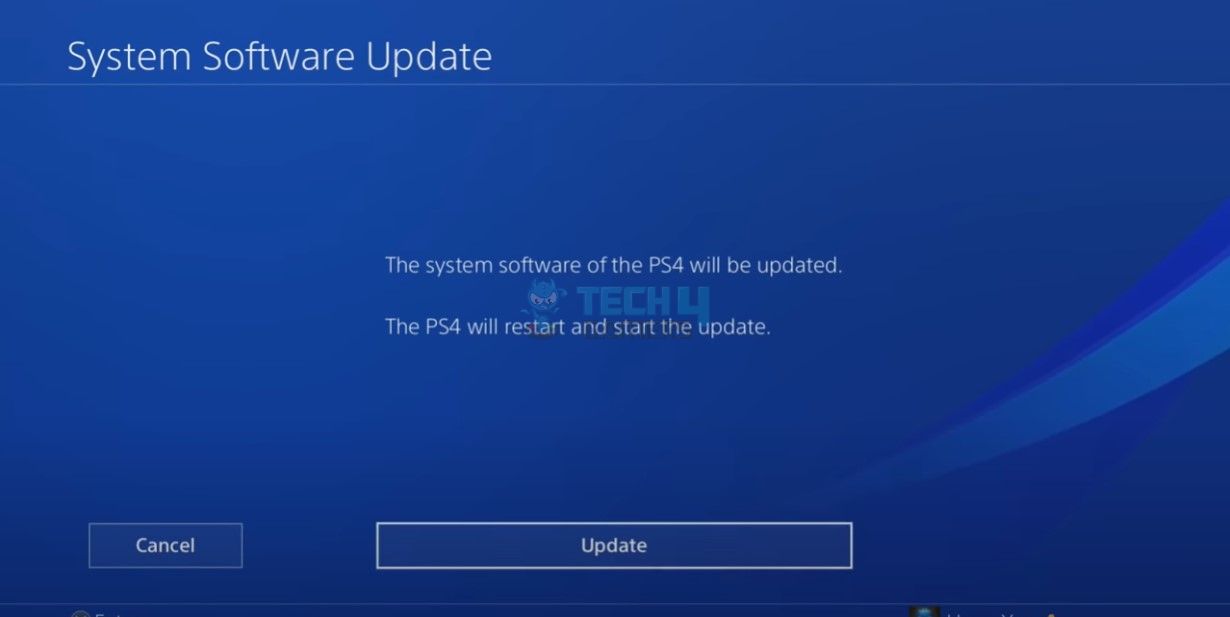
Update System Software – Image Credits [Tech4Gamers] - Select “Update” to initiate the installation process.
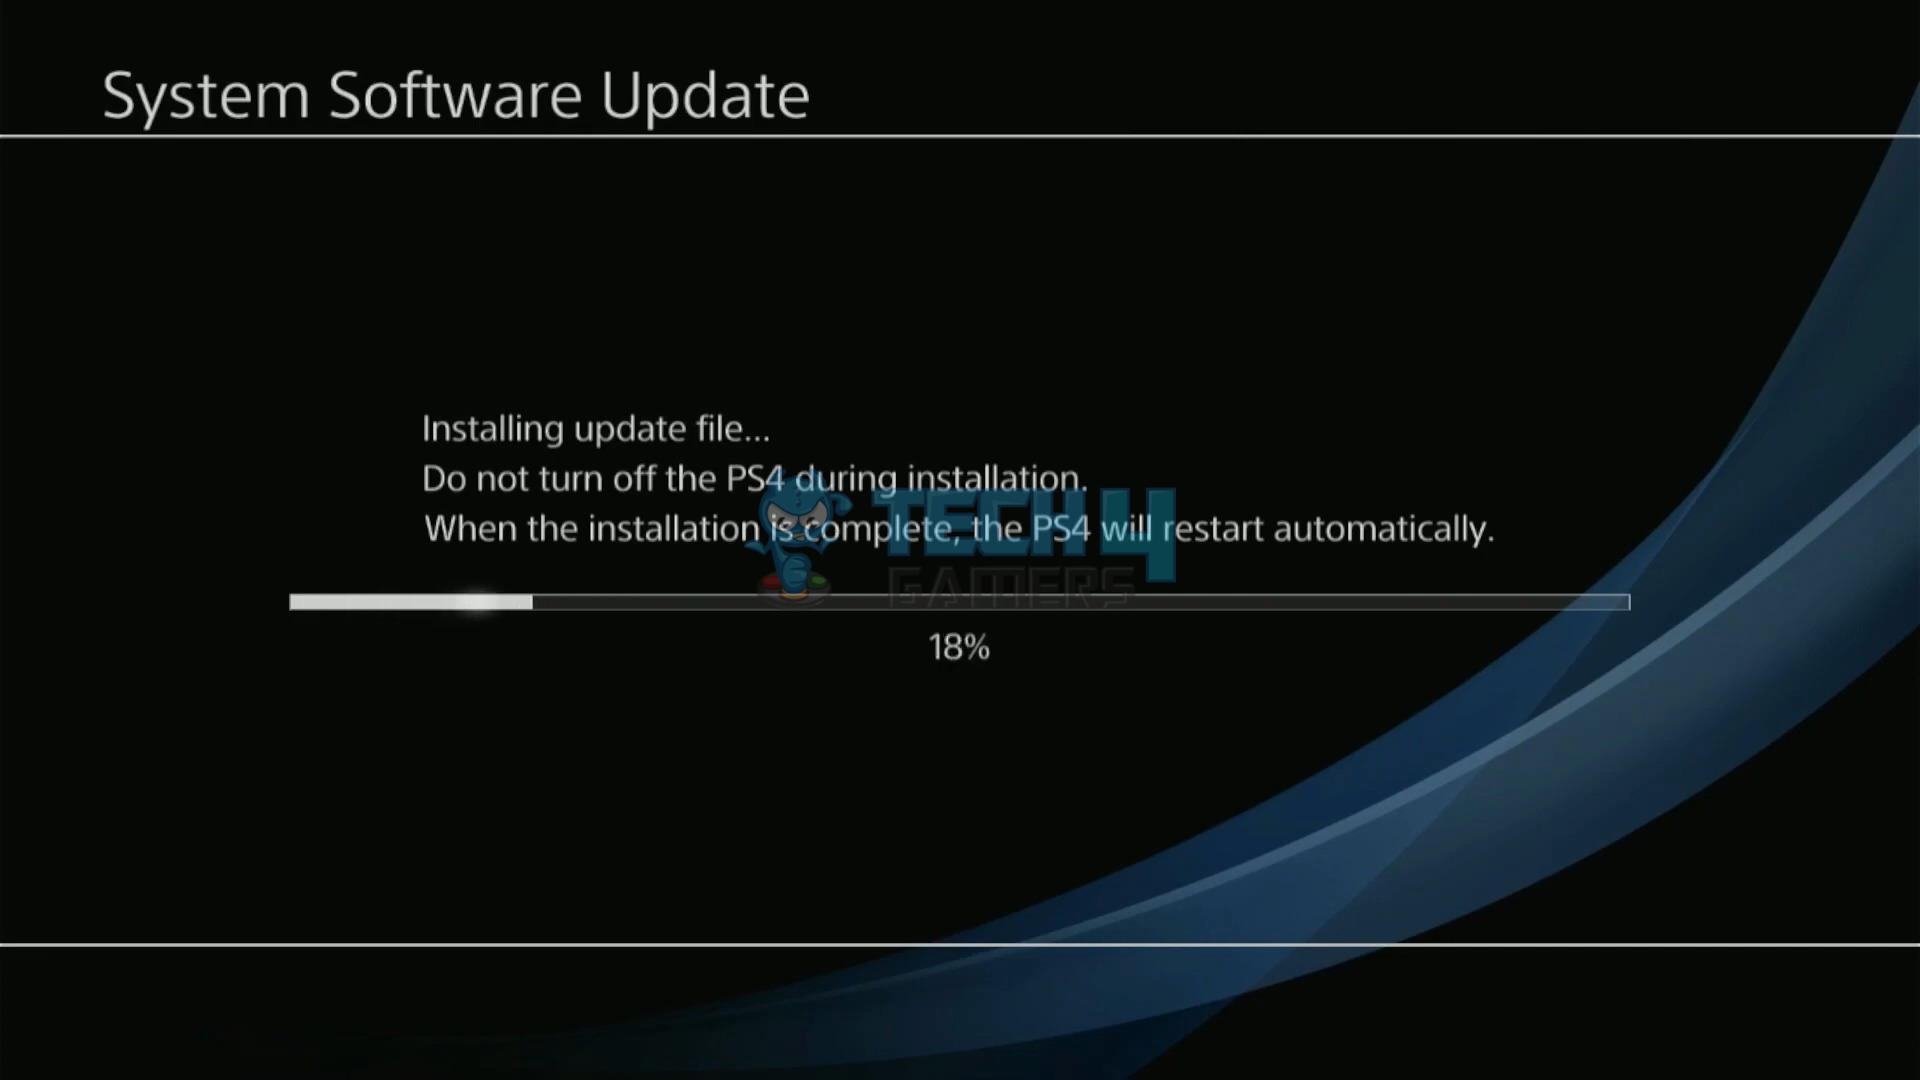
- The PS4 will install the update, which may require some time, depending on the update’s size.
System Software Update – Image Credits [Tech4Gamers] - After the installation of the update, the PS4 will restart automatically.
- After restarting, inspect whether the fan is working or not.
- If the fan issue persists after updating the system software, you may need to explore advanced troubleshooting options.
Advanced Troubleshooting Options
If basic troubleshooting steps fail to resolve the issue with your PS4 fan not working, there are advanced troubleshooting options you can consider. These options may require more technical knowledge or assistance from professionals. Here are some advanced troubleshooting options to explore:
Testing The Fan Manually
Here’s a detailed explanation of the process of checking the fan manually:
- Ensure that your PS4 is turned off, and carefully open the case.
- Once the patient is opened, locate the fan within your PS4. The fan is usually positioned near the rear of the console.
- Plug in the power cord and turn on the PS4 while keeping the case open.
- Observe the fan’s operation closely.
- Watch the fan blades and see if they spin properly when the PS4 is powered on.
- It suggests a mechanical issue if the fan doesn’t spin or spins irregularly.
- If you have access to a voltmeter and are comfortable using it, you can test the fan’s power supply.
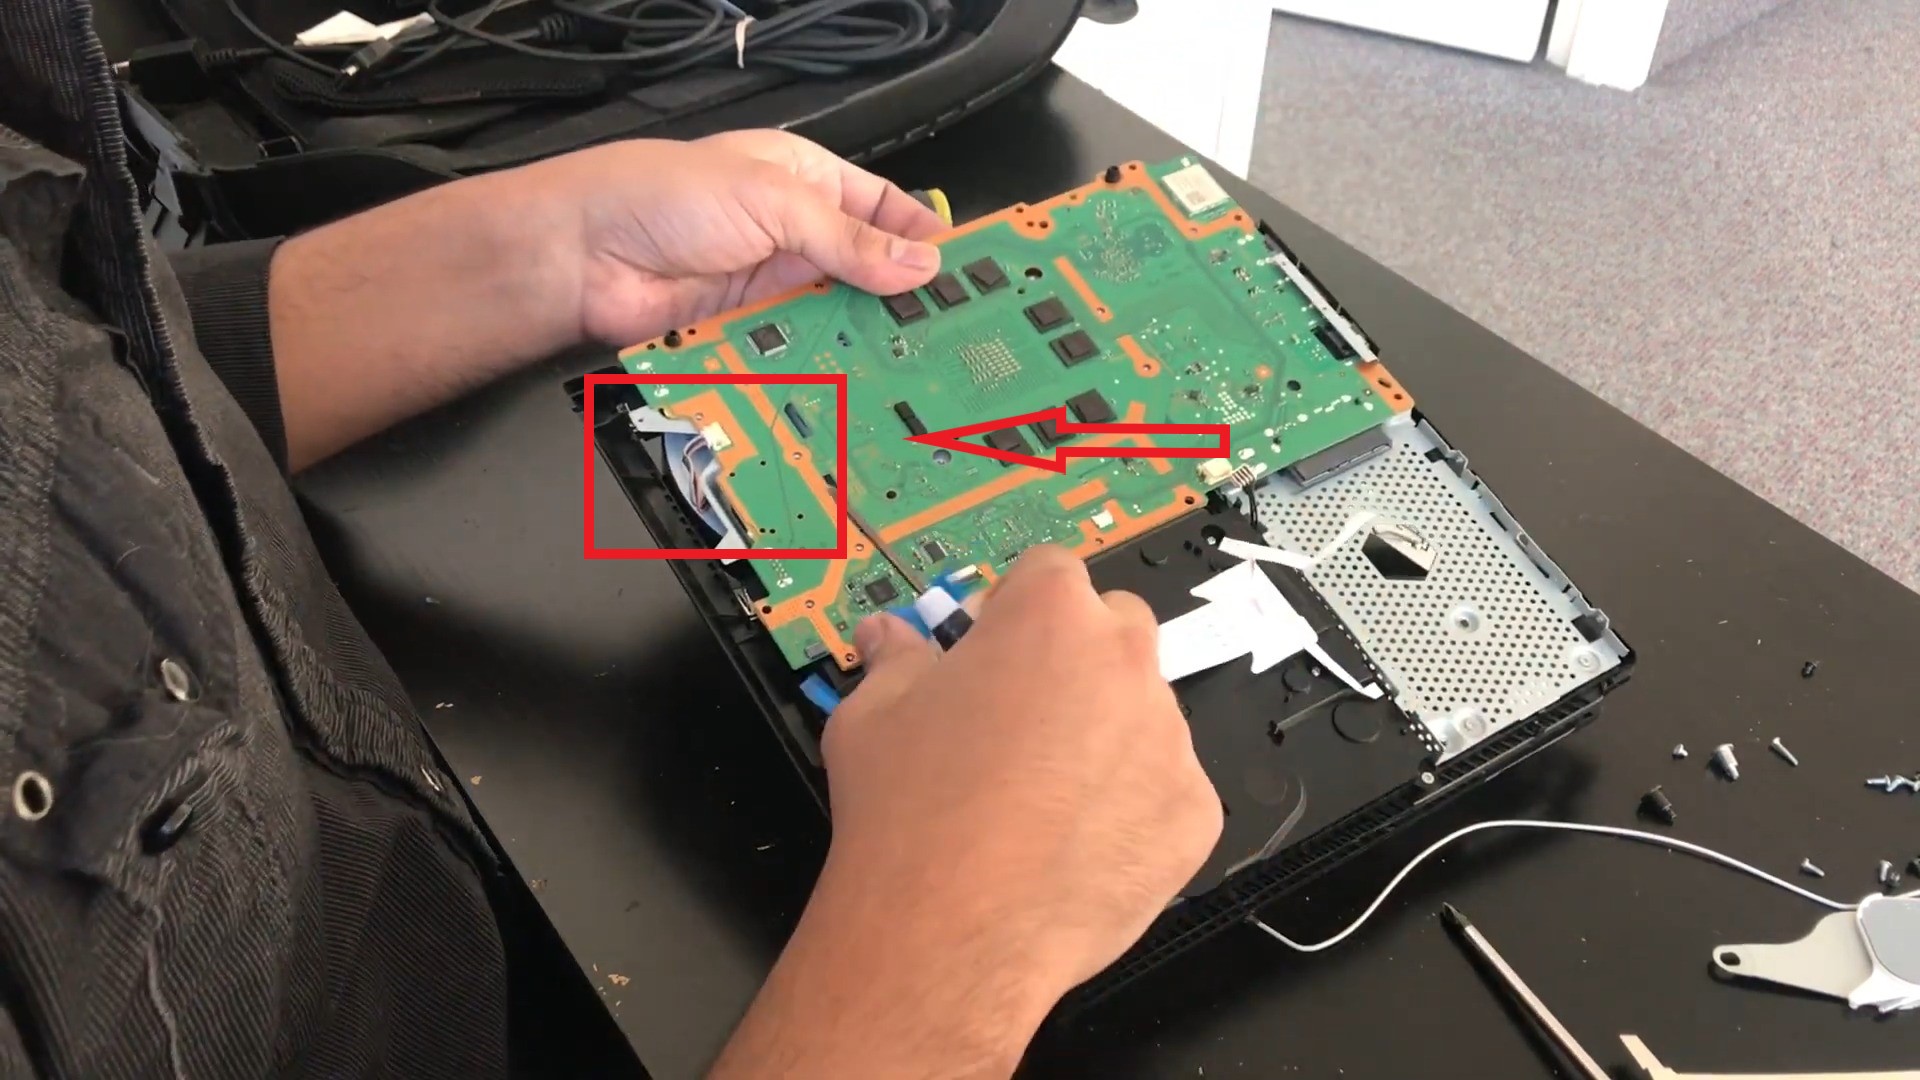
- Locate the fan’s power connectors, usually connected to the motherboard or a separate power supply cable.
PS4 Fan Connector – Image Credits [YT/Fasttech] - Connect the voltmeter’s positive lead (red) to the positive wire of the fan connector and the negative information (black) to the negative wire.
- Turn on the PS4 and check the voltmeter reading. If it shows the expected voltage (around 12V), it indicates that power is reaching the fan correctly. There may be a power supply issue with no voltage or significantly different readings.
- Now power off, unplug the PS4 and ensure the fan’s connections are secure.
- Inspect the fan’s power cable and ensure it is correctly connected to the motherboard or the power supply cable.
- Make sure there are no loose or damaged wires.
Replacing The Fan
If your PS4 fan is damaged or completely non-functional, you may need to replace it.
Here is a step-by-step guide on how to replace the fan in your PS4:
- Make sure you have a compatible replacement fan for your specific PS4 model. Refer to the official PlayStation support website or consult the PS4 user manual to determine the correct fan model.
- Gather the necessary tools for the replacement, such as a screwdriver.
- Please power off your PS4 and disconnect it from the power source.
- Carefully remove the plastic casing of your PS4, as I have mentioned earlier.
- Locate the fan within your PS4.
- Detach any cables or connectors that are connected to the fan. Gently unplug them to avoid damaging the wires.
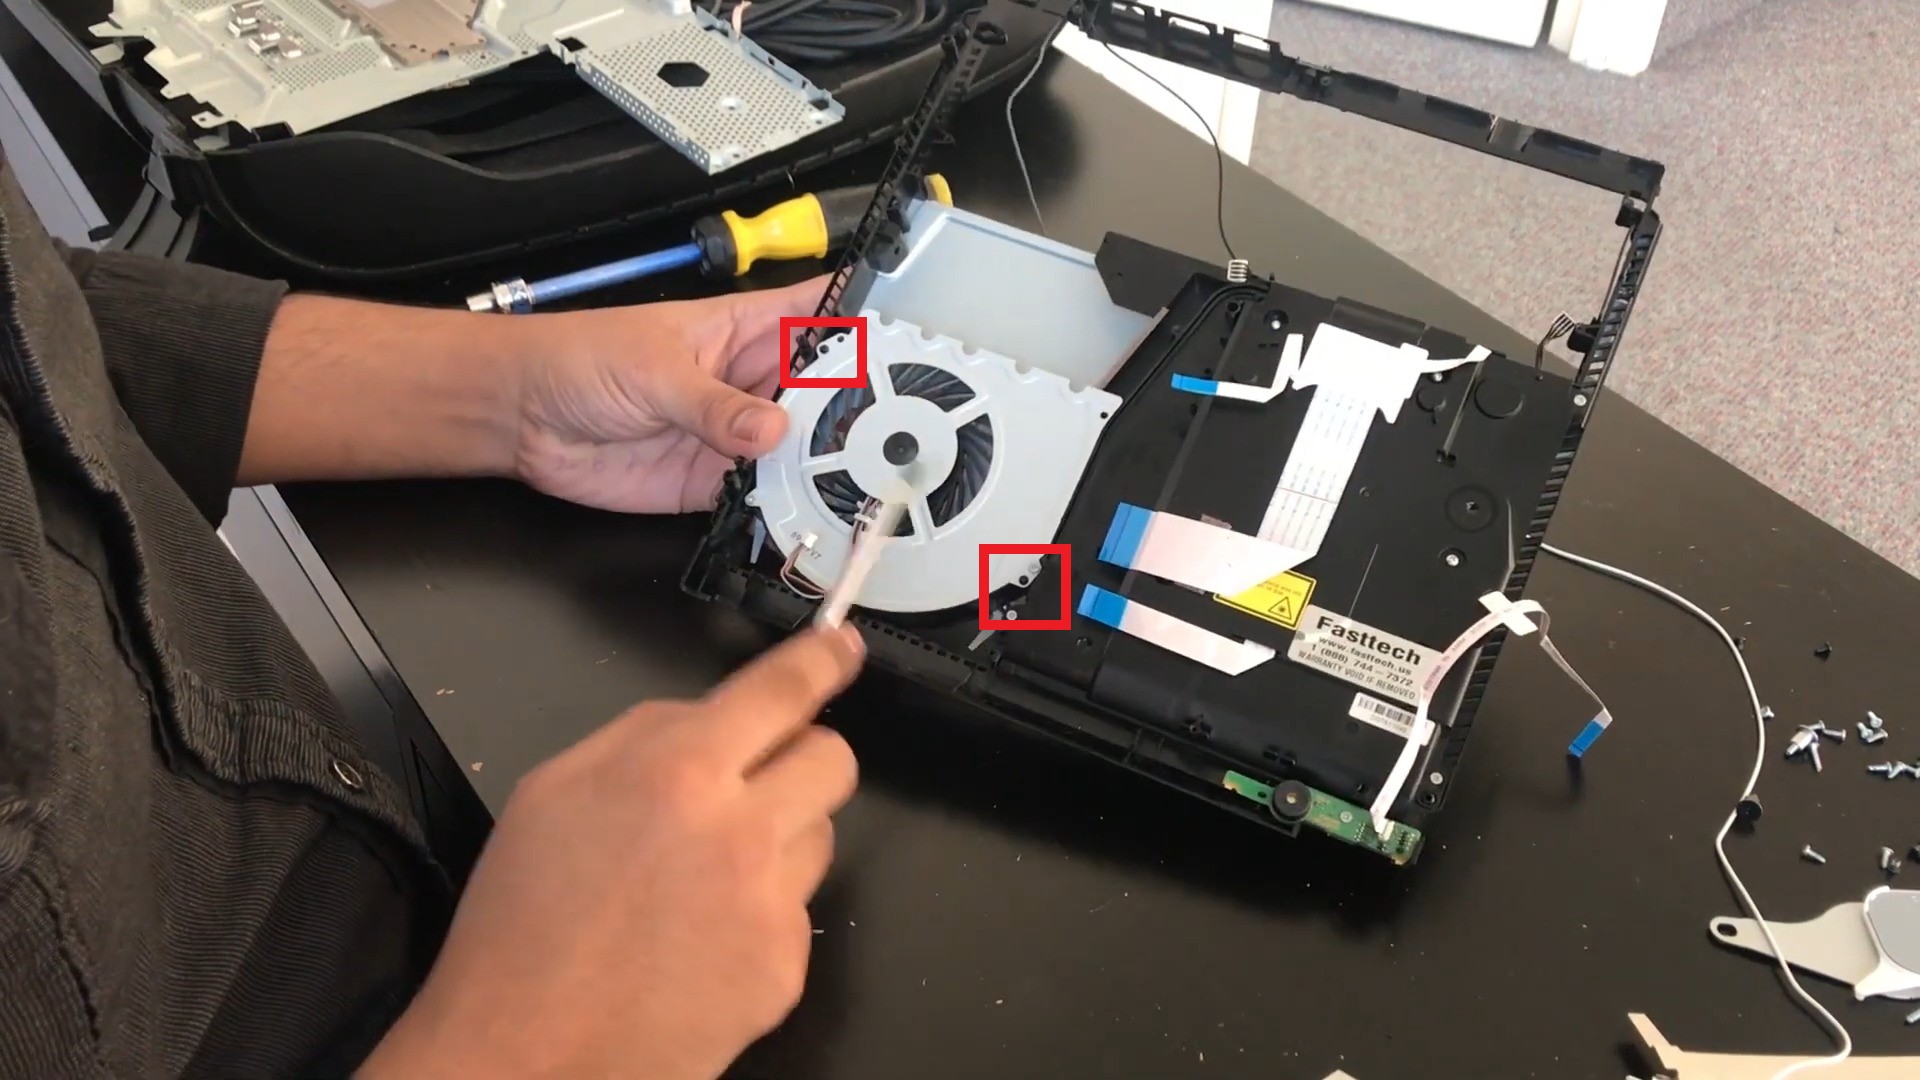
- Depending on your PS4 model, you may need to remove screws or clips holding the fan in place.
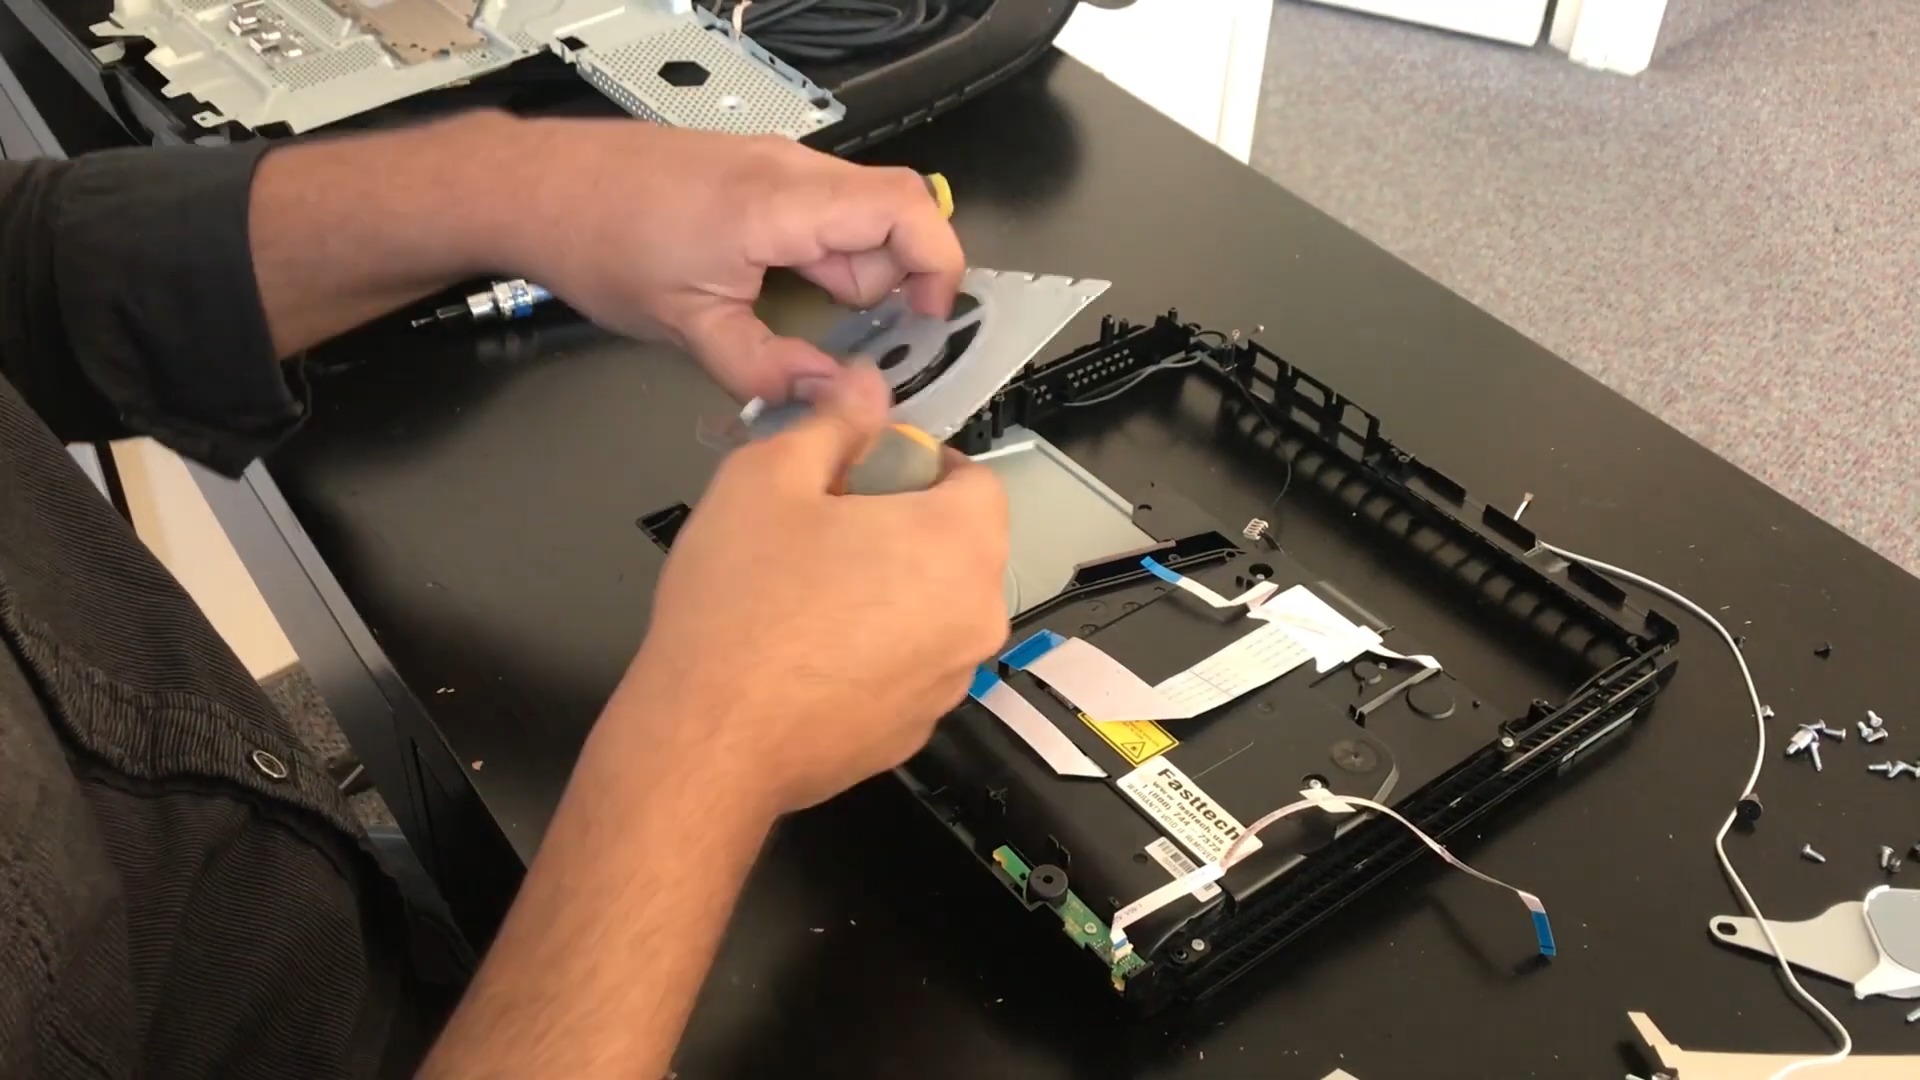
Remove The Screws Holding The Fan – Image Credits [YT/Fasttech] - Once the fan is free from any attachments, gently lift it out of the PS4, being mindful of any delicate components nearby.
Gently Lift The Fan Out- Image Credits [YT/Fasttech] - Take the replacement fan and align it with the previous fan’s designated slot.
- Attach any screws or clips that secure the fan in place. Ensure that it is evenly positioned.
- Reconnect the cables or connectors that were previously disconnected, ensuring they are securely plugged in.
- Close the PS4 case.
- Plug in your PS4 and turn it on.
- Observe the fan’s operation to ensure it is functioning correctly. It should spin smoothly and consistently.
- Monitor the temperature of your PS4 during gameplay or heavy usage to verify that the new fan is effectively cooling the system.
Professional Repair Options
If you have attempted the previous troubleshooting steps and your PS4 fan is still not working or are uncomfortable performing the repairs yourself, it may be time to consider professional repair options. Here are some options to consider:
Warranty Coverage And Manufacturer Support
Check if your PS4 console is still under warranty. If so, contact the manufacturer or an authorized service provider for warranty coverage for fan-related issues.
They may offer free repair or replacement services if the warranty covers the fan malfunction. Be ready to present proof of purchase and any required documentation.
Contact Sony Support
Contact Sony’s customer support if your PS4 is out of warranty or needs further assistance. They have dedicated support channels such as phone support, online chat, or email, where you can describe the problem you’re facing with your fan.
They will walk you through the troubleshooting process and explain the next steps.
Authorized Repair Technicians
You can take your PS4 console to an authorized repair centre if you prefer hands-on professional repair. These centers are certified by Sony to perform repairs on their gaming consoles.
They have trained technicians who specialize in diagnosing and fixing issues with PS4 consoles, including fan problems.
Independent Repair Services
You can explore independent repair services that specialize in console repairs. These repair shops are not affiliated with the manufacturer but may offer competitive pricing and quick turnaround times.
It’s essential to do thorough research and read reviews to ensure they have a good reputation and experienced technicians who can handle PS4 fan repairs.
Thank you! Please share your positive feedback. 🔋
How could we improve this post? Please Help us. 😔
[Errors Troubleshooting Expert]
Arsalan Shakil (aka GuyThatDoesEverything on YouTube) is a PC Tech Enthusiast and Electronic Geek. With over 10+ years of experience in Electronics, he then decided to explore Software Engineering to design embedded products and automate existing hardware solutions.
When he started tearing down old cameras to understand how they worked, he was shocked (literally, when he got zapped by a flash discharge capacitor), giving him the power (debatable) to fall in love with videography/photography. He also started making some fun videos that later became YouTube tech reviews.
Skills:
- 10+ years of experience in Electronics design, embedded solutions, and prototyping
- Majored in Software Engineering
- Research paper publication in IEEE for Embedded Military Uniform & LoRa WAN wireless technology
- Specialized in IoT Solutions
- PC Enthusiast & PC Modder
In his local region, he’s known to expose cheap PSU brands, often claiming fake certification or false claims on the box. He’s a true nerd and needed some friends in his life. Then he met some guys who work at Tech4Gamers, and they also came out to be equal nerds who suggested he join Tech4Gamers as a Hardware Expert.


 Threads

![How We Fixed The Unmountable Boot Volume Error In Windows 11 Unmountable Boot Volume [Windows 11 - FIXED]](https://tech4gamers.com/wp-content/uploads/2023/09/Unmountable-Boot-Volume-Windows-11-FIXED-218x150.jpg)

![Xbox Series X: No Sound Error [Our Tested Fixes] Xbox Series X No Sound Error](https://tech4gamers.com/wp-content/uploads/2024/01/xbox-series-x-no-sound-error-218x150.jpg)