 Threads
Worth It?
Review Summary
The Orico SharpVid 4K doesn’t try to reinvent the wheel, but it does a solid job of giving you what matters. It is a small, solid card with an aluminum body, and it doesn’t disappoint when handling 4K/60Hz recording with VRR. I tried it out on different platforms and didn’t run into any real issues. Honestly, it was just plug it in, hit record, and you’re good to go. Using it to switch between gaming, streaming, and recording felt simple enough. There was nothing I had to overthink. It’s not out here trying to show off with fancy features, and the price isn’t exactly cheap, but it holds its ground pretty well next to Elgato or AverMedia stuff.

Overall
-
Design - 8.5/10
8.5/10
-
Build Quality - 8.5/10
8.5/10
-
Performance - 9/10
9/10
-
Ease of Use - 9/10
9/10
-
Value - 8/10
8/10
Pros
- 4K 60Hz loop-out & capture
- Compact and portable
- Easy setup
- HDMI/Type-C input switch
- Sturdy build
Cons
- Rubber feet feel a bit flimsy
- Price may feel high for entry-level users
- Limited color options
- No dedicated software bundle


Update: Orico is currently offering a 15% discount on their website using the code CUV653C2, valid from September 13th to 30th.
If you’ve been around consuming streaming content or into its streamer-focused products, chances are the first brands that pop into your head are Elgato or AverMedia. They’ve been running the market for a while and dominating the space for years for pretty good reasons. I’ve tested several capture cards from the latter over the years, so I have a pretty good idea of what makes a capture card genuinely worth using.
That’s why I wanted to see how Orico’s SharpVid 4K performs. The brand is better known only for accessories like hubs, docks, and storage devices, which makes it an interesting product.
Key Takeaways
- The Orico SharpVid 4K is a compact capture card that delivers smooth 4K/60Hz recording with VRR support. It is built with a sturdy aluminum build, provides a plug-and-play setup, and has broad compatibility across platforms.
- You should consider the Orico SharpVid 4K if you want an easy setup, require outstanding performance, and need solid build quality.
- You should skip the Orico SharpVid 4K if you’re on a tight budget, prefer extra features, and want a brand-name staple.
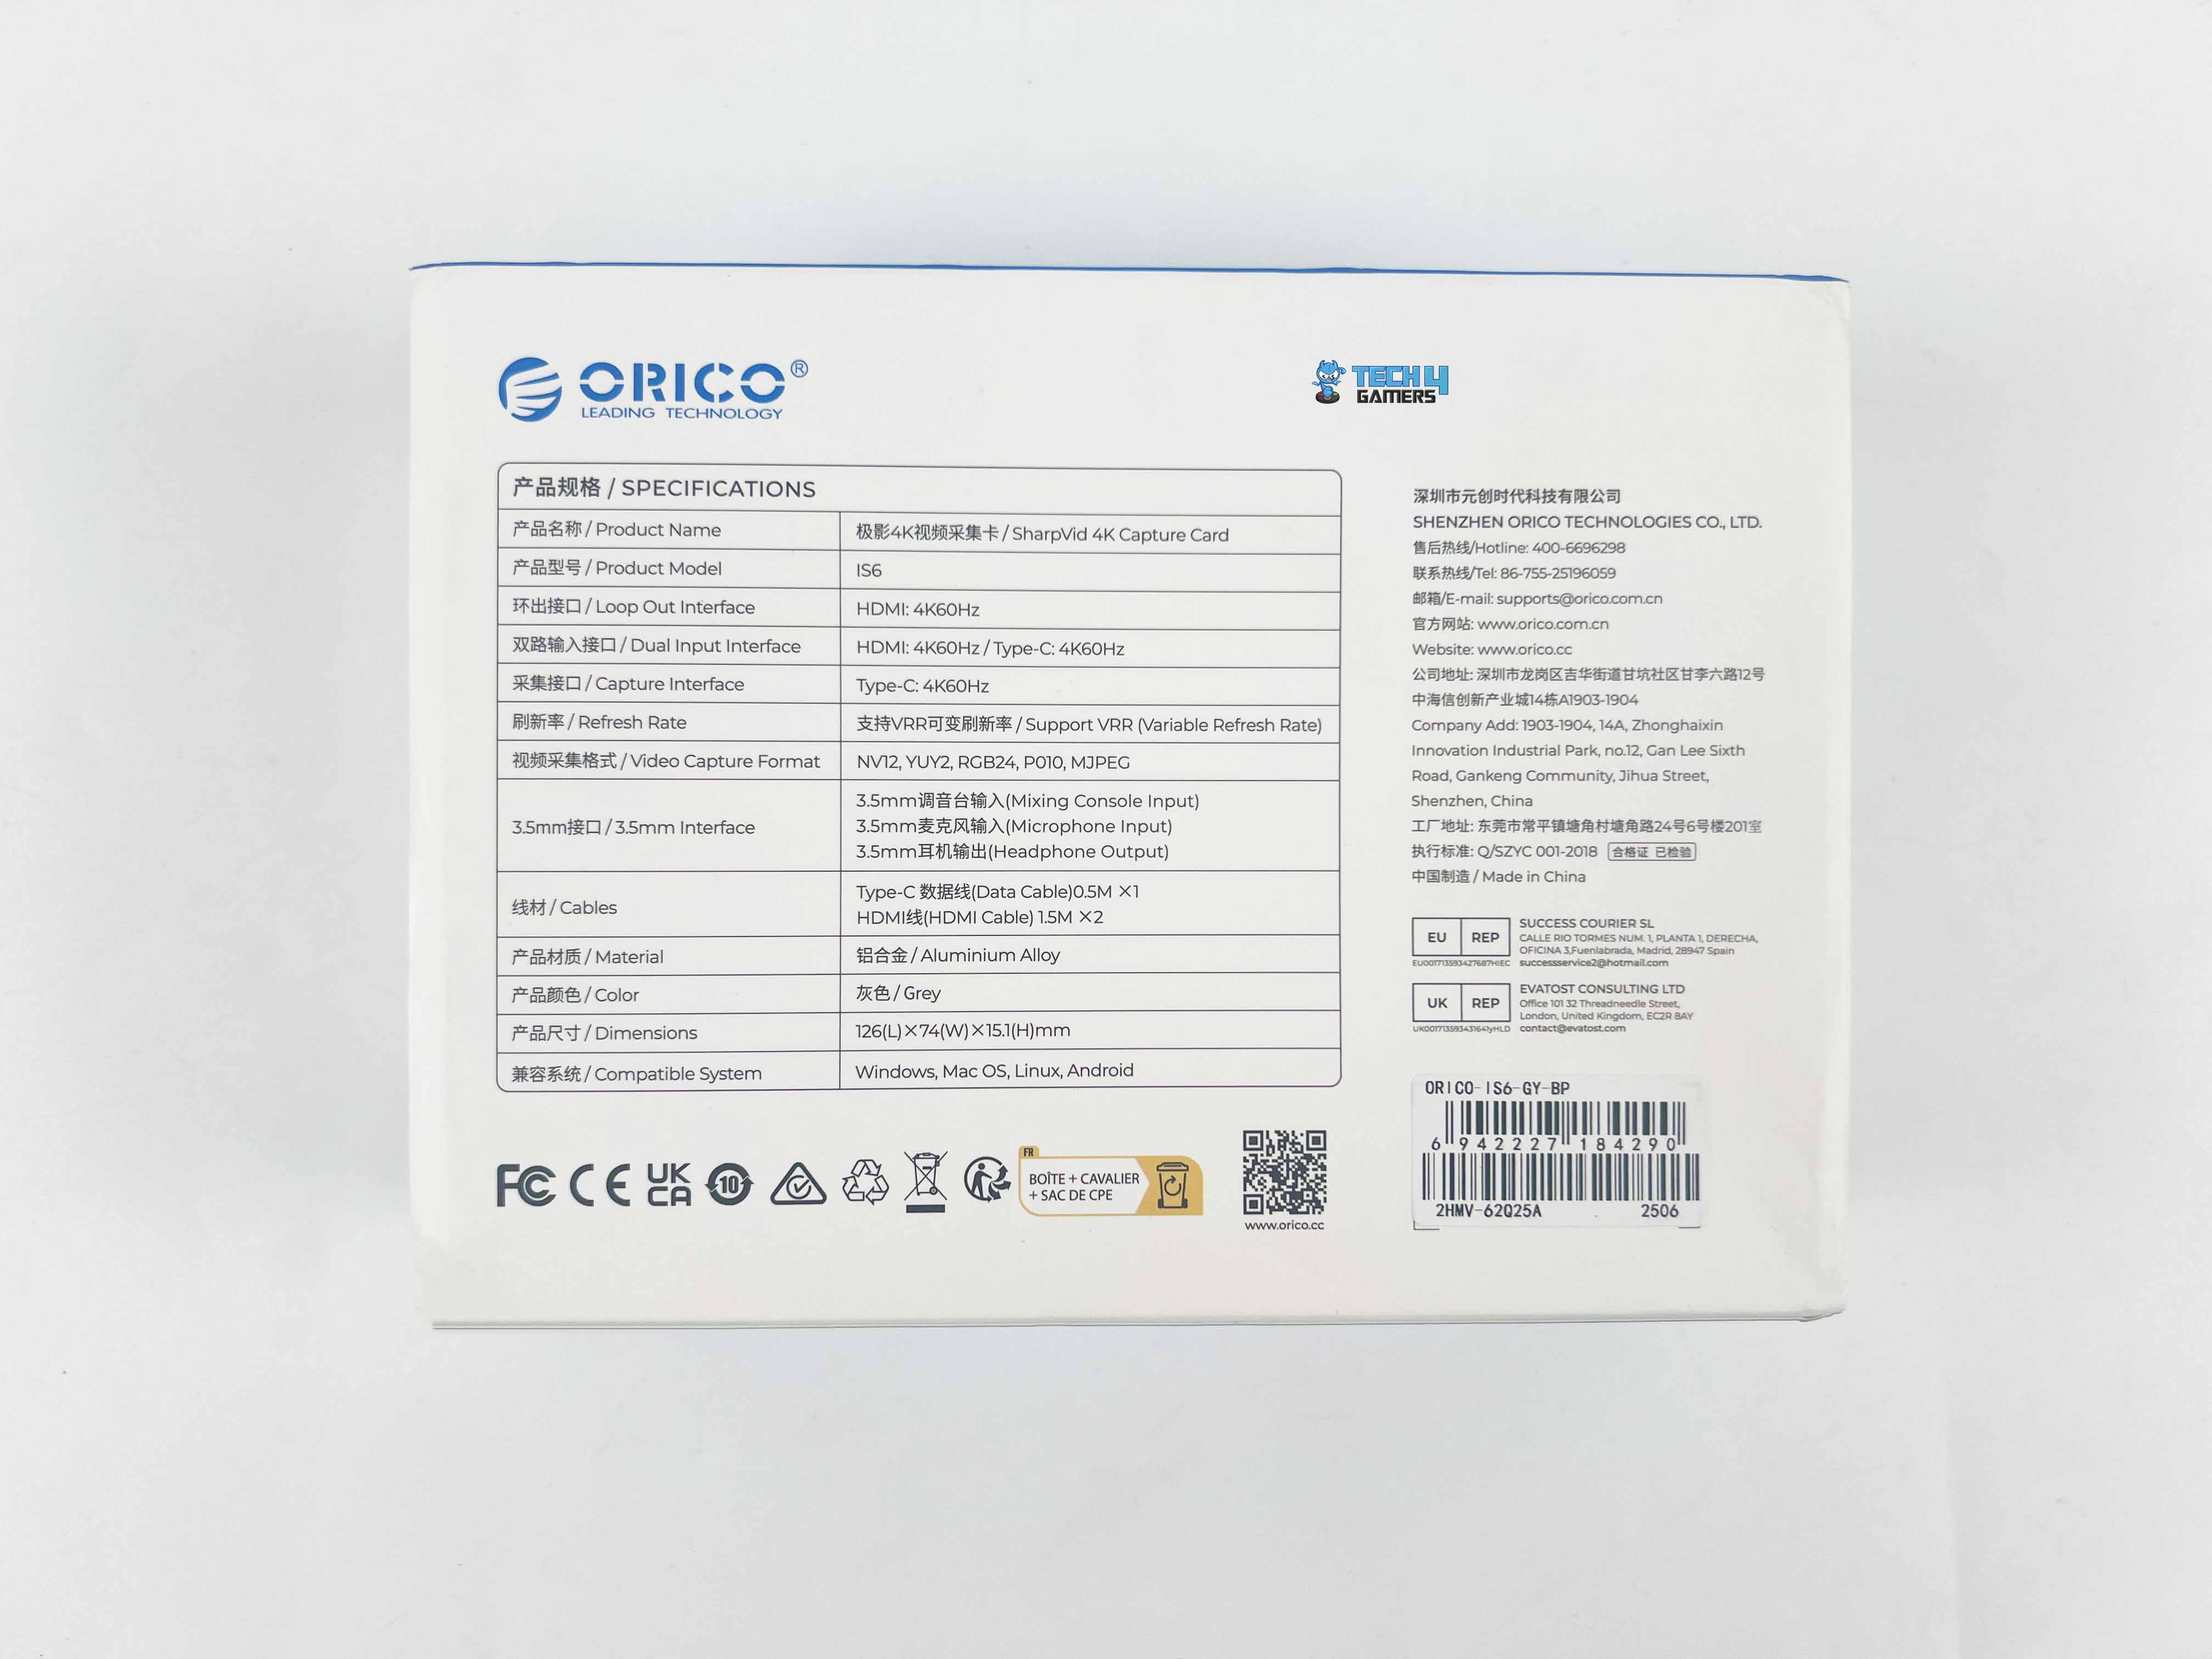
Here are the technical specifications:
| Model | ORICO-IS6 |
| Material | Aluminium Alloy |
| Color | Grey |
| Dimension | 126*74*15.1mm |
| HDMI | 4K60Hz |
| Type-C | 4K60Hz |
| Capture Interface | Type-C 4K60Hz |
| 3.5mm Jack | 3.5mm voice adjustment, 3.5mm Mic, 3.5mm Headphone |
| Cable | Type-C 10G, 0.5M*1 HDMI Cable:1.5M*2 |
| Supported System | Windows, Mac OS, Linux, Android |
What Makes the Orico SharpVid 4K Capture Card Different?
The Orico SharpVid 4K has entered a market where most of the share is owned by Elgato and AverMedia, with a sturdy aluminum build, a clean design, and performance comparable to the big names. What really gives it an edge is the hardware input-toggle switch and dual 4K60Hz support, which simplifies multi-device use. It checks all the boxes that include 4K60 capture, VRR support, OS compatibility from Windows to Android, and user-friendly setup, all of which are impressive for a brand starting out in the capture card market.
Packaging & Unboxing

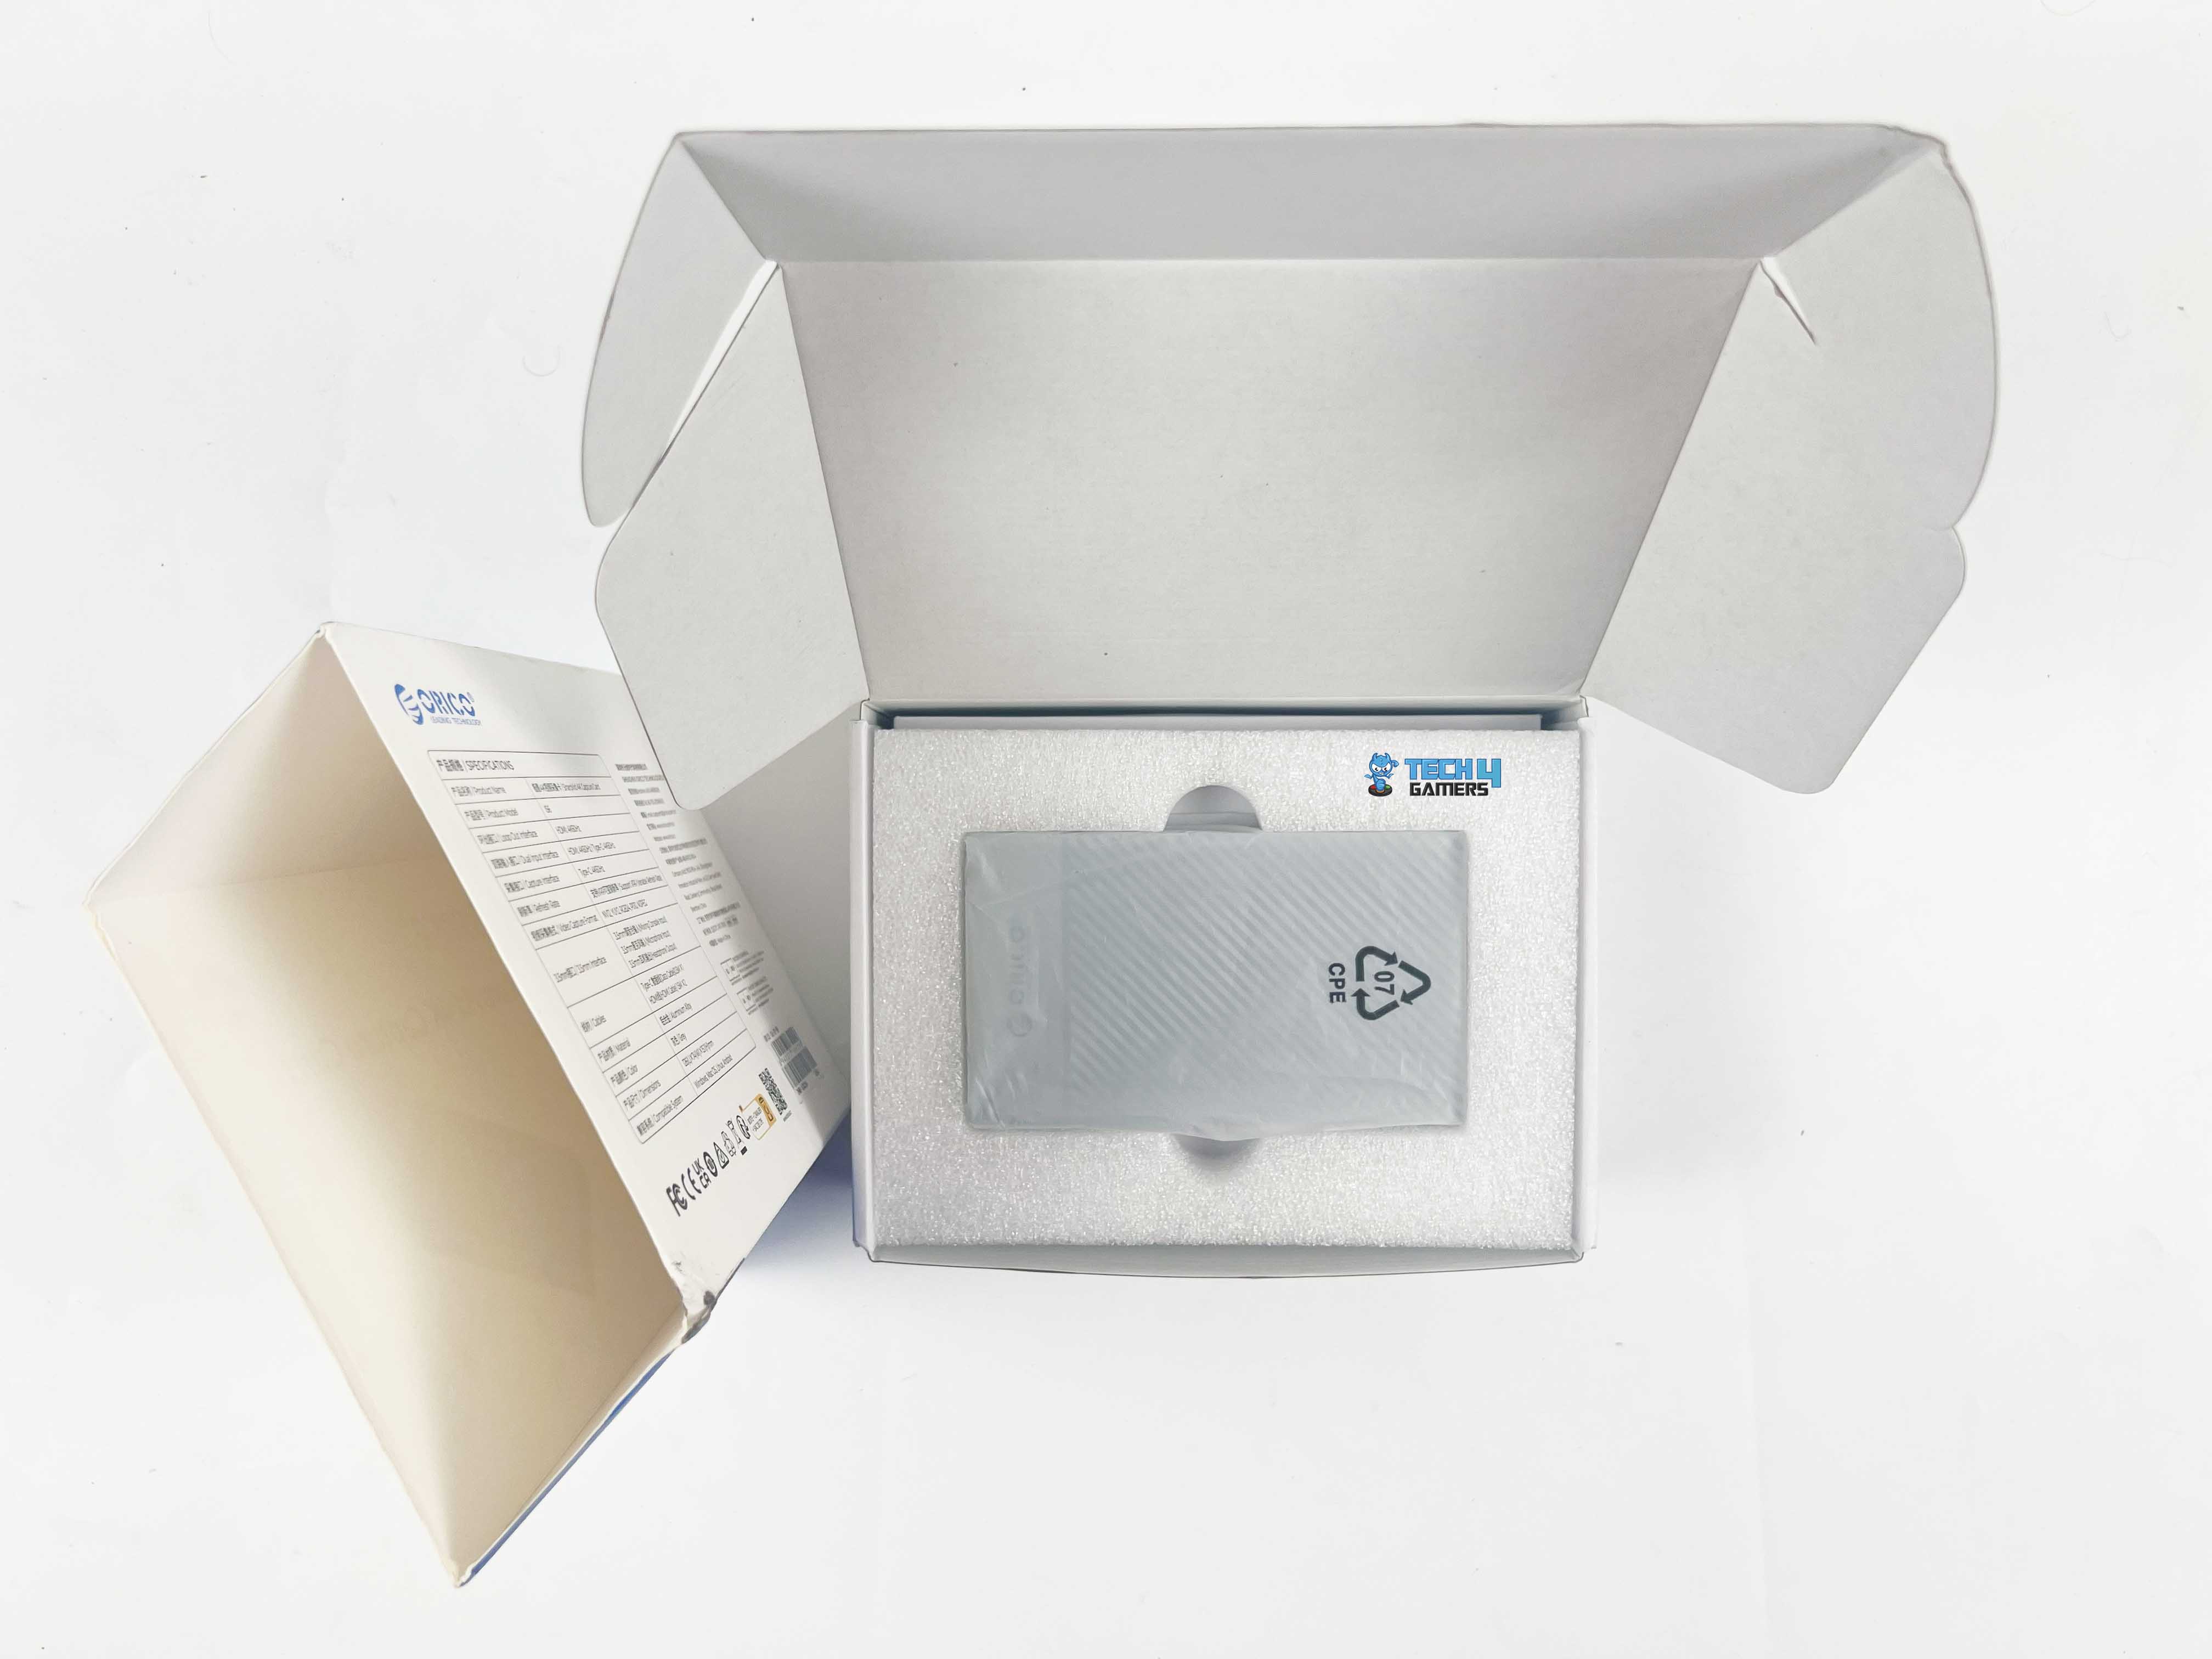
Opening up the SharpVid 4K is actually a bit of a mini experience, as Orico went with a dual-layer packaging. The first thing you unbox is a slim cardboard sleeve that slides right off, and underneath it is the actual box. The sleeve itself is covered with all the usual specs and details. The front shows the card itself, with the Orico logo branding in the corner, along with the model name.
The sleeve itself sticks to a simple white-and-blue theme, which is clean enough that it doesn’t feel overdone. Along the top, there are a bunch of small icons showing off things like the aluminum body, the Type-C port, the audio options, and HDMI. If you flip the box over, you’ll see the complete list of specs printed on the back.
Box Contents
Once you take off the sleeve and open the main box, you’ll first see the capture card wrapped in a soft plastic sleeve. It is seated in a smooth, molded white foam that keeps it from moving around in the box. Underneath it, there’s another space where the cables and manual are placed. It only comes with the basics, but at least you don’t need to go looking for extra things before you can actually start using it, as everything is provided inside the box.
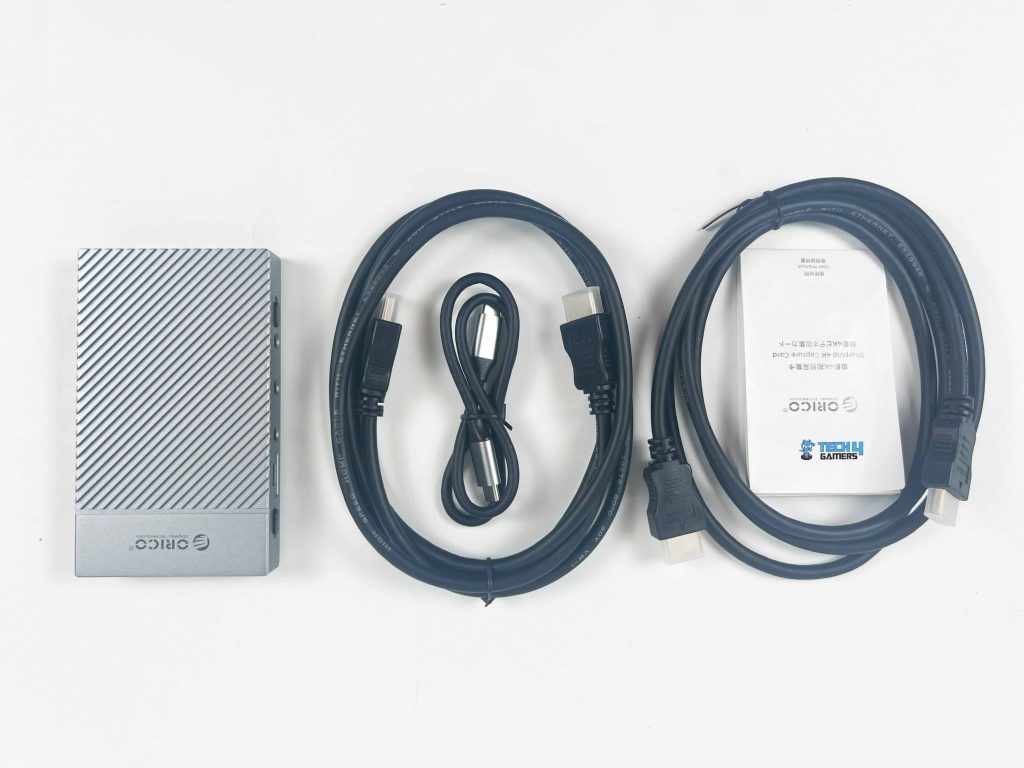
Here is the list of everything that you’ll find inside the box:
- Orico SharpVid 4K Capture Card
- USB Data Cable
- 2x HDMI High-Definition Cable
- Multilingual User Guide
Design
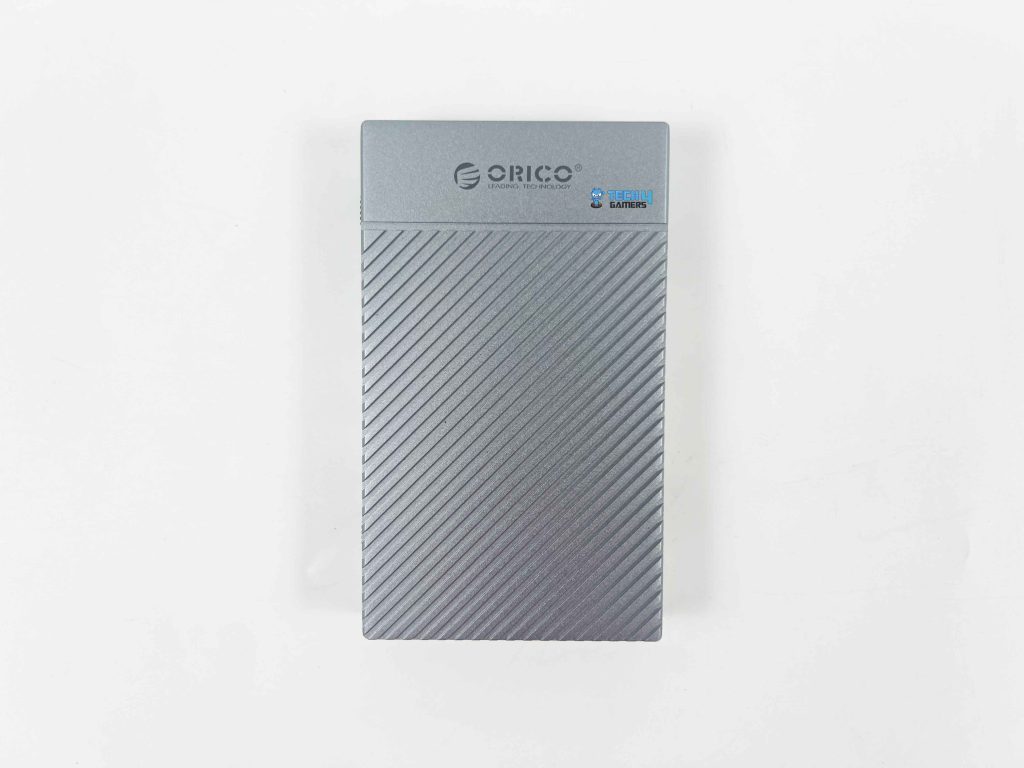
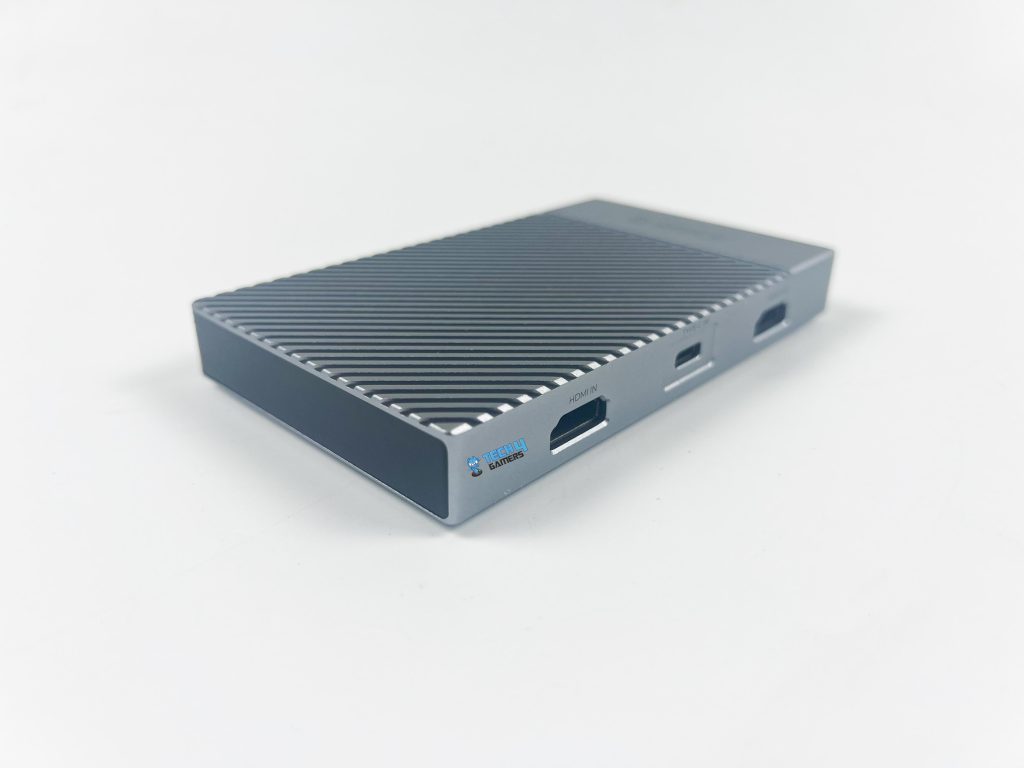
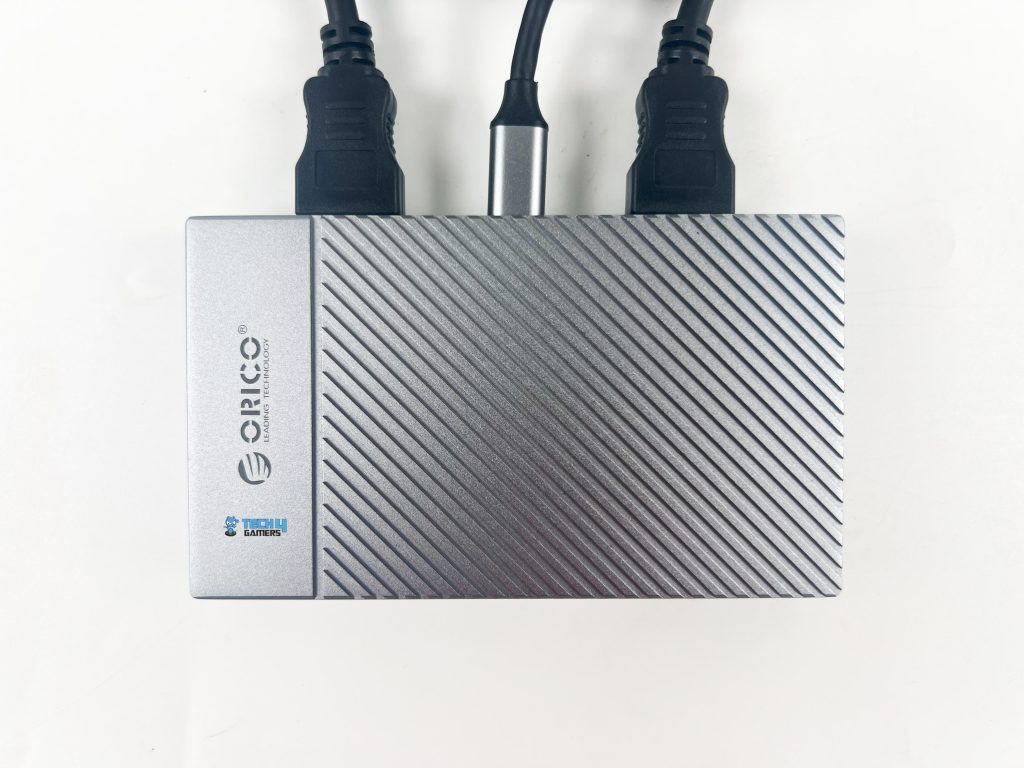
The SharpVid 4K is pretty compact, about 126 × 74 × 15mm, so it hardly takes up any space. On my desk, it just sort of blends in with the rest of my setup. It’s pretty portable, as if I’ve got to move it, I toss it in my bag, and that’s it. Honestly, half the time I forget it’s even there on my desk until I need it again.
As for the design, Orico kept it minimalistic. It is clean and modern without trying too hard to stand out. The card comes in only a gray color, keeping it sleek and neutral rather than flashy. On top, two different patterns are going on. The upper part is simply flat, featuring a small Orico logo. Below that, there’s a diagonal design that at first had me thinking the lines were popping out.
But it’s really just a smooth slope. It’s something like bevel and emboss. That little slope gives it a slightly modern aspect. Moreover, Orico added a pair of black strips on the sides, which helps break up all that gray. It’s nothing extraordinary, but it does stop the design from looking too plain. The gray blends in adequately, and the angled pattern and the black strips stop it from feeling simple.
Build Quality
The SharpVid 4K feels surprisingly solid for its size. Orico has used aluminium alloy for the casing, which not only looks premium but also serves a practical purpose, as it helps with heat dissipation. The company claims it can safely handle up to 72 hours of continuous use, which is impressive, though I didn’t test it for that long myself. Streaming or recording for three days straight isn’t really my thing.
That said, during everyday use, it stayed cool the entire time, which I think is primarily thanks to the use of aluminium alloy material. In terms of sturdiness, this capture card is solid. There’s no bend or flex in the body, no matter how much pressure you apply. There is nothing that feels cheap. I didn’t drop it on purpose, but just holding it gives you the sense it could take a bump or two without breaking apart.
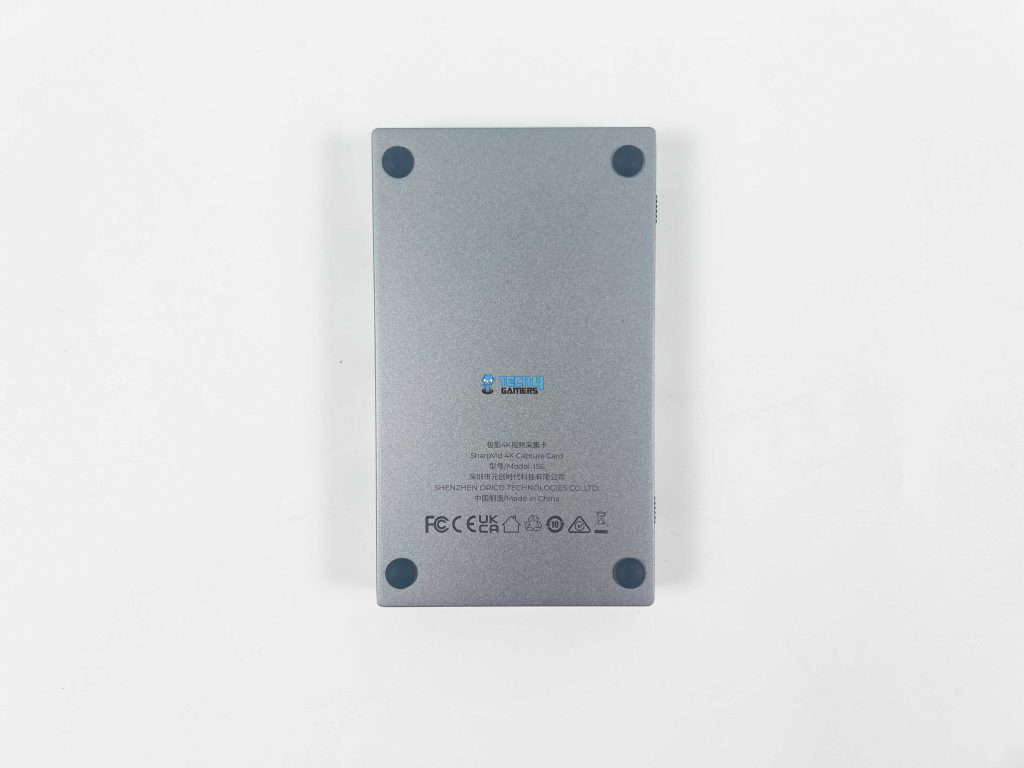
What I liked is that it still feels light in the hand, not chunky or bulky to move around. The matte finish also looks great. It keeps the card looking clean, and I didn’t really see it gather up fingerprints or smudges. Underneath, it’s got four little rubber feet. Honestly, they look tiny at first, like they wouldn’t do much, but the card actually stays in place just fine. It doesn’t slide around on the desk at all.
Ports
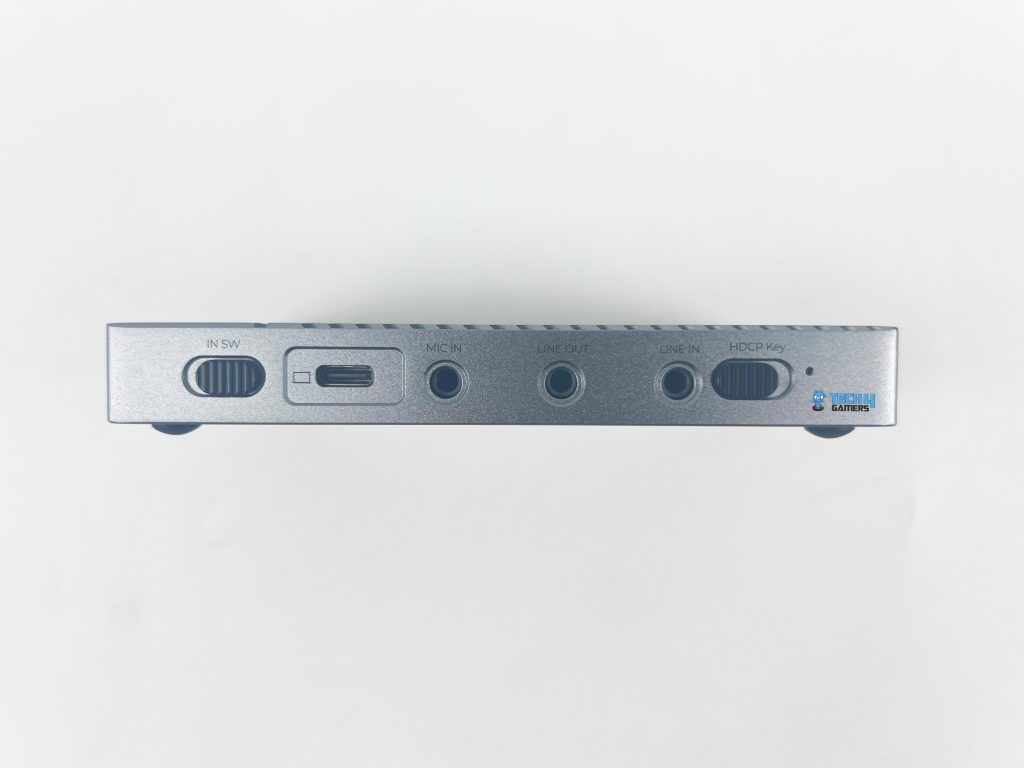
The SharpVid 4K has its ports thoughtfully split between the front and back, making everything easy to access without crowding a single side. Starting with the front, it’s where most of the ports are located. On the left side, there’s a little toggle switch instead of a standard button. Flick it one way and it picks up the HDMI input, flick it the other and it switches over to Type-C.
I actually found it pretty handy when I was switching between devices. Thankfully, I could do with only a quick switch. Next to that, there’s the Type-C connection interface, which lets you plug notebooks and PCs. Right beside it are three 3.5mm jacks, including mic in, line out, and line in. The mic input worked perfectly with my microphone, while the line out allowed me to plug in my earphones.
The line in can be used with a mixing console or an external audio source. I didn’t have any means to test that one, but if everything else is working perfectly, then it would have been as well. There’s also an HDCP switch on the front. When you toggle the switch to the left, HDCP is enabled, blocking protected content from being recorded. Whereas, moving it to the right disables it.
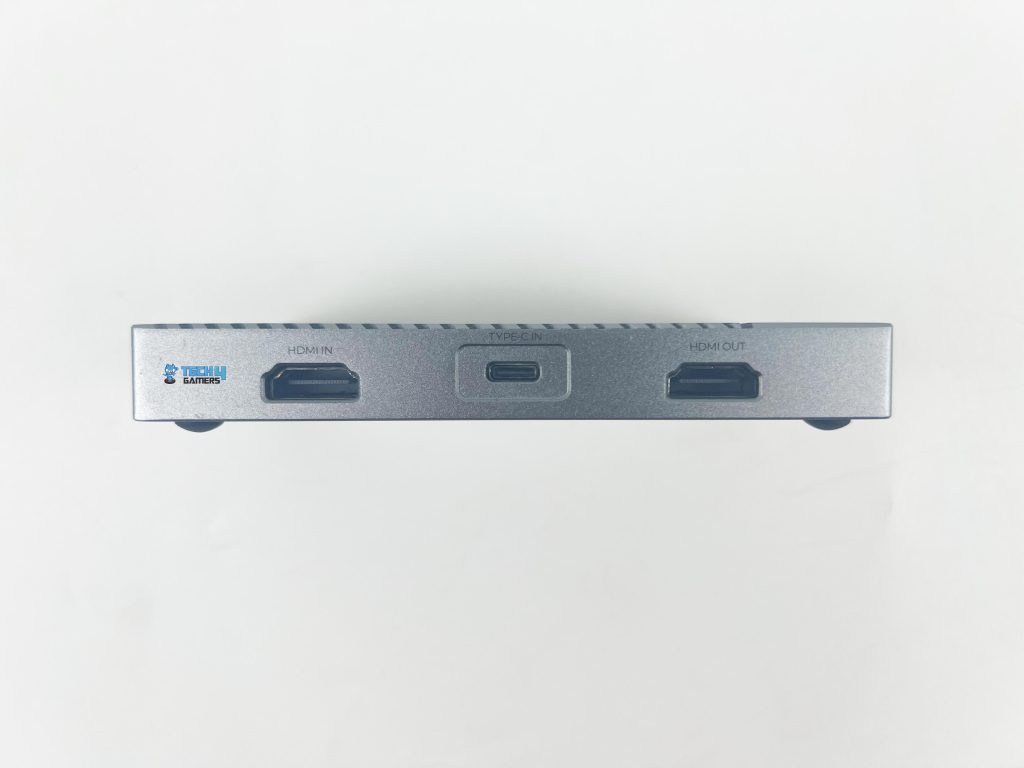
Lastly, a small pilot lamp on the front serves as a subtle LED indicator, indicating the device’s status. On the back, there’s an HDMI input for consoles, cameras, camcorders, or tablets, a Type-C input for smartphones, laptops, or PCs, and an HDMI loop-out for monitors or TVs. Everything is clearly labeled, which eliminates guesswork, and plugging in cables feels tight and secure, not loose.
Setting Up
One of the best things about the SharpVid 4K is how plug-and-play it is. Honestly, setting it up was super easy. First, I connected my console, laptop, PC, or smartphone to the capture card. Then, you can open whatever program you’re gonna use. I tried it with OBS, Streamlabs, Zoom, and many more. Thankfully, it worked with all of them without any trouble.
The next step is to locate the video and audio source settings within the software and select the capture card as your input device. Then I did the same for the audio. After that, I adjusted the video and audio settings, including resolution, frame rate, and audio quality. You need them to match the card’s settings. If the settings are not compatible, the video may stutter, or the sound might be out of sync.
Once that’s all sorted, you can just hit record or start streaming. You can also check that the card is working through its LED pilot lamp. For instance, solid blue means it’s getting a signal, flashing blue means there’s nothing, and if it’s blinking blue and red, that’s standby with some signal issues. It’s a subtle hint, but it actually helps when troubleshooting.
I got it working with my PC and console in just a few minutes, without needing any drivers or additional software. Speaking of which, the SharpVid 4K supports driveless installation across a wide range of operating systems, including Windows, macOS, Linux, and even Android. That makes it ideal if you frequently switch between devices or stream with different setups.
Features

The SharpVid 4K lets you capture and loop out at 4K/60Hz. With it, I could play my games at 4K with 60 FPS and have the card record or stream at the same quality. I tried it with a few AAA titles, and I could really tell the difference in the quality of the footage. It came out detailed, crisp, and accurate to what I saw on my monitor. There were no weird color shifts and no compression artifacts.
Furthermore, it also supports VRR. If you’ve ever recorded or streamed without VRR, you probably know what screen tearing or frame stutter looks like. With VRR on, the SharpVid 4K automatically adapts to your source’s frame rate, keeping the video smooth. I tried turning VRR off to see what would happen, and there was a big difference. Without it, fast-paced moments had noticeable tearing.
With VRR on, they felt fluid, even during sudden framerate drops. Moreover, it supports multiple formats, including RGB24, YUY2, NV12, P010, and MJPEG. I know, there are a lot of letters, but each one does something different. When I tried RGB, the colors appeared sharper, which made it great for streaming or any video work where you want colors to really stand out.
YUY2 felt like a balanced option, which I found especially handy for video conferencing. NV12 trades a little color depth for system ease, as it noticeably reduces CPU load. P010 was clearly made for higher-end workflows, keeping more detail. Finally, MJPEG surprised me with how responsive it felt. It offered an outstanding balance of quality and low latency, which is why it’s so often used in medical imaging.
Performance
It handles everything remarkably, whether you’re recording, streaming, or switching between devices with its input switch. I didn’t notice any significant lag, as there was little to no latency. Everything felt seamless when I was playing fast-paced games. For instance, while testing it with Valorant, my shots, crosshair movements, and ability usage matched perfectly on the recorded footage.
Moreover, the capture quality was sharp and vibrant. The footage from Valorant showed accurate colors without any washed-out tones. Even little details like skins and map textures looked sharp, and effects during fights didn’t blur out like they sometimes do on other capture cards. The bitrate remained stable throughout, even during intense firefights with lots of explosions and particle effects.
Nothing looked compressed or jittery, as it really maintained a high-quality capture that I’d be happy to upload directly to YouTube without additional post-editing. There were no frame drops or stuttering at all. For comparison, some lower-end capture cards would occasionally struggle during gunfights, but this card performed well.
Thanks to the aluminium alloy build, the device stayed cool during testing. Even after recording for a few hours straight, the temperature felt perfectly normal. Lastly, audio came through perfectly in sync with the video. I didn’t notice any drift or desynchronization as I watched the playback. All the gunshots and footsteps were in sync with the video.
Should You Buy it
Buy it if
✅ You want an easy setup: The SharpVid 4K is plug-and-play, working smoothly across Windows, macOS, Linux, and even Android without the need for drivers.
✅ You require outstanding performance: With 4K/60Hz capture, VRR support, and multiple video formats (RGB24, NV12, MJPEG, and more), it delivers detailed visuals and reliable performance for both casual and professional streaming.
✅ You need solid build quality: Its aluminum alloy casing not only feels premium but also keeps the device cool during long recording or streaming sessions.
Don’t Buy it if
❌ You’re on a tight budget: It’s not the cheapest capture card out there, sitting between entry-level and premium options.
❌ You prefer extra features: Unlike some competitors, it skips flashy extras like customizable RGB lighting or bundled software.
❌ You want a brand-name staple: If you’re more comfortable sticking with well-established brands like Elgato or AverMedia, Orico may feel like an unknown gamble.
My Thoughts
After spending quite a considerable amount of time with the Orico SharpVid 4K, what stood out to me most was how well-rounded the whole package is. It’s a compact little card, but it doesn’t give off a cheap vibe either. The cables fit nicely into the ports, and setting it up took only minutes. To this date, I have been using it without any trouble.
Performance-wise, it left a positive impression. The capture quality looked sharp, and the colors didn’t feel off or washed out. I never ran into random disconnects or weird stutters either. Even after a long session, it stayed cool and performed smoothly. I’ll admit, when I first looked at the price tag, I thought it was sitting a little high compared to other capture cards on the market.
But after using it, testing different formats, switching between devices, and streaming without a single issue, the price started to make sense. It’s not exactly a budget option, but for what it costs, it does what you’d hope. At the end of the day, it comes across as a balanced card. For the price, I would definitely recommend it.
Thank you! Please share your positive feedback. 🔋
How could we improve this post? Please Help us. 😔
[Hardware Reviewer & Editor]
After many years of exploiting various pieces of hardware, Abdul Hannan now serves as an editor at Tech4Gamers. He’s been in the PC hardware reviewing industry for almost a decade, and his staff of passionate geeks and reviewers is second to none.
Abdul Hannan is constantly seeking new methods, you will always see him running into New Computer Courses to improve the performance of his computer components since he is an ardent overclocker. He is well-known for providing the most extensive and unbiased analysis of the newest and greatest hardware for PC gaming, including everything from GPUs to PSUs.


