 Threads
Ergonomically Superb!
Review Summary
The Cooler Master Caliber R1 Gaming Chair is a premium choice for extended gaming or work sessions. Crafted with durable materials and thoughtful design, it offers exceptional comfort and support, especially through its adjustable neck and lumbar pillows.
Hours Tested: 2 Months

Overall
-
Design - 9/10
9/10
-
Comfort - 8.5/10
8.5/10
-
Features - 8/10
8/10
-
Value - 8.5/10
8.5/10
Pros
- Premium breathable PU leather for extended comfort
- Inclusion of adjustable neck and lumbar pillows
- Ergonomic design for prolonged sitting
- Straightforward assembly with provided tools
- Sturdy 5-star base and Class 4 gas lift
Cons
- Casters struggle on carpets, requiring more effort to move
- Some concerns raised about potential wear due to lumbar pillow pressure


Cooler Master has graciously provided the Caliber R1 for review, a gaming chair available in four vibrant colors: Purple, Red, Blue, and White. Crafted with comfort and extended use in mind, these chairs boast an ergonomic design tailored for lengthy gaming sessions. Utilizing premium breathable PU fabric, they aim to minimize fatigue while ensuring maximum comfort. Additionally, the inclusion of headrest and lumbar pillows aims to alleviate strain on the neck and back.
Key Takeaways
- Caliber R1 is Cooler Master’s ergonomic gaming chair, featuring premium PU leather, adjustable elements, and thoughtful design for extended comfort during gaming sessions.
- The Caliber R1 is recommended for gamers seeking a comfortable and durable gaming chair that prioritizes long hours of use without compromising posture or support.
- The Caliber R1 may not be for Individuals looking for more specialized or niche features, beyond the standard ergonomic design, might explore other gaming chair options catering to specific preferences or needs.
- Why you can trust Tech4Gamers: Our reviews are based on dedicated hands-on testing by our team of experienced hardware experts. Find out more about how we test.
| PRODUCT | Gaming Chair |
|---|---|
| PRODUCT NAME | Caliber R1Gaming Chair |
| PRODUCT NUMBER | CMI-GCR1-2018 |
| HEIGHT | 136cm (with base) |
| BACKREST LENGTH | 83cm |
| BACKREST WIDTH | 57cm |
| OUTER BACKREST WIDTH (WIDEST POINT) | 57cm |
| SEAT WIDTH (INCLUDING SIDES) | 57cm |
| SEAT DEPTH | 52cm |
| ARMREST ADJUSTABILITY | 23-30cm |
| ARMREST TO ARMREST | 72cm |
| DIAMETER OF BASE | 72cm |
| FLOOR TO BASE | 35-43cm |
| HEIGHT ADJUSTABILITY | 8cm |
| RECLINE | 90-180 degree |
| AVAILABILITY | selected regions |
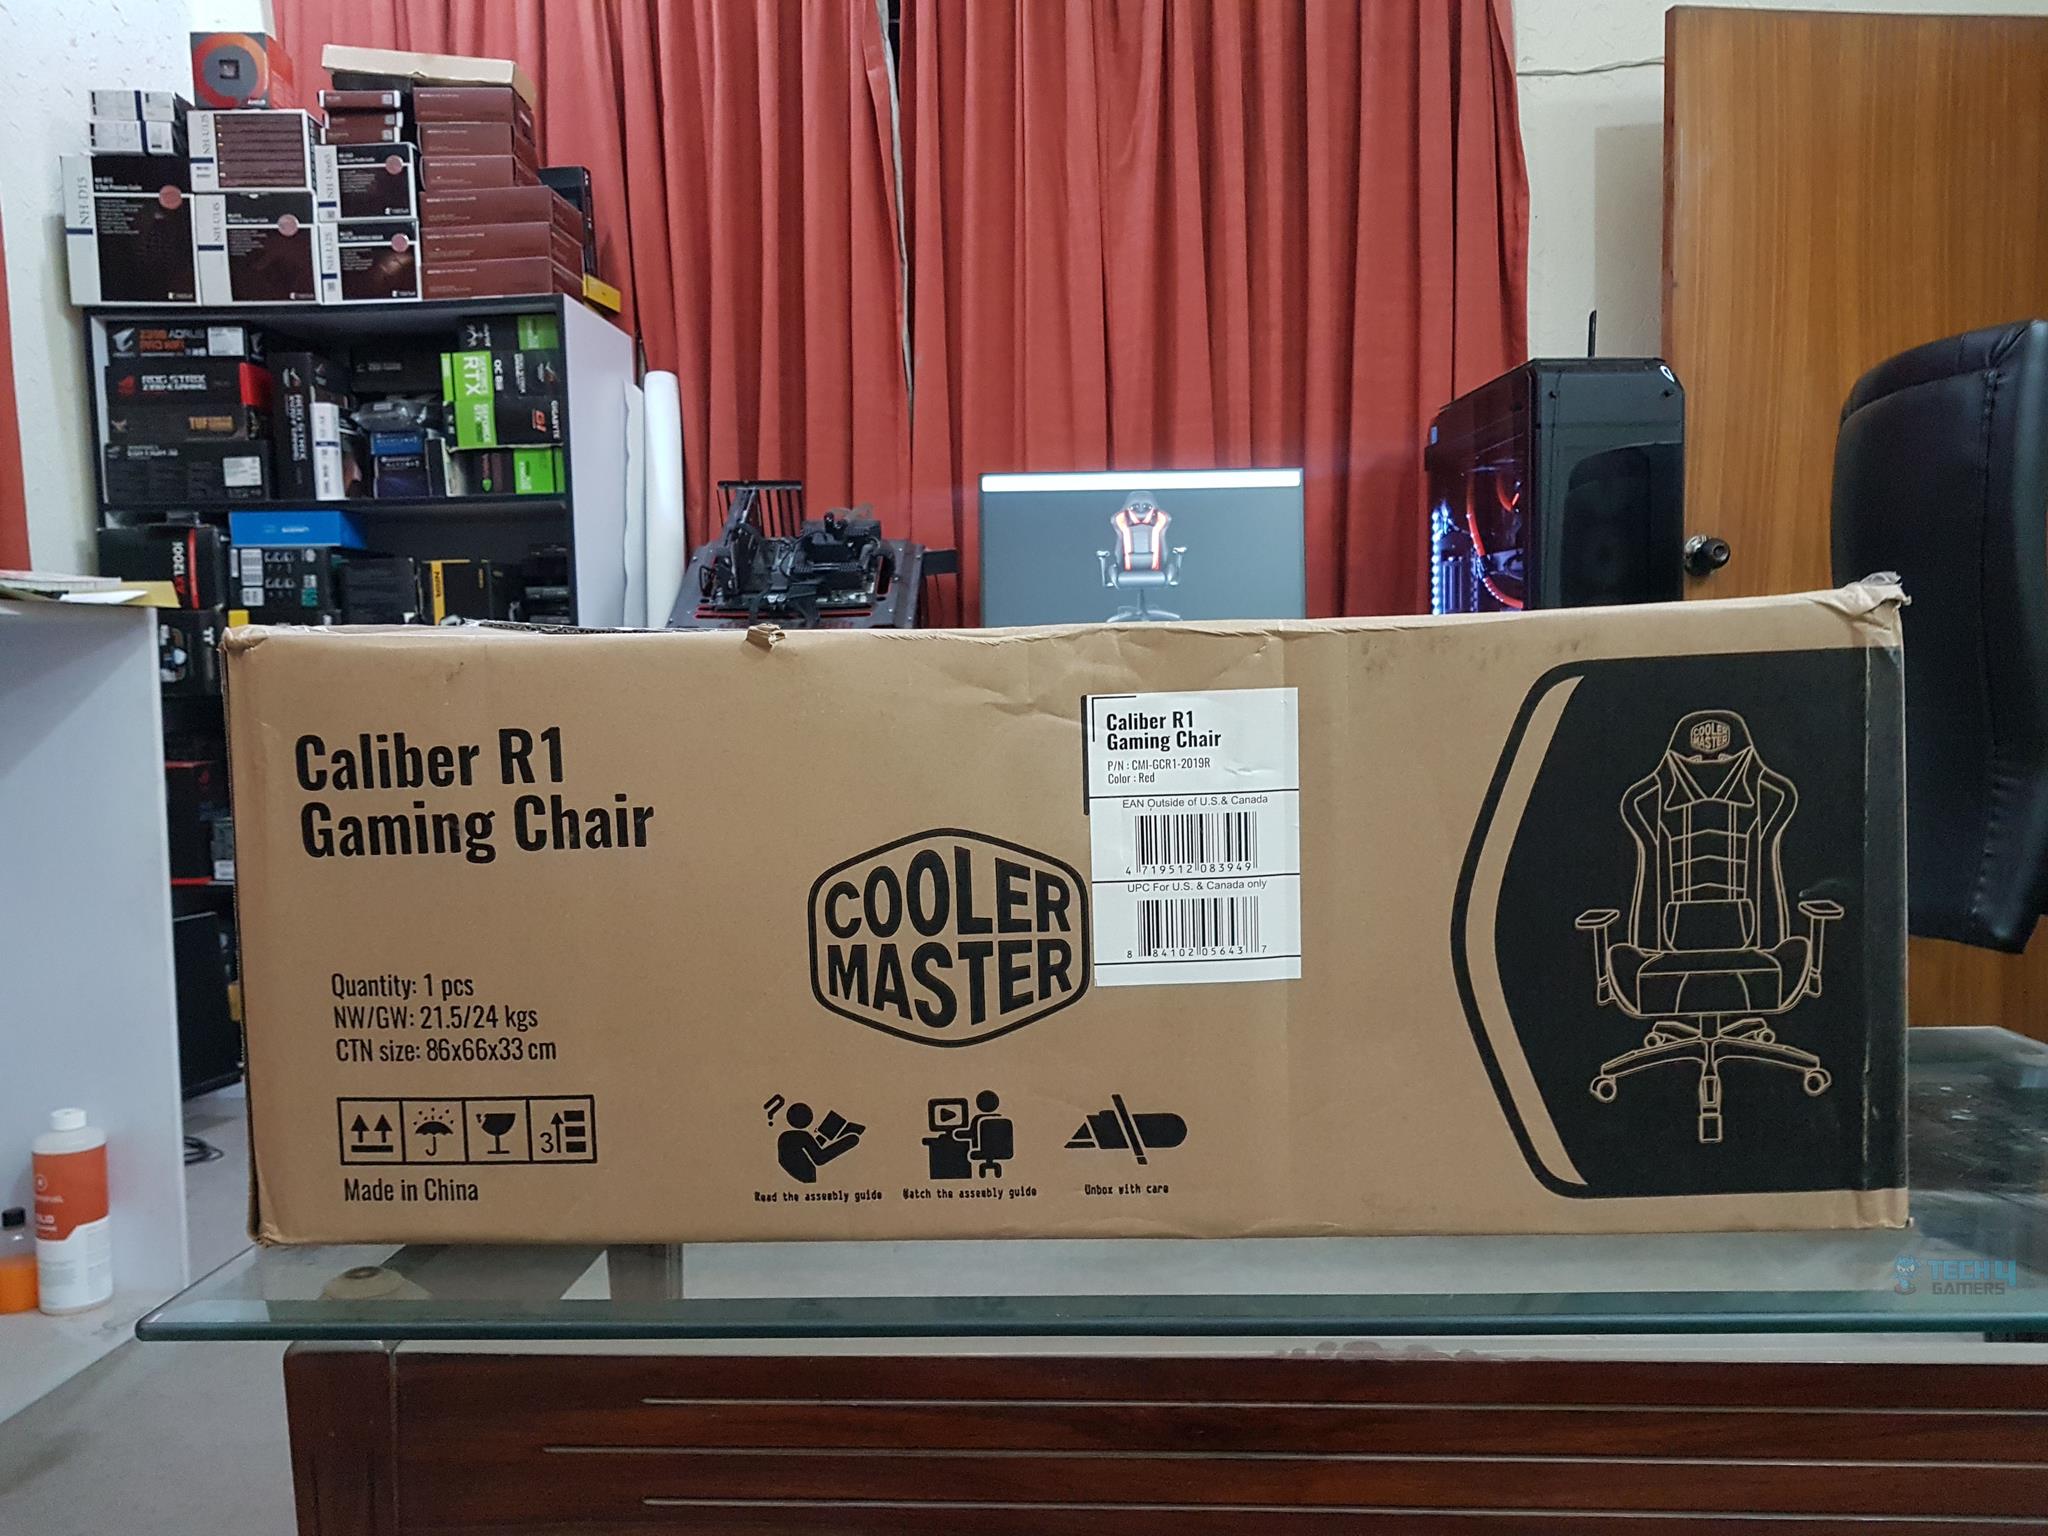
Packaging and Unboxing
While the chair comes disassembled, the cardboard box is still rather big.
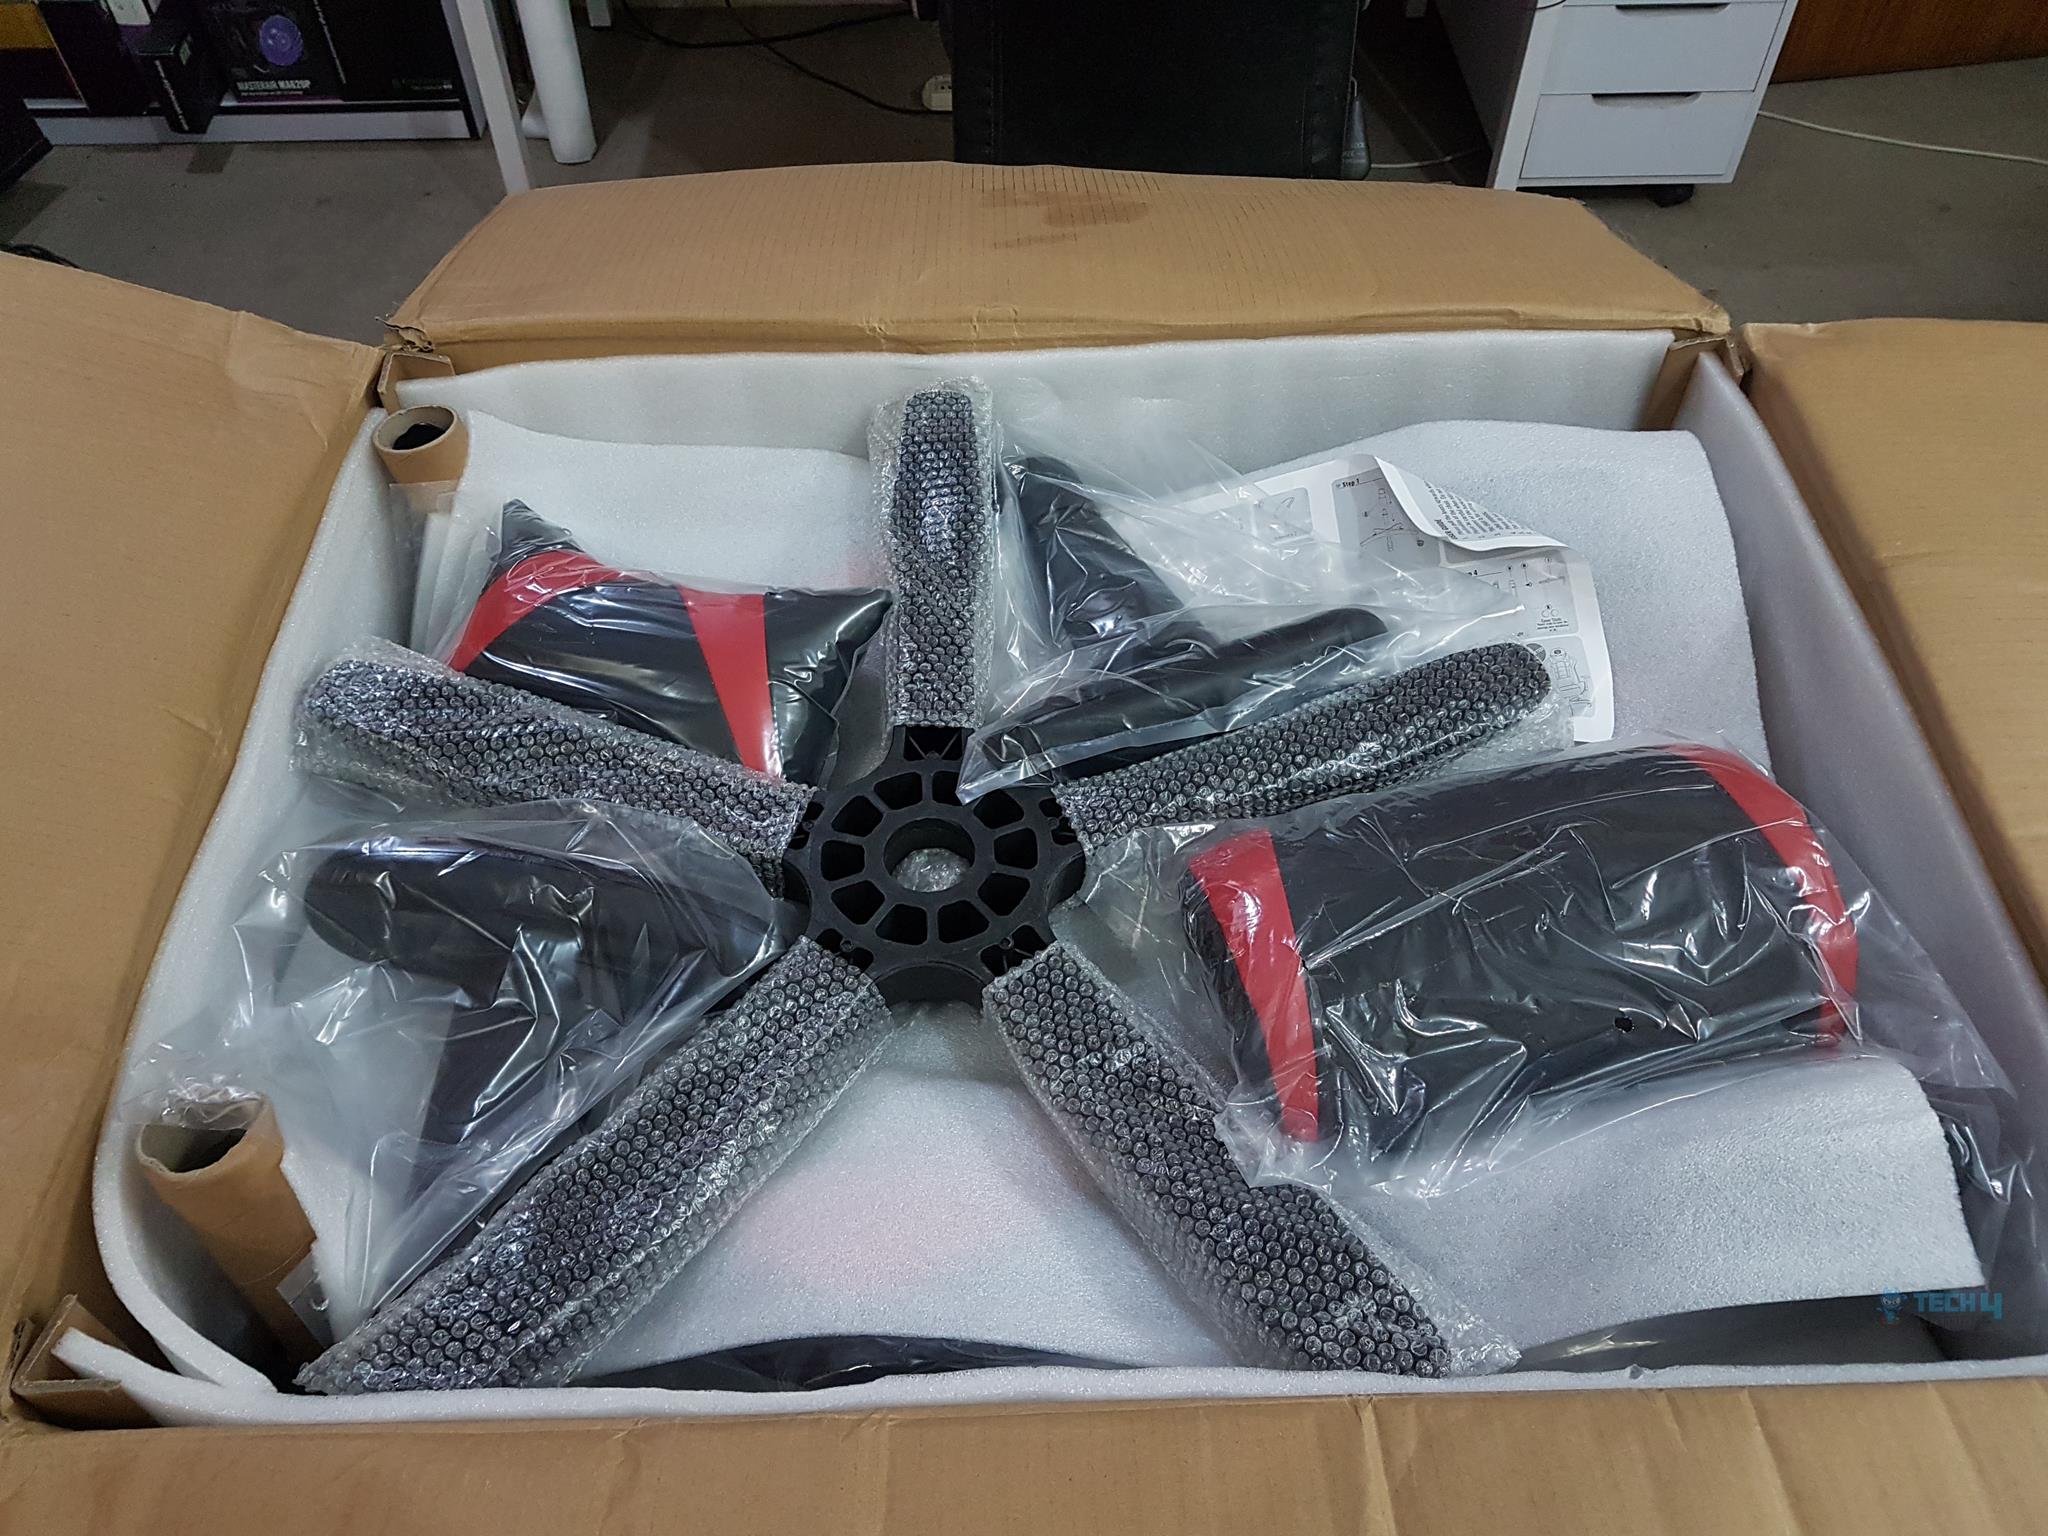
Contents
The box includes the following:
- 1x Base
- 5x wheels
- 1x Backrest
- 1x Seat
- 2x Arms
- 1x Headrest pillow
- 1x lumbar pillow
- 1x Gas lift and cover
- 1x Tilt Mechanism
- 2x Backrest Covers
- 2x Cover studs
- 1x Universal tool
- 12x M8x18mm bolts
- 2x Philips Screws
- 2x Flat Washers
- 2x Lock Washers
- 1x User Manual
Closer Look
Let’s start with taking a look at each component of the unit. I would emphasize the users to read the instructions manual or check the video beforehand.
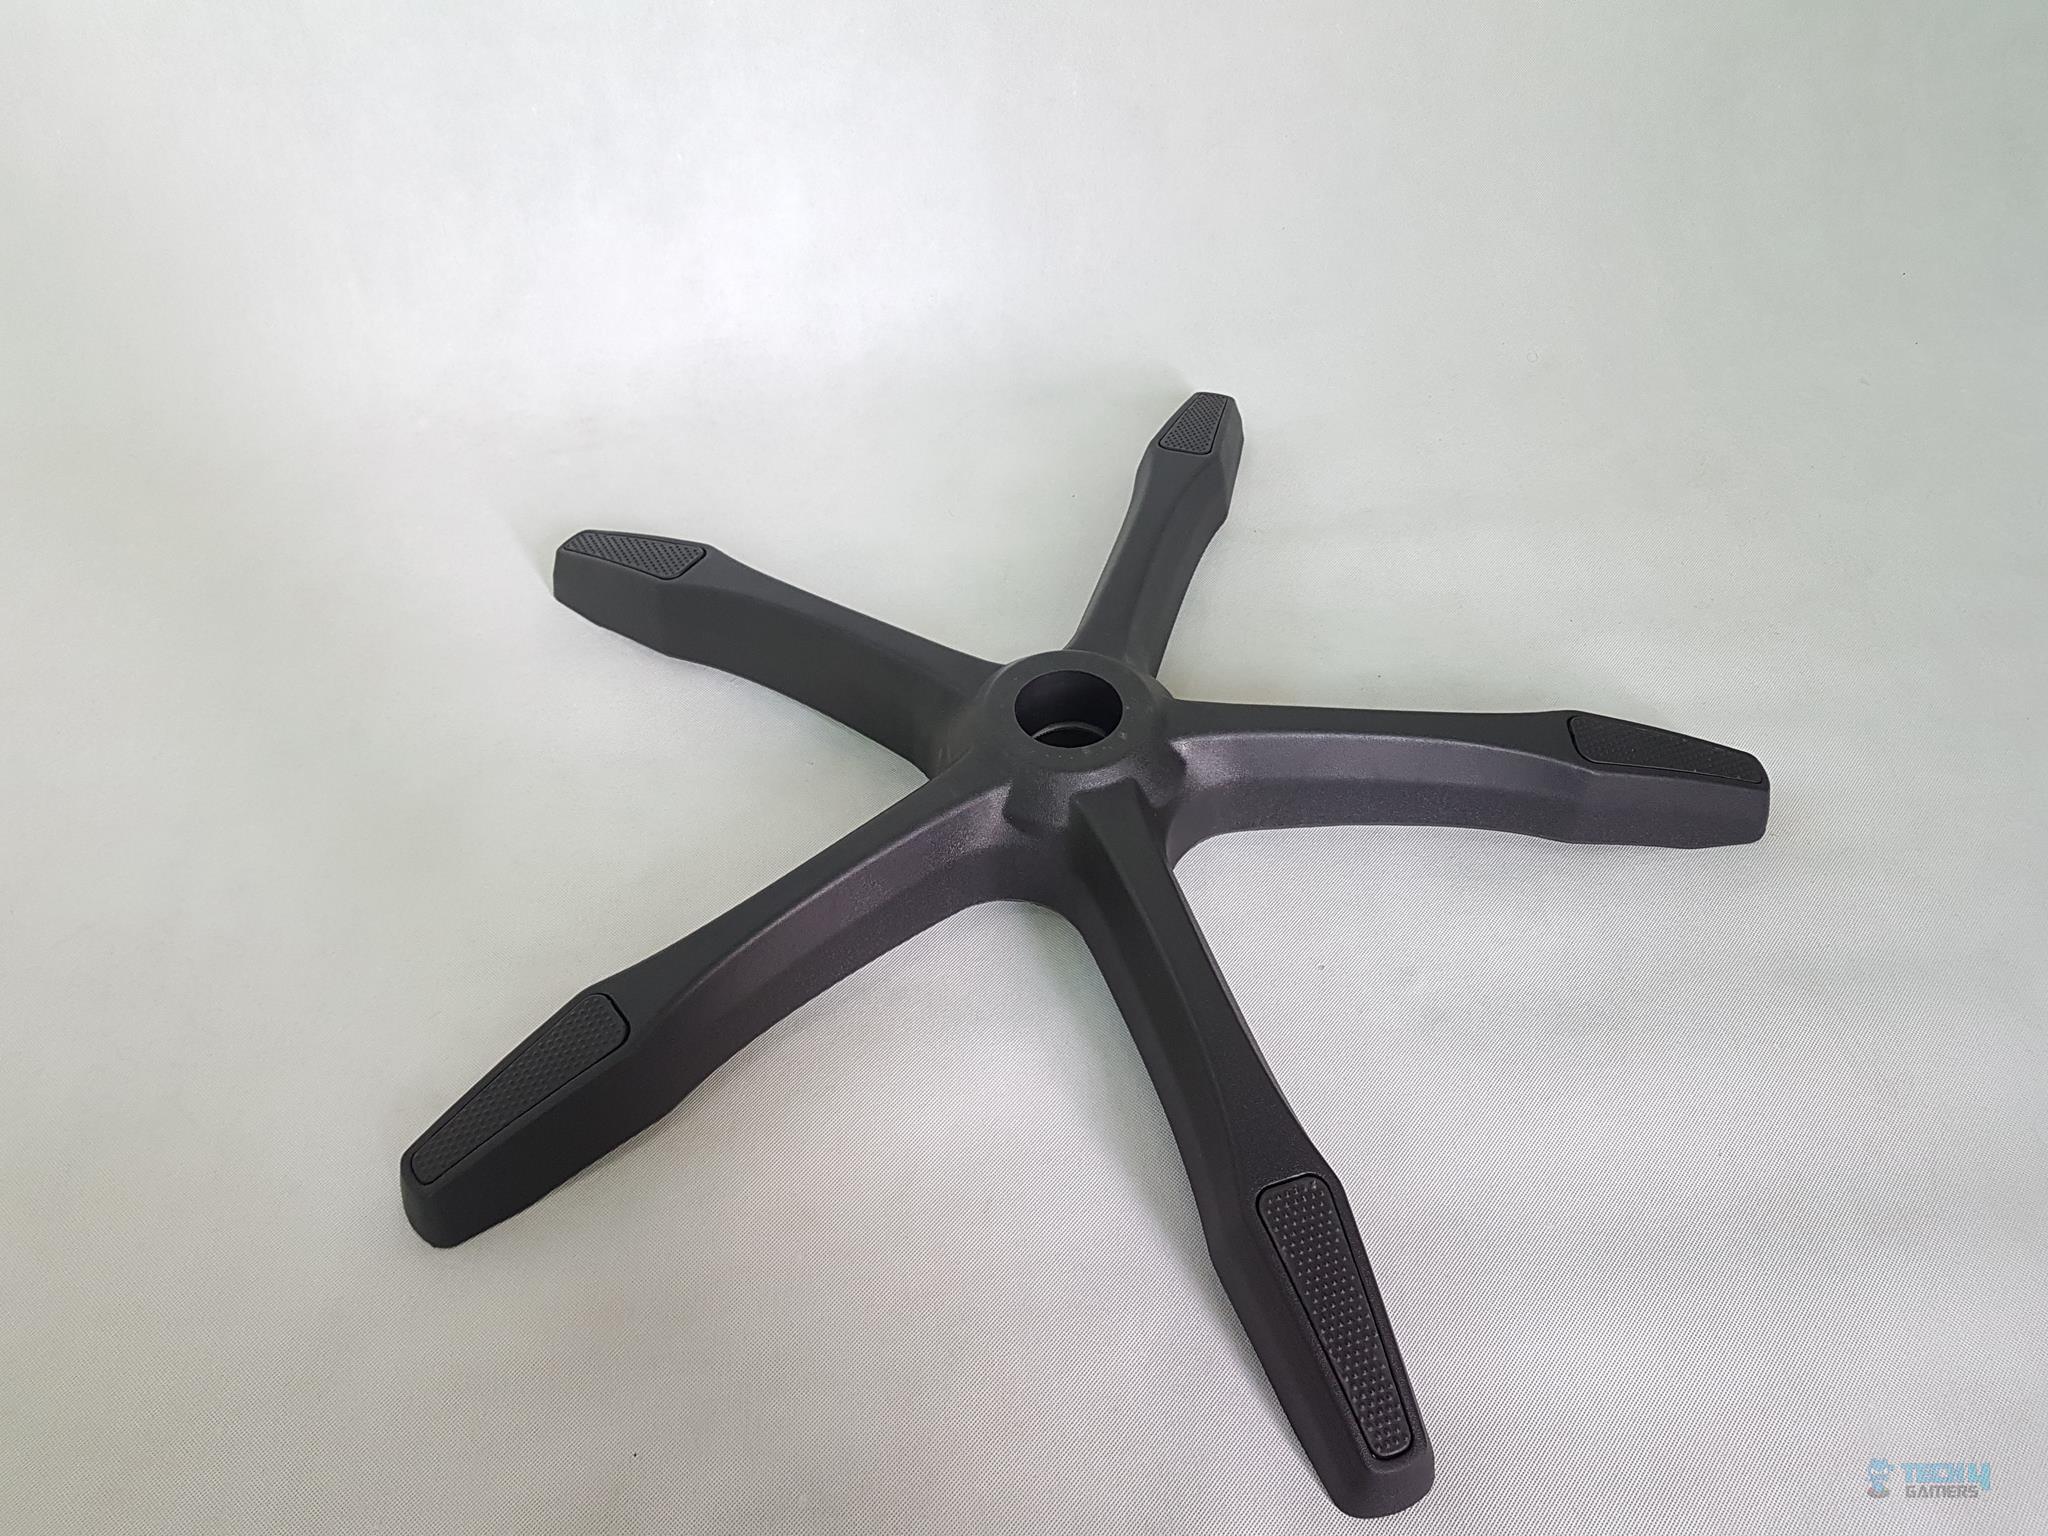
The chair features a 5-star base with a sleek matte black finish, boasting a total diameter of 72cm and standing at a height of 35-43cm from the floor. Its base comprises five legs, each ending with a ribbed surface designed to secure the feet without a footrest, a common absence in many gaming chairs. Notably, the base’s leg ends accommodate casters or wheels, inserted into the holes for effortless assembly.
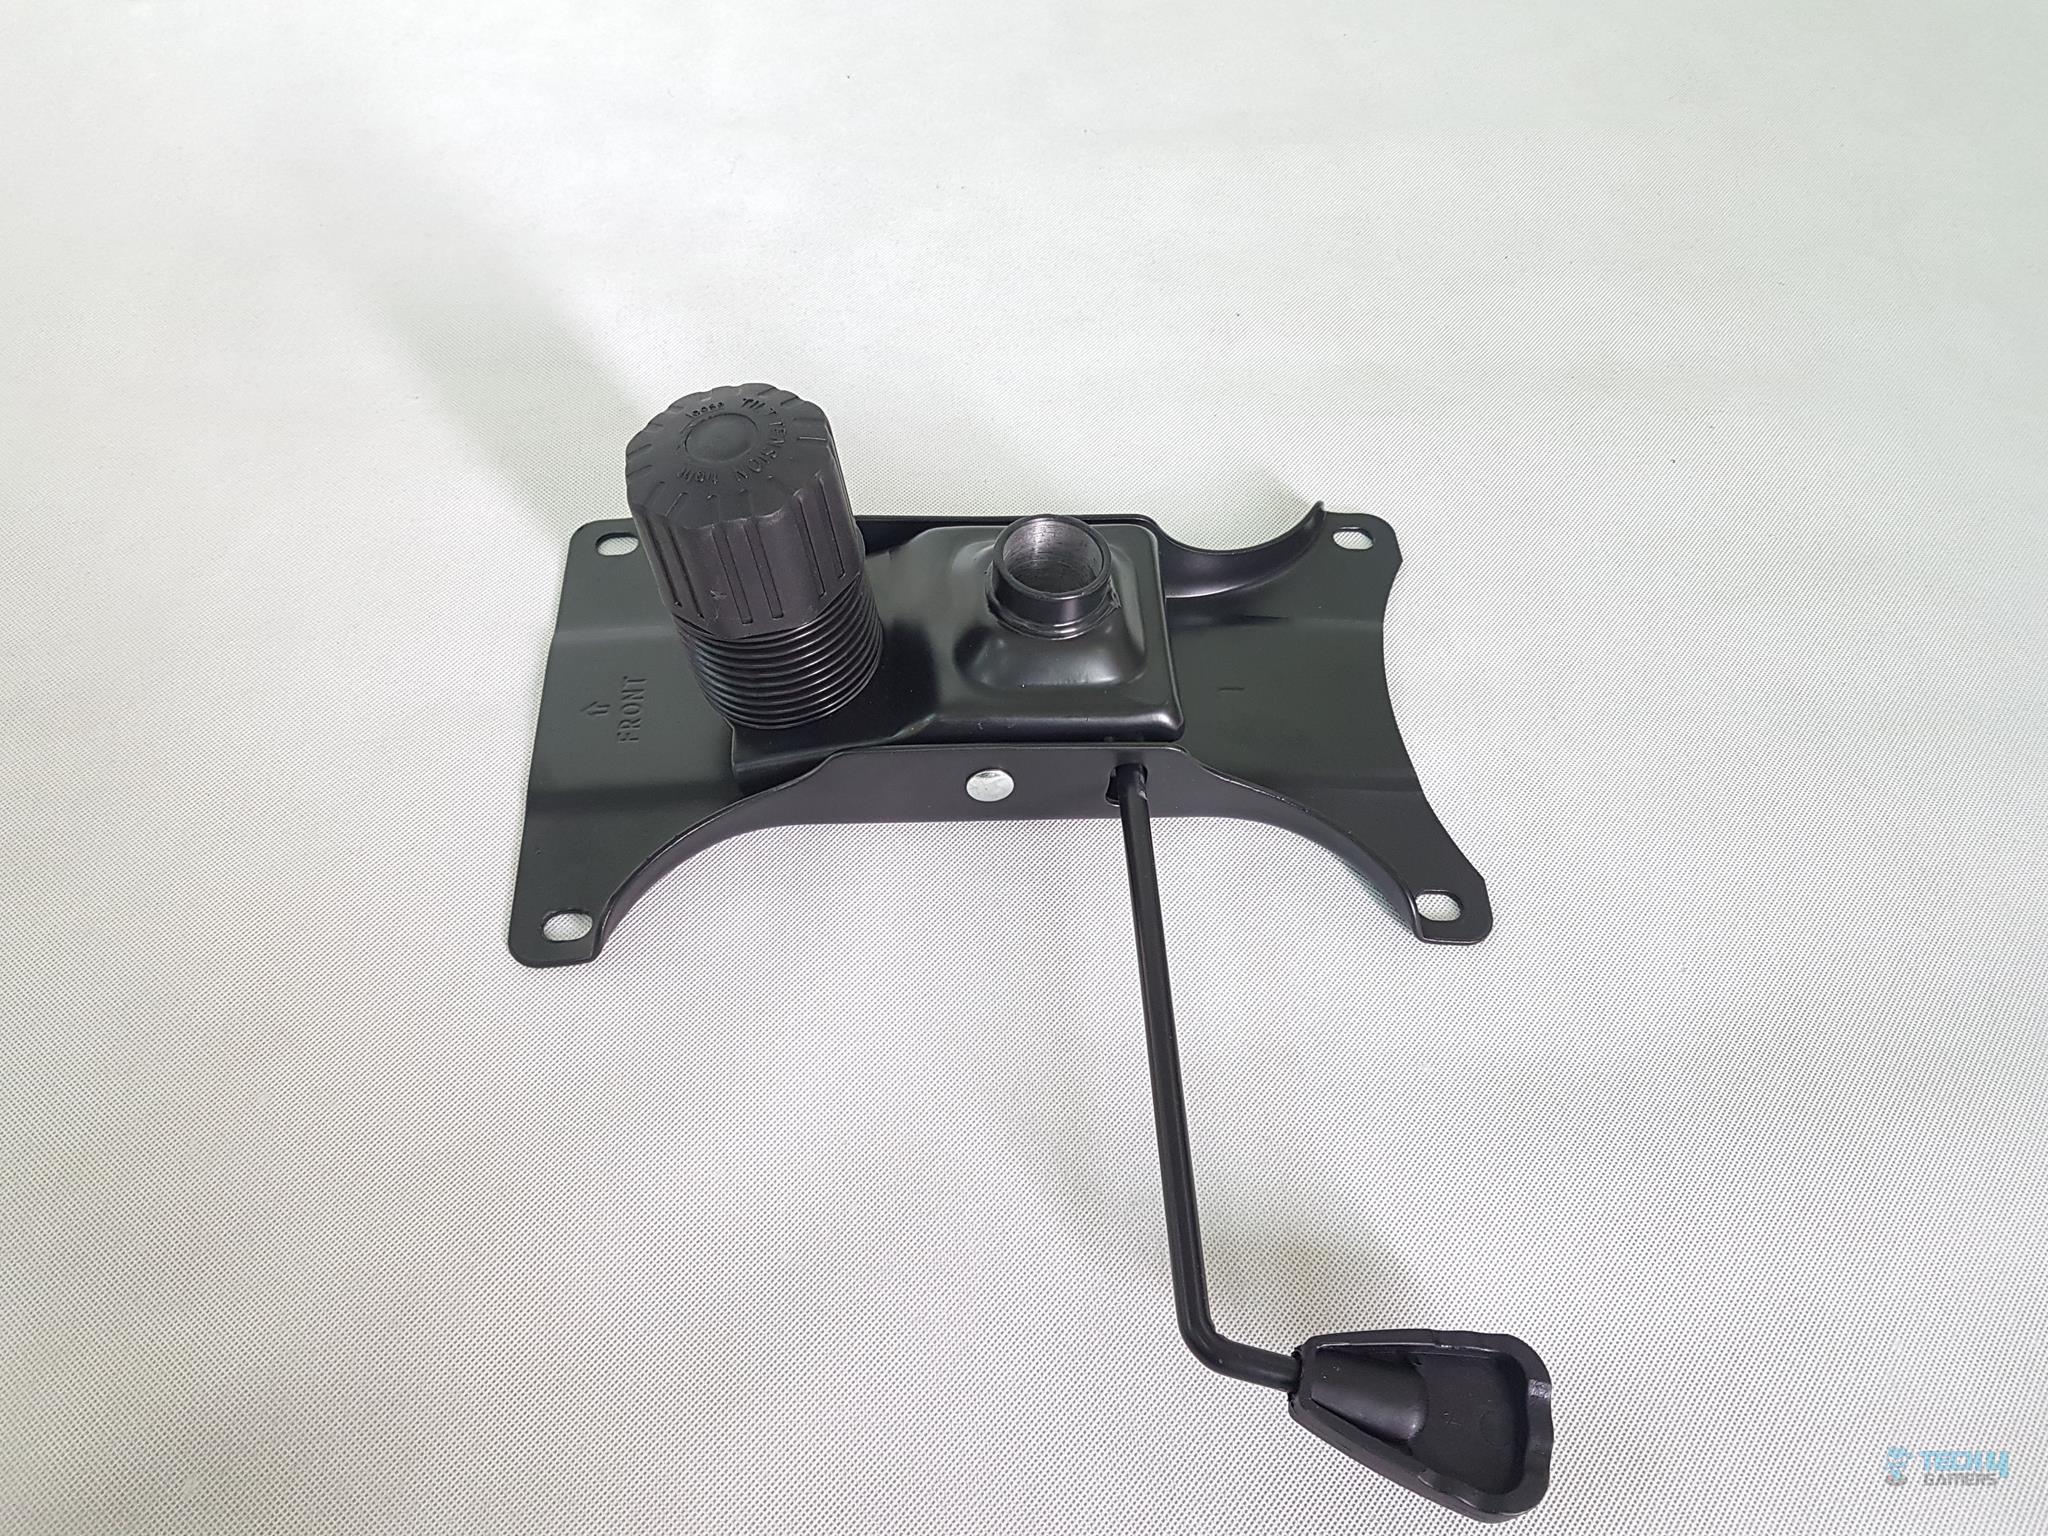
The tilt mechanism, crafted in black steel, includes an arrow symbol marking its front end. When attaching it to the chair, ensure this side faces the front, aligning the 4 holes at the corners for the M8x18mm bolts to secure the tilt mechanism to the seat.
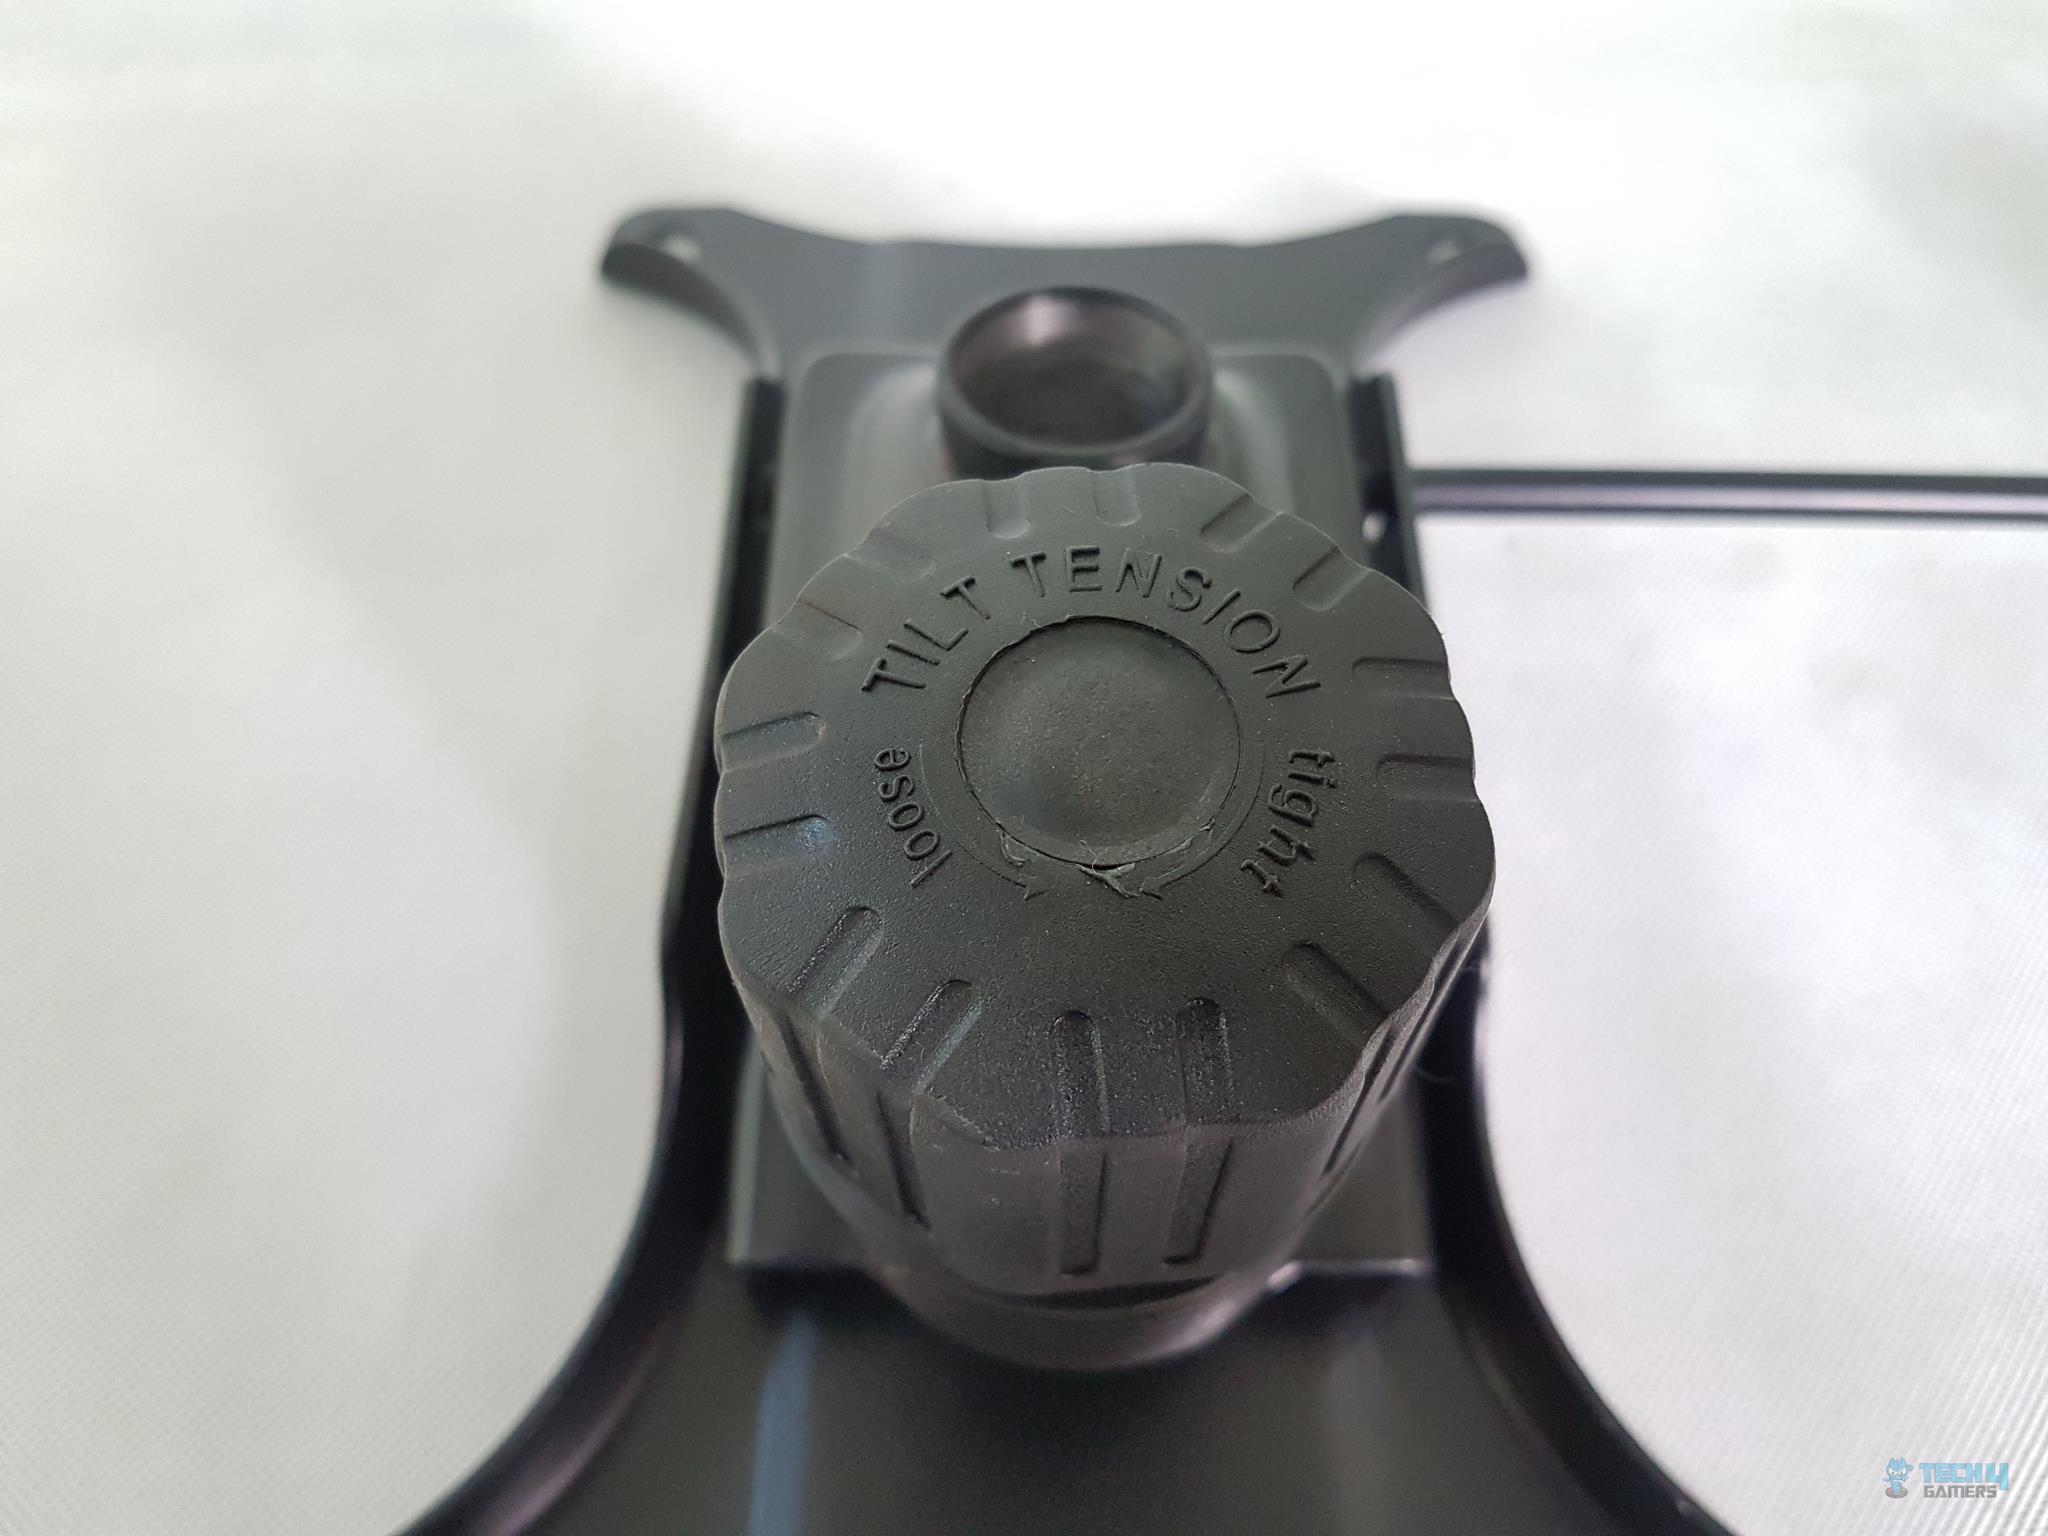
Additionally, a plastic cover allows you to adjust the tilt tension by rotating it in a specified direction, either loosening or tightening the tilt as needed.
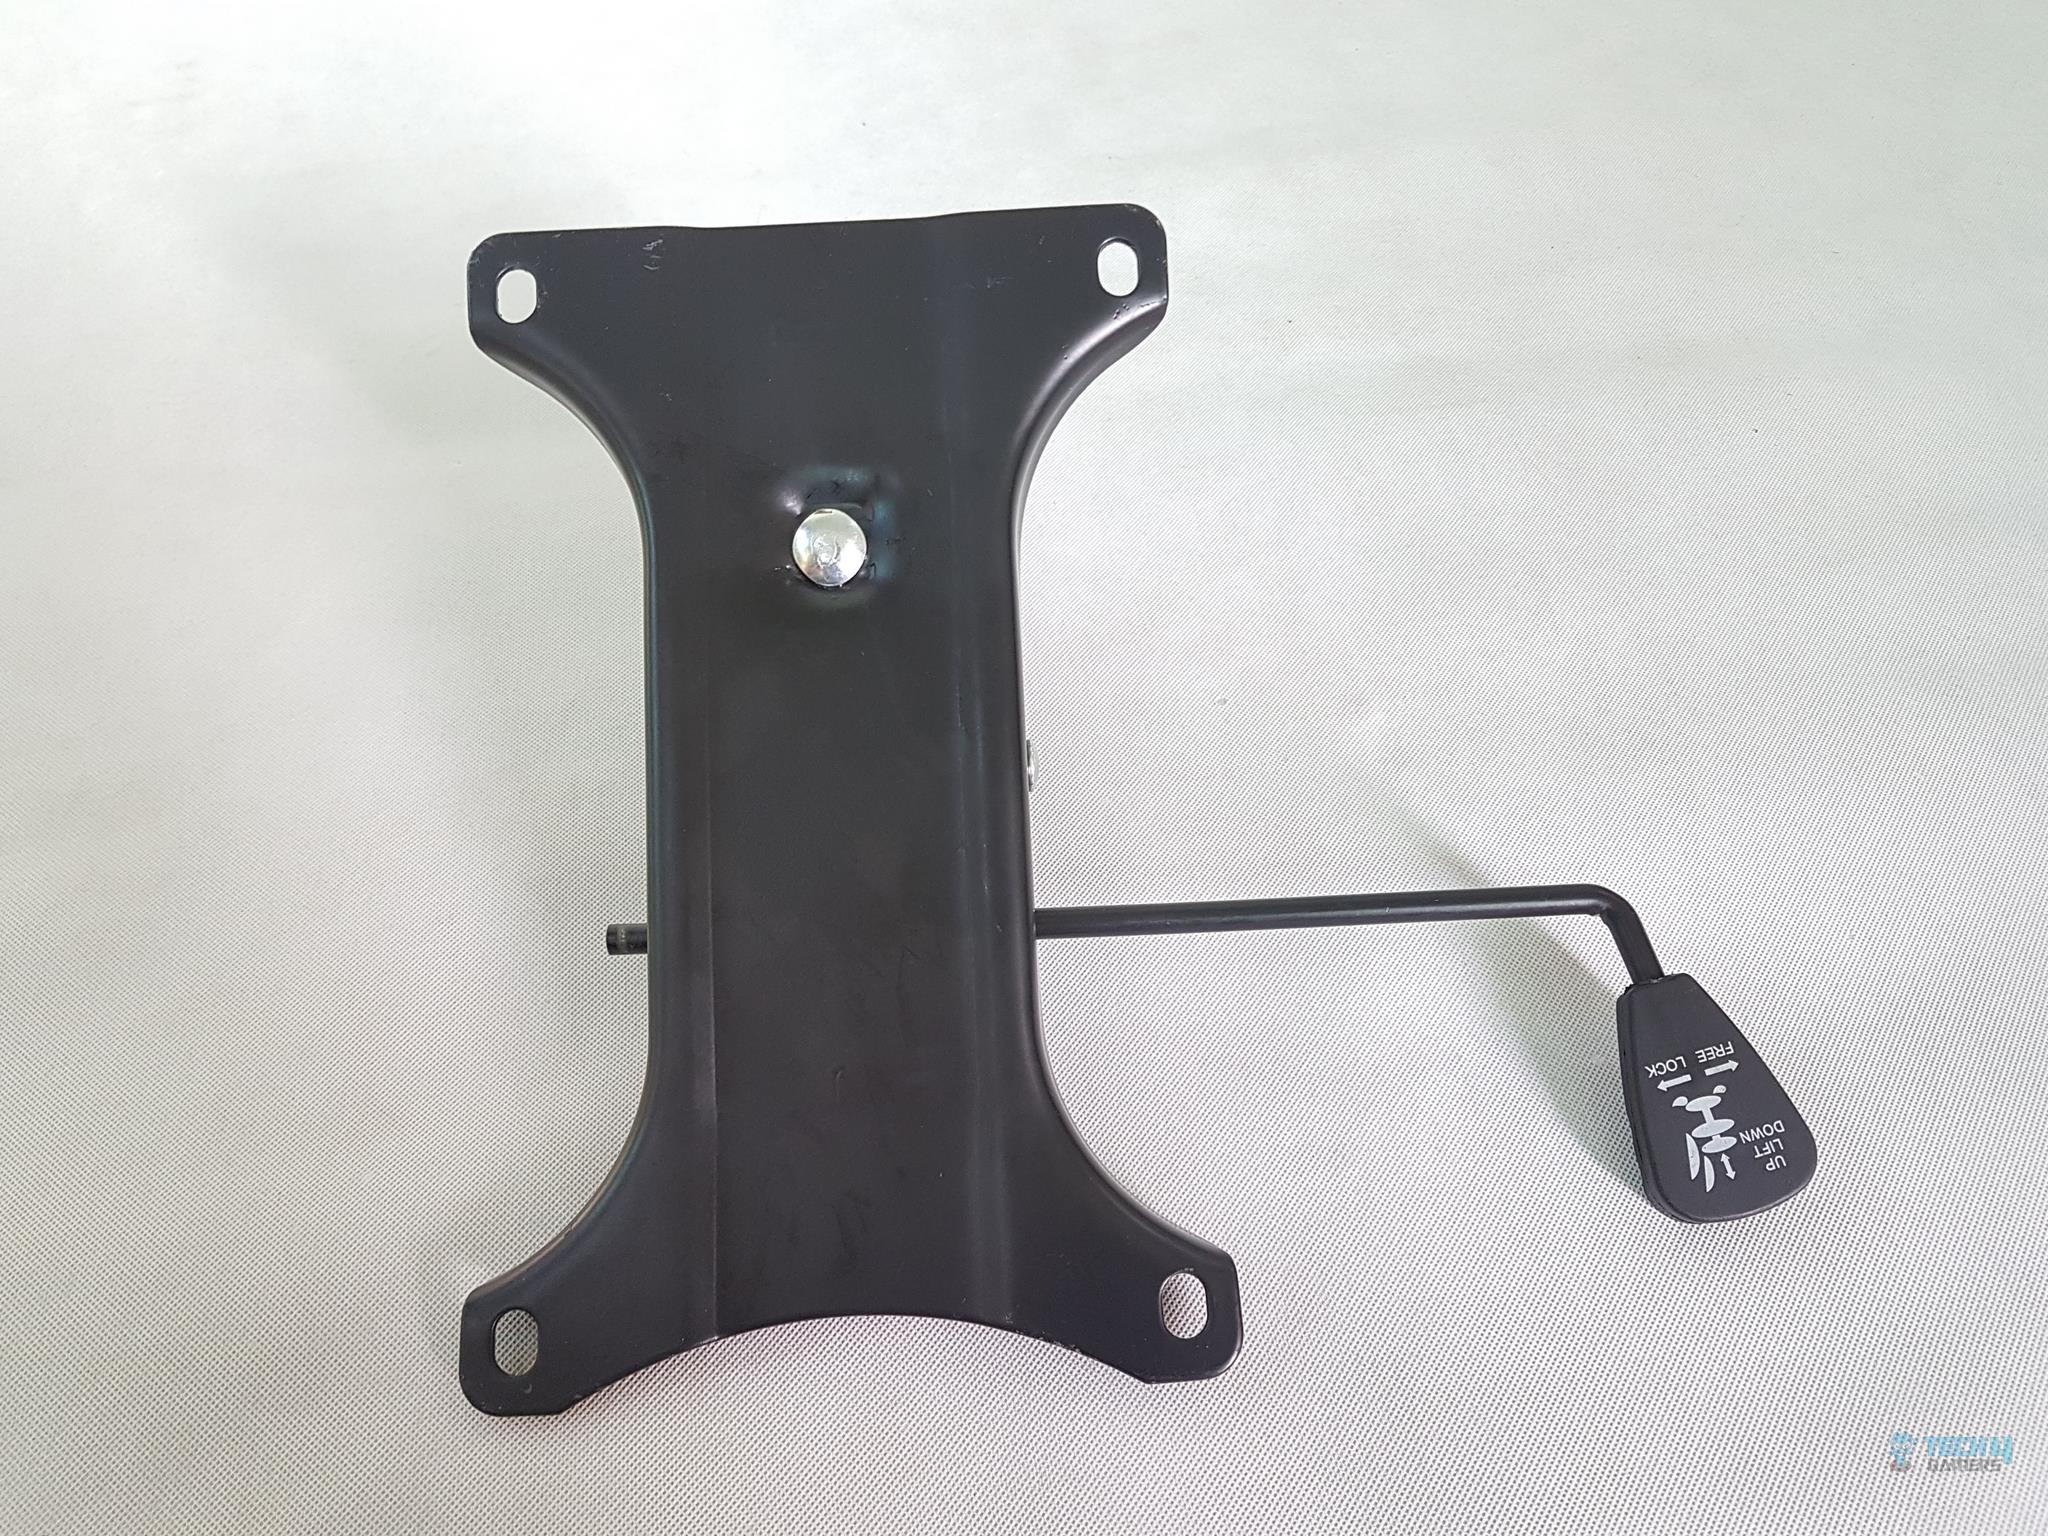
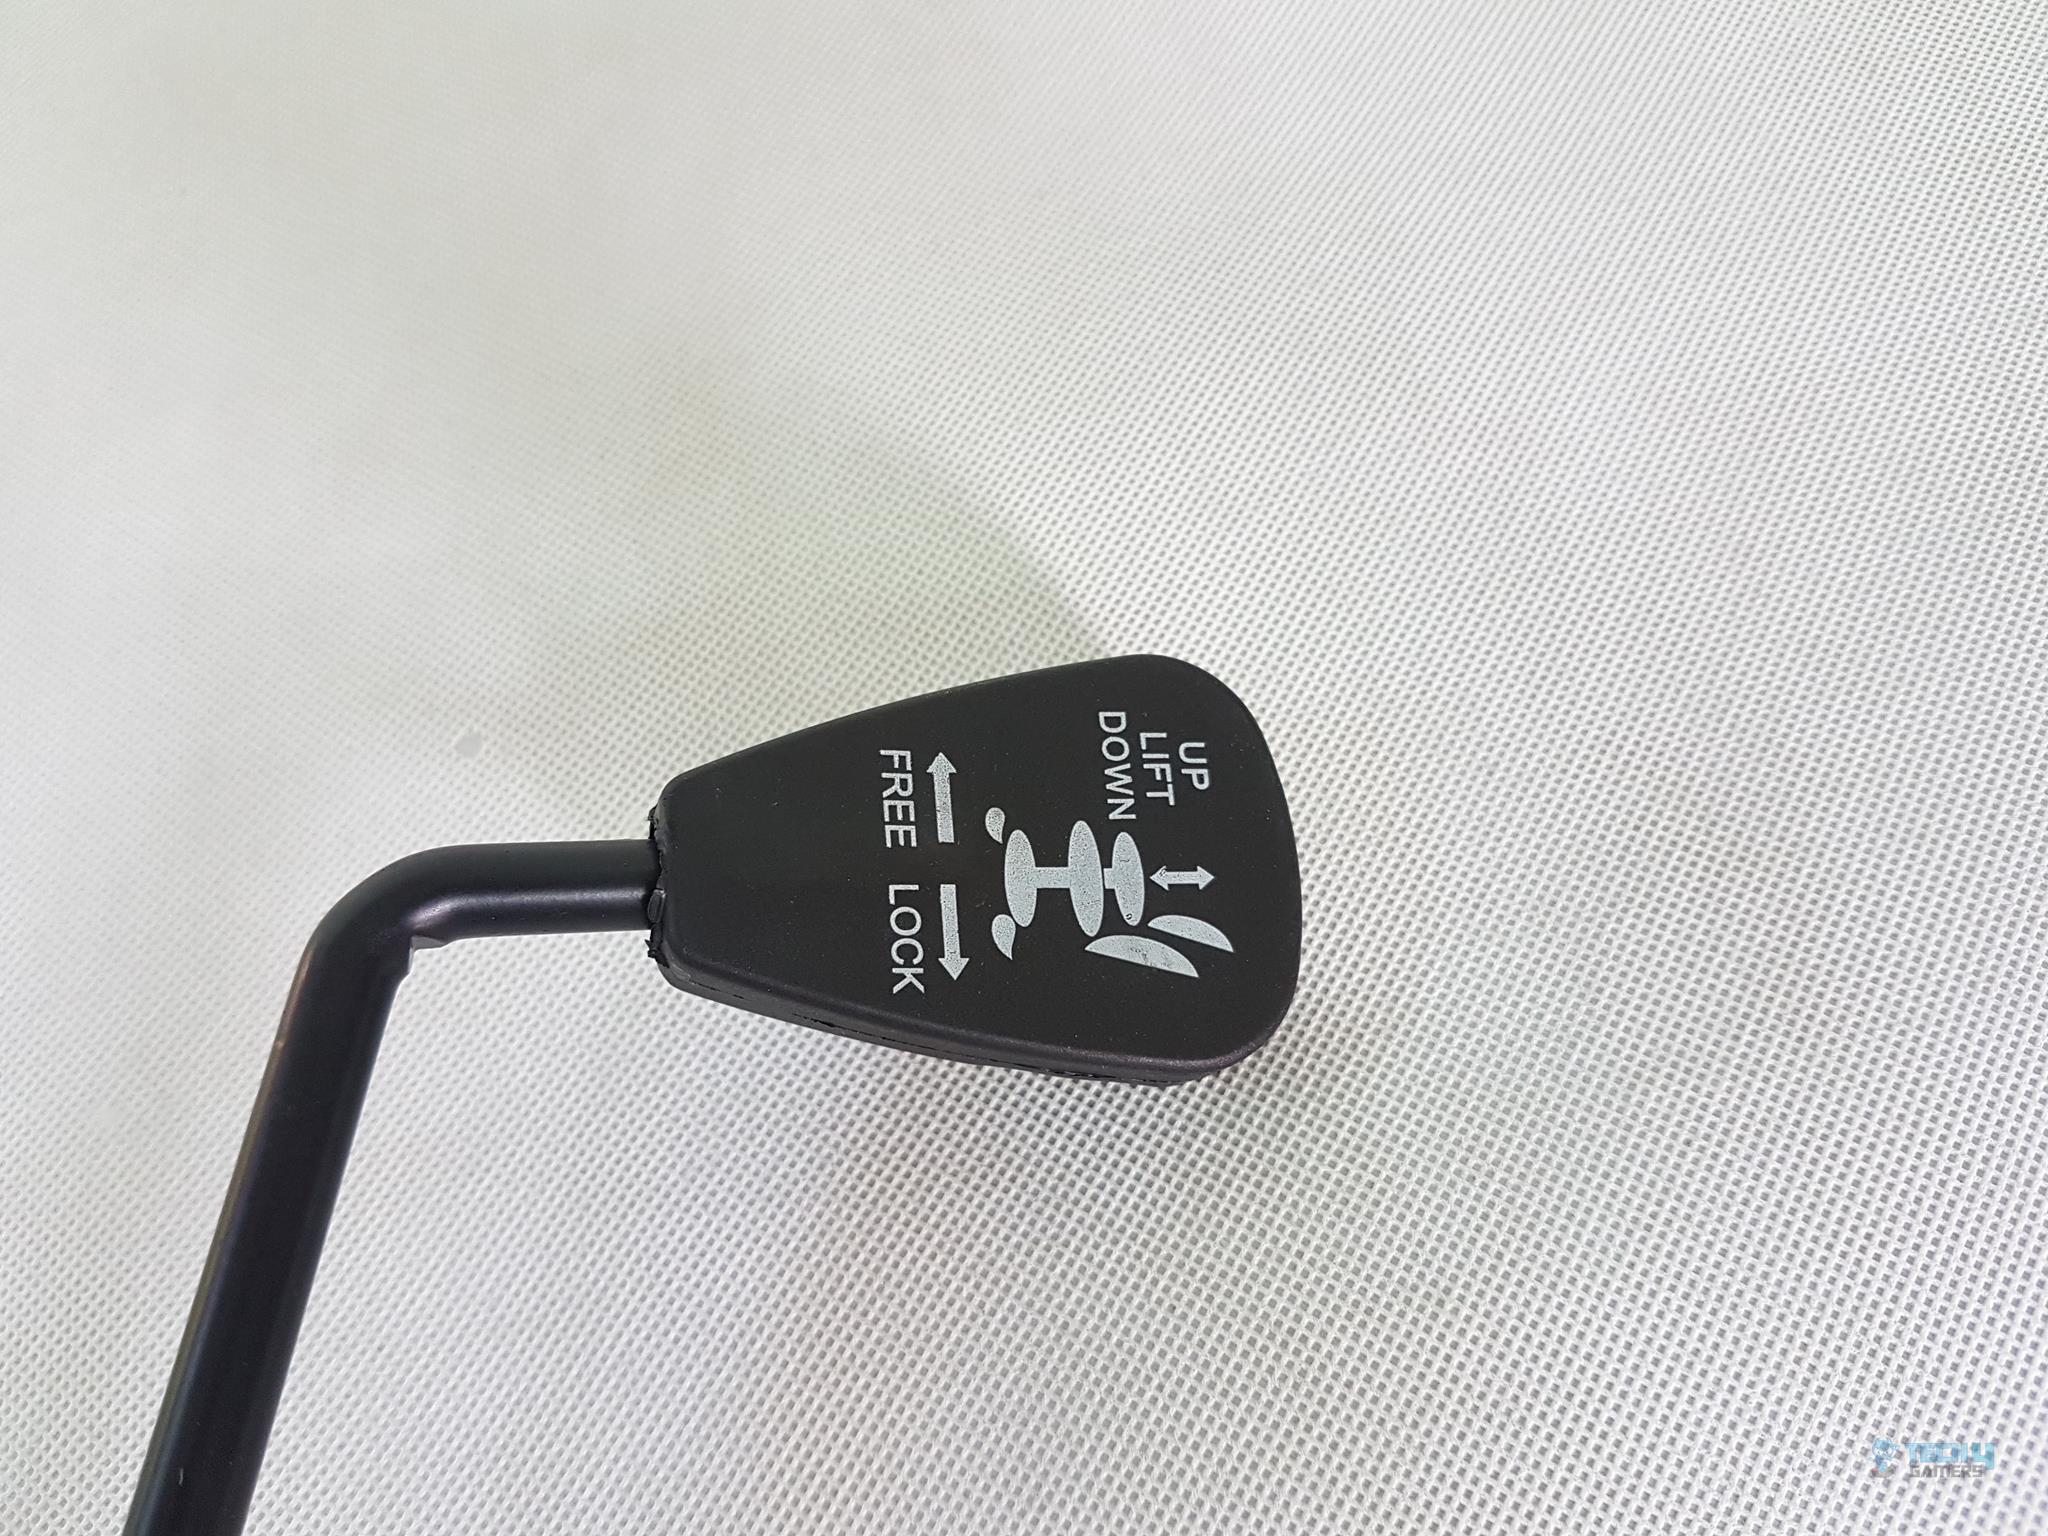
The other side is a flat surface. This is the side which faces the seat. The markings on the handle hint the user on how to lock/unlock the tilt. Similarly, the uplift down mechanism is printed.
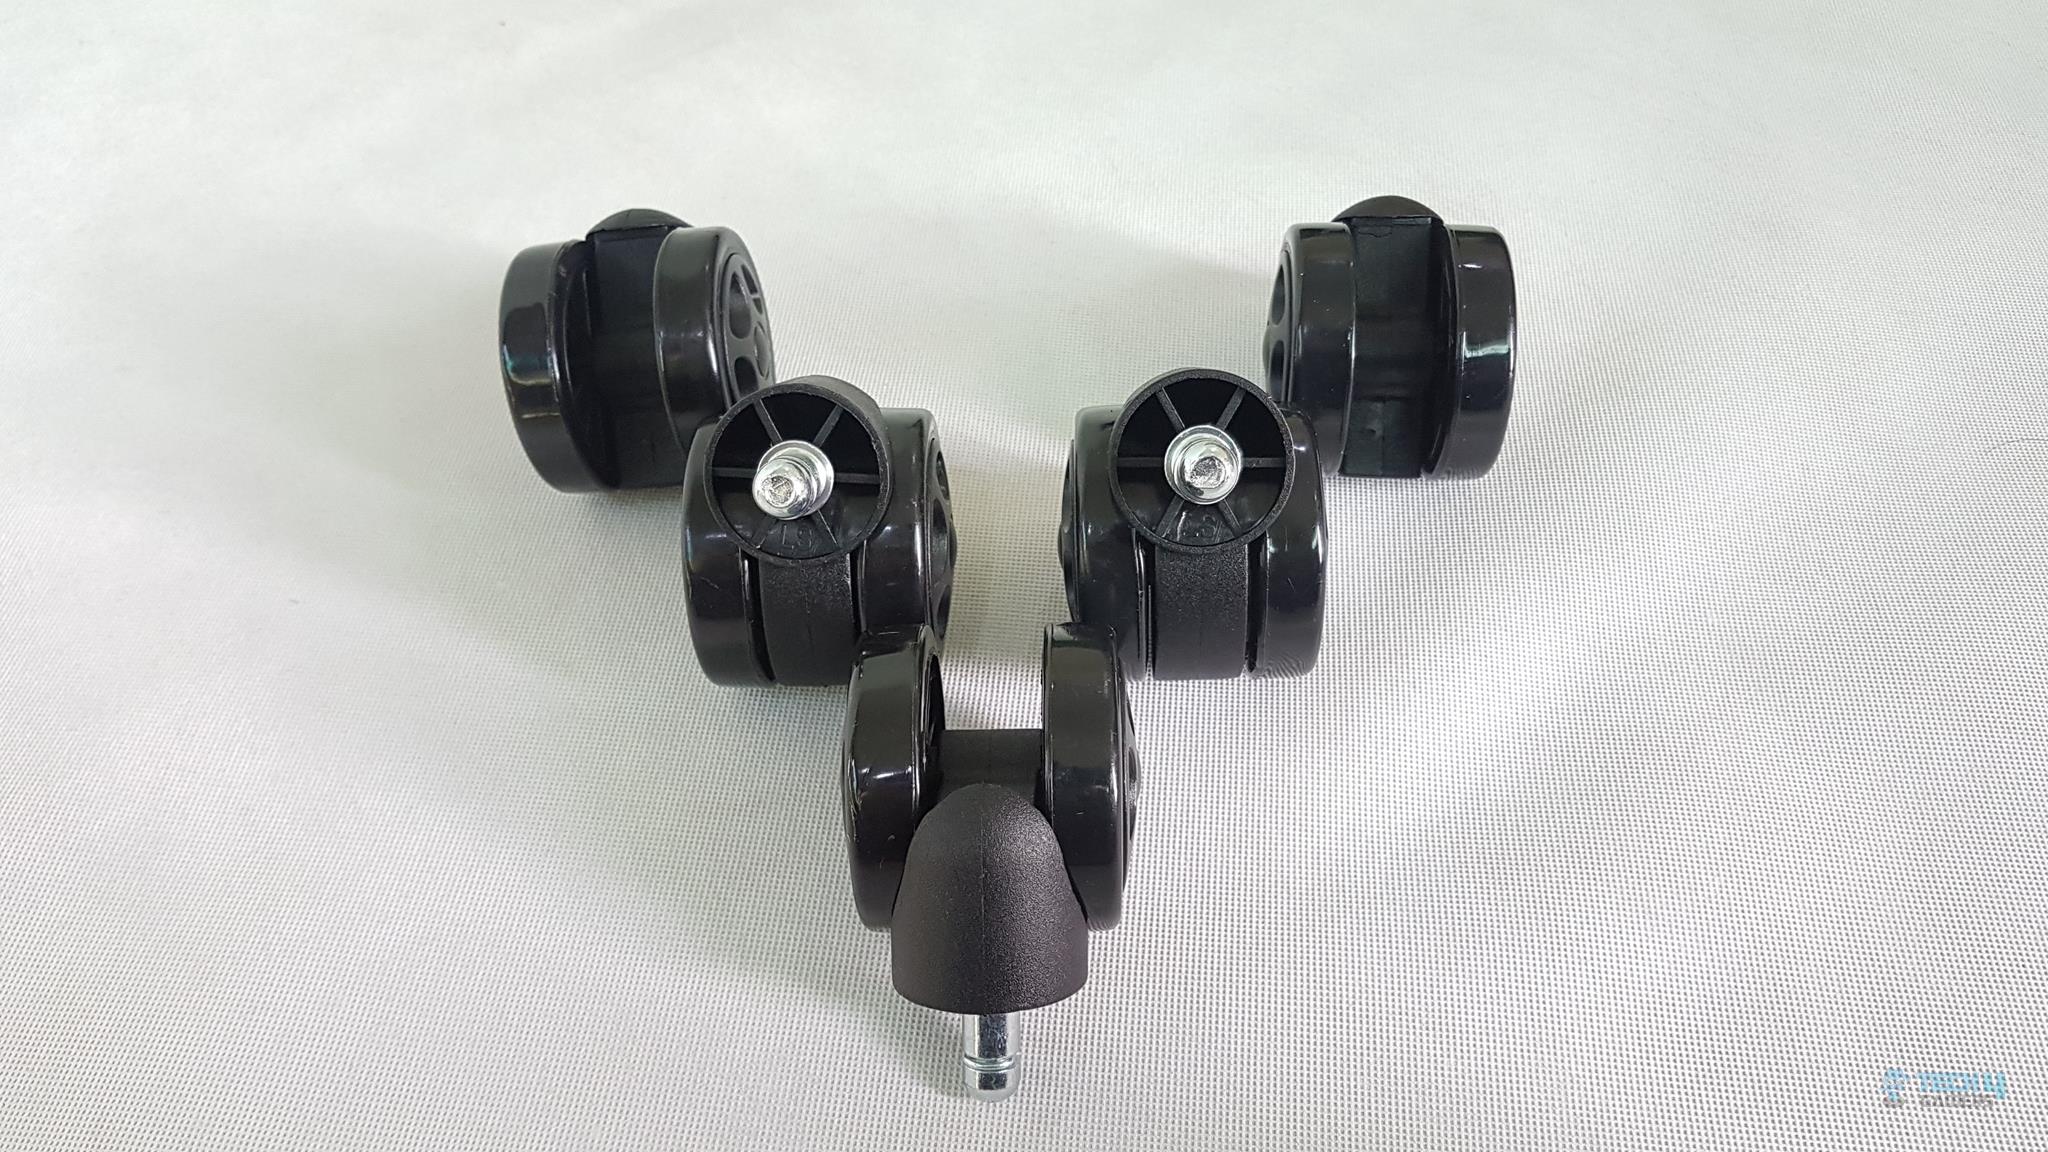
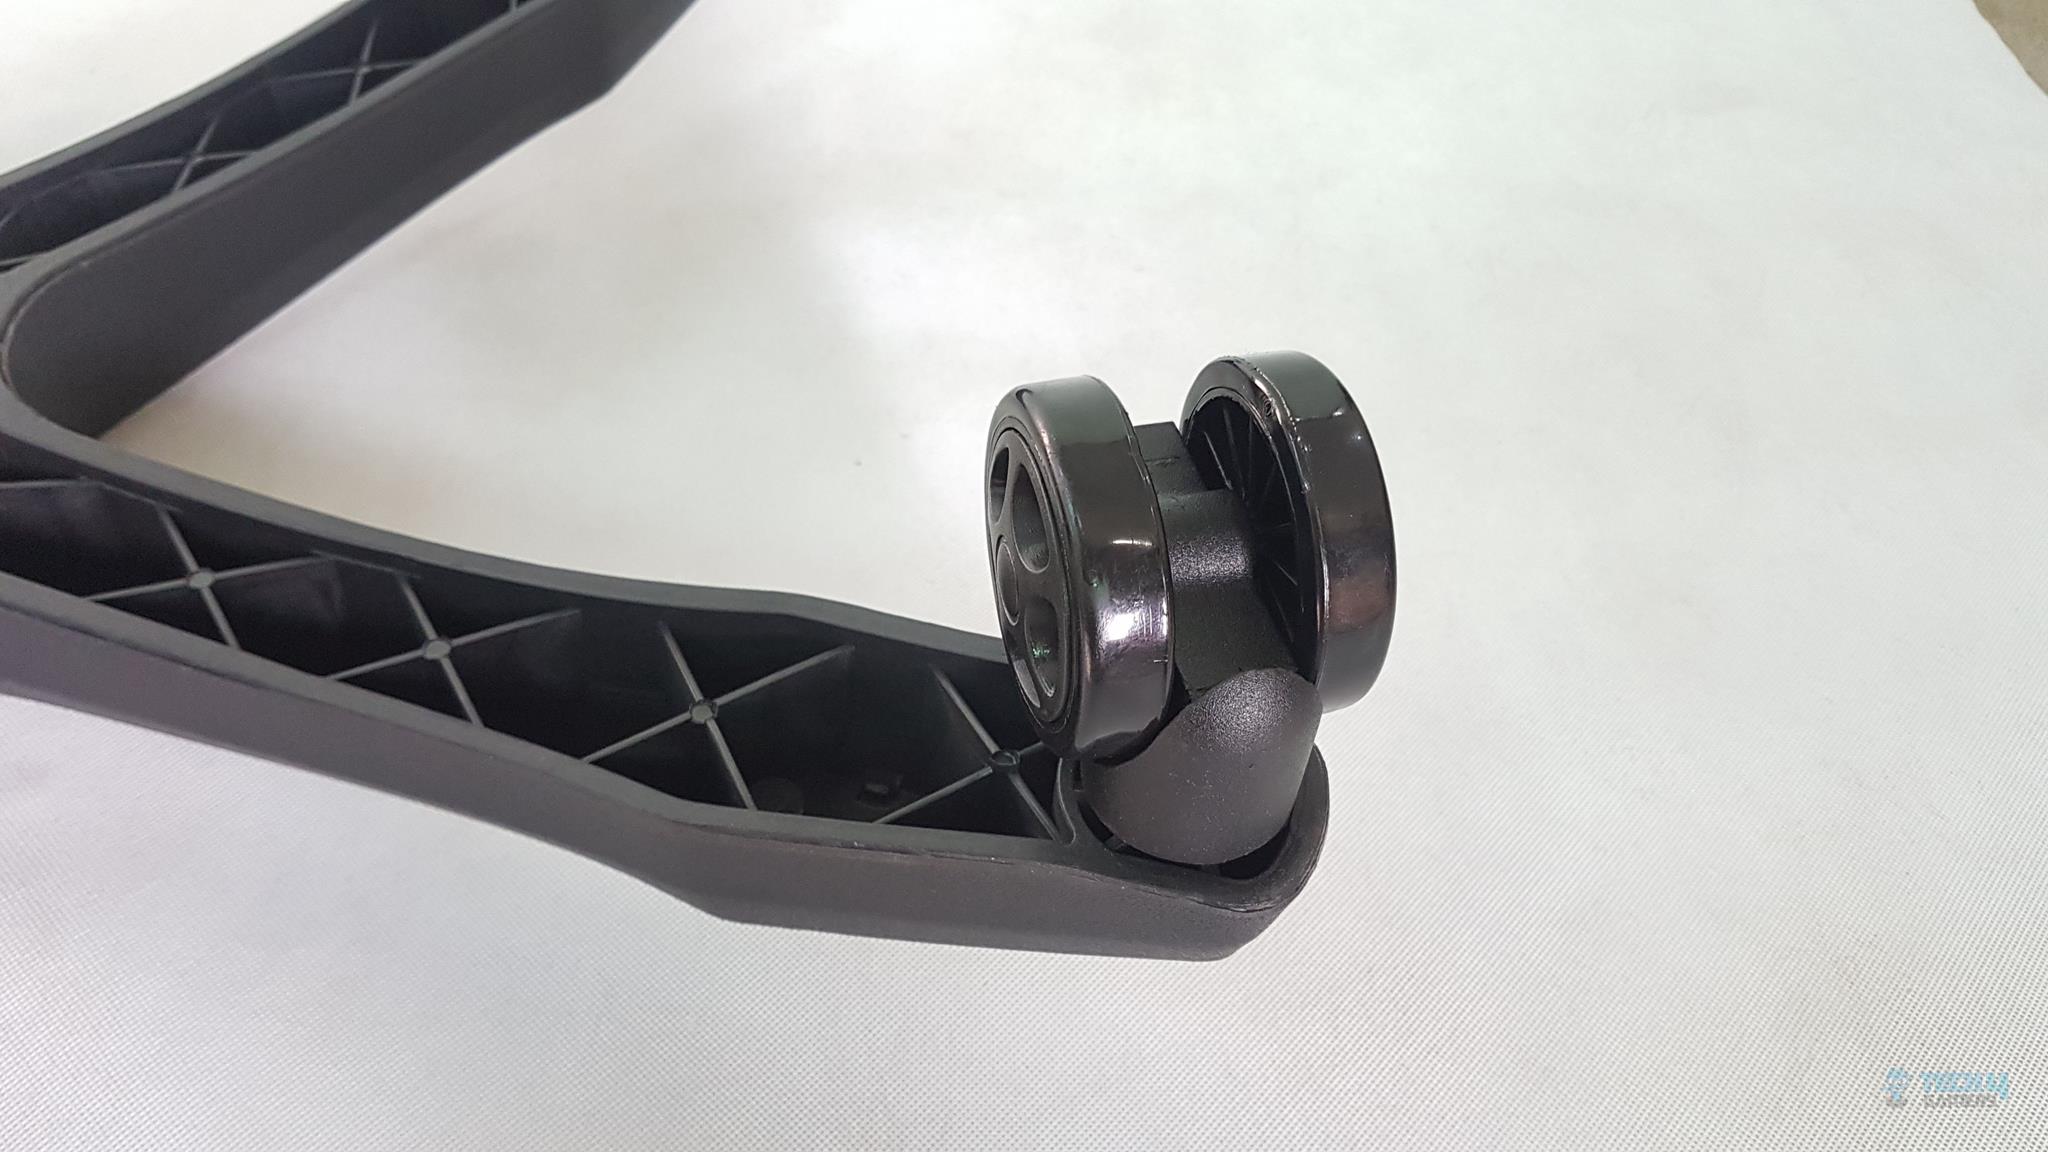
Five wheels/casters, each with shiny black caps, come enclosed. They feature a standard design with silver knobs on the opposite side that connect the wheels to the base effortlessly.
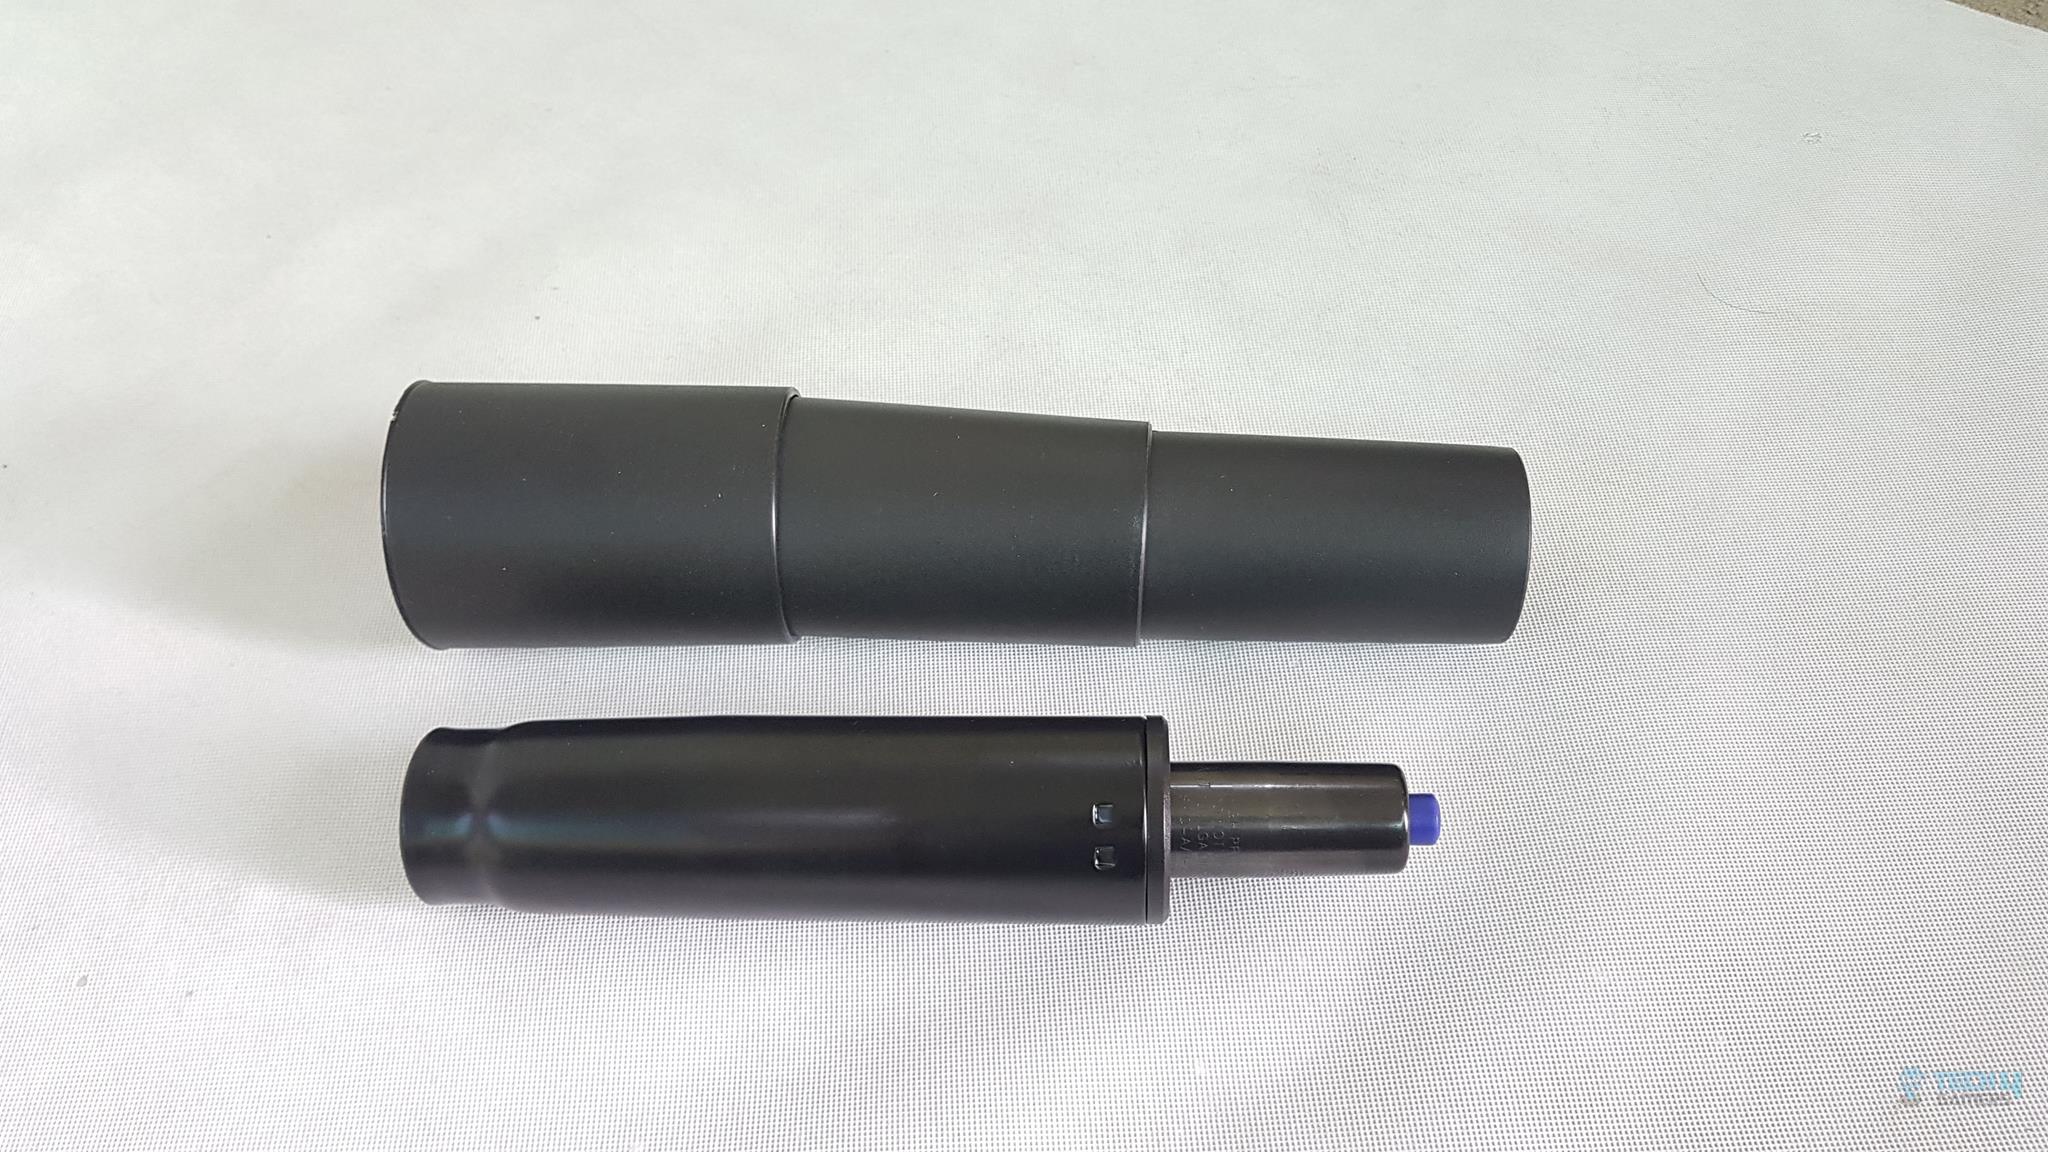
Cooler Master includes a gas lift for hydraulic height adjustment in the Caliber R1. This metallic, powder-coated mechanism, falling under Class 4, enables chair height adjustments of up to 8cm and supports weights of up to 150 KG.
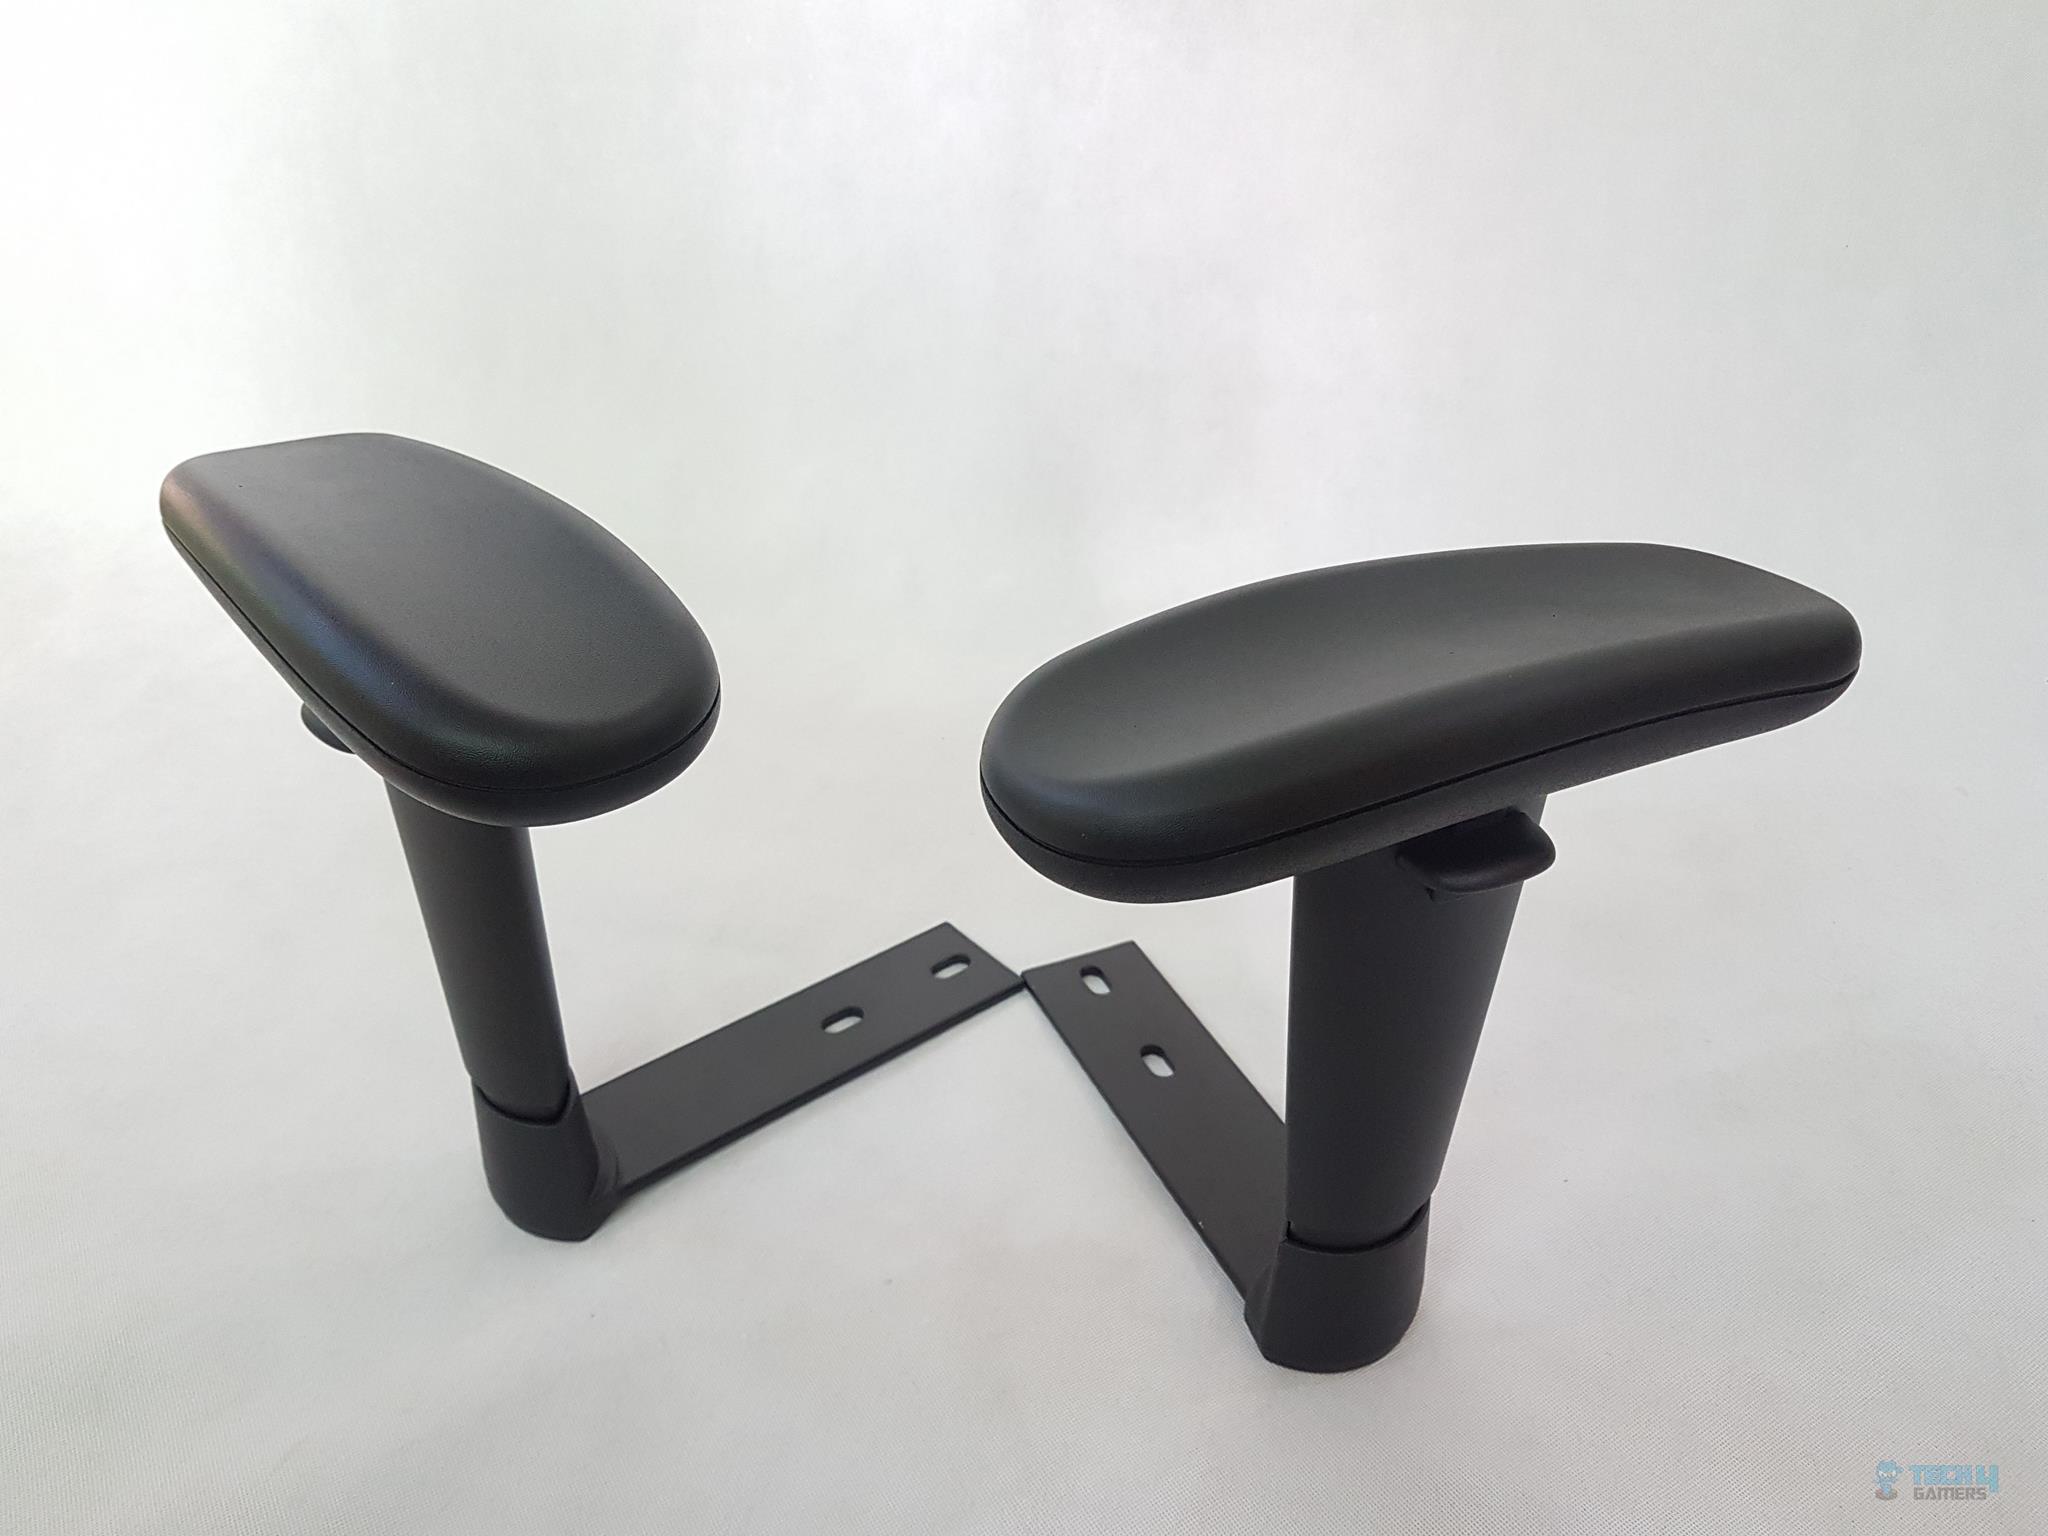
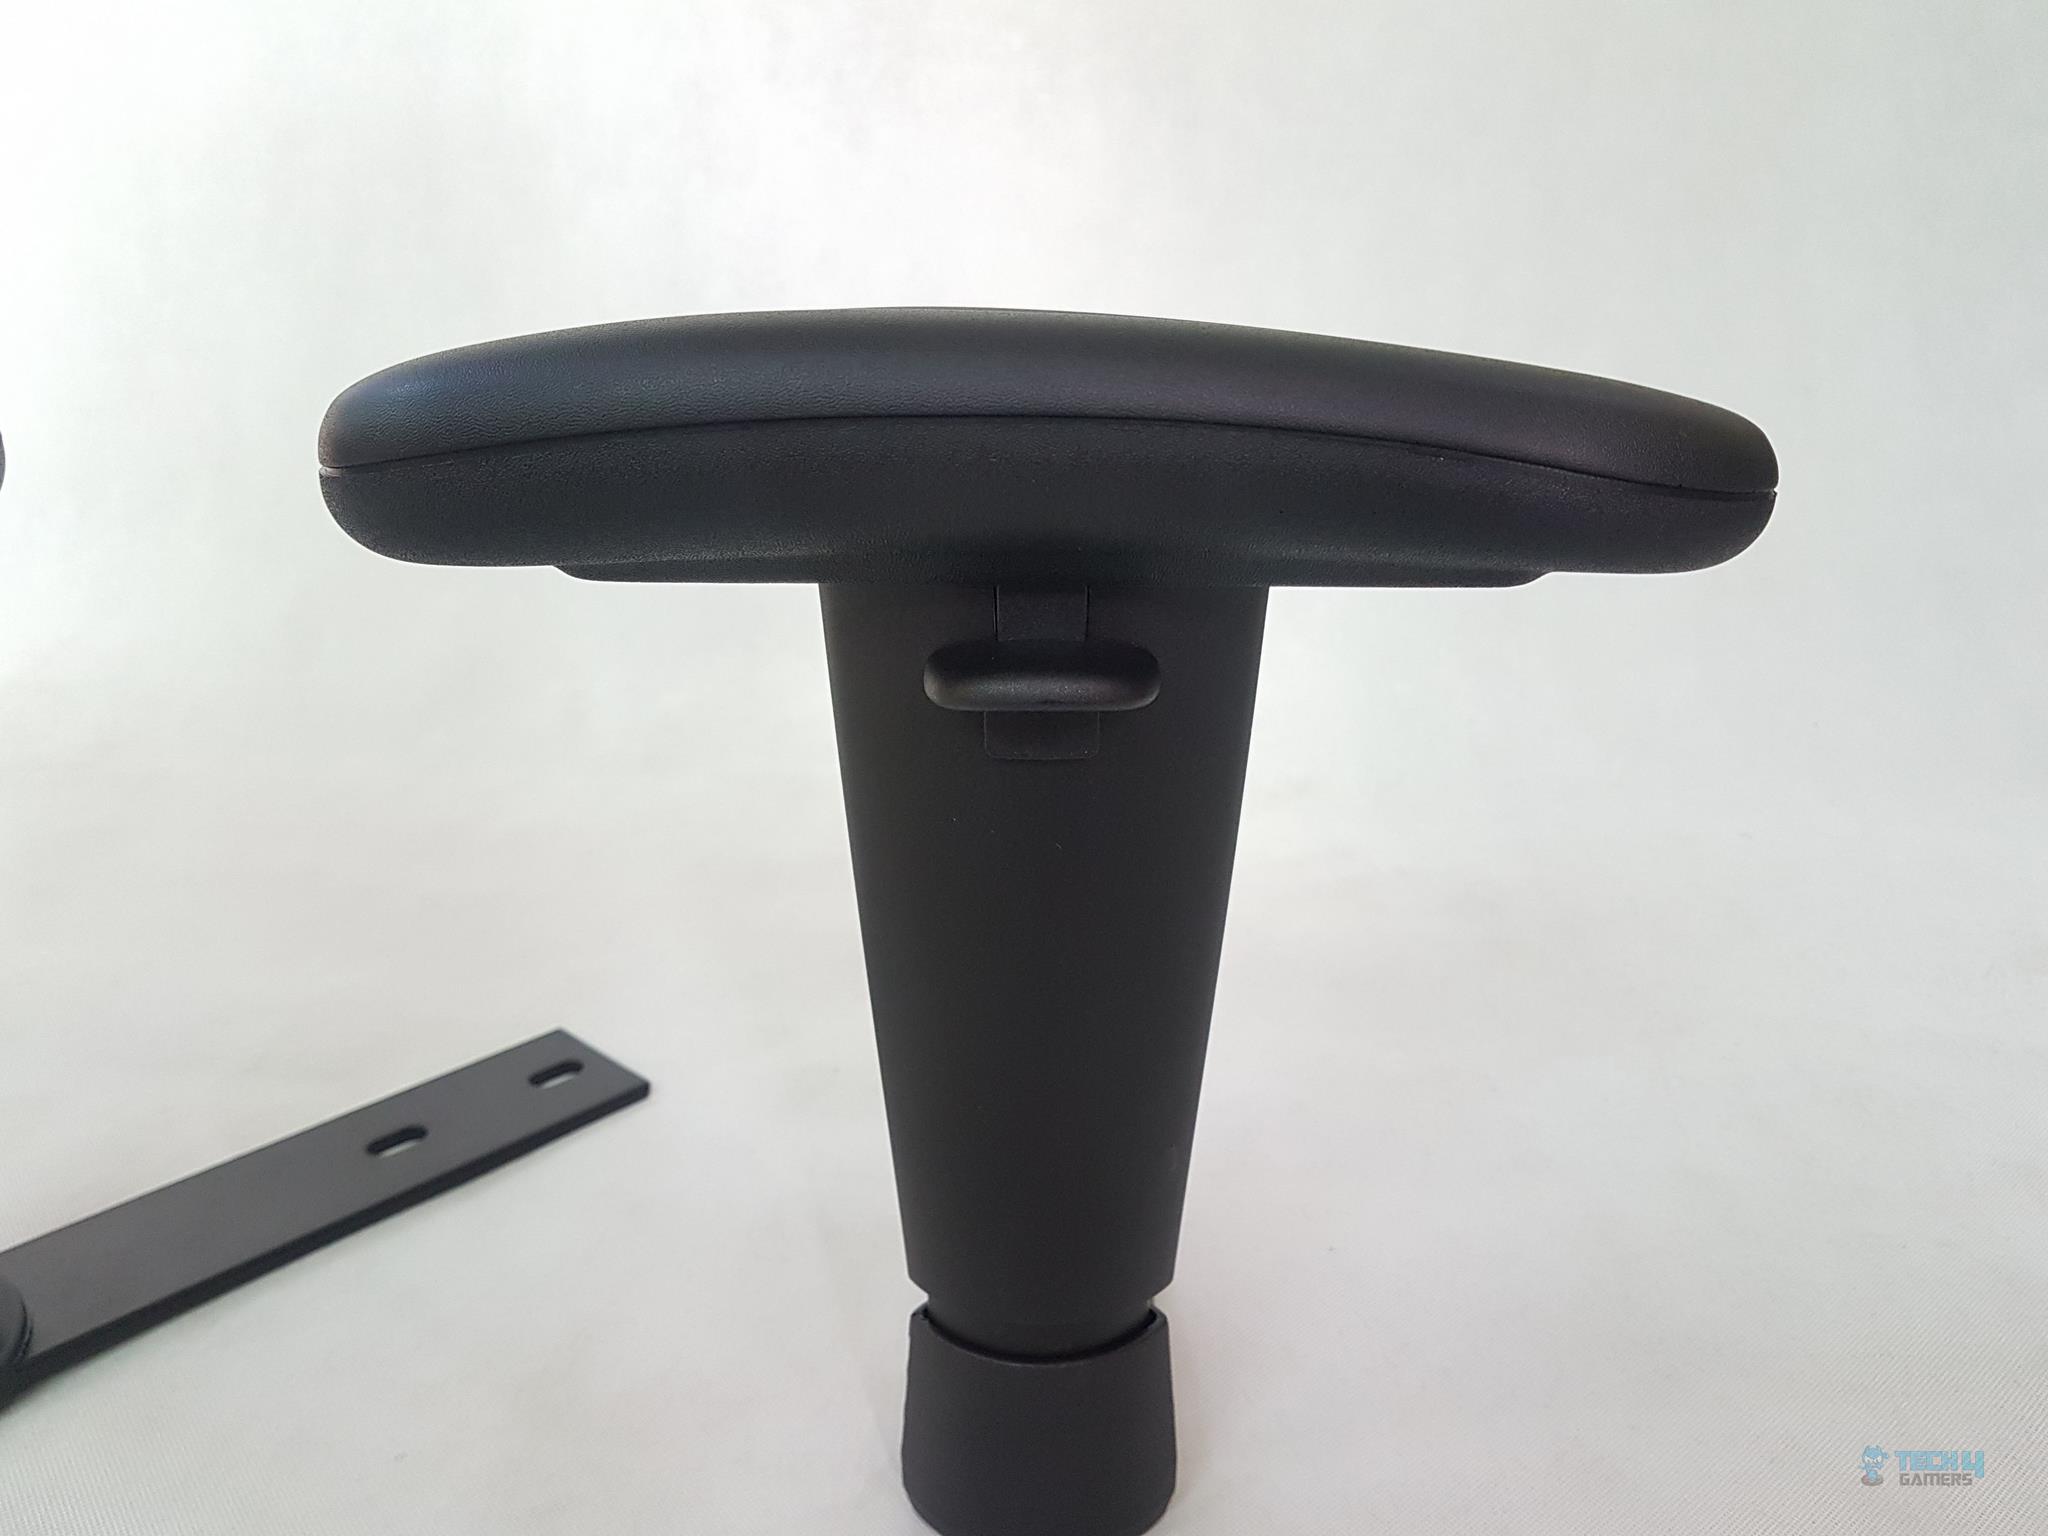
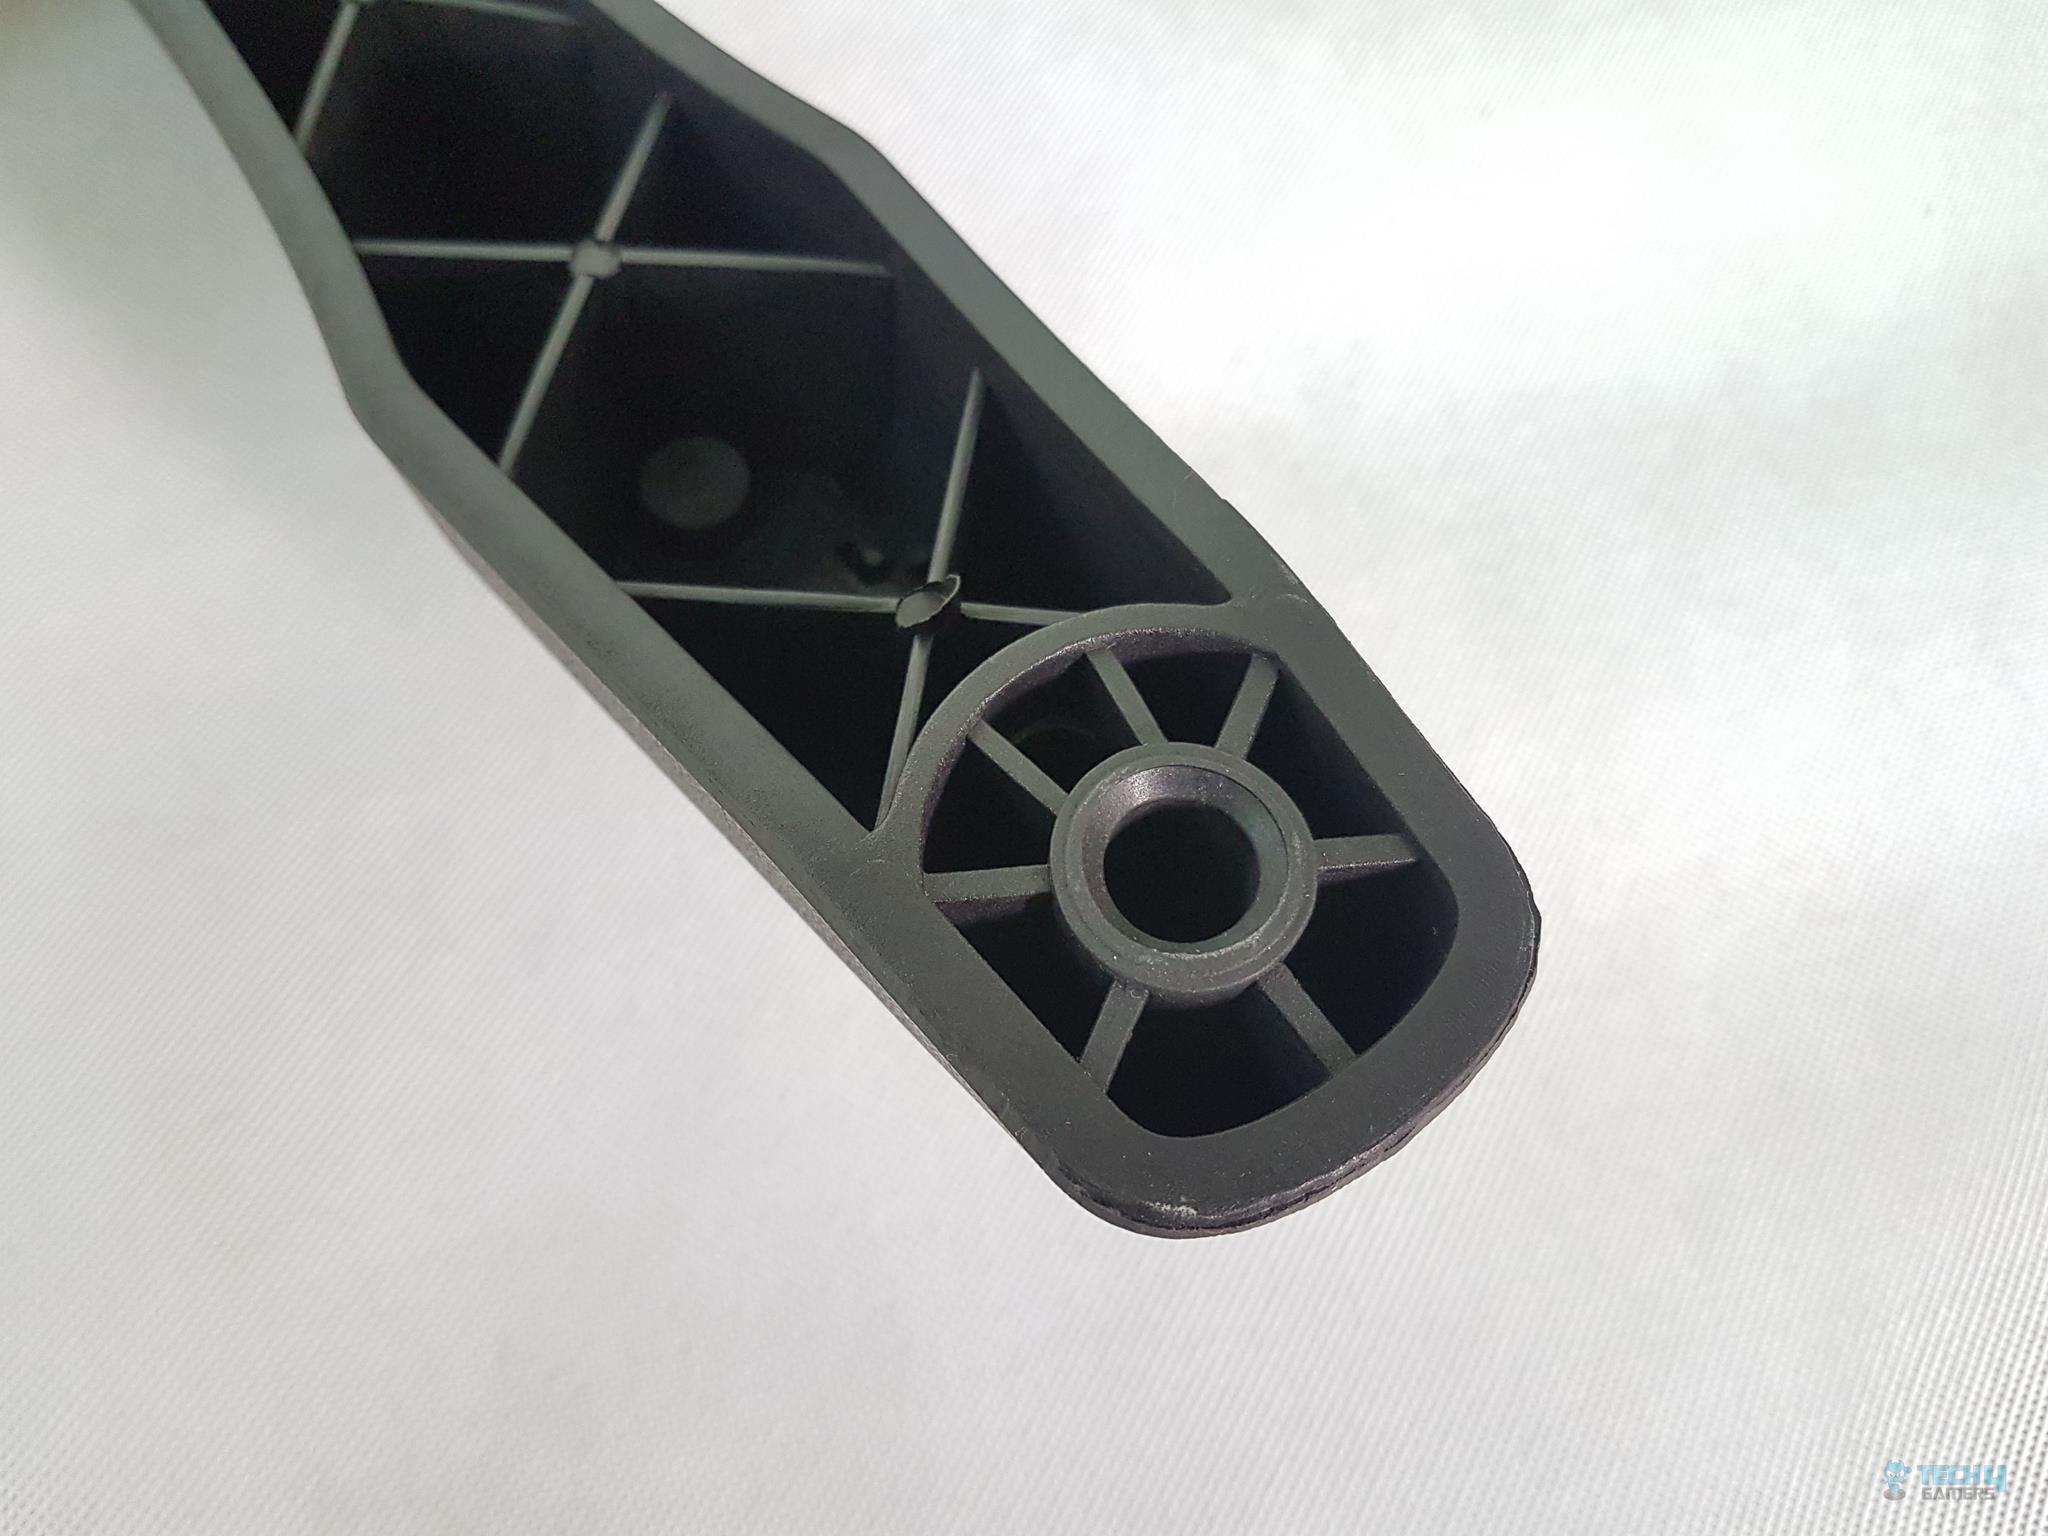
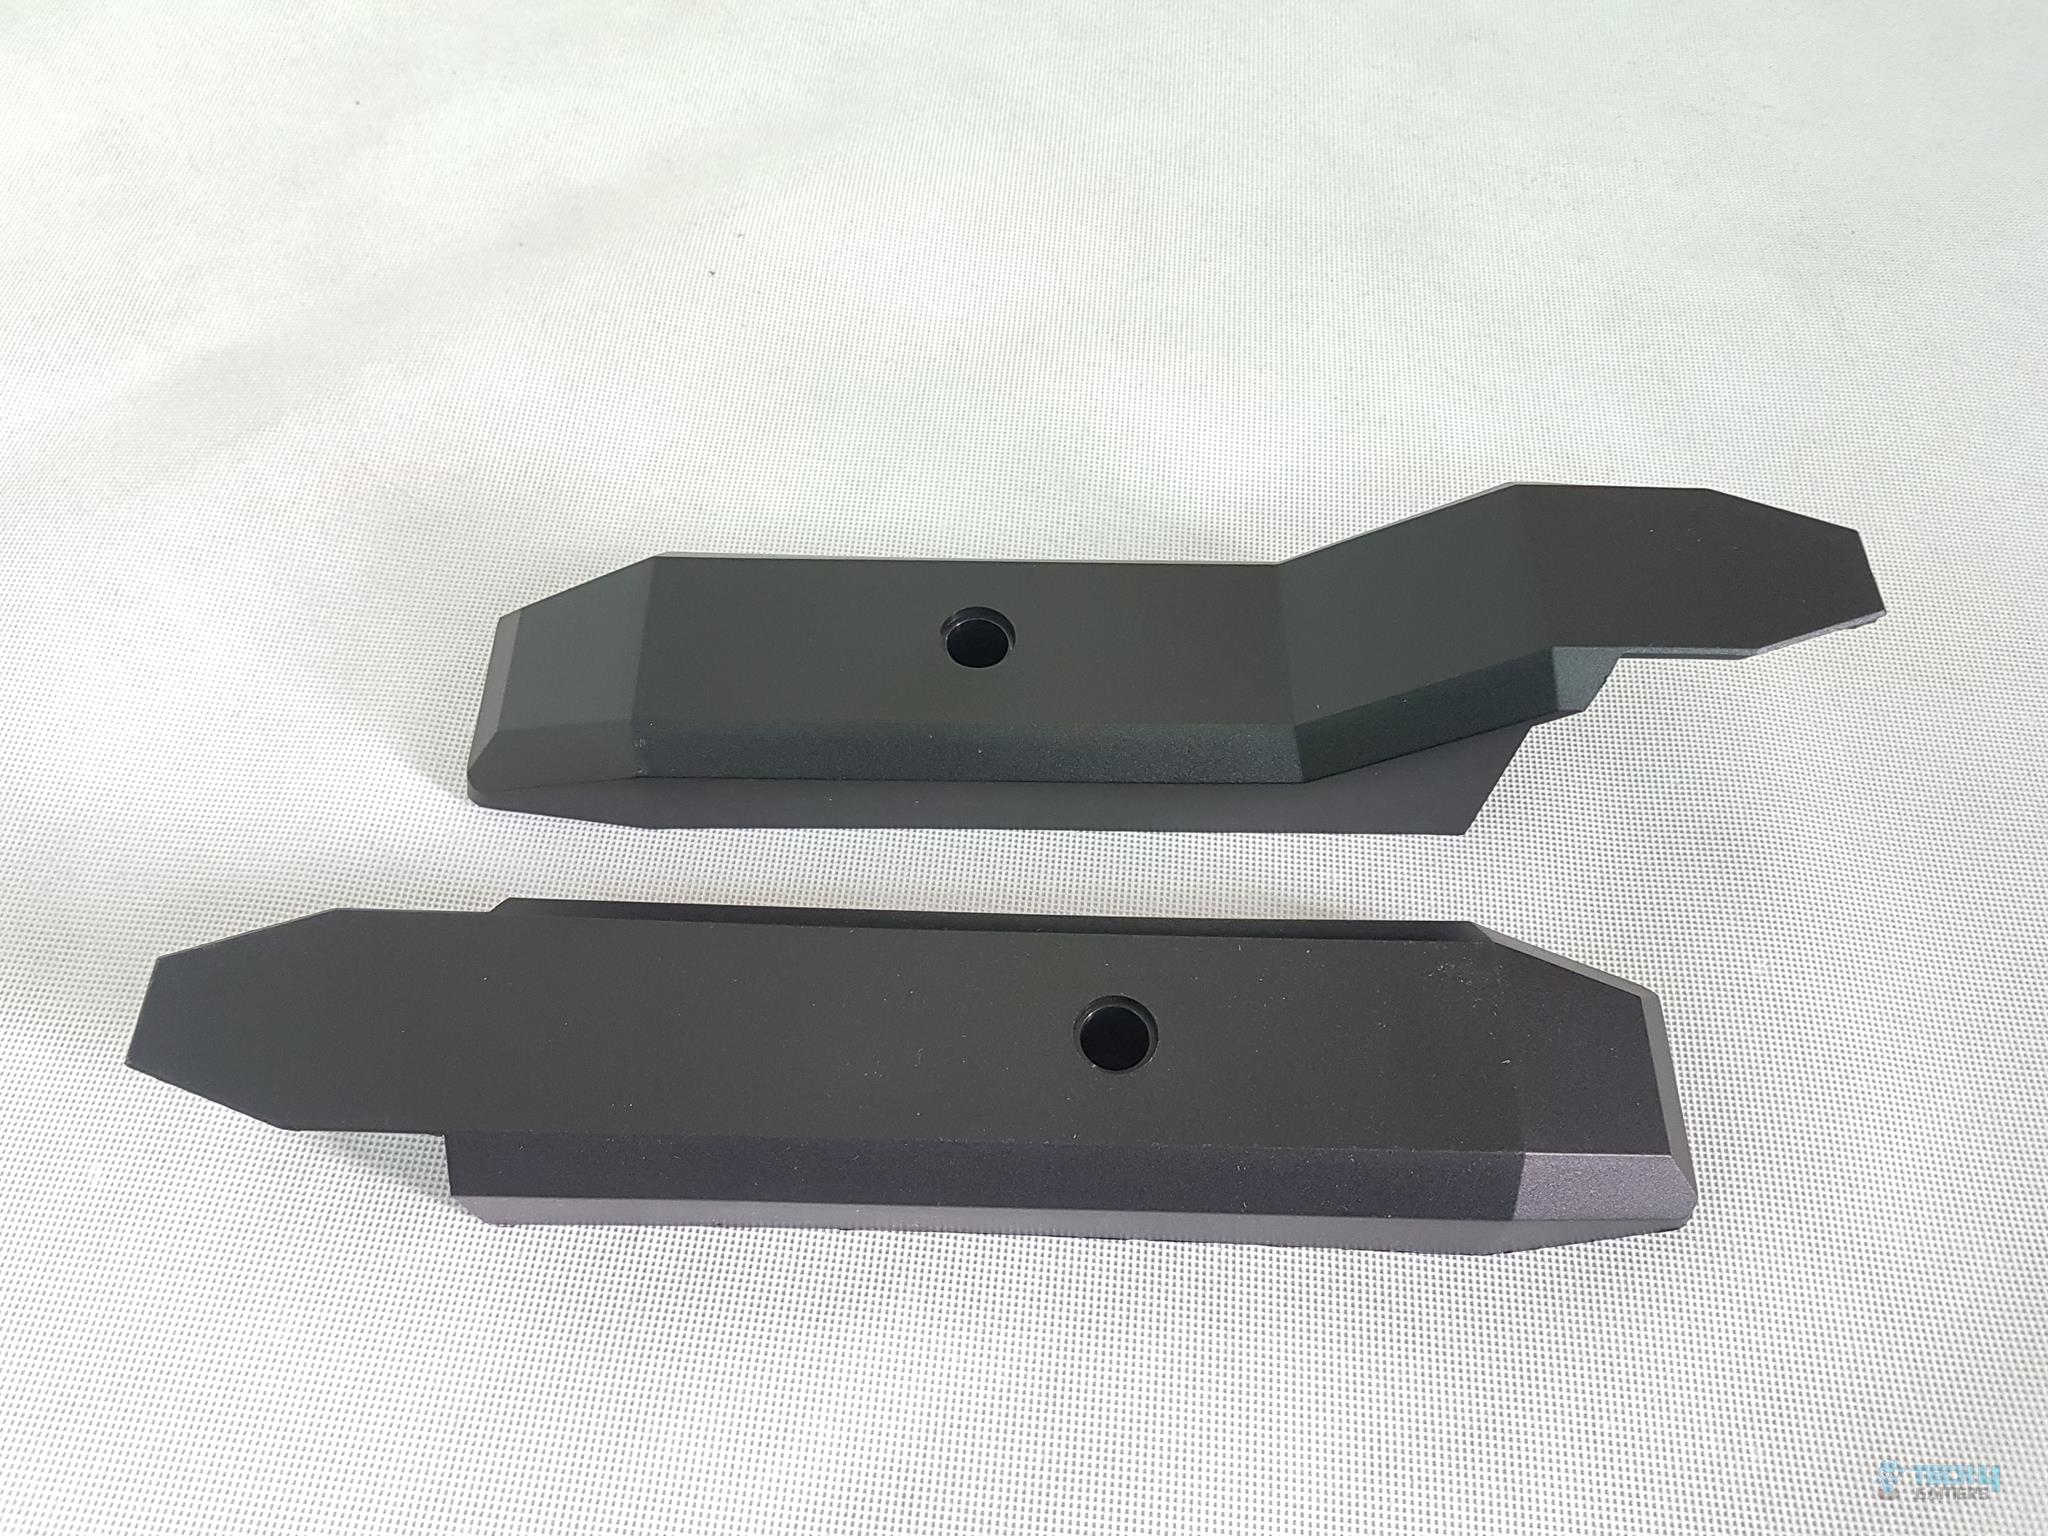
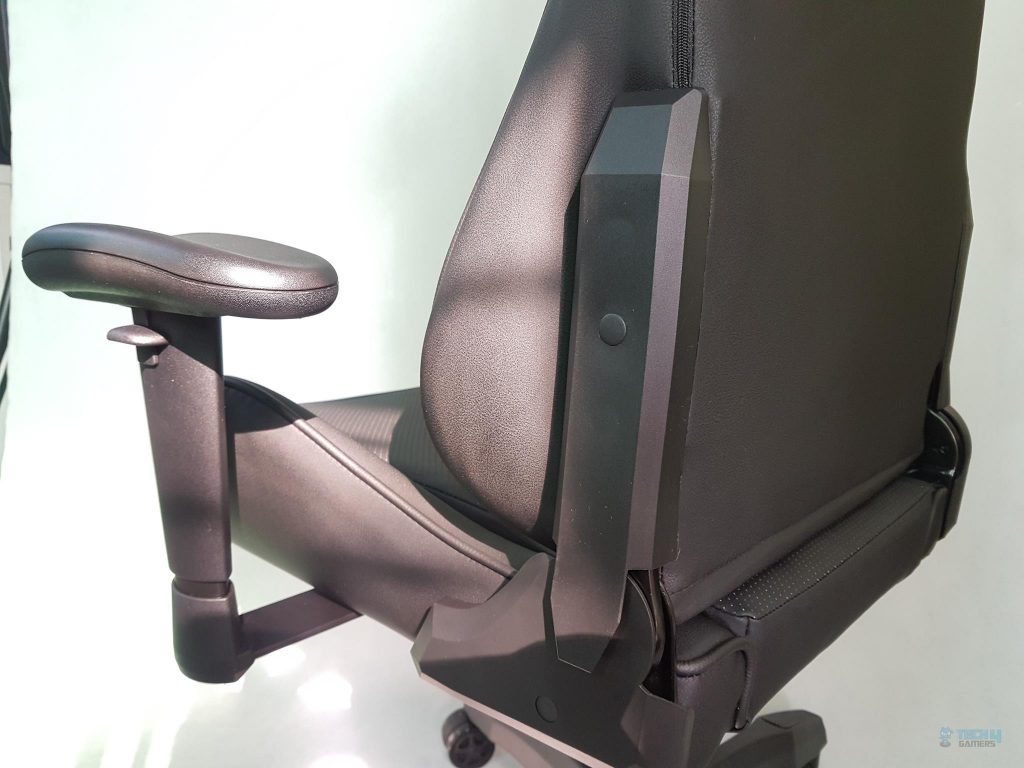
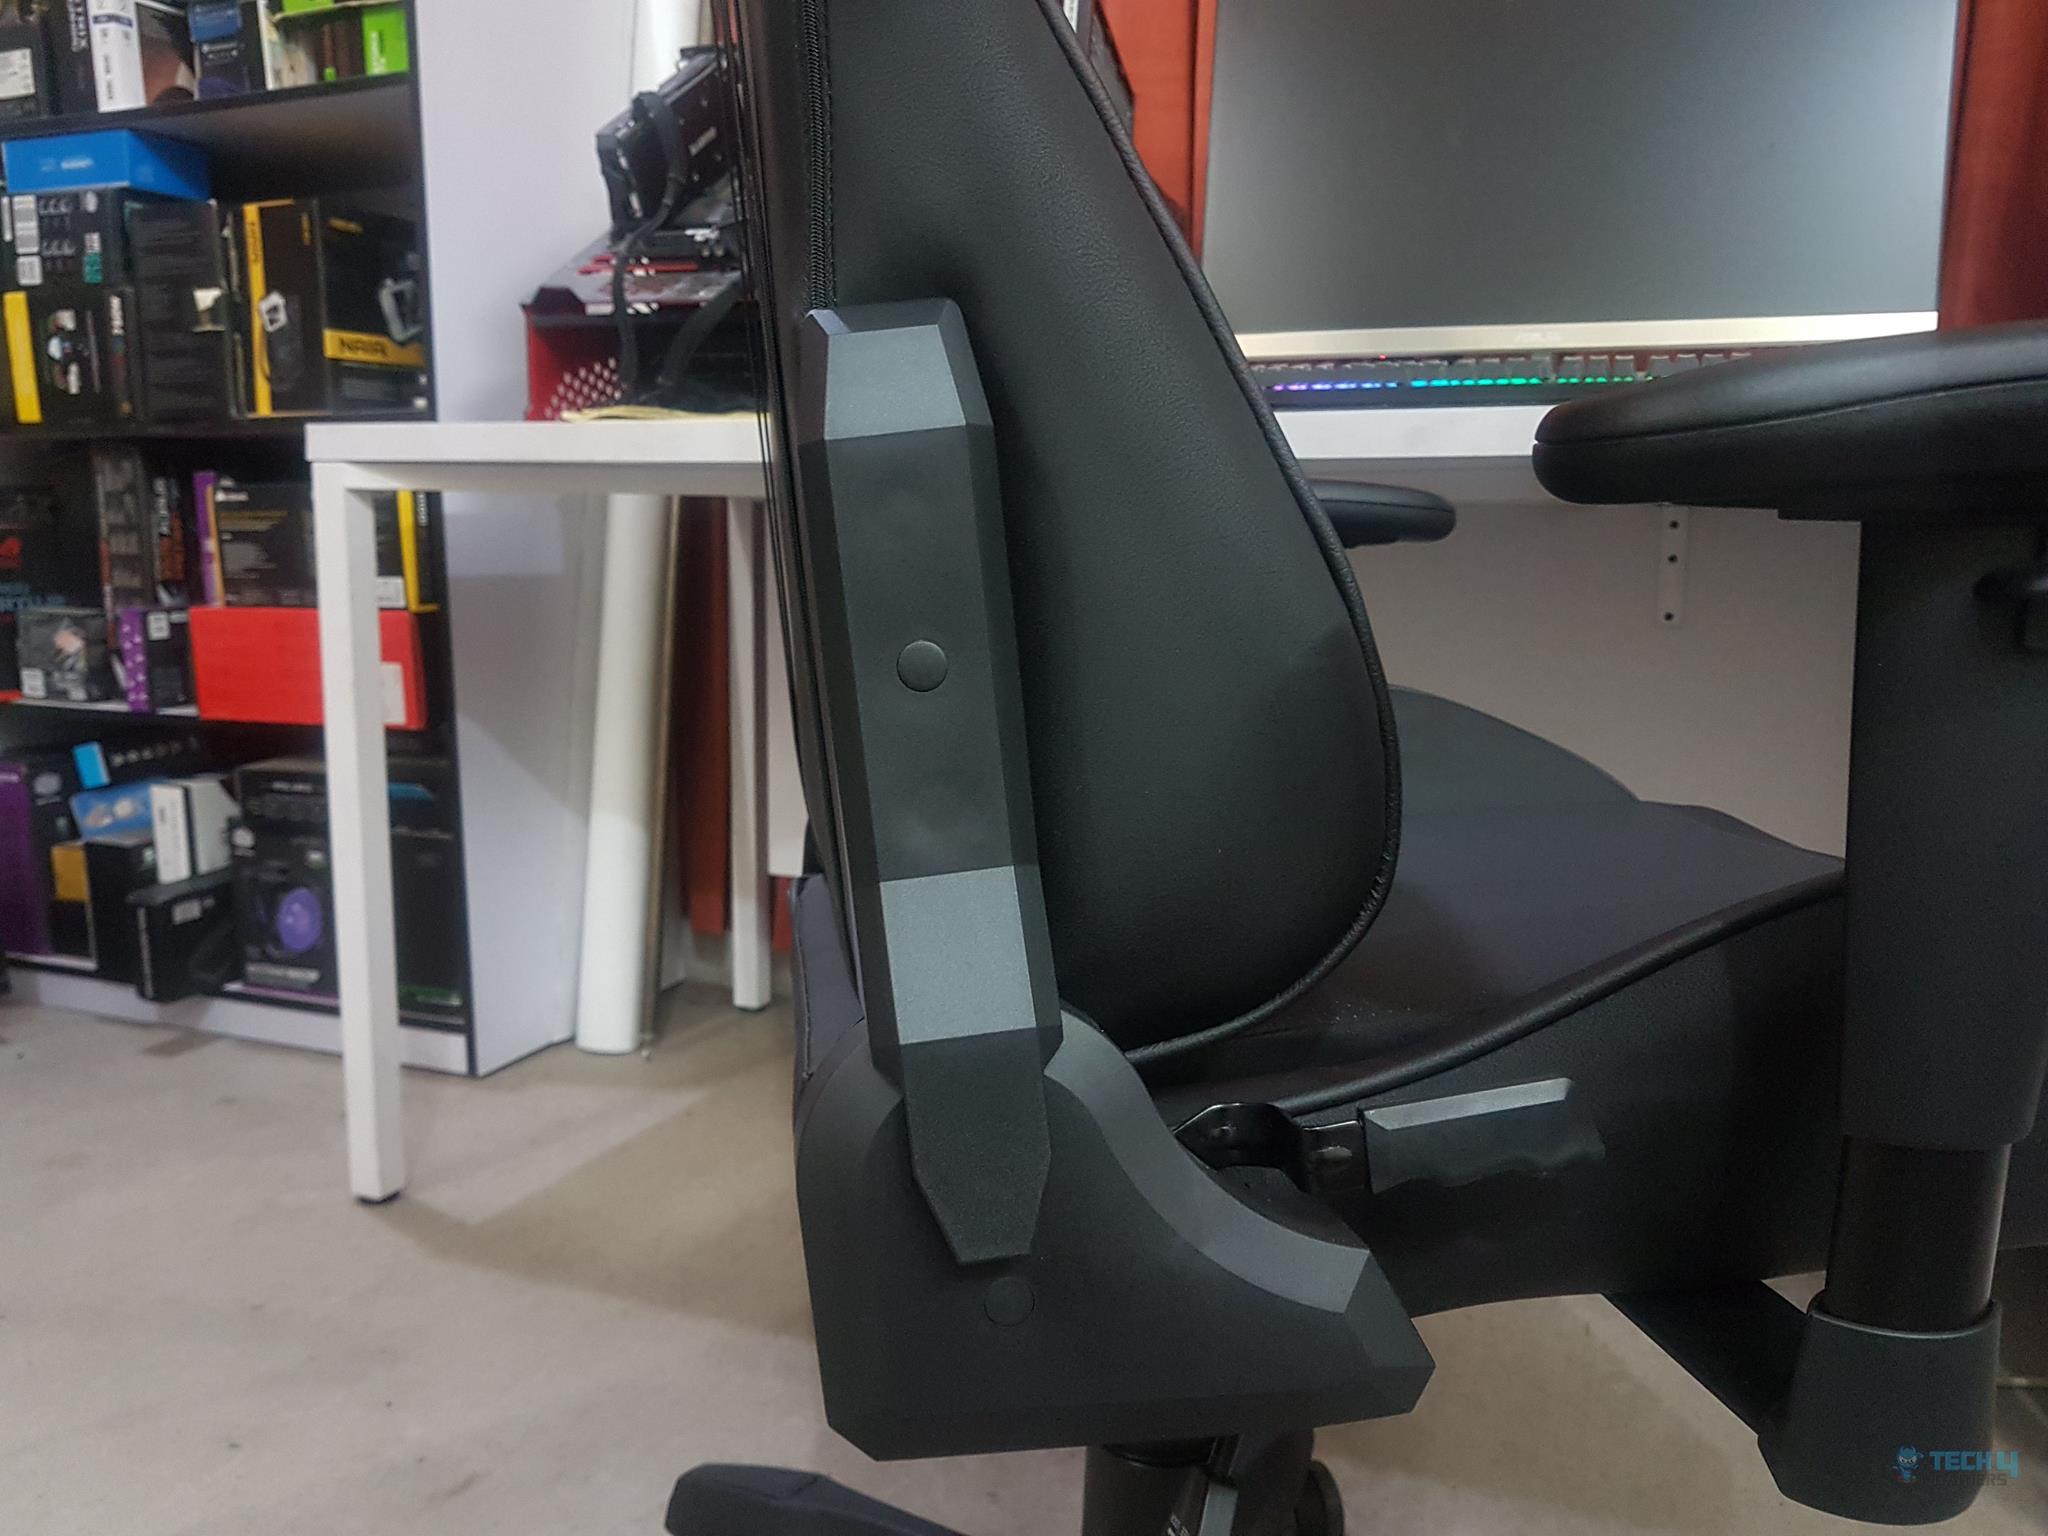
The Cooler Master package includes two sidearms made of steel and plastic, sporting a matte black finish. These ergonomically designed arms feature a longer top cover, providing ample space for users to rest their arms comfortably.
Each arm’s height is adjustable using a plastic hook on the outer side. Pulling it upward unlocks the arm, enabling users to customize the height as needed. Releasing the puller locks the arm securely in place.
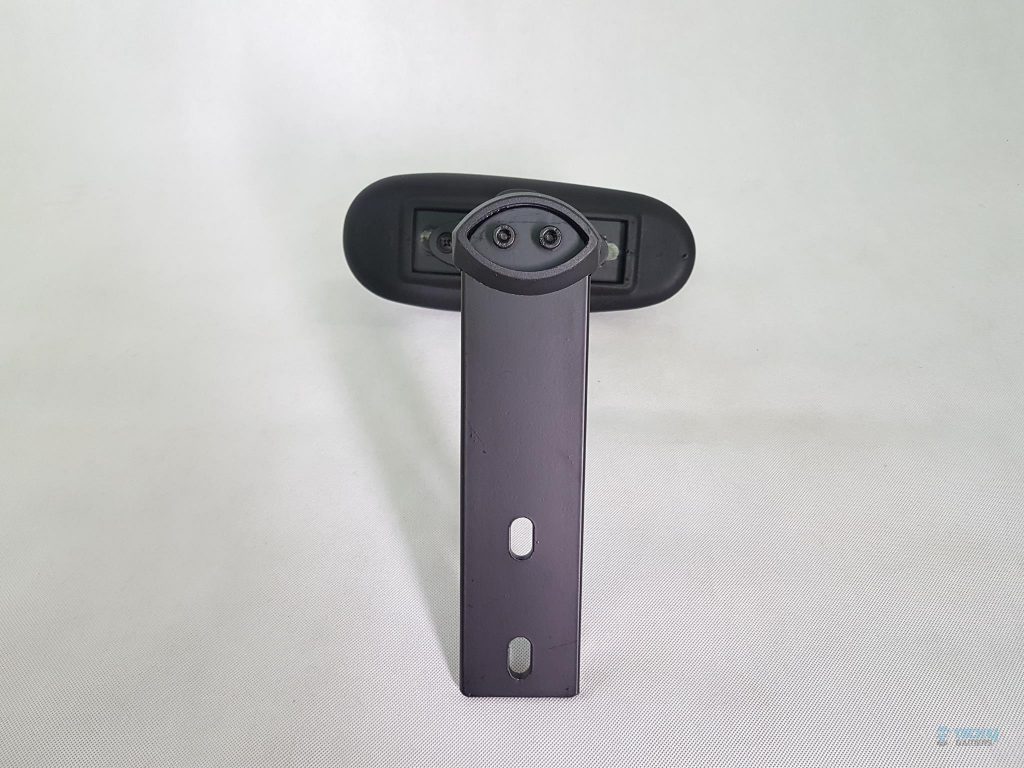
Looking at the base of the arm, we can spot two holes. This is where the provided M8x18mm bolts are passed through to secure the arms to the seat.
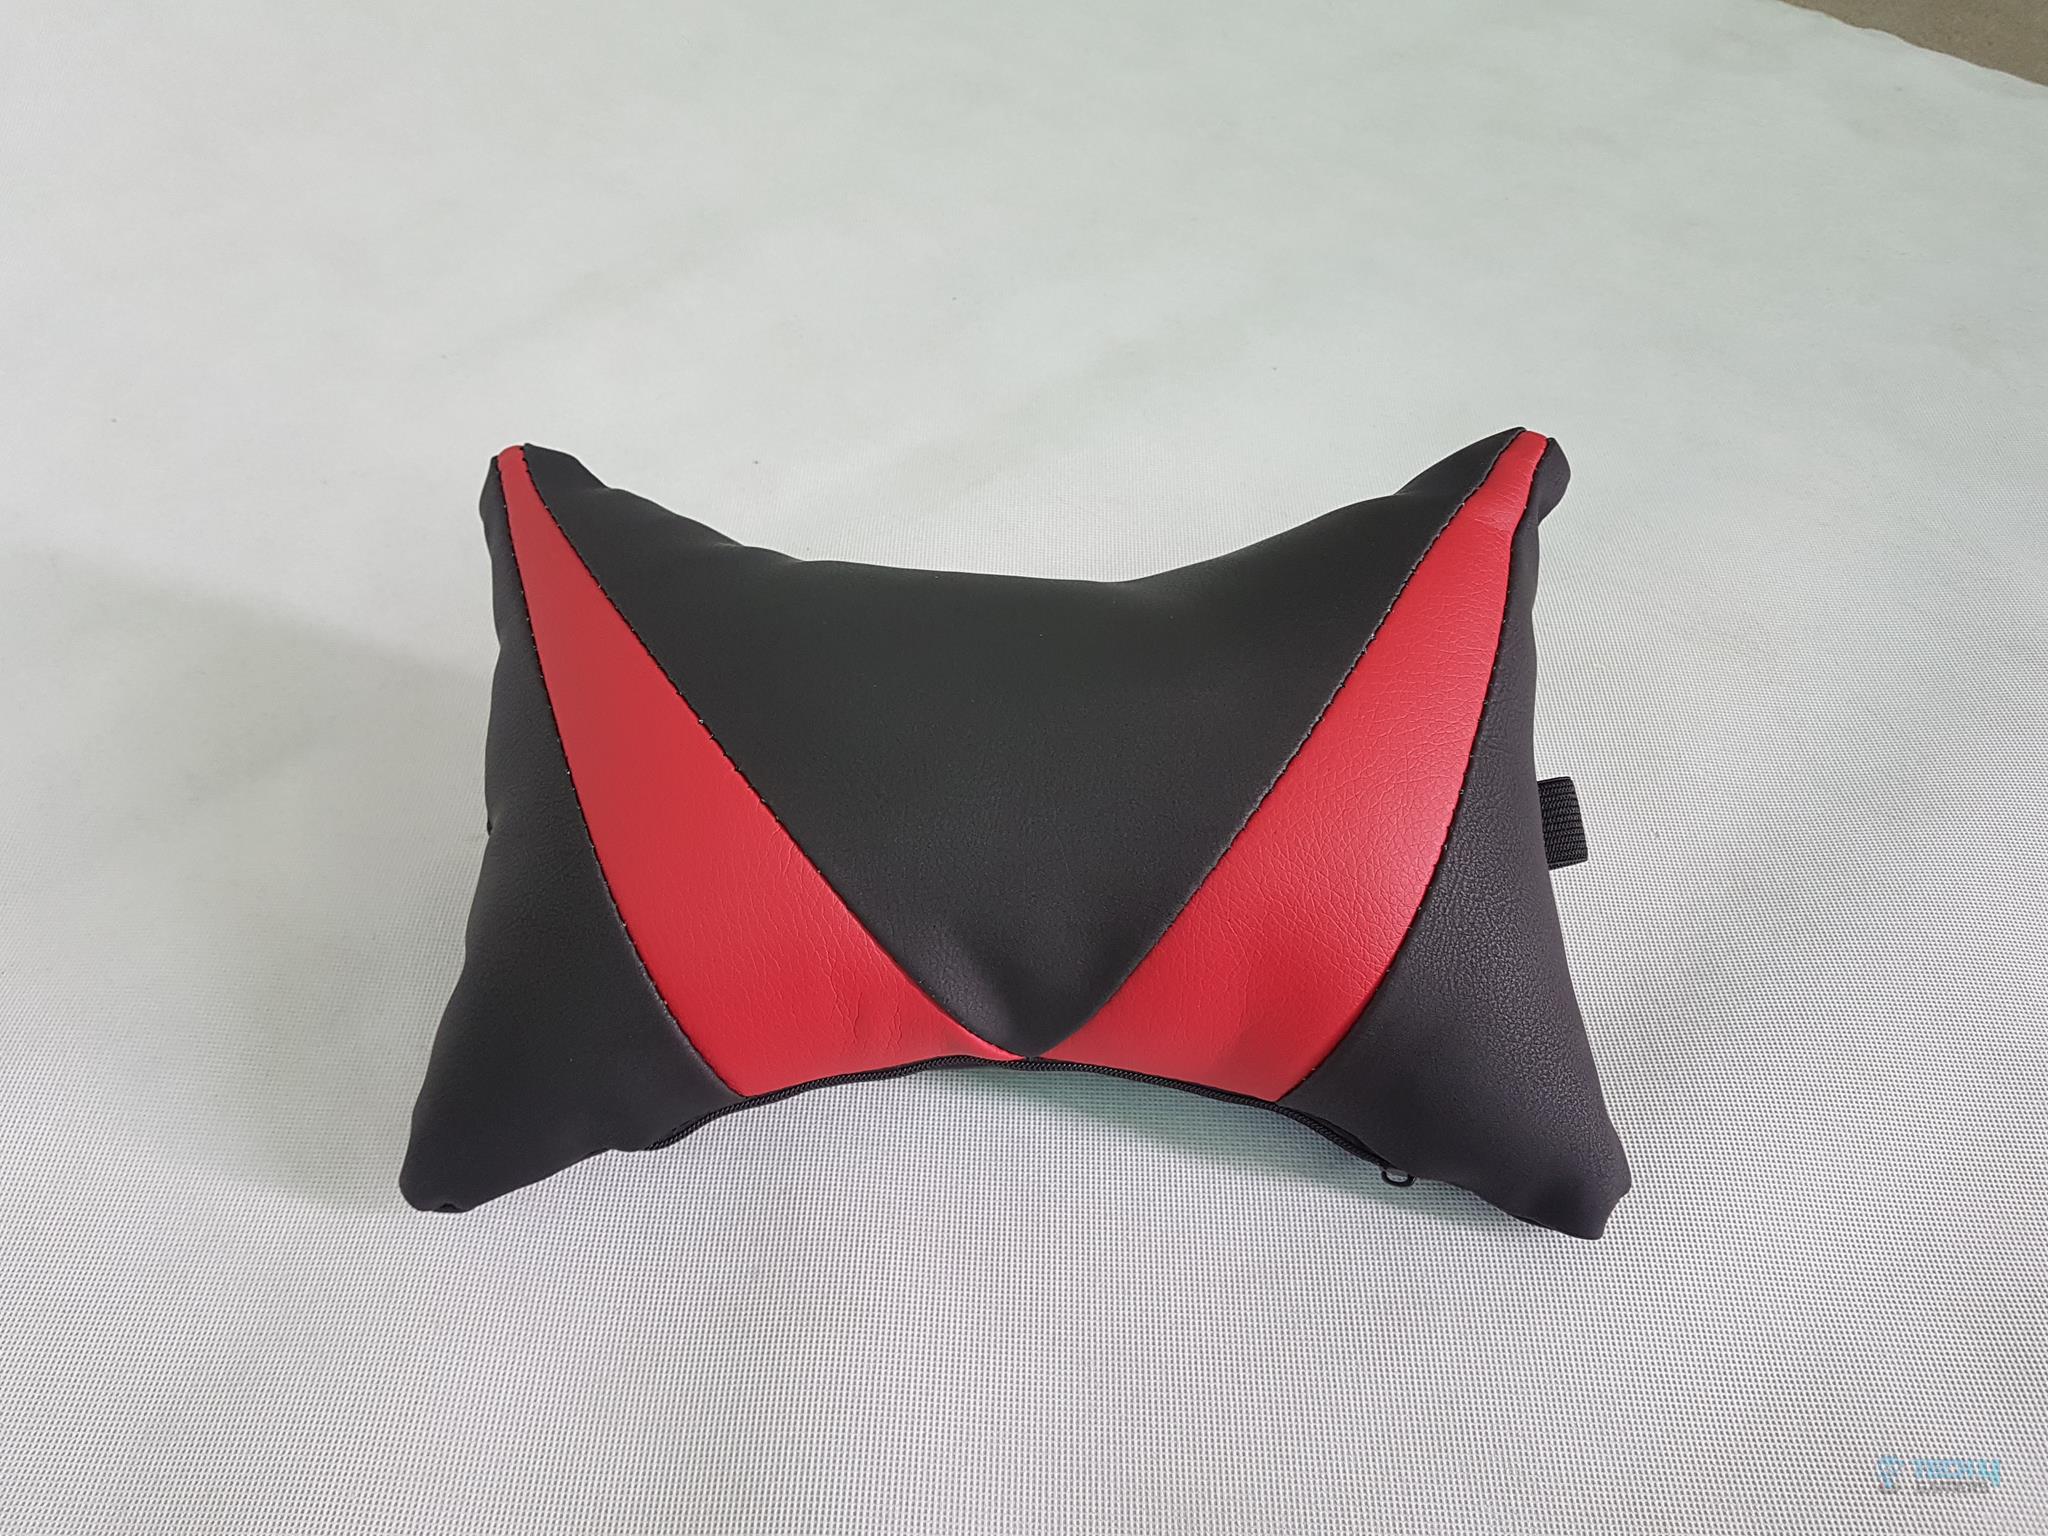
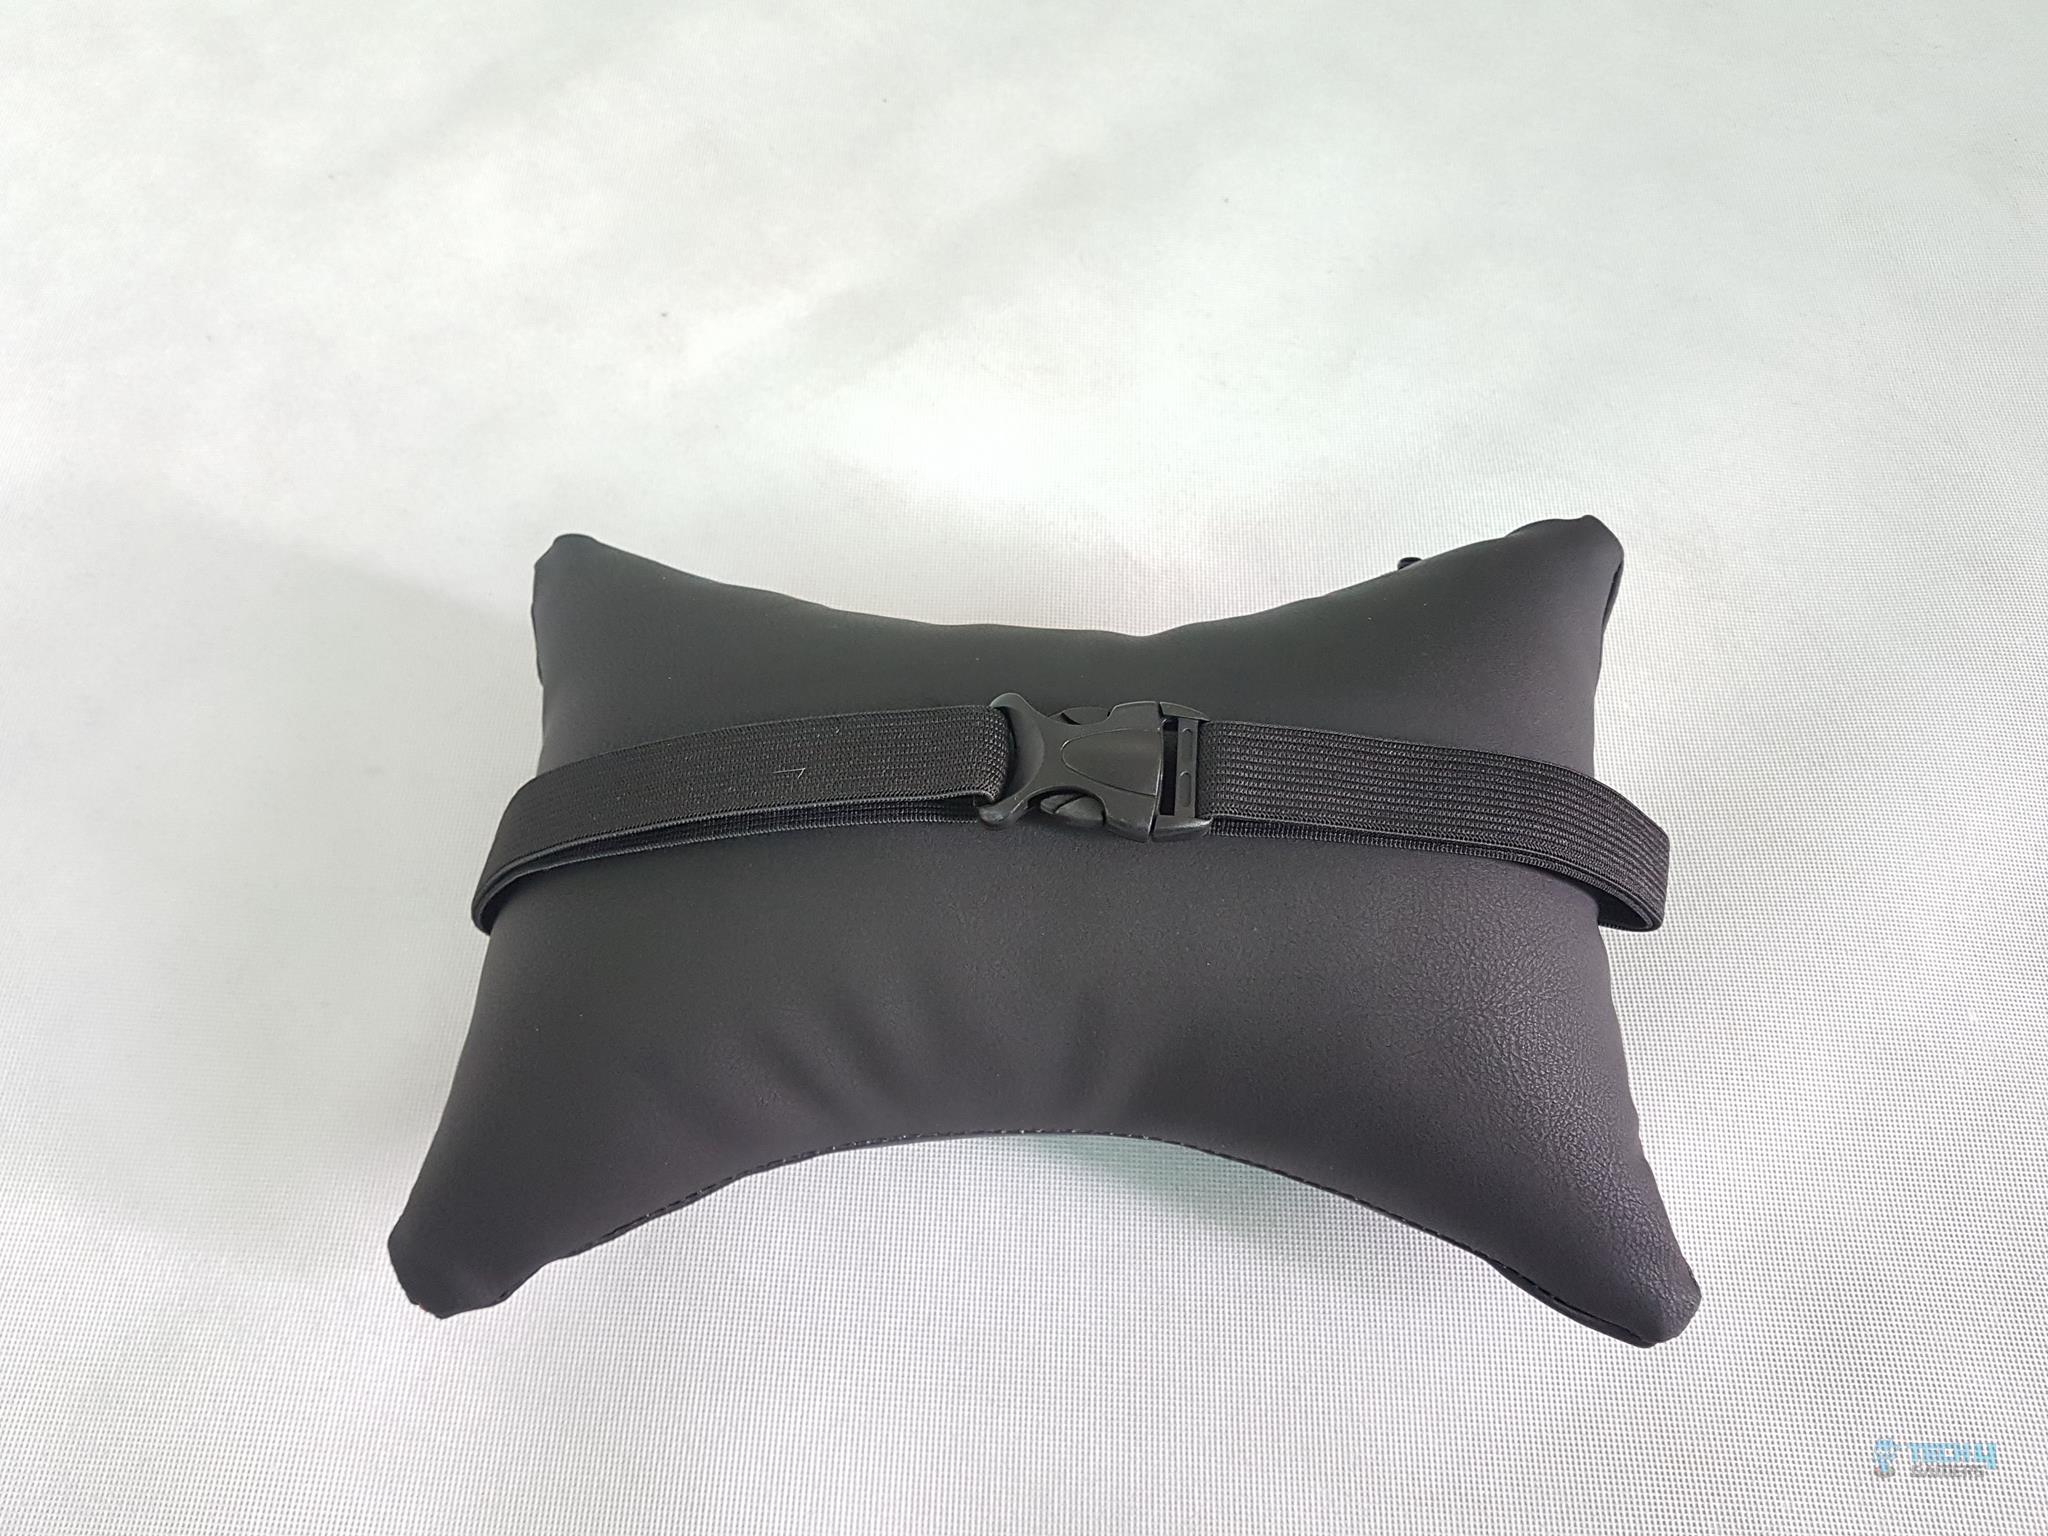
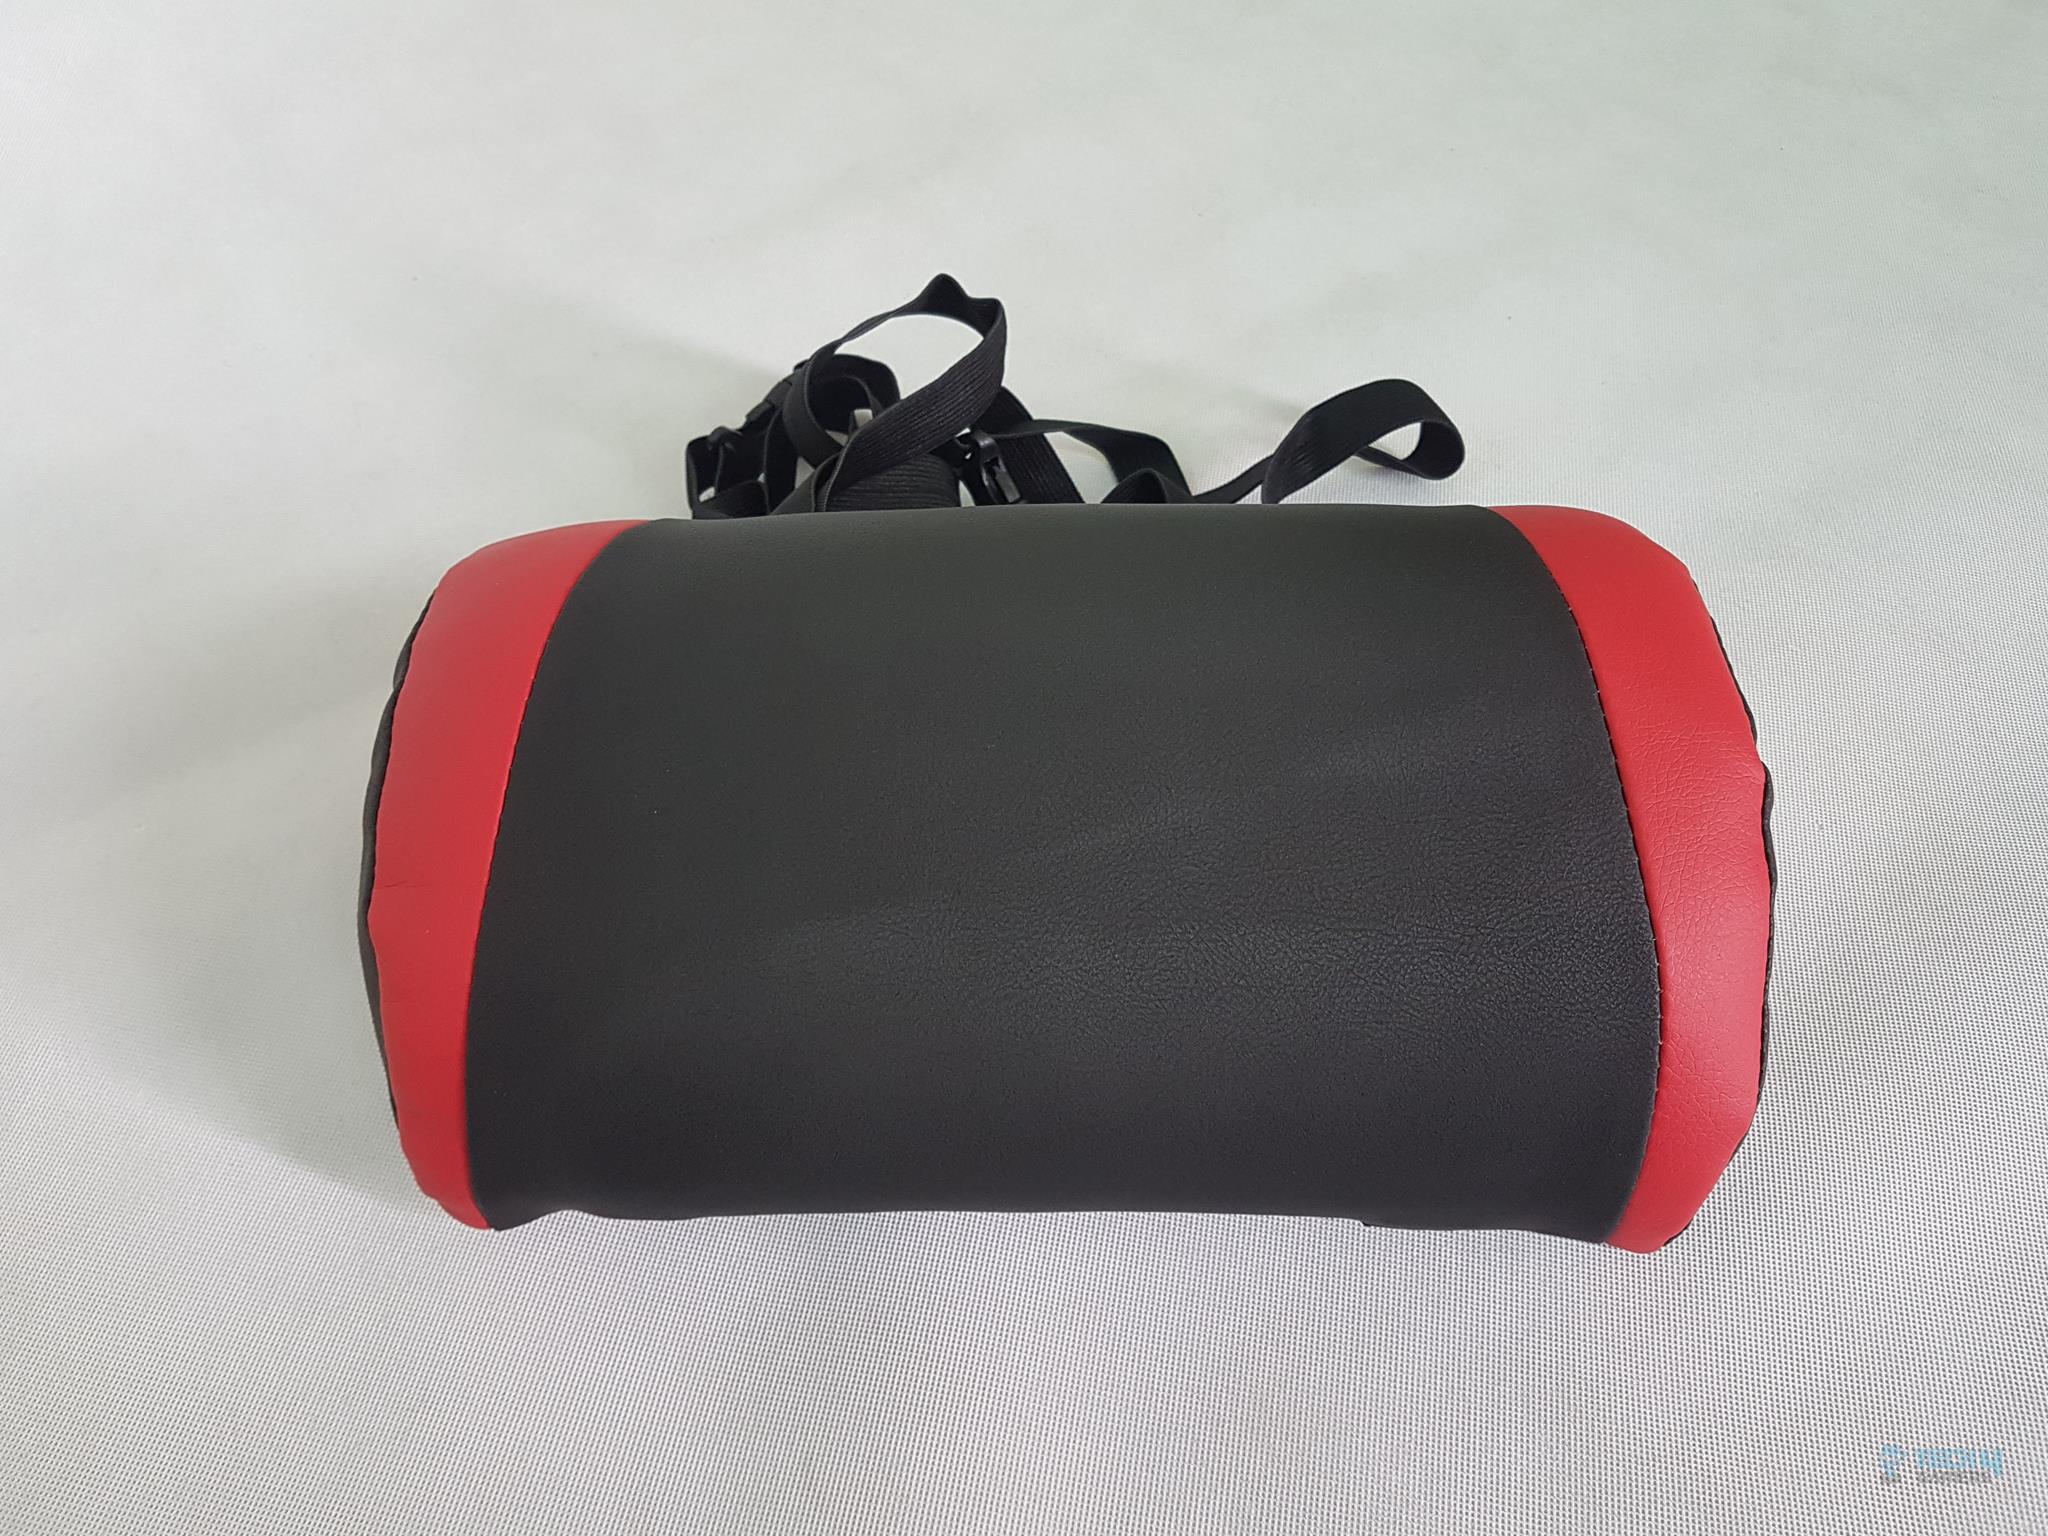
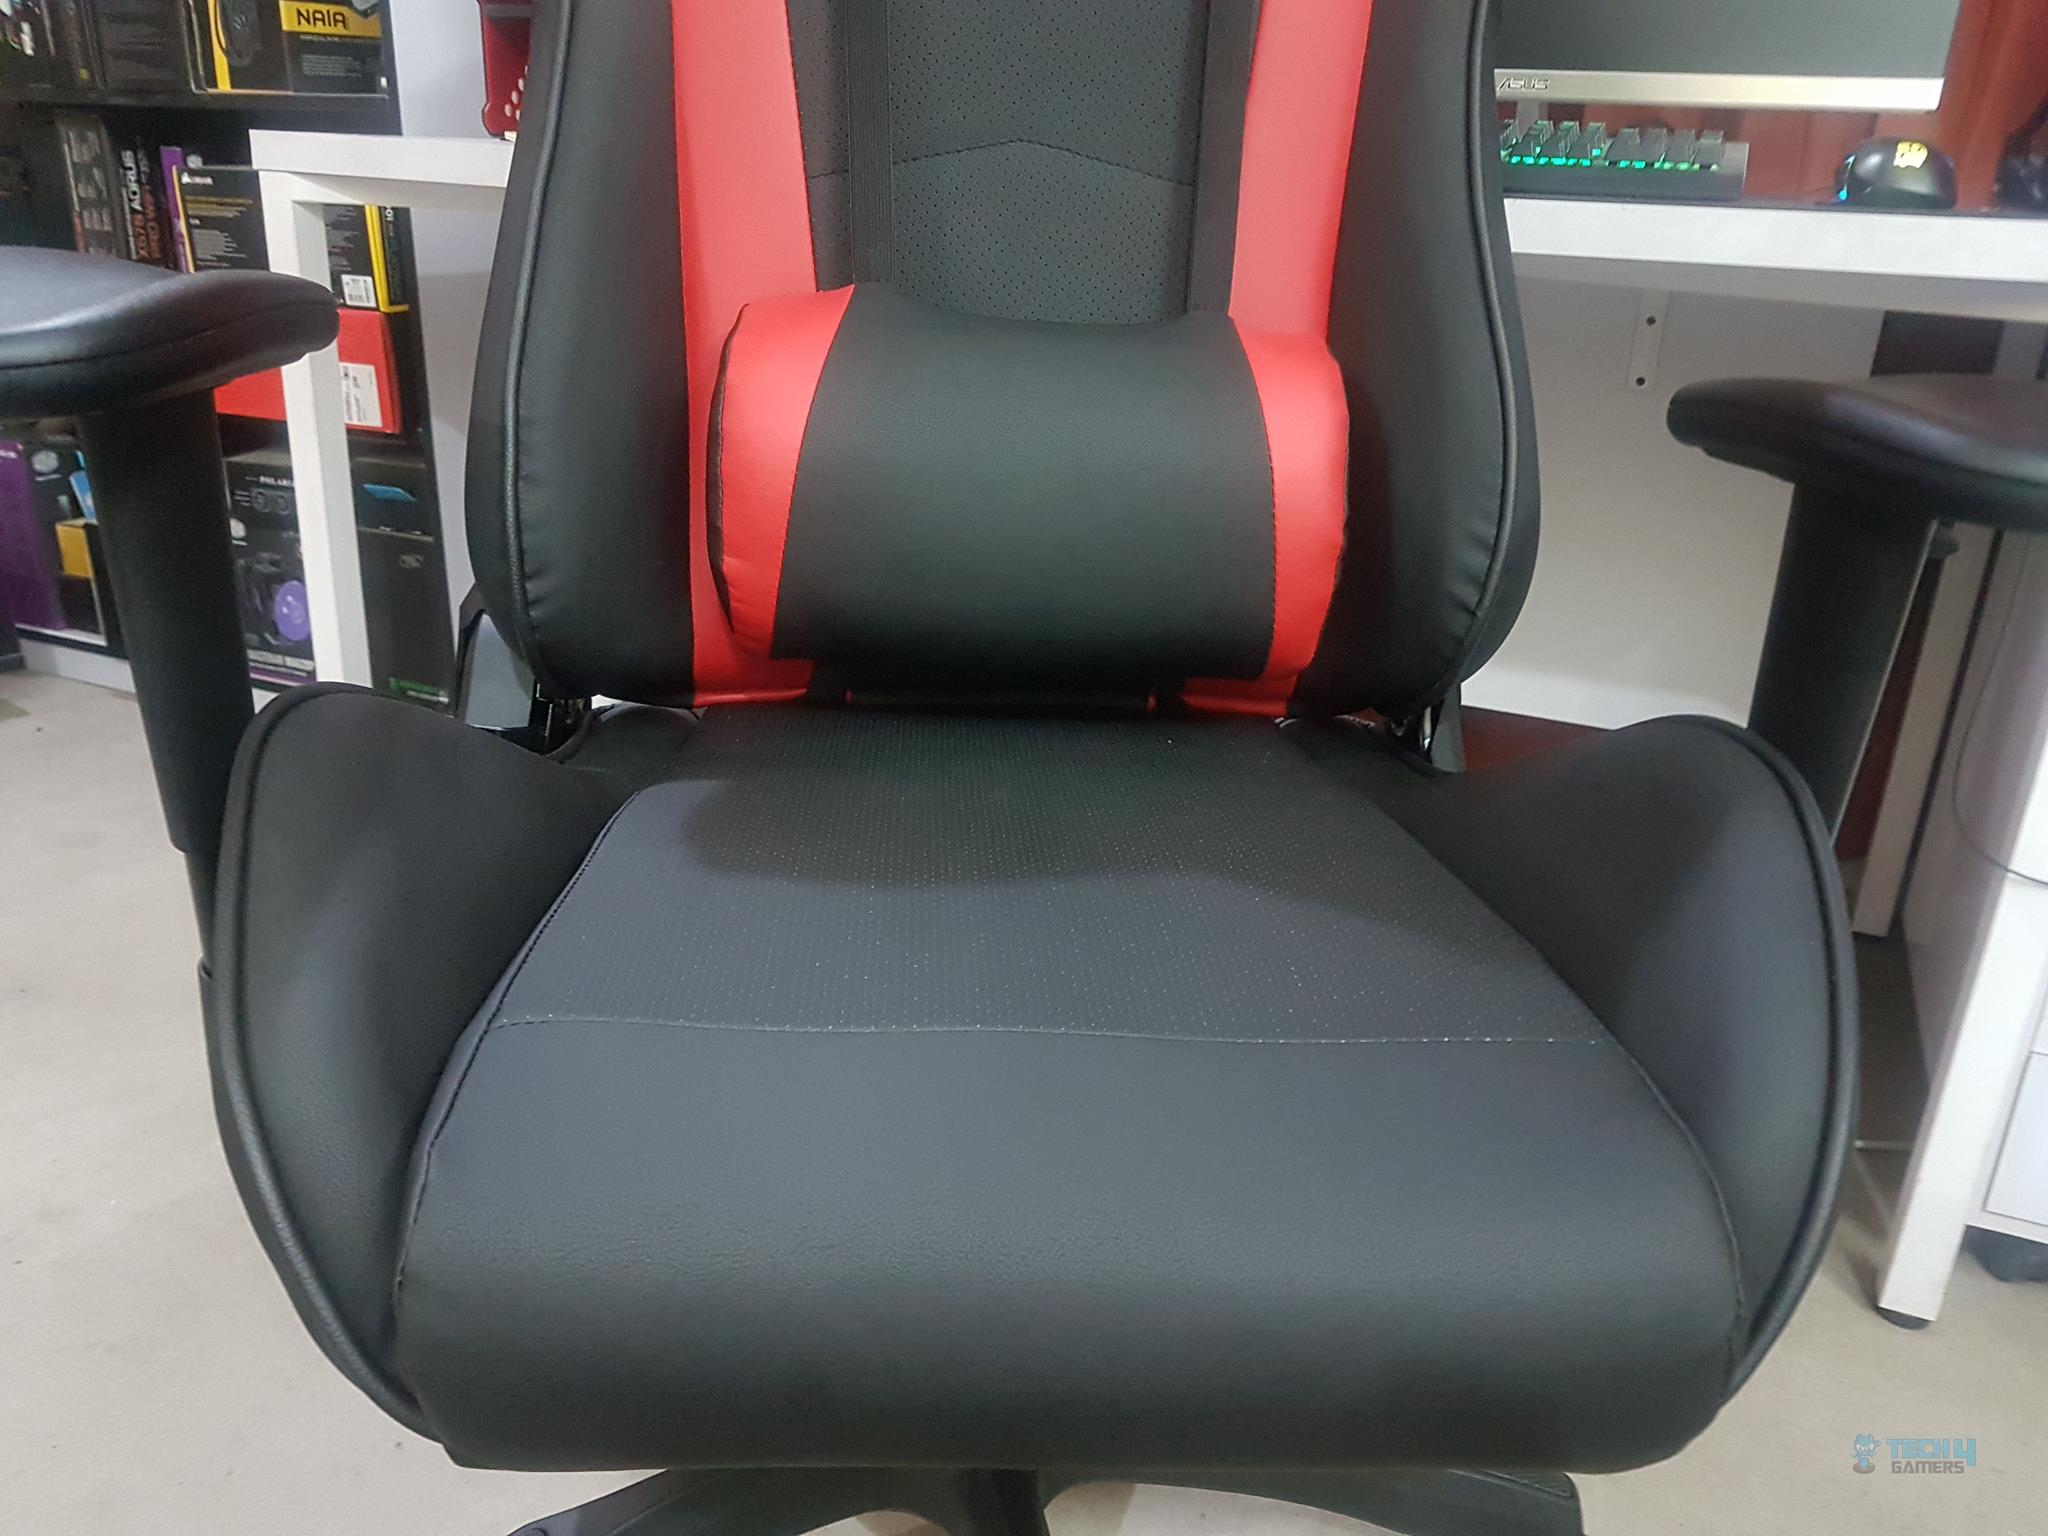
Cooler Master has provided a neck pillow which is made of the same premium breathable PU material. The red color portions are designed in harmony with the overall design layout on the backrest as we will see shortly. The stitching is on the point. The backside of the neck pillow has a black color plain surface. There is a strap with a hook and a catcher.
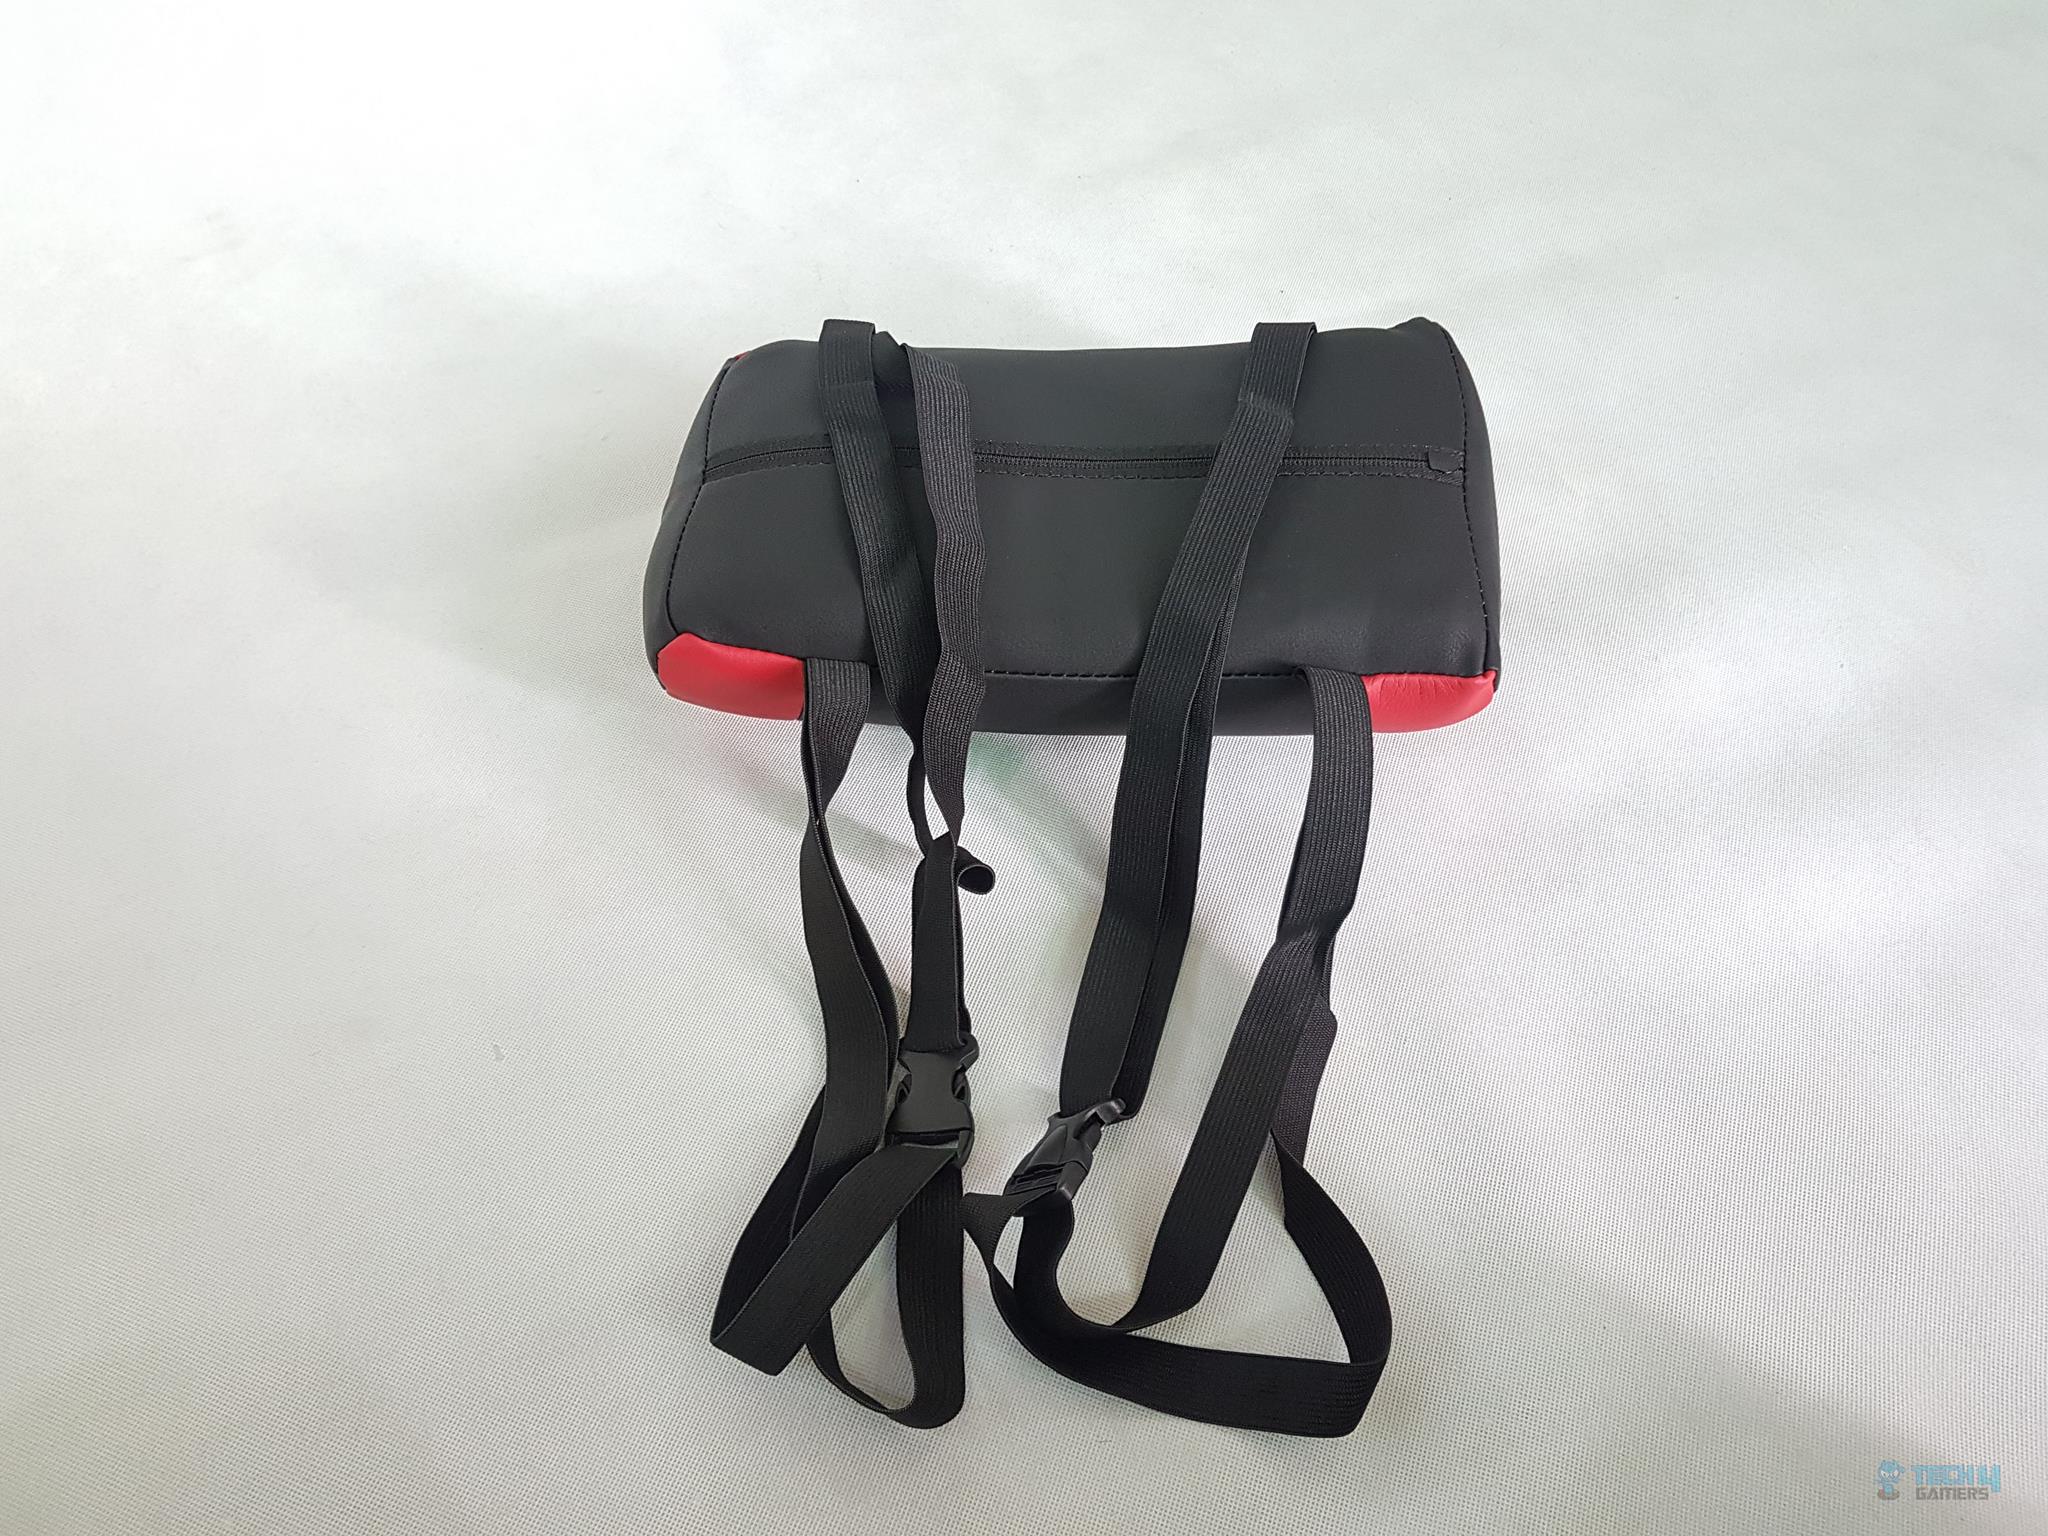
The second pillow included is lumbar. It supports the back of the gamer/user to avoid fatigue and strain during the longer session. It has a same color design though it is rounded on the edges. The backside of the lumbar pillow is the same. It has two straps with hooks and catchers. The straps have elastic nature and have more length as it has run from the top to bottom of the backrest.
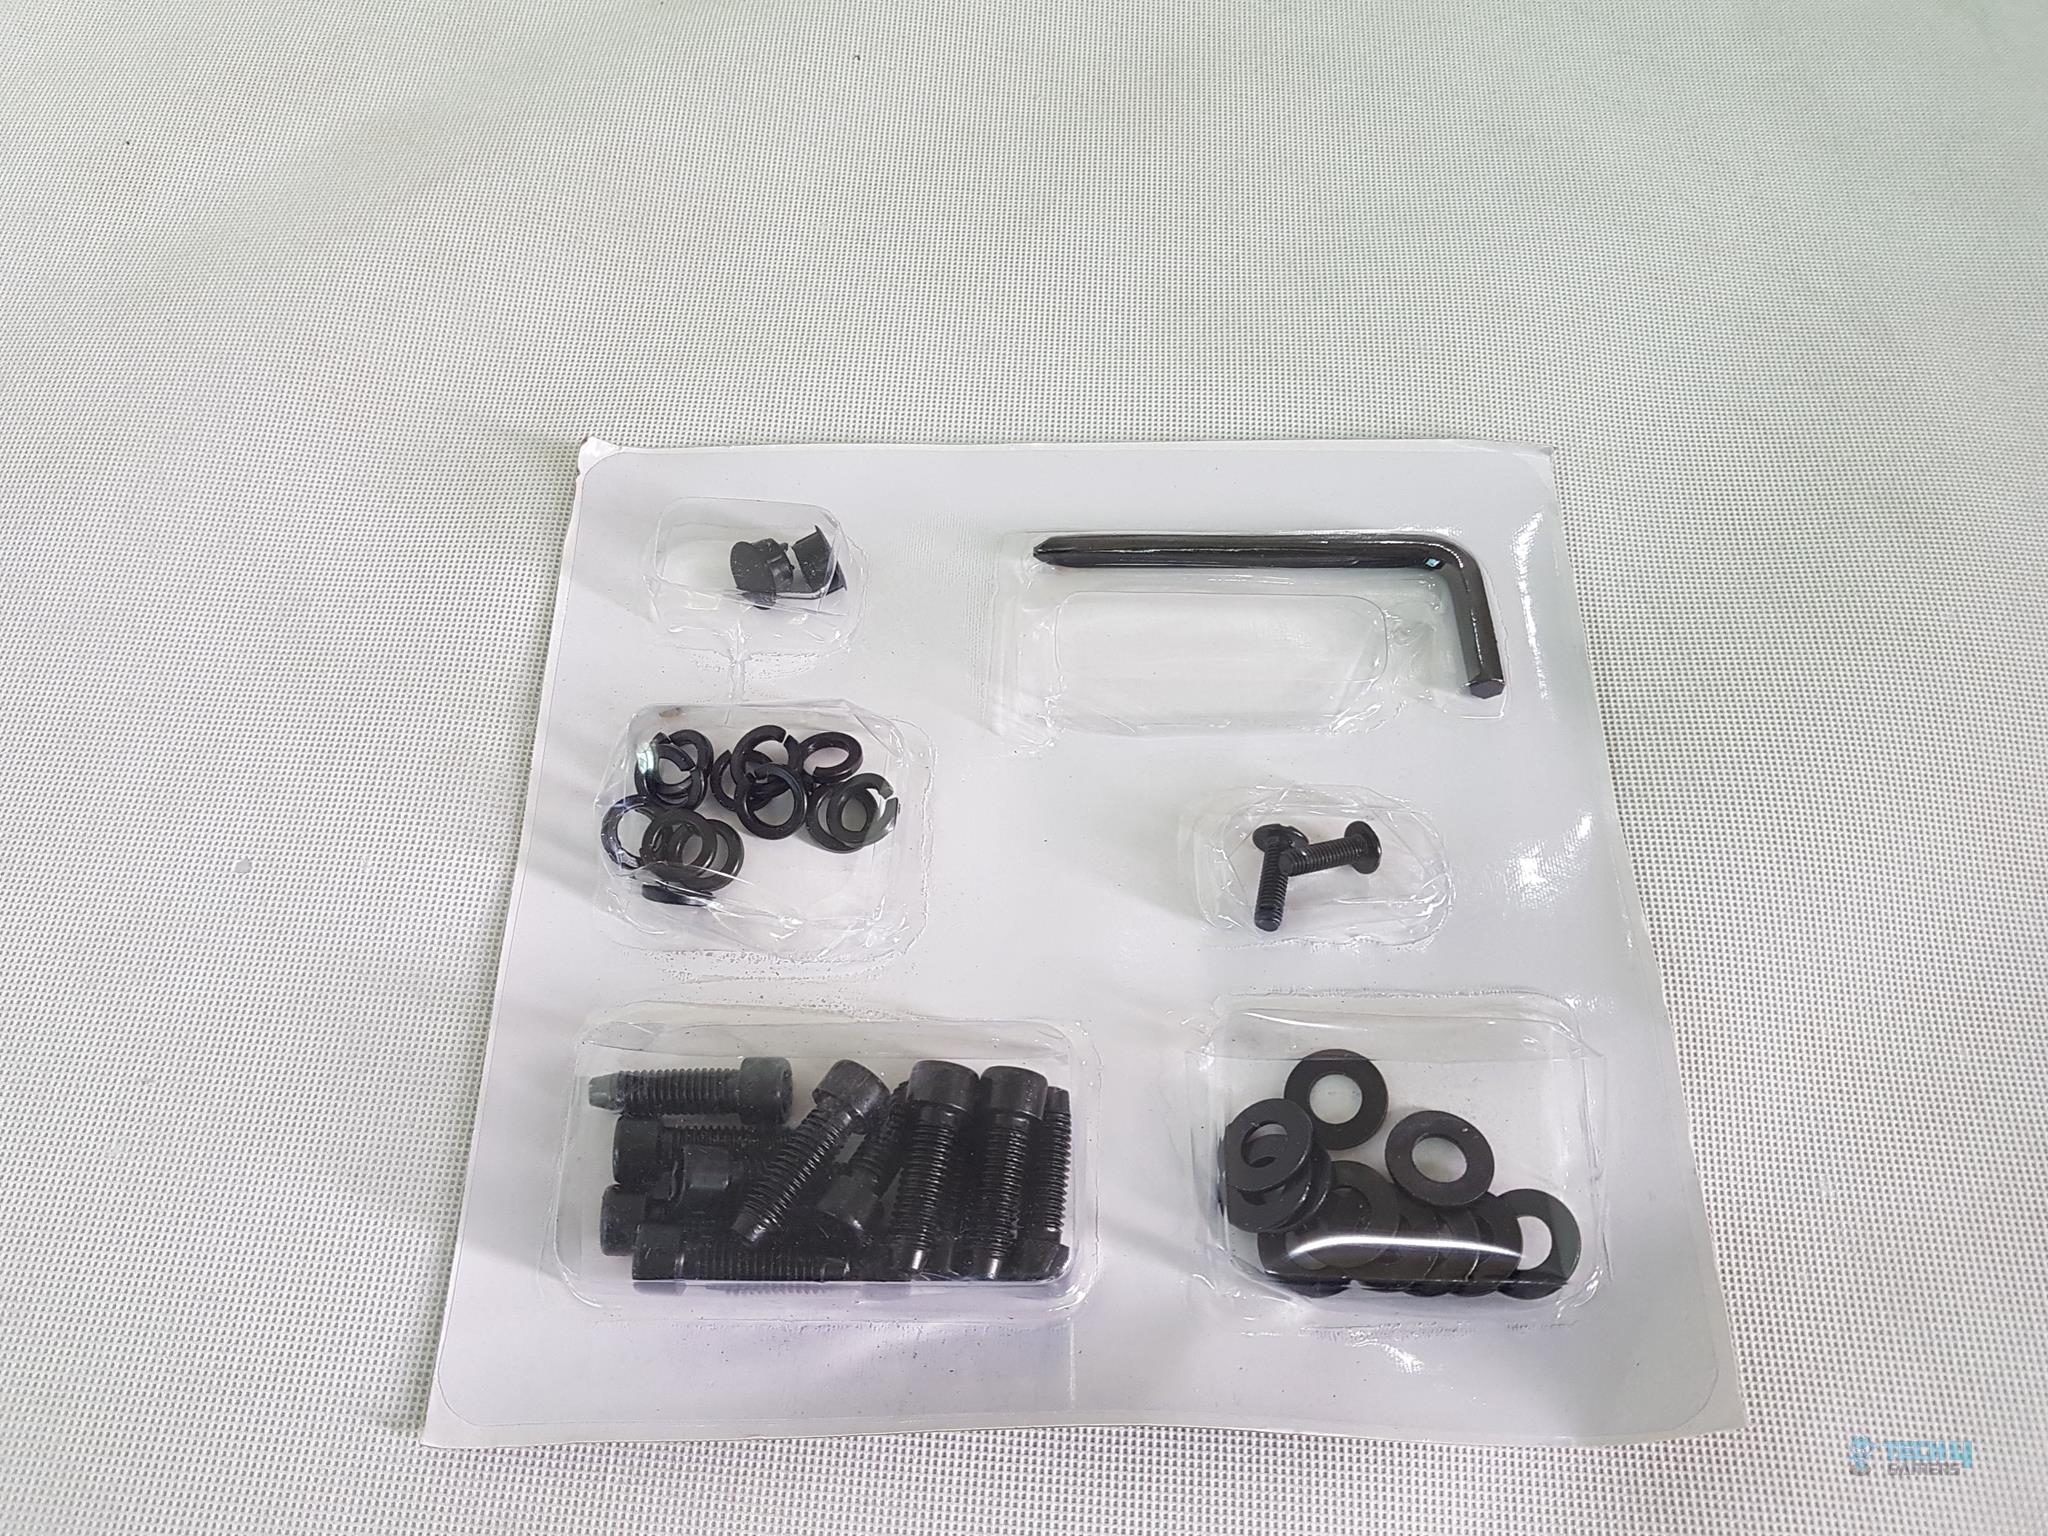
Cooler Master includes 12 M8x18mm bolts, each paired with flat washers and locking washers for the assembly process. Given there are no spares, careful handling during assembly is essential.
The package also contains two matte black plastic side covers designed to conceal the bolts on the backrest once it’s attached to the seat. This clever addition ensures a seamless, polished appearance, hiding the assembly details for an overall flawless design.
Backrest & Base
It is time to take a look at two main components of the gaming chair which are seat and backrest. We will start with looking at the backrest.
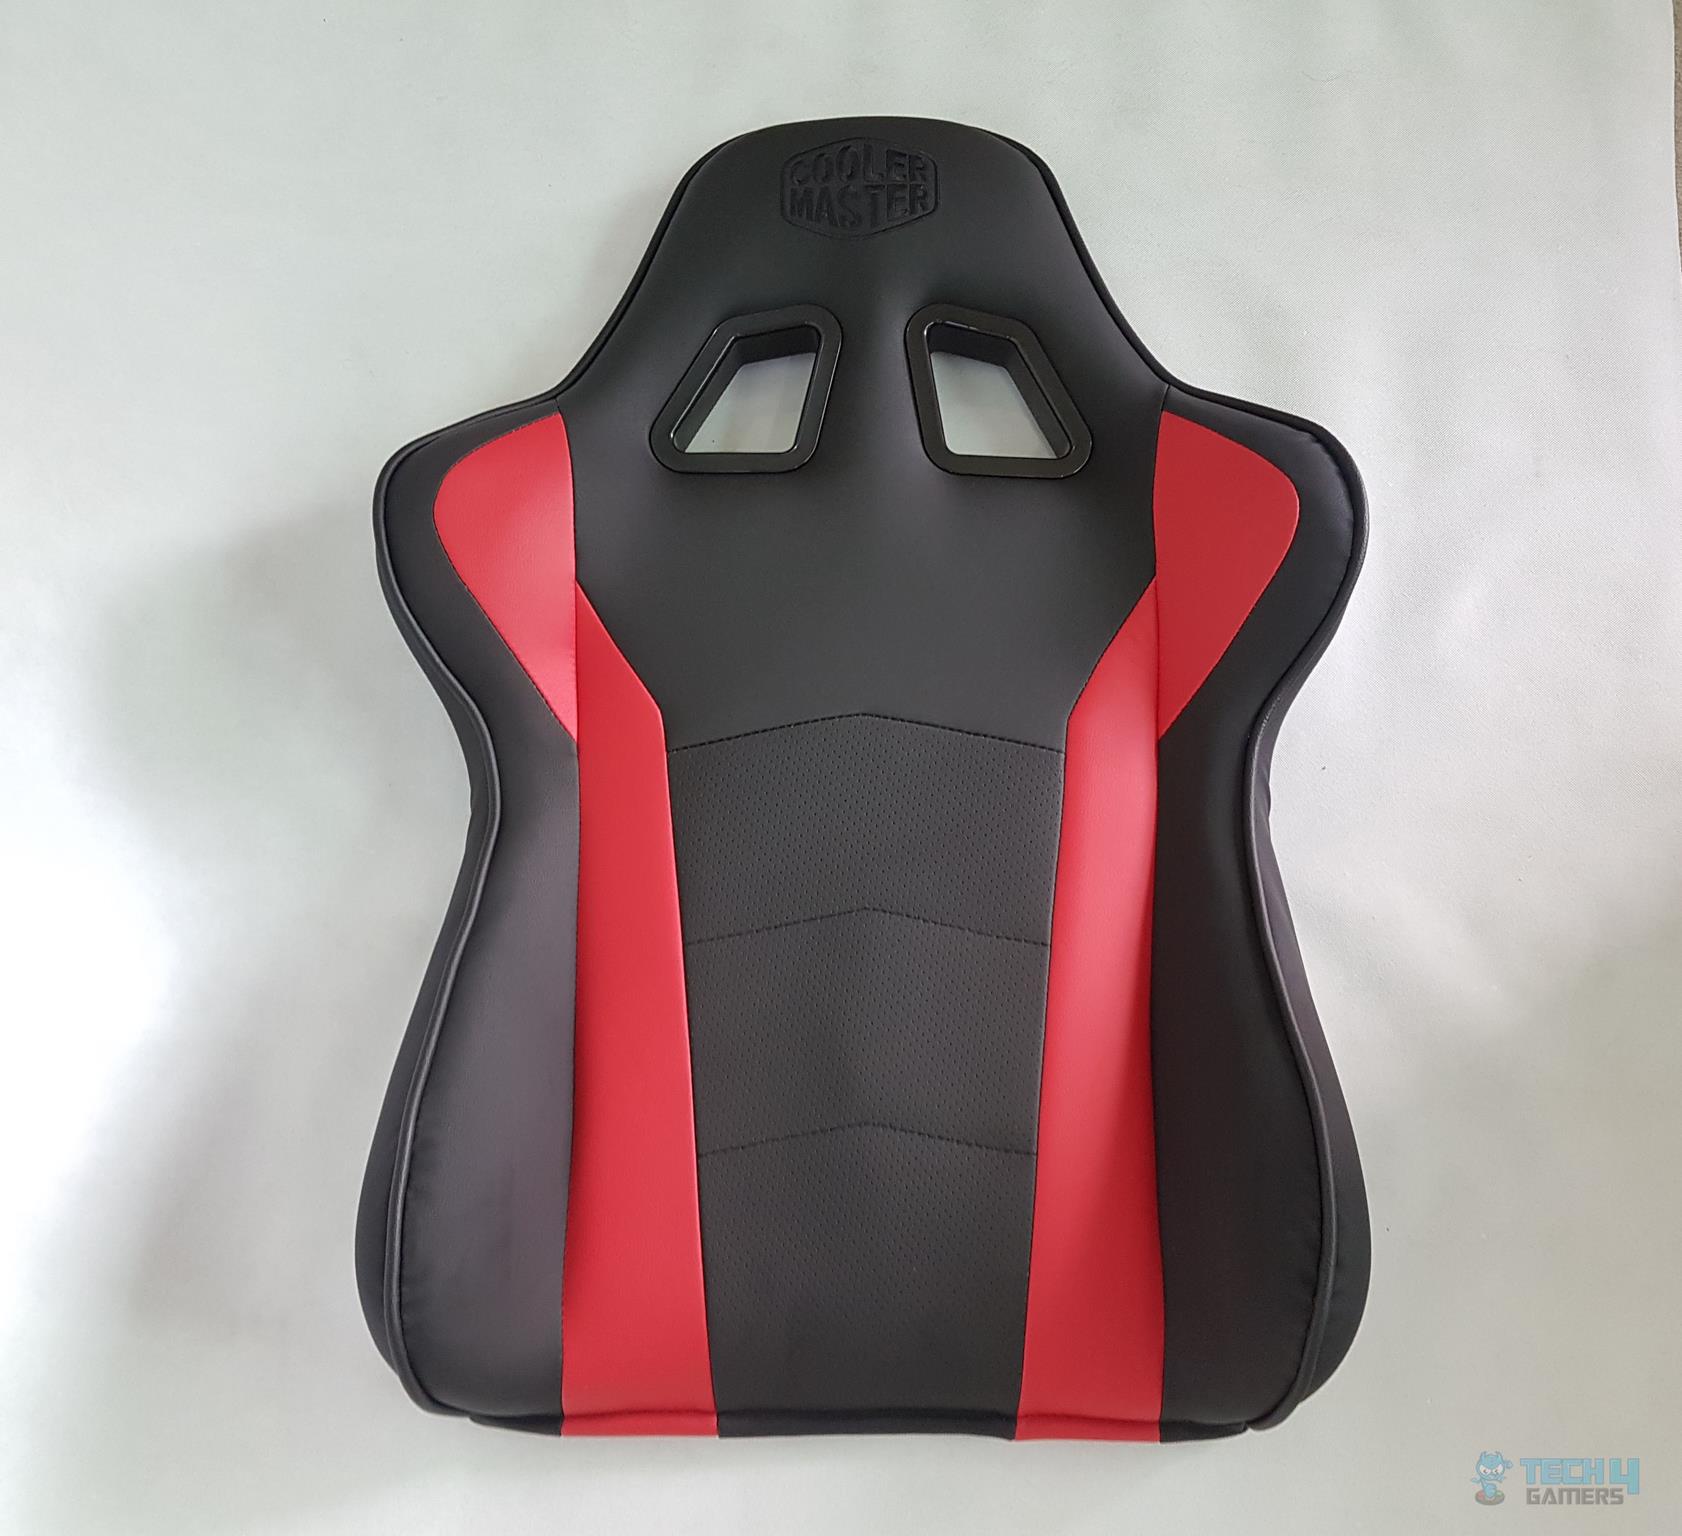
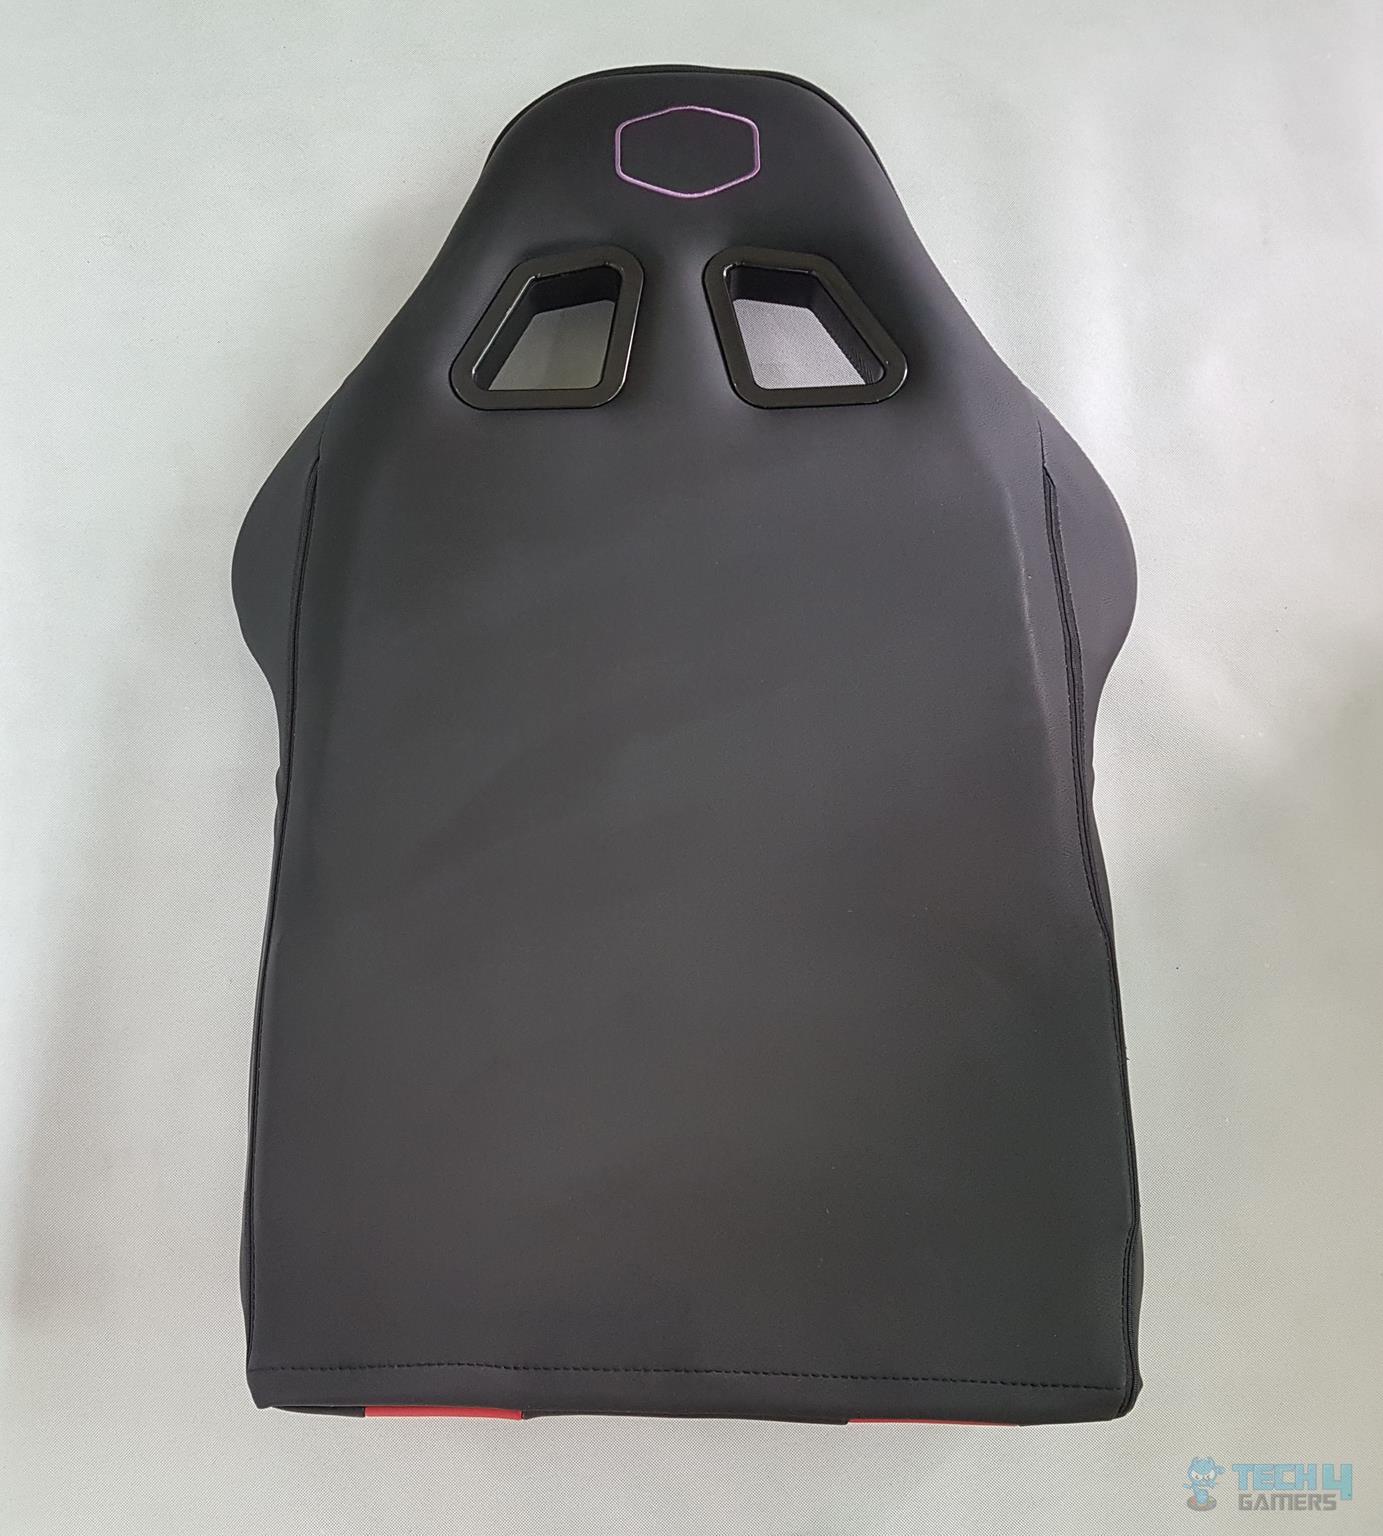
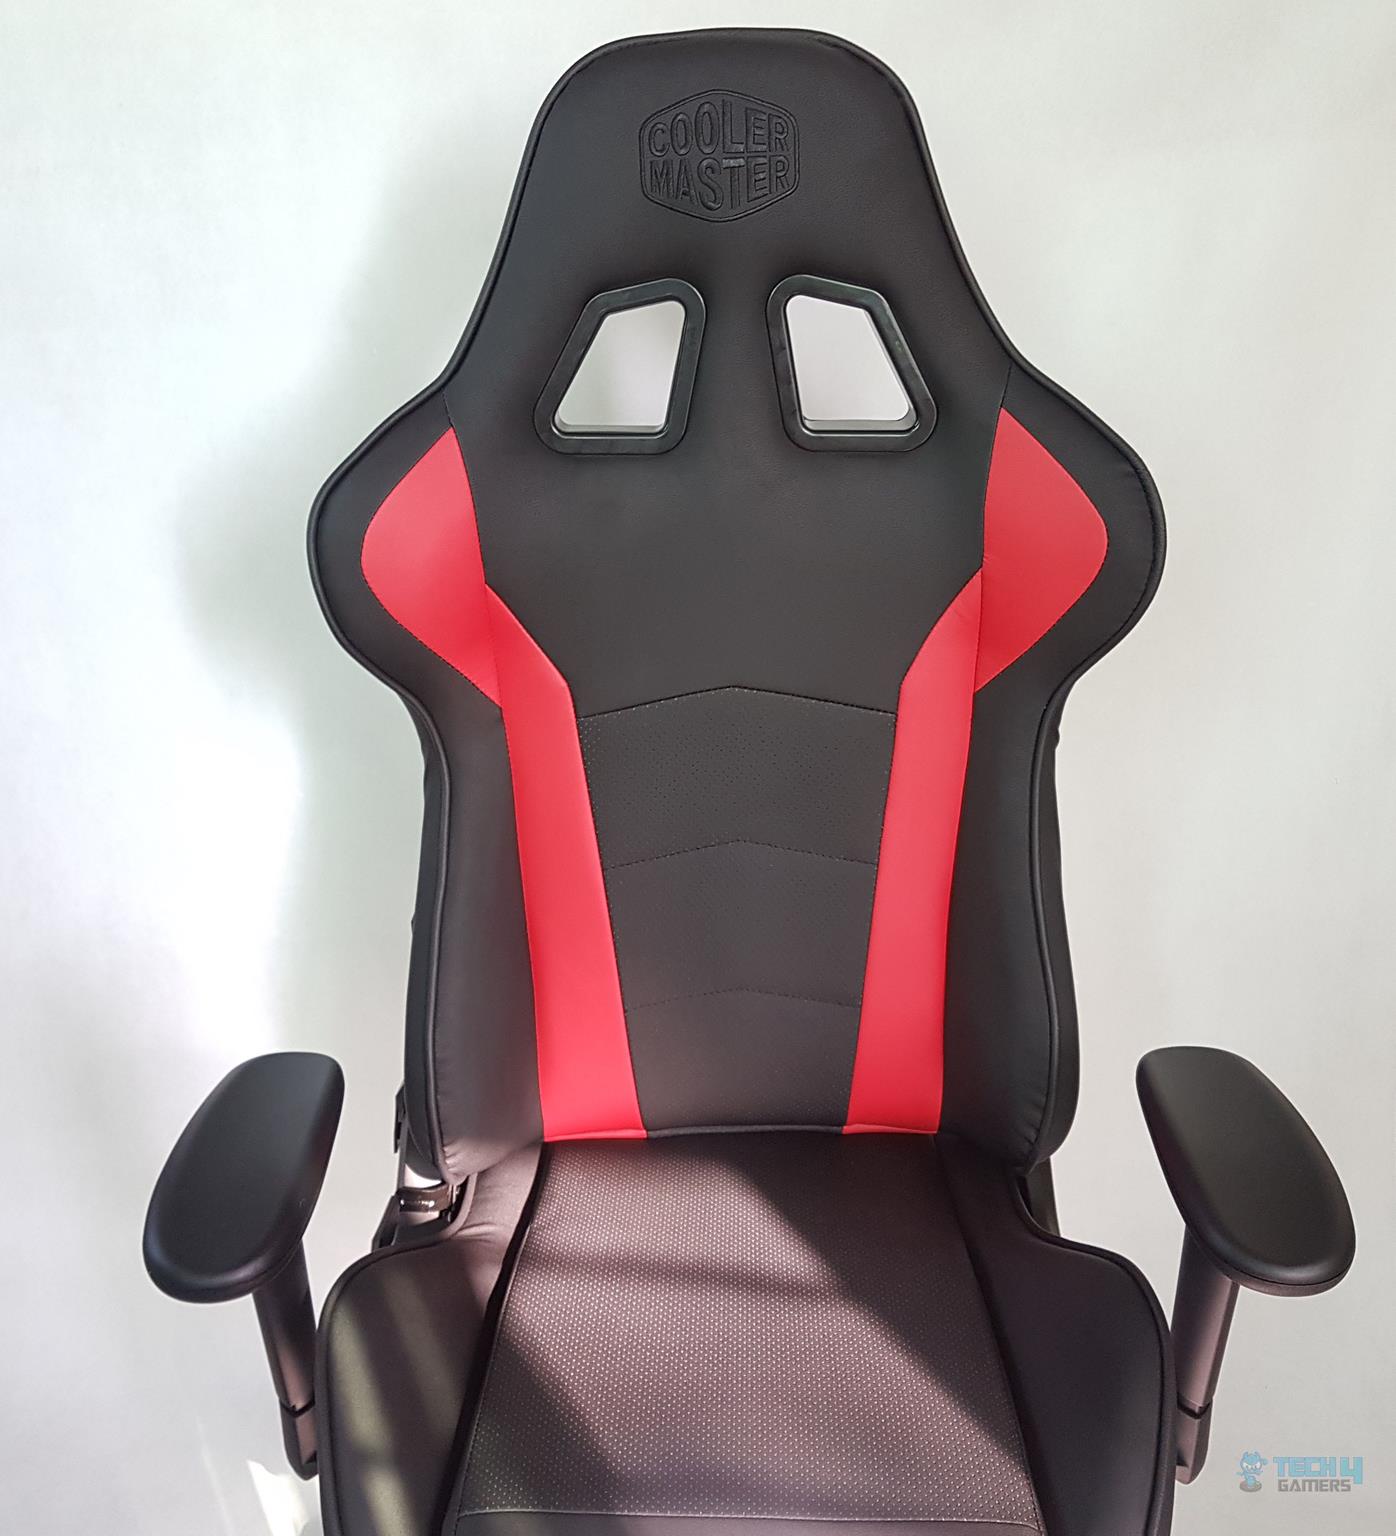
The backrest measures 83cm in height and 57cm in width at its widest points. It sports a sleek dual-tone design, combining matte black and red colors. The back-facing section features a mesh finish for breathability and comfort during use.
Cooler Master’s logo is elegantly stitched at the top, accompanied by two shiny black plastic-framed cutouts below it. These serve as attachment points for the neck pillow’s belt, allowing easy securing to the chair.
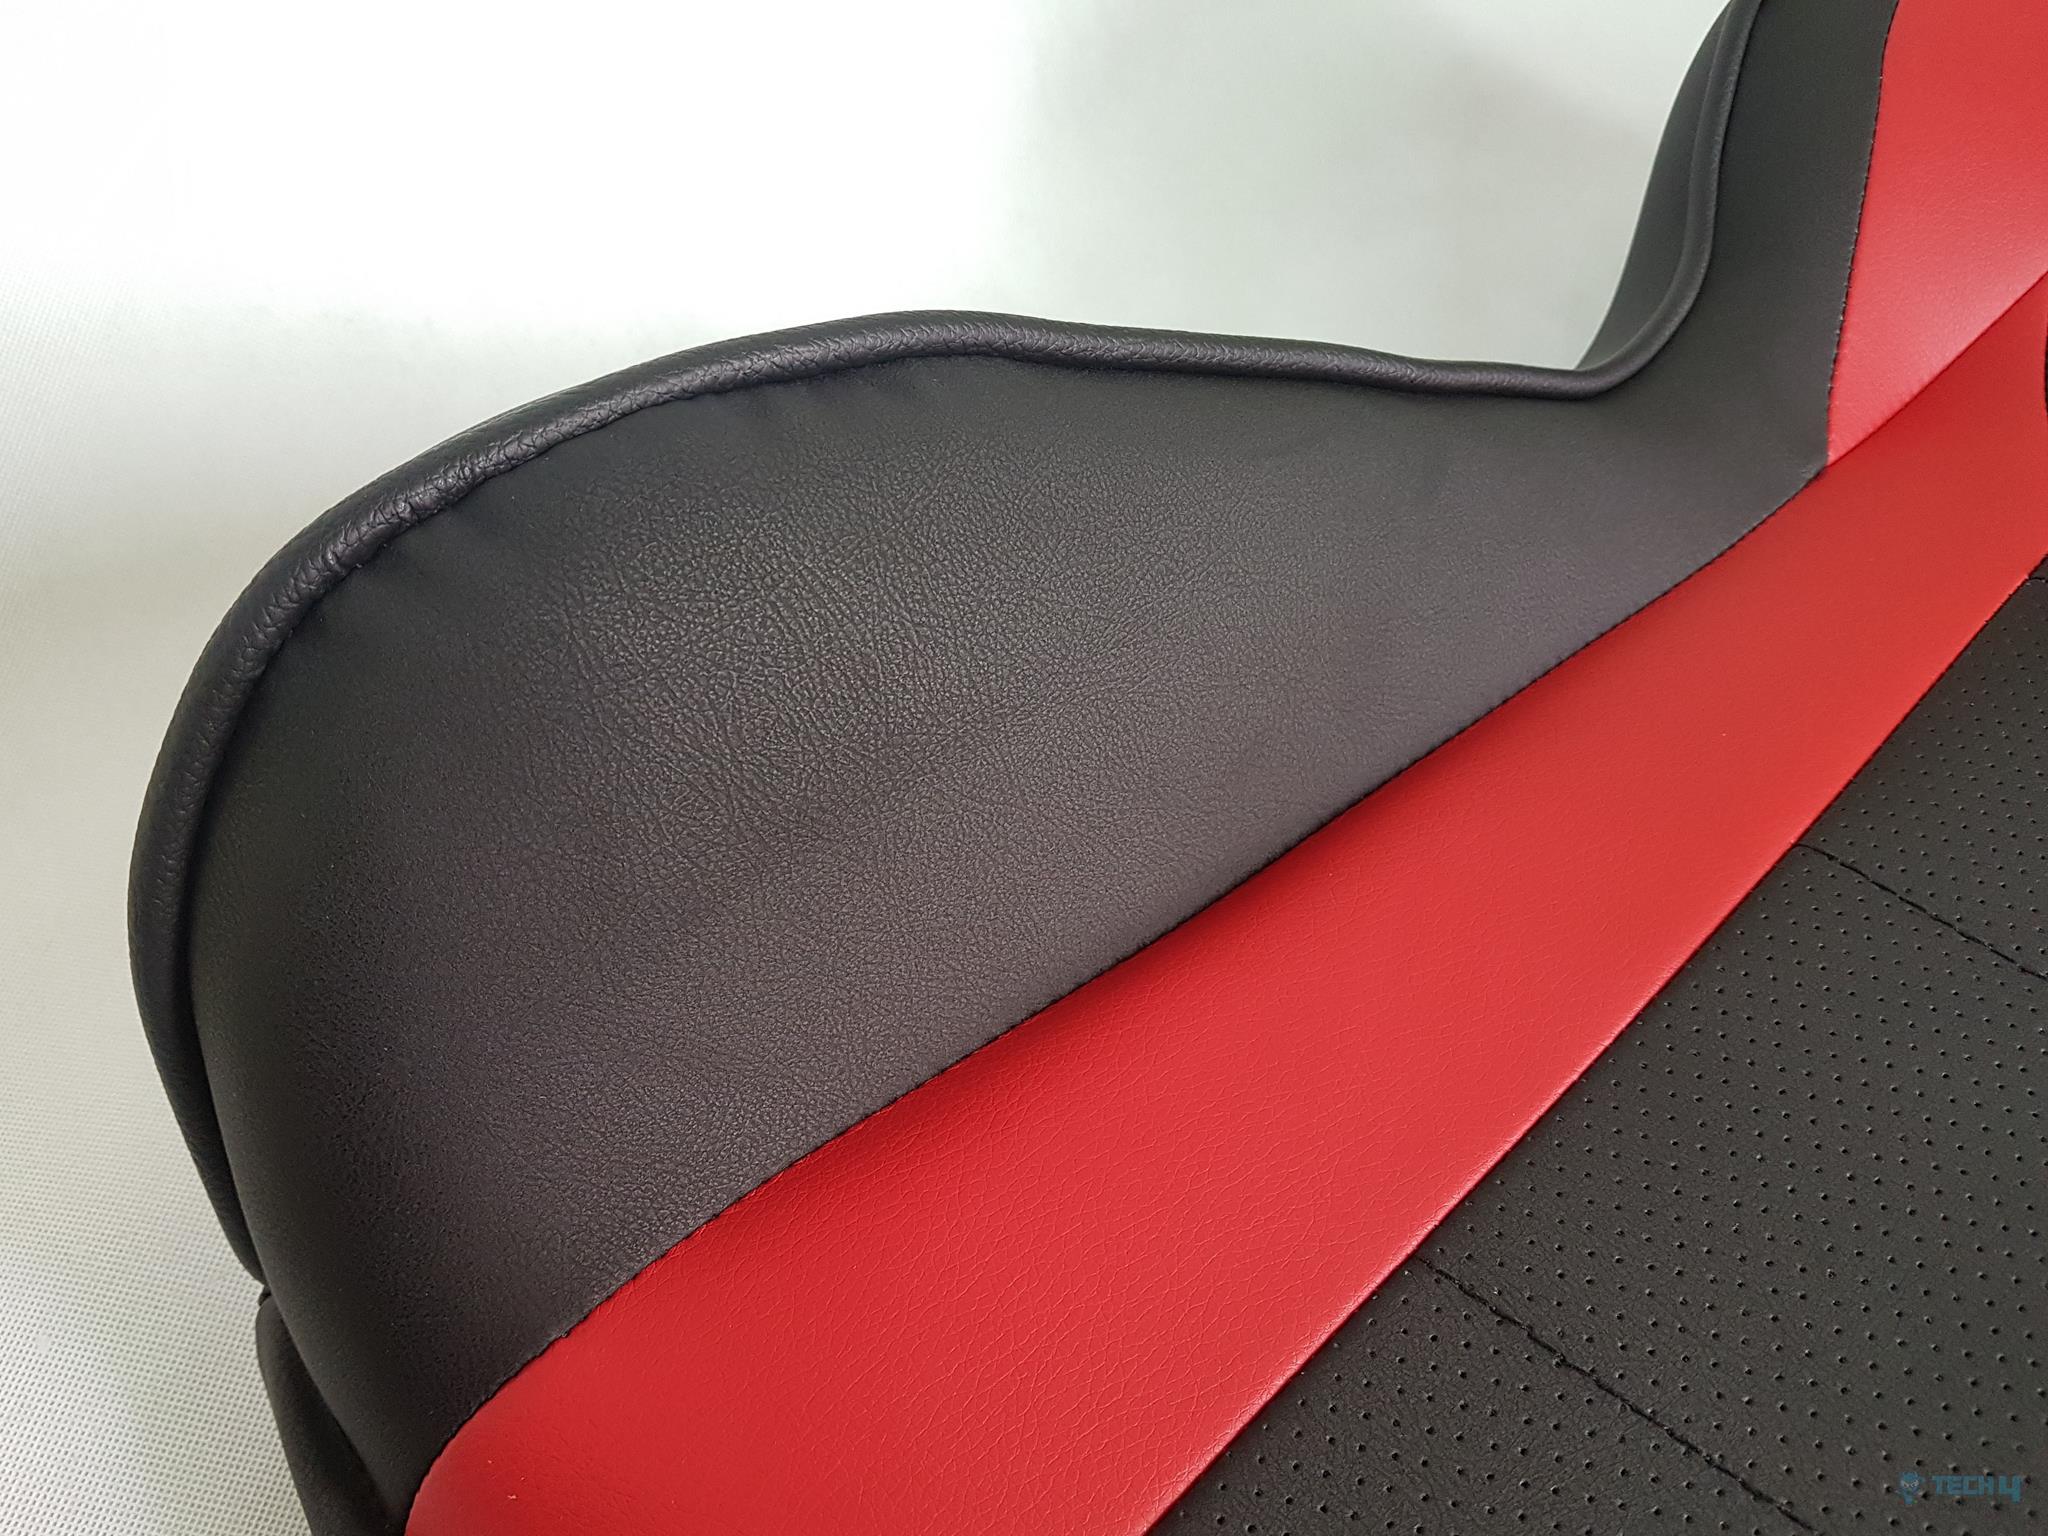
On both sides, the backrest displays consistent design and stitching, offering excellent support with angular protrusions along the edges for enhanced comfort and posture.
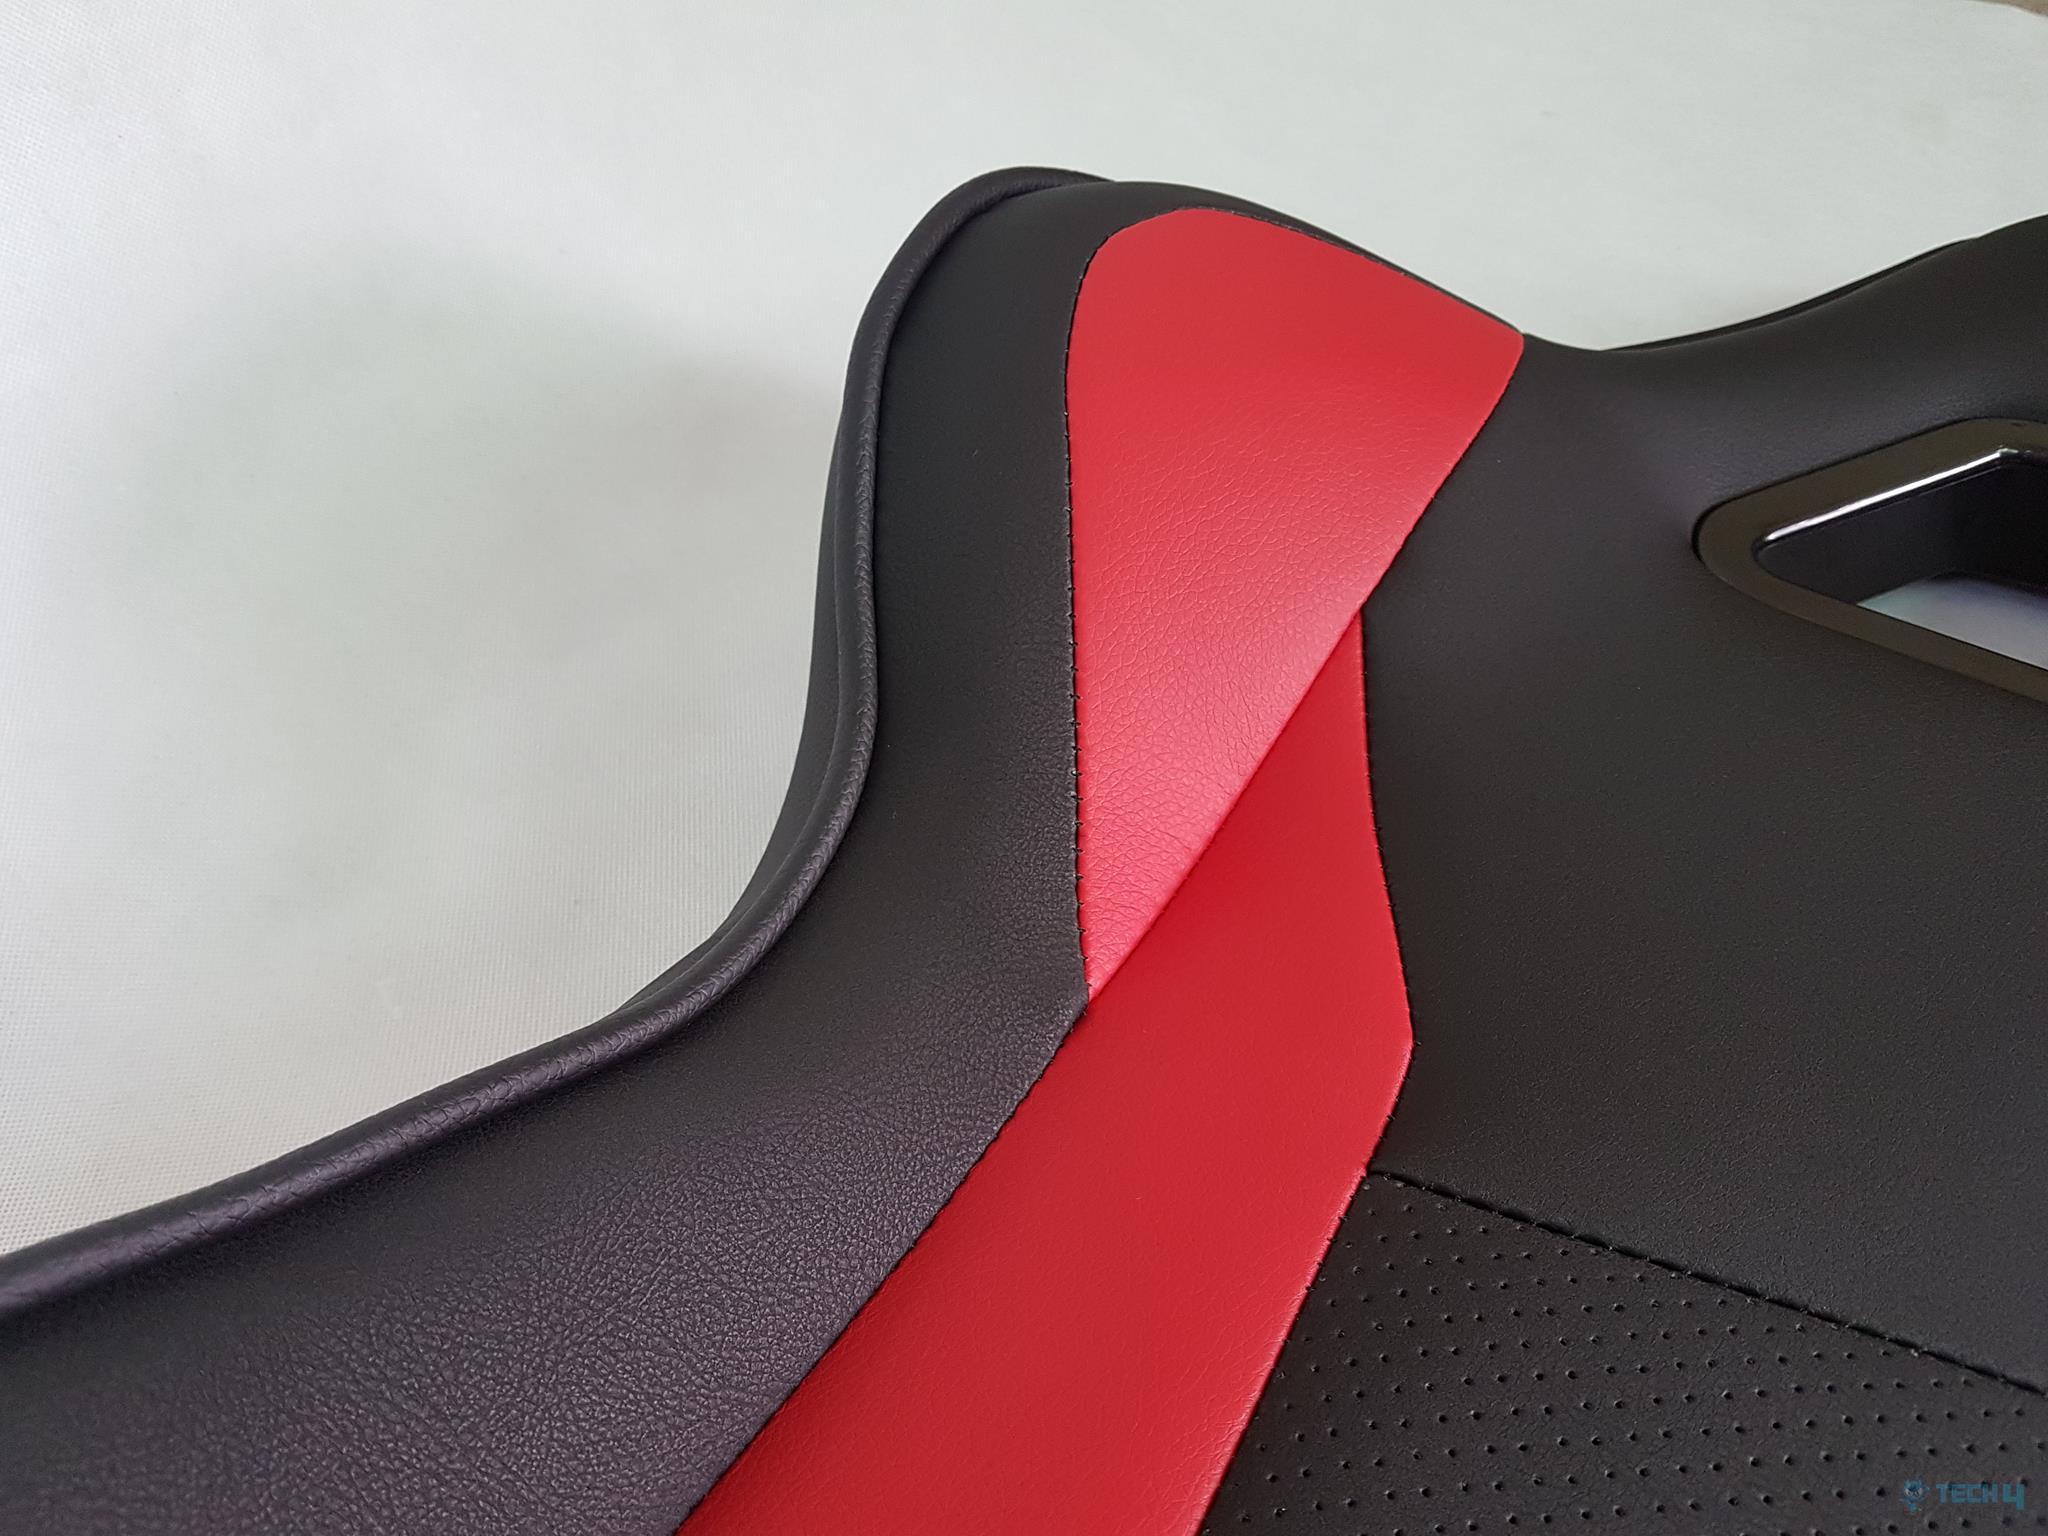
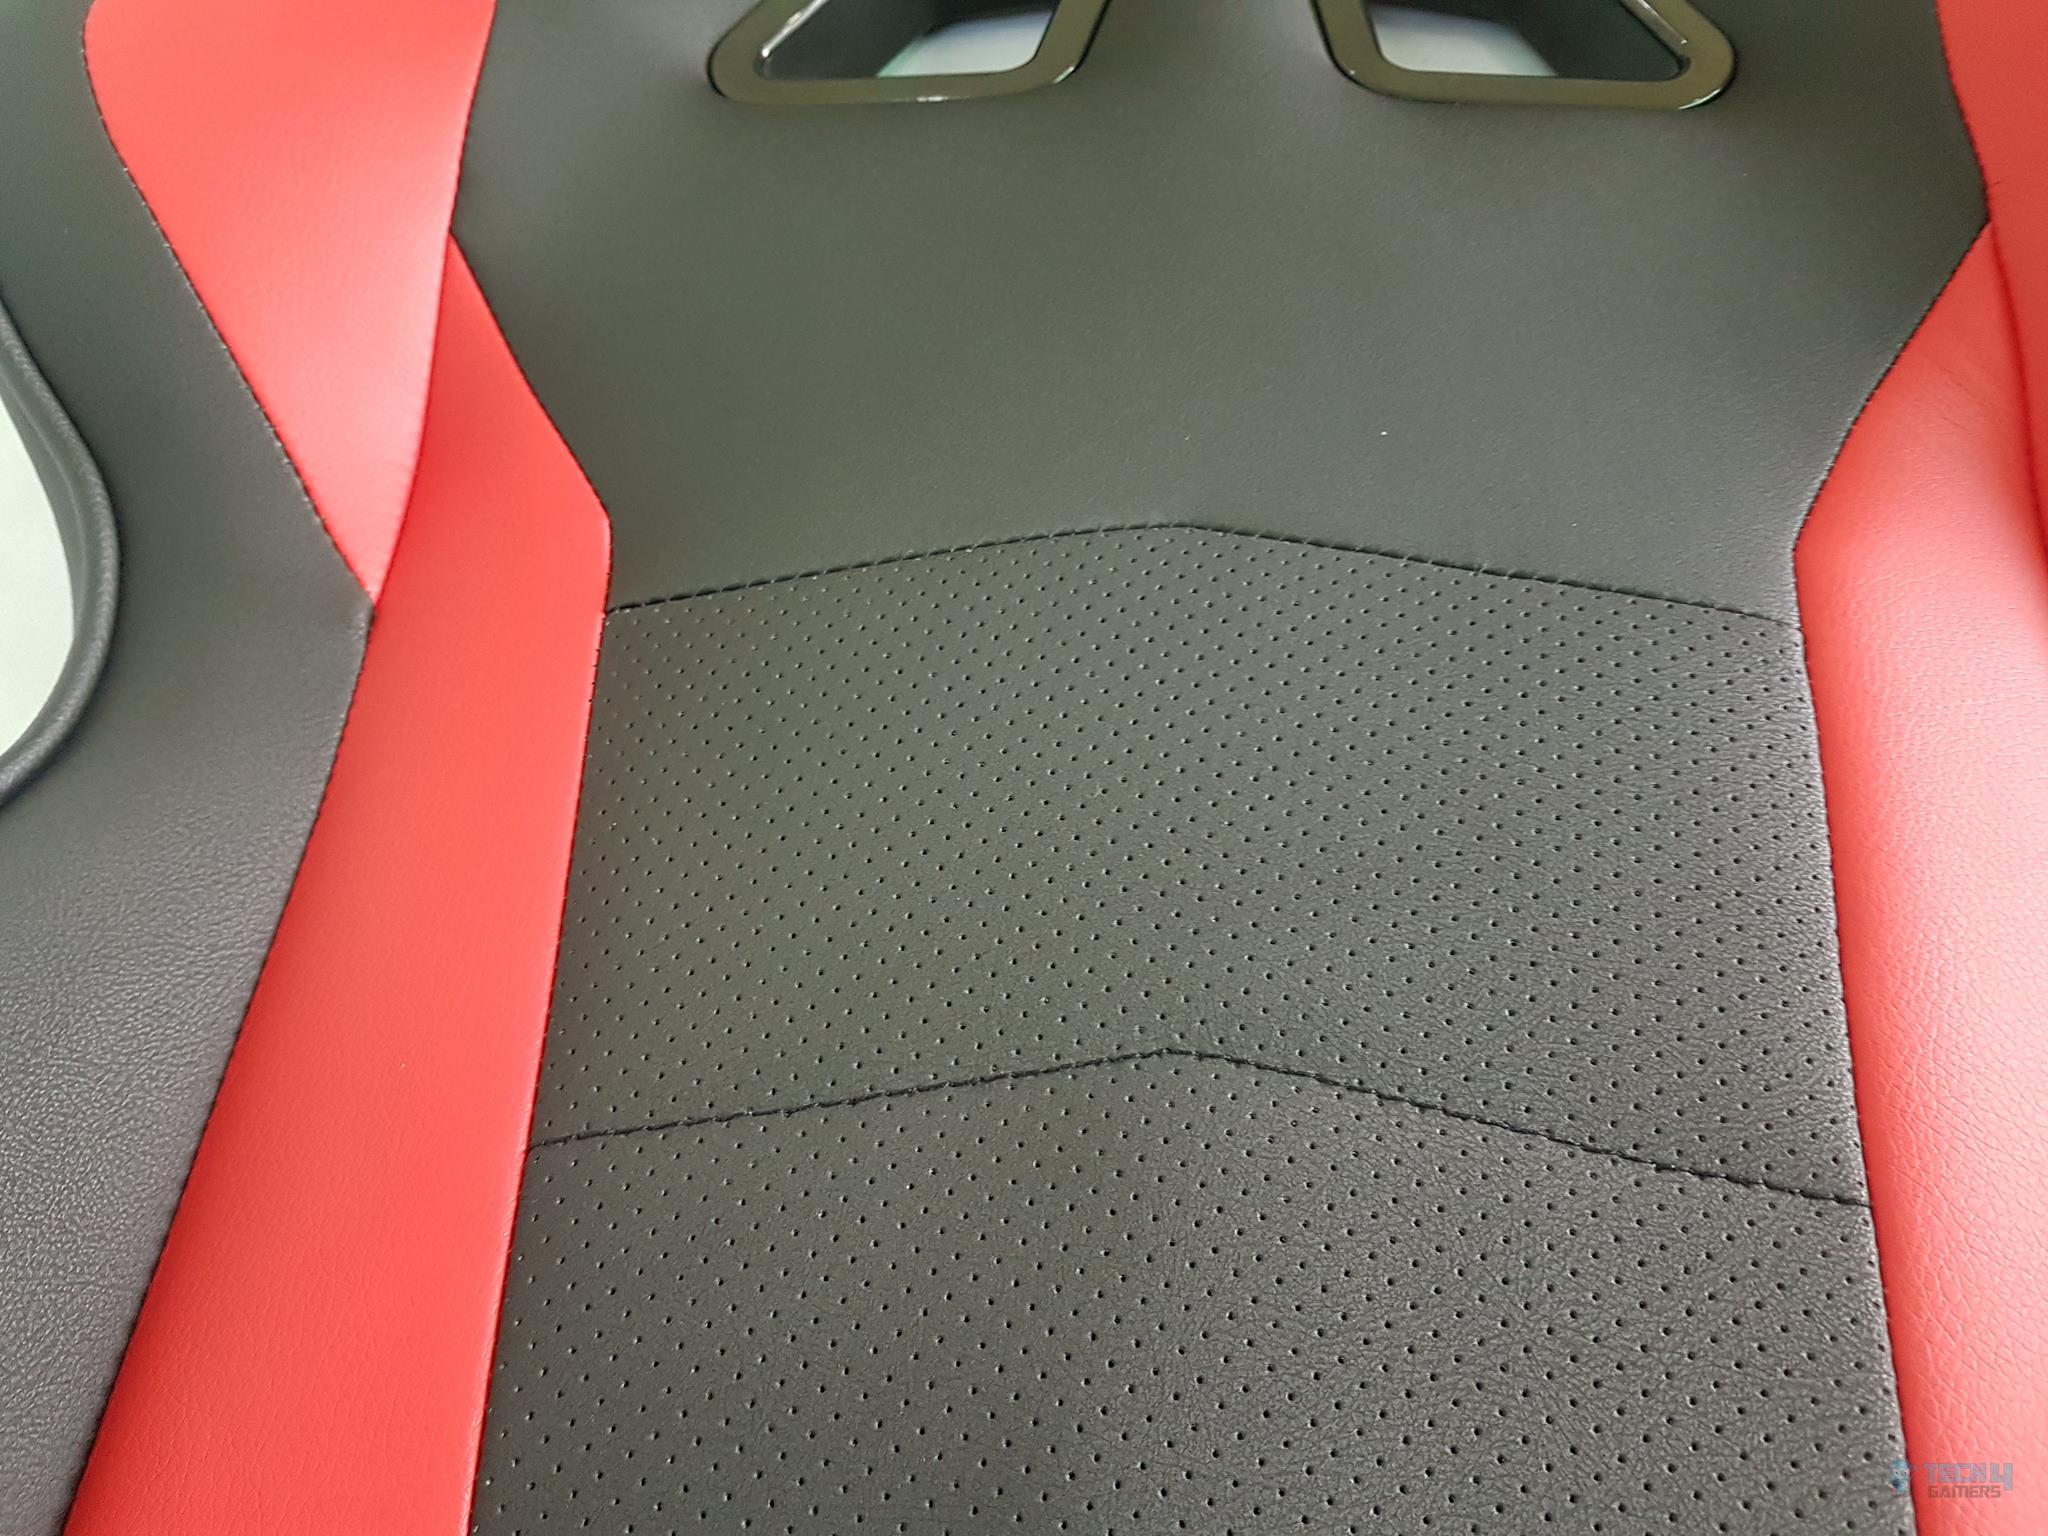
The edges on the top side have narrow width compared to the edges on the main section. They are in an angular fashion forming symmetry in the overall design. The main section is textured. It has stitching in three main sections on all four sides.
There is a nice folding at the base of the backrest. This folding is following the overall symmetry of the design.
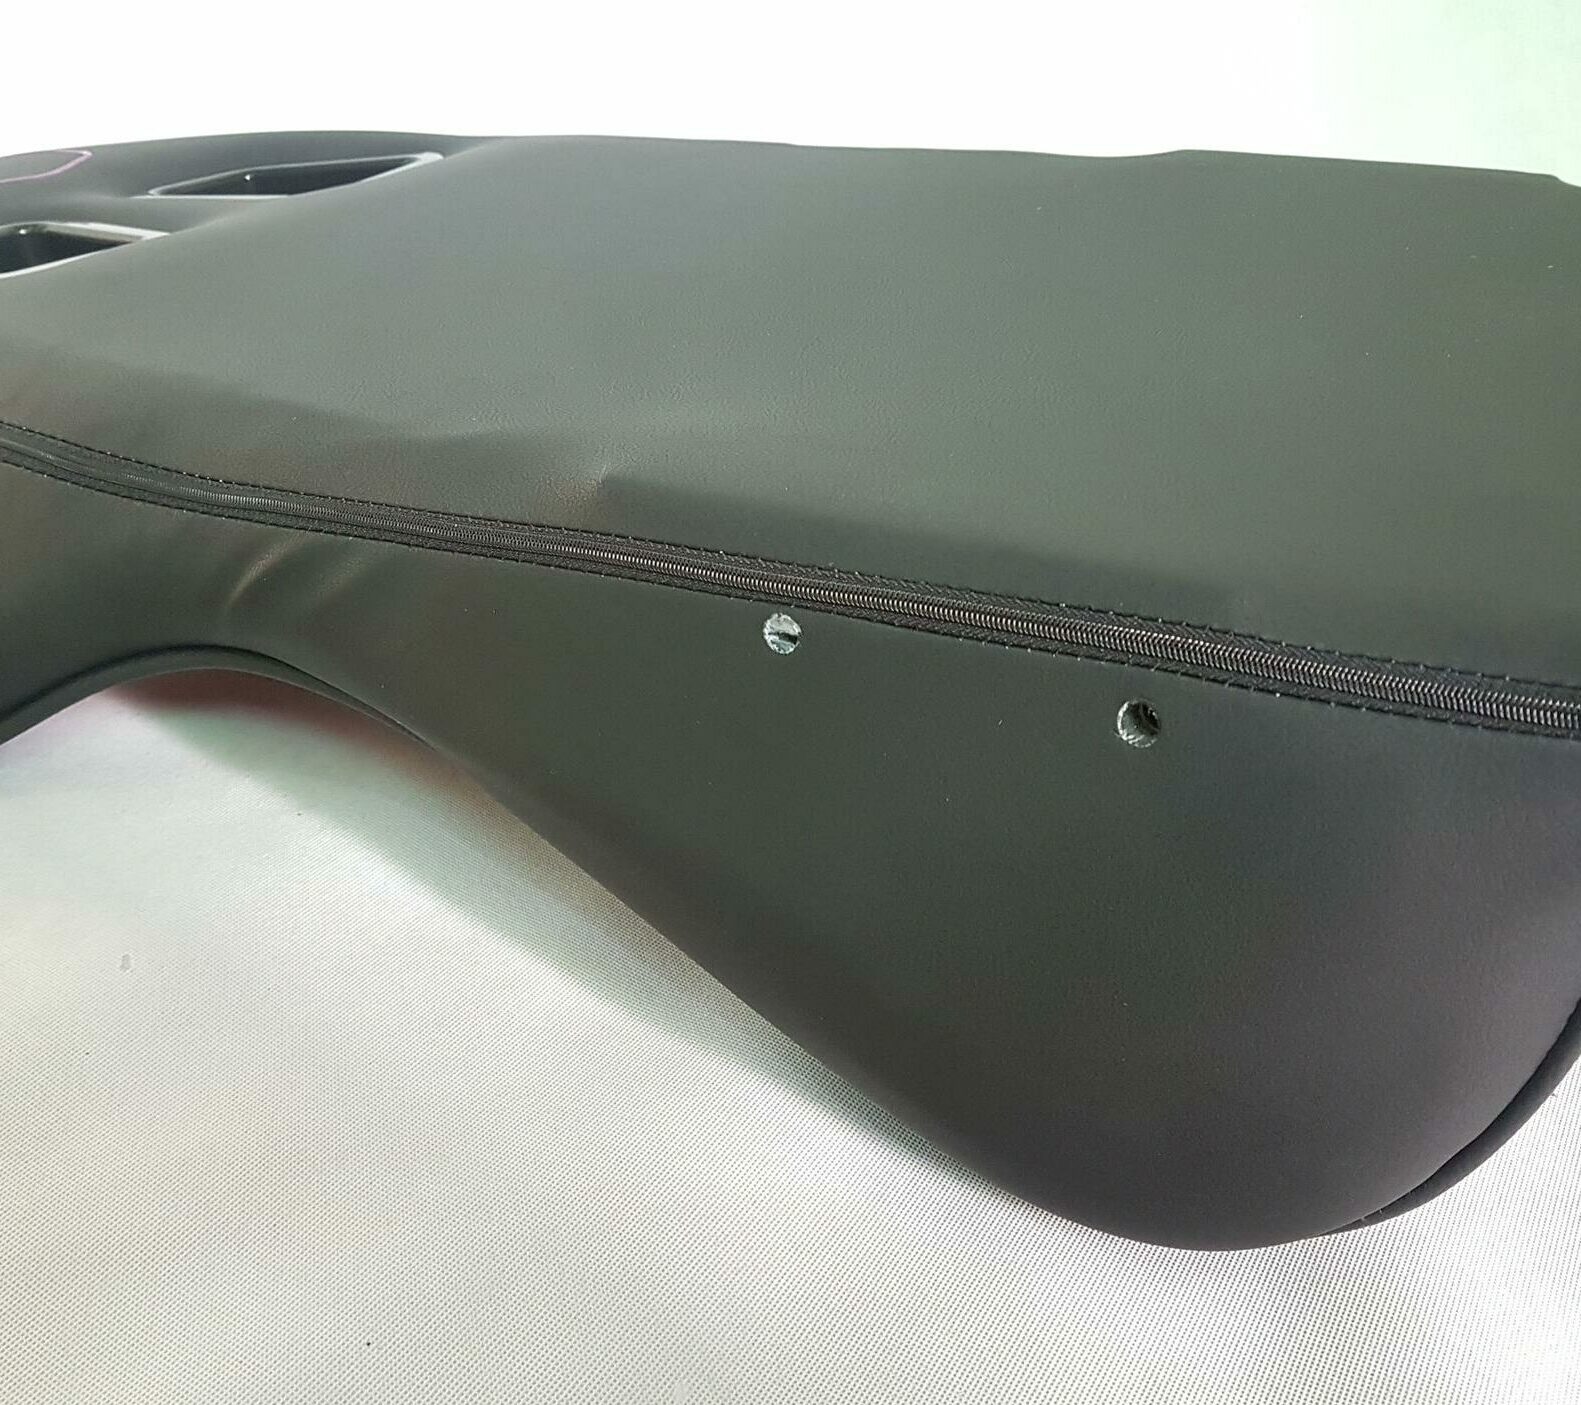
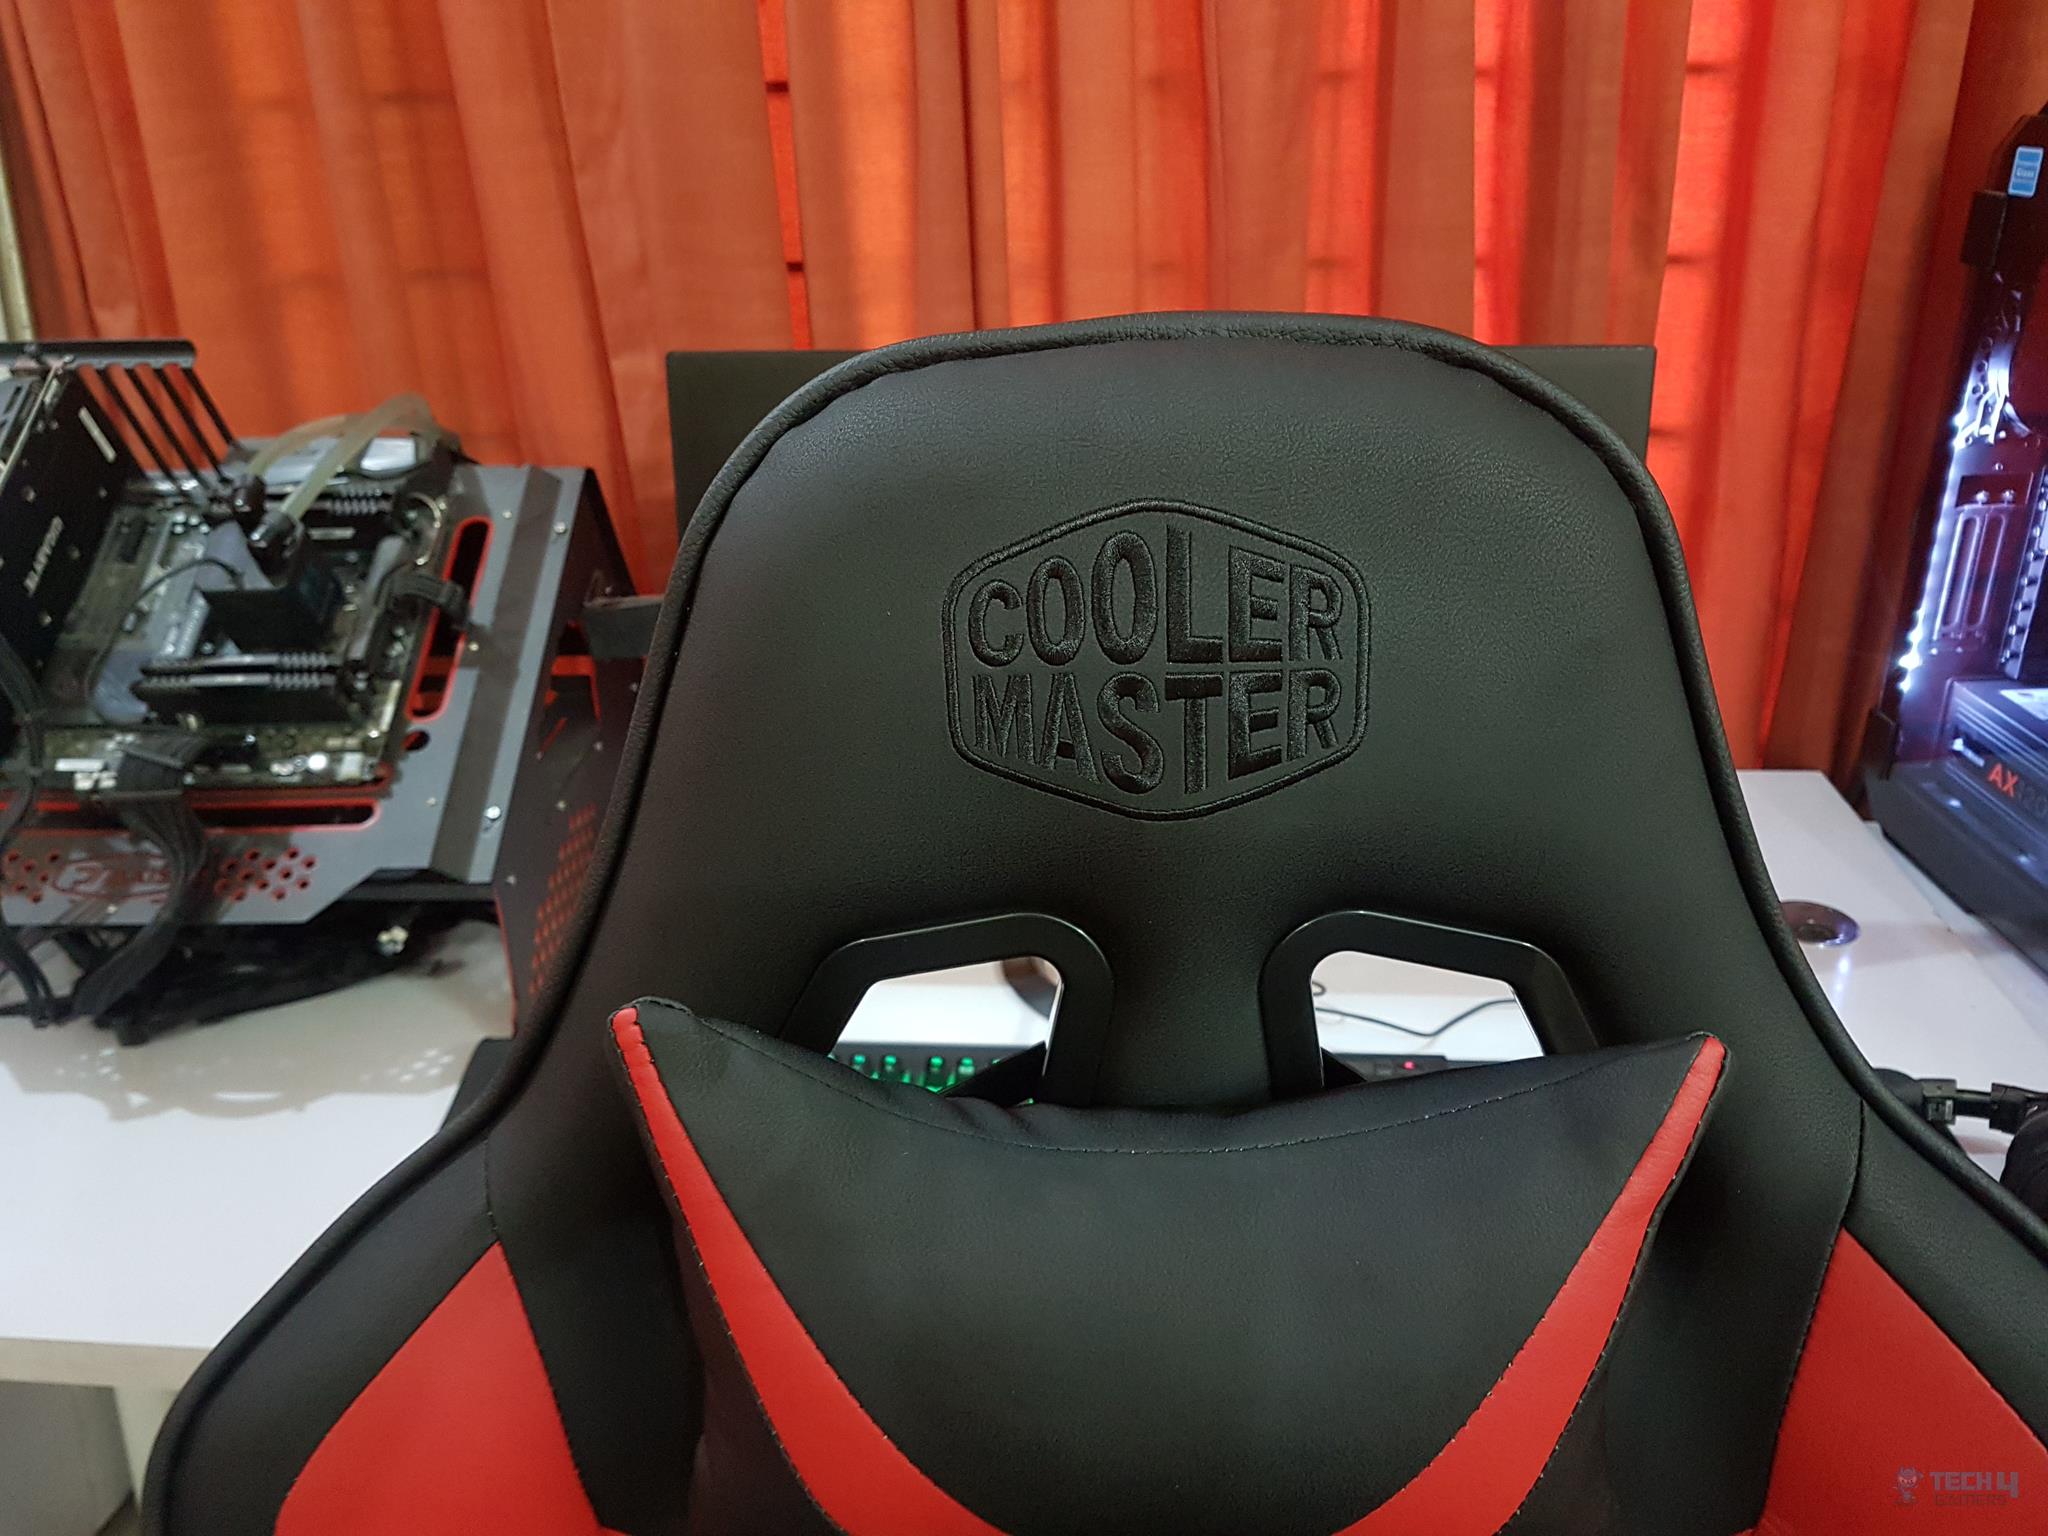
Examining the backside of the backrest reveals a plain black surface, with visible stitching at the bottom. At the top, Cooler Master’s branding is highlighted in purple.
Both left and right sides mirror each other in design. A full-length zipper runs along, excluding the top raised section. Additionally, there are two circular cutouts near the bottom, used to pass bolts for securing the backrest to the seat frame.
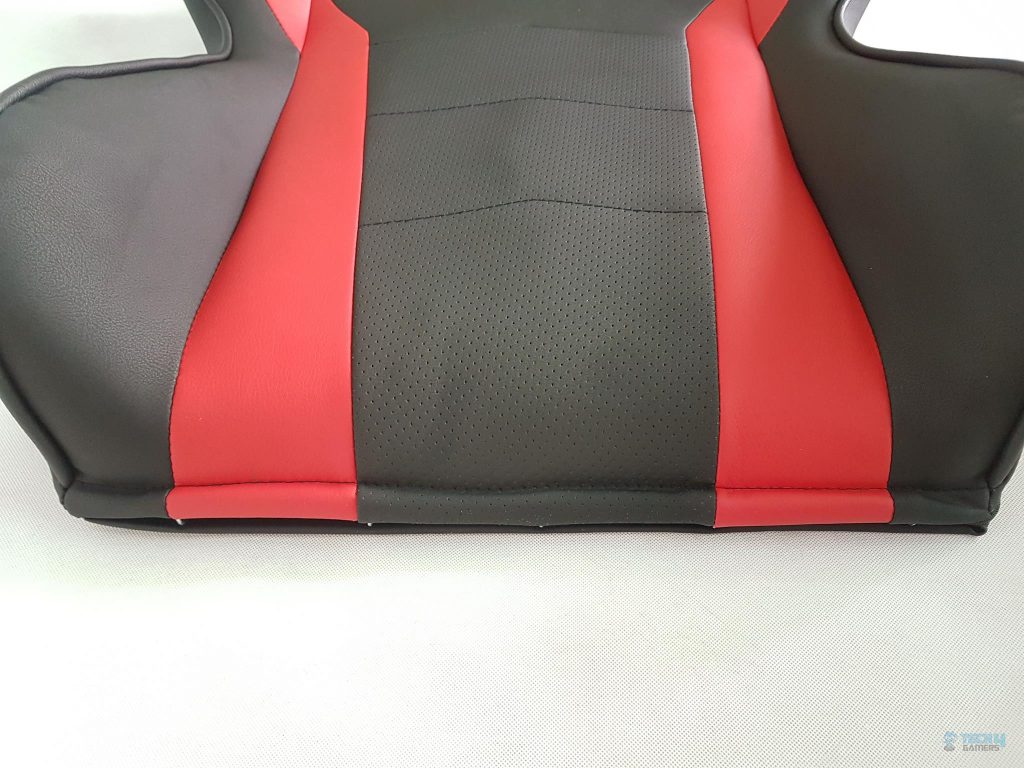
Let’s inspect the seat. It spans 57cm in width and 52cm in depth, noting that the lumbar pillow slightly reduces the overall depth. The seat showcases a textured pattern throughout its length, with raised edges angled to promote proper posture while seated. Visible stitching decorates the front side.
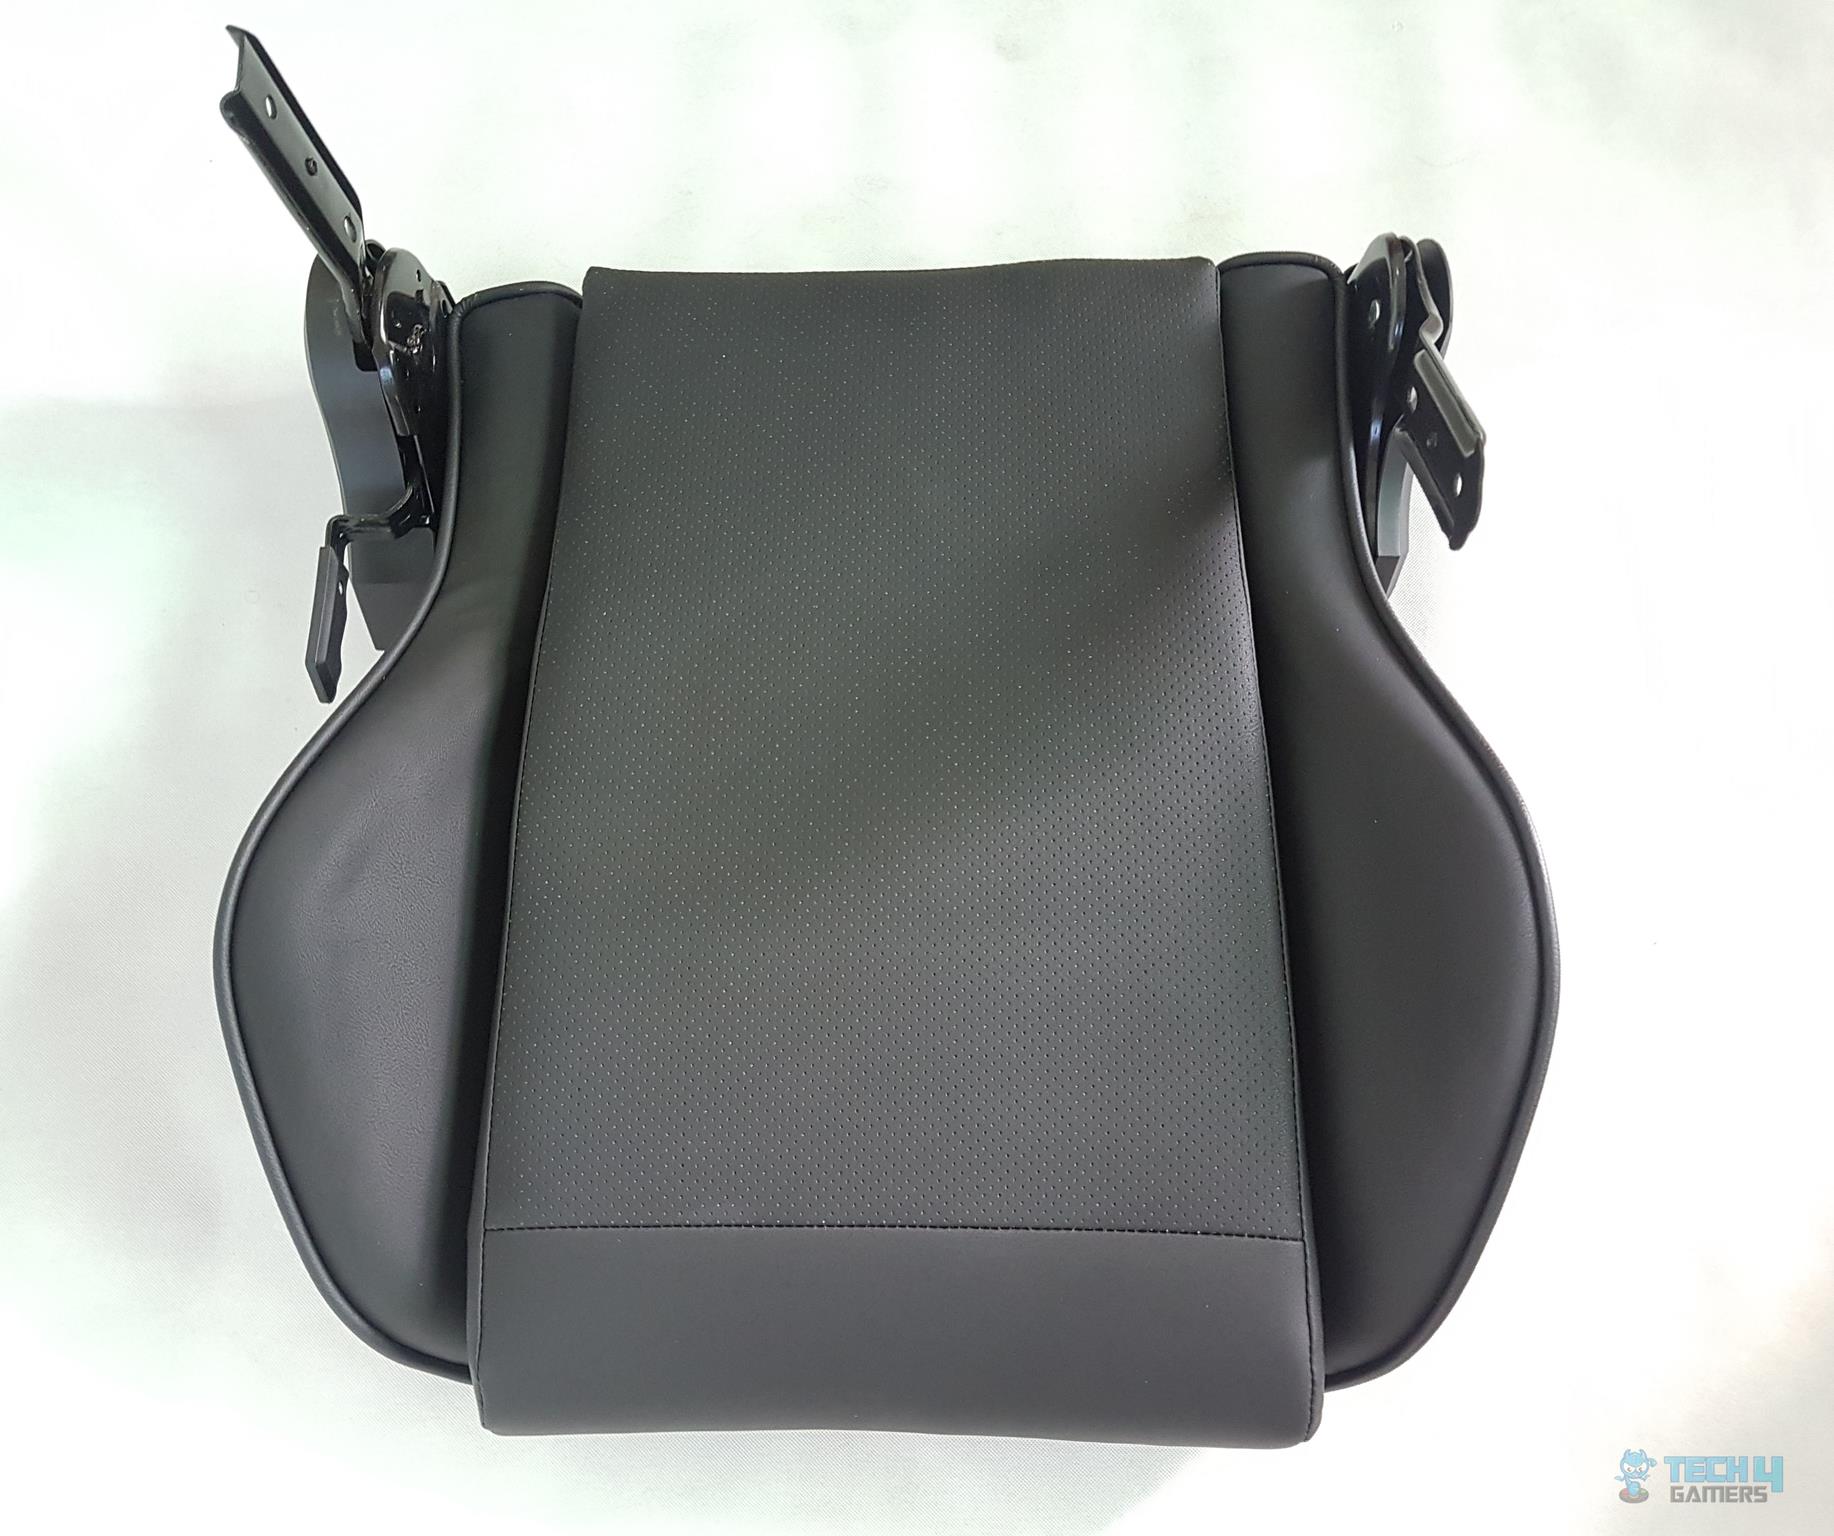
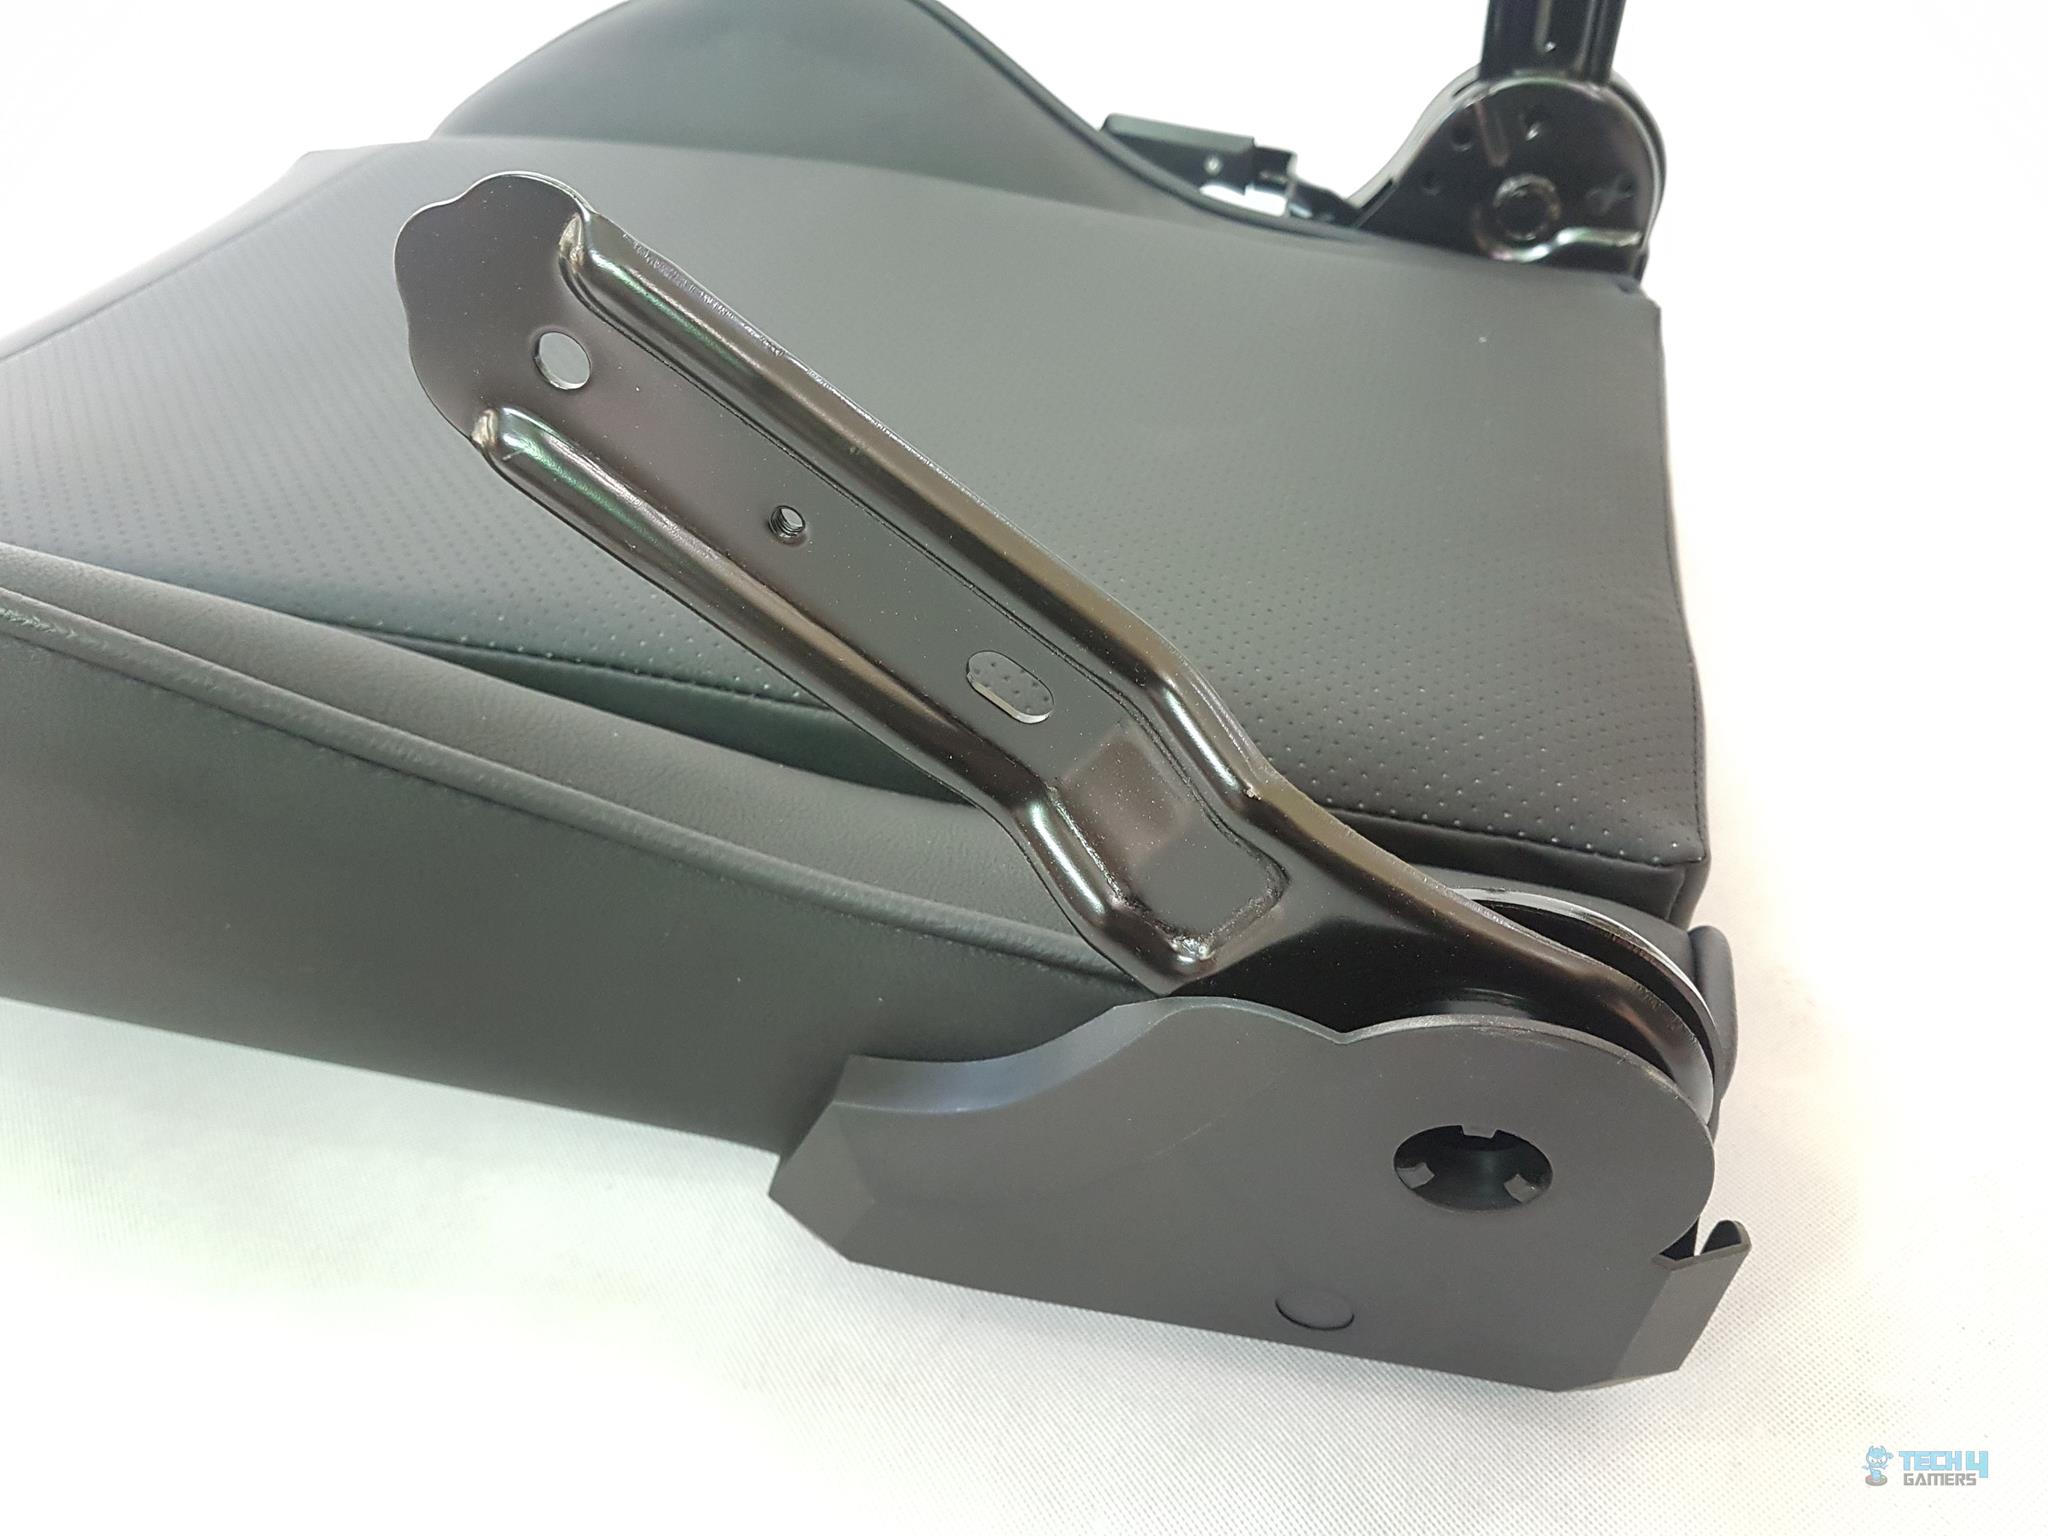
Towards the seat’s rear, the edges slope downward, with two plastic frames on either side. These frames hold two metallic structures, serving as the attachment points for the backrest.
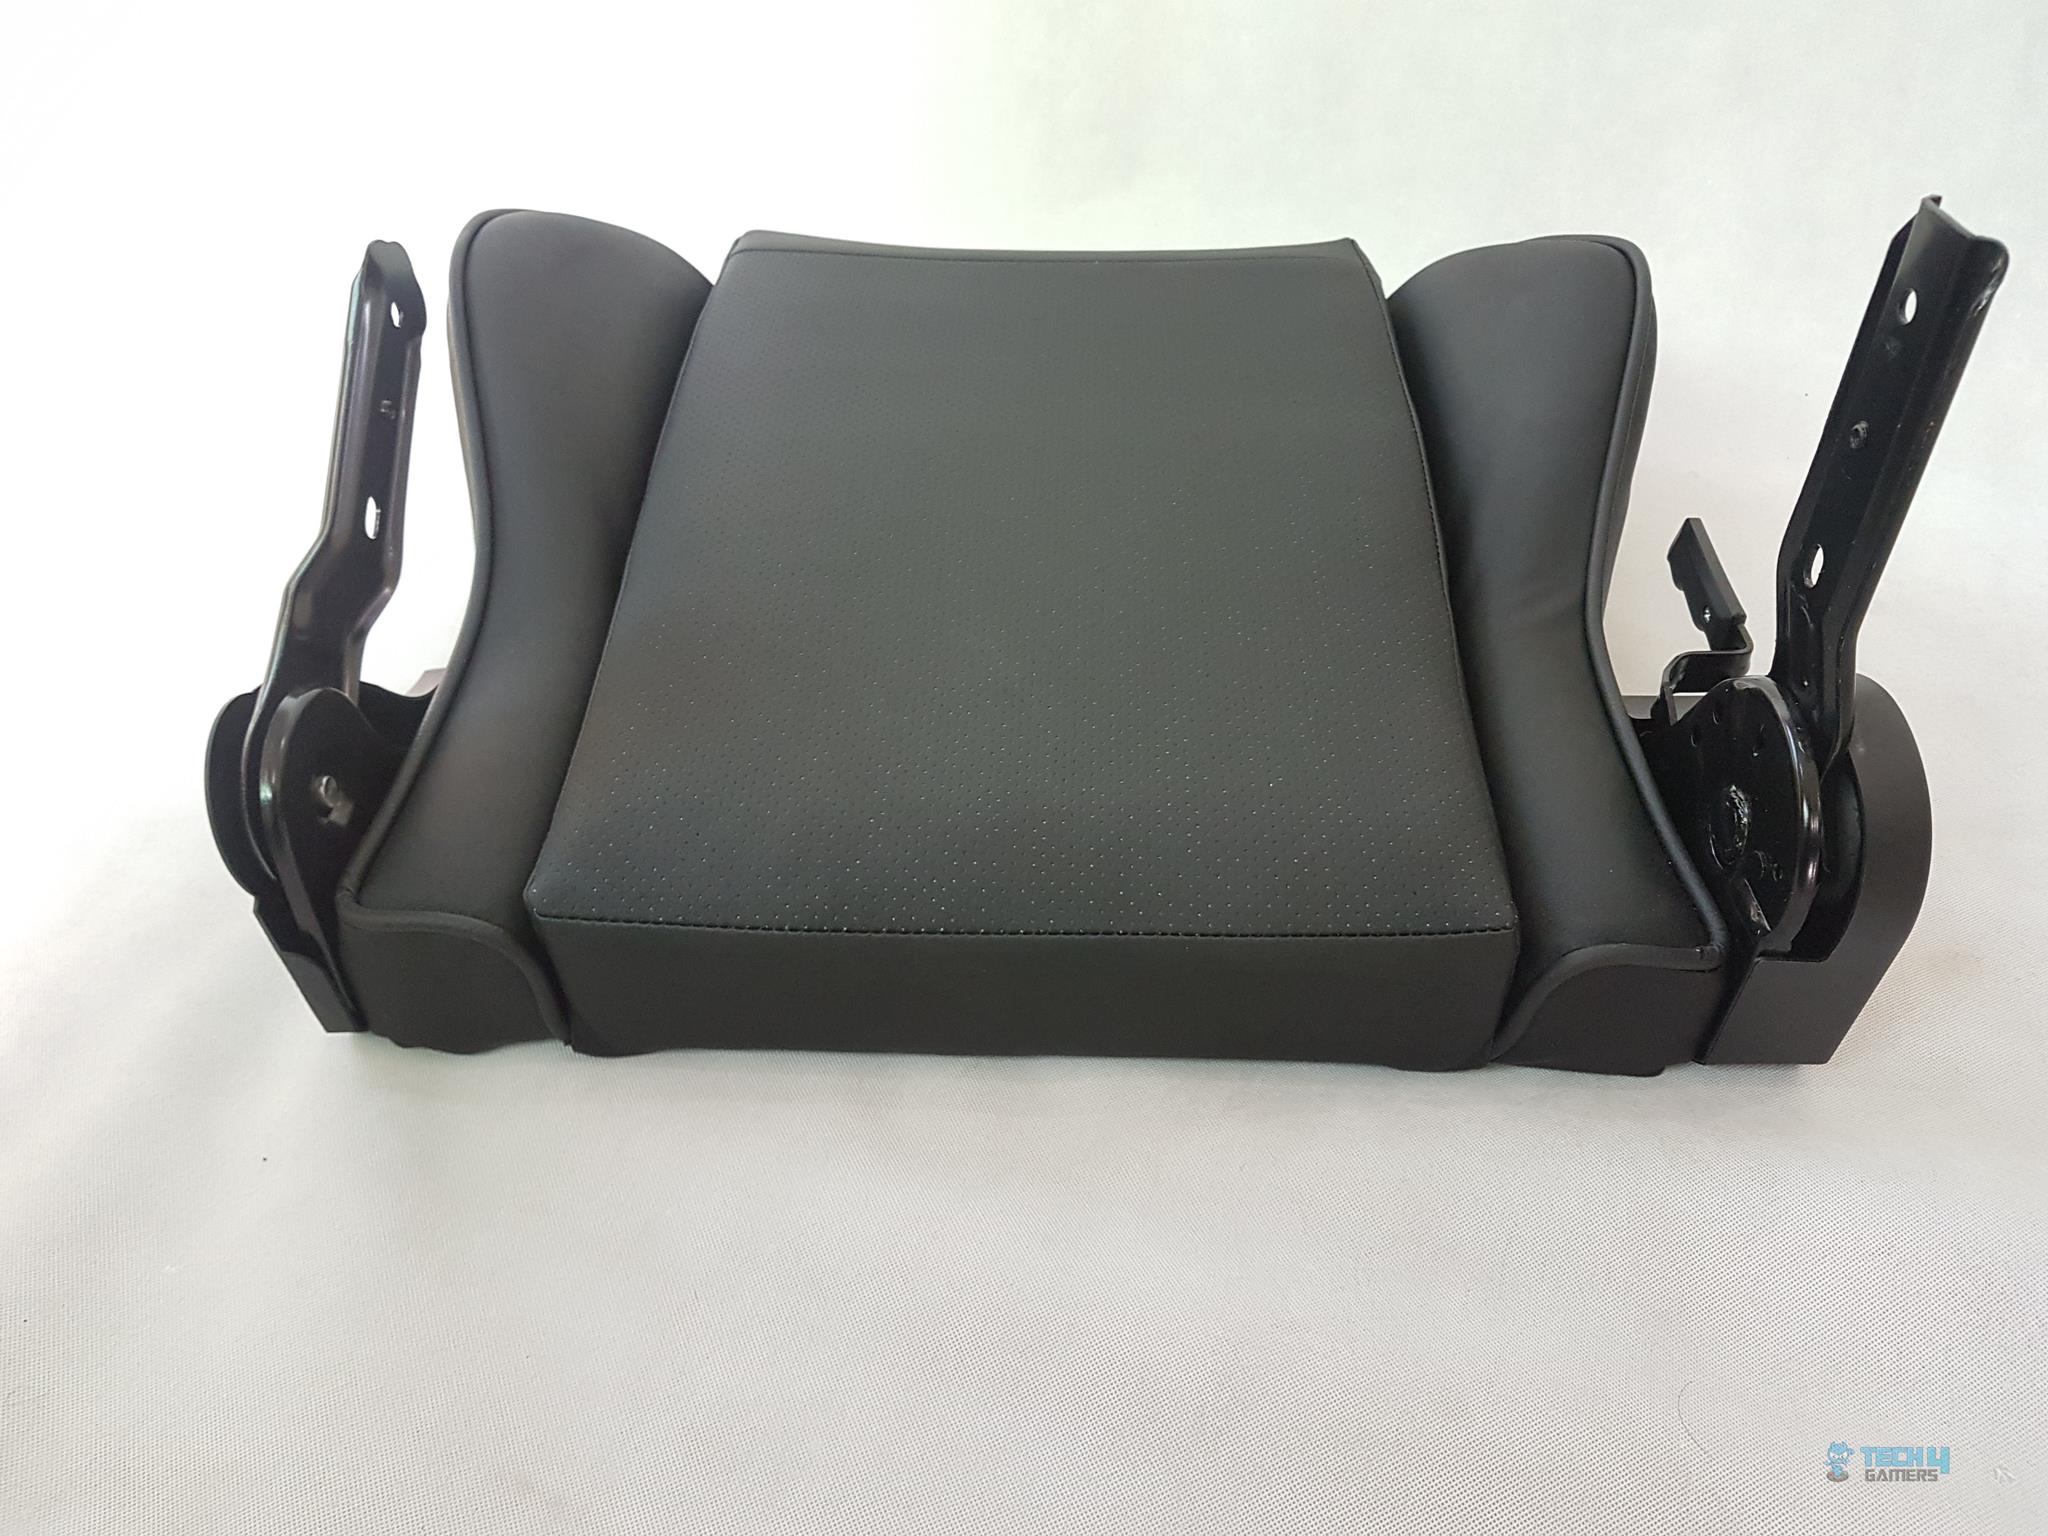

Looking at the backside of the seat, we can guess the thickness of the seat as well as the symmetrical flow of the sides.
The right side of the seat has a lever to control the reclining feature of the chair. The chair has a recline of 90~180°. This is not a free recline design. The user has to pull the lever and set the backrest in the desired recline state. As soon as the lever is released, it locks the backrest in that position.
Notice the hole in the middle of the plastic frame. This is where the plastic cover is attached to the backrest to hide the metallic arms connecting the backrest with the seat.
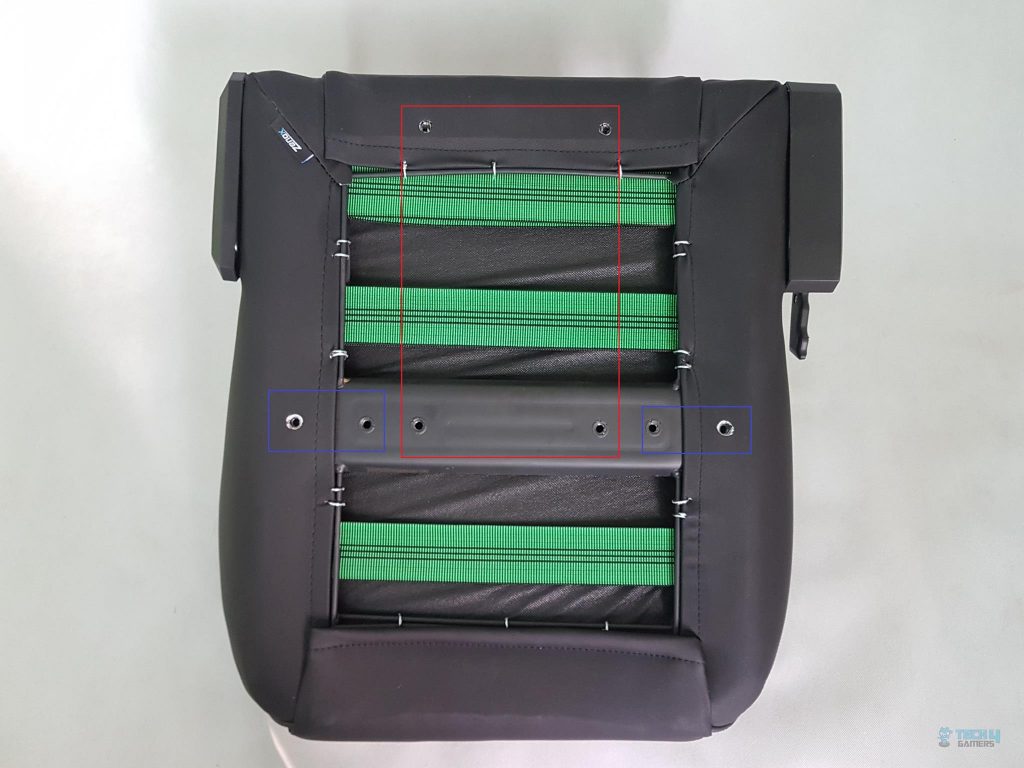
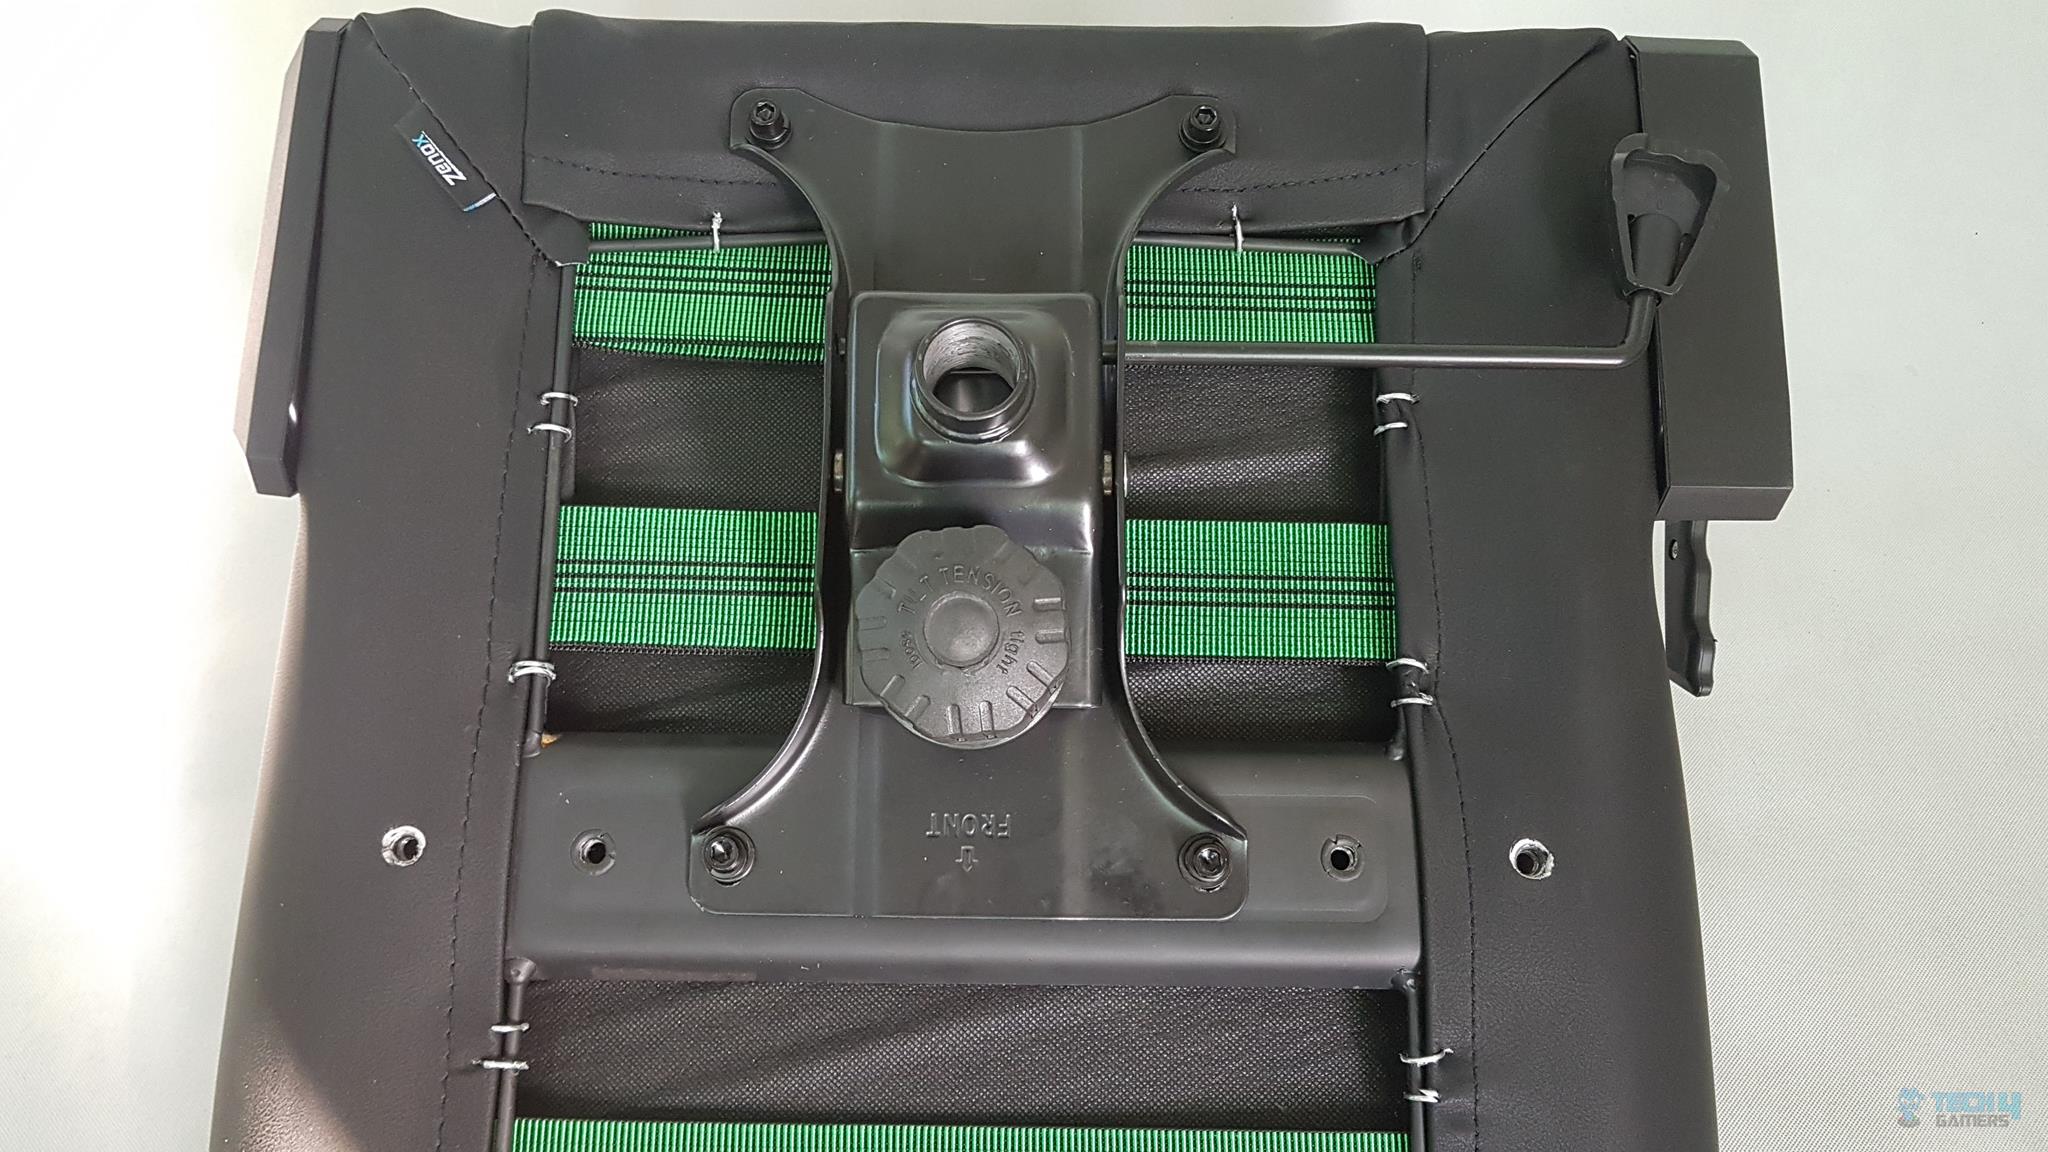
Looking at the base of the seat, we can see three green color stripes. There is a mid-plate with 4x holes on it. There are 2x holes towards the rear side. The tilt machine is secured to the base of the seat using 4x bolts.
We have highlighted holes to be used for the tilt machine in the red color rectangle. The blue color rectangle holes are where the side arms are to be installed.
Assembling
Now that we have looked at each of the components of the gaming chair, it is time for a quick look at the assembling.
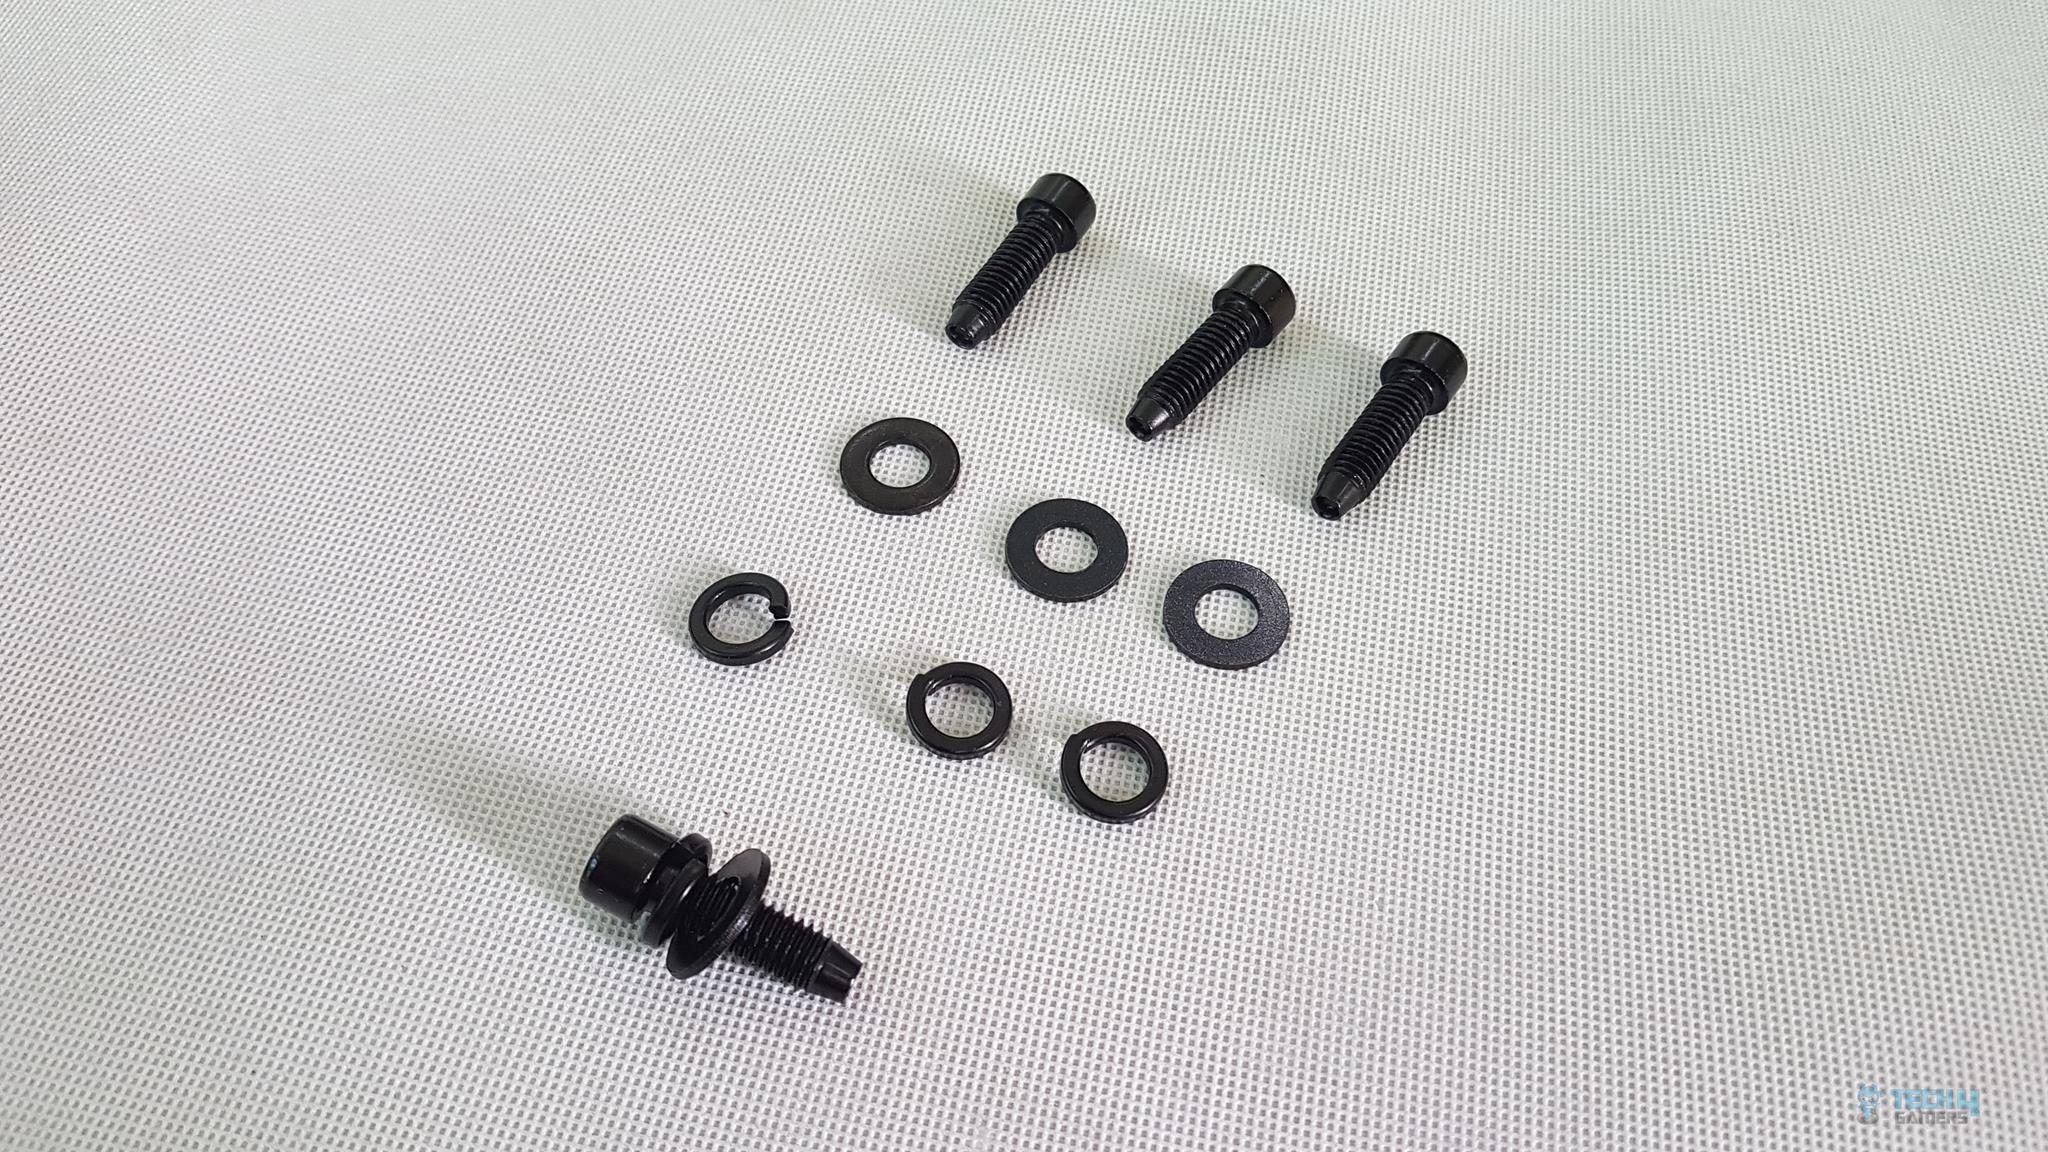
For each bolt, there are two different washers. The locking washer should be inserted first followed by the flat washer on the bolt. Install the wheels/casters on the base. Press the tip of the wheel on the hole on each leg of the base. They should snuggle in.
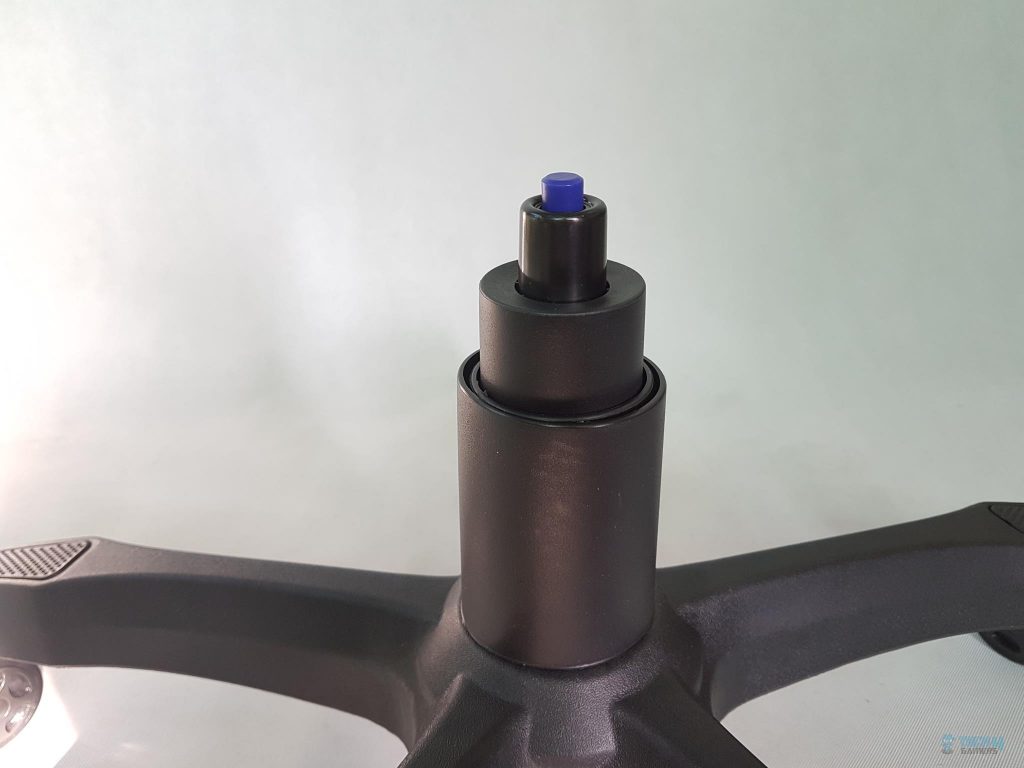
Install the gas lift machine on the base. Pass the main cylinder in the central hole of the base. Pass the plastic cover through the cylinder.
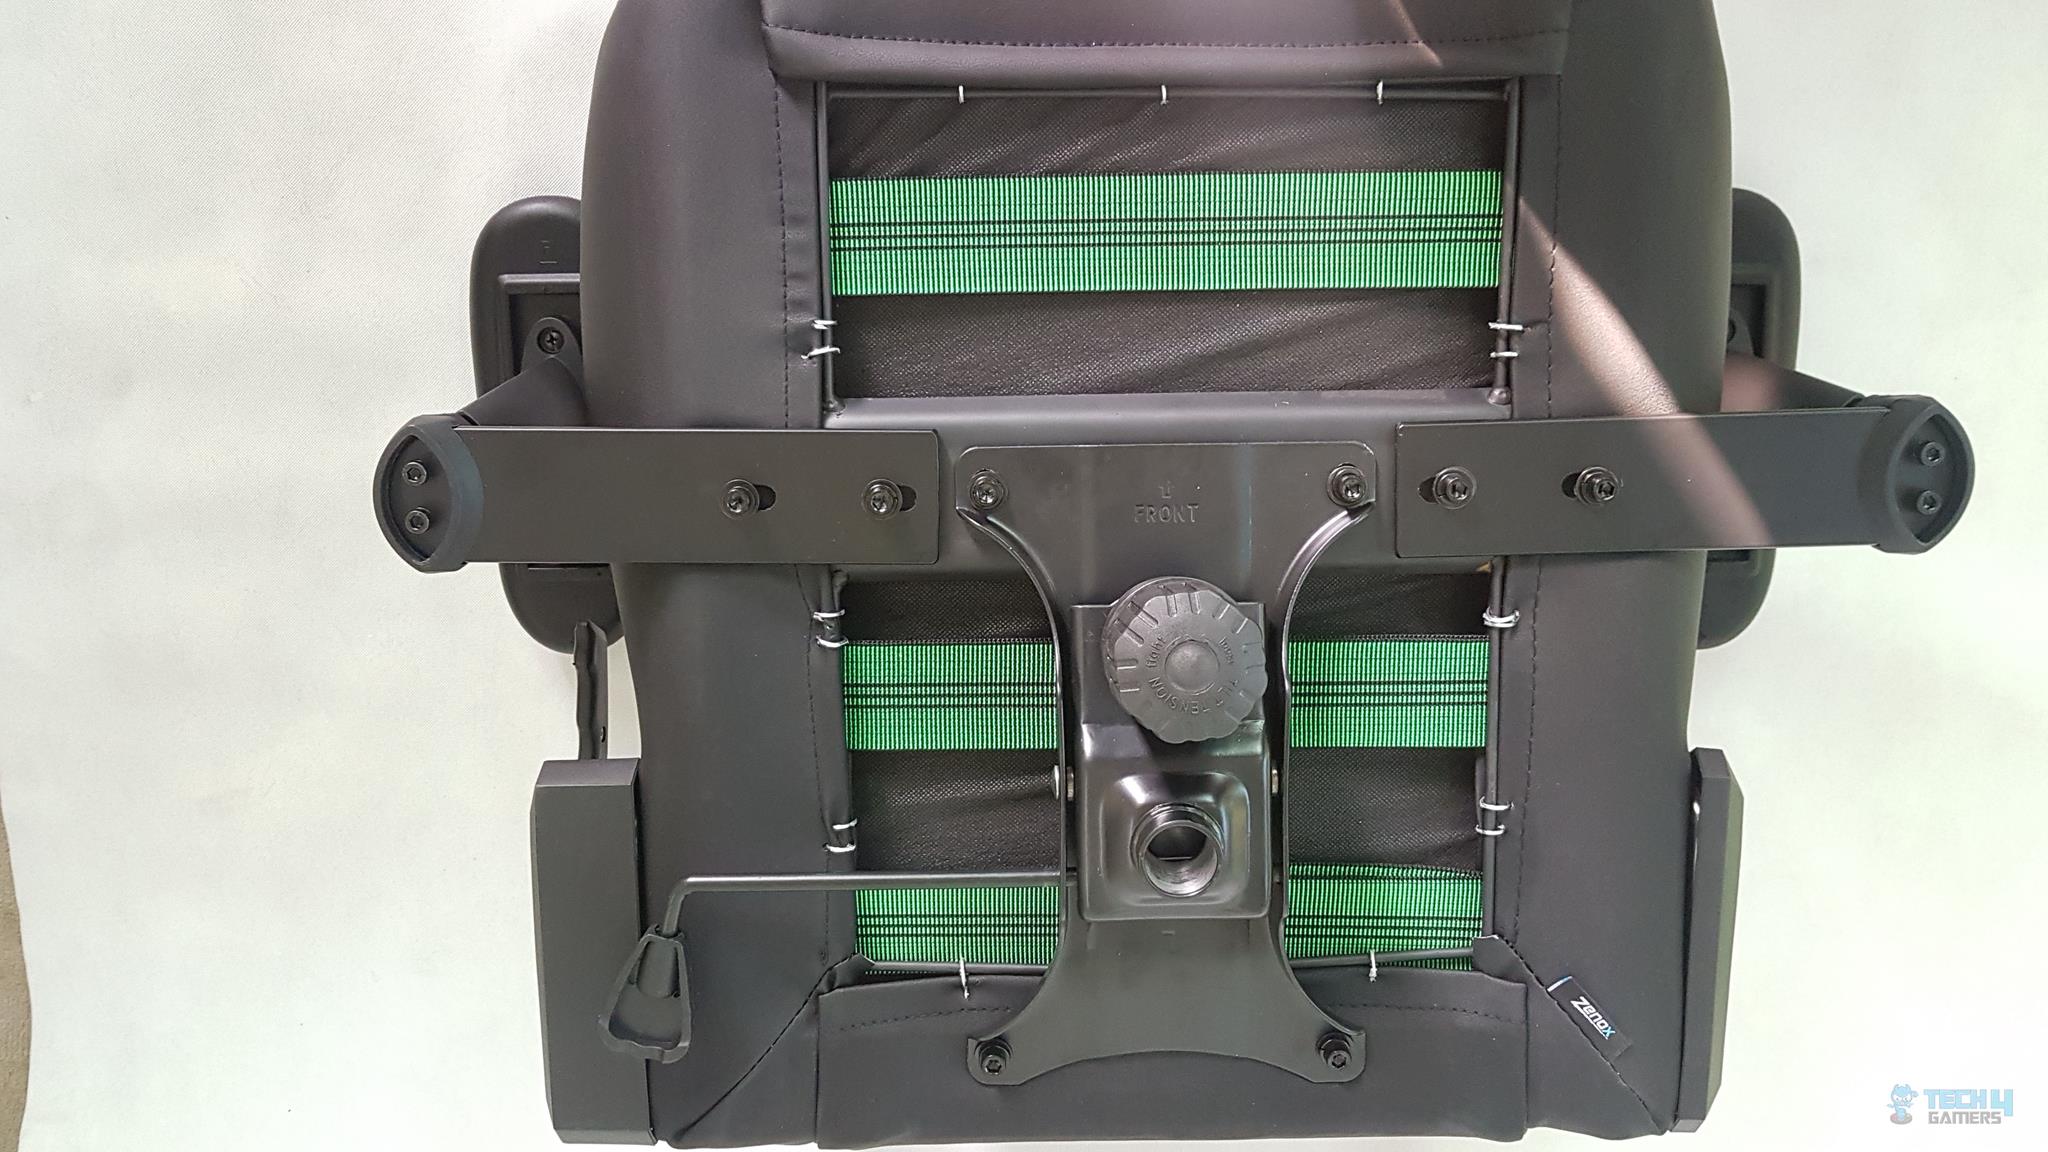
Install the tilt machine to the base of the seat using 4x bolts. Use the universal tool provided in the accessories to tighten the bolts. Install the side arms to the base of the seat using the 4x bolts. You can adjust the position of the side arms along the length to make them more or less widened as per your desired comfort level.
By now the seat has been set up on the base and you can actually sit on the seat. Now comes a bit tricky step which in installing the backrest on the seat. Place the backrest on the seat by aligning the holes on the sides of the backrest’s lower side to the holes on the metallic plates of the seat. Pass the bolts on all 4 holes on both sides to secure the backrest and start tightening them. This would install the backrest.
In the last step, place the plastic covers on the lower sides of the backrest and secure them using the Philips screws. Optionally, you can install the neck and pillow lumbers.
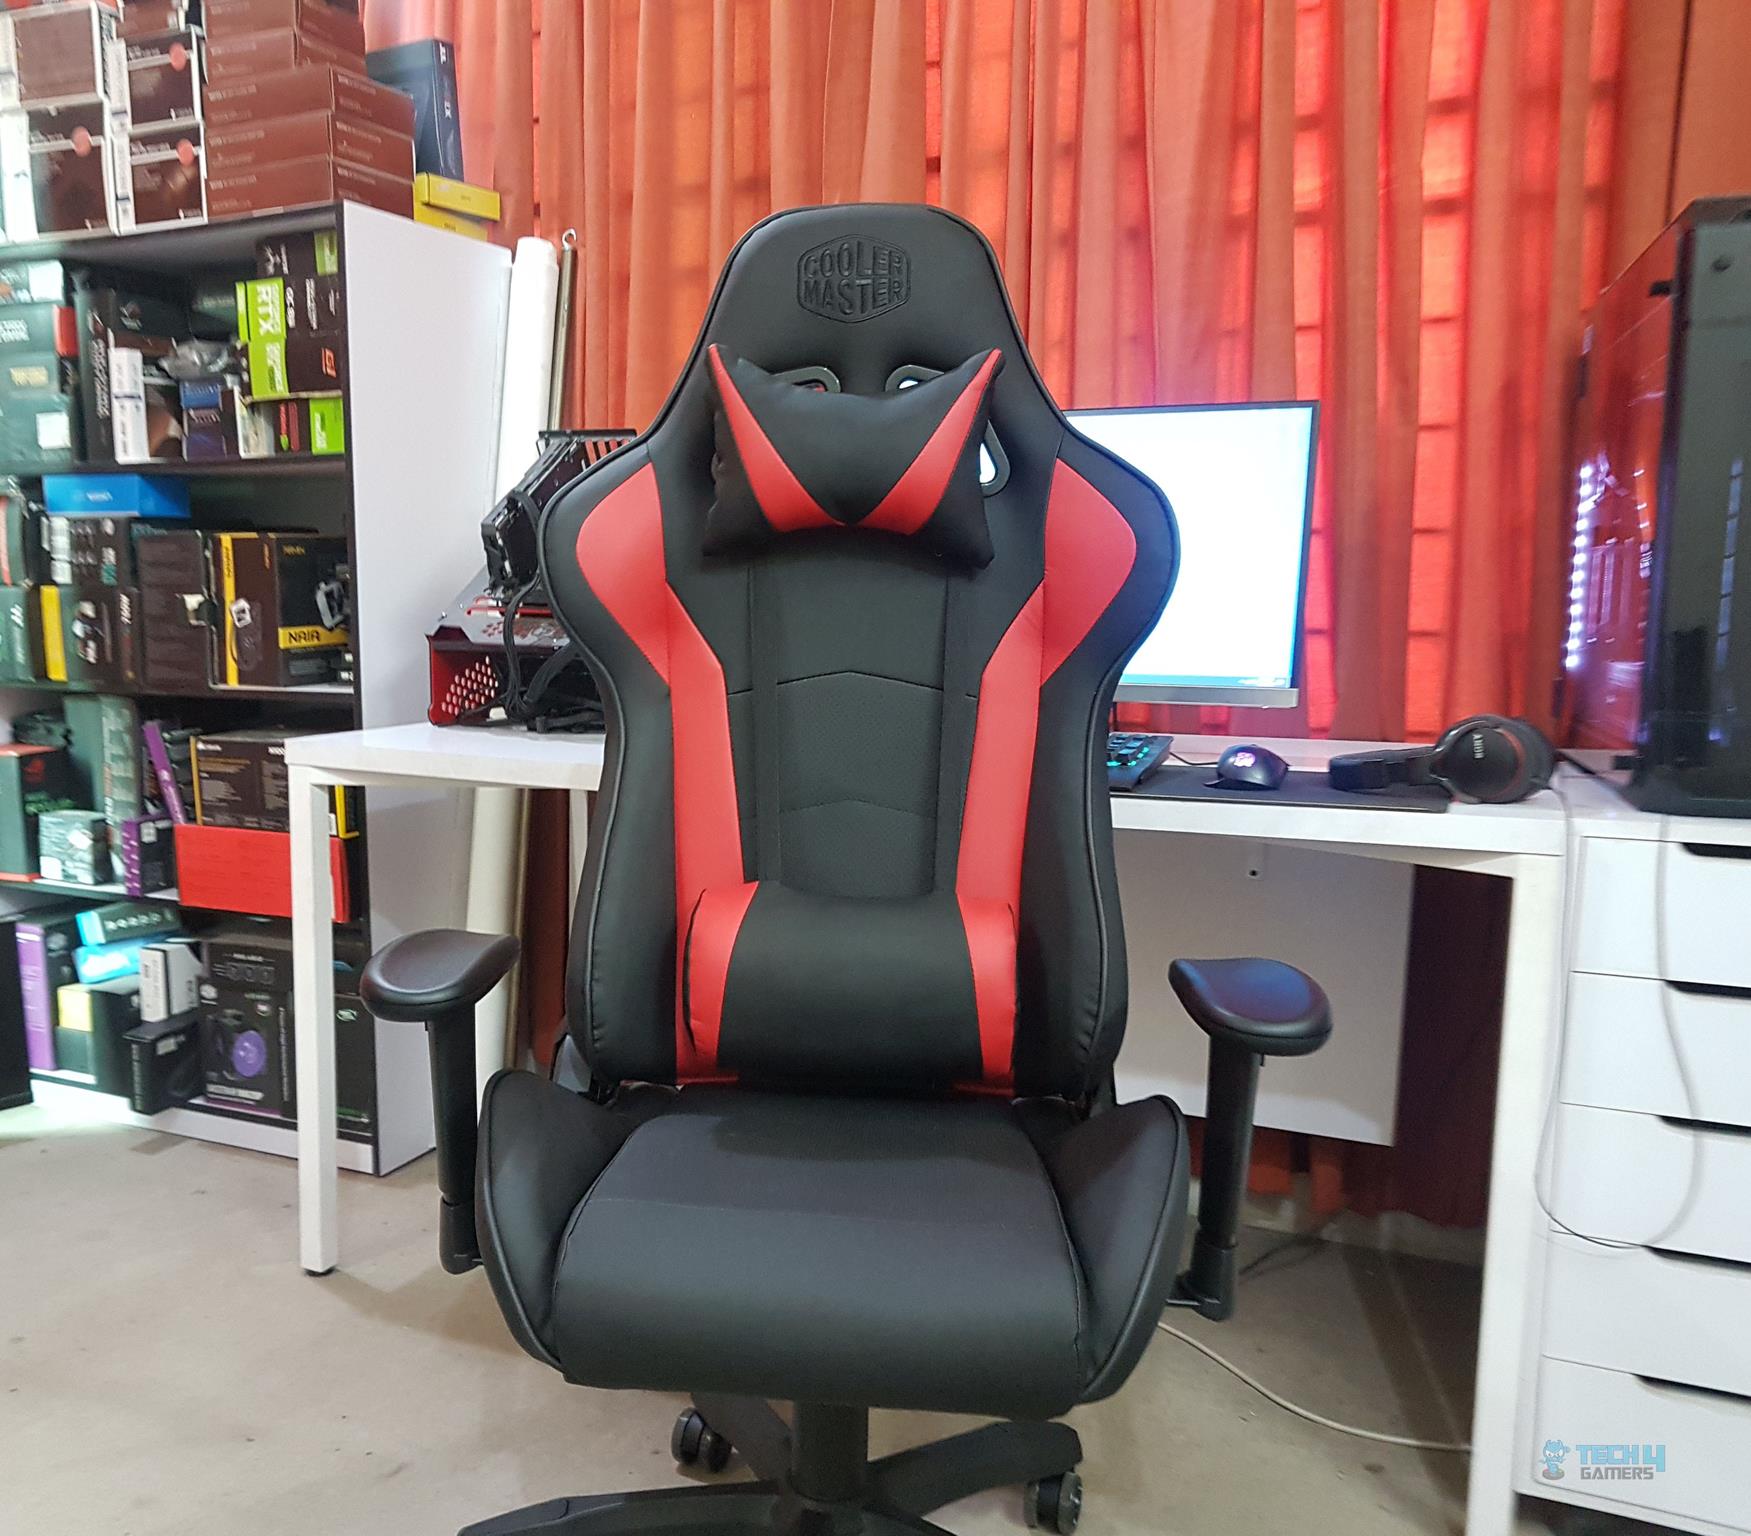
Showcase Gallery
Here are some of the pictures of the assembled chair.
Personal Experience
Right after assembling the Cooler Master Caliber R1 Gaming Chair I underwent the surgery of the femoral neck. I had to wait for 3 weeks before I was allowed to start resuming my life slowly. I was worried about sitting on the PC for the longer session as I had a pile of stuff to go through but Caliber R1 had it covered for me with utmost comfort and convenience.
It helped with my sitting and not only sitting but also with the right posture. The total ergonomic design is damn helpful. One community member reaches out to me as he is using this caliber r1 review chair for some time and he is complaining of the backseat bottom portion roughing out due to the lumbar pillow’s belt’s pressure.

My chair is in use over 50 days and I have not spotted any such observation yet. It may be too early for me to call that in but time will tell. Watching movies, playing games, doing my editorial stuff, I have never been that comfortable before.
This caliber r1 chair is rated to tolerate 150~160 KG. The reclining is going from 90° up to 180° and is holding even in the extreme orientation. I have no complaint with this chair.
Should You Buy It?
From my experience, who would benefit most from this product?
Buy It If:
✅ You’re an enthusiast seeking optimal comfort: The Cooler Master Caliber R1 caters to users seeking prolonged comfort during gaming or work sessions, thanks to its ergonomic design and adjustable pillows.
✅ You prioritize a durable and sturdy build: If you’re after a gaming chair that ensures long-lasting durability and stability, the Caliber R1, with its sturdy base and Class 4 gas lift, could be an ideal choice.
Don’t Buy It If:
❌ You prefer chairs for specific surface types: If you primarily use your chair on carpets or rough surfaces and prefer smoother mobility, the Caliber R1 might pose some challenges.
❌ You’re looking for minimal lumbar pillow pressure: Users concerned about potential wear due to lumbar pillow pressure might find the Caliber R1’s design less suitable for their needs.
Conclusion
Gaming chairs are essential for any gaming setup these days, and choosing the right one can be tough with so many brands competing in the market. Cooler Master recently launched their Caliber R1 Gaming Chair, available in purple, red, blue, and white. I received the red variant for review, which was delayed due to my recovery from surgery, but I’m thrilled to be back on track.
Crafted with premium breathable PU leather, the Caliber R1 ensures long gaming sessions without causing fatigue. The ergonomic design offers comfort during extended use, and the included neck and lumbar pillows reduce strain on the back and neck. With dimensions measuring 136cm in total height and a backrest height of 83cm and width of 57cm, it provides ample room and support. The armsets are adjustable between 23-30cm, adding to its versatility.
The chair’s 5-star base, with a diameter of 72cm, features textured edges on each leg and holes underneath for caster insertion. The Class 4 gas lift, coated in black, supports up to 160KG, ensuring durability and sturdiness. However, I noticed that the casters struggle a bit on carpets, requiring more effort to move compared to smoother surfaces like hardwood floors.
I appreciated the thoughtful design of the neck and lumbar pillows, made from the same breathable PU material and easily adjustable. The backrest, adorned with striking red stripes and the Cooler Master logo, exudes a bold yet attractive appearance. Assembling the chair was straightforward, aided by Cooler Master’s inclusion of a universal tool. My experience with the chair has been incredibly comfortable, free from any issues or complaints.
I’m grateful to Cooler Master for providing the opportunity to review their impressive Caliber R1 Gaming Chair.
Recent Updates
- December 30, 2023: A few text changes to improve readability.
Thank you! Please share your positive feedback. 🔋
How could we improve this post? Please Help us. 😔
[Hardware Reviewer & Editor]
Meet Nauman Siddique, a highly experienced computer science graduate with more than 15 years of knowledge in technology. Nauman is an expert in the field known for his deep understanding of computer hardware.
As a tech tester, insightful reviewer, and skilled hardware editor, Nauman carefully breaks down important parts like motherboards, graphics cards, processors, PC cases, CPU coolers, and more.
- 15+ years of PC Building Experience
- 10+ years of first-hand knowledge of technology
- 7+ years of doing in-depth testing of PC Hardware
- A motivated individual with a keen interest in tech testing from multiple angles.
- I majored in Computer Science with a Masters in Marketing
- Previously worked at eXputer, EnosTech, and Appuals.
- Completed Course in Computer Systems Specialization From Illinois Tech
Get In Touch: nauman@tech4gamers.com


